The number one rule for lifting—since lifting is life, it’s also the rule number one for life—is always look cool. This accounts for every variable of the workout and all the choices which come with it. Looking cool requires flawless technique, accounting for all safety points, and training with intention.
Training with purpose is the only way to get your peak physique. Let’s face it, we got into training to get jacked and stacked. Improving your physical appearance is an important exercise goal. Strength is a skill, sure. The stronger you become, the more you will get out of life. It is pretty safe to say we can accept this as a universal truth. However, since strength is a function of mobility and stability, we must pay homage to the details of healthy movement.
No other tools in modern history have offered more for dynamic strength gains than kettlebells. For some people, strength is a side effect of training. For others, strength is their only goal. Certainly there are trade offs in training which must be considered when setting goals, and more strength should always be a top priority. But, wanting to look like the prototypical athlete isn’t vanity—it is strength on display. And it takes a truck load of work. When we’ve put in the work, our bodies show it. People will check us out or size us up. How we look communicates our work ethic, discipline, overall health, confidence, and other aspects of our character. This is the cover of the book by which every other human judges our stories.
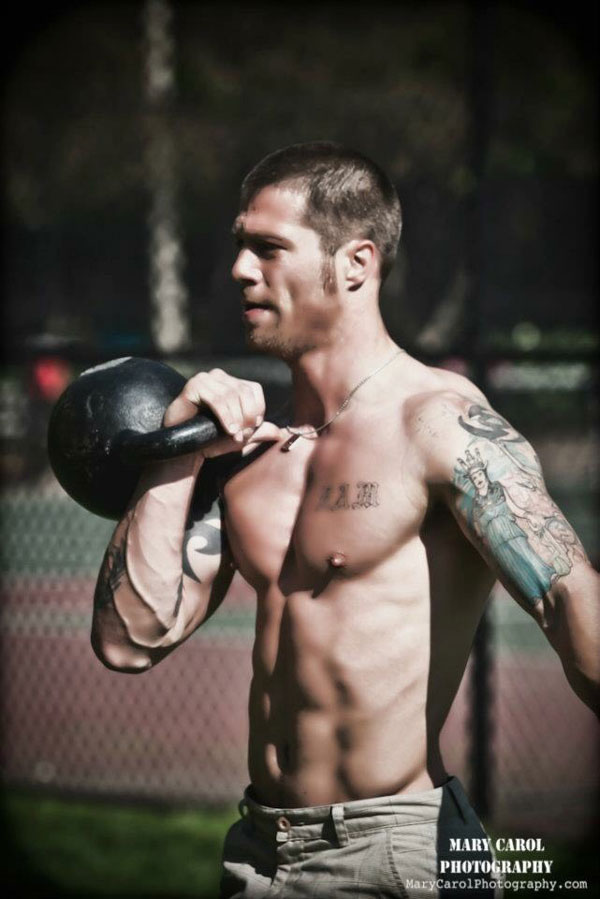 On some level, we all try to make ourselves more presentable. We’ve bought designer jeans from boutique stores and tried designer workouts at twice the price for half the results. If you haven’t reached this conclusion yet, let me help enlighten you: it’s not the clothes on your body that matter, it’s the body in your clothes. So, let’s tune up our bodies and spend our time wisely. Male or female it is important to maintain our muscle mass as we age and the kettlebell gets results. That’s why we train with kettlebells for massive shoulders, thick arms, solid legs, ripped abs and athletic skills for any task.
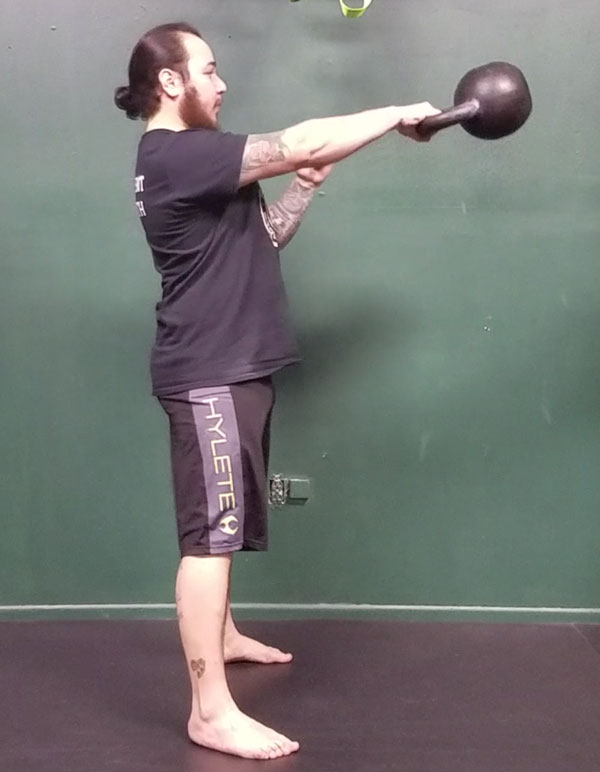
It’s grind time! Kettlebell ballistics are fun and one of the best ways to increase your conditioning and stamina but if you’re looking to bulk up, then kettlebell grinds are the answer.
Two key variables in the strength and hypertrophy equation are “X” (the speed of the work) and “Y” (time under tension). We want to simplify this equation and solve for X and Y. Every rep of our hypertrophy training program, becomes about decreasing X and increasing Y as we increase the resistance across the sessions. This is why kettlebell ballistics take a back burner during this period of training. To grow our muscles, we also need to choose the right movements. We don’t want to isolate the targeted muscles, because that approach doesn’t yield as much mass. Compound exercises are universally accepted as the most effective way to build muscle and strength. This still holds true at universities and “bro-science labs” around the world. Luckily for us 99% of kettlebell exercises are compound exercises.
Compound movements involve more than one muscle group, and usually use two or more joint systems. With all this tension, we won’t need much variety in our program. Since each exercise supports the next, there isn’t much need for accessory drills. With double servings from a simple menu of exercises, we will stimulate the growth environment.
These eight kettlebell drills are essential for building mass:
Kettlebell Front Squat:
Double Kettlebell Deadlift:
Military Press:
Renegade Row:
See-Saw Press:
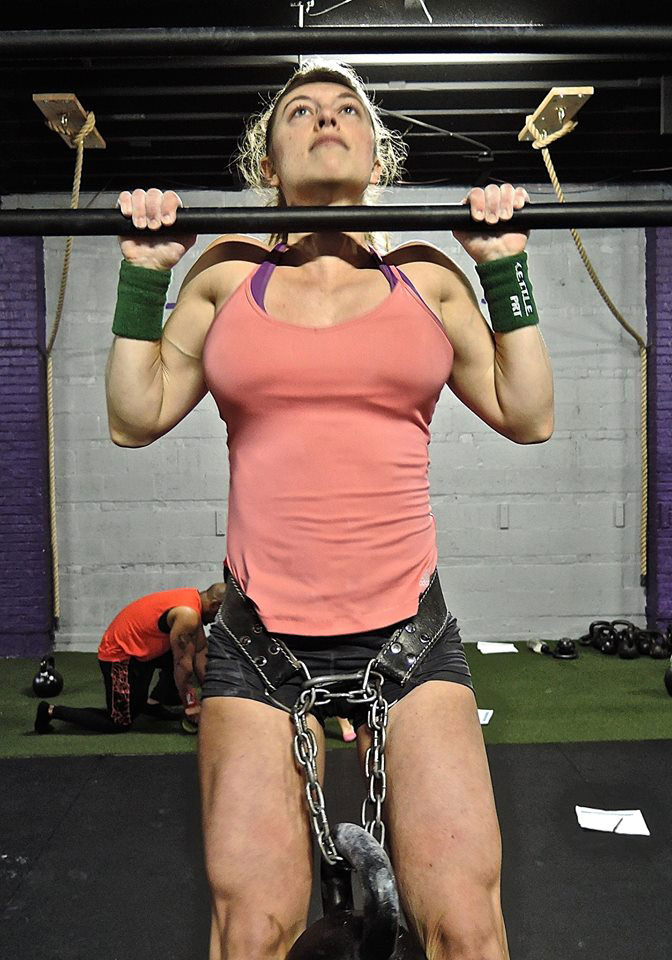
Weighted Pull-up:
Back Lunges (Kettlebells Racked):
Single-Leg Deadlift:
Bent Press:
To keep growing muscle while combating training plateaus, we must attempt to master the training tactics of irradiation and lifting tempo. The concept of irradiation is important for creating tension and linking tensing muscles together. Strongly tensing a muscle will recruit nearby muscles to assist and support. However, this does not happen automatically. One must force neuromuscular activity to call as much of the muscle fibers into the workload through a full range of motion.
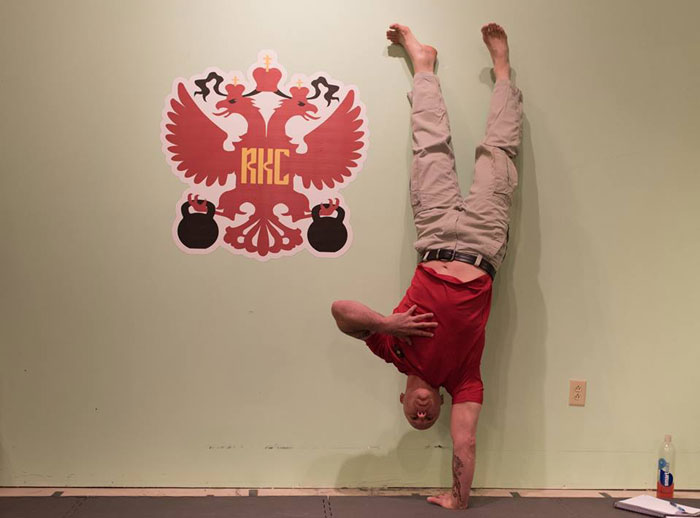
By making light training weights feel heavier during your reps, you force more supporting muscle tissue into activation. This is one of the central themes of the RKC. This type of training takes more focus, more attention to detail, and it isn’t easy—but training isn’t easy, nor should it be. We demand results, and that’s why we crush the handles tightly for the entire set. That’s why we force our inhales and exhales on time. That’s why we flex our glutes, quads and abs as we stand through the top of our squats. When we make our training more difficult by adding tension, we will force more hypertrophic adaptation with 85% resistance for sets of eight to twelve reps.
The tempo of the lift and instructions for maintaining tension throughout the set are the missing pieces from most mass building plans. We must focus during all three phases—eccentric, isometric, and concentric—of the working muscle’s stretch-shortening cycle to maximize growth.
The tempo of the lift is the amount of time spent in each phase under the added tension of the load. Add tension and stay active as the resistance is loaded through the eccentric or “negative” phase. Don’t rush this part, stretching the muscle combined with overload is the most effective stimulus for muscle growth. Pause and hold at the fully loaded position for at least one full second, sometimes up to five. Exploiting this isometric position under great resistance yields significant results.
The concentric phase of the lift is usually the most difficult phase since the muscle fibers are shortened under the resistance. When the muscles shorten, they get dense and pumped from the work. People often confuse this phase as the growth phase because it is difficult, but many studies have shown that it is not the most important phase for hypertrophic response. To make the muscles grow, place great emphasis on the negative phase.
A lifting tempo of 5-2-2 is a five second negative, a two second isometric pause, and a two second focused contraction until there is a full squeeze of the working muscle groups. That is how every rep is executed. A tempo of 3-2-1 is quicker: three second eccentric, two second isometric, and one second on the concentric phase. Your breathing may need to change with the longer duration lifts, but never lose your structure. “Breathing behind the shield” is an important cue to remember, especially when briefly holding those isometric positions.
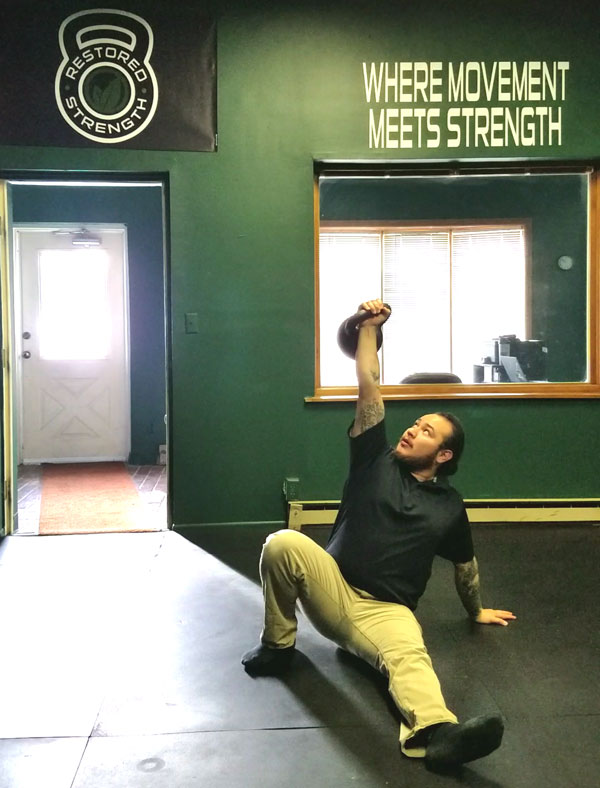
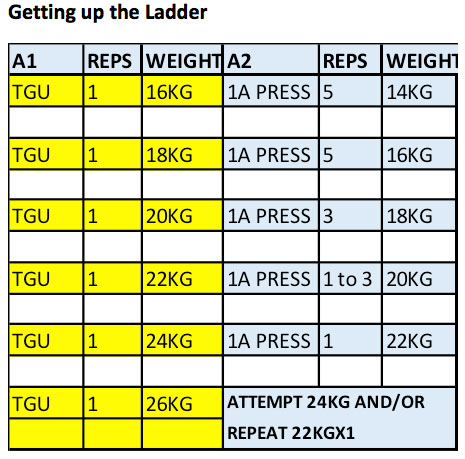
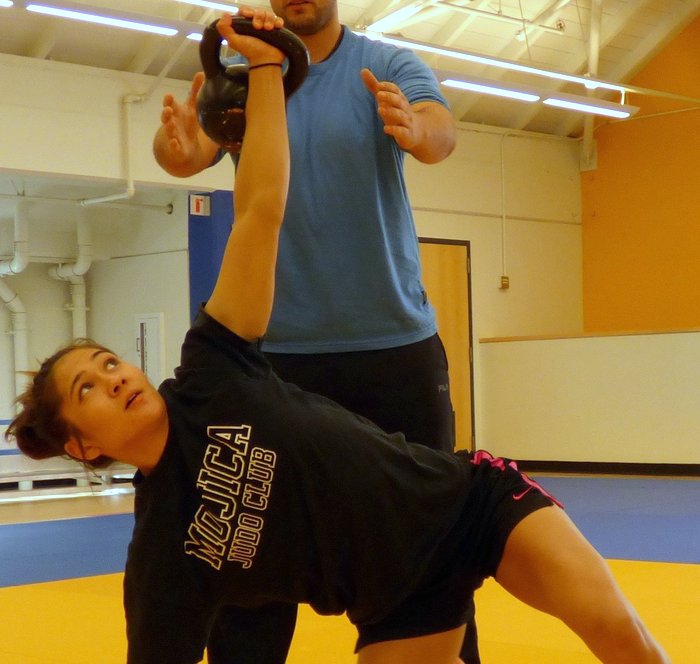
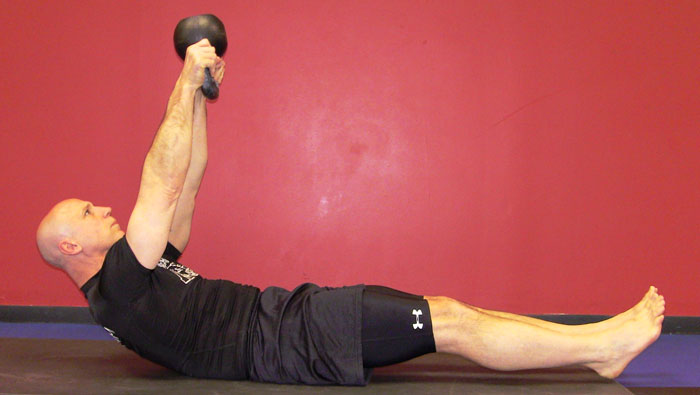
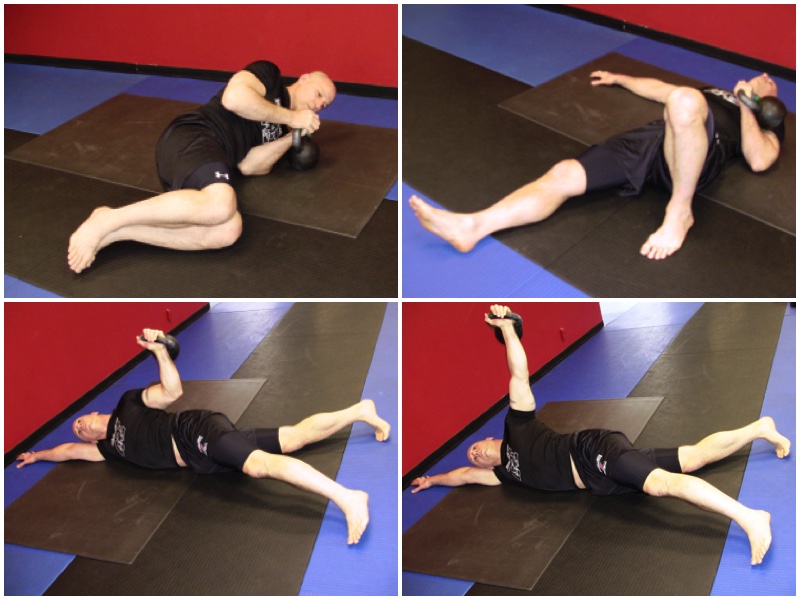
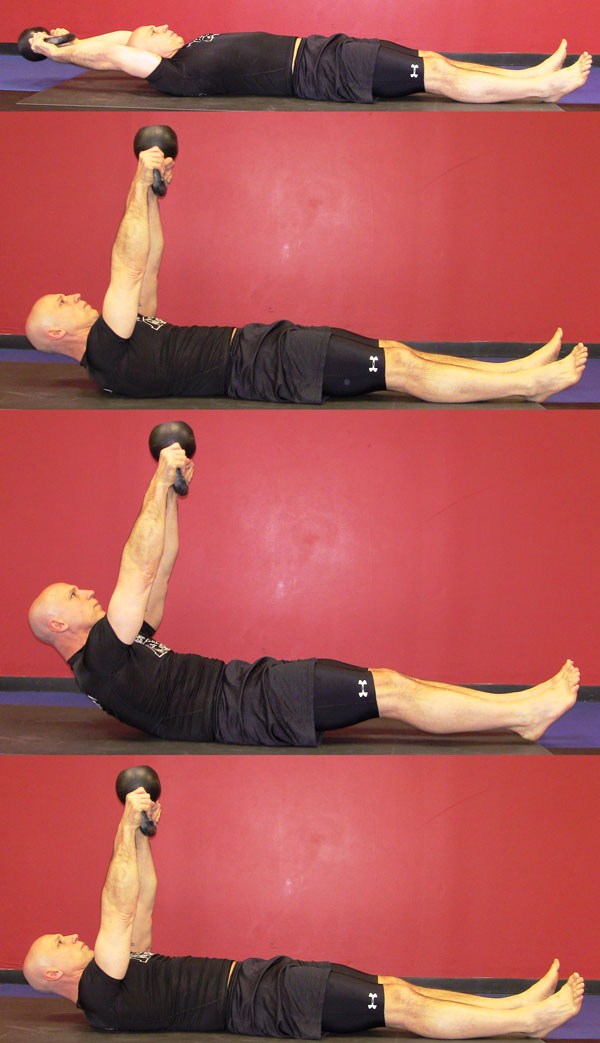
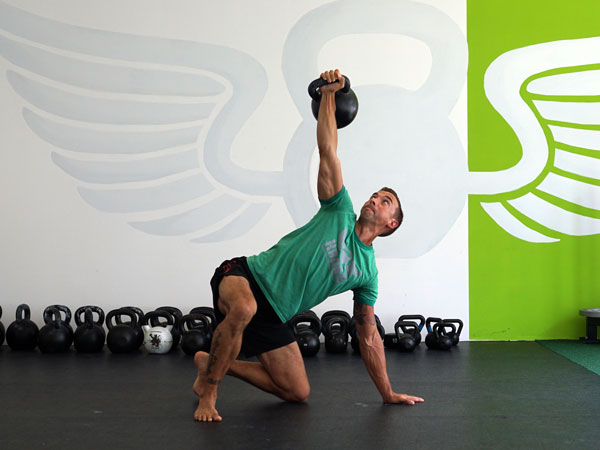
What about the get-up and snatch? The get-up is a great drill to set up a strong and stable body. I would never discount the get-up. I think it’s the best exercise in the history of fitness. It will get your shoulders fully functional, fortify strength, and build coordination throughout the entire kinetic chain. This is why I prefer to use the get-up in beginning of my workouts. Instead of a warm-up, I call it a gear-up for getting everything grinding at the right speed.
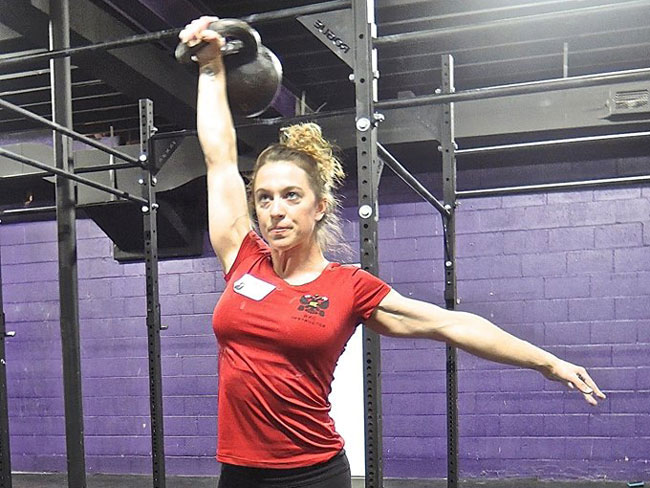
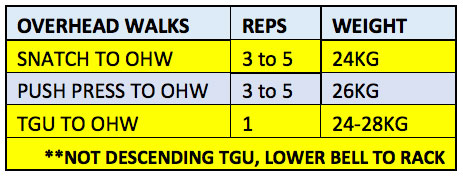
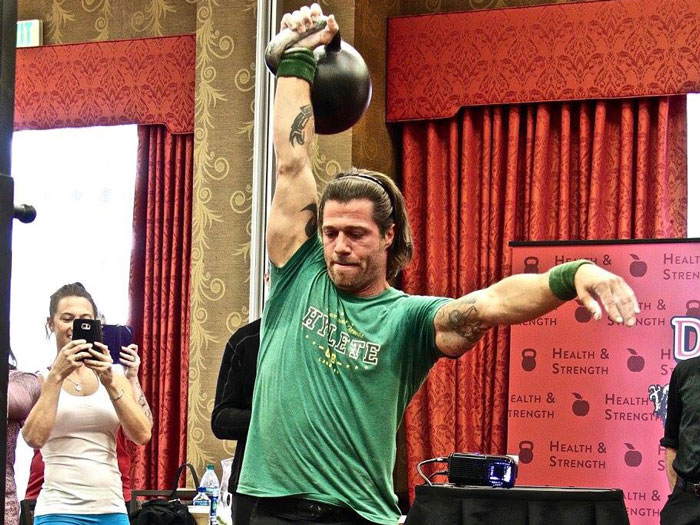
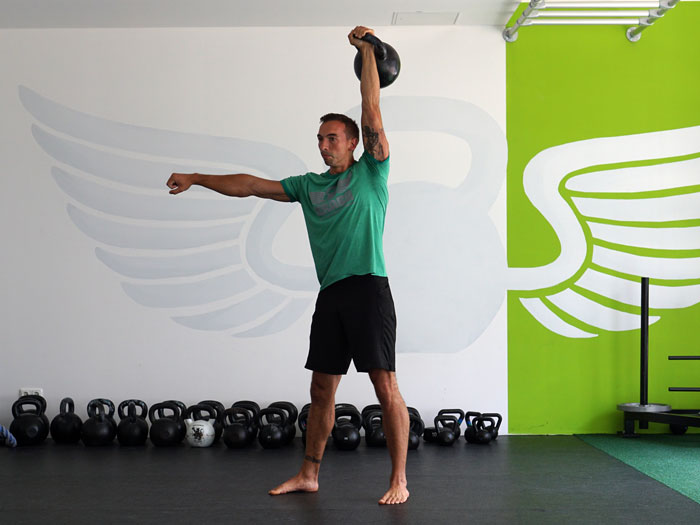
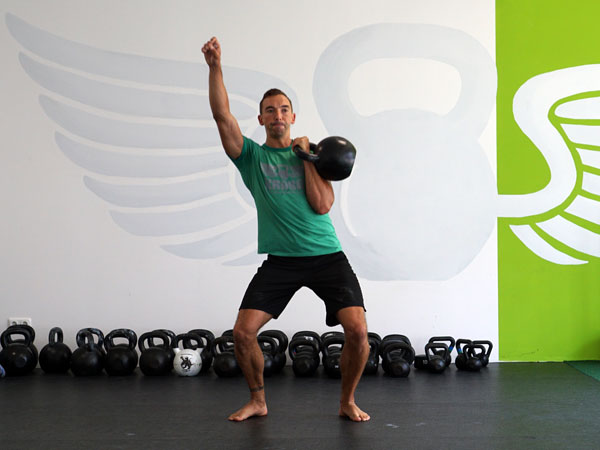
I also love the kettlebell snatch. Throughout this muscle-building program, the snatch is best used as a workout finisher. Since we’re striving to train the muscles to generate more force, maintaining tension through the concentric phase, and especially the eccentric phase is the best way stimulate muscle growth. The snatch does a great job of eccentrically loading the posterior, but it happens so quickly that barely any time is spent under that tension. This is why it is not the greatest “muscle building” exercise even though what it does for the glutes, legs and abs is incredible. The snatch still is the Tsar of kettlebell exercises, but use it at the end of your session.
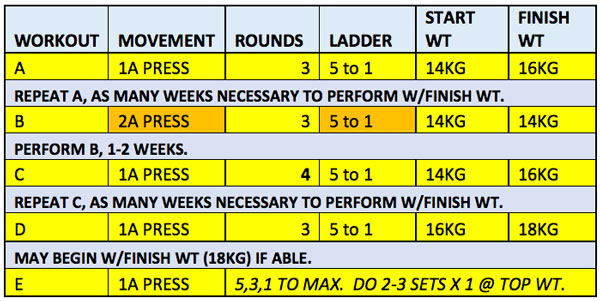
Having a wide range of kettlebells is necessary for double kettlebell drills and heavier progressions. Heavy weights will be necessary. As I mentioned earlier, strength will always be a central focus of all our programming. To achieve this most effectively, training weights should be in the calculated ranges of 80%, 90-95% and even beyond 100-105% efforts. It’s great that Dragon Door manufactures the “in between” weights in increments of two kilograms. Having these options will help smooth out the growth curve so the jump up to a bigger kettlebell won’t take nearly as long as before.
 With strength on the rise, it’s time to volumize. So, double up every workout. Sets of double military presses will make your upper body, shoulders and arms more massive than single kettlebell work of the same volume. The same will hold true for all of your kettlebell skills and progressions. Two kettlebells are greater than one. Studies have shown that bi-lateral exercises are best for stimulating the most muscle hypertrophy. The beauty of training with kettlebells is that asymmetries are attacked since each weight must be unilaterally stabilized. Using a barbell can hide some of these asymmetries which can become imbalances over time. Using double kettlebells balances both sides of the body. With that said, I would still recommend barbell training at other points throughout the year. After all, we still want to follow the principles of The Purposeful Primitive.
Always train to improve your lifting technique. Perfect technique doesn’t just make you look cool, it is also the only way to achieve your strength or size goal. Your strength will build as you slowly increase the resistance, but be smart, if there is pain then stop. Check the ego. Technique is not about mental toughness. Good technique ensures that every increment of the movement, at every moment of the rep, for every rep of the set is intentional. The focus is on flawless architecture of the body; the machine as it moves. Marty Gallagher says, “We worship at the altar of technique.” If your technique is flawed with your training weights, then you may never reach your goal weight.
Training with a coach is the surest way to get rock solid technique in the shortest time possible. Other ways to check your technique are training with a partner or taking video of your lifts. You can learn a lot from an outside perspective. No matter how heavy the resistance or how fatigued your body, form and focus matter above all.
To force the muscles grow, this program will call for “heavy” lifts. Anything above 80% of your max is heavy, and ideal lifting technique must hold true on those heavy attempts to maximize muscle growth. Don’t sacrifice your results just to complete a rep. You’ll need to shore up your technique under these loads for even heavier loads in the future. This is the basic concept of progressive overload.
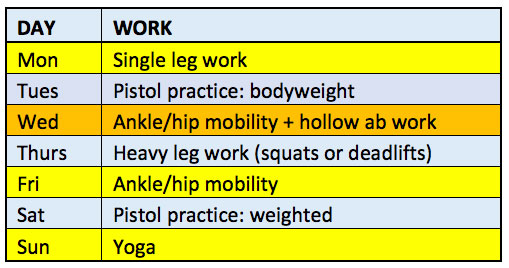
Finding the right work / life balance in a lifting program is important for continued progress. I recommend hitting a hypertrophic training plan twice a year. I like to split the year up in four periods and let my fitness goals change with the seasons. It is a harmonious to try to gain size in the fall, strength in the winter, hypertrophy in the spring, and then get ripped for the summer. For mass gaining programs, I would recommend lifting four days a week.
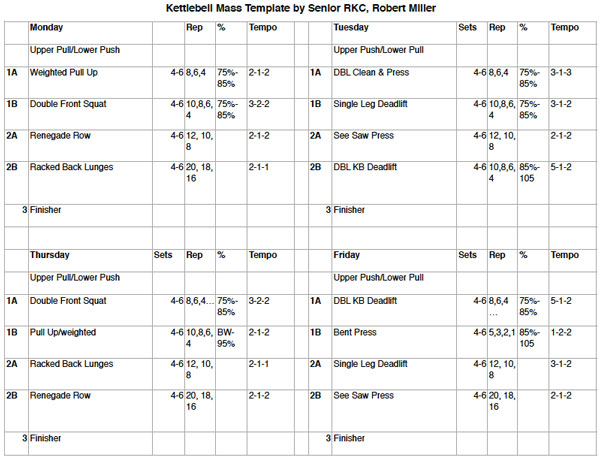
Organize the workouts in opposing modalities and muscle groups. For example, pair upper body pushing exercises with lower body pulling exercises. The next training session should look like the opposite with an upper body pull paired with a lower body push exercises. For mass, it’s best to do 4-6 sets organized into strength pyramids. Rep ranges should stay around 6-12 to optimize the growth response. Rest periods between sets are important for growth and can last from 1-4 minutes. It’s ok, breathe!
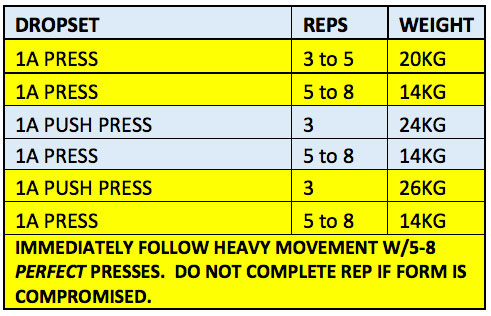
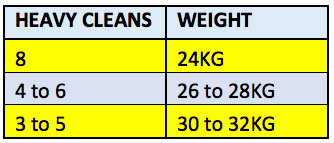
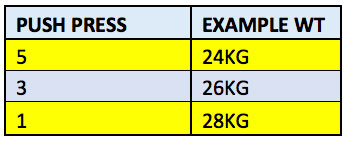
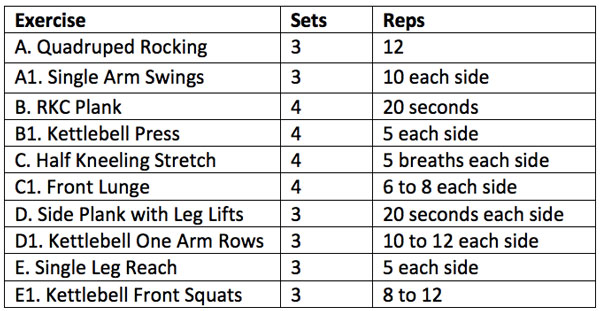
This template demonstrates the simplicity of working opposite modalities to push and pull your way to a bigger, stronger body. Increase the weights weekly as progress dictates.
Robert Miller’s RKC Mass Template:
**Workout finishers are high intensity intervals for the last 10 minutes of the workout. Use a 0:50 second work period and a :10 rest period. Organize 5 opposing drills and do 2 rounds.
Example:
- Jump lunges :50
- Push Ups :50
- Plank :50
- Snatch (left) :50
- Snatch (right) :50
Last, but equally important is recovery. You must focus on this phase of your training as well. After making progress with very rigorous training days, it’s necessary to bounce back. Size gains are made because the work causes microscopic tears in the muscle fibers; then the muscle fibers rebuild thicker and stronger. This rebuilding process takes proper nutrition and rest. Recovery grows muscles like rain grows flowers.
Here are a few simple tips to help shorten recovery time between training days: set a bed time, eat for recovery not flavor, drink a gallon of water everyday, stretch twice a day, nap daily, limit inflammatory foods like sugar and alcohol. Keep your eyes on the prize. Results are cool. Vices are not.
The only thing missing from this mass building plan is eating, abs and arms. In our training it is best to keep things simple and eliminate excess. Nutrition should be no different. I don’t really subscribe to fad diets. I just stick to a few simple principles to fuel muscle growth while keeping me lean in the process.
1) Drink a lot of water. Don’t drink calories. No more soda, beer, or juice. Just drink water and black coffee.
2) Eat leans, greens, fruits and nuts. Nourishment as nature intended.
3) Start every day with breakfast.
4) Eat frequent meals. Up to 6 small meals a day within your caloric ranges.
5) No excess. Garbage in is garbage out.
To make the abs visible, clean up your nutrition. Instead of ab isolating exercises in this program, the drills we chose are also some of the best core exercises out there. The abdominal muscles will grow in size. Many professional bodybuilders don’t do “ab” exercises. The heavy squats, weighted pull ups and other such drills require so much abdominal recruitment that accessory work is not necessary. A careful approach to nutrition is what makes the abs really pop.
While there are many diets and guidelines you could follow, most well-studied diets follow the aforementioned principles. Even though it is difficult to balance gaining mass and strength while keeping a lean physique, it can be done masterfully. This is also why it is important to periodize your programming throughout the year and eat to nourish your lifestyle. Focus on long term gains and sustainability—we must do this work for the rest of our lives.
There aren’t many accessory arm exercises in the program since the arms are integrally important to every compound drill. Similar to the abdomen, the arms are always working, so making them grow is as easy as adding a few extra sets and reps before or after your workout finishers. The two drills below do a great job of isolating and adding volume to the biceps and triceps.
Alternating Kettlebell Curl:
Kettlebell Skull Crusher:
Rome wasn’t built in a week, so take time building your physique. While there are many muscle building techniques and strategies out there to sort through, every expert I have asked for help has employed the principles in this post on some level.
This is how to grow muscle: lift heavy kettlebells, eat, sleep, repeat!
****
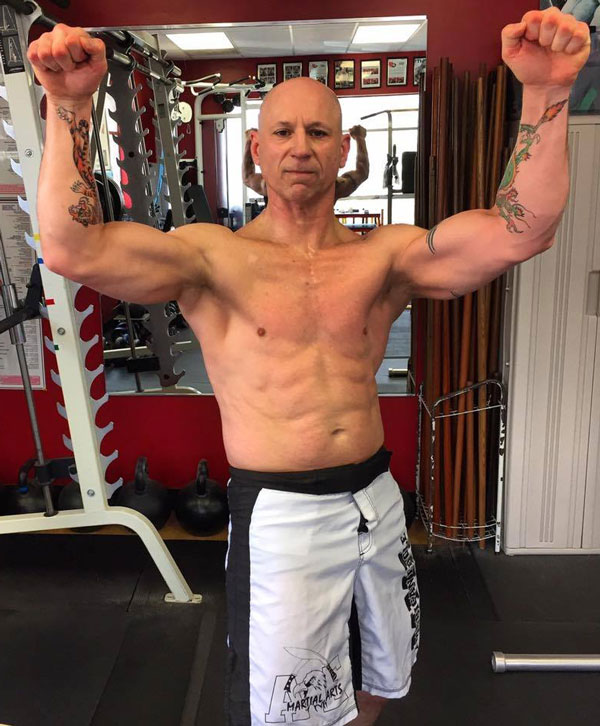
Robert Miller, Senior RKC trains individuals and groups at www.kettleprt.com 1750 n. Kingsbury Ave. Chicago IL 60612. Be sure to listen to his podcast StrongArguments.com


 The RKC is known as the School of Strength because we educate candidates on how to teach strength to others. As we all know the