• Skip to main content
  • Skip to primary sidebar
  • Home
  • Contributors
    • Matt Beecroft, Master RKC
    • Martijn Bos, Master RKC
    • Andrea Du Cane, Master RKC
    • Angelo Gala, Master RKC
    • Chris Holder, Master RKC
    • Steve Holiner, Master RKC
    • Dan John, Master RKC
    • Mike Krivka, Master RKC
    • Thomas Phillips, Master RKC
    • Robert Rimoczi, Master RKC
    • Phil Ross, Master RKC
    • Max Shank, Master RKC
  • Workshops
    • HKC Workshops
    • RKC Workshops
    • RKC-II Workshops
  • Find an RKC Instructor
  • Resources
    • Articles
    • Forums
    • Kettlebells
    • Products
  • Blogs
    • PCC Blog
    • Strong Medicine Blog
  • Archives

RKC School of Strength

Official blog of the RKC

video

4 Standards To Master The Kettlebell Swing

February 27, 2020 By William Sturgeon Leave a Comment

Four Standards For Mastering the Kettlebell Swing by William Sturgeon

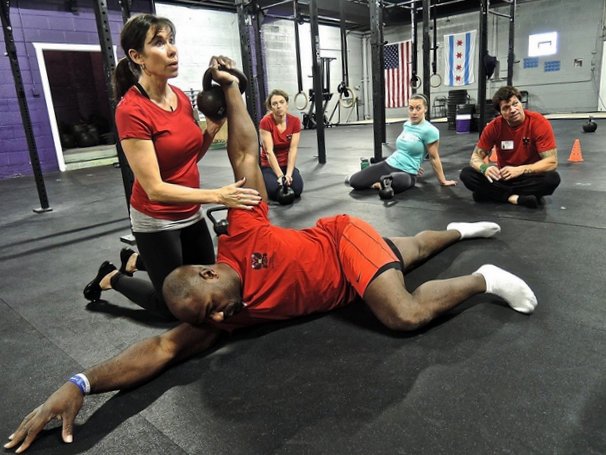
To begin learning how to perform a kettlebell swing, you must master the most fundamental movement of the exercise—the hip hinge. Learning how to properly hip hinge, hike pass, deadlift and perform a dead-stop swing will set you up for guaranteed success with the kettlebell swing.
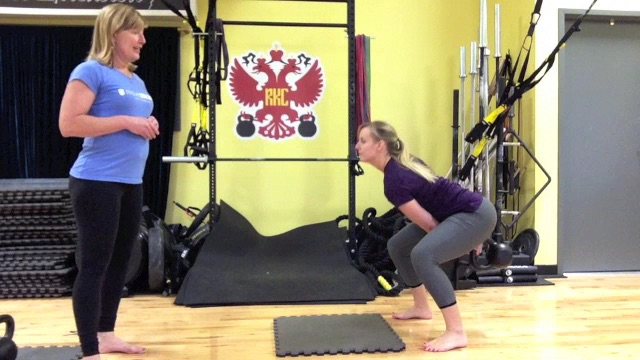
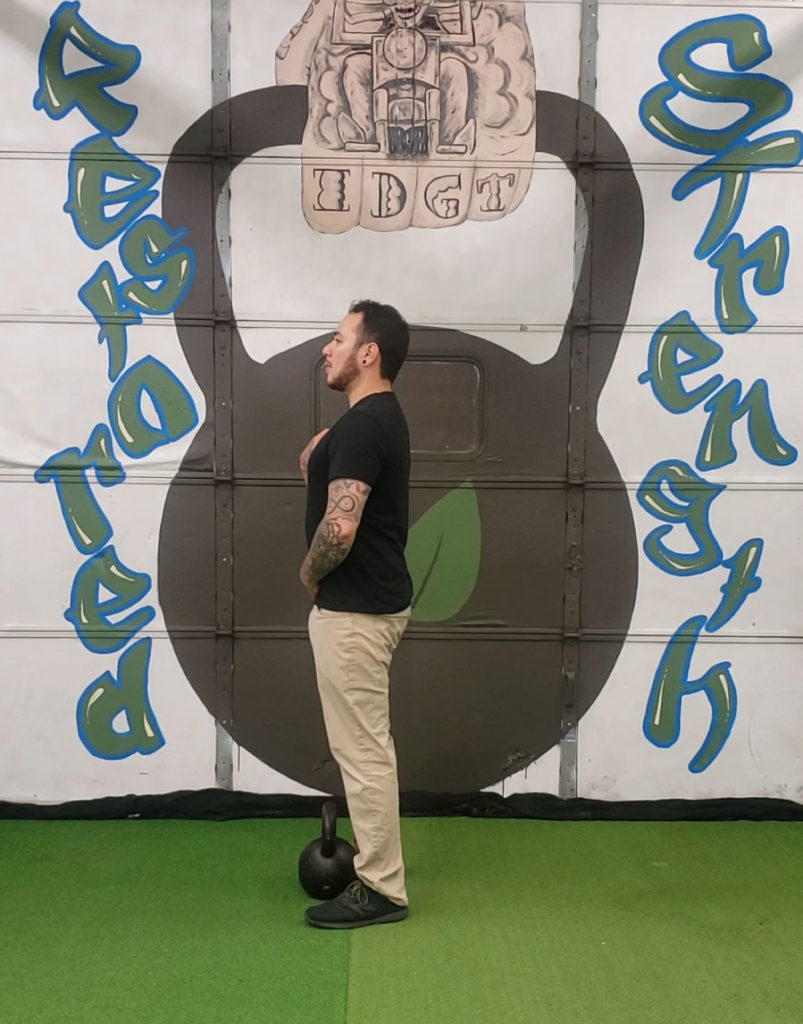
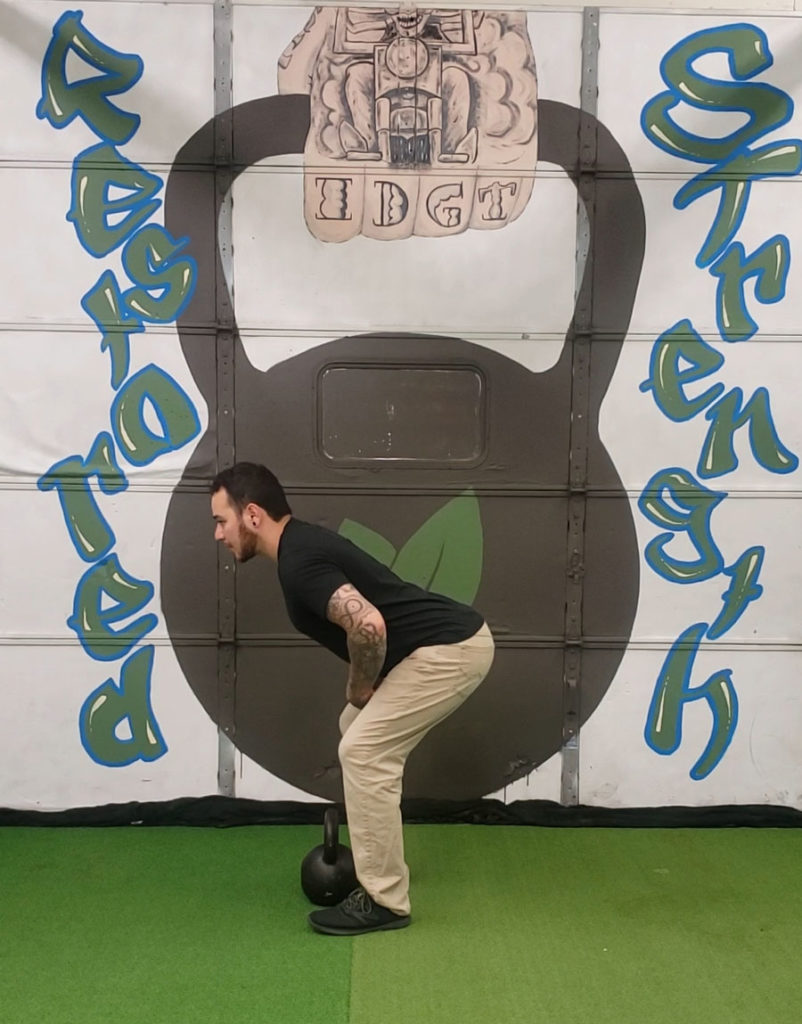
Master Your Hinge:

The foundation of the kettlebell swing is built off a strong hip hinge. When you are able to teach your clients how to optimally use their hips, they will get the full benefits for the proper muscles used in the swing. You will also keep your clients safe and reduce their exposure to injury.

Use these coaching cues:

  • Start in a tall & tight position with your feet shoulder width apart.
  • Have a slight bend in your knees.
  • Reach your hips back.
  • Drive your hips forward and stand tall.
Stand tall & tight
Reach your hips back

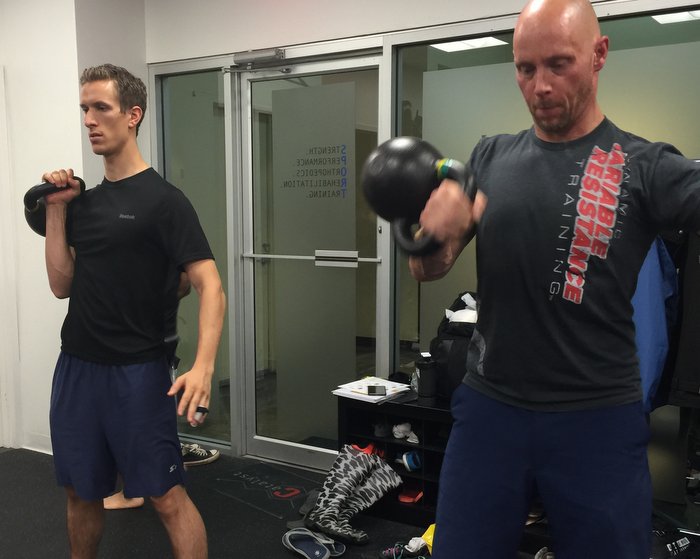
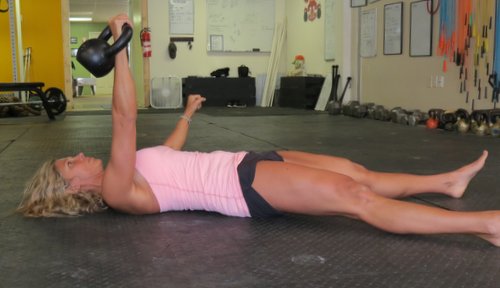
Master Your Hike Pass:

The next step in the kettlebell swing is to master the hike pass. This motion begins to teach you the momentum of the swing. Learning the hike pass teaches you how to properly propel the kettlebell behind you. The back of the hike pass shows you what the bottom position of the kettlebell swing looks like.

Use these coaching cues

  • Get into your hip hinge.
  • Tilt the kettlebell towards you and break the handle in half.
  • Sit into your hips and toss the bell high into the thigh.
  • Keep your chest up & eyes forward.
Tilt the bell towards you and break the handle in half.
Sit into your hips and toss the bell high into the thigh.

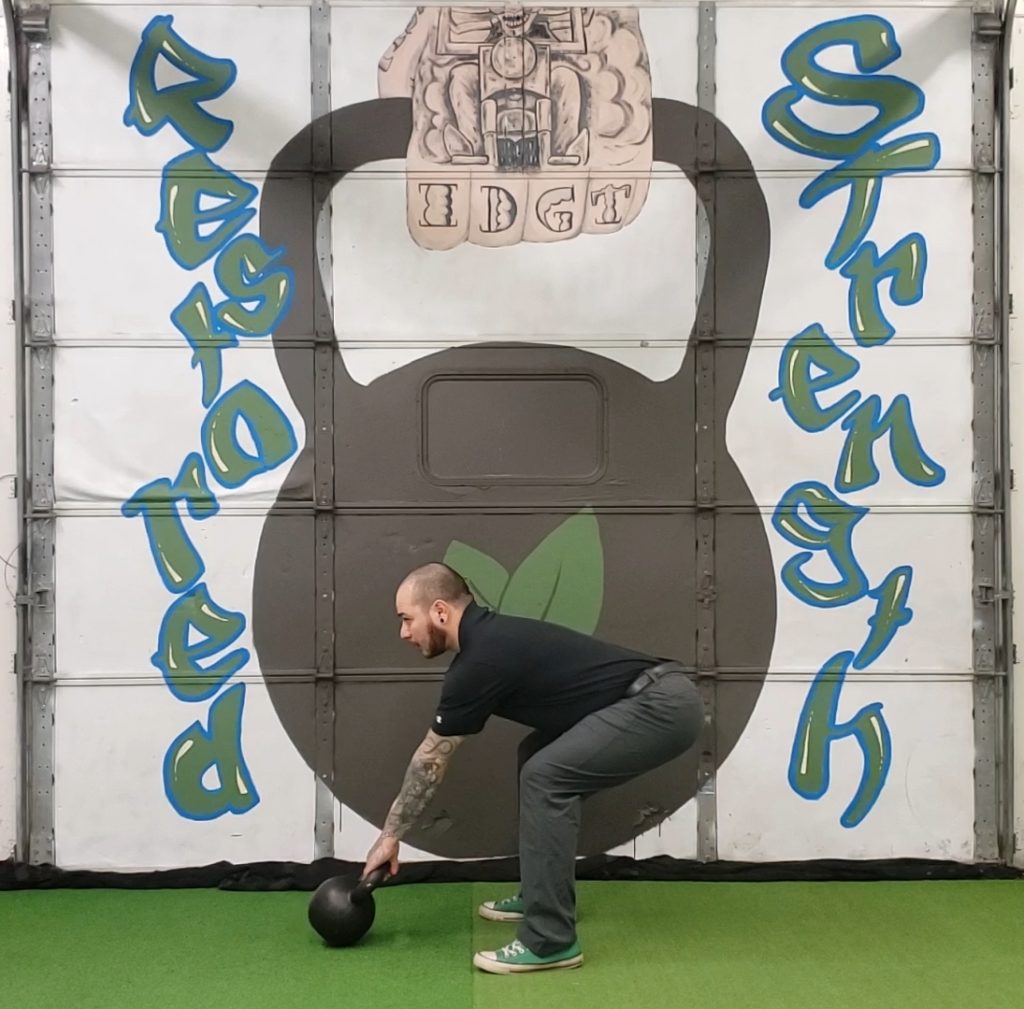
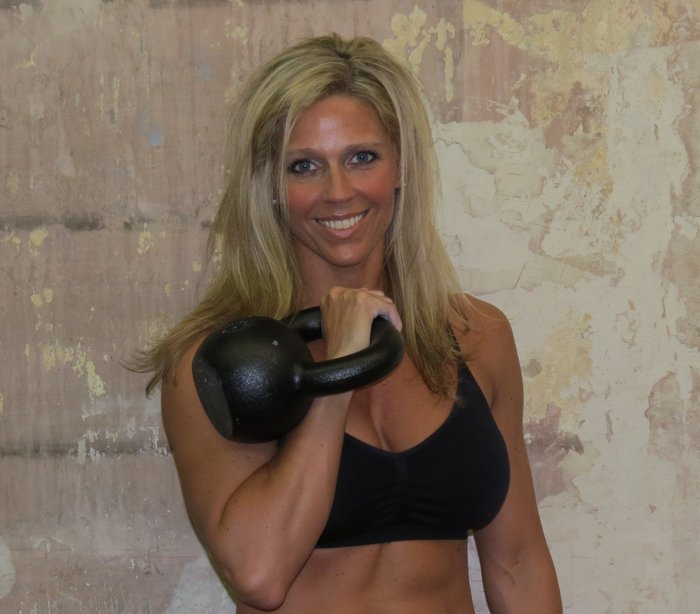
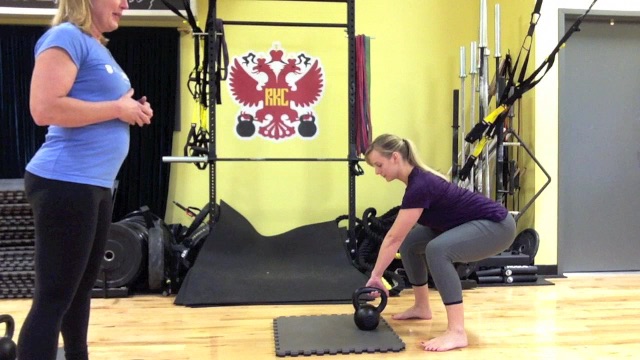
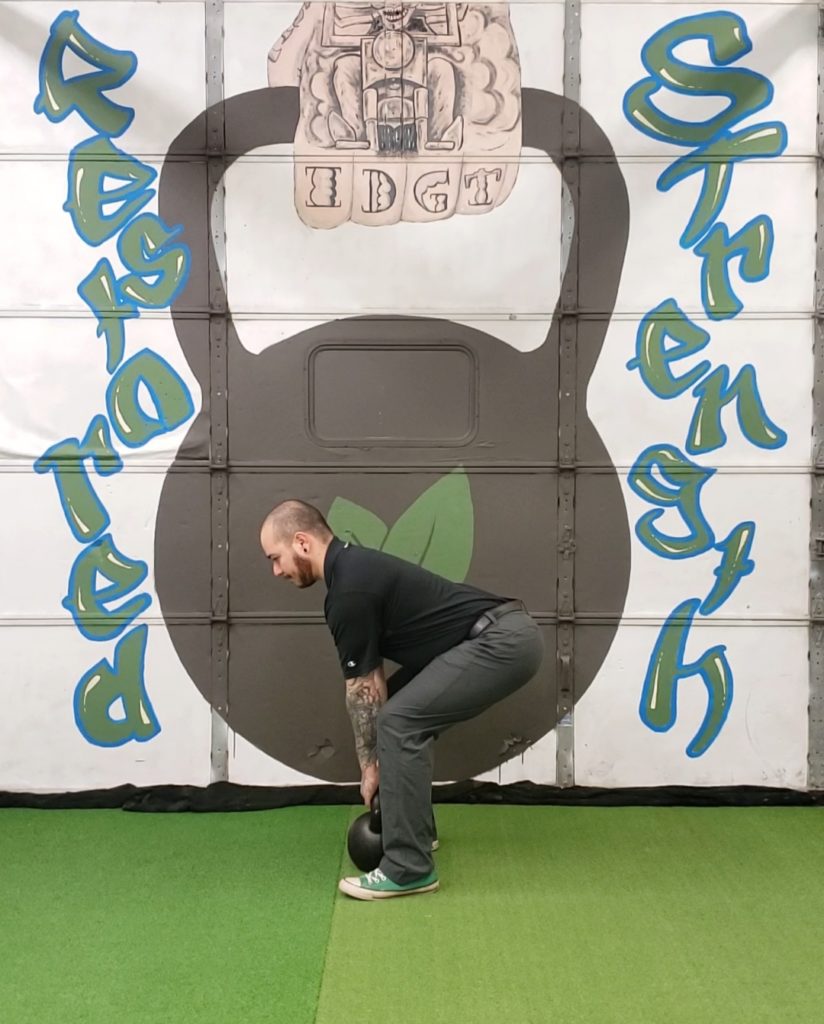
Master Your Deadlift:

Next is the deadlift. When teaching the deadlift, you are helping your client understand how to properly load the hips. The deadlift teaches you to snap the hips and fully lock out at the top. This is important because this teaches how you should be at the top of the swing.

Use these coaching cues

  • Start with the kettlebell between your feet.
  • Go into your hip hinge.
  • Break the handle in half.
  • Punch your feet into the ground and snap your hips forward.
Go into your hip hinge.
Snap the hips and fully lock out at the top.

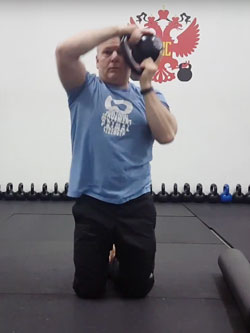
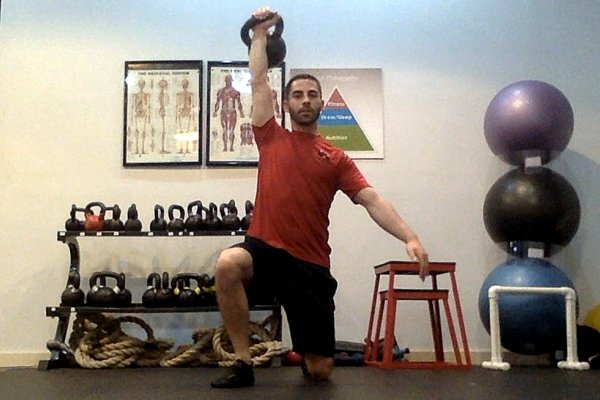
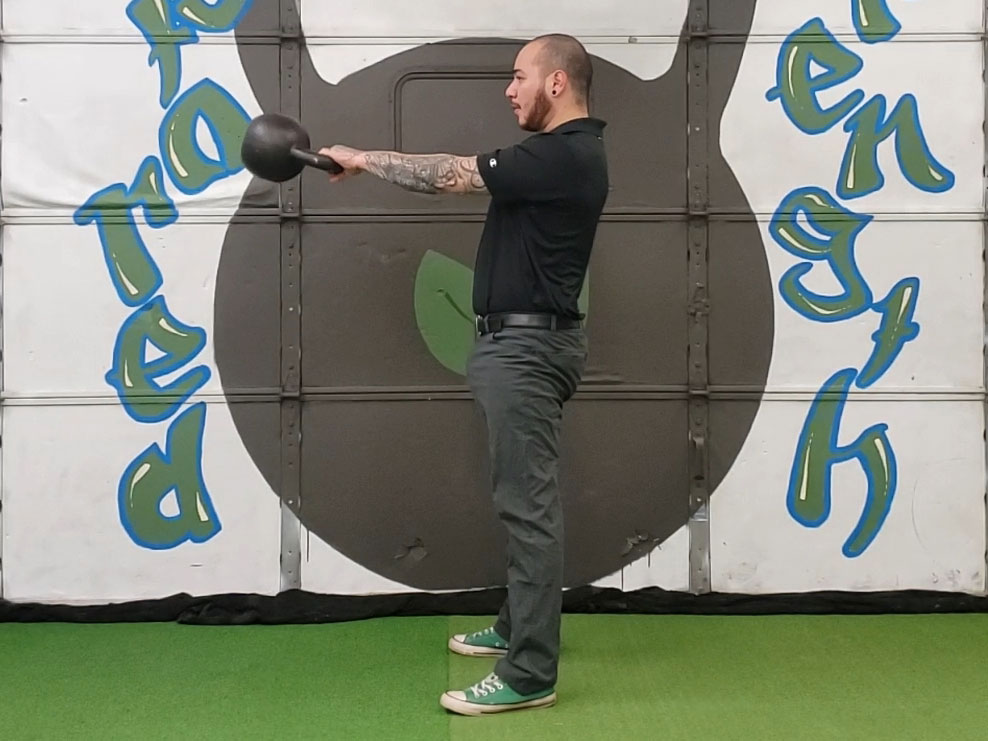
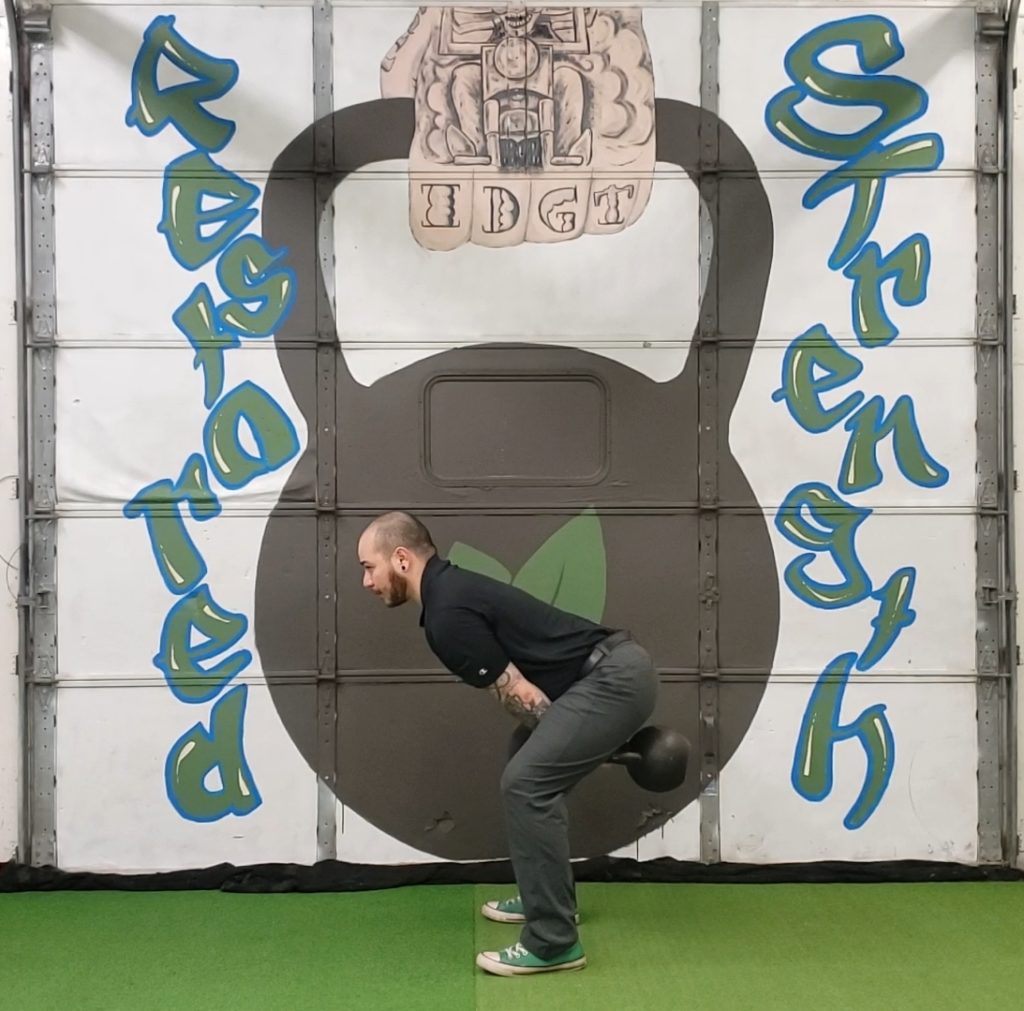
Master Your Dead Stop Swing:

The last step in mastering the kettlebell swing is the dead stop swing. Mastering the dead stop swing puts all of the other steps into one. You begin by starting in a hip hinge position, next you go into your hike pass, and lastly you go into your dead lift. Each rep is initially starting the swing back over and enforcing all the skills you have learned prior to this step.

Use these coaching cues

  • Start in your hike pass position.
  • Toss the bell back.
  • Explode through the hips and let the bell float up.
  • Wait for the bell to push your hips back and park the bell.
Sit into your hips and toss the bell high into the thigh.
Explode through the hips and let the bell float up.

To get the most out of your swing and master the basics, review and practice each of these steps.

***

William Sturgeon, RKC Team Leader, RKC II trains clients at his gym, Restored Strength. Contact him through his website at RestoredStrength.com or follow him on Facebook: facebook.com/restoredstrength


Filed Under: Kettlebell Training, Tutorial Tagged With: kettlebell swing, kettlebell swing technique, kettlebell technique, swing standards, video, video tutorial, William Sturgeon

Try This Solo Version of a Classic Kettlebell Corrective Partner Drill

December 28, 2016 By Shari Wagner 5 Comments

Shari Wagner RKC Team Leader Swing Setup

I was working with a personal training client who was having trouble packing his shoulder in the one-arm kettlebell swing, particularly in the hike pass position. He had no problems with this in his two-hand swing, it only happened when he switched to the one-arm swing. So, I used the RKC towel pull drill with him and voila! It taught him the feeling of properly loading in the hike position and it improved his shoulder packing when he went back to swings.

This client trains with me once a week to learn proper kettlebell technique, and the rest of the time he trains on his own at home. How could he duplicate this drill on his own when he didn’t have a training partner or qualified instructor to train with him at home? We needed a solution so that he could practice the drill prior to each set of one-arm swings, at least until he was able to groove the pattern in his swings.

The deadlift drag is a wonderful exercise and I use it quite often. In this drill, you set up as if to swing, but instead, you drag the kettlebell on the floor very slowly, keeping yourself in the hike position and loaded up through the posterior chain the whole time. However, I sometimes find that the deadlift drag doesn’t have the same carry-over into the swing itself. Not every drill will work for every person to correct the pattern they need to correct. In this case I wanted my client to be able to really load up in the same way we do with the towel pull drill since it really worked to help his one-arm swing. I wanted him to have his arm connected to his body as if the kettlebell were behind him like it is in the hike position of the swing.

I came up with a similar drill using a resistance band. I used a band that was about 1/2” wide, that provides about 15-30 lbs of resistance. Keep in mind that you’re using a double thickness of the band when you set it up as I have in the video below. The loading in this drill happens from the front as you are pulling the band behind you, rather than loading from the back in the towel pull drill. But, the drill still worked really well for my client. He got his shoulder packed in the hike position and felt the loading and support that comes from the shoulder position in the in the swing.

We did one set like you’ll see in the video below and it had the same positive effect on his one-arm swing technique as when we did the towel pull drill together at the gym. The best part is that he can now do the resistance band drill when he trains by himself at home. I prescribed for him to do about five pulls of the band, followed by one 10-second static hold before every set of one-arm swings.

I did experiment with this same idea, and we turned around to try and load up from the back, in order to really try and emulate the towel pull. I personally didn’t like this as much as pulling from the front, because I felt like the resistance of the band wanted to pull me backwards and without a partner to brace against in the pull, I didn’t feel like I was in control of the movement as much. I also didn’t feel like I could engage the lats and the hips in the same way or to the same extent.

I invite you to try this drill both ways and let me know what you think in the comments section below!

Here’s a quick workout you can do using this resistance band drill, the deadlift drag, and the all-important single rep swing. Hopefully the combination will really help your one-arm swings.

  • 5 1-arm deadlift drags, left side
  • 5 single rep swings, left side
  • 5 band pulls, left side with :10 hold on last rep
  • 10 1-arm swings, left side
  • Repeat on the right

Repeat for 5-10 sets, resting as needed between sets

****

RKC Team Leader Shari Wagner, RKC-II, PCC, CK-FMS owns Iron Clad Fitness in Denver, Colorado. She can be contacted through her website at IronCladFit.com, email: info@ironcladfit.com or by phone 720-900-4766. Follow her on Facebook: facebook.com/IronCladFitness and Twitter: twitter.com/IronCladFitness.

Filed Under: Coaching, Kettlebell Training, Tutorial Tagged With: how-to, kettlebell drills, kettlebell training, kettlebell tutorial, RKC, Shari Wagner, video

Do You Even Stretch, Bro?

November 2, 2016 By Paul Britt, DC 6 Comments

Paul Britt Hip Flexor Stretches RKC Blog

We all tend to have a set routine that we use as a warmup for our training. There are articles galore on the RKC Blog about those, even some that I have written. What do you do after you are through with your training session? Many people throw in a few random stretches and are done. I like to have a plan and a process in most of my sessions.

This particular series is one that I use quite often. It helps deal with the position of daily living that the majority of people in modern society participate in: sitting. Our bodies tend to want to be lazy and expend as little energy as it can get away with. As we sit all day, the body figures out that it can contract and shorten the hip flexors as a way to save energy and be lazy. But, what do we need to be strong, prevent back injury and get the most out of our training? Healthy, flexible and fully functioning hip flexors. Your movement prep should be used to prep the trouble areas for movement. On top of that, kettlebells and Convict Conditioning training helps strengthen and correct the muscular imbalance/tightness that we are working to improve.

But how do you get our increased flexibility and lengthening to stick? In the video below is a series that I use after kettlebell training to maintain the improvements gained in the training session. It also helps prevent the muscles from returning to the contracted position.

The series is pretty basic and easy, but it stretches the hip flexors effectively. It starts with the basic RKC Hip Flexor stretch. The stretch is much shorter in movement than a typical hip stretch, as we are really focusing on the hip flexor and rectus femoris. Do not over extend this stretch, as you can damage the hip capsule and associated ligaments. The next stretch is similar except that you rotate the rear hip and rotate the front leg, but maintain the squared off posture in the upper body. This is a little different stretch in that you feel it through the obliques and possibly as far up as the anterior serratus muscles. The last stretch is the extended hip stretch. I utilize breath to sink deeper into it. At the end of the stretch, you let the back leg rest on the floor and pull yourself forward slightly as you feel the stretch on the back thigh.

As with any stretching, if there is pain, back off and do not push through it. Do not hurry, and use your breath to allow the stretch to happen easily.

***

Senior RKC Paul Britt has been an RKC kettlebell instructor since 2006. Paul trains people at workshops and privately. Paul is currently attending Parker University working on his Doctor of Chiropractic degree Paul has served as an assistant instructor at many RKC and HKC Courses, is a Certified Kettlebell Functional Movement Specialist (CK-FMS) and works with some of the top Chiropractors in North Texas. Please visit his website for more information or to contact him

Filed Under: Mobility and Flexibility, Tutorial Tagged With: flexibility, hip flexor stretch, hip flexor stretch video, Hip Stretch, kettlebells, Paul Britt, post-workout stretch, RKC hip flexor stretch, video

A Superset Series for Shoulder Mobility

June 29, 2016 By Paul Britt, DC 3 Comments

Paul Britt Kettlebell RKC Arm Bar

I’ve screened many people with the Functional Movement Screen. In conducting all of those screens, I’ve observed typical patterns, one of which tends to be shoulder mobility issues. While this post is not a treatment plan or medical advice, it is the quick shoulder mobility series I use after the initial individual work and correctives. It’s a great way to open up thoracic and shoulder mobility after a long day of sitting or just living in today’s world.

I have my students perform the series as a superset. They move from one exercise to the next without a break. I typically have them perform the series three times. It’s a great mobility set and general warm-up for the session ahead.

We start with the RKC armbar. Use an appropriate weight for the movement. What is appropriate? I typically use a 14kg for the series as it is a warm-up / mobility drill and not strength focused. There are several versions of the RKC armbar, but I tend to have my knee bent at 90 degrees to keep my lumbar spine out of the exercise. This also focuses the exercise on the mid-thoracic area instead of rolling your hips into the ground. I like to take 3-5 breaths per side before moving on to the next drill.

Paul Britt's 67-year-old client practices the RKC armbar
Paul Britt’s 67-year-old client practices the RKC armbar

The next stop is the bretzel stretch. I rest my head on a roller or another padded surface to keep my neck free of tension so I can focus on the movement. I breathe to move through the stretch: I breath in, tighten up, then relax and exhale as I move deeper into the stretch. I typically practice for 3-5 breaths per side to move through the stretch.

Paul Britt Bretzel

The last move in the set is the kettlebell halo. Since this is still a mobility exercise and not a strength move, I keep the weight at 14kg. I like the half kneeling position as it also helps to teach the body how to be stable. You can also do the halo standing if your knees prevent you from kneeling. While I did not demonstrate it in the video below, you can also use half kneeling to develop stability. I perform ten halos in one direction and ten in the other.

Paul Britt Kettlebell Halo

After a 30 second rest, I begin the series again.

If you have shoulder pain, do not perform any of these exercises without medical evaluation. I also highly recommend that you see an FMS practitioner for screening to address any and all movement issues.

***
Senior RKC Paul Britt has been an RKC kettlebell instructor since 2006. He trains clients at Britt’s Training Systems, his award-winning Hardstyle Kettlebell Training Facility in Rockwall, Texas. Paul has served as an assistant instructor at many RKC and HKC Courses, is a Certified Kettlebell Functional Movement Specialist (CK-FMS) and works with some of the top Chiropractors in North Texas. Please visit his website brittstrainingsystems.com for more information.

Filed Under: Kettlebell Training, Mobility and Flexibility, Tutorial Tagged With: bretzel, mobility training, Paul Britt, RKC, RKC arm bar, shoulder mobility, superset, video

7 Steps to a Bang-Free Kettlebell Clean

May 11, 2016 By Steve "Coach Fury" Holiner 6 Comments

Steve Holiner Kettlebell Clean

Few movements in “kettlebell land” frustrate people like kettlebell cleans. Not everyone enjoys the bruising and soreness we often deal with while learning cleans. And, cleans can get stressful if we’re anticipating multiple slams to the arm.

In my years as an RKC Instructor, I’ve found kettlebell cleans to be one of the most challenging moves to truly own.

The common issues most people have with cleans fall well within the learning curve. Bruising, soreness, and forearm slamming stop as technique improves. Cleans should not hurt. However, you will need to invest some quality time to smooth out your clean. Patience and practice will go a long way!

Here are seven tips for achieving bang-free cleans:

1.    HINGE. People often begin to squat their cleans when they focus on getting the kettlebell up. From watching your backswing, I shouldn’t be able to tell if you’re going to do a swing, clean, or snatch. Keep the hinge consistent.

2.    GRIP. Loosen up folks! Your grip should be fairly relaxed. Think of your fingers as a hook and your thumb as a safety latch. The kettlebell handle must be able to move within your hand.

3.    ROTATE. As soon as your kettlebell is at the end of the backswing, begin to externally rotate your arm toward the rack position. Think “THUMB TO BUM” in the backswing—then, what my buddy Geoff Hemmingway calls “OLD TIMEY MAYOR” in the rack position. The kettlebell will actually make contact with the forearm during the float. This allows the kettlebell and arm to meet the torso at the same time. This tip will eliminate the big bang that can happen when the kettlebell lands last.

4.    VOLUME CONTROL. With practice you will learn to exert the right amount of force from the hamstrings, glutes, and hips to ease the kettlebell into the rack position. If the kettlebell is coming in too fast, and you can’t slow it down to prevent banging, then lower the volume. On the flip side, if you are using your biceps to curl the kettlebell into the rack, then you’ll need to turn the volume up. The kettlebell must float during the clean!

RKC Kettlebell Cleans

5.    LOW AND CLOSE. The path of the kettlebell should be low and close to you during the clean. If the kettlebell goes too high, it will arc down and slam into you. If the kettlebell goes too far away from you, it will whip into you. Keep your elbow close to your ribs. While some say to pin the elbow to your ribs, I’m not a huge fan of that cue, because when the focus shifts to the elbow, the arm will often get tense. Excess tension in the arm often leads to banging, curling, and eventual elbow discomfort.

6.    NEUTRAL WRIST. Keep your wrist neutral for a smooth bang-free clean. Own that rack position!

7.    REVERSE. Don’t over-think the eccentric part of the clean. Keep the kettlebell close, keep the grip relaxed, and rotate “thumb to bum” as the kettlebell goes into your hinge. Keep your shoulder in the socket as you spill the kettlebell into the backswing.

These seven tips will have a big impact toward removing the impacts on your arm! But, don’t try them all at once, or your brain will smoke. I suggest trying one drill at a time. You’ll have bang-free cleans in no time!

Let me know how these work for you.

Thanks for your time!

-Fury

***

Steve “Coach Fury” Holiner’s superhero headquarters is Mark Fisher Fitness in NYC. Fury’s a Master RKC, a DVRT Master Chief, and an Original Strength Instructor. He is available for classes, semi-privates, instructor training and programming at MFF. Check out coachfury.com, facebook.com/coachfury Instagram @iamcoachfury and Twitter @coachfury for more info.

Filed Under: Kettlebell Training, Tutorial Tagged With: Coach Fury, fixing kettlebell cleans, how to do a kettlebell clean, kettlebell clean, kettlebell cleans, kettlebell technique, Steve Holiner, video

Two Quick, Easy and Effective Kettlebell Exercises for Any Population

May 4, 2016 By Andrea Du Cane Leave a Comment

Andrea Du Cane, Master RKC

There is something to be said about simplicity of movement and reinforcing the fundamental patterns of our kettlebell lifting.

I’ve taken two basic exercises and by using two kettlebells and focusing on the correct alignment and movement, I have turned them into simple and effective exercises for all populations—including your brand new clients, older clients and those recovering from certain injuries.

Double Kettlebell Deadlift Drag

The first drill is a double kettlebell deadlift drag. Normally we do this exercise with one heavy kettlebell. By using two medium to heavy kettlebells (heavy enough to complete the movement correctly with each arm), you open up the upper body kinetic chain. This will illuminate asymmetries from one side of the body to the other. It also allows you to strengthen the weaker side. Start with the same size kettlebell in each hand and then use a kettlebell one size larger on the weaker side.

For the purposes of this article and video, I will be using the same size kettlebell.

Get into the set up position. The kettlebells are approximately an arm’s length in front of you. Grab the kettlebells and pull yourself back toward your heels. You should feel as though you would fall back on your butt if you let go of the kettlebells. Lock your lats down into a packed position and maintain a long and neutral spine. SLOWLY drag the kettlebells back towards your heels with your elbows straight. Feel how the movement is initiated by the lats and the triceps. Do not let your hips drop below your knees, and do not let your spine flex at all!

The key is to not use any momentum. In fact, it is best if the floor you are using is sticky or rubber—the more resistance the floor offers the better.

If you feel most of the tension in the quads, then you are not getting your hips back far enough and are trying to hold your position with your quads instead of your glutes and hammies. The abs must be braced the entire time, and you should use a long firm exhale as you drag the kettlebells back. Release, step back, and re-set for the next rep.

I go the length of my gym, or at least 8-10 drags. Repeat for 1 or 2 more sets as desired. Remember, never let your back round into flexion at any time during this exercise!

Double Kettlebell Straight-Leg Deadlift

The double kettlebell straight-leg deadlift, is another simple but effective exercise to challenge the posterior chain. It is an excellent exercise for the hamstrings and glutes. And as in the deadlift drag above, it utilizes the lats.

There is an interesting difference between these two exercises. The deadlift drag uses the lats to do the work by pulling the kettlebells back toward the heels, while the hips and legs maintain stable strength. With the straight-leg deadlift, the lats are held stable while the hips and hammies initiate the movement through hinging. In other words, the movements and stabilization are reversed, but both are working the same muscles. Pretty cool huh!

Here’s how to do the double kettlebell straight-leg deadlift:

Pick up two moderately heavy kettlebells using good deadlift technique. Stand with your feet between hip and shoulder width apart. Keep your elbows straight and locked, and your lats retracted and contracted. Begin to send your hips back into a hinge. Keep your knees as straight as you can manage while maintaining a neutral spine at all times.

The amount of knee flexion and the depth of your torso forward relate to your hamstring flexibility. The more flexible you are, the straighter you can keep your knees and the lower you can fold forward without any flexion in your spine.

Inhale into your belly as your chest comes forward. Pause briefly at the bottom, keeping the glutes and hamstrings contracted. Tighten a little more and then exhale as you come back up to the starting position.

You will feel a deep stretch/contraction from your glutes down through your hamstrings. This exercise can be considered a loaded stretch for the glutes and hamstrings. It is a very powerful hamstring developer.

As usual, there should be NO flexion in the spine. Start with a limited range of motion until you can use the full range of motion with a neutral spine. You can adjust the amount of knee flexion as well—just don’t allow yourself to turn it into a regular deadlift, you’ll be cheating yourself out of the main benefit of this exercise.

As I mentioned above, the lats, back and core are working very hard to stabilize during this exercise, so they are benefiting too!

Start with 3 sets of 8 moving slow and controlled.


****

Andrea Du Cane is a Master RKC Kettlebell Instructor, CK-FMS, CICS, and RIST, ZHealth certified, she has a BA in Psychology from the University of Minnesota and is also a Pilates instructor. She is the author of several books and dvds including The Ageless Body, The Kettlebell Boomer, and The Kettlebell Goddess Workout.  She has over twenty years of aerobics, weight training and fitness experience, with an additional background in… Read more here.

Filed Under: Kettlebell Training, Tutorial Tagged With: Andrea Du Cane, deadlift, deadlift drag, double kettlebell, kettlebell drills, kettlebells, master rkc, Master RKC Andrea Du Cane, straight leg deadlift, tutorial, video

Dan John, Dr. Chris Holder and Chris White instruct at the San Jose RKC

April 15, 2016 By John Du Cane, CEO and founder, Dragon Door 5 Comments

SanJoseRKCGroup

I recently saw a terrific movie at one of our local Indie theaters, called Tangerine by Sean Baker (who has now become one of my favorite directors).

Tangerine is about transgender prostitutes in Los Angeles. Shot in a raw, neo-realistic, “street-doc” style, it’s funny, endearing, soulful, sad and enlightening. And beautifully shot. I loved it!

All very wonderful…but what has Tangerine got to do with kettlebells and the RKC?

Answer: it inspired me to start filming RKC and PCC events that I attended…

Why?

Because Tangerine was filmed entirely on an iPhone—and still looked fantastic on the big screen!

So I bought an iPhone 6 and shot with it at the recent San Jose RKC, taught by Dan John, Chris Holder and Chris White. I handed over all the footage to Adrienne Harvey and asked her to compose an initial short video—to give you a taste of the RKC culture in action.

Here it is:

You can see that Adrienne did a fantastic job editing from the mass of footage I dumped on her… 🙂

We hope to use more of the footage in future blogs and articles. But this is a start…

Filed Under: Kettlebell Training, Workshop Experiences Tagged With: Chris Holder, Chris White, Dan John, John Du Cane, RKC, RKC Workshop, Russian Kettlebell Certification, San Jose RKC, video, Video recap, workshop experience

The Clean Viking Salute, a New Spin on a Kettlebell Classic

March 16, 2016 By Ryan Jankowitz 5 Comments

Ryan Jankowitz Kettlebell Clean Viking Salute

As a kettlebell instructor, I love performing kettlebell complexes and chains. I also enjoy putting my clients through complexes and chains—though they may not love them as much as I do.

Complexes and chains allow you to string several movements together without putting the kettlebell down. Complexes and chains create a very time efficient, heart-pumping workout that hits many different movement patterns. Not only do we train several different movement patterns, but we are also able to explore the “time under tension” concept. The more time we spend holding tension, the stronger we become.

With that being said, I want to share one of my favorite chains. Gus Petersen’s “Viking Salute Workouts”, from the RKC Book of Strength and Conditioning, inspired this chain.

Gus Petersen’s Viking Salute Chain:

  • Snatch x 1
  • Overhead Lunge x 1
  • ½ Kneeling Press x 1
  • Overhead Lunge back to standing x 1
  • Repeat

If you have not read the RKC Book of Strength and Conditioning, I highly recommend you pick it up. It contains some really great programs and workouts that will spice up your training.

Gus Petersen’s “Viking Salute Workout” is great for intermediate to advanced kettlebell practitioners, but what about beginners?

My variation may work very well for those new to kettlebells, or instructors working with beginner clients. Instead of performing a snatch to start the chain, we begin with a clean.

Here’s the Clean Viking Salute chain:

  • Clean x 1
  • Rack Lunge x 1
  • ½ Kneeling Press x 1
  • Rack Lunge back to standing x 1
  • Repeat

I have used this chain successfully with individual clients and classes alike. With this chain, we explore a pull, hinge, lunge and vertical push all within one workout. I usually have my clients perform 5 reps on each side and anywhere from 3-5 sets in a training session.

Feel free to get creative with this chain and turn it into a complex or even add some rack carries. Give this workout a whirl and let me know what you think.

Stay Strong.

****

Ryan Jankowitz, RKC-II Instructor, CK-FMS, is a life-long athlete who can’t imagine sitting behind a desk. He enjoys sharing his passion for fitness and spreading the RKC knowledge. Ryan operates a remote fitness coaching service and is available for private kettlebell workshops as well. You can reach him at ryan@rjkettlebell.com or through his website rjkettlebell.com. He also works with clients and teaches kettlebell classes at Fitness on the Run in Alexandria, Virginia. If you’re in the area, visit fitnessontherun.net and come swing some bells with Ryan.

Filed Under: Kettlebell Training, Workout of the Week Tagged With: Gus Petersen, kettlebell chain, kettlebell complex, kettlebell video, kettlebell workout, kettlebell workout video, kettlebells, RKC, Ryan Jankowitz, video, viking salute

The Sweaty Beast Workout

May 13, 2015 By Beth Andrews 4 Comments

Beth Andrews Senior RKC

I live for a great workout. Do you? This is one of my favorite workouts and it’s a hit with my students as well. I thought I would share some of the kettlebell love and sweat with you. This workout is challenging, fun, will leave you in a pool of sweat and feeling like a beast when you’re done.

You can take this workout and grow with it by challenging yourself with heavier weight. I would first suggest you complete it with a kettlebell that’s your snatch test weight. When you can successfully do that, you can advance to the next size kettlebell.  🙂

Most people are familiar with the snatch and goblet squat, but are unfamiliar with the one arm chest press. Here are a few things to remember when performing the one arm chest press, a few options for the workout, a quick video tutorial and a demo sample of the workout.

1.There are many different ways to do the one arm chest press. My preference is to perform it with both legs down and both arms off of the floor, in the video below. This variation requires more body control/core stability. If you can’t keep your low back flat and your bum tight, bring one or both knees up. I prefer both knees up or both down.  Please option it out if needed. See pictures below.

Beth Andrews Chest Press Legs Up option
Yes! Legs up, bum tight, low back on floor.
BethAndrews Chest Press Legs Down Option
YES! Legs down, bum tight, low back on floor.
 belly button up to chin. This will help bring low back to the floor.
No! We want to prevent arching the low back.
Focusing on squeezing the glutes and pulling
belly button up to chin. This will help bring low back to the floor.

2. It can be challenging to chest press with your snatch test weight. No worries, just drop down to a lighter weight for that exercise.

3. You have 25 min to complete the workout. This workout is not about beating the clock, the timing is to keep you focused. It is all about good form, you gain nothing by racing through and taking shortcuts with form. Finish strong, my friends!

4. There are two ways I like to mix up the reps: a 10-1 countdown on all exercises, in a circuit fashion, or stay with 5 sets of 10 reps on everything for a beastlier challenge.

Check out the One-Arm Chest Press video tutorial:
(All kettlebells in the videos below are official Dragon Door kettlebells that have been painted)

Now you’re ready to give the The Sweaty Beast Workout a try! 🙂

***

Beth Andrews is a Senior RKC, PCC Team Leader, and CK-FMS. She leads HKC and RKC certifications, and assists at the PCC. She became the 5th Iron Maiden in 2013. Beth owns Maximum Body Training and a successful online training business. She has over 25 years of training experience. For online training or to host a certification, email Beth at: bethandrewsrkc@gmail.com. For more training tips and workouts subscribe to her YouTube channel, Beth Andrews RKC or visit her website at maximumbodytraining.com

Filed Under: Tutorial, Workout of the Week Tagged With: beth andrews, chest press, kettlebell technique, kettlebell training, kettlebells, one arm chest press, RKC, tutorial, video, workout, workout of the week

Achieve Pain-Free Single Kettlebell Cleans From The Start

January 28, 2015 By Lori Crock 5 Comments

RKC Team Leader Lori Crock's Kettlebell Cleans Tutorial

I am a coach who hates to see people in pain from doing cleans.

And it doesn’t matter whether it’s a beginner, or a more advanced kettlebell athlete, the clean can be a challenge to do as effortlessly as its kindred ballistic—the swing or even the snatch.

I speak from experience—the clean was hard for me when I was preparing for the RKC-I. It wasn’t hard with the typical thump on the wrist and forearm in the catch. No. My issue was a shoulder-hike on one side as the kettlebell made its way up … which can be even worse with the trap pain and the potential for some serious asymmetry down-the-road.

To avoid this, read on!

When you are first learning the clean, it can seem mysterious as to what the hand, arm and kettlebell are doing on the way up to the racked position. It happens so fast!

Often we see the clean only as a transitory movement that prepares us for pressing, front-squatting or doing racked carries—instead of focusing on the quality of the clean—even though we know a more efficient clean results in stronger pressing and squatting. And the clean is a nice alternative to the swing or snatch for conditioning.

You might not realize the inefficiencies in your clean if you don’t train it on its own very often—until you notice bruises on your wrist or arm the next day.

So let’s review the phases of the clean to achieve pain-free cleans. Note that the coaching cues included here are phrases I use when teaching to help people remember key points. The phrases may not exactly match the words used in our RKC manual, but they are rooted in my RKC kettlebell training.

The Swing

Get your two-hand and one-hand swing down first to set your start position, hip hinge and especially a deep back swing. Use cheat cleans (two-hand cleans) while you are learning the swing to prevent grooving bad movement patterns with your single kettlebell clean.

The Setup

Clean setup is just like the swing, holding the center of the handle, except the handle is tipped vertically for internal shoulder rotation to prepare your elbow to lock into your side once your arm moves through to the front of the body.

Coaching Cue: Set up like a slingshot.

Lean back with hamstrings on, lats activated, the kettlebell is tipped toward you—the whole body is taunt and slightly leaning back—and ready to release the kettlebell into a deep back swing.

You are in this same slingshot position each time you clean, whether from the ground or in the air into another rep. This athletic, ready position also applies to the Swing and Snatch with the handle in a horizontal position … but when learning the clean, in my experience, students need a reminder about the importance of the setup because they are more focused on the finish.

Lori Crock Kettlebell Cleans Tutorial: The Setup
The Set Up

The Back Swing

Get into your best hip hinge and hike the bell back as deep as possible to load and explode out of your hips. Shortchanging the back swing means you’ll end up without the power to send the kettlebell upward; so your body may compensate by arm curling the kettlebell or hiking the shoulder to assist the kettlebell upward.

Coaching Cue: Crush the wall behind you with your tailbone and explode up.

Go back to the swing if you are having problems achieving a deep back swing and hip explosion.

Practice: Swing-Swing-Clean 3 times each side to refine the back swing for the clean.

Lori Crock Kettlebell Cleans Tutorial: The Back Swing
The Back Swing

The Breathing

Breathe in through your nose to fill the diaphragm on the back swing. Exhale as the hips snap and knees and glutes lock.

Hardstyle breathing is used for power production and safety at the concentric or positive part of the clean (and all ballistic kettlebell movements). Exhaling when the hips snap creates a powerful muscular contraction in the torso that assists the body with the movement.

Coaching Cue: Explode, exhale.

Time your exhale on the hip snap/lock—not on the catch of the kettlebell in the racked position.

The Rise

When the kettlebell enters the front of the body there is some quick work to lock the elbow against the side of the body and get the hand around the kettlebell handle with a loose grip. Do this right away after the back swing when the hand is at hip level rather than waiting until you are about to rack the kettlebell.

Coaching Cue Elbow and Arm: Hip and zip

Lock the elbow into you side above your hip, zip up your jacket; keep you hand and arm close to your chest as you guide the kettlebell upward.

Coaching Cue Hand: Houdini hands

Move your hand quickly around the kettlebell handle as soon as it enters the frontal plane; do this quick hand work at approximately hip/waist level.

Practice: Clean in front of a wall, door, or post to practice keeping the kettlebell close to the body if you tend to cast it out away from the body. Use your other hand to cover your face in case of actual impact to the wall.

The Catch

The triangle of your forearm / upper arm will receive the kettlebell and hold it with even pressure (50% pressure on forearm and 50% on your bicep), but think of the whole body as catching the kettlebell. We move into a vertical Hardstyle plank when receiving the kettlebell to help avoid high impact on the wrist and forearm.

In the racked position, the kettlebell will not be sitting on your chest; instead, the inside of your arm will connect with at the side of your torso with a vertical forearm and vertical wrist about at the level of your collarbone. Do not hold your racked arm out in space—keep it touching the body to prevent overloading the elbow joint and to engage the lats. The arm and the body are connected and working as one unit.

Coaching Cue Torso: Catch with your cylinder of strength (Thanks, Andrea Du Cane for this phrase!)

Feel the muscular sinking in of your whole body around the kettlebell (not a collapse, but a tightening) as your abdominals and glutes contract, lats engage, knee caps roll up into quads and the entire body links and locks to receive the kettlebell in the racked position.

Coaching Cue Wrist: Knuckle up!

Because we use a loose grip on the rise of the kettlebell, beginners sometimes end up catching with a ‘broken wrist’ (wrist slightly bent back) in the racked position. To avoid this, re-tighten the grip after the catch so that knuckles are flat and facing the ceiling.

Practice: 5 Cleans left and 1 Hardstyle plank for 15 seconds / repeat right.

The Drop

Tip the wrist to release the kettlebell into a downward descent with a relaxed arm, thumb down slightly and the shoulder will be slightly internally rotated. Use only enough tension to hold on to the kettlebell and guide it to the floor or into another rep. Your hips, as usual, are doing most of the work. Keep the kettlebell as close to your body as possible, with your arm still touching your body, and finish with the arm straight in the back swing position at the end of drop before setting the kettlebell gently on the ground.

Note that death-gripping the kettlebell on the drop can lead to elbow pain.

Coaching Cue: “Waterfall” the kettlebell downward.

Allow gravity to do most of the work on the descent of the kettlebell using only a light grip.

Putting it All Together

Now you are ready to put it all together and practice your (hopefully!) pain-free cleans.

The Practice

I use the clean for conditioning in complexes and chains. I also like kettlebell chains that include a clean to practice smooth transitions between movements. This complex meets both of those goals. I use one kettlebell for all movements with 1 minute of rest between 3-5 rounds.

10 Cleans left / 10 Cleans right

SA 2 Swings-2 Cleans-2 Press left

SA 2 Swing-2 Clean-2 Press right

***
By Lori Crock, RKC Team Leader, FMS II and MovNat MCT II. Lori owns MoveStrong Kettlebells in Dublin, Ohio where she teaches small group kettlebell classes to all ages and fitness levels and continues to be amazed, inspired and educated by her students. Her email address is lori@movestrongkbs.com

Filed Under: Kettlebell Training, Tutorial Tagged With: clean a kettlebell, kettlebell cleans, kettlebell how to, kettlebell instruction, kettlebell technique, kettlebell video, Lori Crock, RKC Team Leader, video

  • Go to page 1
  • Go to page 2
  • Go to Next Page »

Primary Sidebar

Featured Products

previous arrow
BOOK-RKCBookofSnC
HardStyleKettlebellChallegeDanJohn700
BookCoverMasterTheKettlebell1
RKCiconKettlebell512
KettlebellGoddessdv040
next arrow

Recent Posts

  • Key Kettlebell Exercises To Help You Create Better Balance
  • How to Most Effectively Use Kettlebells to Meet Your New Year Goals
  • 1 Exercise That Checks All The Boxes
  • Kettlebells in the Clinic
  • How Breathing Can Improve Your Kettlebell Training
FOLLOW US ON TWITTER!

Archives

Copyright © 2023

Dragon Door Publications / The author(s) and publisher of this material are not responsible in any manner whatsoever for any injury that may occur through following the instructions or opinions contained in this material. The activities, physical and otherwise, described herein for informational purposes only, may be too strenuous or dangerous for some people, and the reader(s) should consult a physician before engaging in them.