• Skip to main content
  • Skip to primary sidebar
  • Home
  • Contributors
    • Matt Beecroft, Master RKC
    • Martijn Bos, Master RKC
    • Andrea Du Cane, Master RKC
    • Angelo Gala, Master RKC
    • Chris Holder, Master RKC
    • Steve Holiner, Master RKC
    • Dan John, Master RKC
    • Mike Krivka, Master RKC
    • Thomas Phillips, Master RKC
    • Robert Rimoczi, Master RKC
    • Phil Ross, Master RKC
    • Max Shank, Master RKC
  • Workshops
    • HKC Workshops
    • RKC Workshops
    • RKC-II Workshops
  • Find an RKC Instructor
  • Resources
    • Articles
    • Forums
    • Kettlebells
    • Products
  • Blogs
    • PCC Blog
    • Strong Medicine Blog
  • Archives

RKC School of Strength

Official blog of the RKC

William Sturgeon

Stop Using Machines and Start Using Kettlebells

February 18, 2021 By William Sturgeon Leave a Comment

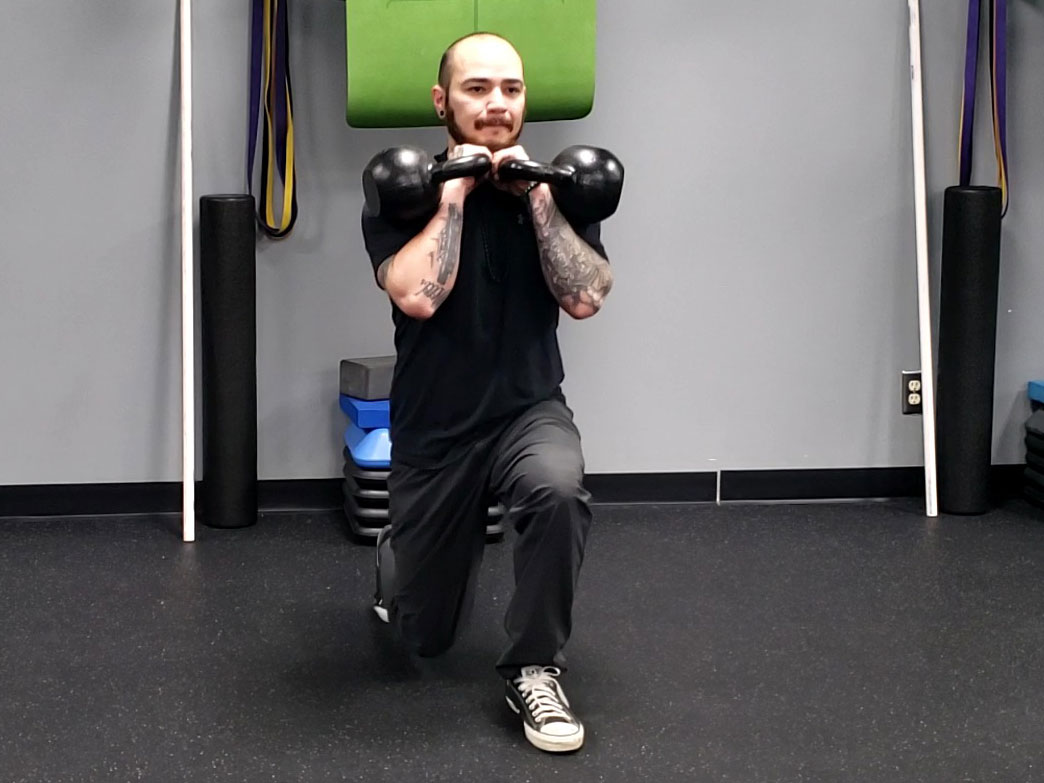
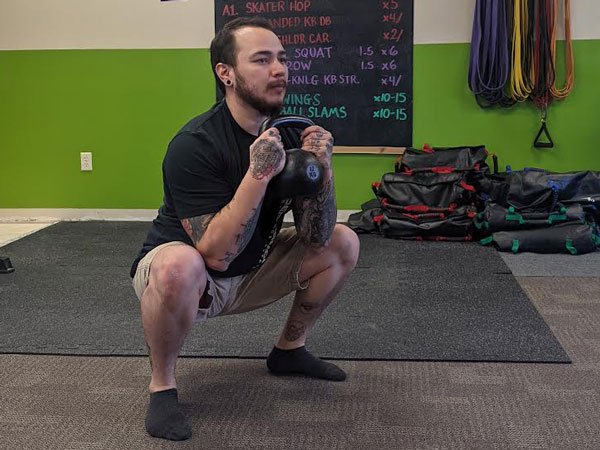
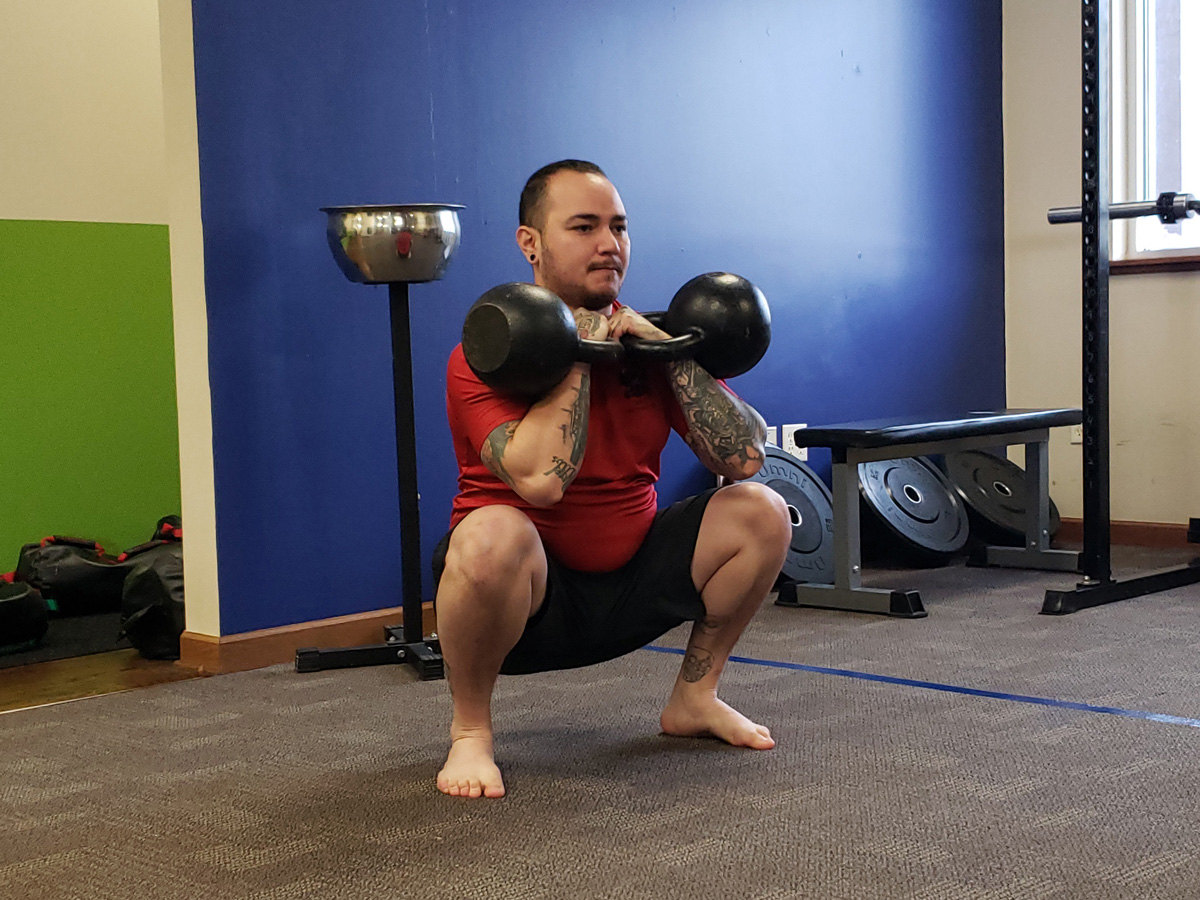
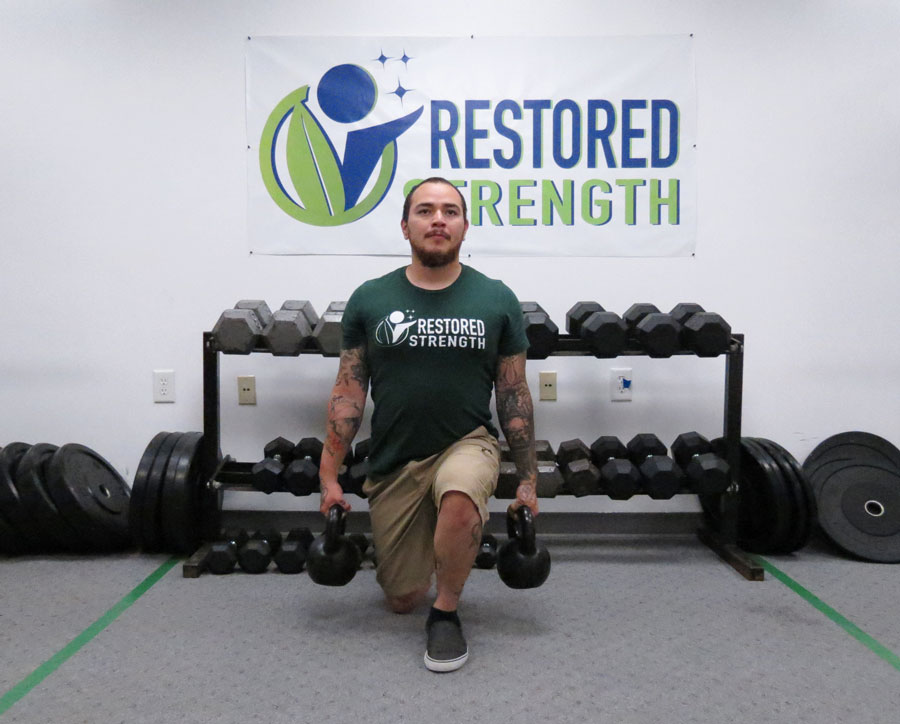
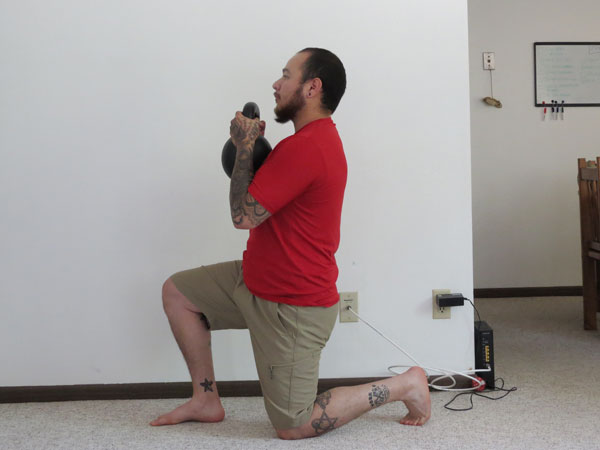
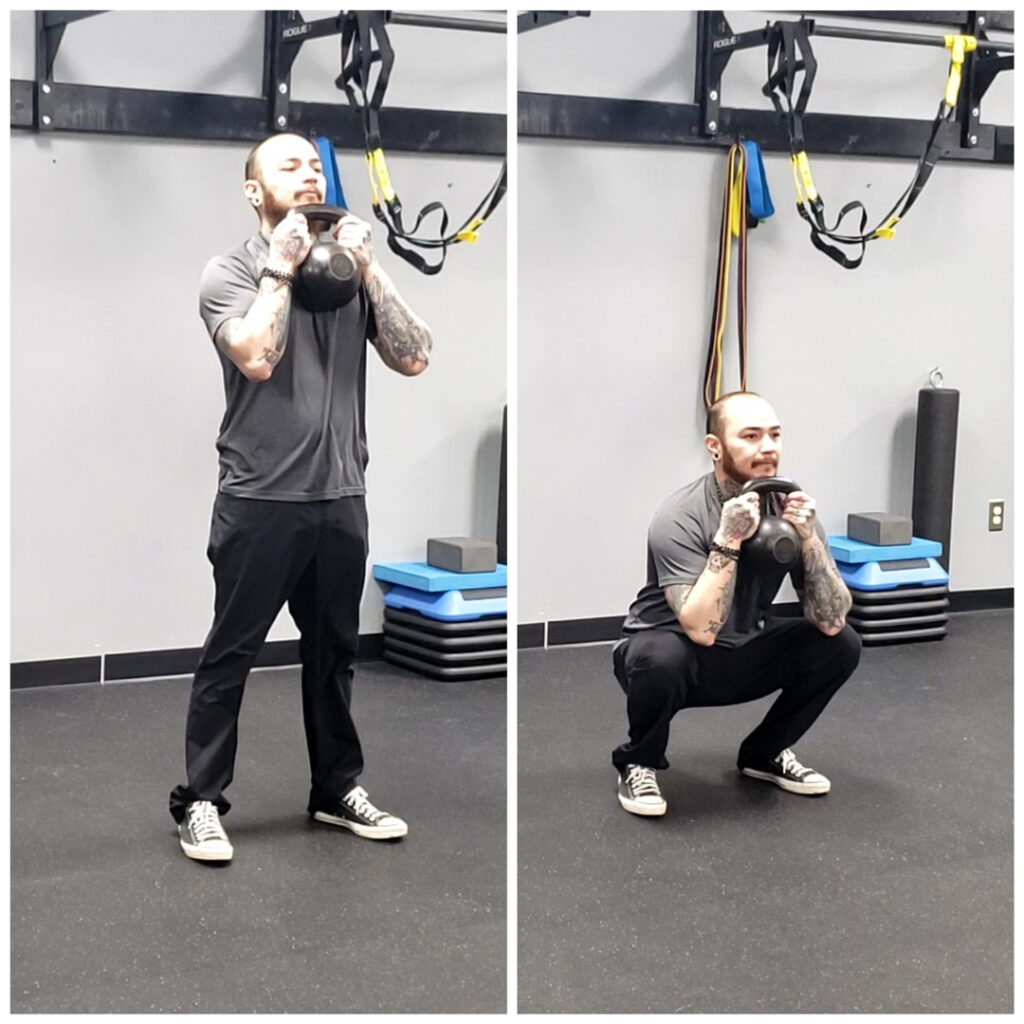
William Sturgeon Double Kettlebell Front Squat

I am going to ruffle a few feathers with this post, but I want to challenge the way you’re currently thinking about your training. Training with machines isn’t bad, but it isn’t the best way. Machines often take up too much space and don’t really develop true strength. Gyms are filled with machines because they are easy to use, are self-limiting, and users do not require guidance.

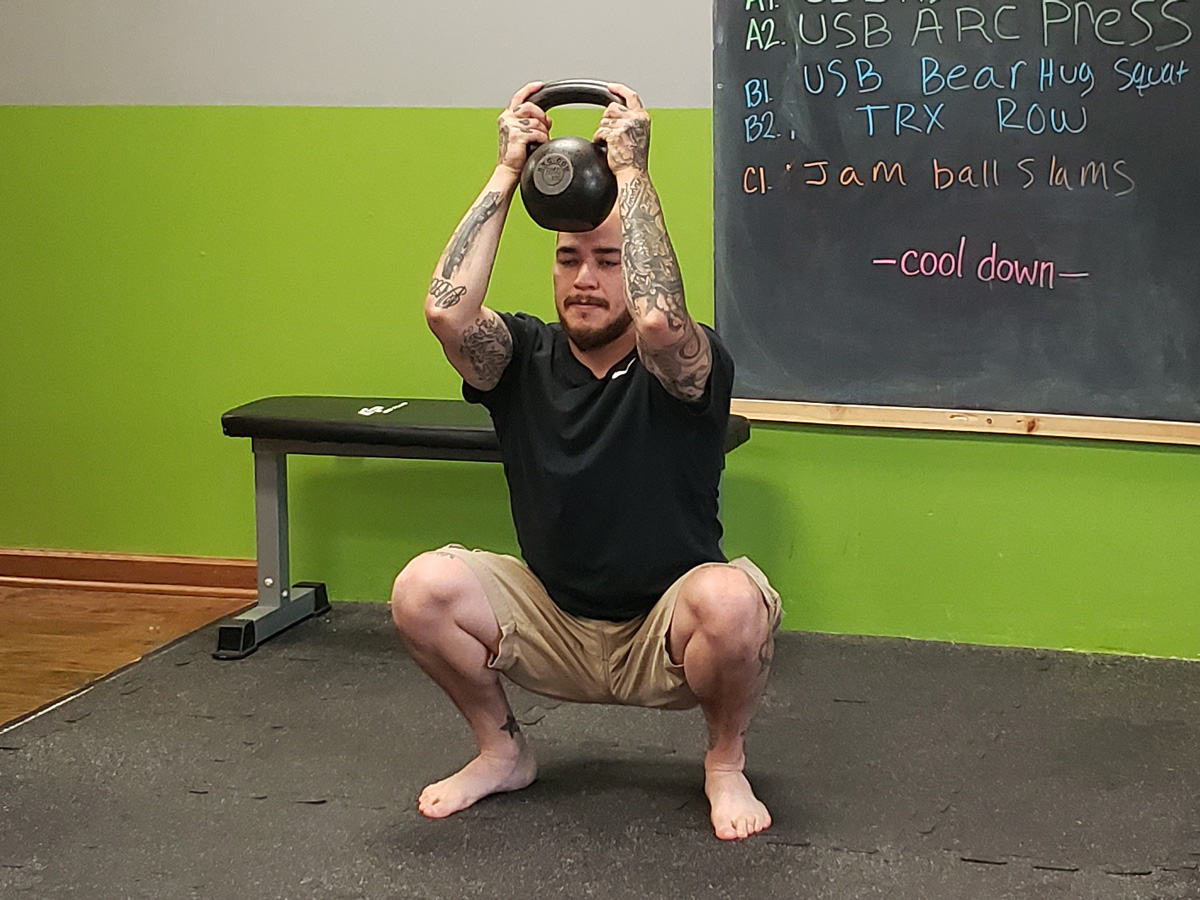
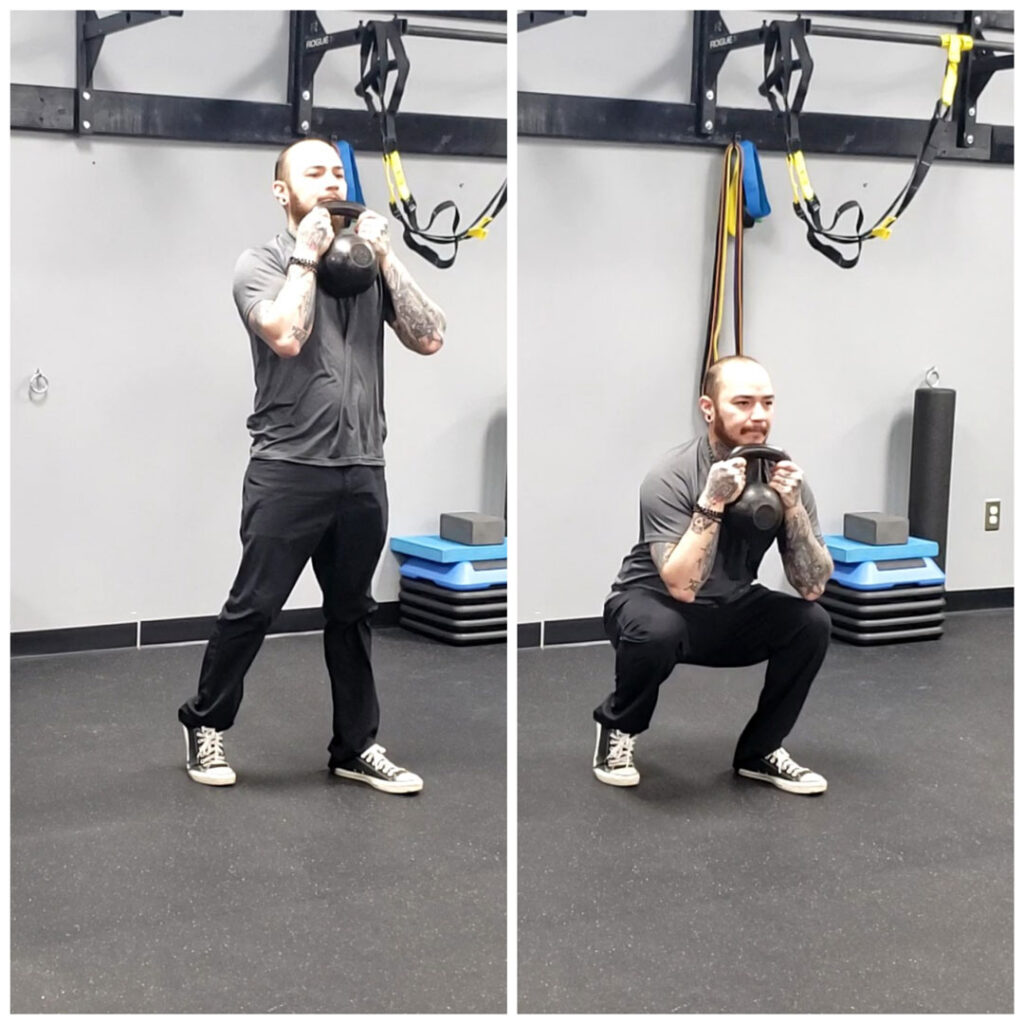
The other issue with weight machines is that they often used in a seated position, which does not require the user to create core stability. For example, compare a kettlebell goblet squat to a machine leg press—there’s a BIG difference in the number of muscles that are working. The goblet squat requires you to use your core to keep your body in a neutral position. The lower body controls the movement, and the upper body maintains the movement. With the leg press, all of these challenges are removed by being in a seated/fixed position.

Another issue with machines is that they can forcibly stretch a joint beyond its range of motion. For example, if you do not get your arms in the right position in a pec deck machine, you will overextend the shoulder before loading it. Compare this to a traditional push up which is limited to a full range of motion without force.

Compared with machines, the kettlebell is a better tool to build strength, mobility, and aerobic capacity. The kettlebell requires the exerciser to use proper body mechanics in order to gain these benefits. And a kettlebell is just one single piece of equipment which can be stored in one foot of space.

Let’s dive deeper into why you should start using kettlebells and forget machines

Kettlebells Help Create Ballistic Power

The swing is one of the most popular exercises people associate with kettlebells. A kettlebell swing is a ballistic movement that generates a great amount of force. It is important that we train the body to be explosive. The swing movement shares a lot with sprinting mechanics. The quicker and more explosive we are with heavier kettlebells, the more this aspect will carry over to other movements and aspects of life.

Gain True Strength

One of my favorite exercises and tests of true strength is the kettlebell front squat. This exercise requires you to load the body structurally, while moving through a full range of motion. The ankles, knees, hips, and spine are loaded at a higher demand. The core is further challenged to maintain the upper back with weight loaded in front of the body for the complete movement.

Increase Your Range of Motion

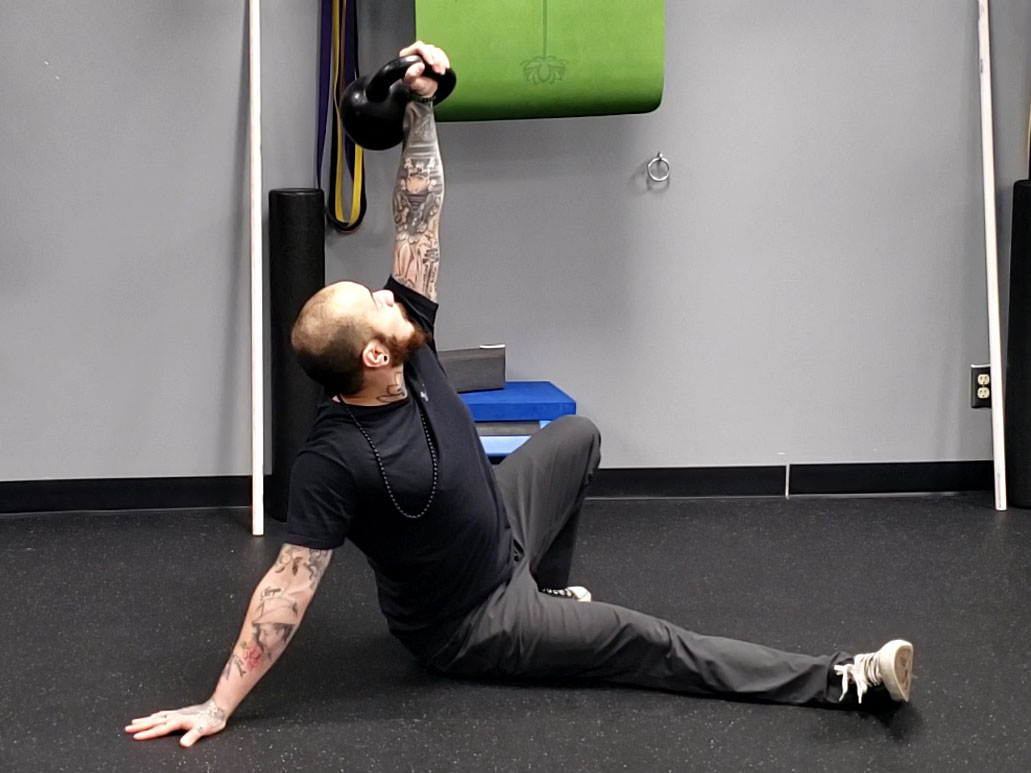
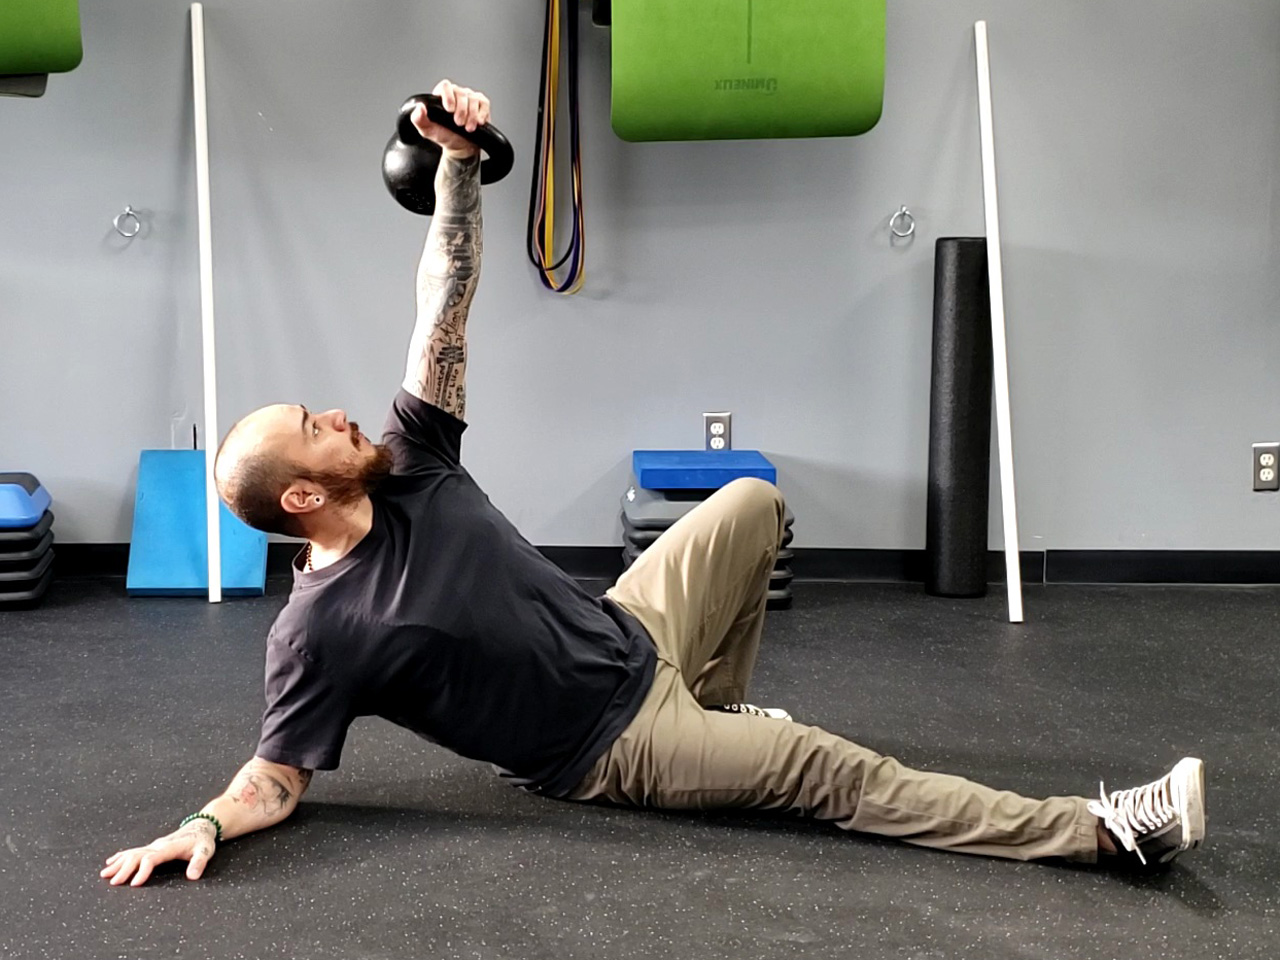
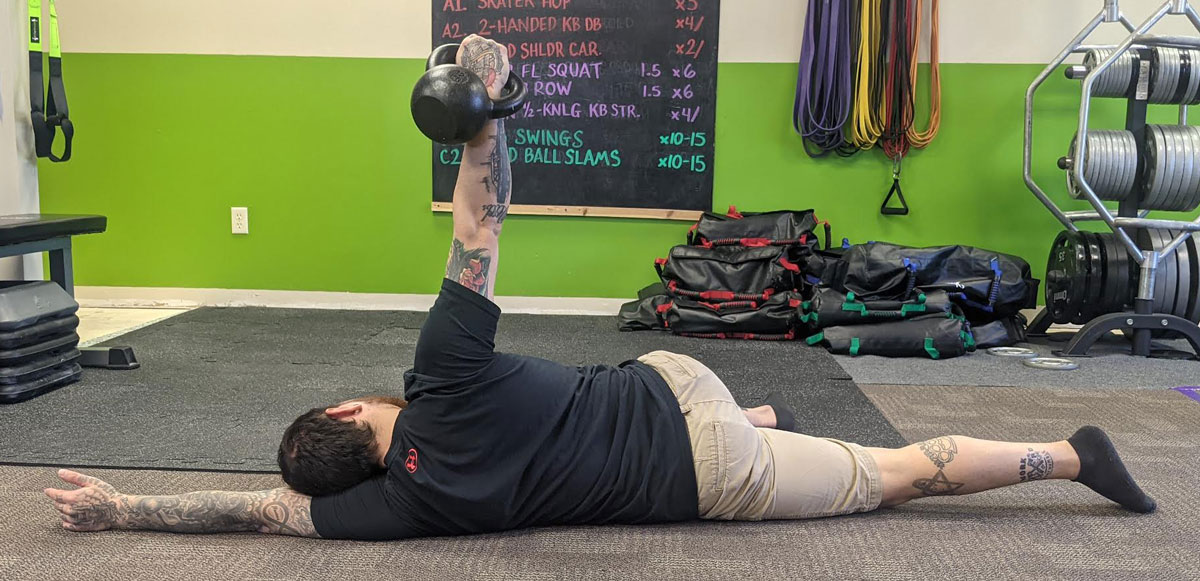
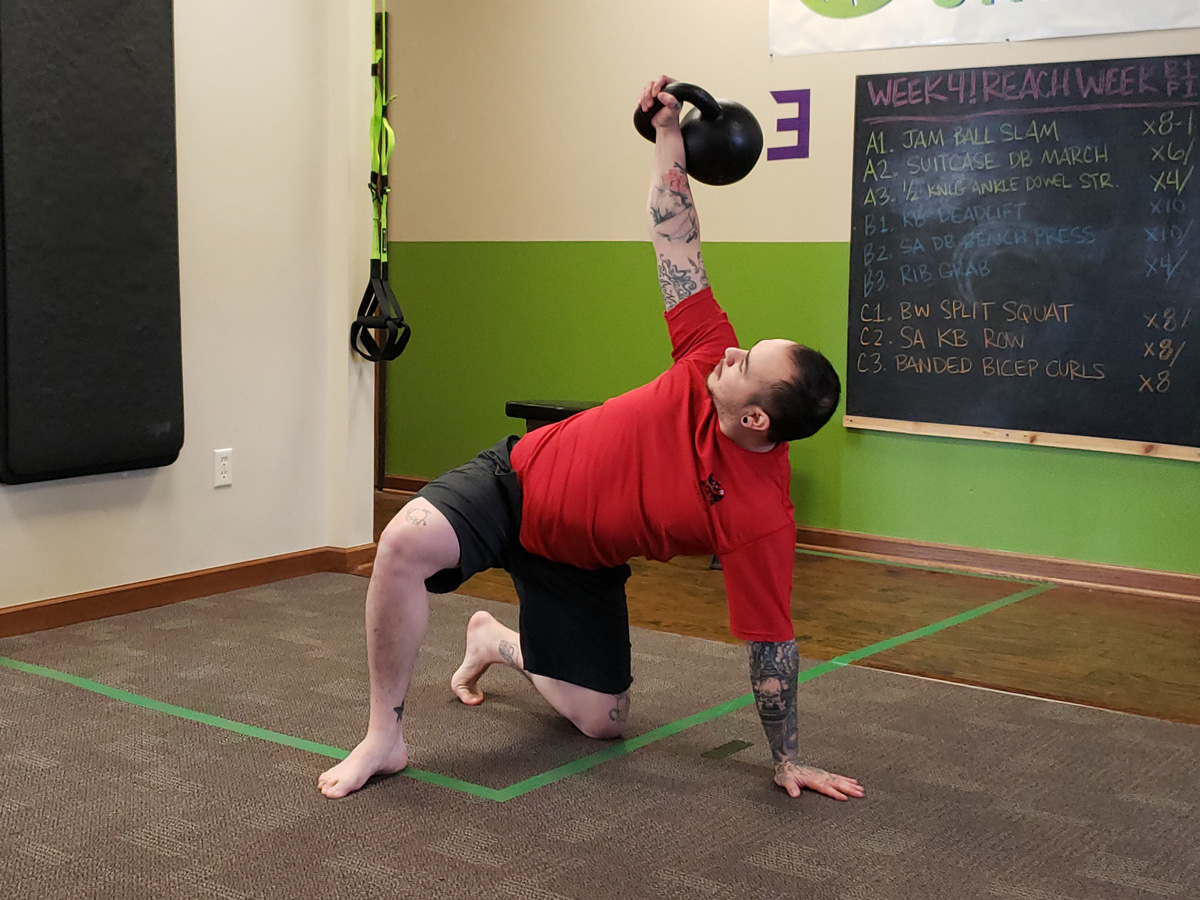
The get-up is an amazing exercise that engages the full body, multiple joints, and the core. It develops mobility and strength. This exercise begins on the ground, progresses to standing, then returns to the ground—all while the exerciser holds a load overhead. You must have an adequate range of motion in the ankles, hips, and shoulders to perform this exercise. The progressions leading to the full get-up can act as mobility drills to prep the body for the complete exercise

William Sturgeon Kettlebell Get-up

Increase Your Aerobic Capacity

Have you heard of the dreaded RKC Snatch Test? It’s 100 kettlebell snatches which must be completed in under 5 minutes at a prescribed weight. This can get the heart rate high and cause puddles of sweat. I use single arm swings and snatches to increase my aerobic capacity up and have noticed that it transfers to other areas of my fitness.

Don’t rely on machines, become a machine! Begin by working with a kettlebell instructor. You can do more and benefit more while training with just one kettlebell.

***

William Sturgeon, RKC Team Leader, RKC II trains clients at his gym, Restored Strength. Contact him through his website at RestoredStrength.com or follow him on Facebook: facebook.com/restoredstrength
Filed Under: Kettlebell Training Tagged With: fitness, kettlebells, RKC training, strength training, training, William Sturgeon

3 Reasons To Train Barefoot with Kettlebells

January 6, 2021 By William Sturgeon Leave a Comment

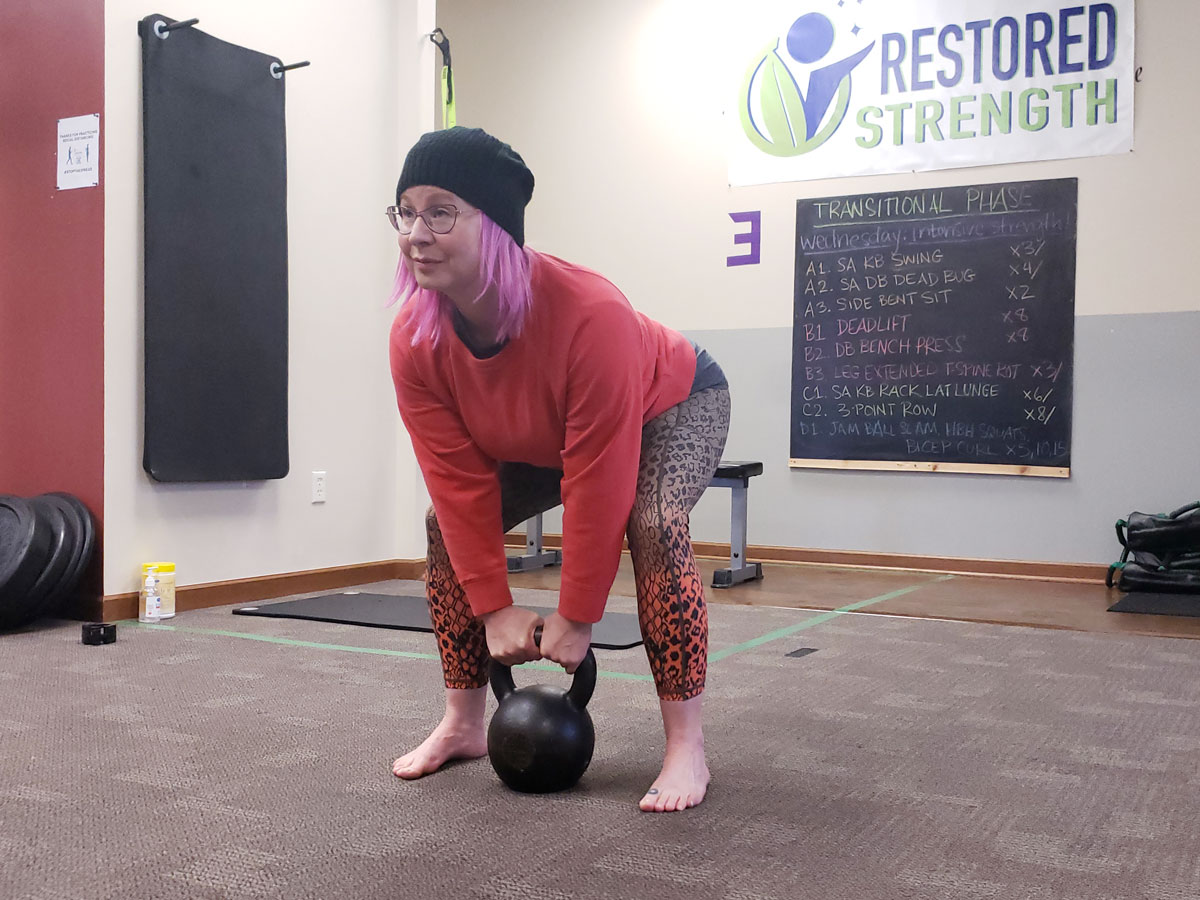
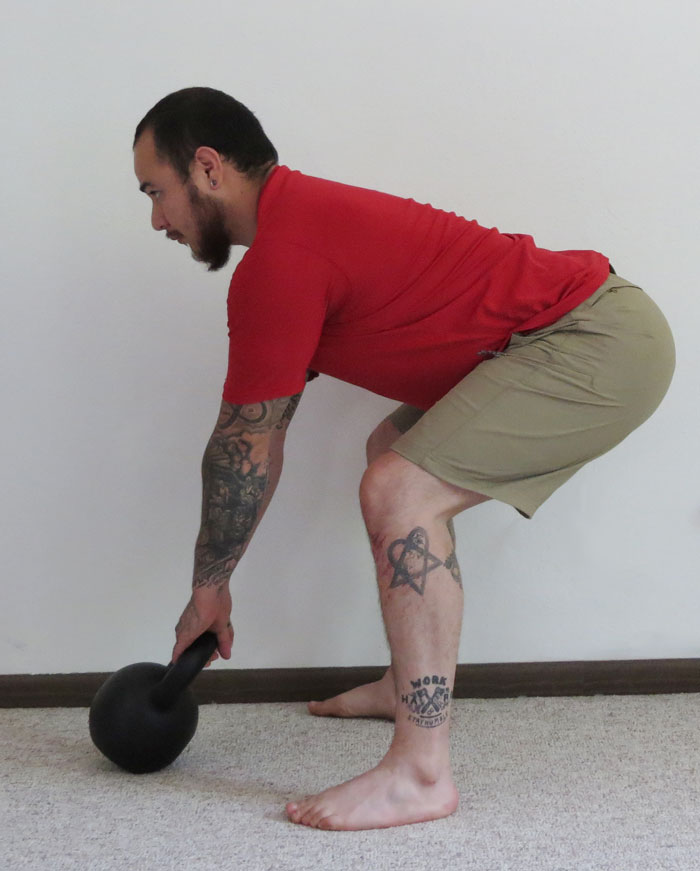
Training Barefoot With Kettlebells - Deadlifts

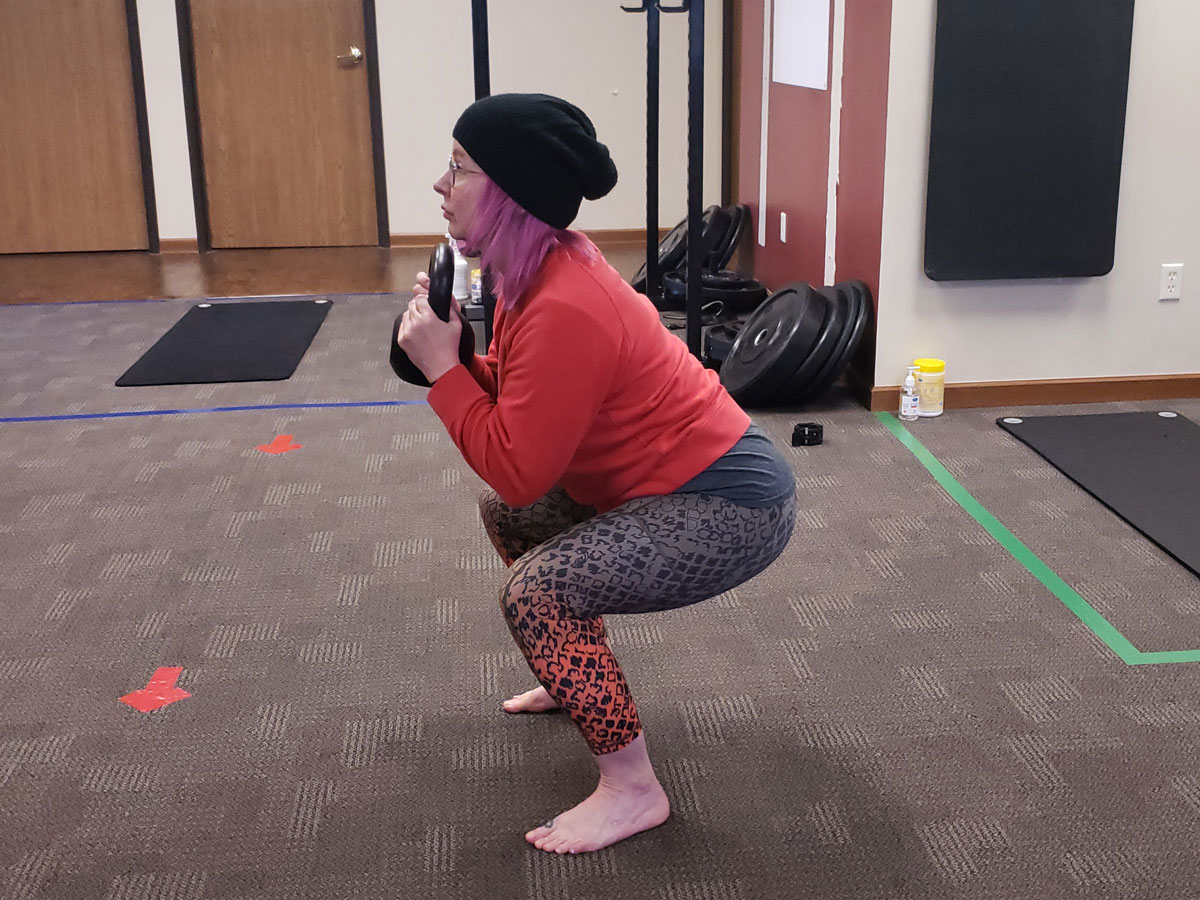
At my gym Restored Strength, it is common to see our members training barefoot during their kettlebell sessions. In today’s society it rare to see people spend time barefoot in their own home or at work. The feet are typically neglected when it comes to training, because most people don’t think that feet need to be trained. But there are a lot of benefits to training barefoot.

Wearing shoes can impact the way we train in many ways. Most shoes come with an elevated heel which naturally puts the feet in a more plantarflexed position. The reason that this becomes an issue when training with kettlebells is that you will have a faulty foundation. You will not be centered on your feet in order to truly push down into the floor to get your entire posterior chain to fire. Another issue with shoes is that they limit the range of motion (ROM) in the ankle.

Training Barefoot With Kettlebells - Goblet Squats

Here are my top three reasons that you should train barefoot:

Better Sense of Body Awareness

Proprioception is our awareness of our body in space and movement. We have many proprioceptors all throughout the body, with a big portion of them located in our feet. When we spend all day wearing shoes, we begin to neglect the proprioceptors in our feet. This is because they are not being stimulated by the ground, they are receiving feedback from the insides of our shoes. Exposing your feet to a hard surface will greatly increase the proprioception in your feet because they are not being protected by a large rubber sole.

Greater Ankle Mobility

During my undergrad studies, I did a research project on the benefits of training barefoot. We found that the test subjects who trained without shoes had a greater ROM in their ankles compared to those who trained with shoes. Having tight restricting shoes can inhibit the ankles’ ability to freely move.

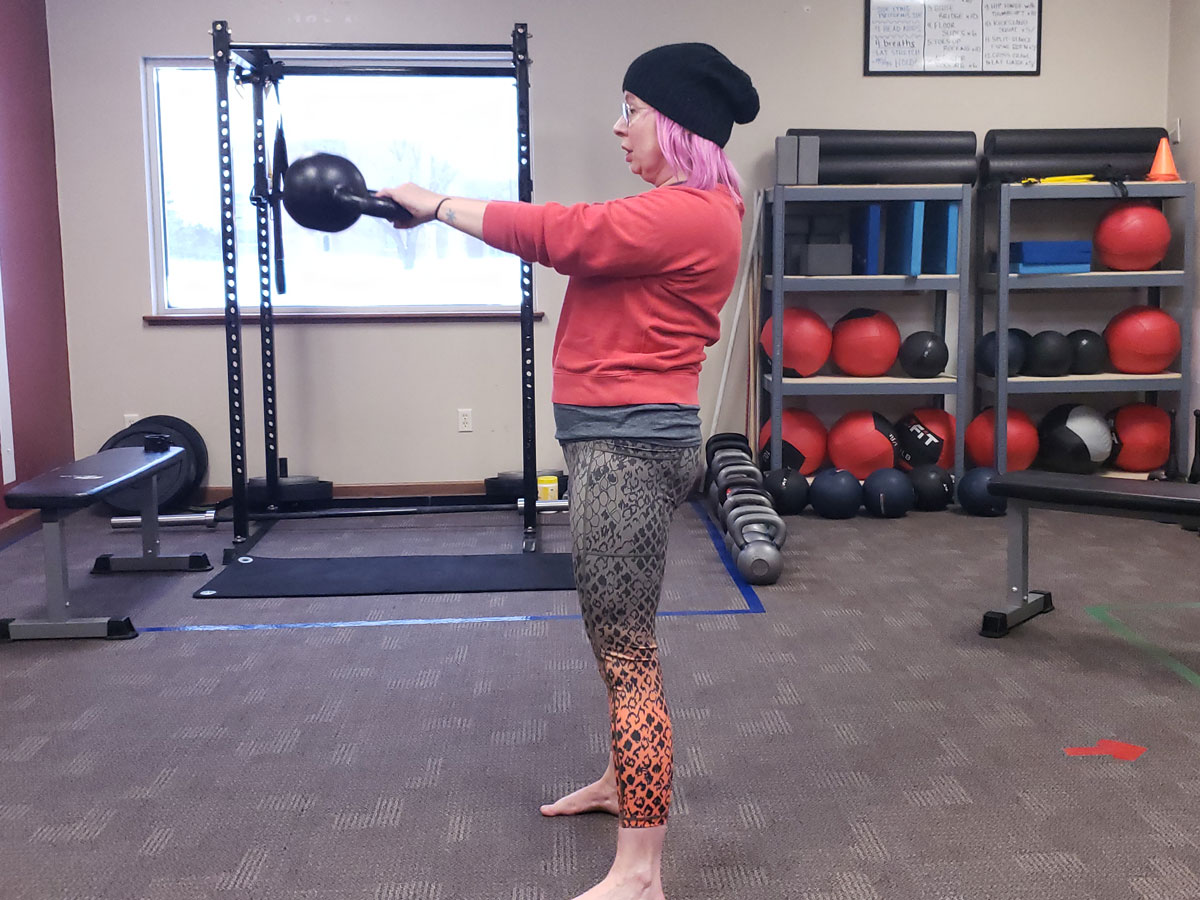
Training Barefoot With Kettlebells: Swings

Increased Foot Strength

When training barefoot, you will focus more on how to firmly plant your heels in the ground as you swing a kettlebell. The foot has 29 muscles. Nineteen of them are intrinsic muscles—smaller, finer muscles. Being able to strengthen the intrinsic muscles will help you develop greater ankle stability and mobility.

To safely train barefoot, you should ALWAYS be aware of your surroundings. Don’t let your grip or technique get sloppy because that is a first-class ticket to injury. Gradually introduce barefoot training to your kettlebell practice in order to get the most out of it.

***

William Sturgeon, RKC Team Leader, RKC II trains clients at his gym, Restored Strength. Contact him through his website at RestoredStrength.com or follow him on Facebook: facebook.com/restoredstrength
Filed Under: Kettlebell Training, Mobility and Flexibility Tagged With: ankle mobility, barefoot training, foot strength, kettlebell training, training barefoot, training barefoot with kettlebells, William Sturgeon

Four Kettlebell Workouts to Maximize Fat Loss

August 21, 2020 By William Sturgeon Leave a Comment

William Sturgeon Kettlebell Fat Loss Workouts

As coaches, instructors or personal trainers, our clients often come to us for help with a fat loss goal. And while there are many ways that we can help our clients achieve their goals, the most important factor to consider for fat loss is nutrition.

There are no specific workouts that can help someone “out train” a bad diet. If someone is still consuming more calories than they are burning, then they will not receive the maximal training effect from a fat loss workout. But, once a client can change the way they eat, then they can really gain the most out of these workouts.

Once nutrition has been handled, strength training is the best way to help your clients lose weight and gain strength. Training in every plane of movement is important for sustaining optimal joint and muscle health. After the strength portion of the session, finish up with a conditioning workout such as the ones listed below. This approach will cater to your client’s specific weight-loss goal.

Here are four example workouts you can add at the end of your clients’ sessions to help with fat loss!

EMOM (Every Minute on the Minute)

Popularized in CrossFit training, EMOM stands for “Every Minute On the Minute”. This type of workout can even be done with one tool and one exercise. You can either work for a predetermined number of reps or for a time interval. If you choose a time interval, be sure to keep the work to rest ratio at 1:1 (30 sec on, 30 sec off) or 2:1 (40 seconds on, 20 seconds off).

Example:

10-15 minutes

  • Kettlebell Swings :20 seconds
  • Rest :40 seconds

Density Training

In fitness, density is the amount of work you do within a given time. With this training format, we are not as focused on the amount of weight lifted, or the speed we’re working. The focus is on completing the most amount of work during a set amount of time. This focus will help sustain a decent heart rate throughout the workout.

Example:

30 minutes

  • Kettlebell Snatch x5
  • Get-Up x1
  • Kettlebell Front Squat x6
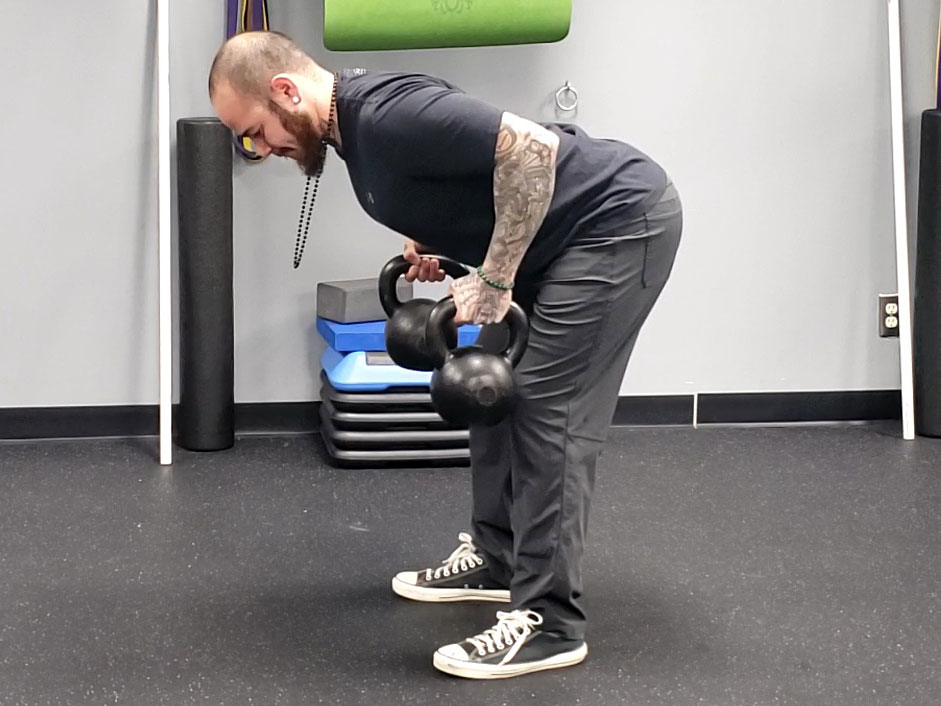
  • Kettlebell Bent Over Row x8
  • Kettlebell See-saw Press x6
  • Thoracic Rotation x4

AMRAP (As Many Rounds as Possible)

Another workout popularized by CrossFit is AMRAP, which stands for “As Many Rounds as Possible”. An AMRAP workout can use any given number of exercises, but typically 2-5 exercises for a set amount of time. The goal is to move as quickly as possible while racing against the clock. Each week try to complete the same number of rounds or more as compared to the previous week. During the workout, the goal is to minimize rest and maximize the work.

Example:

10-15 minutes

  • Double Kettlebell Clean x5
  • Farmers Carry :30 seconds
  • Double Kettlebell Reverse Lunge x5

Circuits

Traditional circuit training is similar to HIIT, High Intensity Interval Training. A circuit can work a few different ways: station to station or exercise to exercise. The goal can be for reps or for time with each exercise. Often, exercises are grouped so that 2-4 exercises are completed per station, before switching to the next one.

Example:

10 min

  • Single Arm Swing x5
  • Single Arm Thruster x6

10 min

  • Goblet Squat x:20 sec
  • Single Arm Row x:15 sec

10 min

  • Two Hand Kettlebell Dead Bug x:20 sec
  • Single Arm Overhead Carry x:15 sec

When it comes to helping our clients achieve their weight-loss goals, we have to remember that it’s most important to address nutrition first. Then, we can choose from a variety of training approaches to reach their goals.

***

William Sturgeon, RKC Team Leader, RKC II trains clients at his gym, Restored Strength. Contact him through his website at RestoredStrength.com or follow him on Facebook: facebook.com/restoredstrength
Filed Under: Coaching, Kettlebell Training, Workout of the Week Tagged With: fat loss, fitness, general fitness, kettlebell workouts, William Sturgeon, workouts

Why Hikers Should Train With Kettlebells

July 20, 2020 By William Sturgeon Leave a Comment

William Sturgeon Kettlebells For Hiking

Hiking can be a very vigorous sport, and requires a great amount of strength and endurance. Trekking for hours on steep hills and uneven terrains is very demanding on the body. While out on the trail, you are faced with harsh climate conditions and potential risks for injuries. If you are wanting to improve your hiking and reduce fatigue and injury, you should consider training with kettlebells.

Kettlebell training can complement your hiking abilities in many ways. It is easy to just train for the sport itself, but sometimes that isn’t enough. Using kettlebells as a means of training will help enhance your time out on the trails.

Increase Strength with Kettlebells

One of the greatest benefits of kettlebell training is that it can increase your overall strength. Having greater strength makes it easier to carry more in your pack for longer periods of time.

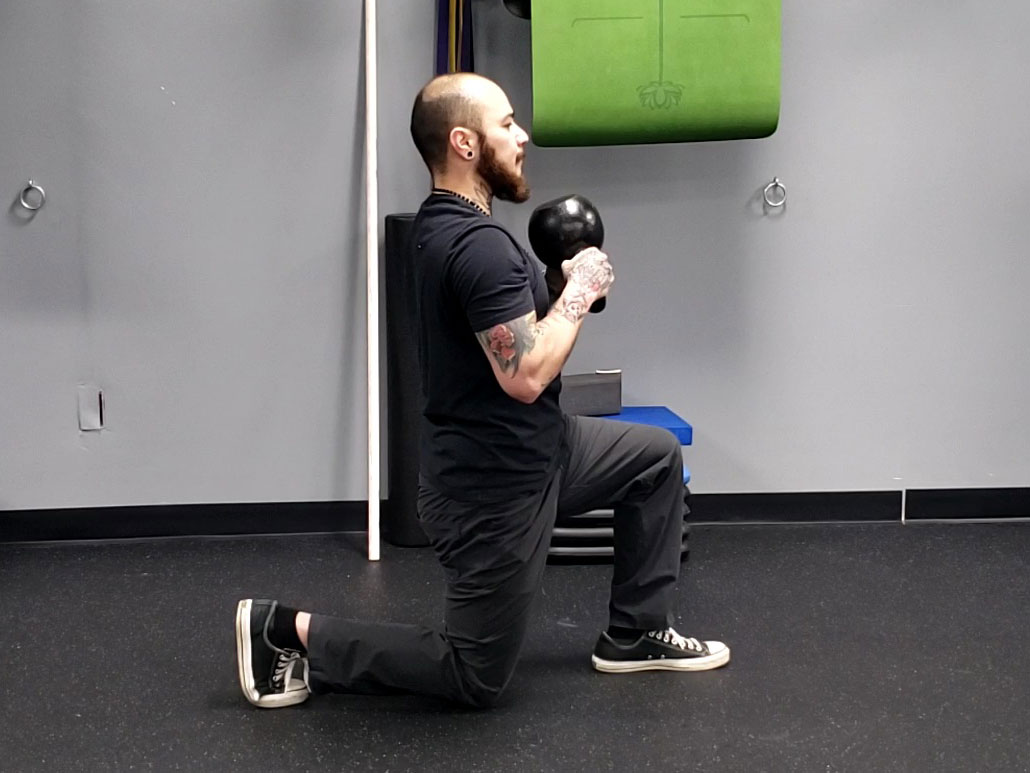
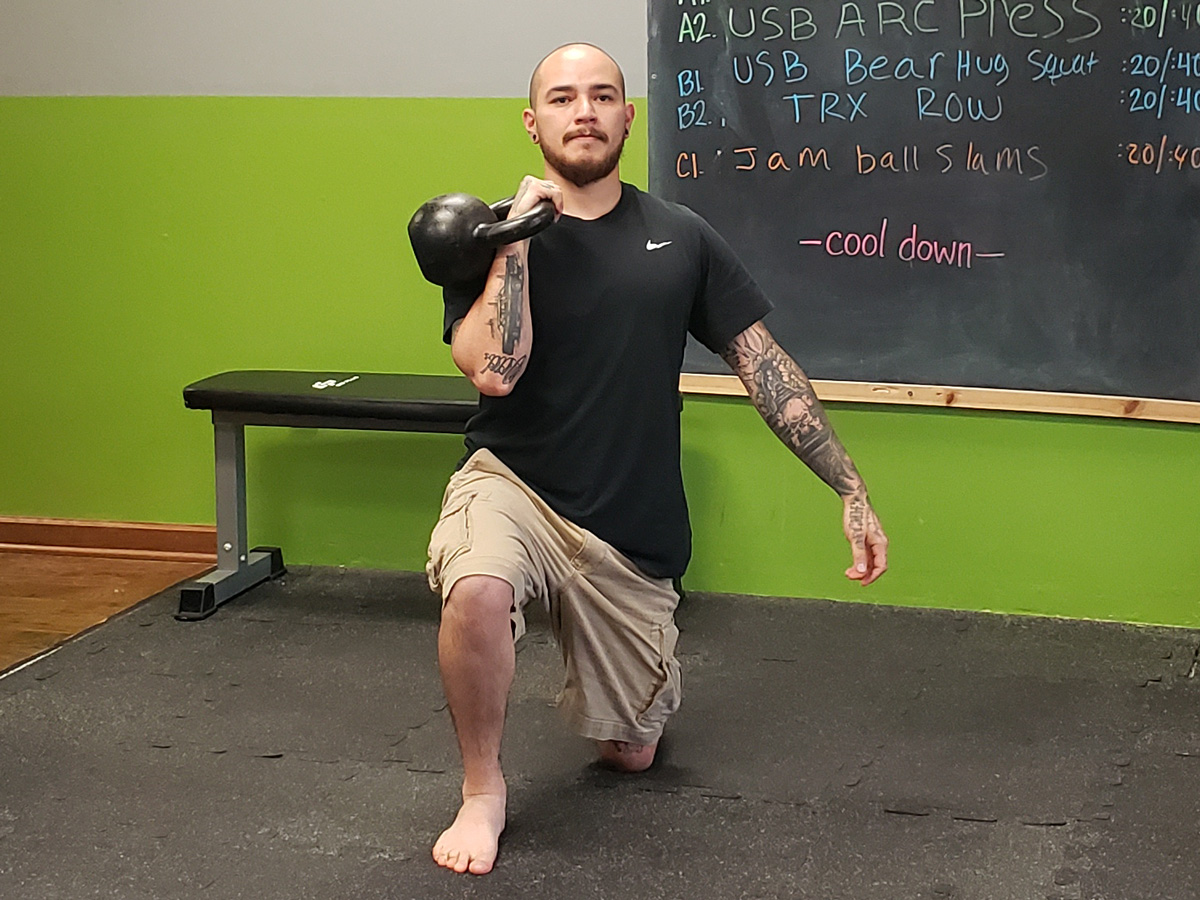
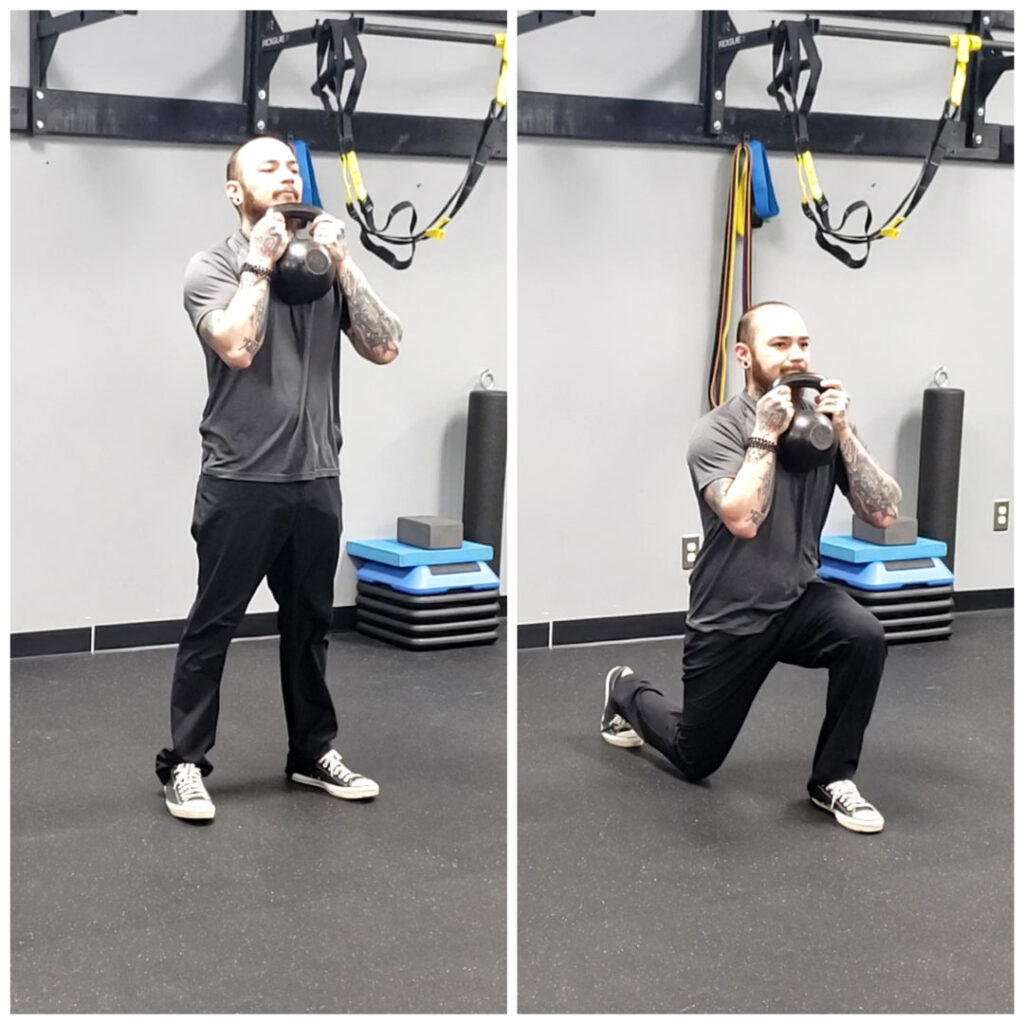
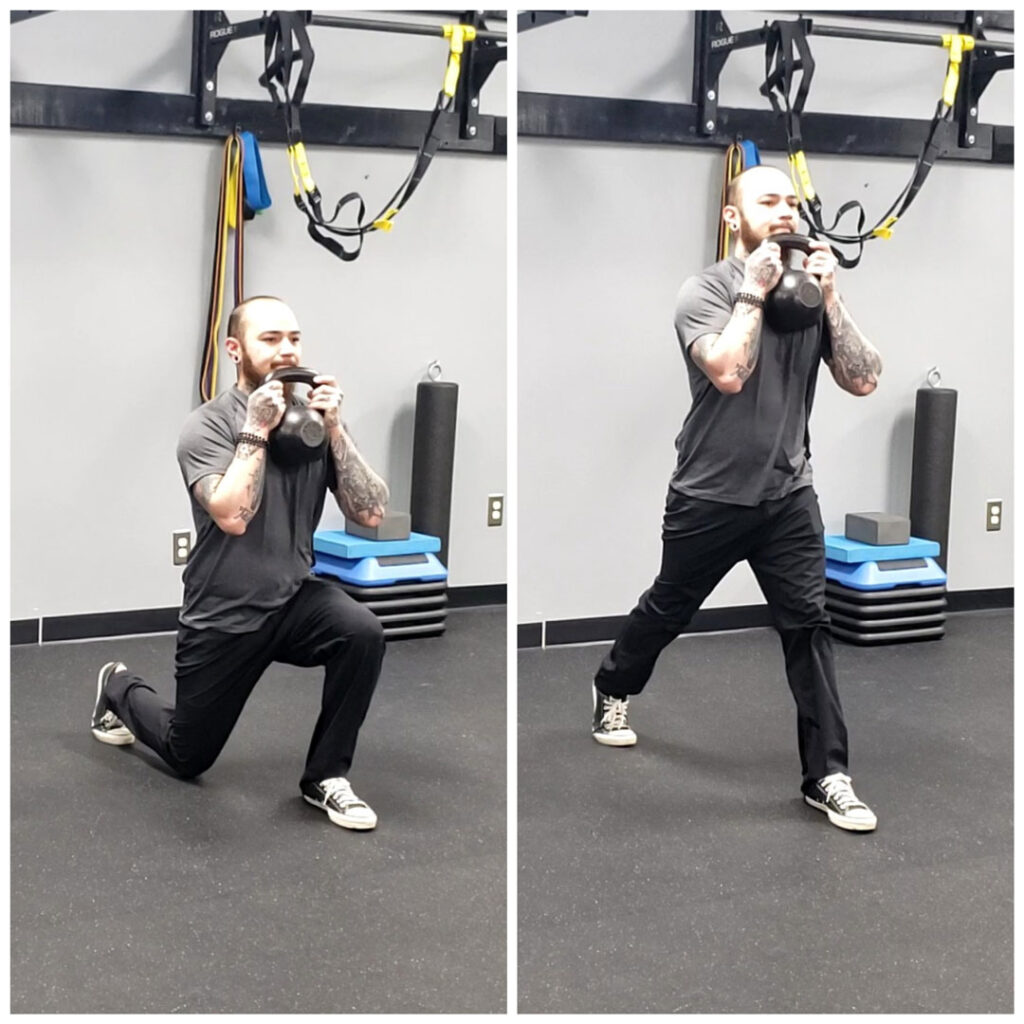
Goblet front lunges are a great exercise to build stronger legs. Increasing your lower body strength makes hiking up hills much easier. When you’re stronger, your adventures are less taxing and more enjoyable!

William Sturgeon Goblet Lunge

Build Up Endurance

Hitting the trails for many hours can be pretty exhausting, so a great way to increase your work capacity is by increasing your endurance. Kettlebell swings are a staple exercise for building stronger lungs. Doing high intensity interval training is one of the best ways to improve your endurance. Working with kettlebell swings for longer intervals with minimal rest will focus on the glutes and hamstrings—and it’s very important to strengthen these muscle groups for hiking.

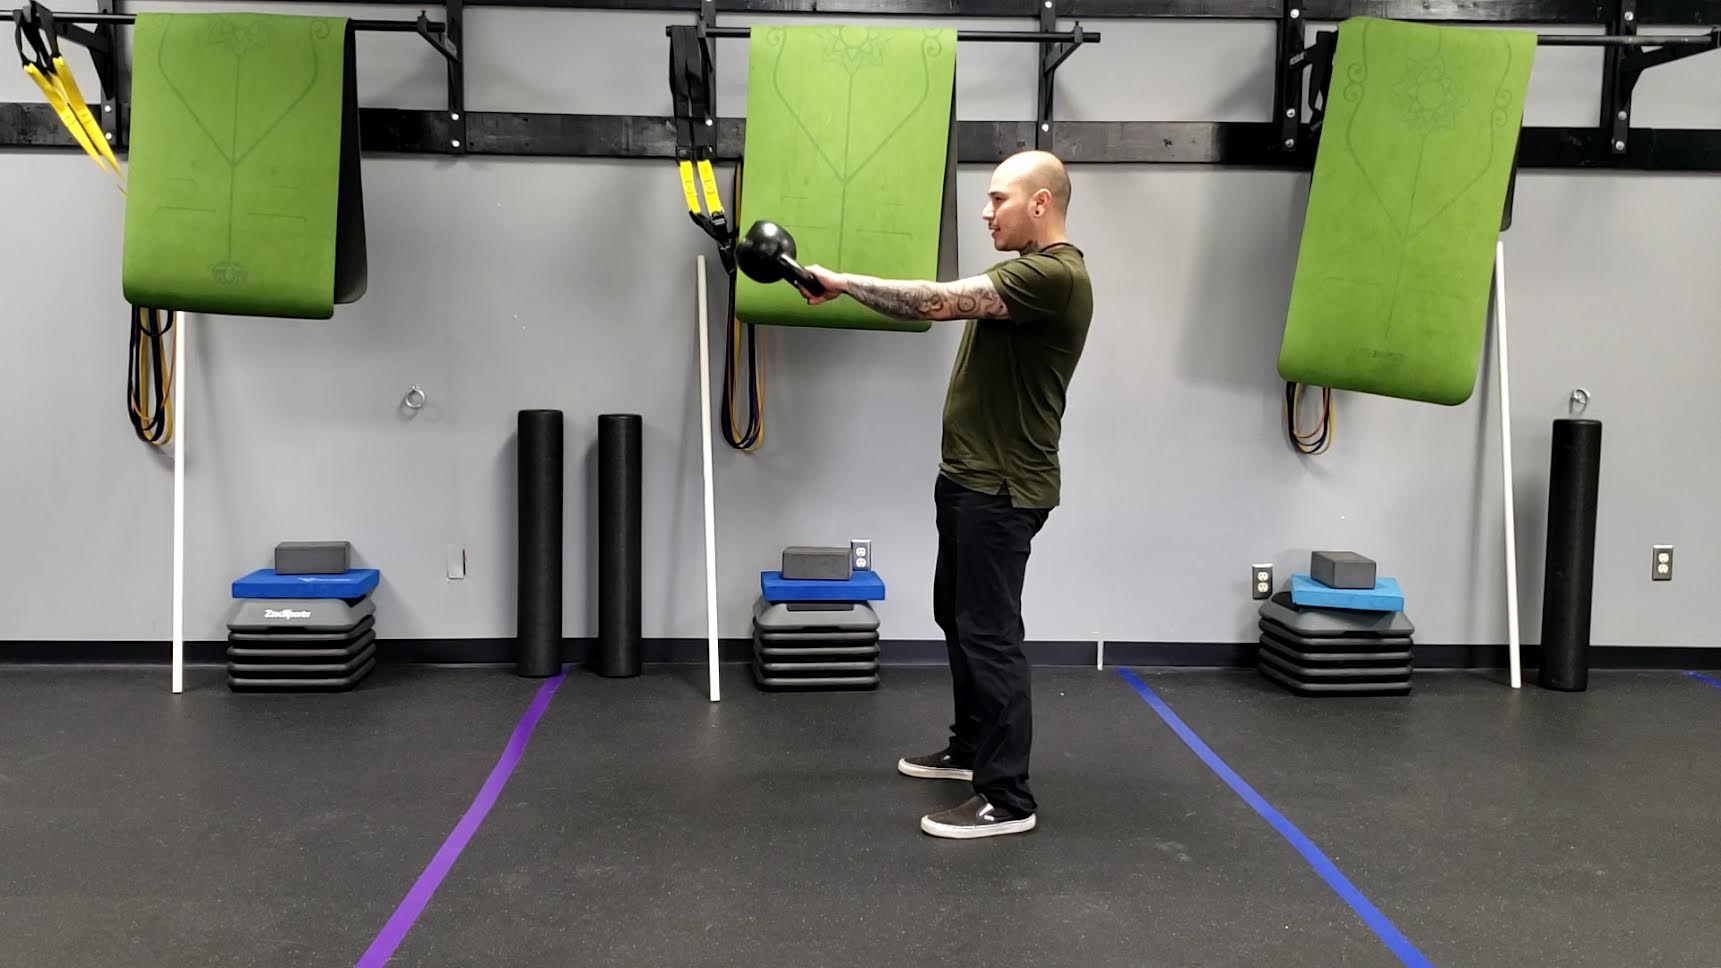
William Sturgeon Kettlebell Swing

Help Reduce Risk of Injury

Common hiking injuries involve the feet, ankles, knees, hips, and low back. In order to reduce the chances of injury, it is important to strengthen the muscles in these surrounding areas. Exercises such as single leg deadlifts and lateral lunges are great for creating better ankle and hip stability. Single leg exercises are important because hiking is a single leg sport.


Longer Treks and Bigger Adventures

After increasing your strength, endurance, balance—as well as improving other areas of weakness—you can go on longer hikes. You will have become more resilient and will be able to sustain longer more difficult hikes with greater ease.

I enjoy the simplicity and minimalism that hiking brings to my life. Using the kettlebell is the same for me and my training. It is a simple but very effective tool for progressing towards my fitness goals.

Start using kettlebells to improve your physical strength and endurance to get the most out of your hikes!

***

William Sturgeon, RKC Team Leader, RKC II trains clients at his gym, Restored Strength. Contact him through his website at RestoredStrength.com or follow him on Facebook: facebook.com/restoredstrength
Filed Under: Kettlebell Training Tagged With: endurance training, hiking, kettlebell exercises for hiking, kettlebell strength training, kettlebell training, William Sturgeon, work capacity

8 Essential Kettlebell Exercises for Hikers

May 1, 2020 By William Sturgeon Leave a Comment

Kettlebell Get-up William Sturgeon, RKC Team Leader

With summer right around the corner and hikers getting ready to hit the trails, it’s important that we maintain our strength to enhance our time trekking. Hiking can be an exhausting hobby that demands a great amount of strength and conditioning. Using these eight kettlebell exercises will help you set yourself up for a great hiking season.

Kettlebell Swing

The kettlebell swing is a great exercise to help with conditioning the body for those long treks. Using the kettlebell swing as a conditioning tool will help build up the lung capacity needed for the trails.

William Sturgeon Kettlebell Swings

Goblet Split Squat

Hiking is a unilateral sport, meaning we are working one leg at a time. The goblet split squat is going to help strengthen your quads to face those tall hikes.

Kettlebell Press

Trekking poles can be a great tool to use when hiking, but they may also require a little more upper body strength. Practicing the kettlebell press will help you strengthen your shoulders.

Single Arm Row

Carrying a backpack around for long periods of time can take a toll on the upper back. Using the kettlebell row will help your posture and strengthen your back.

William Sturgeon, RKC Team Leader - Kettlebell Rows

Single Deadlift

The single leg deadlift will help strengthen your ankle and glutes. This greater stability can help reduce injuries on the trail.

William Sturgeon RKC Team Leader, one leg kettlebell deadlift

Kettlebell Get-Up

Being on the trail all day long while carrying a bag can be very taxing, use the Get-Up to help build a stronger core from all angles.

Halo

The halo is a simple kettlebell exercise for creating greater shoulder mobility. This will help you when climbing and/or carrying your bag.

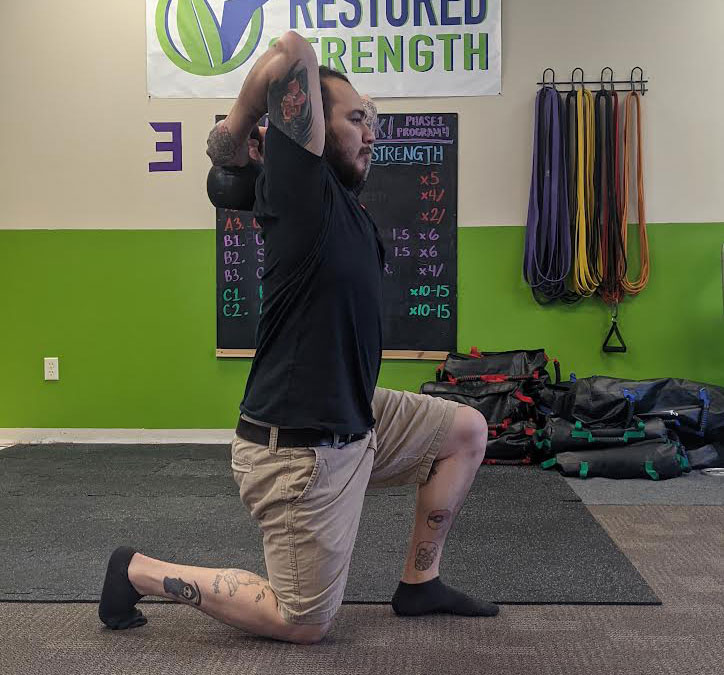
Kettlebell Half Kneeling Stretch

Ankle and calves can get really tight from long treks. Be sure to use this exercise to help mobilize the joint and stretch the muscle.


***

William Sturgeon, RKC Team Leader, RKC II trains clients at his gym, Restored Strength. Contact him through his website at RestoredStrength.com or follow him on Facebook: facebook.com/restoredstrength
Filed Under: Kettlebell Training, Tutorial Tagged With: hikers, hiking, kettlebell exercises, kettlebells for hiking, William Sturgeon

4 Standards To Master The Kettlebell Swing

February 27, 2020 By William Sturgeon Leave a Comment

Four Standards For Mastering the Kettlebell Swing by William Sturgeon

To begin learning how to perform a kettlebell swing, you must master the most fundamental movement of the exercise—the hip hinge. Learning how to properly hip hinge, hike pass, deadlift and perform a dead-stop swing will set you up for guaranteed success with the kettlebell swing.

Master Your Hinge:

The foundation of the kettlebell swing is built off a strong hip hinge. When you are able to teach your clients how to optimally use their hips, they will get the full benefits for the proper muscles used in the swing. You will also keep your clients safe and reduce their exposure to injury.

Use these coaching cues:

  • Start in a tall & tight position with your feet shoulder width apart.
  • Have a slight bend in your knees.
  • Reach your hips back.
  • Drive your hips forward and stand tall.
Stand tall & tight
Reach your hips back

Master Your Hike Pass:

The next step in the kettlebell swing is to master the hike pass. This motion begins to teach you the momentum of the swing. Learning the hike pass teaches you how to properly propel the kettlebell behind you. The back of the hike pass shows you what the bottom position of the kettlebell swing looks like.

Use these coaching cues

  • Get into your hip hinge.
  • Tilt the kettlebell towards you and break the handle in half.
  • Sit into your hips and toss the bell high into the thigh.
  • Keep your chest up & eyes forward.
Tilt the bell towards you and break the handle in half.
Sit into your hips and toss the bell high into the thigh.

Master Your Deadlift:

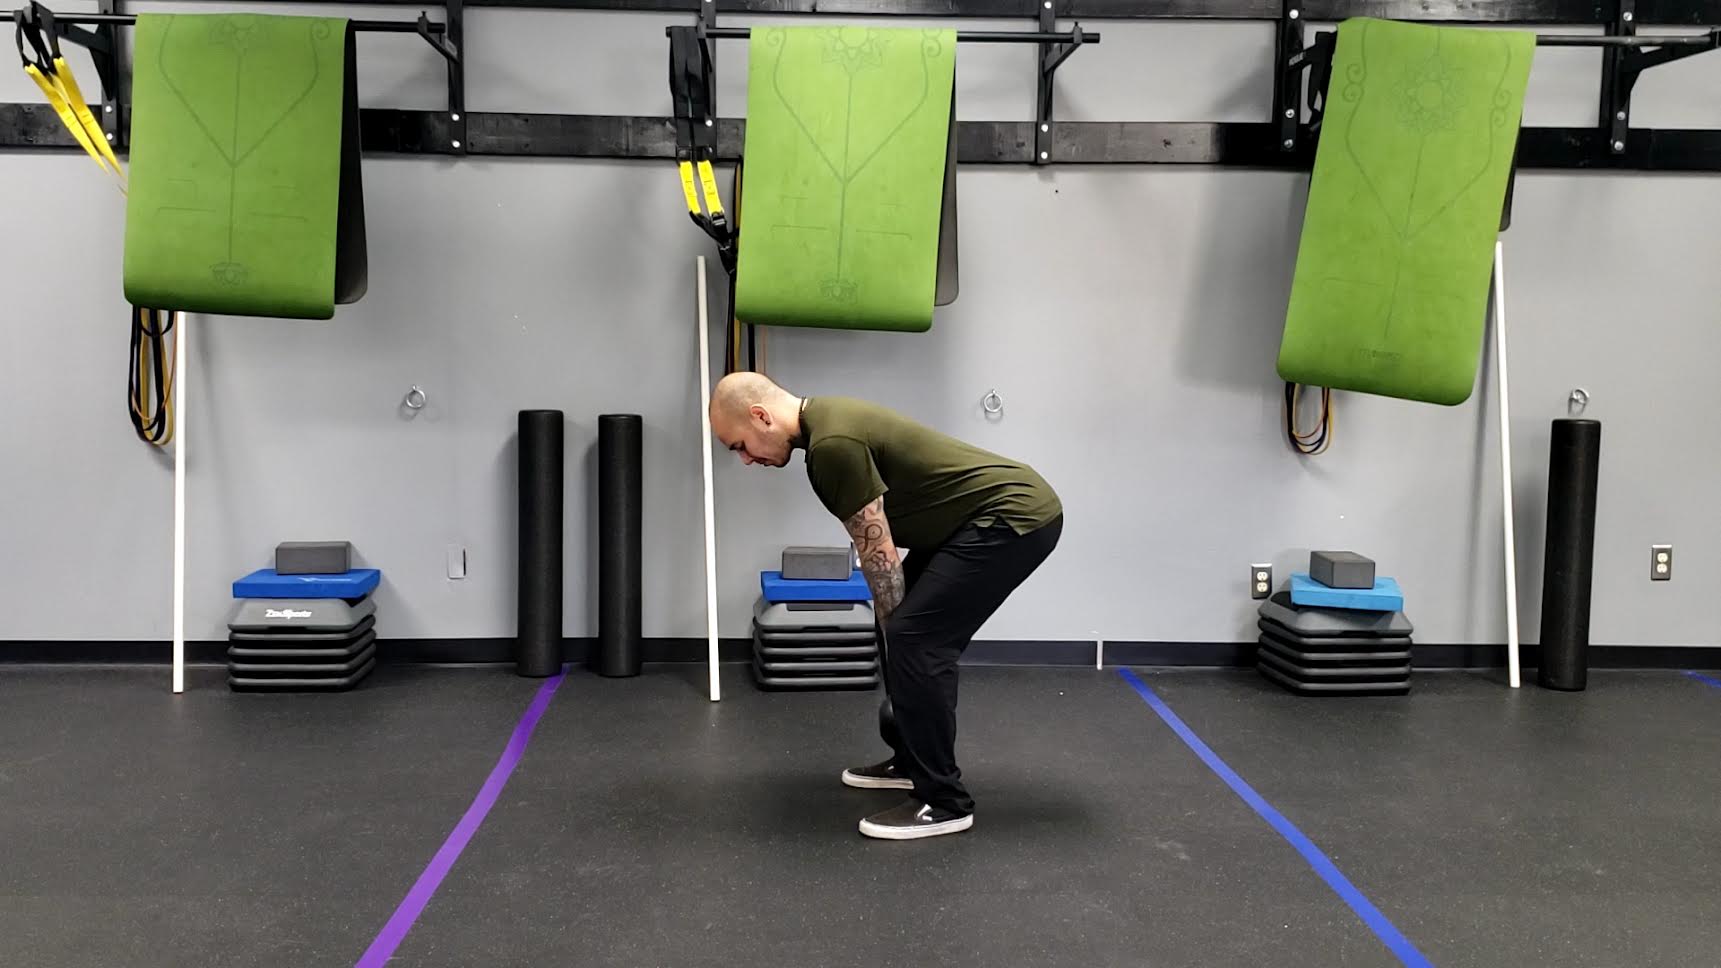
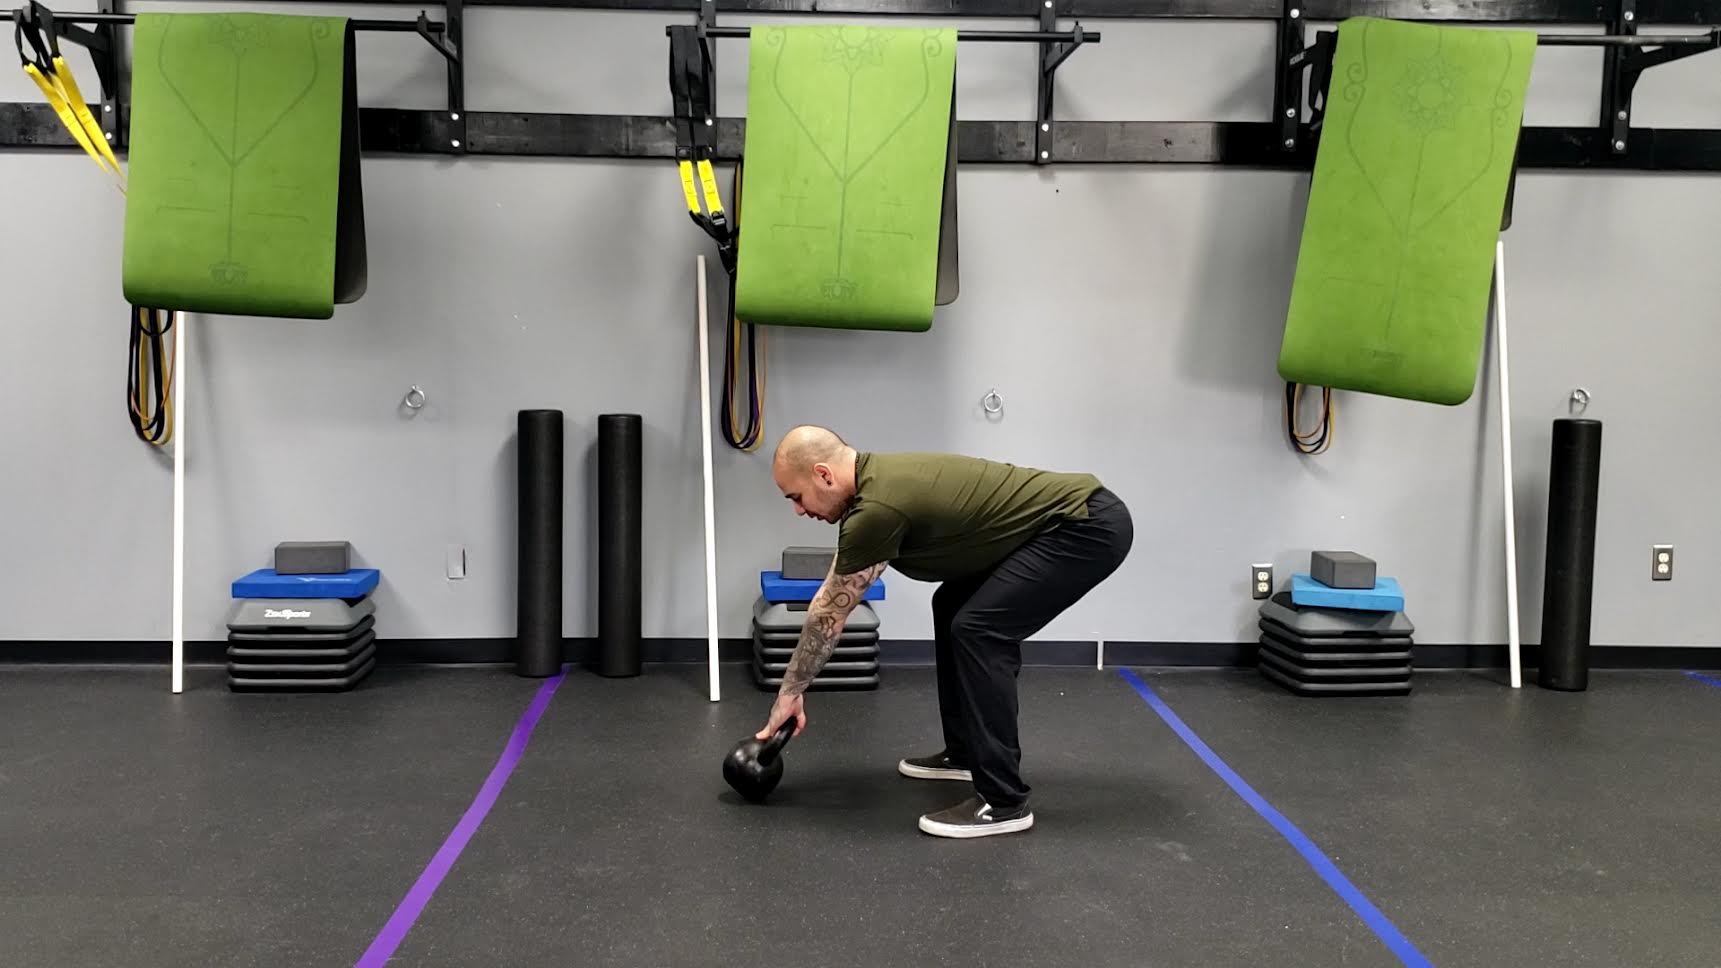
Next is the deadlift. When teaching the deadlift, you are helping your client understand how to properly load the hips. The deadlift teaches you to snap the hips and fully lock out at the top. This is important because this teaches how you should be at the top of the swing.

Use these coaching cues

  • Start with the kettlebell between your feet.
  • Go into your hip hinge.
  • Break the handle in half.
  • Punch your feet into the ground and snap your hips forward.
Go into your hip hinge.
Snap the hips and fully lock out at the top.

Master Your Dead Stop Swing:

The last step in mastering the kettlebell swing is the dead stop swing. Mastering the dead stop swing puts all of the other steps into one. You begin by starting in a hip hinge position, next you go into your hike pass, and lastly you go into your dead lift. Each rep is initially starting the swing back over and enforcing all the skills you have learned prior to this step.

Use these coaching cues

  • Start in your hike pass position.
  • Toss the bell back.
  • Explode through the hips and let the bell float up.
  • Wait for the bell to push your hips back and park the bell.
Sit into your hips and toss the bell high into the thigh.
Explode through the hips and let the bell float up.

To get the most out of your swing and master the basics, review and practice each of these steps.

***

William Sturgeon, RKC Team Leader, RKC II trains clients at his gym, Restored Strength. Contact him through his website at RestoredStrength.com or follow him on Facebook: facebook.com/restoredstrength


Filed Under: Kettlebell Training, Tutorial Tagged With: kettlebell swing, kettlebell swing technique, kettlebell technique, swing standards, video, video tutorial, William Sturgeon

Use These 3 Cues to Teach The Deadlift

August 21, 2019 By William Sturgeon Leave a Comment

William Sturgeon Deadlift Coaching Cues

When teaching a client how to deadlift, we must first help them master the hip hinge. Often when we begin to teach someone how to hinge we use the following cues: “keep a slight bend in the knees, push your hips back, keep your back straight, pack the shoulders, push your hips forward and stand tall…”

These cues are effective, but when someone has never done a hip hinge before, all these words may be too overwhelming.

When we’re working with a client, we always want to make sure that they are not confused. We want to make our instructions as clear as possible so that they are set up for success.

Start by teaching your client a tall & tight position.

Tall & Tight

  • This position begins standing with feet shoulder width apart. Then, instruct your client to pull their hips slightly forward. Tell them to imagine pulling their belt buckle to their chin.
  • Next teach the tight position. This begins by tucking the ribs down and pinching the shoulders back.
  • The tall & tight position teaches how to maintain a neutral spine while maintaining tension in the core.

Reach Your Hips Back

Next we are going to teach our client how to reach their hips back. “Begin with a slight bend in the knees. Reach your hips back by trying to touch your butt towards the wall behind you, while keeping the tall and tight position.” These instructions can get complicated quickly, so I use the following cues instead:

  • I begin by helping people understand this movement by instructing them to place their fists on their hips.
  • Then I tell them to imagine their body is a can crusher—the upper body being the top half and the lower body being the bottom half of the machine.
  • Next, I ask them to reach their hips back and “crush their cans.”

Drive Through Your Hips

Lastly we will review “driving through the hips” to finish the exercise.

  • While maintaining a tall and tight position, push through the hips to the starting position.
  • Next, think about punching your feet into the ground, while thrusting your hips forward.

Once you’ve mastered this fundamental skill you can now progress to loading your client for a deadlift.

Just remember: tall & tight, reach your hips back, and drive through the hips.

****

William Sturgeon, RKC II trains clients at his gym, Restored Strength. Contact him through his website at RestoredStrength.com or follow him on Facebook: facebook.com/restoredstrength

Filed Under: Coaching, Kettlebell Training, Mobility and Flexibility Tagged With: coaching cues, coaching deadlift, deadlift, how to do a kettlebell deadlift, kettlebell deadlift, William Sturgeon

How to Coach Effective Group Kettlebell Training

February 13, 2019 By William Sturgeon Leave a Comment

William Sturgeon, RKC-II Squat Progression

We can all agree that group training can come with inherent risks if the participants are not coached effectively. Unfortunately, we have all also seen group fitness classes where students are performing rough looking swings, squatting with all of their weight on their toes, or deadlifting like frightened cats!

As coaches, it’s our responsibility to make sure that we always prioritize the safety of our clients and set them up for success in their training. It can be difficult to accomplish a level of high quality training in large groups—especially since groups tend to include people with different skill and fitness levels, past injuries, learning styles and other variables.

So, how do we control the chaos in group training—especially if we are using kettlebells? We begin by learning to regress and progress movements and exercises for our clients. Many coaches will choose a baseline exercise—and also have a regression and progression on hand to modify the workout or program as necessary.

How to Regress and Progress Kettlebell Exercises

Regressing and progressing an exercise for a given client can be complicated if you are not prepared. During an RKC certification workshop, you will learn many ways to regress and progress the Big Six for a variety of a clients. With the information from the weekend workshop—and reviewing your RKC manual—you’ll have many ways to cue, correct, and ultimately guide your clients through the progressions of the Big Six.

To begin, choose a baseline exercise—for example, a kettlebell deadlift, assuming a majority of your clients in class can do it. From the baseline exercise, choose one regression and one progression.

With our kettlebell deadlift example, the regressions might be raising the kettlebell on a yoga block, having practice an RDL, or if they’re absolute beginners or very deconditioned, they could work on fully mastering the hip hinge. You are the chef in your own kitchen and must decide what is best for your situation.

To progress the kettlebell deadlift, we can have clients perform double kettlebell deadlifts, eccentric deadlifts, explosive deadlifts, and many other advanced variations which can make this exercise more challenging. It’s always less of a mental challenge to make an exercise more difficult—it’s much more challenging to make exercises easier. Develop a collection of progressions and regressions to commonly use with your clients then modify them as needed for your specific group setting(s).

William Sturgeon, RKC-II, Hinge And Deadlift Progressions

Selecting the Correct Exercises

Choosing appropriate exercises is crucial for designing and evaluating your programs. While there are thousands of exercises you can choose for training your clients, all of the different tools and implements can lead to overly complicated workouts.

To simplify this process, begin by categorizing the exercises under consideration by movement pattern. For example, I might consider an exercise to be one of the following: lower body pull, upper body push, lower body push, upper body pull, mobility, single leg knee/hip, or core/carry. There are other classifications you can use, but this is what I use for my business.

Instead of trying to include every exercise you can think of, consider the population you are serving and their needs. Also take a look at what exercises you are typically programming for them. Keep it simple. If you’re work with general populations, your exercise selection will be minimal. This is extremely helpful when working with a group of clients who have different athletic abilities. Some clients will be more advanced than others, and some may have never touched a kettlebell before! It’s useful to have a systematic approach for running your classes.

Using Timed Blocks

When I first started leading group classes, I had a difficult time programming the workouts with just straight sets. The participants all moved at different paces, some people needed more coaching while others rushed through the workouts. There’s nothing wrong programming straight sets, but it can be difficult in a group class with a variety of fitness levels.

William Sturgeon Training Template

Using set blocks of time can help create a controlled environment for smoothly running classes. Set blocks of time allow you to attend to those who need extra coaching or attention, while allowing for clients moving at a faster pace to get more volume in their workouts—instead of finishing their set and waiting to move on.

Timed Training Session Example:

  • Warm Up together, 10 minutes
  • Block A 8 minutes
  • Block B 10 minutes
  • Block C 6 minutes
  • Block D 5 minutes
  • Cool Down, 5 minutes

While this example works very well for my group classes, please be sure to consider the individuals you are training in your group(s).

Having systems and structures to organize your programming is essential to running an effective kettlebell group class. Begin by choosing appropriate baseline exercises, choosing progressions and regressions for each, then breaking the session into timed intervals.

****

William Sturgeon, RKC II trains clients at his gym, Restored Strength. Contact him through his website at RestoredStrength.com or follow him on Facebook: facebook.com/restoredstrength

Filed Under: Coaching, Kettlebell Training Tagged With: group fitness, group fitness instructor, group training, kettlebel training, kettlebell coaching, kettlebell group training, progressions, regressions, timed sets, William Sturgeon

Three Ways to Reinforce Tension

October 24, 2018 By William Sturgeon Leave a Comment

William Sturgeon Kettlebell Swing

We commonly coach our clients to create tension with cues such as “brace the core”, “tighten the glutes”, “crush the handle”, etc.  These phrases can help get clients to create tension in their lifts. You may see the specific group of muscles tighten, or a change in your client’s face when you ask them to create more tension.

Deconditioned clients are often unable to create tension through a specific area at first. It’s important that we spend time teaching them certain drills and use different cues to help them find the ability to create tension. It can be challenging to teach people how to apply tension during a lift.

Why Reinforcing Tension is an Important Skill to Practice and Teach:

Tension Keeps You Safe
Ballistic movements like the kettlebell swing require that we move rapidly—and if the movement is done incorrectly it can lead to injury. Kettlebells are not unsafe tools—users with bad technique are unsafe. Placing an emphasis on stressing the muscle with tension will allow you and your clients to work on technique without irritating the joints as much.

Tension Builds Strength
Your muscles recognize tension, not load—this is why we should focus on contracting the muscle before and during the exercise. Using “time under tension” (TUT), you can stimulate the muscle for greater growth. The denser the muscle, the stronger the body. Producing more tension throughout your lifts can also help generate more force.

Tension Stimulates Muscle Growth
Creating mechanical tension is one the of the primary factors associated with muscle growth. Mechanical tension is created by stressing the muscle throughout its full range of motion during an exercise. The phrase “time under tension” (or ‘TUT’ as referenced in the paragraph above) relates to the amount of time we’re stressing the muscle during an exercise. The more tension created during an exercise, the more muscle that will be recruited to perform the task. In turn, this gives the muscle a greater growth stimulus.

Drills That Teach How to Create and Reinforce Tension:

Hardstyle Plank
The RKC Hardstyle plank is the traditional plank’s older, much cooler brother. While a traditional plank is good for teaching a client to engage or brace their core, the client can still perform it poorly or fall short of the correct amount of tension we are looking to create. The Hardstyle plank creates a lot more tension than a regular plank. Most regular planks are held for 30 seconds or more, but the more intense Hardstyle plank is held for a much shorter amount of time maximizing the body’s full strength potential.

How to perform the Hardstyle Plank:

Isometrics
During isometric exercises, the muscle tenses but its length remains the same. A good example of an isometric exercise is an RKC drill we use to help pry open the hips. We place the client in the bottom position of a kettlebell goblet squat, then ask them to create a great amount of tension while forcing “prying” the hips out—all while keeping the hips in place. This powerful drill can help your clients find their glutes while understanding the amount of tension they need to create at the top position of their squat.

How to Perform an Isometric Hip Prying Drill

Time Under Tension
Time under tension is one of the greatest tools for helping our clients create or reinforce tension. Coach the client through a “grind” exercise—such as a kettlebell press—during a set amount of time. The kettlebell press can be performed and progressed in many ways, though most people will immediately want to just increase the weight. But, if we apply “time under tension” to the kettlebell press, we can make a lighter kettlebell feel far heavier. This can help a client spend more “time under tension” while safely finetuning their technique.

The Time Under Tension Kettlebell Press


****

William Sturgeon, RKC II trains clients at his gym, Restored Strength. Contact him through his website at RestoredStrength.com or follow him on Facebook: facebook.com/restoredstrength

Filed Under: Coaching, Kettlebell Training, Tutorial Tagged With: Hardstyle Plank, isometric, isometric exercises, kettlebell press, RKC, strength, strength training, tension, Time under tension, William Sturgeon

The Importance of Single Leg Training

August 15, 2018 By William Sturgeon Leave a Comment

William Sturgeon, RKC-II Split Squat

We spend a lot of time training our clients with bilateral movements, such as squatting and hinging. These dynamic and explosive movements are done in a stationary position. When we choose exercises for our clients—or for our own training—the exercises should always be purposeful movements applicable to their lifestyle and goals. Whether you coach athletes or the general population, everyone moves unilaterally.

Whenever moving in any plane of motion, we move by stepping with one foot first. We move unilaterally throughout our whole day. Unless we’re stationary for a while, we do not spend much time in a bilateral stance. Knowing that all movement is initiated with one foot, why do we place such an emphasis on bilateral movements when training our clients?

There are many reasons to include unilateral exercises in our training programs. But, one of the main reasons I include single leg training is to allow me to train my clients’ weaknesses. While it is easy to temporarily correct a client out of a knee valgus during a squat with the cue “spread the knees apart,” it doesn’t really fix the problem. By including single leg exercises you can help strengthen your client’s asymmetrical weaknesses—which will also strengthen their bilateral movements.

Another reason I favor unilateral movements, is because they can help rehab and prevent injuries. If you train athletes or the general population, your job is to help them reach their goals—and keep them safe during their training. Another great benefit unilateral exercises offer over bilateral exercises is that they promote even more ankle stability and strength. Strengthening the ankles can reduce the chance of ankle injuries—which often lead to knee and hip pain.

The following are a few of my favorite single leg exercises:

Split Squat (see photo at beginning of post)

  • Start at the bottom of a split squat position.
  • Hold a kettlebell as if you were about to do a goblet squat (place the kettlebell near the collar bone).
  • Push evenly with the foot—through the ball of the foot and the heel to stand.
  • Lock the knee at the top of the movement while squeezing the glutes.
  • Lower yourself down slowly, and do not let the knee bang against the ground.

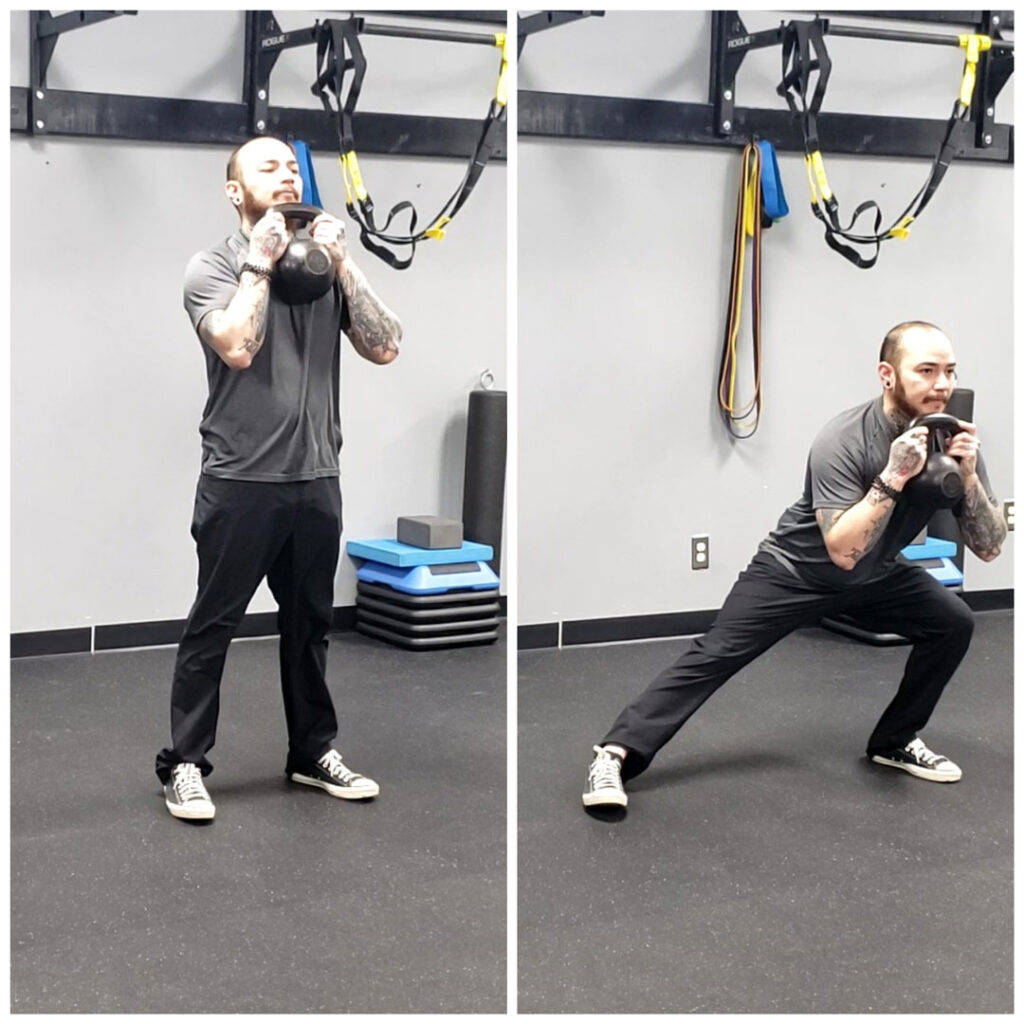
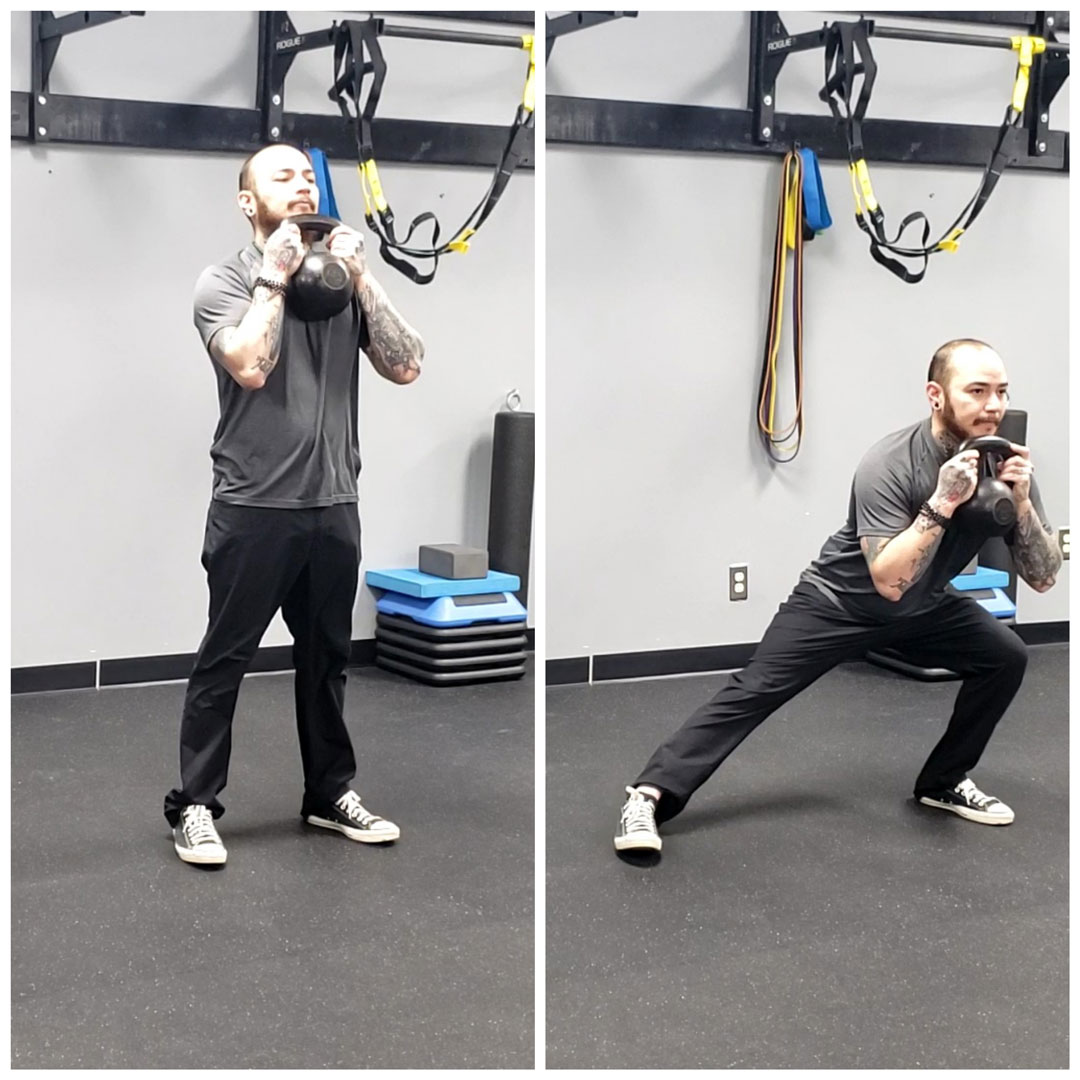
Lateral Lunge

William Sturgeon RKC-II Lateral Lunge

  • Start by holding the kettlebell in the rack position, or at the chest (the goblet squat position).
  • Take a large step to the side.
  • Bend your knees and push your hips back.
  • Return to the starting position by pushing through the inside of the foot you used to step to the side.

Curtsy Lunge

William Sturgeon RKC-II, Curtsy Lunge

  • Start by holding the kettlebell at the chest (the goblet squat position).
  • Step back and behind your other leg.
  • Slowly lower your hips until the knee lightly touches the ground.
  • Push through the front leg, and return to the starting position.

Weighted Single Leg Glute Bridge

Weighted Single Leg Glute Bridge

  • Begin on your back, and hold a kettlebell at your belt line.
  • Raise one leg off the ground by lifting the knee.
  • Tuck your chin and rib cage down as you press the heel of the other foot into the ground
  • Raise the hips up and squeeze the glutes.
  • Lower yourself down slowly and return to the starting position.

Single Leg Rear Deadlift (RDL)

  • Place both hands on the kettlebell handle.
  • Keep a slight bend in the knee and push your hips back.
  • Keep a straight spine and lower the kettlebell below the knee by bending with the hips.
  • Return to the starting position by pulling your chest and hips up as you stand tall.

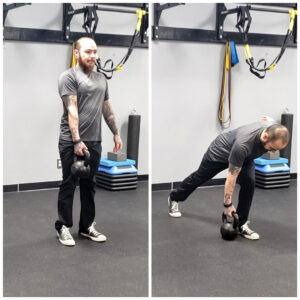
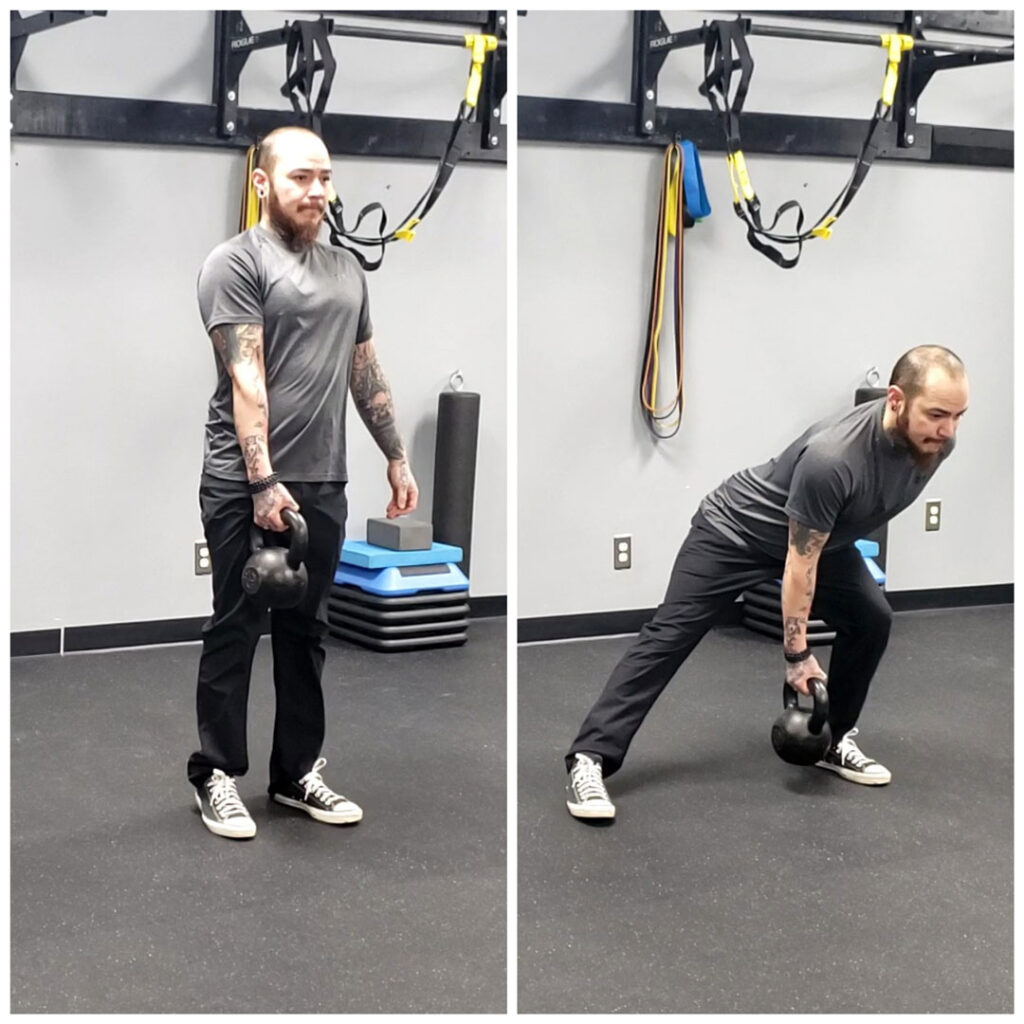
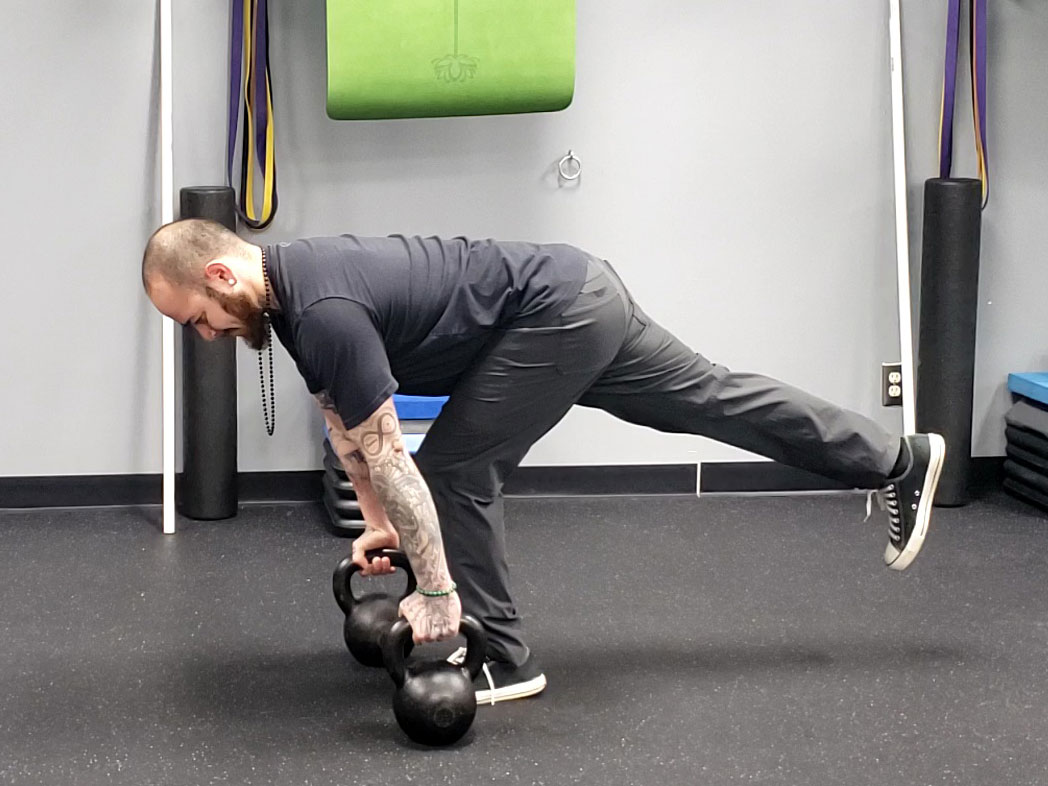
Single Leg Deadlift

William Sturgeon, Single Leg Deadlift

  • Begin with the kettlebell on the ground in line with your toes.
  • Bend at one knee and begin to hinge down while pushing your hips towards the wall.
  • Keep your chest up while lowering yourself through the hips.
  • Return to the starting position by standing tall.

Single leg exercises are essential moves to consider in your kettlebell training.

****

William Sturgeon, RKC II trains clients at his gym, Restored Strength. Contact him through his website at RestoredStrength.com or follow him on Facebook: facebook.com/restoredstrength

Filed Under: Kettlebell Training, Mobility and Flexibility Tagged With: kettlebells, leg exercises, single leg exercises, unilateral training, William Sturgeon

  • Go to page 1
  • Go to page 2
  • Go to Next Page »

Primary Sidebar

Featured Products

previous arrow
next arrow
Slider
Click here to sign up for Dragon Door Emails!

Recent Posts

  • The Kettlebell Get-up in Detail Part 1
  • Stop Using Machines and Start Using Kettlebells
  • How To Burn Fat With Kettlebell Swings
  • 3 Reasons To Train Barefoot with Kettlebells
  • How to Survive & Thrive as a Personal Trainer – However Hard it Gets
Download PDF Catalog
Download the Dragon Door 2018 PDF Catalog/></a></div></div>
		</div></section>
<section id=
FOLLOW US ON TWITTER!

Archives

Copyright © 2021

Dragon Door Publications / The author(s) and publisher of this material are not responsible in any manner whatsoever for any injury that may occur through following the instructions or opinions contained in this material. The activities, physical and otherwise, described herein for informational purposes only, may be too strenuous or dangerous for some people, and the reader(s) should consult a physician before engaging in them.