• Skip to main content
  • Skip to primary sidebar
  • Home
  • Contributors
    • Matt Beecroft, Master RKC
    • Martijn Bos, Master RKC
    • Andrea Du Cane, Master RKC
    • Angelo Gala, Master RKC
    • Chris Holder, Master RKC
    • Steve Holiner, Master RKC
    • Dan John, Master RKC
    • Mike Krivka, Master RKC
    • Thomas Phillips, Master RKC
    • Robert Rimoczi, Master RKC
    • Phil Ross, Master RKC
    • Max Shank, Master RKC
  • Workshops
    • HKC Workshops
    • RKC Workshops
    • RKC-II Workshops
  • Find an RKC Instructor
  • Resources
    • Articles
    • Forums
    • Kettlebells
    • Products
  • Blogs
    • PCC Blog
    • Strong Medicine Blog
  • Archives

RKC School of Strength

Official blog of the RKC

Kettlebell Training

The Get-Up

April 12, 2017 By Dan John 6 Comments

The Get-Up

When in doubt, I pull John Jesse’s classic book, Wrestling Physical Conditioning Encyclopedia (printed in 1974), off my shelf. Jesse collected the history and wisdom of every strength, conditioning and wrestling coach and compiled it into a rare book that covers all the bases of strength training.

The first lesson one learns when reading Jesse is humility. In case you think YOU invented something, flip through the pages to find:
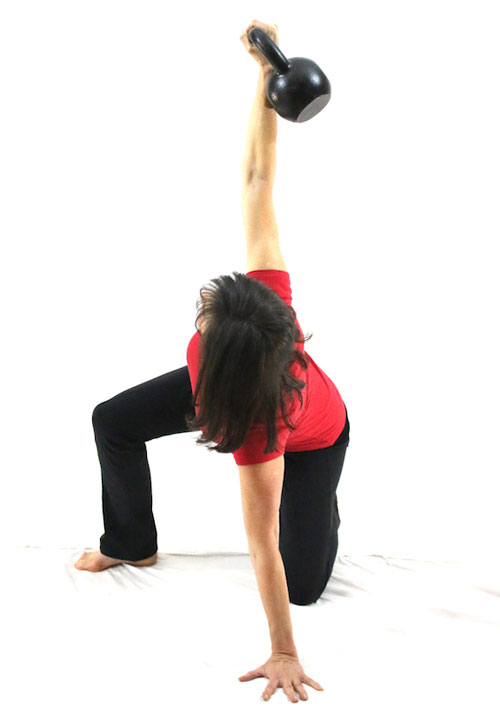
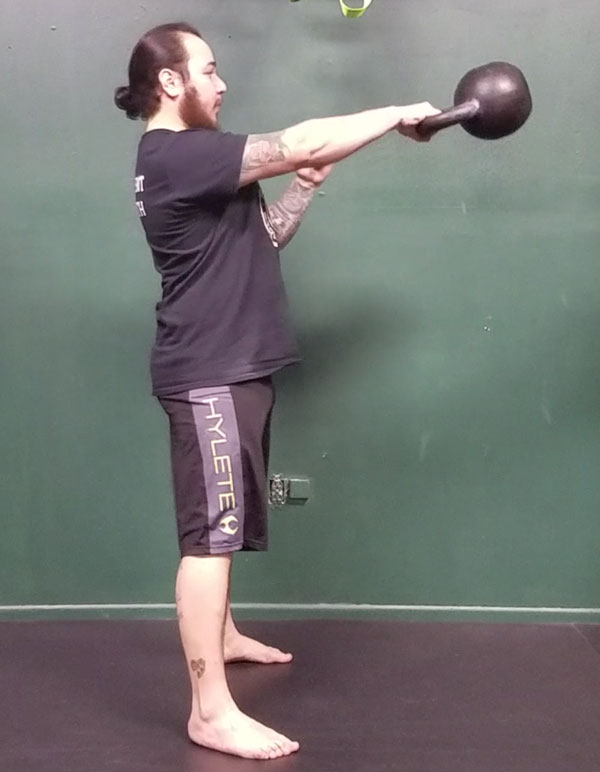
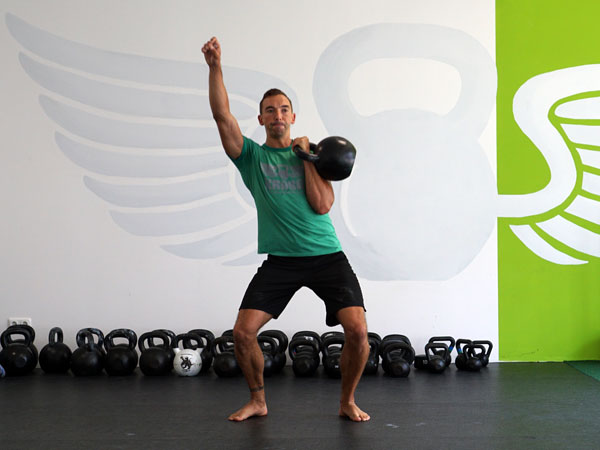
  • Swings
  • Sandbags
  • Circuit training (including mixing bodyweight work with barbells)
  • Rehab, prehab, tendon and ligament work
  • And, many, many more ideas involving equipment, movement and training
  • Oh…and the get-up

On page 154, we meet Otto Arco. He was the model for many of Rodin’s sculptures and we remember him for his skill in one particular exercise:

Arco, at a bodyweight of 138 pounds, could do a one hand get-up with 175 pounds. The get-up was his “secret” to all around body strength, body power and body composition. Arco wrote this in his book, How to Learn Muscle Control:

The main purpose of muscle control is self-mastery. Muscle control involves far more than the mere ability to make the muscles contract. It teaches you to relax, which is sometimes even more important than contraction. It gives you a selective control, and therefore the ability to single out those muscles necessary to the work to be done, and only those muscles; leaving the antagonistic, or non-helpful, muscles relaxed.

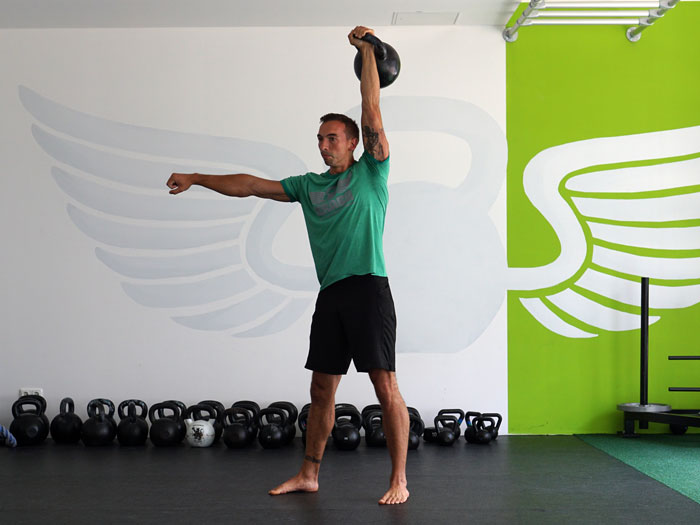
Arco, over a century ago, singled out the core and keys to the Hardstyle system: “selective control.” This is the ability to turn to stone when necessary and to relax…when necessary! It is the secret behind Bruce Lee’s one-inch punch and the ability to hit a golf ball far. We find the get-up in Jesse’s chapter 13, “All Around Strength and General Power Exercises,” where we also discover the ballistic exercises like the swing, the jerk and what we would now call “snatches” in the kettlebell world.

Arco maintained a honed physique that he modeled well into his sixties by focusing on an understanding of muscle-control. While the swing and goblet squat will illuminate the role of flicking the switch of hard/tight and fast/loose, the get-up will demand something best summarized by Jesse (155):

The athlete, in projecting his total body strength in competition, must mold the strength of localized areas into a total coordinated body effort.

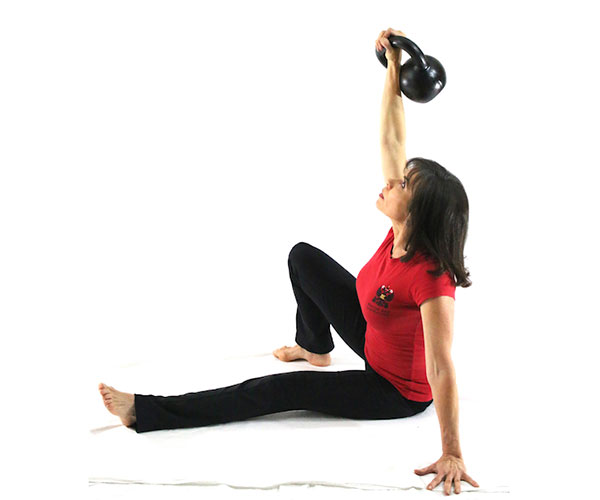
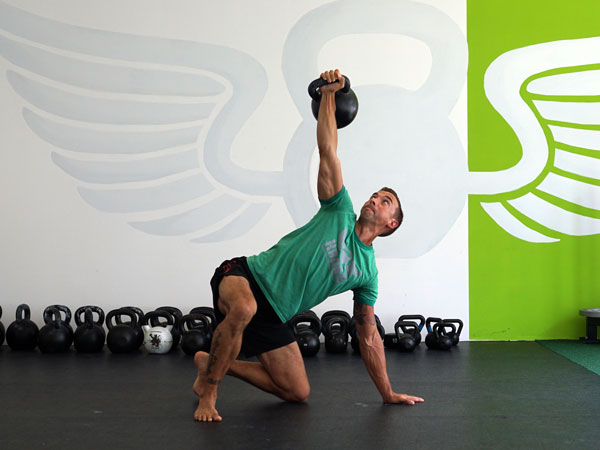
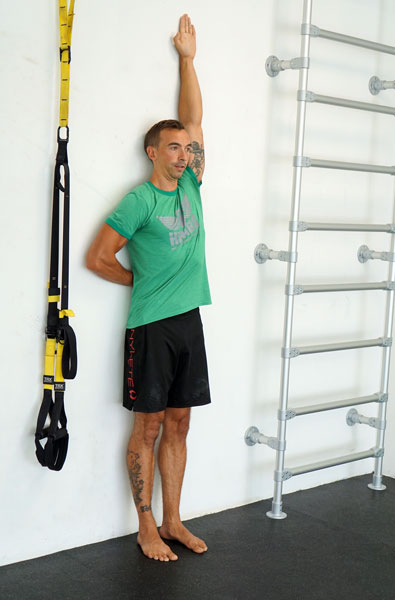
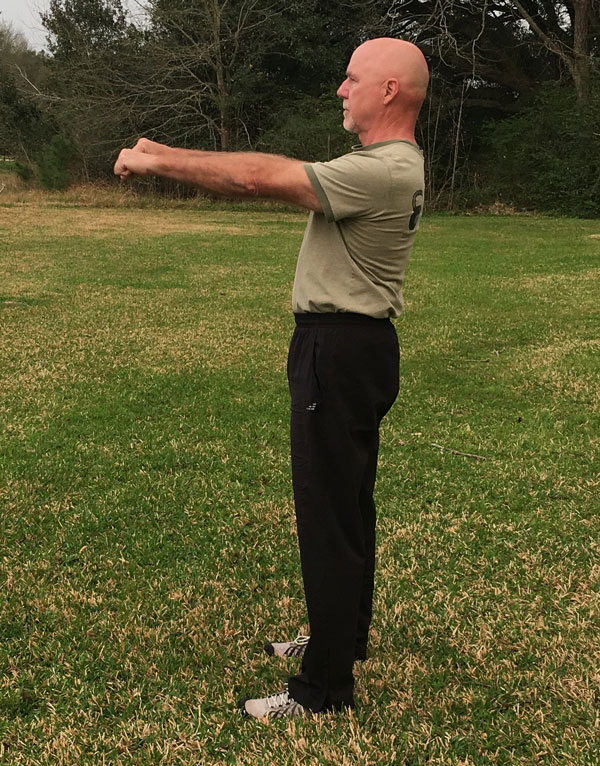
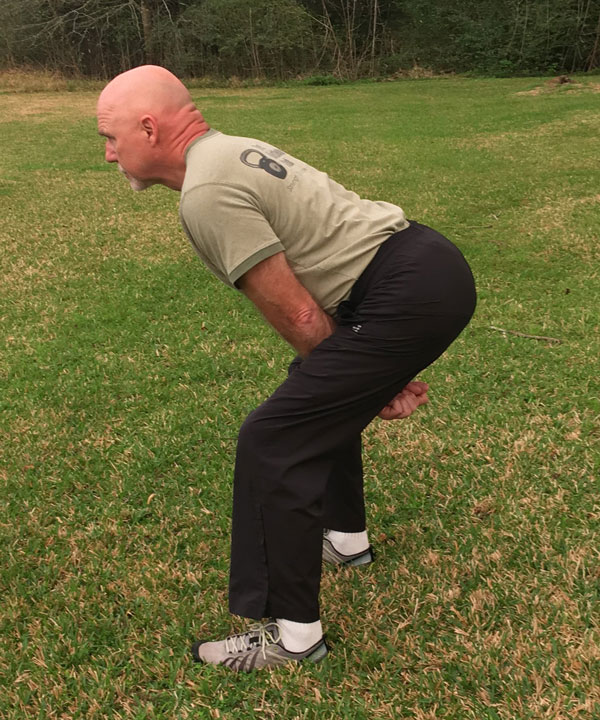
The get-up, sometimes called the Turkish get-up was named after the great tradition of Turkish wrestlers using this move as an entrance test. It has enjoyed a rebirth in the new millennium due to the efforts of members of the RKC. At its simplest, the get-up is simply getting up off the floor with a load and returning back down. It can be done to exacting measures with fourteen or more separate steps up and fourteen or more back down. Somewhere in the middle is how we will teach the get-up.

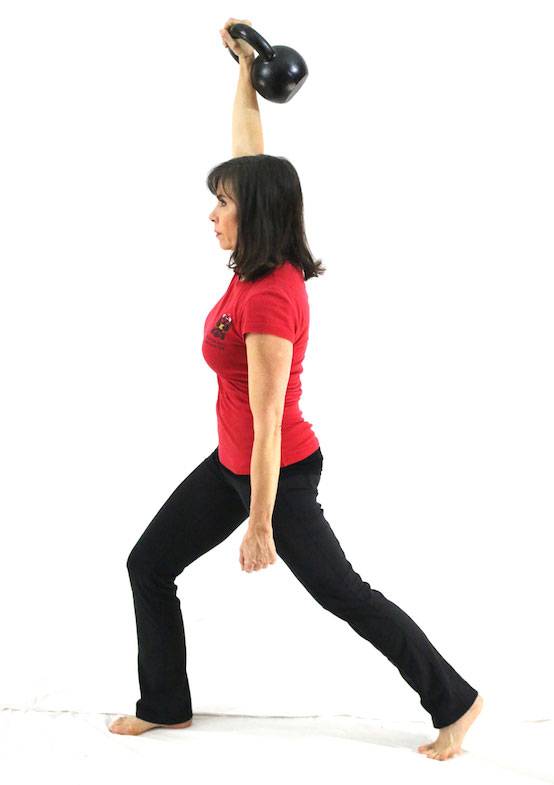
Although the true benefits are “a total coordinated body effort”, when you observe the get-up, you find that many isolation movements are present, too:

Basic rolling

Press

Hinge

Lunge

Loaded carry (waiter walk)

We also find the “four knots”. The hips and shoulders must be both tight enough and loose enough to roll, slide and adapt through the positions as we move from the ground to standing. Both shoulders are engaged during the full movement at a variety of angles and loading parameters. One needs to be tight and loose throughout as we flow through the positions.

The get-up teaches the ability to remain stiff and tense through movement. When discussing reps of the get-up, I always err on the side of fewer. There are two reasons:

  1. Safety is part of performance.
  2. Trashing doesn’t help tuning.

The first point is the key to the RKC Code of Conduct. Don’t trip over a kettlebell haphazardly left on the floor. Don’t let go of a swing and hit someone in the face with a kettlebell. Don’t go out of your way to be stupid just to become (in)famous on the internet.

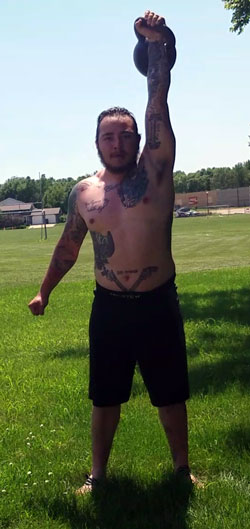
Those are all tenants of the “safety is part of performance” idea. With the get-up, a kettlebell is held directly above your skull. The kettlebell will win in a collision, so don’t drop it on your head.

More to the point, the get-up teaches total body coordination and total body strength. Like the Olympic lifts—the barbell snatch and barbell clean and jerk—it takes a level of focus to perform a get-up correctly. A single heavy get-up reflects the training base of perhaps months or years to get the movement “right.” Like the Olympic lifts, one doesn’t see the months of training and preparation that allow one to perform—and, yes, perform is the right word—a heavy get-up.

I keep the reps low to insure concentration, focus and optimal performance. As an Olympic lifting coach, I rarely get over ten reps in either lift with good lifters. With the get-up, I have found that few people can maintain the high levels of mental and physical coordination beyond about ten reps, too.

Get-up Kneeling Windmill

The second point is hard for many of our hard-charging brothers and sisters to understand: getting trashed is something a college freshman or someone who really doesn’t understand training does. I wouldn’t be surprised to see someone online doing Tabata get-ups some day (twenty seconds of get-up, ten seconds rest for four minutes) or some kind of “get-ups to failure.”

This kind of nonsense is an issue in the fitness industry. Sadly, it is what most people “hear” when we say the phrase “training session”.

Even though I want to make you move better and move more, most people’s ears tell them that I want you to puke in a bucket and lay in a sweaty mess on the floor.

No!

The get-up is all about tuning the body. The words “tune” and “tone” come from the same root. When we train people, we should be trying to tune them up. If you sit too much, stretching the hip flexor family and strengthening the glutes will do much more together.

When someone struggles in a get-up or cheats a position a bit, it tells us that something is going on today. I use the get-up and variations of it to access what is going on with a person that day. An unusual hitch in movement or a lack of mobility here or there can be addressed instantly if we see the get-up as a tuning exercise rather than a trashing movement.

Speed can mask problems. The get-up highlights weak links and poor linkage. My old training partner, John Price, used to always remind me, “An athlete is only as good as the weakest link.” The get-up is a different movement after a trip over ten time zones. The get-up is a different movement the day after an American football game.

But, a few minutes of intelligent corrective work, and tuning the body, allows us to get back into the game.

Stu McGill, the famous Canadian back specialist, offers trainers and coaches a challenge for every workout and program: after the exercises and rep scheme, write a column to explain why each exercise and rep is included.

When it is not included in a workout, we should ask why the get-up is NOT there.

***

Master RKC, Dan John is the author of numerous fitness titles including the best selling Never Let Go and Easy Strength. Dan has spent his life with one foot in the world of lifting and throwing, and the other foot in academia. An All-American discus thrower, Dan has also competed at the highest levels of Olympic lifting, Highland Games and the Weight Pentathlon, an event in which he holds the American record.

Dan spends his work life blending weekly workshops and lectures with full-time writing, and is also an online religious studies instructor for Columbia College of Missouri. As a Fulbright Scholar, he toured the Middle East exploring the foundations of religious education systems. For more information visit DanJohn.net

Filed Under: Kettlebell Training, Mobility and Flexibility Tagged With: Dan John, get up, get-up programming, Hardstyle, hkc, kettlebell get-up, Master RKC Dan John, RKC, teaching get-up

How to Run Injury Free Using Kettlebells

March 29, 2017 By William Sturgeon 2 Comments

William Sturgeon running and kettlebell training

Let’s clear this up right now, strength training and running go together, it’s not one or the other. Most runners avoid strength training for fear of being bulky, or because they’re afraid it will decrease their run time. Runners need to understand that strength training can improve their run time and increase their work capacity. If that’s not convincing, then consider that runners are prone to injuries such as patellofemoral pain syndrome, plantar fasciitis, stress fractures, as well as hip, low back, and shoulder pain. Quite an extensive list. We can prevent these issues by introducing kettlebells into our training.

Why Kettlebells?

The kettlebell is the Swiss Army knife of fitness—you can train for strength, conditioning, mobility, power, etc. with just one tool. A tool that serves multiple purposes is great if you have limited time or not enough space for bigger equipment like barbells or racks of dumbbells. Kettlebells give you the ability to exert a maximum muscular contraction instantly in an explosive power burst. Using exercises like the kettlebell swing or kettlebell snatch will train you to build a lot of power. The amount of tension, speed, and force needed to complete a swing or a snatch is very high, and the benefits carry over into the production of power. Kettlebell exercises have been known to help athletes improve their performance by increasing their power output—this also allows runners to excel in their races.

When training with kettlebells, we are often barefoot or wear minimalistic shoes. At my facility Restored Strength, we highly recommend that our members do not wear shoes. We are in shoes all of the time, and wearing shoes while training puts the foot in a plantar flexed position because the heal is elevated. Because of compression from the shoes they can also restrict the range of motion in the ankle. The freedom of being barefoot allows the ankle to have a greater range of motion. Training barefoot will also raise your kinesthetic awareness by allowing the proprioceptors in the foot to have greater exposure. The benefits can transfer over to your running, when you are not constricted by your shoes.

William Sturgeon Kettlebell Swings

Why Strength Training Can Prevent Injuries

The RKC is well known for being The School of Strength. We promote the importance of strength in a purposeful manner. While strength training has many applications, let’s discuss why it is essential to be a strong runner. When you begin to introduce strength training into your program, you get physically stronger and there’s a physiological aspect as well. Strength training promotes greater bone density which reduces the likelihood of hair line fractures. You will also strengthen the ligaments, tendons, and muscles—which hold and secure joints in proper alignments. If you are not strength training, the certain areas in the body will become weak. Being weak is dangerous since weak muscles and bones are fragile and susceptible to injuries.

Strength training can increase your muscular work capacity, which can improve your running technique. You’re less likely to fatigue, and when your muscles are stronger, you can maintain proper mechanics for longer periods of time. Stronger muscles will decrease the likelihood of fatigue during a race, and strength training helps increase the type 2 (fast twitch) muscle fibers. Focusing on the big five major muscle groups—knees, hamstrings, glutes, trunk, back—used when running will make strength training less daunting.

What to Train

Glutes: The glutes are the key muscle group in the mechanics of running. The gluteus medius will be the main focus, as this muscle is the rotator cuff of the lower body. When you move, it’s the first muscle to quickly contract, and it stabilizes your body when you are on one leg. Running is a unilateral activity—a single leg is in motion—which is why it’s crucial to strengthen and stabilize the gluteus medius in unilateral exercises.

Hamstrings: These bad boys strengthen your lower back. When they contract, they flex the knees, the repetitive motion in running. Your heel should reach your glutes during the back-swing motion, this allows for greater power output when running. With stronger hamstrings, you will be able to produce greater force output when running. Having strong hamstrings will complement your glutes—the two together will prevent low back pain and allow your running to be less strenuous on the posterior chain.

Quadriceps: Runners usually have overdeveloped quadriceps, but it is still worthwhile to train them. The quadriceps are responsible for two major movements in running, knee extension and hip flexion. These actions cause the leg to swing forward when running. The insertion of the quadriceps is located on the tibial tuberosity, the boney projection below the knee. Having stronger quadriceps will assist in maintaining knee position. One muscle of the quadriceps, the vastus medialis, helps stabilize the patella and the knee joints when we run.

Trunk: The trunk is a fancy word for abdominals. The trunk maintains your posture and keeps you upright. When we run, we want to maintain a tall posture and make sure that we are as tall as we can get, allowing us to have a greater range of motion through the hips. We won’t be able to maintain that tall position while running with a weak trunk. Strengthening the abdominals will allow for greater stability. Stronger abdominals also reduce the wobbly feeling when running. If you are wobbling from side to side when you run, then you have an energy leak slowing you down.

Back: The back is the last key player for strong running. Like the trunk, the back has the same role of keeping your body upright. Having a stronger back will help retract the shoulder blades, which prevents the shoulders from rolling forward. Good posture carries over to proper mechanics when running. If you find it difficult to maintain your posture, then you will need to improve your back strength. A strong back can prevent energy leaks through the upper body, and make sure you’re carrying your arms in an optimal way while running. A strong spine complemented by strong mid and lower backs will stabilize the spine and the pelvis.

How to Train

When we train, we want to train movements rather than muscles. The big movements are lower body pushing and pulling, upper body pushing and pulling (vertical and horizontal), trunk work, carries, and unilateral upper and lower body movements. I make mobility training a staple in my programming as well. It is a mixture of movement and strength—you need to be mobile to be strong and you need to be strong to be mobile.

In my opinion, the push/pull upper body/lower body approach is the most optimal way to train. It conserves time and targets every area. Using this type of training will also reduce the amount of training sessions each week. I recommend two to four days each week, depending on your training.

Training day example:
Kettlebell Running Training Day Chart

Conclusion

Strength training can undoubtedly improve your run time and prevent injuries if done correctly. There are many different modalities of training, and kettlebells have been the most useful for me. To help your athletic performance, make sure to include kettlebell training in your program. If you are unfamiliar with kettlebell training, find yourself a certified RKC instructor to take your training further.

****

William Sturgeon, RKC II trains clients at his gym, Restored Strength. Contact him through his website at RestoredStrength.com or follow him on Facebook: facebook.com/restoredstrength

Filed Under: Kettlebell Training, Mobility and Flexibility Tagged With: Distance Running, kettlebell training, runners, running, running and kettlebells, William Sturgeon

Warm Up and Cool Down Flow

March 22, 2017 By Paul Britt, DC 10 Comments

Senior RKC Paul Britt

How do you warm up for training? Is there a flow and/or pattern to it? How about the cool down afterwards? I like to consider economy of movement in my warm-ups because it tends to speed up my prep and my cool down. I want the warm-up to systematically prepare me for the session ahead—and I have designed it to work on my mobility and stability issues. In our modern society, we all seem to have similar thoracic restrictions, core stability, active straight leg raise restriction, and toe touch difficulties.

I perform the warm-up in a circuit for one or two sets. Even though one set is typically enough, if I am not warmed up appropriately when I get to the end of the first set, I will add a second. I want to make sure that nothing is left out of my full-body warm-up. The same goes for the cool down—I want to make sure that I hit all my issues that need work. I use this particular flow because my issues are thoracic mobility restriction, ankle mobility. Since I am sitting a lot in class, those are the areas where I concentrate at the start and finish of my workout session.

I start my warm-up with a minute or two on the foam roller. If you have to spend a lot of time on your foam roller or if you’ve named it, get checked out by a professional of some type. I really do a quick run through with it to scan and work through any major trigger points. After the roller, it is time to start moving and warming up.

Perform the following in a circuit:

  • Tall kneeling halo x 10 each way with a light kettlebell
  • 1 RKC armbar on each side
  • Bretzel left and right
  • Pump stretch x 10
  • 1 Get-up on each side
  • 5 Prying goblet squats with same weight as the Halo

After one or two times through my warm-up circuit, I perform five kettlebell deadlifts. I stand up and reset on each lift to perfectly set the groove. In general with my warm-up, everything starts on the ground and moves upward. It is easy to transition from tall kneeling to lying to the deadlifts at the end. It tends to flow well for me.

My cool down follows the same progression, and also moves from the ground up:

  • Supine piriformis stretch, 10 seconds left and right
  • Bretzel left and right
  • Shin box stretch (video)
  • Heel sit stretch
  • Child pose
  • Frog stretch
  • RKC hip flexor stretch
  • Hip flexor stretch with a twist
  • Elongated hip flexor stretch
  • Standing hamstring stretch
  • Cossack stretch
  • Shoulder stretch left and right
  • Pull-up bar hang

Just like the warm-up, I like to move in a flow from the ground up. I did not specify any particular reps for the cool down, instead I typically use my breath to move through the stretches. I find that 3-5 diaphragmatic breaths will safely move me to the edge of my range of motion. I designed the warm-up and the cool down to flow from one position to the next with economy, this makes it faster than if I just did random stretches and warm-ups. Find out the issues you need to address and create a flow that allows you to move smoothly and quickly through the series.

If you are pinched for time, for a workout you could actually load the get-up and squat with a kettlebell and move through the circuit several times. You will benefit from the mobility work and build strength on an open frame. But only load those two exercises in the series. The kettlebell halo and RKC armbar are not strength exercises, they are movement prep and mobility/stability work, so a heavy load is not appropriate or safe.


***

Senior RKC Paul Britt has been an RKC kettlebell instructor since 2006. Paul trains people at workshops and privately. Paul is currently attending Parker University working on his Doctor of Chiropractic degree Paul has served as an assistant instructor at many RKC and HKC Courses, is a Certified Kettlebell Functional Movement Specialist (CK-FMS) and works with some of the top Chiropractors in North Texas. Please visit his website for more information or to contact him

Filed Under: Kettlebell Training, Mobility and Flexibility Tagged With: cooldown, flexibility, flow, mobility, movement prep, Paul Britt, RKC, warm-up

Getting Strong Fast: Four Effective Overhead Kettlebell Exercises

March 15, 2017 By Sebastian Müller 12 Comments

Sebastian Muller Overhead 40kg kettlebell press

Kettlebell exercises are much more common in fitness these days because of the RKC, CrossFit, strongman and functional training. But, only truly strong athletes will be able to lift heavy kettlebells overhead without risking injury.

When I began my training a few years ago, I hated it. No matter where I looked, everybody was stronger than me—at least that’s what I thought when I saw what others were lifting. But, the further I went down the path of strength training, I discovered a real secret. I learned why—after months of training—I still lifted lighter weights than the other guys (and girls).

The difference was that I pressed the weights with very strict form. I would clean a kettlebell and then press it until my arm was straight overhead. While this is an extremely effective way to train your body, it is not really useful for lifting very heavy weights.

If you want to move big kettlebells, you have to be creative. You’ll need to look for effective exercises and movements that allow you to use more of your muscles. This post will outline the four best exercises I’ve found for this purpose.

1. The Get-Up

Turkish wrestlers and aspiring athletes who trained with them used this exercise to prepare for the hard and demanding sport-specific wrestling training. If an athlete couldn’t “get up” with at least half of his body weight, he wasn’t allowed to participate in wrestling training. Being able to lift a lot of weight is just one advantage of the get-up. Your body will learn to work as a unit, and every muscle is involved with this movement. When I first did the get-up with a kettlebell, I chose the same weight I was using for strict presses. After a few weeks, I increased that weight by 100%.

Since one arm is holding the weight straight overhead during the entire get-up exercise, it strengthens and stabilizes your shoulder muscles. When you’re able to do the movement correctly and smoothly, then the goal of using half your body weight is absolutely realistic.

Sebastian Muller 40kg Get-Up

Performing the Get-Up

  • Start on your back, lying on the ground.
  • Safely pick up the weight, and extend your arm to press the weight overhead.
  • Push with your supporting leg to the side and roll up on your elbow.
  • Sit up straight.
  • Bring the knee of the extended leg under your hip.
  • Be sure your upper body is upright, and rotate it straight forward.
  • Stand up into a shoulder-width stance.

2. Bent Press (Advanced)

Old time strongmen and athletes of the 19th century did tremendous feats of strength with this exercise. You don’t see it very much these days, despite its many advantages. (The bent press is a very advanced exercise and should only be attempted when the kettlebell lifter is ready. Find an RKC-II instructor near you for help and coaching with this movement.)

But, if it is safe and appropriate for the trainee, the carryover from the bent press to other movements is gigantic. It also enormously improves hip and thoracic spine mobility. Another special thing about the bent press is that it has no “perfect form”. Everyone does it a bit differently. Although the process is always the same, there are three options: hip dominant (similar to the windmill), thigh dominant (closer to a squatting pattern), or a version that incorporates both movement patterns.

Sebastian Muller Bent Press 40kg

Performing the Bent Press:

  • Bring the weight up to the chest safely (the “rack position”).
  • Position your arm onto your big back muscles and let it remain there.
  • “Sit” under the weight by opening or hinging the hip and rotating the upper body until the arm holding the kettlebell is completely straight.
  • Straighten the hip and legs to return to the standing position.

3. Push Press

The push press bears the most resemblance to the strict press. But with the push-press, the upper body muscles only start to work when the kettlebell is already on its way up. The force of the push press comes from the legs and the hips. A small knee dip followed by an explosive hip extension transfers the force to propel the kettlebell overhead.

Sebastian Muller Push Press Bump with 40kg kettlebell

Performing the Push Press:

  • Bring the weight up to the chest safely (the “rack position”).
  • Hinge the hips and bend your knees slightly (about one quarter of a squat).
  • Explosively extend legs and hips (“bump” see the photo above).
  • Straighten the arm. After the bump, the handle of the kettlebell should be at about the height of your forehead, before you straighten the arm.

4. Jerk

The jerk is an exercise to bring up the most weight overhead with two kettlebells. It takes the upper body muscles responsible for the press almost completely out of the game. Everything in the jerk is similar to the push press up until the bump. When the kettlebells are forehead height, you have to do another dip with the knees and hips—and simultaneously extend both arms.

This exercise is super complex, but also allows you to use a lot of weight.

Performing the Jerk

  • Safely clean the kettlebells up to the chest (the “rack position”).
  • Hinge the hips and slightly bend your knees (about one quarter of a squat).
  • Explosively extend your legs and hips (“bump”).
  • Bend your knees and hinge your hips again when the kettlebell reaches your forehead. Simultaneously extend your arm.
  • Extend your legs and hips to stand up straight with the weight overhead.

Prerequisite Requirements for Safely Lifting Heavy Kettlebells Overhead:

Before you try these exercises, there are prerequisite requirements for lifting heavy kettlebells overhead—which include a certain level of mobility and stability to prevent overtraining or injury.

Sebastian Muller Overhead Reach Test

Test your overhead lockout position:

  • Stand with your back facing a wall with your heels about 5cm (about 2 inches) from the wall.
  • Your buttocks, upper back, shoulders and back of your head are touching the wall.
  • Hinge the hip so that you ‘’pinch’’ your hand to the wall. The pressure on the hand should be there during the entire exercise.
  • Put your other hand straight up overhead.

When the wrist of your fully extended arm touches the wall while your back remains stable, you will have fulfilled the mobility requirements. If you’ve run into trouble here, first work on your thoracic spine mobility and shoulder joints. To safely lift heavy kettlebells overhead, you will also need stable shoulder joints and a strong core musculature. You should have also mastered the basic kettlebell movements: swing, get-up, clean, press, squat, snatch.

The get-up is the best exercise to prepare your shoulders for heavy weights. When you master the get up, you will build a strong foundation for lifting heavy kettlebells. You can even increase the effectiveness of the exercise by adding overhead walks to your get-up sessions. For example, walk with the kettlebell overhead every time you are in the standing position of the get-up.

When a get-up with half your bodyweight is no problem for you anymore, and you are safe in the kettlebell basics, you are ready for the bent press, push press and jerk.

When Training with Heavy Kettlebells, Movement Quality is Essential

The movement patterns of the get-up, bent press, push press and jerk are complex. Many joints and big muscle groups have to work together perfectly. Before you can load these movement patterns with heavy kettlebells, you should master the movements. You simply can’t afford to stop and think about what you have to do next while you are holding a heavy kettlebell. The best way to avoid mistakes is to do everything correctly from the start. Be a professional and learn the exercises from a qualified coach.

Sebastian Muller Rack Position 40kg

How to Use These Exercises:

The movements we’ve discussed in this blog post can be divided into two categories: skill and power. Skill and power exercises belong at the beginning of your training routine. They require high focus, and we want to lift heavy kettlebells with these exercises. It’s a bad idea to tackle this combination while fatigued.

The get-up and bent press are in the skill category. They are complex movements that involve many muscle groups and joints. They are also performed slowly and under high tension. After warming up, do perfect repetitions in turns, always starting with your less strong side. One to a maximum of five sets will do a fine job. After ten total repetitions (five for each side), move on to other exercises.

The push press and jerk are power exercises. While these movement patterns are less complex, you need a lot of explosiveness and power. After warming up, do perfect repetitions in turns, always starting with your less strong side. One to a maximum of five sets will do a fine job. After ten total repetitions (five for each side), move on to other exercises.

Important Rules:

  • Be sure to fulfill the stability and mobility requirements for the overhead movements before attempting them—especially with heavy kettlebells.
  • Master the basics!
  • Learn all of the described movements from a qualified coach.
  • Always practice while fresh, with high focus. Aim to improve a little at every training session.

If you follow these rules, you will surely draw the admiration of others and have the best workouts of your life. Now that you know four exercises for lifting heavy kettlebells, go and lift your training skills to the next level.


***

Sebastian Müller, RKC Team Leader, and PCC Instructor is a personal trainer in Erfurt (Germany) and teaches seminars all over Germany. After 16 years of training he founded the first kettlebell studio in his federal state. He is the head coach of KRABA Erfurt (“Strength and Movement Academy”) and a passionate blogger. His focus lies on what he enjoys the most: to inspire people for simple training and making it an important part of their lives!  Translation by Martin Breternitz HKC, KRABA Erfurt

Filed Under: Kettlebell Training, Tutorial Tagged With: advanced kettlebell exercises, bent press, get up, heavy kettlebells, jerk, kettlebell training, kettlebells, push press, Sebastian Muller, tutorial

Naked Swings

February 22, 2017 By Jay Armstrong 4 Comments

Jay Armstrong, Senior RKC Seesaw Press

Two years ago I woke up one morning and fell out of bed. I could not stand up. My right leg was in extreme pain and it felt like there was high voltage electricity running through it. A nerve in my back had been pinched by my vertebrae. I spent a week in the hospital on morphine while they ran tests. (Okay I think it was a week). Eventually, they did minimally invasive surgery to relieve the pressure on the nerve. Then, I began the slow rehabilitation process…

I went for a follow up visit with the surgeon. He told me, “There are two types of patients. The first type will use this sort of pain event and back surgery as an excuse. They will be afraid, they won’t work on regaining their movement abilities and they will never fully recover. You are probably the second type. You are the kind of person who will try to do too much too quickly and will soon have a relapse.” His advice to me was to be very careful.

Naked Swings
Naked Swings

I wanted a speedy recovery but I certainly did not want to go through this again. I realized two important things:

  1. I must move if I wanted to regain my former movement skills and rehabilitate the lost abilities. (Yes, it was bad. After surgery, I was unable to get up off the floor without using my arms for assistance.)
  2. I must pace my recovery so that I maximized my progress and minimized the risk of injury.

I run a place called The Kettlebell Club in Houston, Texas and I teach regular group classes there. I wanted to get back to swinging the kettlebell as soon as possible but also wanted to heed the surgeon’s warning. So, as soon as I possibly could, I began practicing naked swings – lots of them.

In workshops, classes and demonstrations I had often shown students the various aspects of the kettlebell swing without a weight. But, I had not performed many repetitions of kettlebell swings without a kettlebell. When I began religiously practicing naked swings I immediately realized that I had found a real jewel. The speed of your kettlebell swing is fixed when you have a kettlebell in your hand. But, without a kettlebell, you can perform the swing motion at a variety of speeds from very slow to very fast. You will improve the way you use your respiration to support the swinging motion. You can even pause at various points in the swing to check your posture or the activation of specific muscles. (Clearly, posture and spinal stabilization were a key focus for me.)

Top of Swing Position

The top part of the kettlebell swing is a demonstration of ideal posture and spinal alignment. On each repetition, lengthen your spine, insure your thoracic spine is open, your head is over your shoulders, and your pelvis is in a neutral position (or slightly tucked).

The bottom part of the kettlebell swing is essentially the set up for a deadlift except that your hands have moved between your legs, behind your knees and lined up with your spine. Being able to spend time at the bottom of the kettlebell swing (since the kettlebell doesn’t force you to continue the movement) allows you to fine tune this position. You should feel a good loading of the posterior chain (i.e., glutes, hamstrings, back muscles, etc.) In addition, insure that your shoulders are well connected to your body while in this position.

Bottom of Swing Position

The naked swing will also help your understanding of the transitions from top to bottom and from bottom to top. Without the kettlebell dictating the speed of the movement, you can maintain your erect posture while your hands slowly (and safely) move downward before you begin your hip hinge movement.

I credit the thousands of reps of naked swings with accelerating my recovery and in a virtually risk-free manner. In addition, this work significantly improved my understanding of the mechanics of the kettlebell swing and gave me an excellent, new teaching tool.

***

Jay Armstrong is a Senior RKC, 6 Degree Black Belt TKD, and Master Z-Health Trainer.  The past 30 years have been dedicated to helping others develop confidence through increased strength and pain-free, exceptional mobility.  His quest for knowledge continues.  He runs The Kettlebell Club in Houston, Texas.

Filed Under: Kettlebell Training, Mobility and Flexibility Tagged With: Jay Armstrong, kettlebell exercises, naked swings, swings, tutorial

Does the Snatch Test Really Matter?

February 1, 2017 By William Sturgeon 4 Comments

Every RKC instructor has gone through the rigorous snatch test. This is five minutes of full effort—snatching a kettlebell for 100 repetitions. Ask anyone who has done it and they will tell you the joys of the test. Many RKC candidates are nervous and frightened when it comes to the snatch test. They end up putting so much effort and stress about test that they miss the big picture of what the weekend is really about—learning.

William Sturgeon Kettlebell SnatchesThe RKC is known as the School of Strength because we educate candidates on how to teach strength to others. As we all know the title of RKC instructor is not given, it’s earned. One of the requirements is the snatch test and it’s part of the right of passage to earn your title as an RKC instructor. But, I want to bring this to everyone’s attention: your ability to safely instruct kettlebell training is not related to how fast you finish your snatch test.

The biggest test that many people underestimate and under-prepare for is the coaching aspect of the certification. I can say that I fell into this when I first got certified. I put so much effort in preparing for the snatch test that I didn’t want to focus on anything else. I passed my RKC that weekend, but I wish I would have put more effort and focus on the coaching part of the weekend. As candidates, you are surrounded by other fitness professionals with years of experience—many people also undervalue this aspect of the weekend. Taking in all the cues and corrections the instructors have to offer is so important for growth as teacher of strength.

One year after my certification, I was able to attend another RKC as a volunteer. The candidate coached me though the swing and the plank. And while he used good cues and good progressions, he ultimately did not pass the snatch test. But, he wasn’t bothered by that, his focus was on passing the other two tests—the coaching test and the technique test. This was a good candidate who had his priorities straight. A year later I was able to assist at an RKC Workshop, and this was my opportunity to share with the candidates the importance of coaching. I assured them that the focus for the weekend was to learn how to teach and perform proper kettlebell technique, not to finish the five minute snatch test in four minutes. Knowing how to properly progress and regress a client means you are competent in coaching while keeping your clients safe.

William Sturgeon Get-Ups

Safety is our number one goal when we working with clients. Making sure that you put a bigger focus on the learning aspect of the weekend will lead you to a successful career in coaching. The RKC is more than just a certification, it’s a system that has principles that apply to all areas of fitness. If you place priority on passing your snatch test and not your ability to coach, you are doing yourself a disservice. Focus on reading your manual and taking notes, I have had the opportunity to assist at an RKC and an HKC, both times I advised the candidates to grab their manuals and write notes. The master instructors have been teaching for years, they will often give cues or corrections that are no in the manual that will be beneficial to remember, so make sure to take notes.

Passing your certification comes with three big tests, your ability to perform the exercises with proper technique, your ability to coach, and your snatch test. This should be the order of importance when you are preparing for your RKC. You will become a teacher of strength, and will show your clients what you learned with proper coaching. Take time to understand that the snatch test is not the most important part of becoming an RKC instructor.

Here are some of my favorite coaching cues to correct the swing:

****

William Sturgeon, RKC II trains clients at his gym, Restored Strength. Contact him through his website at RestoredStrength.com or follow him on Facebook: facebook.com/restoredstrength

Filed Under: Coaching, Kettlebell Training Tagged With: becoming an RKC, Coaching, how to become an RKC, kettlebell training, kettlebell tutorial, kettlebells, RKC Testing, RKC workshop experience, RKC workshop prep, William Sturgeon

Get out of Your Kettlebell Rut with These Partner and Group Exercises

January 25, 2017 By Laurel Blackburn 2 Comments

Laurel Blackburn Kettlebell Partner Workouts

I started my fitness business, Boot Camp Fitness and Training in 2005, and I started Tallahassee Kettlebells shortly after my RKC 1 in 2009.

In that time, I have amassed many individual, partner, and group workouts. I still have the notebooks and binders full of workouts and exercises that I have used over the years. Even with these valuable resources, I still like to come up with new exercises or new ways to do old favorites. One of the things that keep my clients coming back year after year is the variety in our workouts.

In my experience, providing a variety of exercises and movements give my clients the results they want. Whether or not they come for fat loss, muscle gain, or to improve performance, movement, and health, the varied workouts and exercises we do fit the bill.

One of the things I pride myself on is creativity—I am very creative. Ask me for percentages or any other math and I’m going to look at you as if you were speaking Latin. But, give me a block of concrete and I’ll come up with ten different exercises.

Give me a pair of kettlebells and the possibilities are endless.

I’m sure many—or even most of you have your go-to exercises and workouts, too. I occasionally find myself going back to the same workouts and getting in a bit of a rut.

There is nothing wrong with the basics. You and your clients should be proficient with the basics like the deadlift, squat, and press variations before you get all fancy. You and your clients should also have good movement patterns and mobility before you start getting too crazy adding new things to our programs. Remember, everything is built on the basics.

In the video at the end of this post, I give you several partner workouts you can use in circuit training with a group or an entire class. Use these exercises to jump start your own creativity. You can add movements, change the reps, add a timer, do ladders or anything else you can come up with.

Partner Workout #1

Swing, Squat, and Pass

Partner A does one swing, one squat, and then uses a rotation pass to hand the kettlebell to partner B. Keep the abs tight!

Variations:

  1. Add a rep to the swings and squats up to ten and back down to one.
  2. Each person does a set number of reps before passing the kettlebell to their partner.
  3. Set a timer, and each partner goes for a set amount of time before passing the kettlebell.
  4. Add different movements each round for a chain. Example:
  • one swing, pass kettlebell
  • one swing, one squat, pass kettlebell
  • one swing, one squat, one two-hand press, pass kettlebell

Partner Workout # 2

Pullover, Triceps Extension, and Pass

  1. Add reps each round
  2. Add a one arm chest press before the pullover. Make sure to switch sides at the start of the next round. It will look like this: Partner one does chest press or presses on the right, five pullovers and five triceps extensions and pass the kettlebell. Partner does the same. Next round partner one starts with a chest press or presses on the left side.

Partner Workout # 3

Renegade Lunges

  1. Do a forward lunge first before the reverse lunge pass.
  2. Add reps to each set.
  3. Partner on does a set amount of forward and reverse lunges before the kettlebell is passed.
  4. Use different holds for the kettlebell such as racked or overhead before the pass.

Get creative and use these few exercise as a platform to come up with some new stuff for your and your clients.


****

Senior RKC, Laurel Blackburn owns Boot Camp Fitness and Training and Tallahassee Kettlebells.  Look for Laurel at www.bootcampstogo.com or www.tallahasseekettlebells.com.

In her early fifties, Laurel is out to prove that age is just a number. Her goal is to motivate and inspire people everywhere, both young and old that strength, flexibility and mobility can get better with age. Follow her adventures on her blog: www.SuperStrongNana.com.

Filed Under: Kettlebell Training, Workout of the Week Tagged With: kettlebell partner workout, kettlebell workout, kettlebell workouts, kettlebells, Laurel Blackburn, partner workout, partner workouts

The Road to the Iron Maiden Challenge

January 18, 2017 By Katie Petersen 5 Comments

Katie Petersen Iron Maiden Challenge Kettlebell Press

I did it! I finally did it! This was all I could think for at least a month after completing the Iron Maiden Challenge. For anyone unfamiliar with this challenge, an Iron Maiden must complete a pistol, pull up, and strict press with the 24kg kettlebell (Beast Tamer: 48kg). I struggled with each of the lifts in different ways over the years; but did not understand my greatest obstacle until the day of reckoning, when I missed my first pull up. When all the training was done, I had one more beast to defeat and it was not in the shape of a kettlebell. It was the voice inside my head…the mean one…the one that self-sabotages, doubts, and makes me feel small. As defeat loomed, I had to find a way to cross over the dark swamp of uncertainty holding me back from everything I had worked toward. I had to rewrite my belief system; to accept my own moment of greatness; to open my heart to myself and let it shine brightly in the world. Here is my story.

In April 2013, I was doing a kettlebell workout with Rob Miller in a Chicago park. I performed a 24kg get-up for the second time ever, precariously balanced on uneven terrain as the sun’s blinding rays sealed my eyes shut. Ecstatic, I expected to revel in my unprecedented success and call it a day. Instead, Rob says “nice” and “you will have to do the Iron Maiden in October.” Excuse me? A pull up, one-arm press and pistol with a 24kg? I barely got a get-up with the 24kg, which took every ounce of effort I could muster. Was he serious? My final figure competition season had just closed and left me extremely depleted. I was not at all confident that I would regain the strength I’d lost, let alone surpass it. To give you an idea of where I started, I had just worked back up to 5 bodyweight pull ups; was very new to the pistol; had I not pressed anything heavier than the 16kg kettlebell.

My Iron Maiden trajectory began on a slippery slope of disbelief, intrigue, and dare I say, annoyance. Yep, annoyance was probably the biggest driver: annoyance that Rob thought it could be so easy for me;  annoyance that there were 4 or 5 women out there who had done it and here I was doubting myself; annoyance at how incredibly far-off this goal felt. And Rob just decided I would do it at an RKC Workshop in the next 6 months. Most of all though, I felt annoyance at my annoyance…who was I if I wasn’t willing to become greater than this moment? Those questions spun me down a path I did not expect. And so the journey began.

October 2013 simply was not a realistic goal date. But I did step forward with a new sense of discipline. That Summer/Fall I followed a Triphasic program focused around barbell squats and deadlifts to rebuild my strength base. About 4x/week, I worked on my kettlebell technique to prepare for the RKC.

By October, 2013  I attained the following:

  • Pull up: 12kg (26lb)
  • 1RM Pistol: 18kg (40lb)
  • 1RM Press: 18kg (40lb)

Although my baseline was a far cry from a 24kg, it was progress. It didn’t matter how long it would take. After five years of grueling off-season training, an unapologetic in-season diet, endless travel to national stages only to come within two places of professional IFBB status, I desperately needed a goal to fill! I had just gone fifteen months without entering so much as a 5k and had all of this pent up competitive-energy stirring. I was not going to quit until it was done.

I began learning from every blog post I could find about achieving the Iron Maiden or Beast Tamer and/or improving 1RM’s in these movements. Unsure of my next steps, I read Andrew Read’s Beast Tamer, which offered an excellent jumping off point with tips and routines. I discovered much of the material in the book roots from the RKC Level II curriculum. As intelligent and well-written as the book is, mastery of these movements meant experiencing the education for myself. My next move was crystal clear. I signed up for the RKC II in April 2014.   After going through the certification, my body awareness and neuromuscular connection around the pistol, press, and strict pull up grew exponentially. If you have any desire to be stronger these movements (especially if you want to be an Iron Maiden/Beast Tamer), learn from the countless months I spun my wheels with far less progress than I was capable of achieving.

From the beginning, the pull up was my toughest lift. Every week was jam-packed with heavy lifting and a consistent yoga practice—yet, I still managed to avoid my weakest link and didn’t even know it. Sounds naïve, I know, but I was doing them every week with negligible progress. As I look back, though, I can see how they were grossly deprioritized.

I overvalued how much deadlifts and ancillary back exercises would contribute to my pull up game. They inarguably help with strength; but the truth about getting better at pull ups is that you have to do more pull ups. After 8 months, doing low volume/heavy weight (2x/week) increased my 1RM to a 16kg; but I hadn’t added a single measly rep to my bodyweight max. My nervous system was missing literally hundreds of reps needed to genuinely fortify enough pull up strength for a 24kg.

I dug through the Dragon Door forum and found a plan that looked incredibly smart. I later found out, this program is actually in the RKC II manual!   It was time to ramp up the volume and get my baseline strength in order. This plan promised to bring a 5RM (bodyweight) to a 10RM in 1 month…sold! As you can see in the Pull-up Program below, you are supposed to attain a new max rep set every 6 days. It seems like such a tall order that I was shocked and impressed by how well the plan worked. About half-way through, a wrist injury sent me on a 2 week hiatus and I feared major regression.   Not a single rep was lost. I saw clear evidence on how much better a 10-15 min daily practice could preserve my strength than hitting it once or twice a week.

5 RM Pull-Up Program Chart
If needed, add 1 rest day/week. It will take 5 weeks to complete. For results, prioritize the pull up program. If you are not recovering well enough, scale back other training before increasing rest days. (Note: if you have a 9RM, begin there, i.e. Day 1: 9,10,11,12,13 and adjust accordingly).

Over a 6 week period, I glided from a 6RM to an 11RM. After a small recovery period, I attempted my first weighted pull up in 2 months. The 16kg max moved up to an easy 3 reps, as well as earning a new 1RM with the 20kg. Huge progress! I began reintroducing weighted pull-ups in a variety of routines; but gravitated most toward a 5-3-1 model. After years of dreading the pull up, I flipped the script on my “weakest lift” and it has remained one of my most proficient movements.

Katie Petersen Iron Maiden Pull Up

One of the greatest lessons I learned was to not get bullied by my own limiting beliefs. I didn’t feel strong doing the pull up so I unconsciously avoided them. I had become fixated on feeling strong in every workout. That sticking point with my ego had me devoting more time, attention, and planning toward the movements eliciting more progress. Physical weakness is just like any shadow inside–we might ignore it, justify it, or worse yet, accept it–but it will relentlessly beg for awareness in one way or another. Those weaknesses are here to teach us something, not to break us down. Ignoring the hard stuff just equates to a more strenuous lesson down the road, in far more areas than just training. Some of my best advice roots from this realization.

As it applies to training, if you are preparing for the Iron Maiden or any goal, pick your worst/least favorite movement and begin there. Do it every day. Nurture the movement. I no longer viewed the pull-up as part of my workout, the meat of my workout, or as a workout at all. For a measured amount of time, they became a daily practice that needed to feel as routine in my awareness as brushing my teeth. My body began to feel “off”, like I was missing something, on the days I rested. This created a higher degree of “habit” that was needed to groove the movement pattern deeply into the brain synapses, let alone muscle fibers.

Practicing everyday does not mean over-training, however; it also does not need to be a progressive-overload like this pull-up program. It does mean organizing and prioritizing around the goal. For example, if I was struggling with the pistol, I might follow something like this:

Training chart for pistols

In order to follow the pull up program, I had to face down another ego-check. I was accustomed to using weight in every pull-up session and didn’t want to be seen doing only bodyweight reps. That little brush of arrogance zapped pretty quickly as the daily work began. I couldn’t have managed weighted reps with the volume each week required. The beauty of de-loading is an allowance to drastically intensify volume and frequency without getting injured. Every rep is done to perfection or not counted. I can’t emphasize enough how beneficial it was to revisit the proverbial baseline, a.k.a. bodyweight reps vs. weighted reps. If you are stuck on a 1RM, re-programming in a similar system may just blow you away. Take yourself back to the oh-so-humbling 60% max and practice with it. Train with it regularly throughout the week rather than max out every set or every workout. Do something to improve the movement daily, including mobility drills and rest.

I practiced mobility not only on “off” days but also between every pull-up set (scapular pulls, wheel pose, foam rolling, crow pose, wall glides, pec stretches, etc.). In this way, everything I did spoke to my goal. Boldly set your intention: write it down, live it, know the outcome is already happening, and don’t let anything get in its way.

Now let’s talk about the other two lifts. Presses probably got the most attention in my Iron Maiden training. The press wasn’t as defeating as the pull up but it was a greater challenge than the pistol; so it made for the most fun in “seeing progress”.

I approached the press with a three part awareness of the movement:

  • The body has to sense the pattern of movement with total automation
  • The body has to sense the intensity of the goal load to lockout overhead (2nd half of press)
  • The body has to sense the intensity of the goal load to initiate out of rack (1st half of press)

Here’s how these three parts translated unto my training:

A. Patterning/Volume for Automation

Similar to my advice with the pull up, automation requires the pattern of movement to be a deeply rooted habit. With a max rep, not a nanosecond can be wasted for the body to “think” about what’s next. It just fires.   Ladders are a perfect way to pick up volume in a short period of time and jump start strength gains. Below is an example ladder. I followed something similar to this pressing routine 1x/week up until about 6 months out.

Patterning Volume For Automation
1:1 work to rest ratio (You go-I go, if you have a partner). If body is recovering well, add a few single rep sets after the indicated ladders.

B. Desensitizing Goal Load+ at Lockout

Drilling familiarity, stability, and strength with a 24kg+ in the overhead lockout. Below are some ways to make it fun. Adjust the weight according to your current state and goals. As a reference point for the tables listed, goal: 24kg, current max: 20-22kg, snatch test kettlebell: 14kg.

Getting up the Ladder

Each time I did the set of presses, it felt much lighter than expected after holding the heavier load for the duration of a get-up. You can skip rungs on the ladder if you are not making this the core of your workout.

Press Ladder Chart

Each time I did the set of presses, it felt much lighter than expected after holding the heavier load for the duration of a TGU. You can skip rungs on the ladder if you are not making this the core of your workout.

Overhead Walks Chart
Whenever possible, slow the negative/lowering of bell to rack at the finish of the OHW.

Dropset Chart

C1. Desensitizing Goal Load+ into RACK

This speaks to improving the proficiency and load with the clean. The clean bottles all the potential energy necessary to explode into a press. When I am maxing out, there is not a moment’s pause transitioning from clean to press. They blend into one fluid movement. Under this technique, if the clean is sloppy at a max load, the press isn’t going to happen. The practice is to clean heavier than necessary to convince the body of competence at the goal load.

Heavy Cleans Chart

Heavy push presses helps link the transition from rack to press, even with the use of momentum. I would often pair both the heavy cleans and heavy push presses into the same workout.

Push Press Chart

C2. Enhance firing out of RACK

Continuing the current from the clean into a press relies on whole body linkage. Squeeze your quads tighter then tight and push the floor away with your feet immediately upon pressing the bell. Do not let go of the legs. On a 1RM, my quads fatigue, not my shoulder. Below are two ways to practice speed out of the rack position, as well as leg/hip power production:

  • Hold kettlebell or barbell in the rack for 5 counts, then explosively press, singles @ 80%
  • Speed presses with 2 count pause in rack AMRAP @ 60%

I find an explosive clean and press technique can leave the bottom range of the press remarkably weak if slowed down. This is not to be overlooked and can be acknowledged by “revisiting baseline” and grabbing those lighter weights. Here are a few creative ways to pick up strength awareness through that first half of the press:

  • Bottoms up clean and press
  • 1 ½ reps: press halfway up, pause 2 counts, lower to rack; then press all the way up and lower to rack—this is one rep. Move SLOWLY through all portions of the rep.

I incorporate barbell presses to assist with A-C. While it is not an exact match to kettlebell pressing, the pattern is similar. In this way, you can train your body’s leg power, press initiation and lockout under a much heavier load than possible with double bells.

The final piece of the puzzle for both presses and pulls, is to consistently work on shoulder stability and mobility. This includes all the same stretches from the pull up section and adds the following:

  • Bottoms up cleans, racked carry, overhead walk, press, squat, pistol (single and double kettlebells)
  • Arm bar
  • Broken arm bar
  • Get-ups + shoulder circles
  • Windmill
  • Farmer’s walks
  • Racked carry

Once again, so many of the mobility drills, desensitizing techniques, and understanding of body linkage are attributed to the wisdom shared in an RKC-II Workshop.

The final lift, the pistol, was not as difficult to attain but absolutely needed work. I mostly needed to increase strength in the bottom range, as this is where I teetered most. The Beast Tamer book offered useful guidance in this area, too. A few of my favorite tricks:

  • Descend into pistol, hold for 10 seconds; replace the other foot to ground and stand from a close stance squat. Advance to stand up from 1 leg after the 10 sec hold.
  • 1 ½ reps: lower to bottom of pistol, rise halfway, lower back down, stand all the way up. This = 1 rep. Alternate sides at first, and work up to 3-5 consecutive reps each leg.
  • Bottom range reps: lower to bottom of pistol, rise several inches; lower again to repeat for reps.

I had achieved the 24kg pistol but was not rock solid. Back to baseline. Just like pull ups, I set a goal to achieve 10 unbroken bodyweight pistols before returning to weight. I purchased Paul Wade’s Convict Conditioning, which was equally entertaining as it was intelligent. Even though I felt skilled in this movement, I didn’t want to skip any steps only to reveal a weak point under heavier load. The book lays out a tier system of movements that must be completed to advance into the next tier. I followed his pistol progressions from beginning to end and the so-called regression work proved unexpectedly challenging!

Once I added weight back to the pistol, I followed a 5-3-1 or 3-2-1 sequence with at the finish of deadlift days. One other day/week, I continued to do a few high rep sets at bodyweight and the bottom range drills listed above.

For many people the difficulty of the movement begins with the mobility. Luckily, I have had a regular yoga practice for over 15 years and did not need to condition this area.   If you cannot easily squat below parallel with your feet touching together, focus on mobilizing. You don’t have to do yoga, but you will need to put calculated effort into improving hip and ankle mobility. It is also important to get comfortable with spinal flexion (practice plough pose + related variations in the side bar). On the other side of that flexion is creating and maintaining a strong, hollow ab position. The RKC II dissects how to conjure maximum cores strength and introduces many unique variations. I strongly recommend attending the Level II; but if you haven’t made it yet, Keira Newton delivers a helpful hollow plank series in this 5-Part Video Blog.

When accomplishing a long sought after goal, in this case about 2 ½ years, I almost forget where I started–the programming, the “un-programming”, the books, advice, practice, injuries, frustration, and oh yeah, life itself getting in the way. My journey was not a straight and narrow path, but I can say one thing for sure; if it was, I would have learned nothing. I ran into many walls and gained insight from each. As lengthy as this article has become, I believe the most valuable part of my achieving the Iron Maiden is the ability to share the inner intricacies of my experience.

So how did my story end? After all of this preparation, I unmistakably veered toward failure and had to conquer one last lesson…

I am staring down defeat, once again. What is it about this moment? It keeps showing up as if I have a choice. There it is…don’t I have a choice? I have just failed my first pull up attempt in the Iron Maiden Challenge and panic is rising in my chest. I gave it EVERYTHING I have and barely got my nose to the bar. I can’t begin to explain how shocked I felt in this moment. I had effectively turned the 24kg pull-up from my most challenging adversary into my most certain lift.   The press, on the other hand, had been tormenting me with a come-and-go as it pleases reliability along with a very fresh trap strain. Yet, somehow, I easily speared that kettlebell overhead several minutes earlier. I was literally in a state of confusion. How did I not do that?   I hear an echo of John Du Cane’s voice, “You have two more attempts. Take as much time as you need.” Half-dazed, I nod and crouch back to the ground, as if to clean my wounds.

Hovering above that bell, the faces, voices, and objects began to fade from the room. In one mosaic flash, 5 years of national figure competitions flooded my mind…predicted to win by national judges, websites, even myself…and year after year, defeat. I could hear my coach’s pep talk, telling me I gave it everything I could; it just wasn’t “my time”; it wasn’t “my turn to be on top”.   Maybe it’s like that today…it’s just not “my time”. It’s OK if I don’t have it today. I can do it at the next RKC… There I was again, feeding it, accepting the failure. Was it really that easy to let it all go?  Those once comforting words of the past were now freezing me in time. In all those years of competing, maybe it was me who wasn’t ready to win; maybe it was me who kept myself flying below the radar; and today, maybe it was me who kept my chin below that pull up bar. The moment staring me down wasn’t defeat. It was opportunity. This pull up will decide whether or not I become an Iron Maiden today. You only have one attempt….that’s all you have, that’s all you need. Pull it together NOW…an unwavering confidence rushed over me… It IS my time to shine. And as it turned out, I did have a choice that day.

The whole world is you vs. you. When I look back to where it all began, standing in the park, shaking my head ‘no’ to Rob’s seemingly absurd suggestion, I knew I was losing. That frustration powerfully transmuted into passion and determination. I have much gratitude for Rob stoking this fire and Dragon Door presenting this intensely rewarding challenge. Ultimately, I want to relay that anything is possible. Cliché? Maybe. I’ll say it again. ANYTHING you DESIRE and CHOOSE to stay COMMITTED to achieving, no matter what the obstacle, is possible. The seed was planted when I first heard about the Iron Maiden. Though, it took days to feel, weeks to want, months to believe, and years to harvest. For me, the road to the Iron Maiden is about so much more than building strength or staying devoted to a goal. Whether you are going after a max lift or simply looking for some motivation, remember that you are infinitely more powerful than your strongest moment and called to learn from your weakest.   I hope something written here might resonate with you and reflect your own inner strength.  Like any worthwhile journey, when you stand up to the struggle, you stand in your truth to embrace everything you can become. And somewhere in this space, you learn that you are becoming everything you always were…a star in your own story. I walked a long road of competitive endeavors in order to finally “see” that greatness is a part of me. It is a part of all of us. Now go out there and shine brightly in the world!


***

Katie Petersen is an RKC Team Leader, PCC Instructor, and also holds nutrition/training certifications with Poliquin, Precision Nutrition, and NASM.  She owns Active Evolution, a successful training and nutrition counseling business in Chicago, working with both online and local clients.  Katie also has a niche clientele of fitness competitors (bodybuilding, bikini, figure), as she has several years experience as an nationally ranked NPC Figure Athlete.  For online or personal training, visit her website, www.activeevolution.net or email Katie directly at petersenkatie1@gmail.com. Subscribe to her YouTube channels, Katie Petersen RKC and We Train Chicago to follow her training videos and tips.

Filed Under: Kettlebell Training, Tutorial Tagged With: Beast Tamer, Beast Tamer Challenge, How to train for the Iron Maiden Challenge, Iron Maiden Challenge, Katie Petersen, Katie Petersen RKC Team Leader, kettlebell training, kettlebells, RKC, RKC-II, training guide, training program, tutorial

Is Your Training Making You Better?

January 4, 2017 By Paul Britt, DC 6 Comments

Paul Britt's clients training Pullups

Why are you training? What is your goal? Is your goal to lose weight? Be stronger? Play better? Is your training working? If not, then you must re-evaluate your training and see what is keeping you from reaching your goal. Are you injured? Are you tired or sick? If so how did it occur and how do you get better? Why train in a way that does not make a positive difference in your life? You are exercising for a reason—it could be improved performance, fat loss, or even stress relief.

Do not just exercise on autopilot; keep the goal the goal. Keep the goal in the forefront of your thoughts. You must have your goals and visions in your daily operating system so that they are always present. This will allow you to adjust your plan, because when you are doing something that does not fit the goal, you know it. If what you are doing doesn’t make you better and move towards your goal, there is no real point in doing it. If you know what you are striving for, everything should lead you to that goal.

You need to look at your plan, evaluate where you are and ask yourself if it is working. If not, don’t despair, just look for alternatives in diet and exercise. No plan, pill or tool will be the magic answer. Try something, evaluate it and repeat until you find what puts you a step closer to your goals. Remember, “better is better.” A tiny improvement is still an improvement and it is a start.

You don’t always have to leave a “sweat angel”!

Do Not Train in Pain

Training in pain is just a faster way to the “Dark Side”! The only outcome you can expect when you train in pain is injury, compensation, and a failure to reach your goals. Unless you are peaking for a specific purpose—like an Olympic gold medal—then don’t go here. What benefit will be gained from injury? If there is pain, stay away from what causes it, and see your doctor. Stop training until released by your medical professional.

Have Fun!

I push myself hard all the time, but I always have fun with it. If you are not happy when training, you are missing all the benefits. If you are not happy or having fun, then exercise becomes “just another thing I have to do”. It should be a positive experience that you look forward to. I try to make my training fun and enjoyable. If it is something you dread, you will not get any real benefits from your time and effort. It should be time away from work and stress. Live in the moment and do not think about the stress from the day/life for an hour.

Take a Break

It is okay to take a break. You can push really hard for 4-5 weeks before your body says “enough”. Put your plan together so that you have time to relax and recover. You need to schedule down time every 3-4 weeks in your training cycle or you will break. The down time can be just a change in activity, hiking instead of running, playing at the park instead of being in a gym. Change is good and speeds up recovery. It also takes the drudgery out of training.

Breaks are good for you, even if you do not think they will help you reach your goals. You cannot drive a Ferrari at 190mph all day, every day without some wear and tear. You have to pull into the pit and take a few minutes/days to recover before hitting the road again.

Training Does Not Have to be Your Life

Exercise should be something that makes you feel better, move better, and get stronger. It should not be something you dread, or that causes pain or injury. If it does any of those things, evaluate what you are doing and make sure it is in alignment with your goals. Spend the minimum amount of time needed to make the changes to reach your goals.

Your Life Needs to be Your Life

Exercise should make you more useful and capable so that you can be there for your family, friends, and loved ones. Be fit to enjoy your life for a long time with your loved ones.

Pau lBritt Group Training Squats


Now that we have discussed a few thoughts on training, where do you go from here? Everyone is at a different place in their life, training and recovery, but the points still work and they must be adapted for the individual. For example, I am now in Chiropractic School full time. My typical day starts at 4:50am and ends at 10:30 or 11pm. I am at school from 7-5PM, drive home for up to 90 minutes, and when I get there I have two teenagers and a child under one year old to deal with—along with my own training, meals, studying, and I have to try and find a few minutes to tell my wife that I love her. There are days when I might get only three hours of sleep a night for several nights in a row. If I did not follow the rules, I would end up burned out even more, and injured due to training. I have to train as it is my stress relief and helps me maintain my fitness level so I can teach at certification workshops.

Considering all of that, what do I do? I base my life on Strong Medicine. It is the guidebook for living a healthy and hopefully long life. I have fully bought into the concept of the Stress Cup. When it is full, or close to full, I know I need to back off somewhere—and that usually means backing off of hard training. Strong Medicine is part of the blueprint for my future practice. Buy it, read it, and implement the plans for eating, sleeping, recovery and stress management.

How the Strong Medicine Plan Works in My Life:

I eat as clean as possible every day by eating lots of vegetables and some protein at every meal. I try to keep a good source of energy, antioxidants and building blocks in my system to help with recovery. I am also very particular in supplementation with fish oils, antioxidants and other similar vitamins and minerals. I check my grip strength in the morning and before I train to determine how hard I can train that day. Here’s an article I wrote about grip strength and training on the Strong Medicine Blog.

I plan simple workouts that I can easily scale to the appropriate level for the day. I like to get some training in every day. I try to make sure at the very least, I do 100 kettlebell swings.

The following plan can have anywhere from 100-200 or so swings. The number of swings will depends on your sleep, time to train, and overall Stress Cup level.

Paul Britt Training Justine with 32kg
The kettlebell you use is up to you, Justine is swinging a 32kg kettlebell.

Monday

Swing/Squat.

10 swings followed immediately by 1 Squat, 10 Swings/2 squats, 10 Swings/3 squats, 10 swings/4 squats, 10 swings/5 squats. I will start the next series at 5 squats and go to 1 for my base of 100 swings. If it is a heavier day, I will go back up the ladder and/or back down for 200 swings. This can be body weight or Goblet Squats with weight.

Tuesday

Swing/Pushup

I follow the same plan as the Swing/Squat

Wednesday

Swing/Pullup

Hmm, there is a pattern here…see above.

Thursday and Friday

I start with Swing/Squat and Friday would be the Swing/Pushup. The following Monday, I would start with the Swing/Pullup.

I like bodyweight work but this could be done with any combination of exercises. You could do presses, double kettlebell front squats, kettlebell rows etc. whatever you need to add to your session. I tend to keep rest to a minimum. I find that it is easy to hit almost 90% of heart rate max doing the exercises as a superset, then it takes about 30 seconds for my heart rate to drop to about 70%, when I can perform another set. This is basically the Burst Cardio idea from Strong Medicine. I use this approach to keep training while staying strong and healthy.


***

Senior RKC Paul Britt has been an RKC kettlebell instructor since 2006. Paul trains people at workshops and privately. Paul is currently attending Parker University working on his Doctor of Chiropractic degree Paul has served as an assistant instructor at many RKC and HKC Courses, is a Certified Kettlebell Functional Movement Specialist (CK-FMS) and works with some of the top Chiropractors in North Texas. Please visit his website for more information or to contact him

Filed Under: Kettlebell Training, Motivation, Workout of the Week Tagged With: how to scale workouts, Paul Britt, Senior RKC Paul Britt, Strong Medicine, time management, training, workouts

Try This Solo Version of a Classic Kettlebell Corrective Partner Drill

December 28, 2016 By Shari Wagner 5 Comments

Shari Wagner RKC Team Leader Swing Setup

I was working with a personal training client who was having trouble packing his shoulder in the one-arm kettlebell swing, particularly in the hike pass position. He had no problems with this in his two-hand swing, it only happened when he switched to the one-arm swing. So, I used the RKC towel pull drill with him and voila! It taught him the feeling of properly loading in the hike position and it improved his shoulder packing when he went back to swings.

This client trains with me once a week to learn proper kettlebell technique, and the rest of the time he trains on his own at home. How could he duplicate this drill on his own when he didn’t have a training partner or qualified instructor to train with him at home? We needed a solution so that he could practice the drill prior to each set of one-arm swings, at least until he was able to groove the pattern in his swings.

The deadlift drag is a wonderful exercise and I use it quite often. In this drill, you set up as if to swing, but instead, you drag the kettlebell on the floor very slowly, keeping yourself in the hike position and loaded up through the posterior chain the whole time. However, I sometimes find that the deadlift drag doesn’t have the same carry-over into the swing itself. Not every drill will work for every person to correct the pattern they need to correct. In this case I wanted my client to be able to really load up in the same way we do with the towel pull drill since it really worked to help his one-arm swing. I wanted him to have his arm connected to his body as if the kettlebell were behind him like it is in the hike position of the swing.

I came up with a similar drill using a resistance band. I used a band that was about 1/2” wide, that provides about 15-30 lbs of resistance. Keep in mind that you’re using a double thickness of the band when you set it up as I have in the video below. The loading in this drill happens from the front as you are pulling the band behind you, rather than loading from the back in the towel pull drill. But, the drill still worked really well for my client. He got his shoulder packed in the hike position and felt the loading and support that comes from the shoulder position in the in the swing.

We did one set like you’ll see in the video below and it had the same positive effect on his one-arm swing technique as when we did the towel pull drill together at the gym. The best part is that he can now do the resistance band drill when he trains by himself at home. I prescribed for him to do about five pulls of the band, followed by one 10-second static hold before every set of one-arm swings.

https://youtu.be/9Ac8T1bpdpo

I did experiment with this same idea, and we turned around to try and load up from the back, in order to really try and emulate the towel pull. I personally didn’t like this as much as pulling from the front, because I felt like the resistance of the band wanted to pull me backwards and without a partner to brace against in the pull, I didn’t feel like I was in control of the movement as much. I also didn’t feel like I could engage the lats and the hips in the same way or to the same extent.

I invite you to try this drill both ways and let me know what you think in the comments section below!

Here’s a quick workout you can do using this resistance band drill, the deadlift drag, and the all-important single rep swing. Hopefully the combination will really help your one-arm swings.

  • 5 1-arm deadlift drags, left side
  • 5 single rep swings, left side
  • 5 band pulls, left side with :10 hold on last rep
  • 10 1-arm swings, left side
  • Repeat on the right

Repeat for 5-10 sets, resting as needed between sets

****

RKC Team Leader Shari Wagner, RKC-II, PCC, CK-FMS owns Iron Clad Fitness in Denver, Colorado. She can be contacted through her website at IronCladFit.com, email: info@ironcladfit.com or by phone 720-900-4766. Follow her on Facebook: facebook.com/IronCladFitness and Twitter: twitter.com/IronCladFitness.

Filed Under: Coaching, Kettlebell Training, Tutorial Tagged With: how-to, kettlebell drills, kettlebell training, kettlebell tutorial, RKC, Shari Wagner, video

  • « Go to Previous Page
  • Page 1
  • Interim pages omitted …
  • Page 5
  • Page 6
  • Page 7
  • Page 8
  • Page 9
  • Interim pages omitted …
  • Page 16
  • Go to Next Page »

Primary Sidebar

Featured Products

previous arrow
BOOK-RKCBookofSnC
HardStyleKettlebellChallegeDanJohn700
BookCoverMasterTheKettlebell1
RKCiconKettlebell512
KettlebellGoddessdv040
next arrow

Recent Posts

  • RKC Big Six Workout
  • The Kettlebell Swing & Low Back Pain
  • Key Kettlebell Exercises To Help You Create Better Balance
  • How to Most Effectively Use Kettlebells to Meet Your New Year Goals
  • 1 Exercise That Checks All The Boxes
FOLLOW US ON TWITTER!

Archives

Copyright © 2025

Dragon Door Publications / The author(s) and publisher of this material are not responsible in any manner whatsoever for any injury that may occur through following the instructions or opinions contained in this material. The activities, physical and otherwise, described herein for informational purposes only, may be too strenuous or dangerous for some people, and the reader(s) should consult a physician before engaging in them.