• Skip to main content
  • Skip to primary sidebar
  • Home
  • Contributors
    • Matt Beecroft, Master RKC
    • Martijn Bos, Master RKC
    • Andrea Du Cane, Master RKC
    • Angelo Gala, Master RKC
    • Chris Holder, Master RKC
    • Steve Holiner, Master RKC
    • Dan John, Master RKC
    • Mike Krivka, Master RKC
    • Thomas Phillips, Master RKC
    • Robert Rimoczi, Master RKC
    • Phil Ross, Master RKC
    • Max Shank, Master RKC
  • Workshops
    • HKC Workshops
    • RKC Workshops
    • RKC-II Workshops
  • Find an RKC Instructor
  • Resources
    • Articles
    • Forums
    • Kettlebells
    • Products
  • Blogs
    • PCC Blog
    • Strong Medicine Blog
  • Archives

RKC School of Strength

Official blog of the RKC

Paul Britt

Kettlebells in the Clinic

October 25, 2022 By Paul Britt, DC 1 Comment

Paul Britt demonstrates a kettlebell get-up

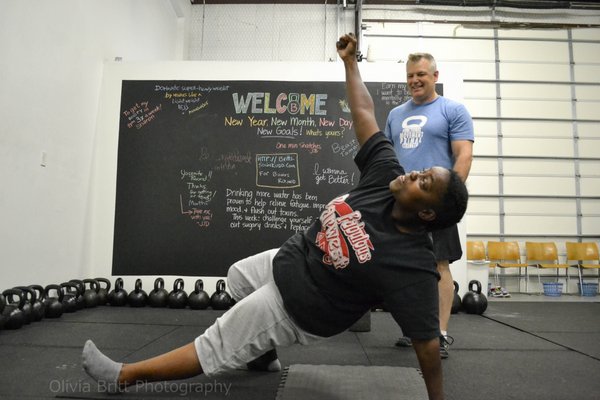
If it wasn’t for kettlebells, I would not be a chiropractor today. I started out with the RKC in 2006 and attended the CK-FMS in 2010. The CK-FMS was the movement program that was based off of the FMS and was taught by Gray Cook and Brett Jones of FMS. It introduced me to movement screening and how to help clients move better, feel better and live better pain free.

amputee athlete performing a get-upI ran my gym based on what the FMS taught. We used the Functional Movement Screen as part of our onboarding program. I loved the results we were getting in members that could not/did not move as well as they should. It started my journey from Law Enforcement/Gym Owner to attending Chiro school. I knew that there was more that I could do to help people with the right credentials, and being a Chiropractor was something that I knew would allow me to help more people achieve even better outcomes.

The ability to look at and screen movement helped tremendously in Chiro school. It allowed me to look at everyone through a movement lens versus just looking at the injury that brought them in. I attended the Selective Functional Movement Assessment certification while in school. That is the clinical variation of the Functional Movement Screen. It allowed me to narrow in on the root cause of the patient’s dysfunction. The RKC/FMS gave me a leg up in the Rehab and improving outcomes.

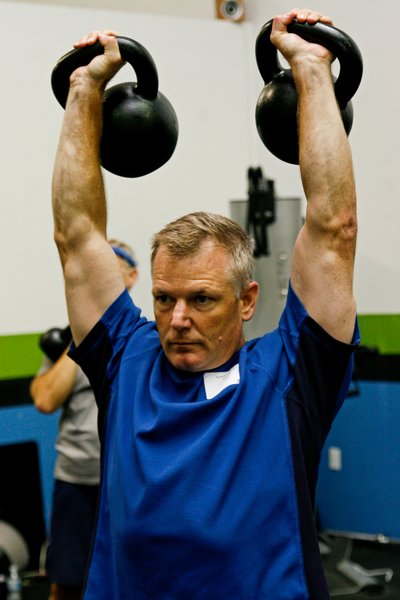
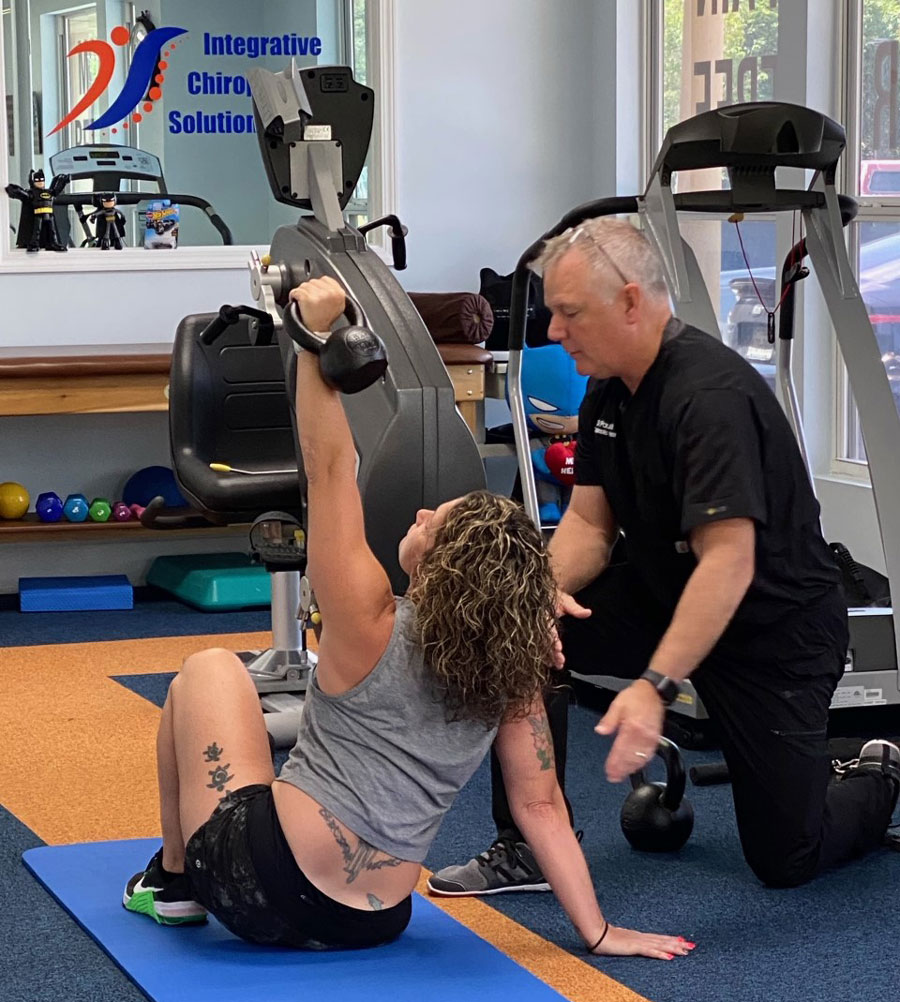
Fast forward a few years and I am still helping people with better movement and decreased pain with kettlebells. Kettlebells are a significant part of our rehab program. They take up little space and can be used by everyone. The allow us to engage our patients in their rehab due to the challenge and the fun of using the kettlebell. Everyone that walks in wants to try and pick up the 106lb…

We use the skills taught at the Hardstyle Kettlebell Certification (HKC) as our base for rehabilitation and strengthening. You will often hear that the swing, Get Up and squat pretty much fix what ails you. Guess what? It is true. We find that if our patients have those three exercises down, their activities of daily living as well as any extracurricular activity can be performed with little to no dysfunction. Can we fix everything? No, but we can help them improve their lives and make them more injury resistant.

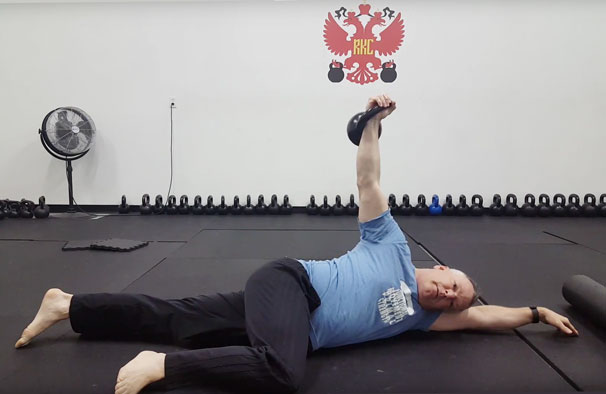
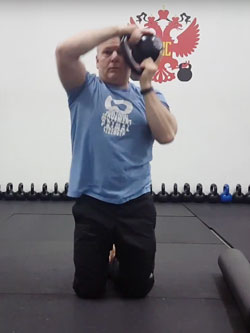
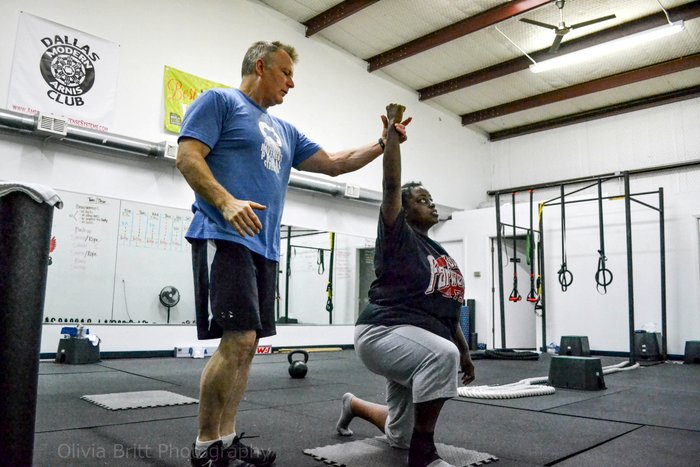
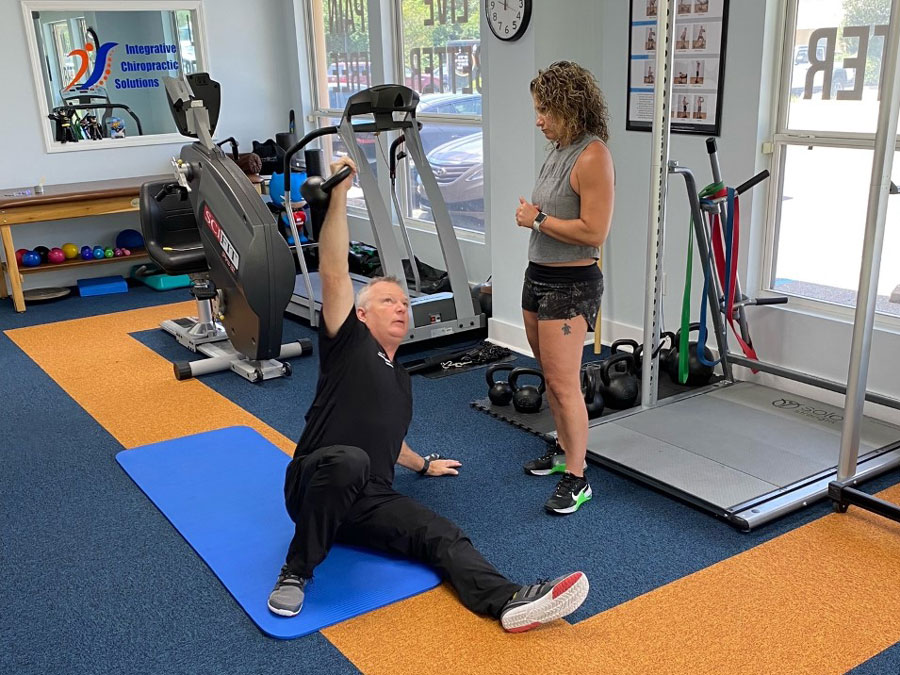
One of our patients, a CrossFit competitor, had to undergo shoulder surgery for a tear. Once we were able to load and stress the shoulder, we started out with the unweighted get up. We started out with rolling to the press. This allowed us to help connect her core to the rest of her body core after six weeks of being sedentary. We performed the movement of rolling to the press without weight. She would lay on her side in the fetal position, roll to supine and press from the floor.

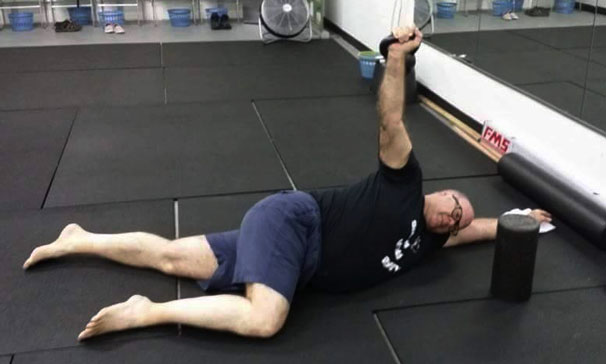
Once she owned the movement, we move to shoulder packing. We use the supine press position and showed her how to pack the shoulder. We accomplished this by lightly pushing and pulling the arm up and down int the press position. This allowed her to feel the movement and perceive what it should feel like when doing correctly. We also showed her to rotate her fist in the press position for movement in the joint. This was for getting fluid moving as well as allowing the body to feel what the shoulder should be doing when functioning correctly.

Paul Britt instructing an athlete performing a get-up

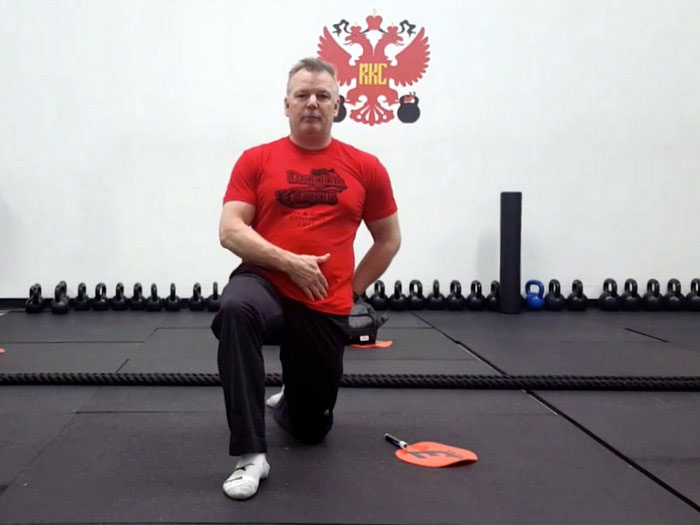
We like to work the standing to half kneeling after teaching the shoulder packing to get to half kneeling and help with stability. I find that this is often easier to teach than having patients work into the post and to the heist and windmill before they can safely move through the mid-range movements. There is no set number or time frame. We have had one patient work through the parts of the get up unloaded for 6 months before they were allowed to use any weight. Time practicing the get up is never wasted time.

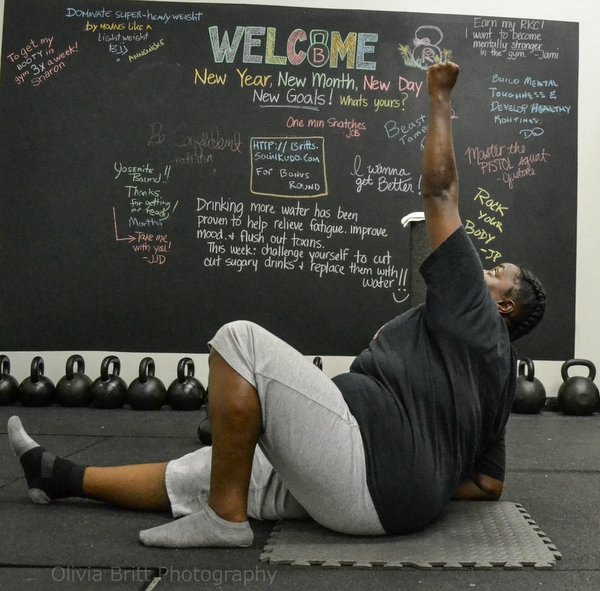
The athlete worked through the rest of the get up without weight and then started with low loads. We moved from 25% internal rotation and 50% abduction to 100% pain free in both ranges of motion in 12 weeks after surgery. She is back to competition weights without pain or dysfunction.

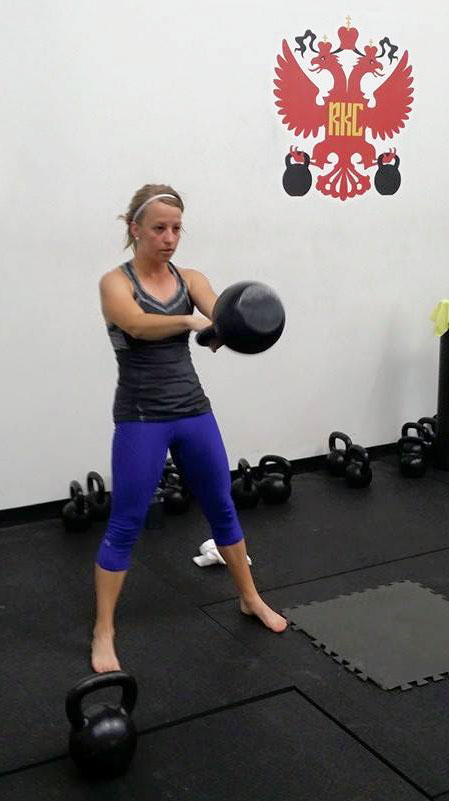
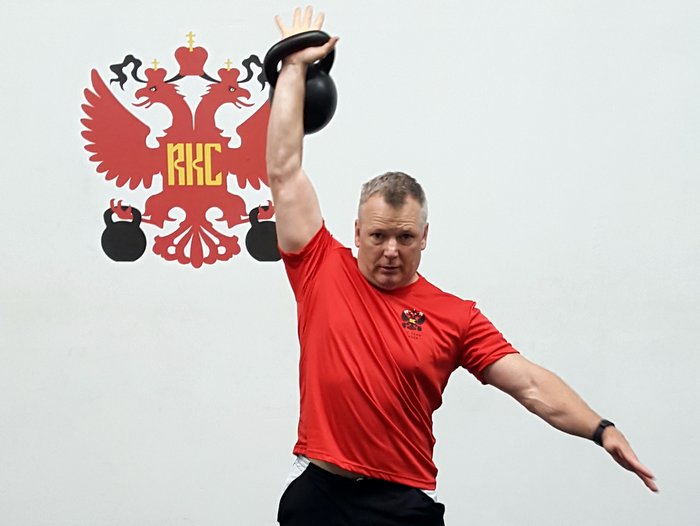
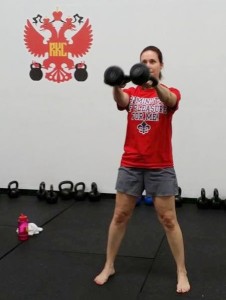
The swing can be used in the same manner. We find the parts of the swing that will benefit patients and work from there. The power of the teaching process and the techniques are often greater than the sum of the swing. For back pain, posterior chain strengthening has been shown to be superior to general exercise and walking programs for treating chronic low back pain. (1)

The swing is a great tool for working with patients with issues in the back. For back pain we start with the basics, breathing. We start with crocodile breathing as taught in the HKC and RKC. A large problem that we find with low back pain and other injuries are breathing dysfunctions. A large portion of our patient base breathe in the upper chest, using traps and accessory muscles to breathe versus the diaphragm. Breathing has been shown to help inhibit the paraspinal muscles and help with spasms. Proper breathing patterns help with balance, pain and the ability to access full strength in a patient. (2)

Proper breathing is essential for being able to develop the ability to use tension and relaxation to get the most out of swings. What do we do, we work on teaching them how to breathe properly. Once they understand how to breathe, it becomes an alert system for us. If they lose the ability to breathe well during an exercise, we have either fatigued them or selected the wrong exercise to use.

The deadlift, the deadlift drag, and the pendulum swing are three of the swing teaching tools that we use a lot. “Deadlifts have been shown to improve low back pain as effectively as low load motor control drills.”(3) That basically says that if the patient is ready, deadlifts are at least as effective as bands, stick drills and similar movements that do not require loads.

Why not make them stronger if it is clinically available to the patient. There is a lot more buy in from the patient when they have that visceral response from lifting real weight and getting stronger each session.

Paul Britt instructing kettlebell deadlift and deadlift drag

The deadlift drag is a great tool for strengthening the posterior chain and connection it with movement. The set up is deadlift hinge with the bell in front. The kettlebell is moved along the ground in a drag utilizing the lats, rhomboids and other muscle of scapular control as well as erectors and glutes. It has helped us to improve scapular control and function in patients that have scapular dyskinesia.

I have personally used the pendulum swing in my own rehab journey. I suffered a disc injury several years ago that kept me from performing standard exercises. I was able to move into a hip hinge but could not move through the full deadlift pattern with weight. I found that the low position was pain free and I was able to swing a kettlebell in that position. I would get into the hip hinge at a position that did not hurt or worsen my symptoms and perform pendulum swings.

Our end goal with swings is to move through two handed to one-handed swings. Research has shown that this is a great way to help mitigate current back pain as well as help decrease future problems. The one hand swing engages the opposite side spinal erectors and same side external obliques leading to greater stabilization in the back and core.(4)

A specific end user for the Kettlebell Swing as a rehab tool is our Post ACL reconstruction patients.(5) The research has shown that kettlebell swings help decrease the risk of non-contact injuries from high risk to a lower risk profile after 6 weeks of training. We teach them the Get Up, before we allow them to swing. The Get Up is used as a strengthening and screening tool to ensure the patient can load the knee safely before transitioning to the swing. The improvements are due to posterior chain strengthening, the semitendinosus and hamstrings.

Paul Britt instructing the goblet squat at his clinic

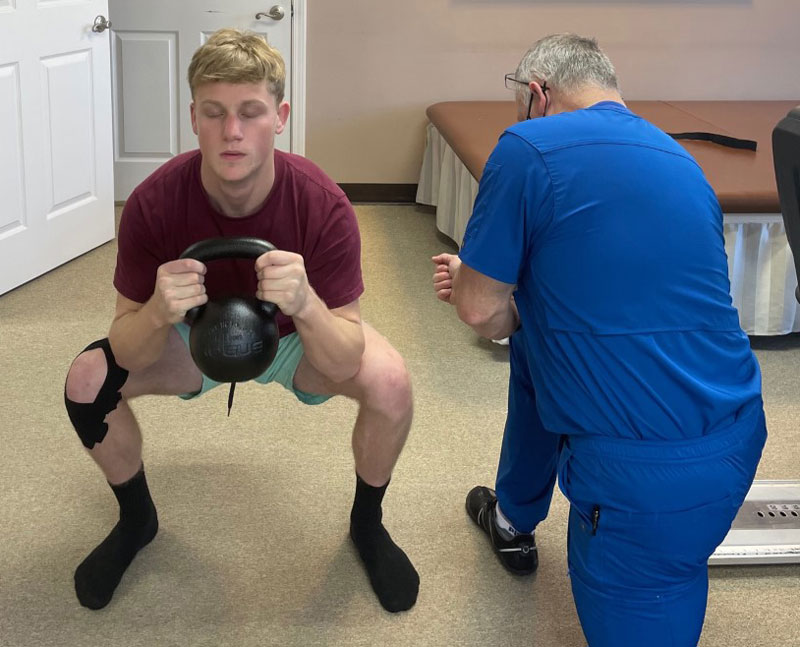
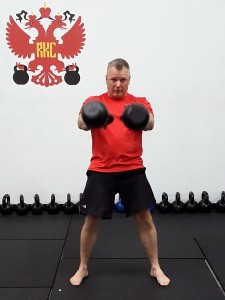
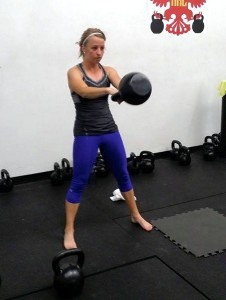
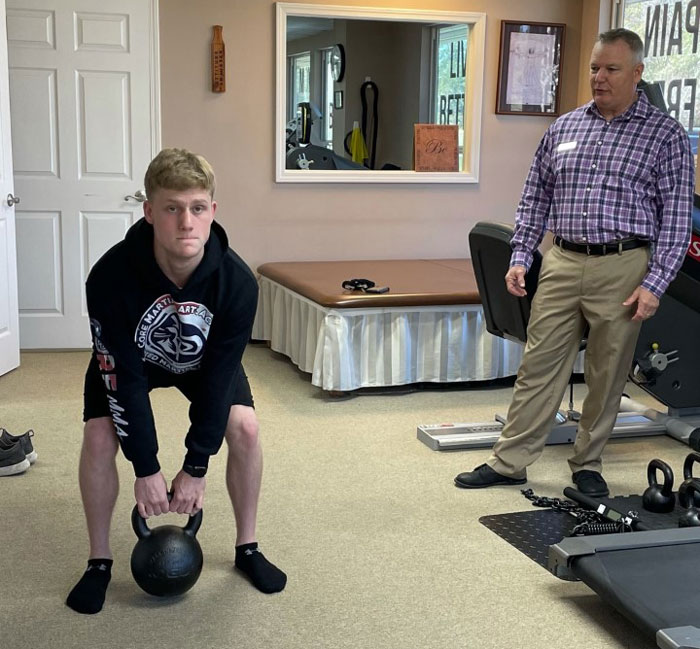
The squat as taught in the HKC/RKC are useful in several ways. We like the squat as the end game for connecting the dots of the rehab program. It requires mobility and stability to perform and control of the breathing and tension. We use Bottoms Up Squats to test for connectivity of the core with the movement pattern. If the Bottoms Up Squat cannot be performed, there is a leak in the pattern.

We want to make sure that our elderly patients can get off the floor and the toilet. If they can do that, we have increased their quality of life and survivability. We have found that patients that have gone through the program have reached those goals.

This is a quick look at how you can implement kettlebells in the clinic to help your patients move better, feel better, live better pain free. It does not have to be complicated to work.

***

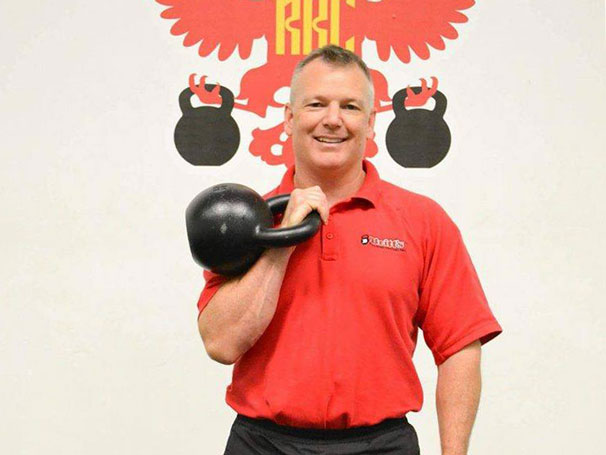
Paul Britt DC is a Certified Chiropractic Sports Physician and Senior RKC based in Gulf Breeze Florida. His practice, Integrative Chiropractic Solutions utilizes kettlebells as rehabilitations tools to help his patients achieve their goals.

  1. Tataryn N, Simas V, Catterall T, Furness J, Keogh JWL. Posterior-Chain Resistance Training Compared to General Exercise and Walking Programmes for the Treatment of Chronic Low Back Pain in the General Population: A Systematic Review and Meta-Analysis. Sports Med Open. 2021 Mar 8;7(1):17. doi: 10.1186/s40798-021-00306-w. PMID: 33683497; PMCID: PMC7940464.
  2. Stephens RJ, Haas M, Moore WL 3rd, Emmil JR, Sipress JA, Williams A. Effects of Diaphragmatic Breathing Patterns on Balance: A Preliminary Clinical Trial. J Manipulative Physiol Ther. 2017 Mar-Apr;40(3):169-175. doi: 10.1016/j.jmpt.2017.01.005. Epub 2017 Mar 1. PMID: 28259495.
  3. Aasa B, Berglund L, Michaelson P, Aasa U. Individualized low-load motor control exercises and education versus a high-load lifting exercise and education to improve activity, pain intensity, and physical performance in patients with low back pain: a randomized controlled trial. J Orthop Sports Phys Ther. 2015 Feb;45(2):77-85, B1-4. doi: 10.2519/jospt.2015.5021. PMID: 25641309.
  4. Andersen V, Fimland MS, Gunnarskog A, Jungård GA, Slåttland RA, Vraalsen ØF, Saeterbakken AH. Core Muscle Activation in One-Armed and Two-Armed Kettlebell Swing. J Strength Cond Res. 2016 May;30(5):1196-204. doi: 10.1519/JSC.0000000000001240. PMID: 26473519.
  5. Zebis MK, Andersen CH, Bencke J, Ørntoft C, Linnebjerg C, Hölmich P, Thorborg K, Aagaard P, Andersen LL. Neuromuscular Coordination Deficit Persists 12 Months after ACL Reconstruction But Can Be Modulated by 6 Weeks of Kettlebell Training: A Case Study in Women’s Elite Soccer. Case Rep Orthop. 2017;2017:4269575. doi: 10.1155/2017/4269575. Epub 2017 Jan 18. PMID: 28197354; PMCID: PMC5286491.

Filed Under: Coaching, Kettlebell Training, Mobility and Flexibility Tagged With: chiropractor, corrective exercise, fms, Getup, hkc, kettlebell get-up, movement, Paul Britt, RKC, Turkish getup

Warm Up and Cool Down Flow

March 22, 2017 By Paul Britt, DC 10 Comments

Senior RKC Paul Britt

How do you warm up for training? Is there a flow and/or pattern to it? How about the cool down afterwards? I like to consider economy of movement in my warm-ups because it tends to speed up my prep and my cool down. I want the warm-up to systematically prepare me for the session ahead—and I have designed it to work on my mobility and stability issues. In our modern society, we all seem to have similar thoracic restrictions, core stability, active straight leg raise restriction, and toe touch difficulties.

I perform the warm-up in a circuit for one or two sets. Even though one set is typically enough, if I am not warmed up appropriately when I get to the end of the first set, I will add a second. I want to make sure that nothing is left out of my full-body warm-up. The same goes for the cool down—I want to make sure that I hit all my issues that need work. I use this particular flow because my issues are thoracic mobility restriction, ankle mobility. Since I am sitting a lot in class, those are the areas where I concentrate at the start and finish of my workout session.

I start my warm-up with a minute or two on the foam roller. If you have to spend a lot of time on your foam roller or if you’ve named it, get checked out by a professional of some type. I really do a quick run through with it to scan and work through any major trigger points. After the roller, it is time to start moving and warming up.

Perform the following in a circuit:

  • Tall kneeling halo x 10 each way with a light kettlebell
  • 1 RKC armbar on each side
  • Bretzel left and right
  • Pump stretch x 10
  • 1 Get-up on each side
  • 5 Prying goblet squats with same weight as the Halo

After one or two times through my warm-up circuit, I perform five kettlebell deadlifts. I stand up and reset on each lift to perfectly set the groove. In general with my warm-up, everything starts on the ground and moves upward. It is easy to transition from tall kneeling to lying to the deadlifts at the end. It tends to flow well for me.

My cool down follows the same progression, and also moves from the ground up:

  • Supine piriformis stretch, 10 seconds left and right
  • Bretzel left and right
  • Shin box stretch (video)
  • Heel sit stretch
  • Child pose
  • Frog stretch
  • RKC hip flexor stretch
  • Hip flexor stretch with a twist
  • Elongated hip flexor stretch
  • Standing hamstring stretch
  • Cossack stretch
  • Shoulder stretch left and right
  • Pull-up bar hang

Just like the warm-up, I like to move in a flow from the ground up. I did not specify any particular reps for the cool down, instead I typically use my breath to move through the stretches. I find that 3-5 diaphragmatic breaths will safely move me to the edge of my range of motion. I designed the warm-up and the cool down to flow from one position to the next with economy, this makes it faster than if I just did random stretches and warm-ups. Find out the issues you need to address and create a flow that allows you to move smoothly and quickly through the series.

If you are pinched for time, for a workout you could actually load the get-up and squat with a kettlebell and move through the circuit several times. You will benefit from the mobility work and build strength on an open frame. But only load those two exercises in the series. The kettlebell halo and RKC armbar are not strength exercises, they are movement prep and mobility/stability work, so a heavy load is not appropriate or safe.


***

Senior RKC Paul Britt has been an RKC kettlebell instructor since 2006. Paul trains people at workshops and privately. Paul is currently attending Parker University working on his Doctor of Chiropractic degree Paul has served as an assistant instructor at many RKC and HKC Courses, is a Certified Kettlebell Functional Movement Specialist (CK-FMS) and works with some of the top Chiropractors in North Texas. Please visit his website for more information or to contact him

Filed Under: Kettlebell Training, Mobility and Flexibility Tagged With: cooldown, flexibility, flow, mobility, movement prep, Paul Britt, RKC, warm-up

Is Your Training Making You Better?

January 4, 2017 By Paul Britt, DC 6 Comments

Paul Britt's clients training Pullups

Why are you training? What is your goal? Is your goal to lose weight? Be stronger? Play better? Is your training working? If not, then you must re-evaluate your training and see what is keeping you from reaching your goal. Are you injured? Are you tired or sick? If so how did it occur and how do you get better? Why train in a way that does not make a positive difference in your life? You are exercising for a reason—it could be improved performance, fat loss, or even stress relief.

Do not just exercise on autopilot; keep the goal the goal. Keep the goal in the forefront of your thoughts. You must have your goals and visions in your daily operating system so that they are always present. This will allow you to adjust your plan, because when you are doing something that does not fit the goal, you know it. If what you are doing doesn’t make you better and move towards your goal, there is no real point in doing it. If you know what you are striving for, everything should lead you to that goal.

You need to look at your plan, evaluate where you are and ask yourself if it is working. If not, don’t despair, just look for alternatives in diet and exercise. No plan, pill or tool will be the magic answer. Try something, evaluate it and repeat until you find what puts you a step closer to your goals. Remember, “better is better.” A tiny improvement is still an improvement and it is a start.

You don’t always have to leave a “sweat angel”!

Do Not Train in Pain

Training in pain is just a faster way to the “Dark Side”! The only outcome you can expect when you train in pain is injury, compensation, and a failure to reach your goals. Unless you are peaking for a specific purpose—like an Olympic gold medal—then don’t go here. What benefit will be gained from injury? If there is pain, stay away from what causes it, and see your doctor. Stop training until released by your medical professional.

Have Fun!

I push myself hard all the time, but I always have fun with it. If you are not happy when training, you are missing all the benefits. If you are not happy or having fun, then exercise becomes “just another thing I have to do”. It should be a positive experience that you look forward to. I try to make my training fun and enjoyable. If it is something you dread, you will not get any real benefits from your time and effort. It should be time away from work and stress. Live in the moment and do not think about the stress from the day/life for an hour.

Take a Break

It is okay to take a break. You can push really hard for 4-5 weeks before your body says “enough”. Put your plan together so that you have time to relax and recover. You need to schedule down time every 3-4 weeks in your training cycle or you will break. The down time can be just a change in activity, hiking instead of running, playing at the park instead of being in a gym. Change is good and speeds up recovery. It also takes the drudgery out of training.

Breaks are good for you, even if you do not think they will help you reach your goals. You cannot drive a Ferrari at 190mph all day, every day without some wear and tear. You have to pull into the pit and take a few minutes/days to recover before hitting the road again.

Training Does Not Have to be Your Life

Exercise should be something that makes you feel better, move better, and get stronger. It should not be something you dread, or that causes pain or injury. If it does any of those things, evaluate what you are doing and make sure it is in alignment with your goals. Spend the minimum amount of time needed to make the changes to reach your goals.

Your Life Needs to be Your Life

Exercise should make you more useful and capable so that you can be there for your family, friends, and loved ones. Be fit to enjoy your life for a long time with your loved ones.

Pau lBritt Group Training Squats


Now that we have discussed a few thoughts on training, where do you go from here? Everyone is at a different place in their life, training and recovery, but the points still work and they must be adapted for the individual. For example, I am now in Chiropractic School full time. My typical day starts at 4:50am and ends at 10:30 or 11pm. I am at school from 7-5PM, drive home for up to 90 minutes, and when I get there I have two teenagers and a child under one year old to deal with—along with my own training, meals, studying, and I have to try and find a few minutes to tell my wife that I love her. There are days when I might get only three hours of sleep a night for several nights in a row. If I did not follow the rules, I would end up burned out even more, and injured due to training. I have to train as it is my stress relief and helps me maintain my fitness level so I can teach at certification workshops.

Considering all of that, what do I do? I base my life on Strong Medicine. It is the guidebook for living a healthy and hopefully long life. I have fully bought into the concept of the Stress Cup. When it is full, or close to full, I know I need to back off somewhere—and that usually means backing off of hard training. Strong Medicine is part of the blueprint for my future practice. Buy it, read it, and implement the plans for eating, sleeping, recovery and stress management.

How the Strong Medicine Plan Works in My Life:

I eat as clean as possible every day by eating lots of vegetables and some protein at every meal. I try to keep a good source of energy, antioxidants and building blocks in my system to help with recovery. I am also very particular in supplementation with fish oils, antioxidants and other similar vitamins and minerals. I check my grip strength in the morning and before I train to determine how hard I can train that day. Here’s an article I wrote about grip strength and training on the Strong Medicine Blog.

I plan simple workouts that I can easily scale to the appropriate level for the day. I like to get some training in every day. I try to make sure at the very least, I do 100 kettlebell swings.

The following plan can have anywhere from 100-200 or so swings. The number of swings will depends on your sleep, time to train, and overall Stress Cup level.

Paul Britt Training Justine with 32kg
The kettlebell you use is up to you, Justine is swinging a 32kg kettlebell.

Monday

Swing/Squat.

10 swings followed immediately by 1 Squat, 10 Swings/2 squats, 10 Swings/3 squats, 10 swings/4 squats, 10 swings/5 squats. I will start the next series at 5 squats and go to 1 for my base of 100 swings. If it is a heavier day, I will go back up the ladder and/or back down for 200 swings. This can be body weight or Goblet Squats with weight.

Tuesday

Swing/Pushup

I follow the same plan as the Swing/Squat

Wednesday

Swing/Pullup

Hmm, there is a pattern here…see above.

Thursday and Friday

I start with Swing/Squat and Friday would be the Swing/Pushup. The following Monday, I would start with the Swing/Pullup.

I like bodyweight work but this could be done with any combination of exercises. You could do presses, double kettlebell front squats, kettlebell rows etc. whatever you need to add to your session. I tend to keep rest to a minimum. I find that it is easy to hit almost 90% of heart rate max doing the exercises as a superset, then it takes about 30 seconds for my heart rate to drop to about 70%, when I can perform another set. This is basically the Burst Cardio idea from Strong Medicine. I use this approach to keep training while staying strong and healthy.


***

Senior RKC Paul Britt has been an RKC kettlebell instructor since 2006. Paul trains people at workshops and privately. Paul is currently attending Parker University working on his Doctor of Chiropractic degree Paul has served as an assistant instructor at many RKC and HKC Courses, is a Certified Kettlebell Functional Movement Specialist (CK-FMS) and works with some of the top Chiropractors in North Texas. Please visit his website for more information or to contact him

Filed Under: Kettlebell Training, Motivation, Workout of the Week Tagged With: how to scale workouts, Paul Britt, Senior RKC Paul Britt, Strong Medicine, time management, training, workouts

Do You Even Stretch, Bro?

November 2, 2016 By Paul Britt, DC 6 Comments

Paul Britt Hip Flexor Stretches RKC Blog

We all tend to have a set routine that we use as a warmup for our training. There are articles galore on the RKC Blog about those, even some that I have written. What do you do after you are through with your training session? Many people throw in a few random stretches and are done. I like to have a plan and a process in most of my sessions.

This particular series is one that I use quite often. It helps deal with the position of daily living that the majority of people in modern society participate in: sitting. Our bodies tend to want to be lazy and expend as little energy as it can get away with. As we sit all day, the body figures out that it can contract and shorten the hip flexors as a way to save energy and be lazy. But, what do we need to be strong, prevent back injury and get the most out of our training? Healthy, flexible and fully functioning hip flexors. Your movement prep should be used to prep the trouble areas for movement. On top of that, kettlebells and Convict Conditioning training helps strengthen and correct the muscular imbalance/tightness that we are working to improve.

But how do you get our increased flexibility and lengthening to stick? In the video below is a series that I use after kettlebell training to maintain the improvements gained in the training session. It also helps prevent the muscles from returning to the contracted position.

The series is pretty basic and easy, but it stretches the hip flexors effectively. It starts with the basic RKC Hip Flexor stretch. The stretch is much shorter in movement than a typical hip stretch, as we are really focusing on the hip flexor and rectus femoris. Do not over extend this stretch, as you can damage the hip capsule and associated ligaments. The next stretch is similar except that you rotate the rear hip and rotate the front leg, but maintain the squared off posture in the upper body. This is a little different stretch in that you feel it through the obliques and possibly as far up as the anterior serratus muscles. The last stretch is the extended hip stretch. I utilize breath to sink deeper into it. At the end of the stretch, you let the back leg rest on the floor and pull yourself forward slightly as you feel the stretch on the back thigh.

As with any stretching, if there is pain, back off and do not push through it. Do not hurry, and use your breath to allow the stretch to happen easily.

***

Senior RKC Paul Britt has been an RKC kettlebell instructor since 2006. Paul trains people at workshops and privately. Paul is currently attending Parker University working on his Doctor of Chiropractic degree Paul has served as an assistant instructor at many RKC and HKC Courses, is a Certified Kettlebell Functional Movement Specialist (CK-FMS) and works with some of the top Chiropractors in North Texas. Please visit his website for more information or to contact him

Filed Under: Mobility and Flexibility, Tutorial Tagged With: flexibility, hip flexor stretch, hip flexor stretch video, Hip Stretch, kettlebells, Paul Britt, post-workout stretch, RKC hip flexor stretch, video

A Superset Series for Shoulder Mobility

June 29, 2016 By Paul Britt, DC 3 Comments

Paul Britt Kettlebell RKC Arm Bar

I’ve screened many people with the Functional Movement Screen. In conducting all of those screens, I’ve observed typical patterns, one of which tends to be shoulder mobility issues. While this post is not a treatment plan or medical advice, it is the quick shoulder mobility series I use after the initial individual work and correctives. It’s a great way to open up thoracic and shoulder mobility after a long day of sitting or just living in today’s world.

I have my students perform the series as a superset. They move from one exercise to the next without a break. I typically have them perform the series three times. It’s a great mobility set and general warm-up for the session ahead.

We start with the RKC armbar. Use an appropriate weight for the movement. What is appropriate? I typically use a 14kg for the series as it is a warm-up / mobility drill and not strength focused. There are several versions of the RKC armbar, but I tend to have my knee bent at 90 degrees to keep my lumbar spine out of the exercise. This also focuses the exercise on the mid-thoracic area instead of rolling your hips into the ground. I like to take 3-5 breaths per side before moving on to the next drill.

Paul Britt's 67-year-old client practices the RKC armbar
Paul Britt’s 67-year-old client practices the RKC armbar

The next stop is the bretzel stretch. I rest my head on a roller or another padded surface to keep my neck free of tension so I can focus on the movement. I breathe to move through the stretch: I breath in, tighten up, then relax and exhale as I move deeper into the stretch. I typically practice for 3-5 breaths per side to move through the stretch.

Paul Britt Bretzel

The last move in the set is the kettlebell halo. Since this is still a mobility exercise and not a strength move, I keep the weight at 14kg. I like the half kneeling position as it also helps to teach the body how to be stable. You can also do the halo standing if your knees prevent you from kneeling. While I did not demonstrate it in the video below, you can also use half kneeling to develop stability. I perform ten halos in one direction and ten in the other.

Paul Britt Kettlebell Halo

After a 30 second rest, I begin the series again.

If you have shoulder pain, do not perform any of these exercises without medical evaluation. I also highly recommend that you see an FMS practitioner for screening to address any and all movement issues.

***
Senior RKC Paul Britt has been an RKC kettlebell instructor since 2006. He trains clients at Britt’s Training Systems, his award-winning Hardstyle Kettlebell Training Facility in Rockwall, Texas. Paul has served as an assistant instructor at many RKC and HKC Courses, is a Certified Kettlebell Functional Movement Specialist (CK-FMS) and works with some of the top Chiropractors in North Texas. Please visit his website brittstrainingsystems.com for more information.

Filed Under: Kettlebell Training, Mobility and Flexibility, Tutorial Tagged With: bretzel, mobility training, Paul Britt, RKC, RKC arm bar, shoulder mobility, superset, video

How Are Your Ankles?

March 23, 2016 By Paul Britt, DC 16 Comments

Paul Britt Ankle Mobility

Have you played a lot of sports?

Do you wear high heels?

If so, how do you think your ankles are doing?

I have found that most of the people who I train tend to lack ankle mobility. This can be the first kink in the movement chain, and lead to further issues within the whole body. Ankle mobility issues can lead to knee, hip, and even shoulder mobility issues. These issues can also travel down that same path from shoulder to ankle. To find out what is ultimately causing the use, see your doctor and/or be screened by someone who is FMS certified. If you have pain, see your doctor first to be cleared.

The following is a quick ankle mobility series that we use in our gym. Everyone who trains with me has been screened with the FMS/SFMA and if they have pain have been evaluated by their doctor.

I don’t show it in the video below, but everything starts with diaphragmatic breathing. We will typically breathe for a couple minutes to transition from work/life stress so we can train mindfully.

We start out by foam rolling the shin area. We work the anterior tibialis, the band of muscle on the outside of the shin. We are using small strokes to locate areas that are tender or tight. We then will make several passes over that area.

Next, we roll out our calves. While it is possible to do that with the foam roller, I like The Stick for this. It allows for adjustable tension on the calf, and requires less force to work on any trigger points/tender areas. I tell my students to only use about 7-10lb of force while rolling. If The Stick looks like a horseshoe, you are using too much force.

Then, we move onto direct ankle work. There are two different versions on the video. The first version—the field expedient manner—requires no equipment. It is performed in a half-kneeling stance. If the right knee is up, take your right hand and cup the right heel. The left hand will cover the toes. The goal is to keep your heel planted as you progress through the motion. Utilizing diaphragmatic breathing, apply some pressure on your right knee with the right elbow as you move back and forth through the movement. I find the normal rep range for the best results is about 10 reps per side. Perform this on both sides.

The second version is very similar except that you are using a stick and moving the knee to the outside of it. You only go as far as you can while still keeping your heel flat on the ground.

The last movement is the heel sit. Sit back on your heels with a little bit of a backwards lean. Tighten your thighs and think about driving your shins into the ground, then relax. You should feel your feet flatten out as you perform 3-5 reps of this sequence.

This quick and easy series is beneficial for restoring mobility to your ankles and improving your kettlebell training.

***
Senior RKC Paul Britt has been an RKC kettlebell instructor since 2006. He trains clients at Britt’s Training Systems, his award-winning Hardstyle Kettlebell Training Facility in Rockwall, Texas. Paul has served as an assistant instructor at many RKC and HKC Courses, is a Certified Kettlebell Functional Movement Specialist (CK-FMS) and works with some of the top Chiroprators in North Texas. Please visit his website brittstrainingsystems.com for more information.

Filed Under: Mobility and Flexibility, Tutorial Tagged With: ankle mobility, mobility sequence, mobility training, mobility video, Paul Britt

Stop Fearing the 5 Minute Snatch Test

September 2, 2015 By Paul Britt, DC 15 Comments

Paul Britt Kettlebell Snatches

Nothing seems to scare potential RKC Instructors more than the 5 Minute Snatch Test (read complete testing requirements here), the gatekeeper of the system. In the long run, it’s only 5 minutes out of 23 hours of training—just 0.36% of the weekend. Sometimes I think the fear comes from a lack of confidence in their preparation, even though I have found that many people over-train for the snatch test. They snatch almost daily for tons of reps for long periods of time. In my opinion, a less is more approach works better. My last snatch test was my easiest one to date, and I only trained an average of 5 minutes a day for the test.

If you break down the kettlebell snatch, it’s a swing that ends up at the top position of the press. My plan was to work the swing and the press to train for the snatch test. It works if you look at the small space you must travel between the two exercises. The swing comes to chest height, and the press begins just a little bit higher. There’s only a small space missing when performing the snatch.

In my opinion, if you cannot handle heavy weight overhead, it’s not smart to ballistically propel the weight into position at the top of the snatch movement. So, my students work on heavy presses—snatch weight or heavier. Since this is RKC prep, this approach knocks out two birds at once.

When it comes to swings, I mix it up a little. I believe in having a great hip extension to launch the kettlebell and use the “float” as rest—with swings and as much as you can during the snatch test. That explosive hip extension also makes snatching easier as there is no pulling or fighting the bell on the way up. You can generate the float and guide the bell into position. That power can be developed with heavy double swings to chest height. This is typically the longest training session because we like to get a little more rest between sets when working on power and explosiveness. We will typically perform 10 reps on the minute, every minute, for 10 minutes. This usually gives us about 45 seconds of rest each set. If I feel like I’m losing some of the pop or if form deteriorates, we will occasionally just perform a set of swings and wait one minute.

On some days, we will see how many swings we can do in a 5 minute set of one-arm swings. A starting goal is to hit 100 swings. After a student can do 100 in five minutes, they will work up to as many as possible in that time frame. We have had a couple of students perform 160 swings in 5 minutes. On other training days, the students will grab a medium weight kettlebell for two-hand swings—somewhere between their one hand and two-and swing weights—and perform 100 two-hand swings in a 5 minute set. This helps bridge the gap between endurance and power.

We do the snatch test about every two weeks. And it is the only training for that day, they don’t get to work anything else other than recovery and mobility.

Typically the first time they hit 100 snatches, they knock it out in less than 4 minutes. They are typically spent and take a while to recover, but once they know that they can do it, we work on strategy and timing. If you finish the test in 3:30 minutes or 4:59 minutes, you still pass. I like to take my time and have something left at the end. We typically train for 10 left and 10 right on the minute for the test, but find that some students like the 20, 15, 10 and 5 rep scheme to pass. Once you can pass the test, the rep strategy comes down to personal preference and finding what works best for you.

The following training template focuses on the swing and snatch, I did not include the rest of the skills, but they can fit into the training plan if they’re thought of as a skill to practice. Use appropriate weights and make sure that the technique is good. There is no need to really push it for an extended length of time. Remember that this is only a small part of your RKC Workshop weekend. Do not dread it so much that you miss the awesomeness of the entire experience.

Monday

  • 5 Minutes of 2 hand swings
  • 5 x 5 pressing

Tuesday

  • 10×10 heavy double kettlebell swings
  • 5 x 5 double kettlebell squats

Thursday

  • 5 minutes of snatch weight one-arm kettlebell swings
  • 3 x 5 presses each side

Friday

  • Light to medium one-arm swings for 10×10 (30 seconds on / 30 seconds off works well)
  • 5 Get-ups left and right

Saturday

  • Snatch test

***
RKC Team Leader Paul Britt has been an RKC kettlebell instructor since 2006. He trains clients at Britt’s Training Systems, his award-winning Hardstyle Kettlebell Training Facility in Rockwall, Texas. Paul has served as an assistant instructor at many RKC and HKC Courses, is a Certified Kettlebell Functional Movement Specialist (CK-FMS) and works with some of the top Chiroprators in North Texas. Please visit his website brittstrainingsystems.com for more information.

Filed Under: Kettlebell Training, Tutorial Tagged With: how to pass the RKC, kettlebell snatches, passing the RKC, Paul Britt, RKC Prep, RKC snatch test, Snatch Test, training template, tutorial

Movement and Learning the Get-Up

June 3, 2015 By Paul Britt, DC 1 Comment

Paul Britt Coaching Get-Up

movement (ˈmuːvmənt)
noun
Movement –

  1. The act or an instance of moving; a change in place or position.
  2. A particular manner of moving.
  3. A series of actions and events taking place over a period of time and working to foster a principle or policy
  4. A tendency or trend
  5. An organized effort by supporters of a common goal.

Movement is the back bone of athleticism and life. But, as a society we do not move the way that we did in youth. We are tied to desks, vehicles, and entertainment that requires us to just sit and become one with a chair. I started this post with the definition of movement as a beginning reference point.

The first two parts (a & b) of the definition are easy to cover and understand. We all move, and each of us has a particular way of moving. The question is, are we moving well? Most people seem to live in a position of flexion. We sleep, eat, drive and watch television from a bent and hunched position. We slouch and sag all day long. Guess what? Our bodies will take the path of least resistance and will stay in the posture that we live in. We were not created to just sit around; we were created to move, run, jump and play.

The third and fourth parts (c & d) of the definition describe what we need to change. We need to change our daily actions and events so that we restore the movement potential we were given at birth. It is time to get off the couch, up from the desk and actually start moving. We need to change our daily habits to allow our bodies to re-learn the movements and positions that we were born to do. Our kids are becoming slugs, thanks in part to videogames and constant visual entertainment. I have seen some kids play twelve hours of PS3, all while slouched and bent into weird positions. What happened to being outside all day, every day until the street lights came on?

The positions that we’re in all day do not help us live a full life. They prevent us from being able to run, play catch, or to live everyday life in the most efficient manner possible. We are held back by being bent and twisted in a life of sitting down. Sitting has been shown to increase the risk of death. Research has shown that sitting is associated with a higher risk of death after controlling for factors including age, gender, smoking status, physical activity, education, body mass index, and living in an urban/city environment.

I know that everyone wants to be active with their friends and family, and stay pain free and mobile into old age. I know I do! I want to be a pain in the rear of my family as long as possible! I think the best way to do this is to be 90 and move so well that no one can catch me!

We should move as much as we possibly can. Better movement allows us to have fewer injuries, live longer and have more productive lives. It is the cornerstone for our overall health.

How Do We Improve Movement Quality?

I teach the get-up as an antidote to improper movement and posture. The get-up is one of the best ways to battle the less-than-ideal positions our bodies grow into from our daily life of texting, sitting, and while working at most jobs. I find that while the get-up works wonders as a transformational exercise, many clients have a hard time learning it.  Some even need to earn the right to perform it.

I teach the steps a little different than most trainers. I like to teach the get-up from the bottom to the middle, and from the top to bottom. This approach seems to work really well for grooving the correct patterns into the neurological system.

Get-Up Tall Sit

I start from the Pick Up to the Tall Sit position. In the first step, roll from your side to prone. This strengthens a primal rolling pattern. Rolling patterns are great tools for teaching the body how to engage the core and stabilize the body under load. Why is this important? It allows the body to develop its innate stability and to connect the lower body to the upper body for more strength.

The next step is the Tall Sit. It allows you to work on shoulder mobility and stability. It will reinforce the connection the core has with the upper body. This is often the step that most of my clients need if their mobility is compromised. I kept one client at this stage for nine months while we worked on improving his thoracic mobility and core strength. During that time, the heaviest weight he used for the training was 4kgs. If we had forced the issue, he would have been injured. He was 60 when he began, and last I checked, he was using a 20kg kettlebell for full get-ups at age 63.

I teach the Hip Lift only as part three of the movement. I find that the movement becomes a little harder for my clients to perform after that point. They cannot initially get the idea of the moving from the low sweep to half kneeling or they do not have the proprioception to make the transition.

The next step that is taught is from standing down to half-kneeling. This allows the student to develop leg strength and improve their stability. It has been my experience that many clients lack stability in the lunge position. By working from standing to half kneeling, then moving through the reverse lunge under control, you can train stability while detecting any asymmetries the student may have. This lets us correct the asymmetry before continuing and possibly causing an injury.

Coaching the Get Up

Once the student has practiced the get up from the floor to low hip lift, and standing to half kneeling, it is time to teach the entire get up. I start from the top and have the student work from the standing position to the half kneeling position. We add the low sweep to the tall sit at this time. They finish the get up to the prone position. Then, they stand back up (not doing a get-up, they simply return to a standing position) and repeat the sequence a few times on each side. The student will perform the get up from standing to prone before reversing the process and performing the get up from the pick up to standing.

I have found that this approach has helped my students learn the get up much faster. By working on these pieces as needed, their mobility and stability has improved even on their first day. This sequencing seems to be less threatening and neurologically taxing for my students, which also allows them to learn it faster.

If you look back at the definition of movement at the beginning, the get up fits it to a “T.”

***
RKC Team Leader Paul Britt has been an RKC kettlebell instructor since 2006. He trains clients at Britt’s Training Systems, his award-winning Hardstyle Kettlebell Training Facility in Rockwall, Texas. Paul has served as an assistant instructor at many RKC and HKC Courses, is a Certified Kettlebell Functional Movement Specialist (CK-FMS) and works with some of the top Chiroprators in North Texas. Please visit his website brittstrainingsystems.com for more information.

Filed Under: Coaching, Kettlebell Training Tagged With: Coaching, get up, kettlebell technique, kettlebell training, movement, Paul Britt, teaching get-up, training get-up

From Broken to Team Leader

December 17, 2014 By Paul Britt, DC 2 Comments

Paul Britt Double Press At RKC

I was broken in October 2012 at the RKC-II. It happened because I was stupid and I let my ego get the best of me at the certification. I thought that I only had a minor training injury prior to arriving in St. Paul for the workshop. I had been working on heavy double presses on a day that I was tired, but due to having to attend this particular cert, I stayed with my “program”. In the middle of my final set, I felt a sharp pain on my left hip and back. I dropped the kettlebells and decided to take a few days off. It was still bugging me a few days later, so I went to a chiropractor. The consensus was that it was just a minor strain and that I would be okay to attend the certification. So off I went, with some kineseo tape to hold me together for the three days ahead of me.

I knew the snatch test would probably put too much stress on my back, so decided that I would wait till the last day to take it. I was able to get through all of my Level 1 skills and the half-body weight press on day 1 without too much trouble. But, I had a few problems with stability that I should have paid more attention to during the skills test. I noticed that I struggled with my foot on the left side for the get-up as it did not want to stay locked down as I moved through the different parts of the movement.

I initially started out with lighter weights than normal, just to allow me to get through the certification. I had a past Master RKC give me a hard time about the weight and I let my ego override what little sense I had and I bumped my weights up. Sometime during the day, I felt a pop in my back on the left side. I did not really feel a lot of pain at the time, so I kept on training. I got back to the hotel in a lot of pain and barely slept. When I got up the next morning, I literally had to drag my leg as I walked down the hall to find some Advil. I ended up buying eight packages and using four to get to breakfast and the first half of the cert. I had to take the other four to get through the rest of the day. The last day was even worse, I thought about just quitting, and I should have. Unfortunately, I am a little stubborn and hate to give up. At that point, nobody really knew what was going to happen to the RKC after that weekend, so in my head, I had to get through the weekend and earn what could possibly be the last RKC-II certification. So I pushed through and passed all of the tests except for the Jerk and the Snatch test. I knew that I had 90 days to send the video into someone to pass those two skills. Turns out that was not going to happen for a long time.

I knew as soon as I got off the airplane in Dallas that I was not right. I struggled to get out of the seat, get to my bags and walk to my car. I ended up getting home and telling my wife that I had screwed up and was badly injured. The pain was pretty constant, so I took off from all training for what was supposed to just be November, but it ended up being a nine month break. I had to train my lead coach, Justine Deets RKC, to pass her HKC and RKC skills without being able to perform them myself. She was my gym replacement while I was recovering. I hosted an HKC in January, but was unable to assist because even picking up 12kgs caused me a lot of pain.

I was not healing, so after the first of the year, it was time to see someone about it. I ended up being referred to the top spine doctor in the area. At my appointment he told me that I had herniated discs at L4-L5 and L5-S1, both on the left side. He informed me that it was a lifelong injury and that my days of heavy lifting were over. To say that I was not thrilled by that was an understatement, so I decided to show him that I would be back to heavy lifting again. I went with a non-surgical solution for the problem and had a series of injections into my back that gave some minor relief. While the injections did not allow me to start lifting again, they did allow me regain some everyday quality of life. It was at that time I met Dr. Steve Horwitz, DC (and now RKC instructor). Dr. Horwitz worked with me on my nutrition and showed me how to ease the inflammation and pain with proper supplementation. Once my nutrition was dealt with, I was able to start healing and training again.

I had scheduled an HKC/Primal Move Certification Weekend with Master RKC, Andrea Du Cane and Senior RKC Jay Armstrong, but was not really doing much in the way of training yet. Andrea knew about the injury, so she would not let me do much during the HKC. I was the ‘go-fer.” While I was finally moving better, I was still in pain with bad movement patterns most of the time. I was able to participate in the Primal Move Certification that weekend and found that it was life changing for me. I was able to go through the workshop pain free. It was amazing how much better I felt just going through the workshop. The one day workshop was like a reset button. It was the first time I was pain free during my day to day activities of living. It improved my movement, eased my pain and that definitely helped my outlook. I had been in a depression since being injured because I was unable to train and burn through my day to day frustrations.

Andrea and Jay also showed me a few drills, including pendulum swings. I also started playing with Figure 8’s as they allowed me to strengthen my posterior chain without moving through painful patterns and positions. I also went to town with Primal Move and added in Convict Conditioning on a daily basis. I would train something every day, but never to failure or into pain. That was my training program for about 3 months and every day I felt better, moved better and got stronger. My focus was on healing and avoiding pain. I spent lots of time on the pullup bar, doing handstand pushups and Convict Conditioning skills on top of daily Primal Move work.

In October of 2013, I hosted an RKC with Andrea Du Cane, Master RKC leading the workshop. She asked to see my skills as an Assistant. I hadn’t trained with any weight over 16kgs in any of the RKC Basics prior to the certification weekend. This was one year after blowing out my back and I figured that it would be ugly. I had not even attempted any of the skills with my snatch test weight prior to this attempt. I was actually scared when I was asked to do it as I knew it was going to be a hot mess. I was pain free and nailed my skills test. After that it was as if I had been freed from a dark hole. Andrea had to keep me reined in all weekend because I was so excited that I was able to train again. She told Shane England RKC, that they had “unleashed a monster”, I could not stop playing around with the kettlebells. I participated in as many of the drills as the attendees did as I tried to fix the bad habits that got me into the position I was in.

After that weekend I continued to train and work on a lot of rehab style work to get back to a decent level of strength. In that time, I was able to host and assist at several HKC’s and RKC’s. I improved my skills and movement at every event I attended. Andrea let me assist at every event and she helped me improve my skills at every certification. If it had not been for her friendship and mentoring, I would not have been able to train or teach at the level I am at now. In July, I was promoted to RKC Team Leader, based in part on my ability to come back as a better instructor because of my injury. It forced me to re-evaluate everything that I was doing as an RKC. Prior to this, my skills were not as good as they should have been. The injury made me a better coach, and I became stronger because of it. I have to use the RKC Principles correctly to avoid being injured again.

Paul Britt Coaching

I was able to get to the point where I was able to press half bodyweight again and knew that I had to try RKC-II again. In October, I hosted the RKC-II at my gym. We had a great group of strong people in attendance. Like the last time, Day 1 was RKC I and our strength requirement test. I felt that it was the easiest and best RKC recert test that I have ever performed. My skills were dialed in and the snatch test was by far my best one that I have ever completed, it was almost easy (the snatch test is never really easy). I passed RKC-II after a long weekend of heavy lifting. I had gone into the weekend with some trepidation, because I had been hurt. It was probably harder for me mentally than physically due to my last attempt ending so badly. I was nervous going into the testing as I did not fully believe that I could get through it without being injured, but I only had a slight issue with my left side pistol stability.

RKC-II Group Photo in Texas

What did I learn from all of this? I learned a lot, though I wish I had learned it without being injured. I was once taught that experience came after you needed it. I hope that someone uses mine to avoid taking the same path. Do not terrain into pain. If you are injured and your life is not in danger, take a break and heal. Do not let your ego cause you to do stupid stuff. There is no certification that is worth permanent injury and we hold a lot of certifications during the year. That is why I am glad that I chose to stay with the RKC. Dragon Door and the RKC’s focus on being a great instructor and their focus on the safe building of your skills is why I am proud to be a part of this community.

What’s next? I am training for the Beast Tamer. The plan is to do it for my 48th birthday at the October 2015 RKC led by Master RKC Andrew Read. There is still room and time to sign up for that certification.

***
RKC Team Leader Paul Britt has been an RKC kettlebell instructor since 2006. He trains clients at Britt’s Training Systems, his award-winning Hardstyle Kettlebell Training Facility in Rockwall, Texas. Paul has served as an assistant instructor at many RKC and HKC Courses, is a Certified Kettlebell Functional Movement Specialist (CK-FMS) and works with some of the top Chiroprators in North Texas. Please visit his website brittstrainingsystems.com for more information.

Filed Under: Kettlebell Training Tagged With: hosting workshop, injury recovery, kettlebell training, mobility, Paul Britt, recovery, RKC, RKC Principles, RKC Team Leader, RKC-II, Texas, workshop experience

Running 10 Miles Without Any Training Runs

November 12, 2014 By Paul Britt, DC 8 Comments

Paul Britt Tough Mudder

I hate running. I really mean it. I would rather go shopping for furniture with my wife and kids, then run around the block. So when I participated in the 3.5 mile Warrior Dash Challenge, I did not include running as part on my training regimen. I fully believed that I would be able to train for it without actually running. And I was correct. I easily completed the Warrior Dash in about 35 minutes.

Later I decided to take on the 10 mile Tough Mudder. I felt that that the Tough Mudder would be a great way to test my theory that you can run a 10 mile course with no running during the training leading up to it. The last time I put in anywhere near this much mileage was as a young soldier back in the 90’s.

I signed up for the January Tough Mudder on November 27th giving me 62 days to prepare for the challenge. I chose a training protocol consisting of kettlebells and bodyweight exercises. There are so many different training thoughts and programs with the kettlebell and within the RKC. I looked at several different ways to make it work such as VO2 Max, Secret Service Snatch Test and several other tried and true programs, but it came down to swings.

The swing is awesome in its simplicity and ease of use. I like the fact that while not injury proof, swings are pretty safe to do for lots of reps and sets. I felt that the general template of time under load was exactly what I would need. The organizers advised that the course would take at least 2:30 minutes to complete so I needed to add more swing time. I also decided that I would need to use a mix of heavier and lighter kettlebells and most likely double kettlebells to be able to develop the strength and stamina to last the 10 miles. What a great testament to Hard Style and the RKC if I could actually pull off a 10 mile run without any running beforehand.

I began the program swinging double 32kg kettlebells for 30 sec on/30 sec off for 15 minutes. The next day was 15 minutes of get-ups with a 32kg, but not straight from prone to standing. Instead, I worked each piece of the get-up for at least two reps. I was able to make it to the windmill position in the 15 minute time frame. It was my goal to add 5 minutes a week to swings and get-ups. The plan was to hit 45 minutes of each exercise. I trained 4 days a week on Monday, Tuesday, Thursday and Friday

Month 1
Monday/Thursday

FMS Correctives
Double swings started out 15 min a session and increased to 35 min a session over the month
Relax Into Stretch

Paul Britt Practicing FMS Correctives for Shoulder Mobility
RKC Team Leader Paul Britt Practicing FMS Correctives

Tuesday/Friday

FMS Correctives
Get Ups 15 min a session increased to 30 min a session over the month
Relax into Stretch

After 4 weeks I reevaluated the program (3 weeks actually, I had a 7 day break due to the flu), How far I had progressed and where I still needed to be. I was up to 35 minutes of double swings with the 32’s and 30 minutes of get-ups with a single 32kg. I felt really good, but I decided that I needed to really push it a little harder. At 4 weeks out, I was a little worried about if I was up to the task, I knew that I was getting stronger, but starting to worry it wouldn’t work. I felt that I was on the right path, but not quite sure where I stood. I was not going to do any training runs, since the goal was not to run before the race.

In looking at the obstacles, distance and what people were blogging about the race, I decided to increase my swing weights to the 40kgs. That would add strength and power that I would be need for some of the 19 obstacles I would face in the Tough Mudder. At this point in my training, it was a big jump and actually, my swing weight was heavier than my own body weight. After making the weight jump, I realized this strategy would also help with mental toughness; because swinging two heavy kettlebells is hard! The first day of the double 40’s lasted about 20 minutes. And I only lasted that long because I refused to quit.

It was during this time that the “10,000 Swings in 21 Days Challenge” started to float around the internet. I thought about it and decided that it fit within my training program/thought process. I figured that more swings would fit the bill. In looking at the numbers, it would take 500 swings a day to reach the 10,000 in 21 days. I knew that I wanted to keep the heavy double swings in the mix and wanted to get as many swings in the 21 Days as possible. Working towards the weight I wanted to hit with double kettlebell swings would probably keep me from 10,000 in 21 days, but I had 25 days of training left in my programming before my 4 days of deloading to be rested. I decided to try and get all of the swings in, but would not sweat it if I didn’t.

The modifications had me swinging almost every day for up to 45 minutes a session. I knew I could not keep up the heavy doubles for 21 days so I changed my schedule to have a medium, light and play weight during the week. The play weight was whatever I felt like messing with on that day for lots of reps. My training week was typically: heavy double swings on Tuesday, Thursday, Saturday and either two hand swings with the Beast or double 32 swings on the other days. The “play” day was exactly that, no real plan of action. Some days it was throwing out a bunch of kettlebells; 48kg, 40kg, 32kg and 24kg and doing 10 swings with each for multiple sets until I was tired., other days it was swings with the 24kgs’s. One thing I did find from practicing every day was that my swings got better, a lot better.

I ended up with 8500 swings on the 21st day and 10,000 by the 24th.

Month 2
Monday/Wednesday/Friday

FMS Correctives
Two-handed or double swings 300-500
Indian Clubs as active recovery

Tuesday/Thursday/Saturday

FMS Correctives
Heavy Double swings 200-500
Indian Clubs as active recovery between each set
Pull ups for 3-4 sets of 3-5

How did it work out for me? I completed the Tough Mudder in 2 hours 45 minutes. It was a hard race, with plenty of obstacles to climb over, crawl under and swing from, and lots of running. But the running was actually the easy part. I did not realize how much swimming we would have to do and the massive amounts of swings dropped my body fat to under 8% and I added 10lbs to my bodyweight. It made it hard to float and the cold water really sucked the heat out of me. It was interesting,  I read the 4 Hour Body by Tim Ferris the week of the race and found his section on running a marathon advocated interval training. It made me realize that I was on the right path with this training program.

Paul Britt Tough Mudder FInish Line

What would I do differently? I would continue with the swings, but keep the get-ups in there to improve core and rotational strength. I had no issues with the posterior chain after the race. My frontal core however, was pretty sore for a few days afterward. I think that if I had kept the get-ups in the mix, I would not have hurt so badly. It stemmed from climbing, monkey bars and helping boost others over obstacles. The grind power derived from the get-ups would have helped in all of those activities.

What is the summary of this little experiment? It is possible to train for a mid-range running event without running in training. Will you have record shattering times? Most likely not, but the goal was just seeing if it could be done. I now know that it can be done. I see a few ways to improve, if I chose to do it again. I would keep the swing volume high, add more get-ups and I would add clean and jerks to the program. The clean and jerks would help develop power strength and some mental toughness.


***
RKC Team Leader Paul Britt has been an RKC kettlebell instructor since 2006. He trains clients at Britt’s Training Systems, his award-winning Hardstyle Kettlebell Training Facility in Rockwall, Texas. Paul has served as an assistant instructor at many RKC and HKC Courses, is a Certified Kettlebell Functional Movement Specialist (CK-FMS) and works with some of the top Chiroprators in North Texas. Please visit his website brittstrainingsystems.com for more information.

Filed Under: Kettlebell Training Tagged With: Athletic Training, FMS Correctives, kettlebell swing, obstacle course race, Paul Britt, running, Tough Mudder, training for obstacle course race

Primary Sidebar

Featured Products

previous arrow
BOOK-RKCBookofSnC
HardStyleKettlebellChallegeDanJohn700
BookCoverMasterTheKettlebell1
RKCiconKettlebell512
KettlebellGoddessdv040
next arrow

Recent Posts

  • RKC Big Six Workout
  • The Kettlebell Swing & Low Back Pain
  • Key Kettlebell Exercises To Help You Create Better Balance
  • How to Most Effectively Use Kettlebells to Meet Your New Year Goals
  • 1 Exercise That Checks All The Boxes
FOLLOW US ON TWITTER!

Archives

Copyright © 2025

Dragon Door Publications / The author(s) and publisher of this material are not responsible in any manner whatsoever for any injury that may occur through following the instructions or opinions contained in this material. The activities, physical and otherwise, described herein for informational purposes only, may be too strenuous or dangerous for some people, and the reader(s) should consult a physician before engaging in them.