• Skip to main content
  • Skip to primary sidebar
  • Home
  • Contributors
    • Matt Beecroft, Master RKC
    • Martijn Bos, Master RKC
    • Andrea Du Cane, Master RKC
    • Angelo Gala, Master RKC
    • Chris Holder, Master RKC
    • Steve Holiner, Master RKC
    • Dan John, Master RKC
    • Mike Krivka, Master RKC
    • Thomas Phillips, Master RKC
    • Robert Rimoczi, Master RKC
    • Phil Ross, Master RKC
    • Max Shank, Master RKC
  • Workshops
    • HKC Workshops
    • RKC Workshops
    • RKC-II Workshops
  • Find an RKC Instructor
  • Resources
    • Articles
    • Forums
    • Kettlebells
    • Products
  • Blogs
    • PCC Blog
    • Strong Medicine Blog
  • Archives

RKC School of Strength

Official blog of the RKC

master rkc

Coaching the Kettlebell Coach

August 1, 2018 By Chris Holder Leave a Comment

Master RKC Chris Holder Coaching RKC Coaches

After attending and passing an HKC or RKC Workshop, we’ve done countless swings, feel confident about the material, and want to present the ideas we’ve learned to our clients. If you are like me, you’ve invested a ton of time and effort into other training systems. And you know that it’s difficult to integrate all the moving parts into a single sensible flow of program design.

During a certification weekend, I make a point to lecture on how to coach. “How to coach” is a drastically different subject than “what to coach”. The RKC manual and the instruction protocols we follow to teach the exercises are very thorough. If you’re a smart coach and refer back to the manual, most cases are very simple. But, how to coach it all—that’s an entirely different conversation.

Is this article about coaching style? Yes and no. Is it about coaching procedures? Sort of… I define coaching as the entire approach when teaching the material, the techniques, and the expected intensities for a given set. For great coaches, this is effortless. But, new coaches will need to make a conscious effort to develop the coaching muscle memory before it can become automatic. After twenty years in the college strength and conditioning world, I can confidently tell you that I’m there—but it took time. In this post, I will outline much of what I teach about coaching.

What Modality Are You Teaching?

Kettlebells, Olympic lifts, TRX, and CrossFit all have certain inherent personalities—and your temperament should fit the training setting. For example, when coaching the Olympic lifts, there is a massive psychological component with an athlete who is attempting a personal best. In that moment, you might go from being a coach to a psychotherapist. You might help them manage fear and hesitancy instead of yelling and trying to fire them up.

It’s extremely important to clearly understand the nature of what you are coaching. A yoga instructor yelling for their students to perform various poses will probably not be a yoga instructor for very long. It’s a ridiculous but clear example.

The RKC is a high tension program, which also means it’s high effort. So, an instructor using a very calming yin tone will likely not help their trainee get the most out of a nasty kettlebell swing ladder.

Embody the spirit of what you are coaching.

Who Are You Coaching?

One of my favorite things about the CrossFit community is that the members know today will not be easy. The programming always includes a big push at some point. If I were a box owner, I would assume that most of my clients have some edge, and that I can take them to some of the outer realms of fatigue, burn and through certain pain thresholds.

Conversely, I will never forget my first paying personal training client. At the time I had been coaching college kids for about seven years when I got an email from a woman who had some back pain and wanted to hire me for kettlebell training. We exchanged emails, agreed on a price and planned our first meeting the coming Saturday.

Remember, I had been coaching bulletproof 18-22-year-olds for years—and a severely deconditioned, 70 year old woman who was about 50 pounds overweight walked in! She was carrying two 2lb kettlebells with plastic handles attached to nylon straps which formed what can only be described as oversized hacky sacks. She insisted on using them. While I wanted to ask her where the hell she found that nonsense, I knew that my tough-guy approach was not going to work. I suddenly had to learn how to work with a brand new demographic. Thankfully, I knew that an elderly woman would not respond to me screaming at her to pick up the weight!

Know Your Stuff

Know the information cold, in your sleep, without thinking. Make sure you refer to your RKC or HKC manual many times after your certification weekend. I’ve had the profound luxury of training between 300-500 athletes every day, Monday through Friday. At minimum I’ll led 1,500 individuals in their training (in groups of course) each week. Regardless of the season, my athletes do 100 swings a day. So, that’s 150,000 swings that I could potentially dissect and critique each week. Most personal trainers won’t see that many swings in a year.

My coaching uptake is fast simply because I’m truly immersed in it daily. I see a slew of funky swings, tons of just-right swings, and more horrible swings than any one person should ever have to see. Every day I quickly analyze and pump out corrections at a blistering pace. I’m not a genius, I simply have critiqued—and continue to critique—countless reps.

Watch everything, be an observer at all times. Watch other people’s clients so you can bank reps. Record your own reps with your phone and critique yourself. Be a student every waking moment of the day and deconstruct what you are seeing—pass everything through your RKC filter. Mentally pick apart what you see to sharpen your blade.

I can coach anyone, and it’s not because I’m special. It’s because I’ve been able to constantly analyze and coach for years without pause. It’s nothing you can learn from a book or at a certification weekend. You have to do the time, put in the reps, and see as many repetition attempts as possible.

What To Watch

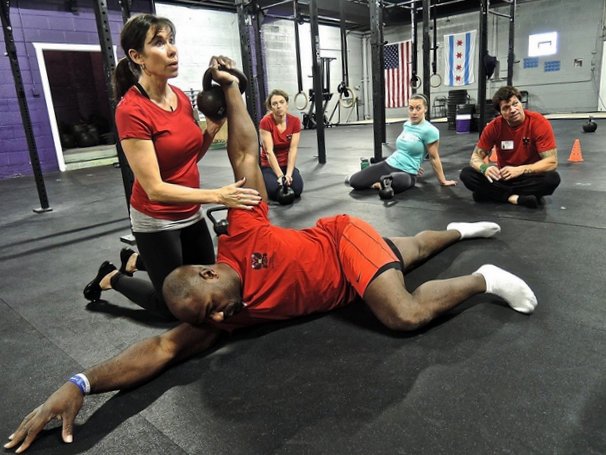
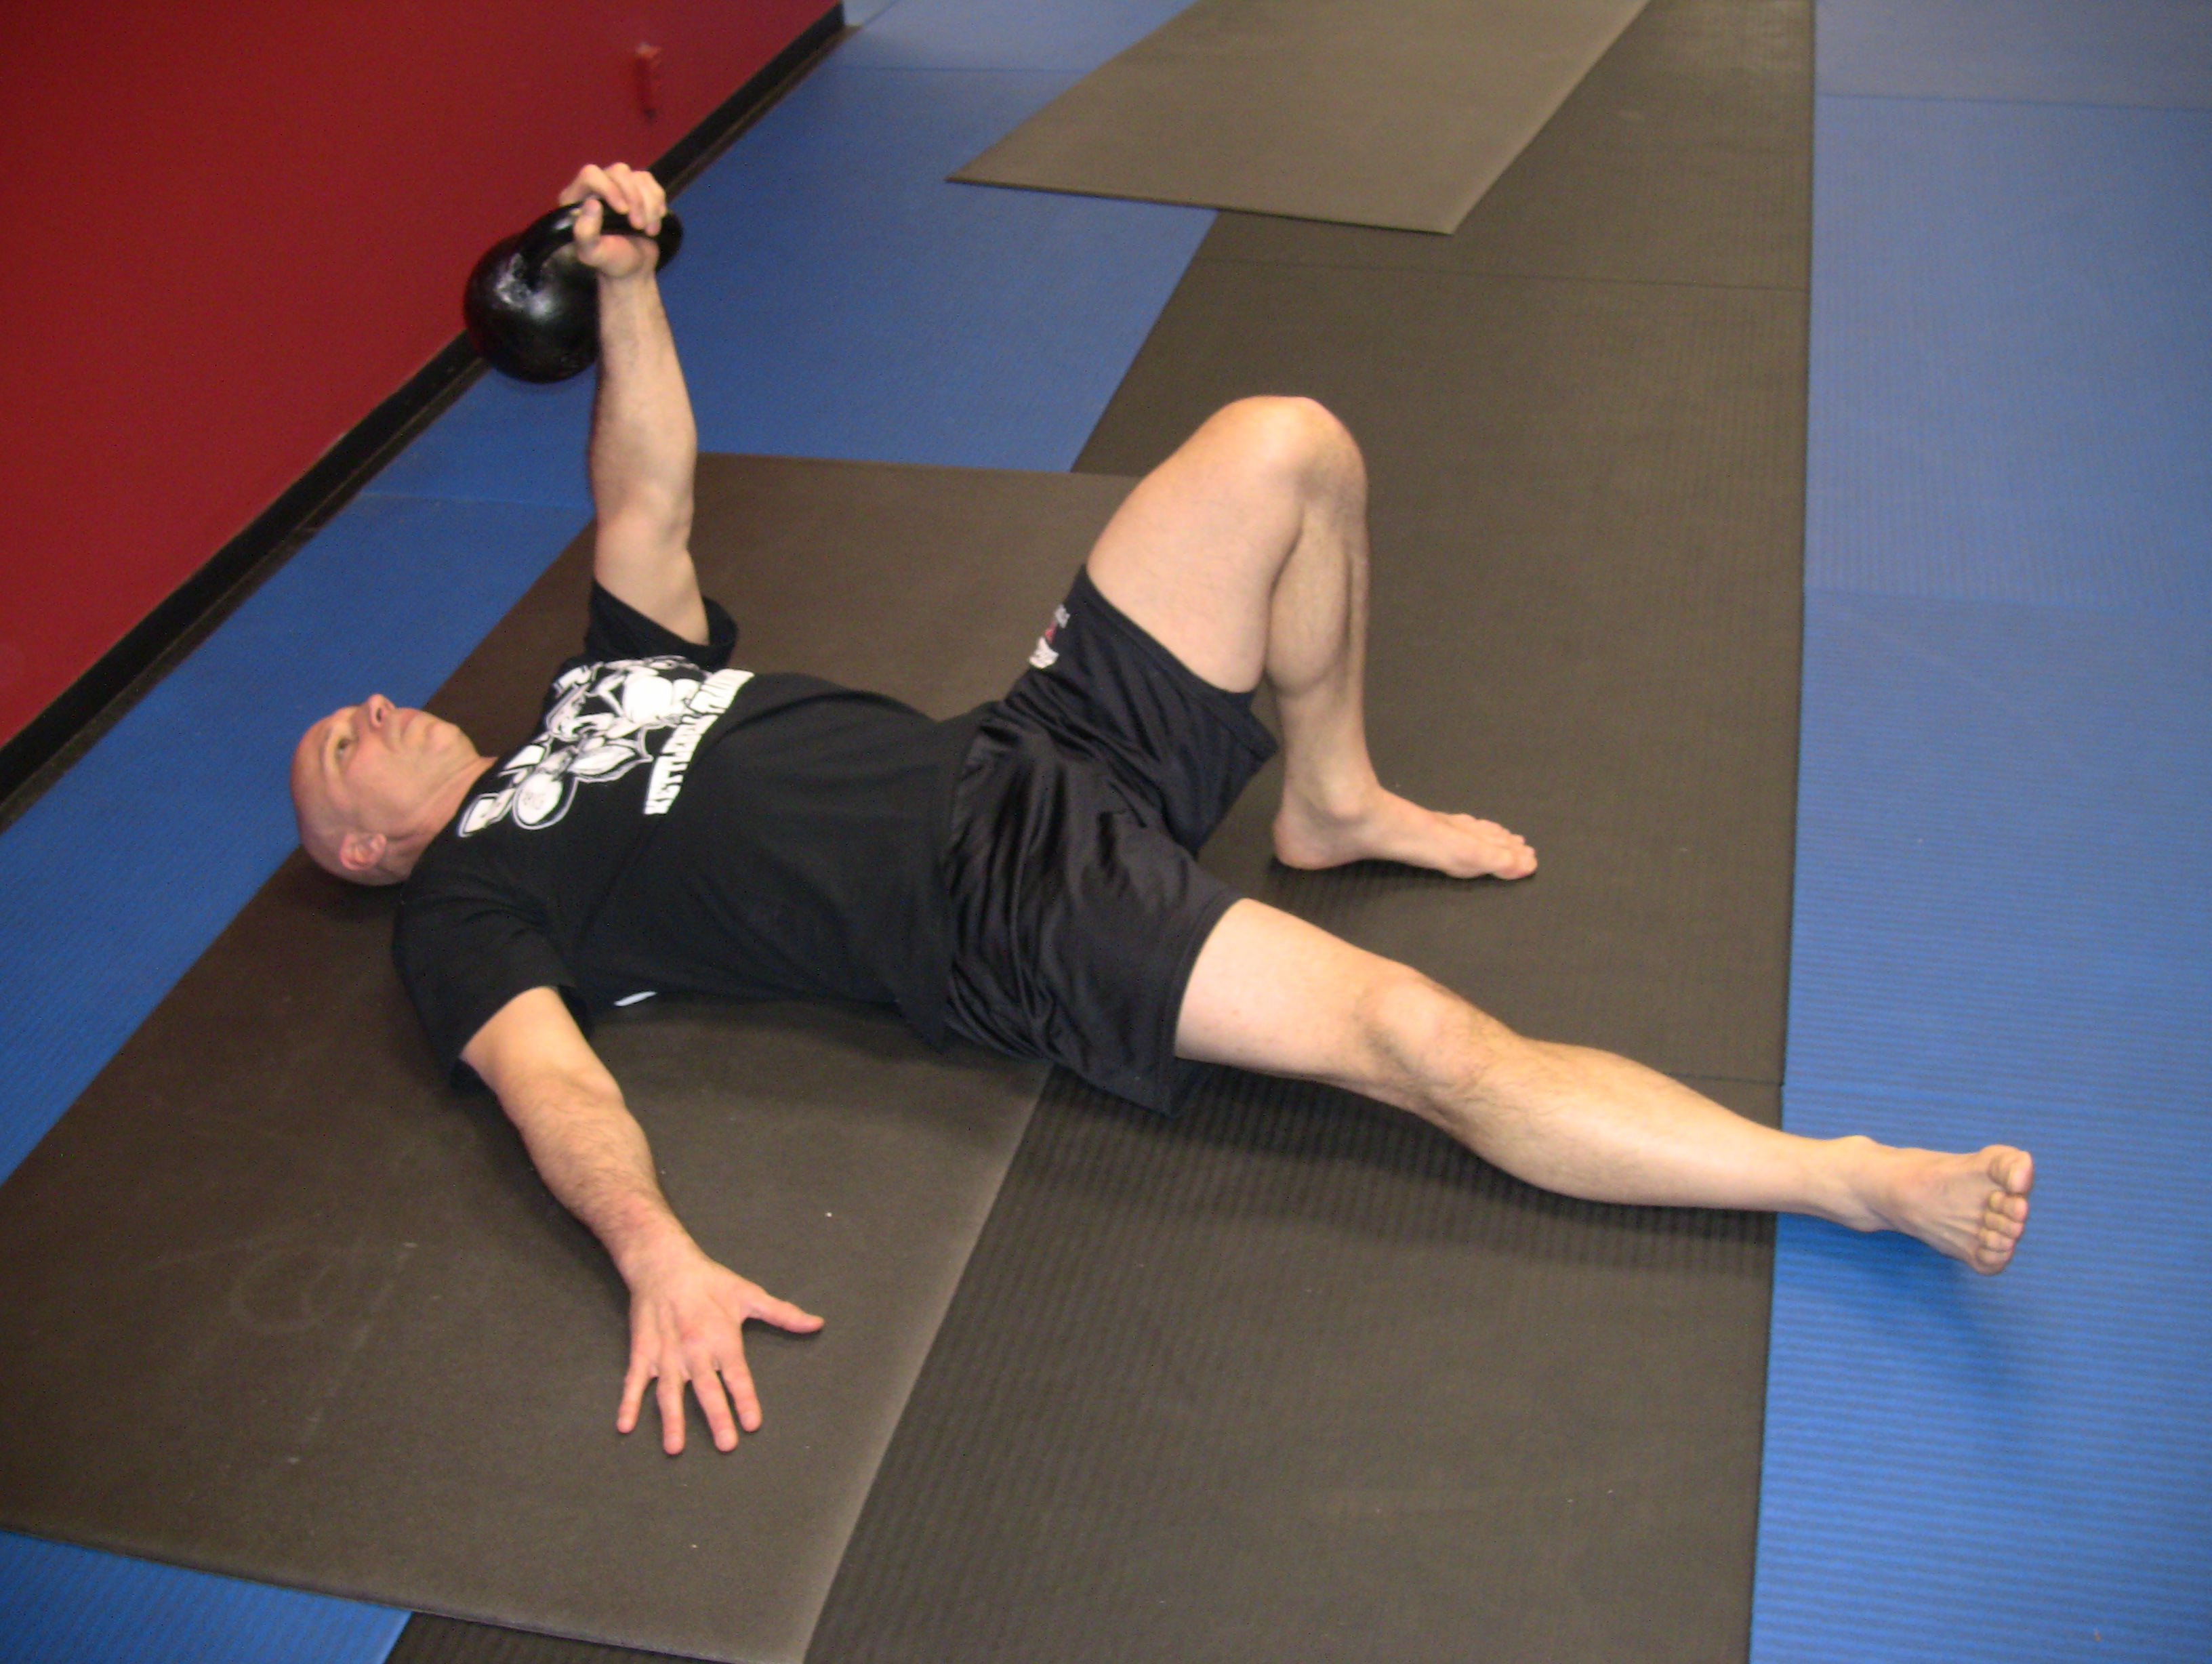
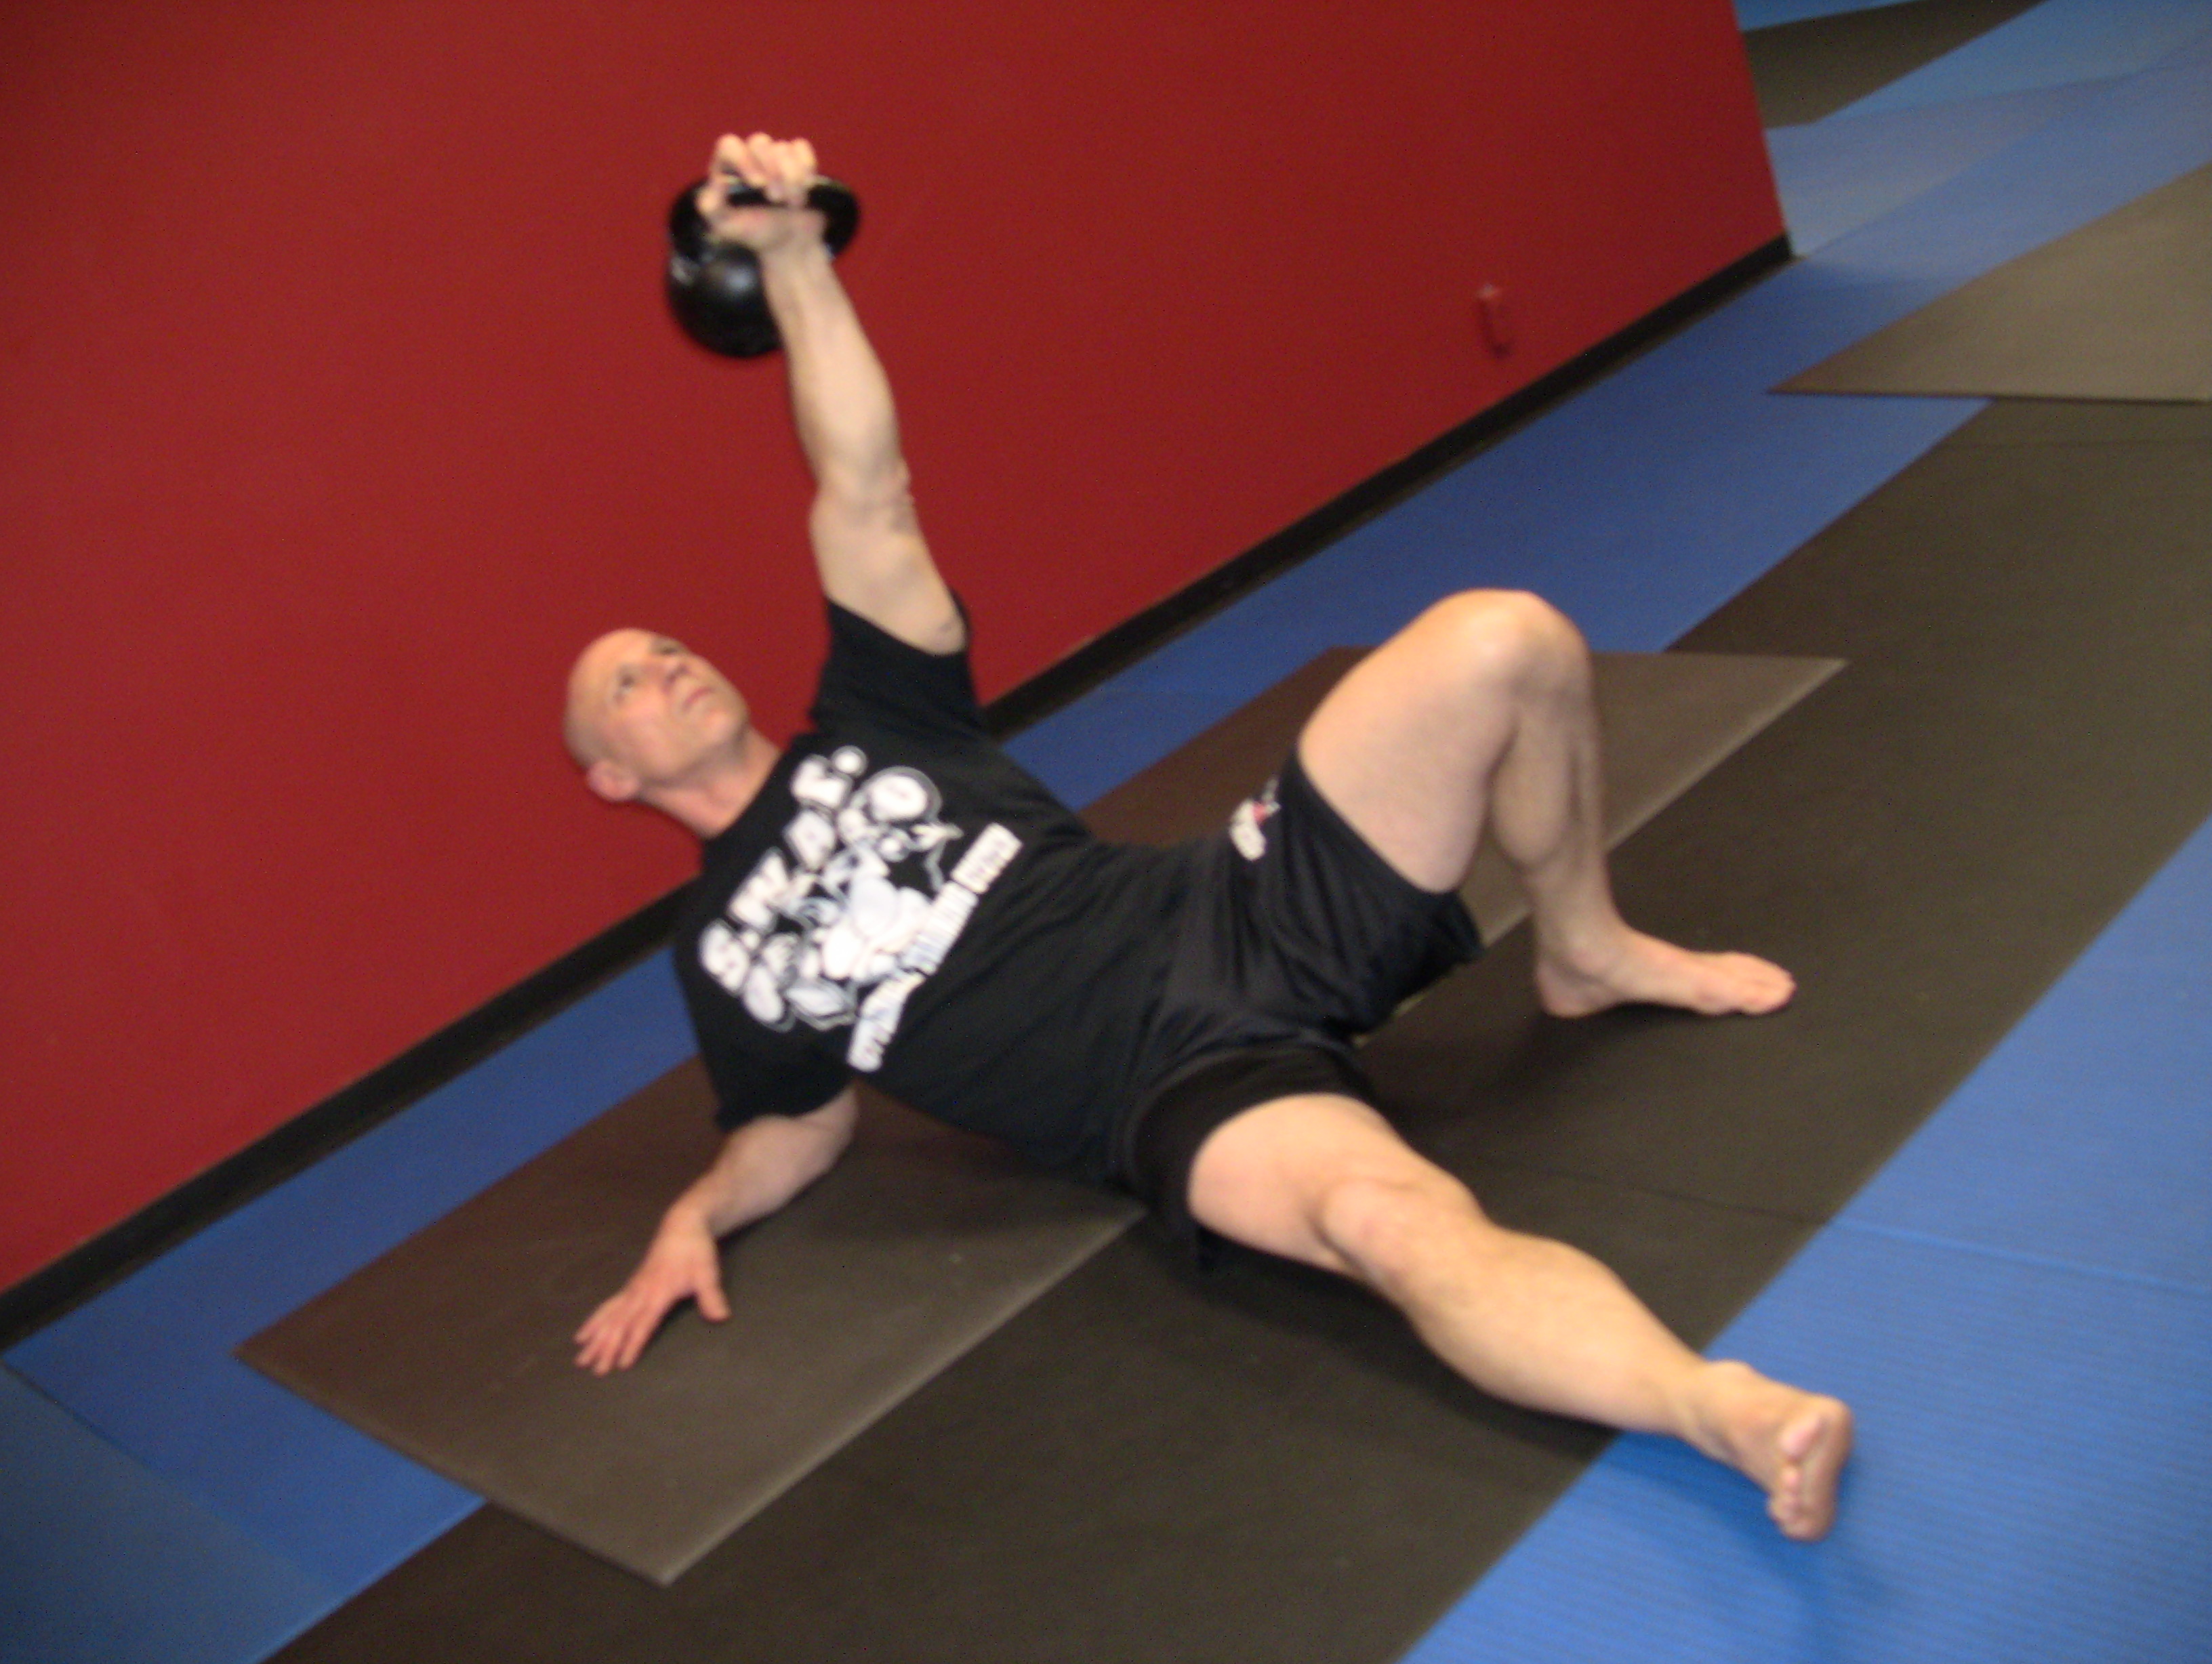
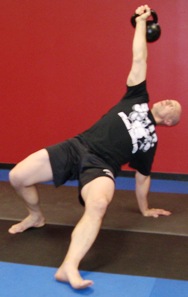
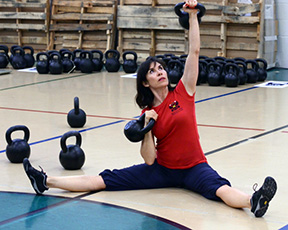
A good coach has a very specific eye for watching reps. Each exercise has lists of technical requirements. But, all of our movements begin with the feet on the floor—even the get-up. As you watch your clients or athletes train, your eyes should first go to their feet. Many technical errors in the top half of the body can be remedied by correcting the feet—not the chest, shoulder, or even the back. Our feet connect the movement to leverage, support posture, and give the athlete a foundation. The feet are the gateway to all things good. So, your eyes should start at the feet and return there throughout the set.

Breathing is also a frequent cause of technical flaws. When do they inhale? When do they exhale? Are they exhaling completely, or are they sipping and leaking? Know the answers, have a game plan for their breathing, and then coach it. Breathing is more listening than watching.

We have very clear standards for all of our movements. You know them because you were responsible for learning and demonstrating them at your RKC or HKC workshop. We don’t just enforce the standards to complicate the RKC weekend, we enforce them because they almost guarantee safety and without question ensure top performance. You need to coach those standards and elements. While we all eventually develop some degree of stylistic variations of our own, before you teach them to your clients, they should already have a firm handle on the basics. Look for the basics as you watch, and correct accordingly.

Lastly, I want you to pay particular attention to the head and neck. The RKC and HKC curriculum is filled with huge, dynamic movements. We need to understand the potential range of motion of the individual spinal joints. Joints are meant to move—until they are not. Whenever the body is loaded, the spine should stay motionless, unless the exercise is specifically designed for the spine to twist, rotate, flex or extend. The spine doesn’t stop at the shoulders, and most trainers forget that the neck is still part of the spine. I have multiple stories that will give you the chills involving athletes simply turned their heads while under load and breaking their backs. So, without getting into too much gore, the head and neck need to stay relatively motionless any time while the athlete is under load. Correct this immediately.

Chris Holder optimal Coaching Position

Positioning Is Everything

While it is important to watch reps, your orientation to the athlete while observing the reps is just as important.

Unless you are a seasoned pro, you should never watch a rep while standing directly in front of the athlete. Conversely, watching someone from behind is not only a very poor position for catching technical errors, it’s also incredibly creepy. Don’t be a creep.

The best location to watch reps and get the largest amount of information is in front and at a 45 degree angle. This is the most optimal spot for nearly all training methods, not just kettlebell training. It gives you the opportunity to see the most movement through several planes of motion. If you can’t stand at 45 degrees for some reason, then standing directly to the side is the next best option.

Intensity

The word HardStyle should say it all. But, after all my years of coaching one fact is very clear: most coaches and trainers don’t fully understand how much intensity they want from their athletes or clients. They don’t know how hard they should go!

With the grinds, we usually work in sets of 5, 3, and 1, and most of the intensity is handled within the programming. But, if you program your clients’ intensity along with sets and reps, they will make even greater progress in less time. For example, let’s consider pressing 3 sets of 5 reps for each arm. You could tell your client to use a 1:5 tempo (1 or burst up followed by a 5 or slow return). You can use any tempo (1:5, 1:2, 3:2, 5:1…) and any combination of ups and downs to really dial in the intensity.

During RKC Certifications, we teach an “effort dial” drill. While you do kettlebell swings for a set of 10, we yell percentages: 80%, 70%, 60%, 100%, etc. This drill quickly teaches how to dial effort up and down in the real world. But, if I am being totally honest, if you aren’t swinging 100% on all the reps, you are wasting time.

Most people don’t know what hard is, so show them. Most of your clients have never ventured into the pain cave. They might think they have, but most have no idea what it means to push. Show them, but be smart and safe. Let them have a real “that was the absolute maximum I could give and couldn’t muster one more” experience. They will thank you.

Be A Tremendous Communicator

Tremendous… read everything. Expand your vocabulary in general and within the realm of training. I’m notorious for saying that we need to have 14 different ways for saying the same thing. Be comfortable communicating because it is the life blood of your business. If you can’t communicate what you know, who cares what you know!

I studied Neuro Linguistic Programming (NLP) for two years so I could refine my ability to communicate. Do you need to do that? No, but you should… or you should study something like it. There are multiple ways to communicate with your clients—it’s not all just verbal. When you are trying to get an athlete to push, your words alone might not do it. The tone, volume, and pace of your speech as well as your body language all effect what your client hears and understands. Own all aspects of your communication so the people under your watchful eye clearly understand on what you want.

10 Questions

I drive my assistants and athletes crazy with “10 Questions,” but it’s incredibly effective. Regardless of what I’m teaching to a group—even if it’s review—I end every section with 10 Questions. My students know that we will sit for the rest of the afternoon until they ask me ten questions related to the information we just covered.

This fall, about 100 new athletes will come into my facility to begin their journey as a Cal Poly Mustang. One of the first things I will teach them is how to do kettlebell swings. For most of them, this is their first experience with kettlebells. Since I coach at such a frenetic pace, I have to know that they are absorbing the information. So, we teach for 30-45 minutes, and then regardless of the size of the group, we gather and they are required to ask me 10 questions. This forces us to communicate. Again, I have been talking a mile a minute at them in the session. I need to know if what I’ve tried to convey has reached them. They raise their hands, or I pick on the ones who are trying to hide. Either way, we break the ice and this helps the athletes become more willing to speak to me next time.

It also puts me on the spot. 10 Questions happens several times a day, especially during heavy instruction times. You wouldn’t believe some of the off the wall ideas going through the minds of these athletes. At times they ask questions I’ve never heard before, and it forces me to think. I have had countless “ah-ha” moments mid-sentence while working through an explanation. And if they truly stump me, I have no problem telling them that I don’t know, but will get them an answer as soon as possible.

For those of you who have taken an RKC or HKC where I was the lead instructor, you all know too well about 10 Questions. I do this at every certification I lead, several times a day. 10 questions is beneficial for a deeper understanding, and it quickly creates rapport between the class and myself, but also within the group of attendees. By the end of day one, they have all asked several questions and they naturally become more willing to speak up as the course progresses.

Lastly…

The moment you think you “have it” is the moment you have lost your way. Many of you would faint if you saw my resume, list of experiences, degrees, mentorships and certifications. I’m very lucky. I’ve learned from the absolute best in the world in a myriad of disciplines. My list of mentors is a who’s who of strength and fitness legends. And after all of this, I know that I’m just scratching the surface. The more I learn, the more I realize how much more I need to learn.

Be a student at all times. Listen to everyone—even the folks you think are full of crap. Every time you close your mouth and listen, you will learn something. Approach each day as an opportunity to forge your coaching craft. Read anything you can, attend workshops and certifications on modalities that you might not think are useful. Listen to podcasts and interviews about the movers and shakers in the industry. Refine your coaching to the point where there’s nothing left to correct, then pick it apart and correct it anyway.

***

Master RKC Chris Holder is a collegiate strength and conditioning coach professionally for over 15 years having worked at Eastern Kentucky University, Appalachian State University and San Jose State University. He is in his second stint and eighth year at Cal Poly in beautiful San Luis Obispo, CA.

The 2000 graduate of Eastern Kentucky University majored in physical education and earned a master’s degree in kinesiology from Cal Poly in 2005. In February 2012, Holder completed his doctorate in Chinese Medical Qigong Therapy. Under the tutelage of world famous Qigong Grand Master Dr. Jerry Alan Johnson, Dr. Holder conducted groundbreaking research on the effects of Medical Qigong Therapy with athletes in competition. This research has spawned other works and additional studies on the effects of this ancient medical practice and its impact on athletes and athletic performance.

Holder received his American doctorate from the International Institute of Medical Qigong in Monterey, CA, and is also licensed in China to practice medicine from The Western District Qigong Science and Traditional Chinese Medicine Research Institute in Beijing, China.

Filed Under: Coaching, Kettlebell Training Tagged With: Chris Holder, Coaching, coaching strategies, leadership, leading, master rkc, RKC, Teaching, Training Athletes

Two Quick, Easy and Effective Kettlebell Exercises for Any Population

May 4, 2016 By Andrea Du Cane Leave a Comment

Andrea Du Cane, Master RKC

There is something to be said about simplicity of movement and reinforcing the fundamental patterns of our kettlebell lifting.

I’ve taken two basic exercises and by using two kettlebells and focusing on the correct alignment and movement, I have turned them into simple and effective exercises for all populations—including your brand new clients, older clients and those recovering from certain injuries.

Double Kettlebell Deadlift Drag

The first drill is a double kettlebell deadlift drag. Normally we do this exercise with one heavy kettlebell. By using two medium to heavy kettlebells (heavy enough to complete the movement correctly with each arm), you open up the upper body kinetic chain. This will illuminate asymmetries from one side of the body to the other. It also allows you to strengthen the weaker side. Start with the same size kettlebell in each hand and then use a kettlebell one size larger on the weaker side.

For the purposes of this article and video, I will be using the same size kettlebell.

Get into the set up position. The kettlebells are approximately an arm’s length in front of you. Grab the kettlebells and pull yourself back toward your heels. You should feel as though you would fall back on your butt if you let go of the kettlebells. Lock your lats down into a packed position and maintain a long and neutral spine. SLOWLY drag the kettlebells back towards your heels with your elbows straight. Feel how the movement is initiated by the lats and the triceps. Do not let your hips drop below your knees, and do not let your spine flex at all!

The key is to not use any momentum. In fact, it is best if the floor you are using is sticky or rubber—the more resistance the floor offers the better.

If you feel most of the tension in the quads, then you are not getting your hips back far enough and are trying to hold your position with your quads instead of your glutes and hammies. The abs must be braced the entire time, and you should use a long firm exhale as you drag the kettlebells back. Release, step back, and re-set for the next rep.

I go the length of my gym, or at least 8-10 drags. Repeat for 1 or 2 more sets as desired. Remember, never let your back round into flexion at any time during this exercise!

Double Kettlebell Straight-Leg Deadlift

The double kettlebell straight-leg deadlift, is another simple but effective exercise to challenge the posterior chain. It is an excellent exercise for the hamstrings and glutes. And as in the deadlift drag above, it utilizes the lats.

There is an interesting difference between these two exercises. The deadlift drag uses the lats to do the work by pulling the kettlebells back toward the heels, while the hips and legs maintain stable strength. With the straight-leg deadlift, the lats are held stable while the hips and hammies initiate the movement through hinging. In other words, the movements and stabilization are reversed, but both are working the same muscles. Pretty cool huh!

Here’s how to do the double kettlebell straight-leg deadlift:

Pick up two moderately heavy kettlebells using good deadlift technique. Stand with your feet between hip and shoulder width apart. Keep your elbows straight and locked, and your lats retracted and contracted. Begin to send your hips back into a hinge. Keep your knees as straight as you can manage while maintaining a neutral spine at all times.

The amount of knee flexion and the depth of your torso forward relate to your hamstring flexibility. The more flexible you are, the straighter you can keep your knees and the lower you can fold forward without any flexion in your spine.

Inhale into your belly as your chest comes forward. Pause briefly at the bottom, keeping the glutes and hamstrings contracted. Tighten a little more and then exhale as you come back up to the starting position.

You will feel a deep stretch/contraction from your glutes down through your hamstrings. This exercise can be considered a loaded stretch for the glutes and hamstrings. It is a very powerful hamstring developer.

As usual, there should be NO flexion in the spine. Start with a limited range of motion until you can use the full range of motion with a neutral spine. You can adjust the amount of knee flexion as well—just don’t allow yourself to turn it into a regular deadlift, you’ll be cheating yourself out of the main benefit of this exercise.

As I mentioned above, the lats, back and core are working very hard to stabilize during this exercise, so they are benefiting too!

Start with 3 sets of 8 moving slow and controlled.


****

Andrea Du Cane is a Master RKC Kettlebell Instructor, CK-FMS, CICS, and RIST, ZHealth certified, she has a BA in Psychology from the University of Minnesota and is also a Pilates instructor. She is the author of several books and dvds including The Ageless Body, The Kettlebell Boomer, and The Kettlebell Goddess Workout.  She has over twenty years of aerobics, weight training and fitness experience, with an additional background in… Read more here.

Filed Under: Kettlebell Training, Tutorial Tagged With: Andrea Du Cane, deadlift, deadlift drag, double kettlebell, kettlebell drills, kettlebells, master rkc, Master RKC Andrea Du Cane, straight leg deadlift, tutorial, video

Elite Abs: “Hollow Plank Positions” (Part 4 of 5)

June 18, 2014 By Keira Newton Leave a Comment

Master RKC Keira Newton performs a plank

Master RKC, Keira Newton continues her series on how to use your new “hollowed out” position with more advanced plank variations.

***

Master RKC, Level 3 Z-Health, MCT. Keira first picked up a kettlebell in 2005 when her husband challenged her to stop laughing and start swinging. She stuck with the challenge when she realized that she could get an all-in-one workout in a fraction of the time she spent at the gym. Keira was convinced… Read more here.

Keira_thumbnail


Filed Under: Uncategorized Tagged With: abs, elite, hollow plank, Keira Newton, master rkc, plank

Elite Abs: “Hollow Plank Positions” (Part 3 of 5)

May 21, 2014 By Keira Newton Leave a Comment

Master RKC Keira Newton performs a plank

Master RKC, Keira Newton shows you how to use your new “hollowed out” position with some more advanced plank variations.

***

Master RKC, Level 3 Z-Health, MCT. Keira first picked up a kettlebell in 2005 when her husband challenged her to stop laughing and start swinging. She stuck with the challenge when she realized that she could get an all-in-one workout in a fraction of the time she spent at the gym. Keira was convinced… Read more here.

Keira_thumbnail


Filed Under: Uncategorized Tagged With: abs, elite, hollow plank, Keira Newton, master rkc, plank

Instant Gratification – A Charm Hard to Resist

May 7, 2014 By Robert Rimoczi Leave a Comment

(Translated from German. Prefer to read the original? Click here.)


Robert Rimoczi teaching at Kraba Gym in Germany

Have you noticed that what we want, and what we need is often light years apart? Especially in the case with training and nutrition, where long-term goals and short-term gratification do not match.

If I want to eat an ice cream in the short term , but long term I want to have a washboard stomach, then I know that eating ice cream is not a step in the right direction, even though it feels good. Ice cream is delicious, but makes you fat!

Unfortunately, this law is much less obvious when training. What does an “eating ice cream” type of satisfaction look like in training?

Sweating, gasping for air , with burning muscles after a workout is a wonderful endorphin rush! Even if you have to convince your body to somehow crawl to the locker room, it’s still a great feeling, right? I love it! I would not trade it for any amount of ice cream!

But … Are you sure that your training has brought you closer to your goal? Could it be that the good feeling is just as deceptive as the delicious taste of the ice cream? When the high from the ice cream ends, I become tired. It takes some basic knowledge about nutrition to know that it feels good to eat sugar, but it does so much bad in the body. Just like when training.

“Come on! ” You might say. “The harder I work, the fitter I get!”

Are you sure? I know many who work hard on a regular basis for years, but very few who have come from A to B  and achieved their goals. So many people also do not measure their progress. If one disregards the weight gain, only the good feeling stays when the ice cream has left.

“But I can feel that my training is good for me,” you say.

Bad food feels good . Poor training also . Do you know why? Because that instant gratification is lying to you.

no ice creamWait! Do you know the guy with the huge chest from the gym? ( Yes – yes, certainly you know him ! ) He has huge pectoral muscles , wow, he can do neat stuff, and he presses and screams until all can see how strong he is. Unfortunately, he’s only good at the bench press.  For a proper squat with his chicken legs—he does not dare. Don’t you think he enjoys his training ? He does – but he probably enjoys it because he has many experiences of success and that good feeling you get when you do exactly what you’re good at.

If you want to progress with your own general fitness, you should work on your weaknesses instead–but do not stop doing the skills you’re best at. The poor guy with the huge chest  feels like an idiot when he does squats, so he does not make them better. Would it help him to continue to do the squat bench press? In the long term, yes. They would surely help him to be more proportional.

A well established program with squats would even improve his performance at the bench press. A balanced set of skills to have is certainly a better basis for the development of one-dimensional training. It is healthier and you’ll have more fun doing it. To specialize in just one thing has many serious weaknesses and is only a short-term pleasure. See professional sports!

It does not matter what your weak point is. It is an underdeveloped part of the body , or a fundamental movement pattern, like mobility, stability, or coordination …

To summarize:

  • You have vulnerabilities
  • Working on these weaknesses has the best cost- benefit ratio
  • But to work on your weak points does not feel so great, because you ‘re doing exactly what you can not do well

Do you see ? It feels bad, and it brings you further, or it feels good, and you are racing against the wall.  Instant gratification is often a bad adviser.

Don’t let your feelings lead your workouts.  Be objective and work towards your goals instead. Then you will find success!

***

Robert Rimoczi, Senior RKC, Munich, Germany has opened a new gym.  You can view his new site at:  http://kraba.de/, email him here, or call the center at 
0180 – 5 999 432. 

Filed Under: Uncategorized Tagged With: fitness, kettlebells, master rkc, trainer, training, weight, workout

Workout of the Week: Lifting Heavy Bells

April 30, 2014 By Andrew Read 1 Comment

THE BEAST
THE BEAST: Russian Kettlebell – 48kg (106 lbs.)

Life is hard and most of us are facing the very real prospect that what we’d like to do is limited by what we can actually achieve. For those of us who are trainers we see clients every day who are limited by their range of movement more than their lack of desire.

The fitness world has made a killing from creating ways for you to exercise and add stress to the body even when you shouldn’t. By putting you in a seated position and using fixed planes of motion equipment manufacturers have actually made the problems worse, not better.

For many the goal of a heavy kettlebell press can seem very far off. Most likely this is for people training for RKC II, but it is a good goal for those who have no desire to ever attend a certification too. The most common pressing goal is a half-bodyweight press so let’s use that as the end goal.

One of the things that needs to be said right upfront is that if you have problem shoulders this is not the program for you. Pressing heavy requires pain free mobile shoulders. If you cannot achieve a solid overhead position with arm vertical and locked out then you need to address that before embarking on a press specialization plan. Remember – mobility before stability/ motor control. Stability before strength.

When planning a session to get big loads overhead you still want to make sure you tick all the right boxes during the warm up to make sure the body is primed and ready to go. A good place to start is with some mobility work – think of this as insurance, and a final double check to make sure that we really are in the right shape to get that heavy load overhead.

The main focus of the session is getting used to lifting heavy bell/s. Because we can’t yet press our goal bell we need to come up with some alternatives to get the body used to having that supramaximal weight locked out overhead as well as teach the body how to deal with getting it to the rack.

Warm up:

  • Foam roller T-spine.
  • Rib Pull x 10 reps each side.
  • Armbar x 10 breaths each side.
  • Get ups x 1 each x 3 with progressively heavier weights (ending one bell below your goal press bell. i.e. if you goal press is 40kg then you might go 28kg, 32kg, 36kg).
  1. Clean and press ladder 1 x 1-2-3-4-5 with a bell you are comfortable with.
  2. Clean weight ladder. Perform 3 sets of successively heavier cleans, performing 3 reps each side. Finish with goal press bell. i.e. if my goal press is the 40kg you would use 32kg x 3/3, 36kg x 3/3, 40kg x 3/3.
  3. Push press x 3 sets of 2 reps with goal press bell.
  4. Two hand swings x 2 sets of 20 reps. Use a light bell. This is active recovery and to help get the tension out from the heavy work.
  5. Heavy get up x 3 x 1 each side. Use a bell one higher than your goal press bell. i.e. if the goal press bell is 40kg then use the 44kg.
  6. Clean the same bell x 3 each side.
  7. Three successively heavier presses. i.e. if the goal press bell is the 40kg then do 32kg x 1, 36kg x 1, 40kg x 1.

***

About Andrew Read, Master RKC, Dragon Door Australia: Andrew Read, Master RKC, Author of Beast Tamer, is head of Dragon Door Australia and Read Performance Training. Recognized as Australia’s leading functional strength trainer he is a regular contributor to Blitz, Inside MMA, International Kickboxer, Oxygen, Ultrafit and Breaking Muscle. His coaching background spans nearly twenty years having worked with many Olympic and world championship level athletes.

Filed Under: Uncategorized Tagged With: Andrew Read, australia, Beast, dragon door, kettlebells, master rkc, RKC

Elite Abs: “Hollow Plank Positions” (Part 2 of 5)

April 23, 2014 By Keira Newton Leave a Comment

Master RKC Keira Newton performs a plank

Master RKC, Keira Newton shows you how to use your new “hollowed out” position with some more advanced plank variations.

***

Master RKC, Level 3 Z-Health, MCT. Keira first picked up a kettlebell in 2005 when her husband challenged her to stop laughing and start swinging. She stuck with the challenge when she realized that she could get an all-in-one workout in a fraction of the time she spent at the gym. Keira was convinced… Read more here.

Keira_thumbnail


Filed Under: Uncategorized Tagged With: abs, elite, hollow plank, Keira Newton, master rkc, plank

Dirty Dozen #9 The Get-up

April 2, 2014 By Phil Ross 1 Comment

Phil Ross Get UpThe next movement in our Dirty Dozen Line-up is #9, The Get Up. The Get Up is often referred to as the Turkish (TGU) or Low Sweep Get Up. Just the mention of the movement conjures up fear, apprehension and utter abhorrence in most people. I had the same attitude until I began to absolutely love this movement!

I recall when I first started training with Kettlebells, I only did the TGU’s (as we referred to them) enough to pass my tests and move on. After the 6 months or so upon passing my RKC 1, I started to notice that through my practice, my TGU’s were getting better. I also noticed that my shoulder was more stable and the weights of my other lifts were increasing! Much to the chagrin of my students, I started to completely embrace the Get Up.

I soon realized that I wasn’t just doing them to pass my next test, but to get the most that I could from the movement. I started to add different types of Get Ups to my training regiment. Bridge, Squat, Bottoms-up, No Hand and Dual Bell Get Ups to name a few.

Phil Ross Get UpI then began to incorporate Heavy Get Up training and worked on methods to imprint the movement into the muscle memory. Owning each segment of the movement became my focus. The Roll to Press, Sit-up to Elbow, Tall Sit, Side Press, Tall Kneel and the Standing Press. Each section of the Get Up needed to be owned. To imprint this I employed three basic approaches. The first was practicing a 5 second hold at each of the 6 specific positions of the Get Up.The second was to perform 5 repetitions at each position and the third was the 5 3 2 1 Method.

Training Method #1:
At each of the positions, hold the Kettlebell in the lock out for a 5 second count. Feel the position of your body and embrace the tension. Don’t simply do it to get it done and over with, though the temptation will be present. Focus on increasing your stability in each of the 6 positions on the way up as well as the way down.

Training Method #2:
This method always evokes moans and groans from my class. Well, that simply makes me grin and tell them how many sets to do. Execute 5 presses at each of the 6 positions. Change position with the Kettlebell in the full lock out, no resting in the Rack. Go up one side of your body, change hands at the top and do your Get Down on the opposite side with the same 5 press repetitions at each position. Repeat on the other side, but perform the ascent with the side that descended last time.

IMG_1885

Training Method #3:
I call this one the 5 3 2 1 Method. I use this for increasing my 1, 2 & 3 RM (Repetition Maximums). I will generally perform 3 to 5 sets of the aforementioned repetitions. Beginning with a lower weight and increasing to a higher one. Be very cautious when performing the doubles and singles, especially if you are in “uncharted waters” (a weight that you’ve never done previously). I noticed the most improvement when I employed this method last in the progression. It is essential to have complete stabilization and OWN each and every of the 6 positions to safely increase the weight of your Get Ups.

Well it’s now time to grab your Kettlebell and GET UP!


Strength & Honor

Coach Phil

***

About Master RKC Phil Ross: Master RKC, 8th Degree Black Belt, Specialist in Bodyweight Strength, PCC and CK-FMS Certified. His name is synonymous with Martial Arts and Fitness. He is known as the area’s Kettlebell King and has successfully competed on the National Level in…  Read more here.


Filed Under: Uncategorized Tagged With: coach, dirty, dozen, dragon door, get up, Kettlebell, kettlebells, master rkc, phil, phil ross

Elite Abs: “Hollow Plank Positions” (Part 1 of 5)

March 26, 2014 By Keira Newton 1 Comment

Master RKC, Keira Newton shows you how to achieve a true “hollowed out” position with several different strength-building plank variations.

***

Master RKC, Level 3 Z-Health, MCT. Keira first picked up a kettlebell in 2005 when her husband challenged her to stop laughing and start swinging. She stuck with the challenge when she realized that she could get an all-in-one workout in a fraction of the time she spent at the gym. Keira was convinced… Read more here.

Keira_thumbnail


Filed Under: Uncategorized Tagged With: abs, elite, hollow, hollow plank, Keira Newton, master rkc, part 1, plank, positions

Painful Elbows? Look at Your Technique

March 5, 2014 By Andrea Du Cane 9 Comments

Thumb_Andrea_red_shirtI can’t count how many people I run into, that have elbow pain and had to stop or back off their kettlebell or pull-up training. I’m sure you know someone who has developed pain in the elbows after working up to heavier cleans and snatches or just more volume. Perhaps they have just started Convict Conditioning or some other body weight program and then find they have to back off due to elbow issues.  Maybe you have encountered the same problem at some point during your lifting career.

Unfortunately, this problem is all too common these days.  Chalk it up to unbridled enthusiasm with their new skill or toy, pushing too hard too fast and lastly not paying enough attention to proper technique.

First, let me explain the difference between two general types of elbow pain.

Tennis elbow: which is caused by inflammation of the extensor forearm muscles, causing pain on the outside (lateral side) of the elbow.

Golfer’s elbow: is caused by inflammation of the flexor forearm muscles inside (medial side) of the elbow. Both are caused by repetitive stress where the muscle and tendon meet and at the point where the tendon meets the bone.

Tennis elbow is somewhat more common than golfers elbow, but both are very common in athletes in their 40’s and 50”s.  This is largely due to the fact that tendons and other connective tissue becomes less flexible, and elastic as we age, causing the tissue to tear and pull away from the bone more easily than in younger athletes.

This is why it is even more important to add volume and load gradually as we get older. However, even young athletes would be wise to train slow and steady and put their focus into good technique instead of reps and weight. And lastly, good technique trumps everything.  With good technique high volume cleans and swings should not be a problem for most people.

Let me explain how lifting kettlebells incorrectly can be effecting your elbows and how to avoid problems in the future.

99% of the time irritated elbows can be attributed to the ballistic lifts, not the grinds.  Meaning that most of the time the problem lies in incorrect clean and/or snatch technique.

As always I start at the swing.  If the single-arm swing is not good, especially on back-swing portion, I know they are risking elbow injury.  And any problem you see in the swing will only be amplified during the drop in the clean and snatch.

Here are a few key points to look for during the back swing (this applies to swing, clean and snatch).

1)    Is the elbow fully extended, or straight at the bottom of the backswing?

2)    Is the arm in contact with the body, the ribcage or thigh or both?  The arm placement does depend on the build of the athlete. People with bigger chests or shorter arms in relation to their torsos will have a harder time hitting this position.  They should look for contact on the upper thigh or wherever is more comfortable.  But, the arm MUST be in contact with the body at the bottom of the back swing.

3)    Is there excessive tension in the arm, especially the forearm? The arm should be as relaxed as possible as the arm swings back between the legs and the elbow straightens. There should be just enough strength in the hand to keep a hold of the kettlebell, not a death grip.

The above applies to all of the ballistic lifts.  The reason is simple, the hips are the driving force of the lift NOT the arm.  Therefore, in order to maximally load the hips, the force of the descending kettlebell must be absorbed through the body and that can only happen if the arm connects to the body at the back swing.  If the arm is separated from the body, all of the force goes through the arm and believe me that’s a lot of force!  Something’s gotta give, either the elbow, shoulder or lower back.  Add to that the fact that the hips are not maximally loaded for the next rep, the arm and lower back end up initiating the upswing – with little to no ballistic power.

The easiest way to make sure your arm connects to the body on the back swing, is to wait until the upper arm starts to make contact with the ribcage before hinging and sending the hips back. This is especially true for the swing and snatch. The clean has a slightly different movement pattern due to the fact that the arm is already touching the ribcage, therefore the hips move at the same time the arm begins it’s drop.

Another way to see this is to watch for the handle of the kettlebell falling below the level of the knees. Sometimes it’s hard to see if the arm connects to the body, or if the timing of the connection is correct, remember the arm needs to connect before the kettlebells swings back between the legs not after.

There are a number of great cues, both verbal and with physical feedback.  One of the simplest cues, is to tell them to “play chicken” with the arm and the hips.  Wait as long as possible as the arm descends and then at the very last minute explosively hinge your hips back. I find this works especially well with my male clients. 🙂

For some clients simply telling them to wait until they feel the upper arm make contact is enough to get the correct timing.  Or have them practice the movement pattern in slow motion without a kettlebell.  Have them stand up tall in their swing stance, and have them lower their arm until the upper arm makes contact with their ribcage and then quickly drive their hips back into the bottom of the swing position.  The cue I use in the back position is “riding a broomstick like a witch.”  Your arm is the broomstick.

You can have them practice a few reps of the movement pattern and then pick up a kettlebell and do a few reps with each arm.  Stop them immediately if you see them reverting back to the bad pattern.

Another simple cue I use is “Hips Drive Arms Guide.” This works especially well for the clean and the snatch.

For others, you have to use some sort of physical or tactile cue.  This starts getting more involved, as with all physical cueing you should check with your state to see if you are allowed to use tactile cuing. If verbal cueing and the movement patterning doesn’t work, I recommend finding an experienced RKC in your area.

Once the swing technique is good, it’s time to look at the clean.  The clean is the most likely culprit. The clean is simply a more complex lift, timing and technique is crucial to execute a good and safe clean. Because there is minimal forward and back movement and more straight up and down, it takes greater force in the hips to drive the kettlebell back, it wants to go straight down to the ground.

Here are a few key points to look for during the clean:

1)    Is the kettlebell being “cast away”? Thrown away from the body?

2)    Is the arm in contact with the body, the ribcage or thigh or both at the bottom, just like in the swing? Or is the kettlebell ending up down toward the floor between the feet instead of back and above the knees?

3)    Is the arm completely straight with elbow locked, with minimal tension in the forearm?

With the swing, the arm is kept straight the entire time, during the clean it must bend and straighten with every rep.  It is hard for some people to not hold tension in their arm or keep their elbow slightly bent at the bottom of the clean.  This usually happens when people are trying to muscle the kettlebell up into the rack position instead of driving with the hips.  On the drop if they don’t sit back fast enough, while keeping the elbow against the ribcage the kettlebell will tend to fall toward the floor.

This creates the need to slow or control the drop with their arm, holding tension in the elbow instead of absorbing the load with the hips.  Remember the cue “Hips Drive – Arms Guide”.  This is exactly what needs to happen.

Over time, holding the tension in the elbow and forearm can cause irritation to the tendons and you’ll end up with elbow tendinitis.  Or sometimes shoulder or lower back pain will develop.

For the clean, the timing of the hips moving back are a bit different.  Since the arm is already against the ribcage, when preparing to re-clean the kettlebell, the hips move slightly ahead of the arm or at the exact same time.  Cue them to throw the kettlebell into their stomach, remember the goal is maximal loading of the hips, so the kettlebell needs to move back not down.

Another cue that works to help reduce elbow discomfort is to tighten the triceps at the moment the elbow locks.  This will help to add stability to the elbow and take pressure off the forearm.

Something else to watch for is over gripping the handle of the kettlebell. You need just as much strength as  necessary to hold onto the kettlebell at the back swing. The grip should be relatively loose especially during the upswing.  Holding extra tension in the hand can also aggravate elbow issues.

Double cleans have a slightly different drop.  Your elbows will momentarily leave the torso to make room for 2 kettlebells to be thrown back between your legs. But the arms drive back and against the inner thighs and/or ribcage. More weight means you need to push your hips back hard and fast and keep your weight back, the force can sometimes pull you forward to your toes.

The snatch is very similar to the clean. Pretty much everything applies.

If you clean up your clean (pun intended), you should find your snatch improves too.

On a last note, if you are experiencing elbow issues during your pull-up practice, this is often a result of too much volume too quickly.  I would recommend less volume more frequently.  Think of a “Grease The Groove” program, 1 or 2 reps spread out over the course of a day rather than lots of reps in one workout.  Secondly, mix up your hand position, pronated, supinnated and neutral wrist positions will help in preventing overuse stress on the tendons.

If you currently are experiencing Tennis or Golfers elbow, the best medicine is the usual:  rest,  ice,  NSAID’s, arm or elbow braces during workouts, stretching the forearms and hands, and forearm strengthening exercises. All will help to get you back to your favorite workouts.

***

Andrea Du Cane is a Master Kettlebell Instructor, CK-FMS certified, CICS certified, Primal Move National Instructor and RIST, ZHealth certified, and has a BA in Psychology from the University of Minnesota.  She is featured on Breaking Muscle website as the February 2012 coach of the month. She is also a Pilates instructor. She has over twenty years of aerobics, weight training and fitness experience, with an additional background in… Read more here.

Filed Under: Uncategorized Tagged With: Andrea DuCane, arm placement, elbows, kettlebells, lifting, master rkc, RKC, single-arm, swing

  • Page 1
  • Page 2
  • Go to Next Page »

Primary Sidebar

Featured Products

previous arrow
BOOK-RKCBookofSnC
HardStyleKettlebellChallegeDanJohn700
BookCoverMasterTheKettlebell1
RKCiconKettlebell512
KettlebellGoddessdv040
next arrow

Recent Posts

  • RKC Big Six Workout
  • The Kettlebell Swing & Low Back Pain
  • Key Kettlebell Exercises To Help You Create Better Balance
  • How to Most Effectively Use Kettlebells to Meet Your New Year Goals
  • 1 Exercise That Checks All The Boxes
FOLLOW US ON TWITTER!

Archives

Copyright © 2025

Dragon Door Publications / The author(s) and publisher of this material are not responsible in any manner whatsoever for any injury that may occur through following the instructions or opinions contained in this material. The activities, physical and otherwise, described herein for informational purposes only, may be too strenuous or dangerous for some people, and the reader(s) should consult a physician before engaging in them.