• Skip to main content
  • Skip to primary sidebar
  • Home
  • Contributors
    • Matt Beecroft, Master RKC
    • Martijn Bos, Master RKC
    • Andrea Du Cane, Master RKC
    • Angelo Gala, Master RKC
    • Chris Holder, Master RKC
    • Steve Holiner, Master RKC
    • Dan John, Master RKC
    • Mike Krivka, Master RKC
    • Thomas Phillips, Master RKC
    • Robert Rimoczi, Master RKC
    • Phil Ross, Master RKC
    • Max Shank, Master RKC
  • Workshops
    • HKC Workshops
    • RKC Workshops
    • RKC-II Workshops
  • Find an RKC Instructor
  • Resources
    • Articles
    • Forums
    • Kettlebells
    • Products
  • Blogs
    • PCC Blog
    • Strong Medicine Blog
  • Archives

RKC School of Strength

Official blog of the RKC

kettlebell tutorial

How and Why to Fix the “Drinking Bird” Kettlebell Swing Mistake

December 2, 2021 By Andrea Du Cane 2 Comments

The Drinking Bird Toy in motion

When the kettlebell swing was first introduced, the idea of ballistically moving weight was a novelty. Other than Olympic Lifting, heavy weights were not lifted explosively. And the ability of moving the load behind the hips was unthinkable.

We take this for granted now after 20 years or more of kettlebell training. We all know the advantages of this type of ballistic training and the unique way it trains our posterior chain, a godsend for all athletes.

Teaching the Swing for Optimal Performance

Because it was so new and unique, we ran into problems with how to teach and perform the swing for optimal performance and effect. With many people quad dominant, it naturally turned into more of a squat style swing.

We worked hard to change that pattern and bring the swing into the hip-hinge dominant pattern it is today. There was lots of experimentation and drills used to find the right movement pattern. And I think for the most part we have succeeded. Today nearly everyone walking into an HKC or RKC Workshop knows the swing is a deadlift/hinge style pattern. Please note that I am not talking about the American (CrossFit) swing, which is meant to be an anterior and quad dominate movement pattern. That swing was developed to specifically mimic the Olympic lifting movement of a barbell snatch.

The “Drinking Bird” Kettlebell Swing Problem

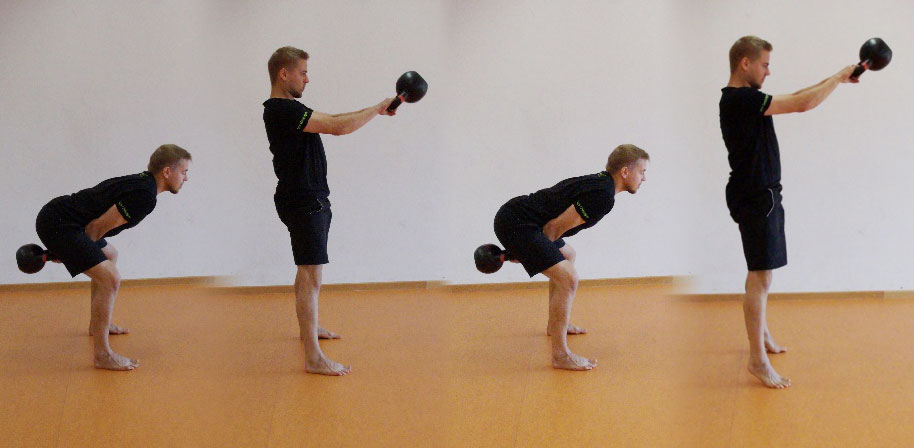
The problem with something being “too good to be true”, is also that “too much of a good thing is no longer so good.” The swing has swung (pun intended) from a too squatty swing to a straight-legged swing, or as I call it the “Drinking Bird Swing”.

It seems that in every video I see, in every workshop I teach, my clients, even myself, people have been overcompensating for the squatty swing, by swinging with nearly straight legs. You could say we have taken the easy road to loading. Let’s face it, it’s more work to sit back deeper, I call it the “lazy butt syndrome”. And if you have flexible hamstrings like some of us, it is way easier.

Swinging with nearly straight legs puts all the power and loading into the hamstrings. It takes away from the quads, but it also takes away from deep glute engagement at the backswing, right where we need the most power. In other words, a “drinking bird” swing will have much less power.

If the hamstrings are on stretch at the backswing, the glutes are not back and down enough to fully engage, so the power in the upswing is diminished.

Imagine doing a lot of snatches only using your hamstrings? No wonder, the arms and back are doing so much of the work, they must make up for loss of power from the hips.

Troubleshooting the Kettlebell Backswing

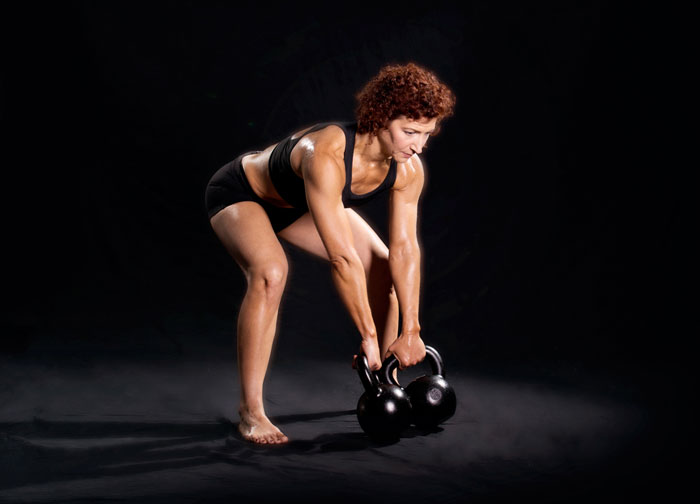
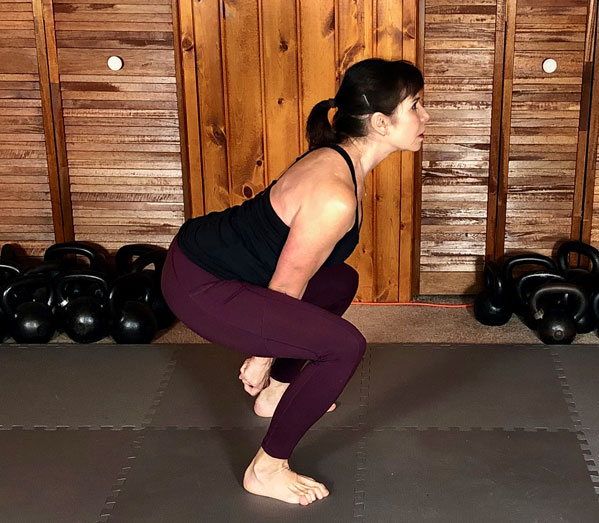
Look at the photos below, in which position do I look the most loaded? I call this the “Goldilocks” of the backswing position.

1) My knees are very bent, and my hips and knees are nearly level.
An incorrect squatty kettlebell swing mistake
A “too squatty” kettlebell backswing

2) My knees are nearly straight, my chest down, my hips and shoulders are level.
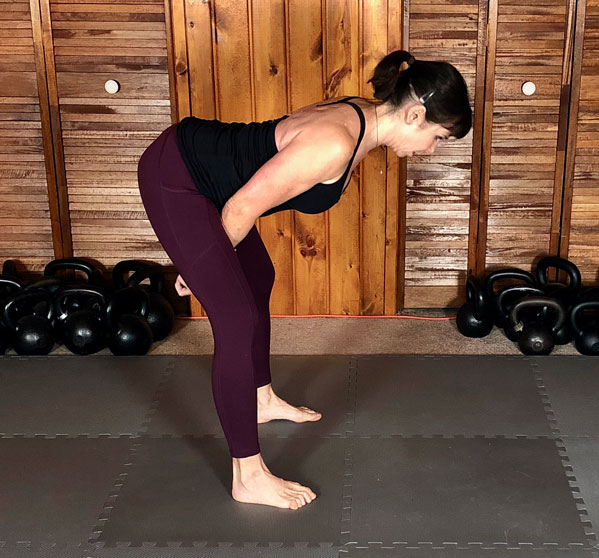
A legs too straight "drinking bird" kettlebell swing mistake
A “drinking bird” kettlebell backswing

3) My knees are bent, my hips back and down, my chest and shoulders lifted slightly.
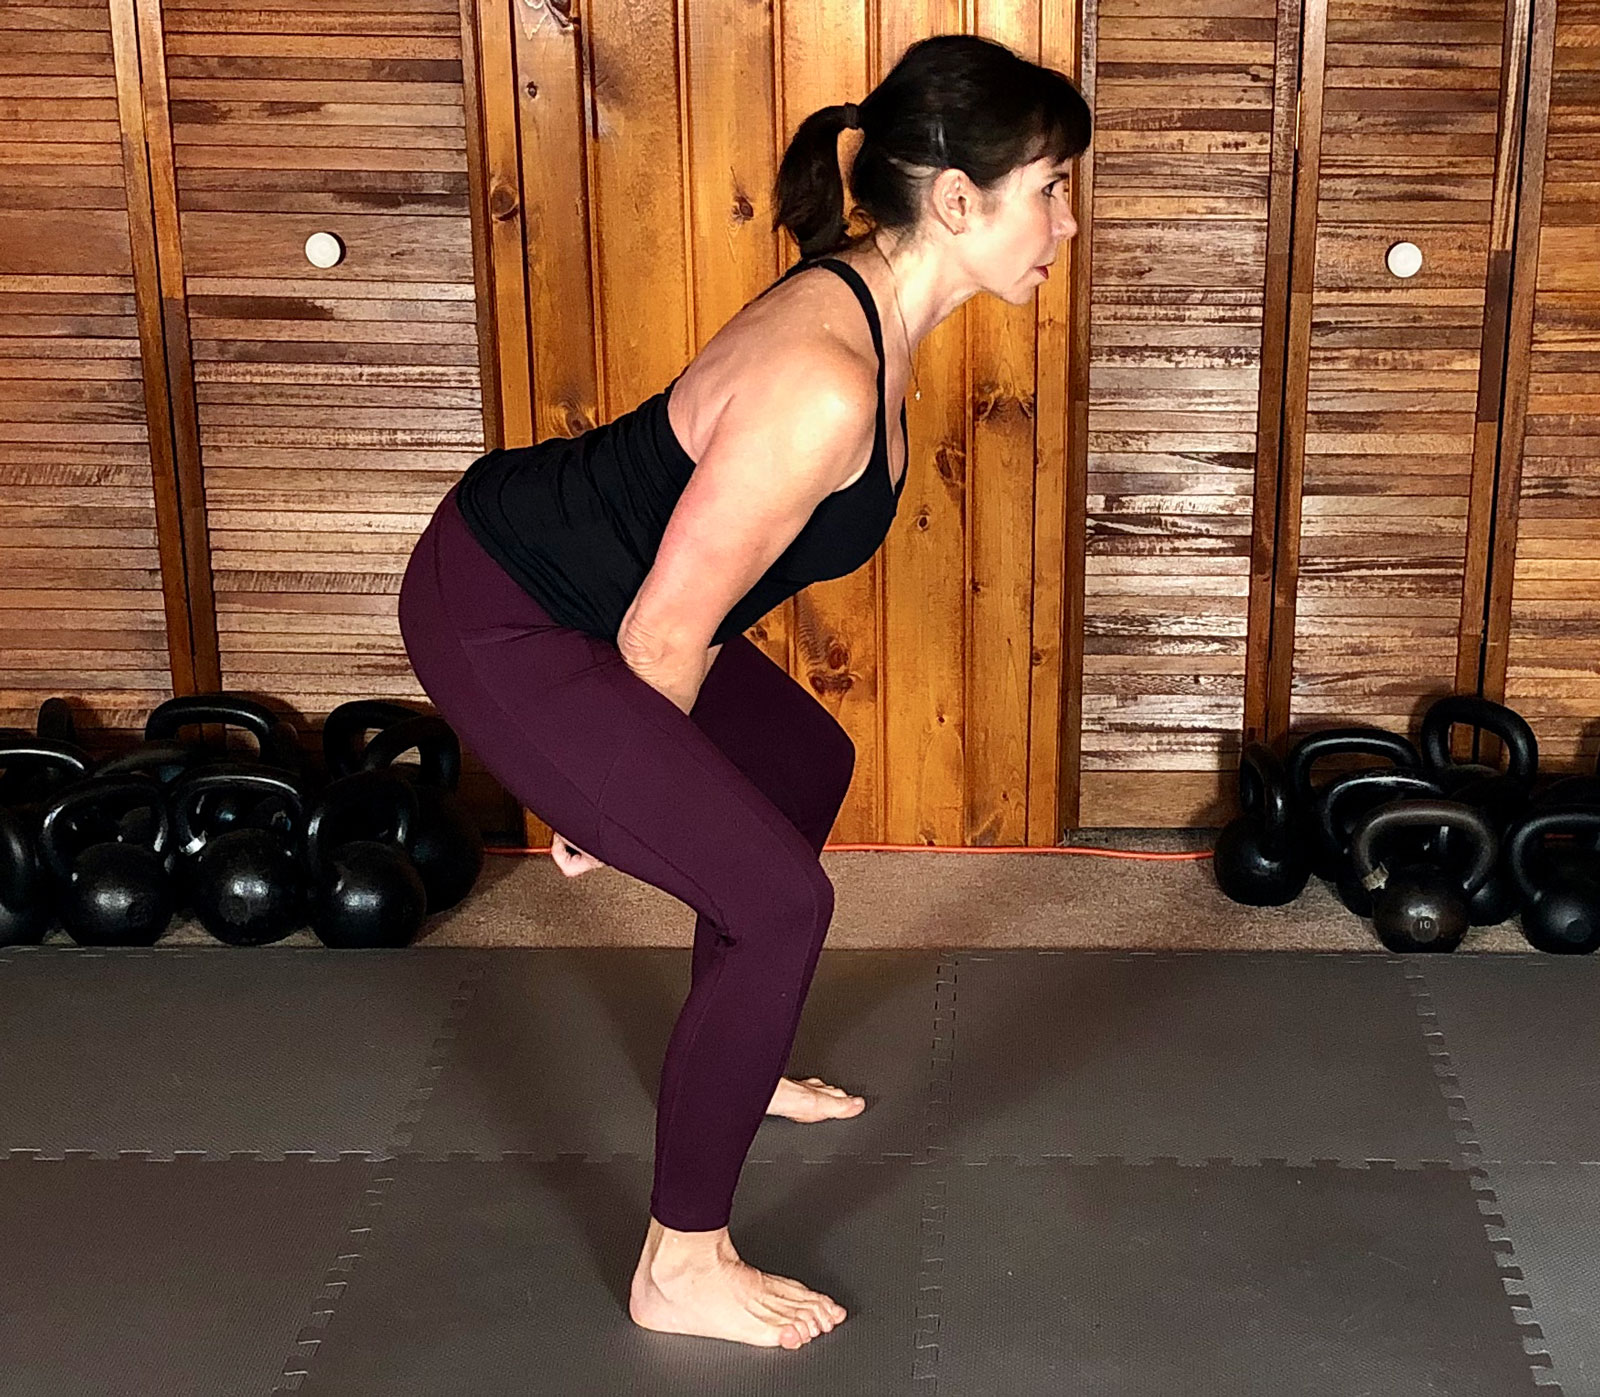
Andrea Du Cane, Master RKC Performs a correct RKC Hardstyle Kettlebell Swing Backswing
A correct RKC Hardstyle kettlebell backswing

Stand up and try each of these positions:

1) Stand feet shoulder distance, both arms in a back swing position, knees very bent, and hips in line with knees. What does it feel like? Where do you feel the most loading?

2) Same stance, this time hinge and keep the knees nearly straight, push the hips back, let the chest/head/shoulders face the ground- shoulders and hips level. What does it feel like? Where do you feel the most loading?

3) Same stance, this time sit back with hips, let the knees bend like you’re sitting back on a medium height chair, keep the chest/shoulders lifted. What does it feel like? Where do you feel the most loading?

My guess is that when you followed #1 you felt the most in your quads; #2 most of the loading is in the hamstrings; #3 you felt a little in the quads, a lot in the hips/glutes and some hamstrings. Picture #3 is the classic back swing position we teach at the RKC: Shoulders above hips and hips above knees.

How to Produce the Most Strength and Power with Your Kettlebell Swings

One of the key principles of Hardstyle kettlebell training is full body tension when we want to produce strength and power. If you don’t engage your glutes and quads and rely primarily on the hamstrings, are you not breaking that Hardstyle principle and losing power?

Yes indeed.

That’s Goldilocks for you. She lets us find the best position to get the most power. Try sitting back deeper into your backswing, I guarantee you’ll have more power, the kettlebell will fly, and you’ll feel your glutes more than you have in a long time.

***

Andrea Du Cane is a Master RKC Kettlebell Instructor, CK-FMS, CICS, and RIST, ZHealth certified, she has a BA in Psychology from the University of Minnesota and is also a Pilates instructor. She is the author of several books and dvds including The Ageless Body, The Kettlebell Boomer, and The Kettlebell Goddess Workout.  She has over twenty years of aerobics, weight training and fitness experience, with an additional background in… Read more here.
Filed Under: Kettlebell Training, Tutorial Tagged With: Andrea Du Cane, coaching kettlebell swing, drinking bird swing, fix kettlebell swing mistakes, Hardstyle Kettlebell Swing, Kettlebell swing mistake, kettlebell swing technique, kettlebell technique, kettlebell tutorial, Master RKC Andrea Du Cane, swing technique

The Turkish Get Down Press and the Road to Windmills and Bent Presses

November 12, 2021 By Dan John 2 Comments

Dan John Performs a Kettlebell Get Down Press

Let me cut straight to the point, something I rarely do: the Turkish Get Down Press (TGDP) has allowed me to speed up the teaching process of three of the most difficult kettlebell exercises to teach and master:

  • The Turkish Get Up
  • The Windmill “Family”
  • The Bent Press

Actually, the TGDP has helped me speed up the teaching of the entire pressing family, too, but I like my world to fit neatly in threes. Certainly, you may know the exercise, but like The Rock’s world in Jungle Cruise, there seems a whole lot more to discover

I liked the movie. Just saying.

Committing to a few rounds of this lift might save you a lot of time and energy later trying to explain the hows and whys of doing the movement.

If you know how my brain works, you also know that this “all starts with a story.” We, my morning training corps (my Intentional Community), were having a typical gym discussion about what to do next in the workout. For the record, not EVERY thing we do in training is computer generated perfection.

Actually, the BEST things we do are usually cobbled together. Not every group can handle a Jazz Improv training program but it seems to work with us as we are a mix of ages, occupations and experience.

I had just returned from a workshop. At said workshop, someone asked about having a workout with just a single kettlebell and a basic knowledge of Tim Anderson’s Original Strength. (I include an example at the end) and we talked about how much I love, love I tell you, doing the Half-Kneeling Press for home trainees. Including me.

Done correctly, with the 90-degree angles at the knees and a tall position of the body, the Half-Kneeling Press stretches, mobilizes, and strengthens a host of bodyparts and “just feels good.”

And, of course, the question came up.

“Which hand with which knee?”

You see, with this press varietal, you have some options. You can press with one arm…or two. You can have your left knee down or your right knee. As you know, in lifting there are three knees:

  • The Left Knee
  • The Right Knee
  • The Hiney

I crack myself up. By the way, spellcheck does NOT like my spelling of “hiney.” For your illumination, I give you the dictionary explanation of my awful joke:

The first records of hiney come from the first half of the 1900s. It is derived from words based on the root word hind, meaning “the back,” as in behind (another euphemism for the buttocks) and hindquarters. The suffix -y or -ie is used to add an endearing or euphemistic quality to words—to make them cuter or more familiar, as in granny and doggie.

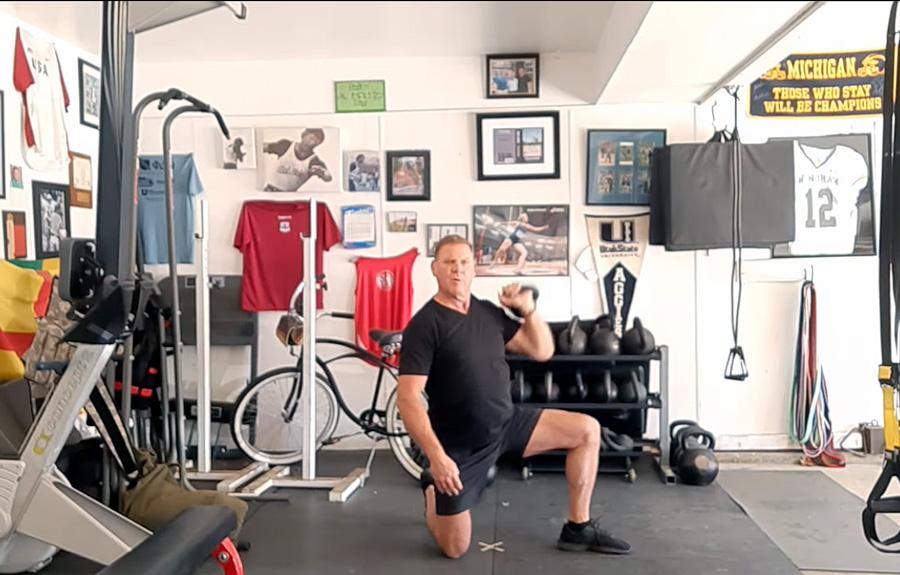
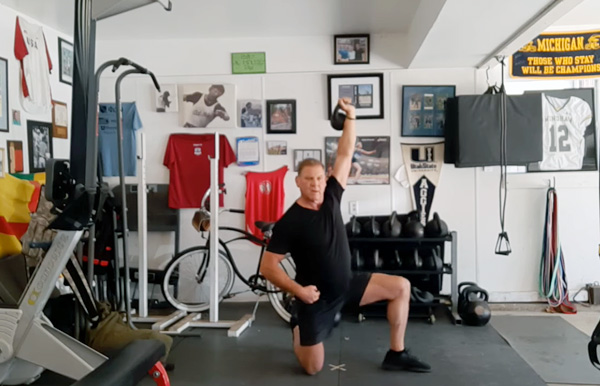
Dan John Demonstrates part of the Get-Down Press Sequence with a light kettlebell

We came to a decision as a group that the left knee should be down if pressing with the right hand and the right knee should be down if pressing with the left hand.

Why?

The Turkish Get Up!!!

Actually, one would learn this doing a correct Turkish Get Down. And, for total candor, it is the Turkish Get Down Press that got us thinking of this reason.

You don’t know the Turkish Get Down Press? Let me say this: for speeding up the teaching of the TGU, I have yet to find anything better than the TGD Press. It’s very simple:

At each step of the TG Down, add a press. I am telling you this now also: go lighter than you think.

Simply, here you go:

  1. I suggest snatching the bell up to the top. You can certainly clean and press but that adds an additional press to a lot of presses.
  2. Standing tall, press the bell.
  3. Step back with the foot opposite the bell into what I call the Cross Country Ski Position. For the record, the “key” to the TGD is a longish step back as it gives you space to move later. The knee will get close to touching the ground, but don’t let it touch. Press the kettlebell.
  4. Bring the knee down to the Half-Kneeling position. Press the bell.
  5. Windshield Wiper the front foot. I recommend pressing the bell here, too.
  6. Hinge back and bring the free hand to the floor. The hand, knee and foot should all be in a line. The knee should bisect that line. Press the bell.

(It should feel like a warmup for the Bent Press because it is a warmup for the Bent Press) Look, an asterisk: * (See Below)

  1. Sweep the butt through to the Tall Sit Position. Press the bell.
  2. Roll to the elbow. Press the bell.
  3. Roll to the floor. Press the bell.
  4. With BOTH hands, bring the bell down, cuddle it, roll to the side and release the bell safely to the floor.

*Position Six is called the Kneeling Windmill and will be the focus of the next article in this series.

Let’s watch someone demonstrate it. The model seems to know what to do.

That’s eight presses. That’s a lot of presses. Moreover, as you will discover, the press grooves were different almost every press. I find that my shoulders feel better after this exercise. This movement can be done for mobility work and this is what I use the move for in my own training.

The TGDP can also be done for hypertrophy. If you did three rounds of both sides for eight total reps per round (24 total presses per hand), I’m just guessing something good would happen. Perhaps you would get those “shoulders that are the envy of your friends” that I used to read about in the muscle magazines. My friends envy my naturally curly hair (with a nod to Peanuts).

So, yes, this exercise is a great exercise. For my work with kettlebells, there are other values to this movement.

First, I’m not sure there is a better way to teach the Turkish Get UP. The Turkish Get DOWN with presses stops the participant at several key points and holds these positions in place. If you can’t get the press groove, there is a good chance the bell is in the wrong place. Most of the little troubling positions and points of the TGU are cleaned up with this simple drill.

Second, and it was only at the most recent RKC II that I realized this as clearly as I do now, this drill is gateway to the Windmill and Bent Press family.

Next time, we will dissect the Kneeling Windmill and show you how this single position can teach so much, so fast to so many.

The simple program I promised you.

One KB only mixed with Original Strength.

A1. Left Hand Press (Stand or Half-Kneeling)
A2. Prone Neck Nod

B1. Right Hand Press (Stand or Half-Kneeling)
B2. Prone Find Your Shoes

C1. Goblet Squat
C2. Six Point Rock

D1. March in Place with Load in Left Hand (Suitcase Carry)
D2. Six Point Rock with Left Leg in wide position (Kickstand)

E1. March in Place with Load in Right Hand (Suitcase Carry)
E2. Six Point Rock with Right Leg in wide position (Kickstand)

F1. Swings
F2. Egg Rolls

“Maybe” Day One:

Super set with Sets of Eight (Three Rounds)
A1. Left Hand Press (Stand or Half-Kneeling)
A2. Prone Neck Nod

B1. Right Hand Press (Stand or Half-Kneeling)
B2. Prone Find Your Shoes

Superset with Sets of Eight (Three Rounds)
C1. Goblet Squat
C2. Six Point Rock

Superset for maybe Thirty Seconds each
D1. March in Place with Load in Left Hand (Suitcase Carry)
D2. Six Point Rock with Left Leg in wide position (Kickstand)
E1. March in Place with Load in Right Hand (Suitcase Carry)
E2. Six Point Rock with Right Leg in wide position (Kickstand)

Five Rounds of 15 Swings and appropriate Egg Rolls
F1. Swings
F2. Egg Rolls

“Maybe” Day Two

Three Sets of Eight
A1. Left Hand Press (Stand or Half-Kneeling)
A2. Prone Neck Nod

Three Sets of Eight
B1. Right Hand Press (Stand or Half-Kneeling)
B2. Prone Find Your Shoes

Three Sets of Eight
C1. Goblet Squat
C2. Six Point Rock

Three Rounds of Thirty Seconds Each
D1. March in Place with Load in Left Hand (Suitcase Carry)
D2. Six Point Rock with Left Leg in wide position (Kickstand)
E1. March in Place with Load in Right Hand (Suitcase Carry)
E2. Six Point Rock with Right Leg in wide position (Kickstand)

“Up to 100 Swings”
F1. Swings
F2. Egg Rolls

“Maybe” Day Three

The entire circuit for three rounds of eights and thirty seconds as appropriate.

  1. Left Hand Press (Stand or Half-Kneeling)
  2. Prone Neck Nod
  3. Right Hand Press (Stand or Half-Kneeling)
  4. Prone Find Your Shoes
  5. Goblet Squat
  6. Six Point Rock
  7. March in Place with Load in Left Hand (Suitcase Carry)
  8. Six Point Rock with Left Leg in wide position (Kickstand)
  9. March in Place with Load in Right Hand (Suitcase Carry)
  10. Six Point Rock with Right Leg in wide position (Kickstand)
  11. Swings
  12. Egg Rolls

There you go…off the top of the head but pretty good.

***

Master RKC, Dan John is the author of numerous fitness titles including The Hardstyle Kettlebell Challenge: A Fundamental Guide To Training For Strength And Power, the best selling Never Let Go and Easy Strength. Dan has spent his life with one foot in the world of lifting and throwing, and the other foot in academia. An All-American discus thrower, Dan has also competed at the highest levels of Olympic lifting, Highland Games and the Weight Pentathlon, an event in which he holds the American record.

Dan spends his work life blending weekly workshops and lectures with full-time writing, and is also an online religious studies instructor for Columbia College of Missouri. As a Fulbright Scholar, he toured the Middle East exploring the foundations of religious education systems. For more information visit DanJohn.net

Filed Under: Kettlebell Training, Mobility and Flexibility, Tutorial, Workout of the Week Tagged With: bent press, Dan John, full body workout, get up, get-down, get-up presses, get-up programming, get-up tutorial, kettlebell tutorial, kettlebell windmill, kettlebell workout

One Kettlebell And 30 Exercises For Infinite Workouts

August 15, 2021 By William Sturgeon Leave a Comment

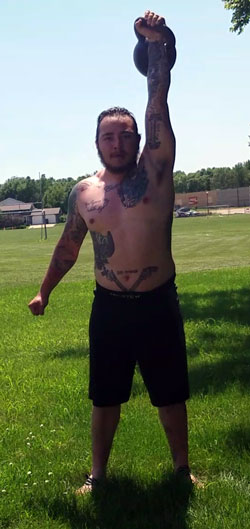
William Sturgeon, RKC-II Performs a half-kneeling kettlebell press

Exploring non-traditional methods of fitness will allow you to add new movements into your training. Josh Henkin from DVRT (Dynamic Variable Resistance Training) Fitness is well known for his “out of the box” ideas around training. To some, it might look overly complicated nonsense, but even if that’s your opinion, there will still be plenty of take-aways to benefit your training.

Your training should be purposeful and intentional. If it isn’t, you’re only trying to find ways to burn calories. Your kettlebell workouts should have some structure with which you program the exercises you will do in a session. Variations can be added to exercises for a particular purpose or variety/novelty—and you get to decide!

In the videos below, I’ll review some new and old variations on the traditional RKC Hardstyle kettlebell exercises. The best thing about all these exercises is that you only need one kettlebell to do them.

Kettlebell Press

When it comes to pressing, there are many ways we can hold the kettlebell and perform this movement. The less stable the body, the more challenging pressing will become.

  • Tall Kneeling Press
  • Half Kneeling Press
  • Z Press
  • Narrow Stance Press
  • Rotational Press
  • Single Leg Press
  • Bottom-Up Press
  • Wide Grip Press

https://youtu.be/-3w6wOh0J78

Goblet Squat Variations

Goblet squats are a staple in my programming—I always add them to my workouts. These kettlebell goblet squat variations can provide even more “bang for your buck” when it comes to getting the heart rate up.

William Sturgeon performs a kettlebell "Simba" squat

  • Kickstand Goblet Squat
  • Power Clean to squat
  • Simba Squat
  • Single Arm Rack Squat
  • Same Side Kickstand SA Rack Squat
  • Single Arm Squat to Press

https://youtu.be/OBk5uOzFmBs

Kettlebell Swings

What’s a kettlebell article without talking about the kettlebell swing? Before trying some of these surprisingly advanced variations, be sure to have a solid foundation in your standard Hardstyle swing. Here’s an earlier article I wrote to help master the kettlebell swing. 

  • AS KB Swing
  • SA KB Swing
  • Hand to Hand Swing
  • Step Back KB Swing
  • Lateral KB Swing
  • Walking KB Swing

https://youtu.be/7gBImdM84-Y

Kettlebell Rows

Rows are another staple in the workouts I lead to counteract all the sitting that most people do for lengthy periods of time. Helping your clients strengthen their upper backs with these kettlebell row variations will do wonders for their posture.

  • 3-Point Row
  • Kick Stand SA Row
  • Bent Over Row
  • Same side SA Row
  • SA Bent Over Row

https://youtu.be/j0dUTTMg0_o

Kettlebell Lunge

Lunging is something we do in our normal activities every day, so we should train the movement to improve our daily lives. Before attempting to train with lunges, make sure that the ankle is stable and strong enough to support the movement.

  • Lunge to Press
  • Same Side lunge
  • Power Clean to Lunge
  • Lateral Lunge to Row
  • Tactical Lunge

https://youtu.be/82vZcCBeeWU

Exercise doesn’t have to be a “one shoe fits all”, but there are principles that we must practice to ensure proper training and safety with our clients. If you’re ready to take your kettlebell training to a new level get yourself RKC certified!

***

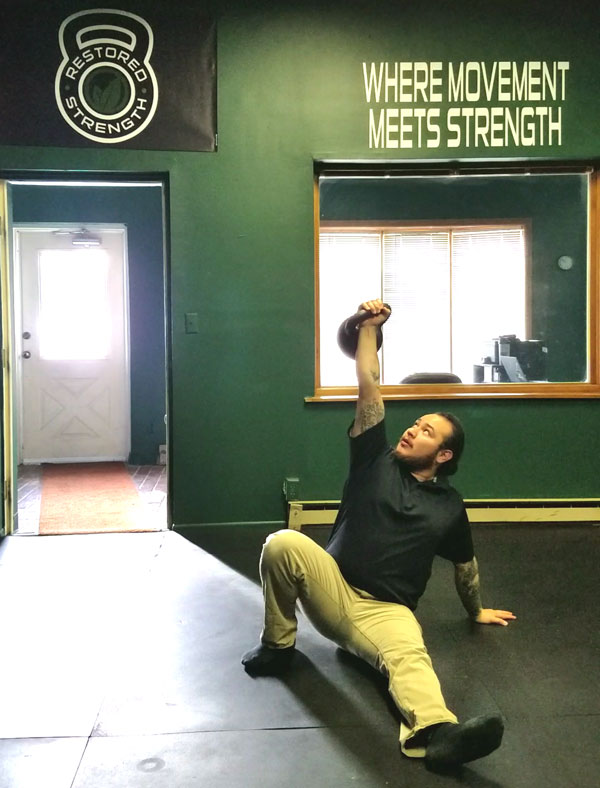
William Sturgeon, RKC Team Leader, RKC II trains clients at his gym, Restored Strength. Contact him through his website at RestoredStrength.com or follow him on Facebook: facebook.com/restoredstrength

Filed Under: Kettlebell Training, Tutorial Tagged With: advanced kettlebell exercises, kettlebell exercise variations, kettlebell exercises, kettlebell tutorial, kettlebell video, William Sturgeon

Beyond the See-Saw Press: Two New Variations

August 8, 2018 By Nick Collias Leave a Comment

Z-Saw Kettlebell Press Nick Collias
Some lifts just never feel quite right, no matter how hard we try to force them to do so. Others are a willing dance partner from the first rep. And from the first time I tried it, the see-saw press just felt right.

Unlike the single-arm press, which took months (er, years) to share the ideal groove, the see-saw offered it up instantly. And because it’s a rhythmic push with a bit of a pull (or an eccentric push that feels like a pull), it demands that all manner of anterior, posterior, lateral, and deep core muscles get in the game of tug-o-war. Any experienced RKC can tell you that this extra activation usually allows you to get 2-3 extra reps, maybe more, with any given weight than what you’d manage with either single-arm or double-arm presses.

That translates to extra strength, extra volume, extra activation, and extra-efficient training. Extra awesome.

Those are all reasons to try the see-saw press. But they’re also reasons to explore different variations of the movement. Here are two variations that have quickly become my two favorite presses, period.

To be clear, I make no claim to inventing either of them. Somebody else probably did long ago. I just happened across them in my training, picked them up, and am now passing them along.

Z-Saw Press

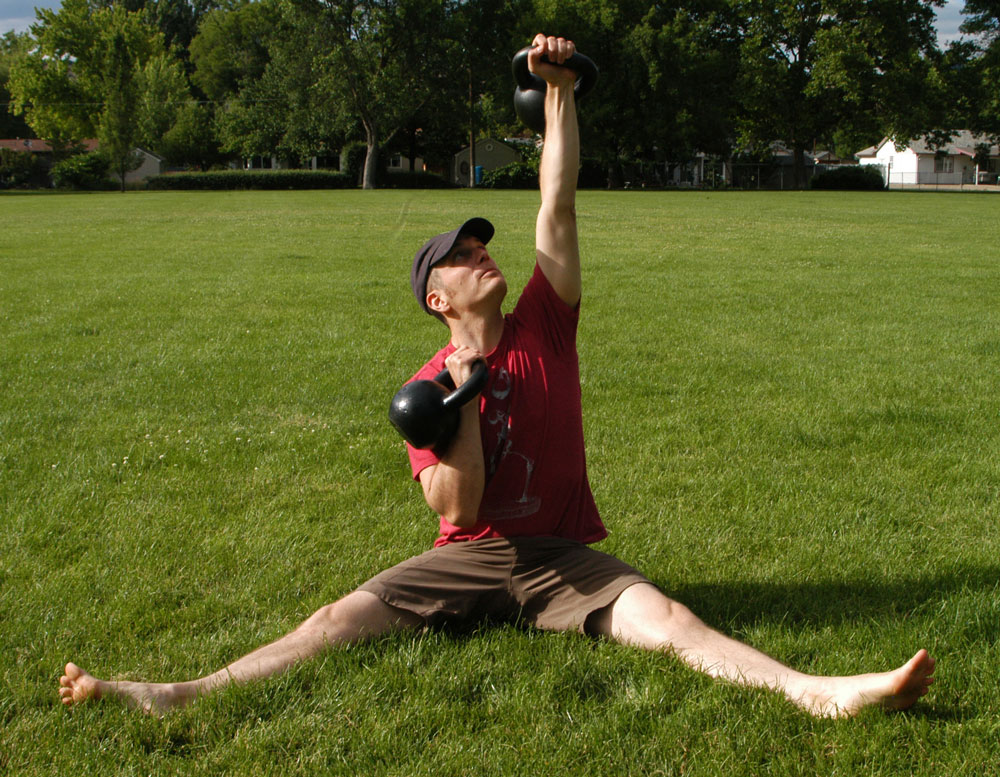
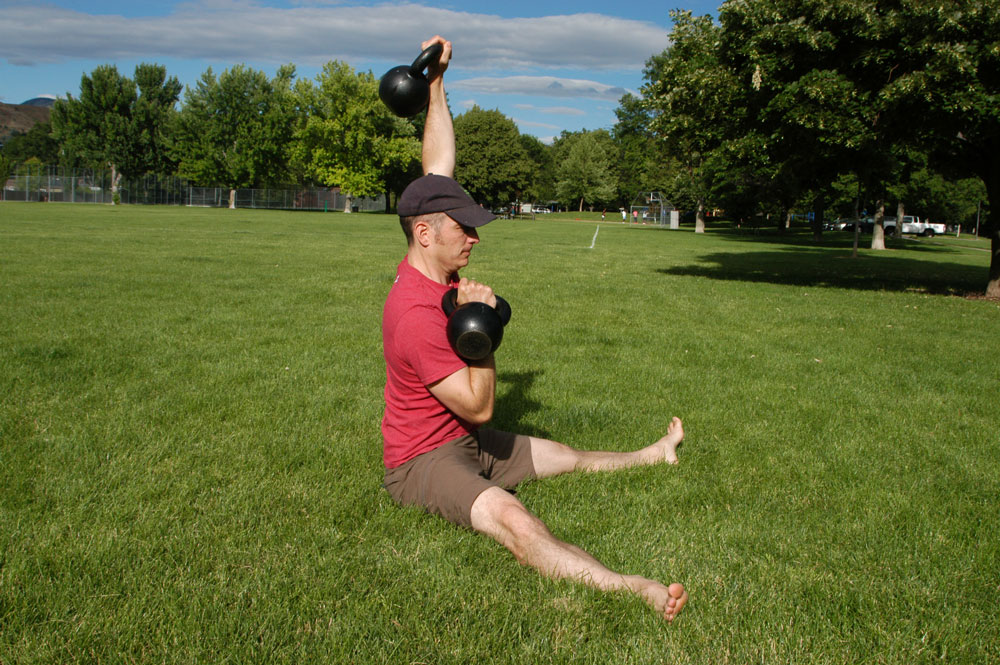
This is nothing more than a seated see-saw press in a straddle position, or what is known as a Z-press. But that alteration changes the lift dramatically.

What I dig about it:

  • Sure, it brings the wicked shoulder pump, but it also ties in more total upper body musculature than any press I’ve tried—even more than the standing see-saw press. All the postural muscles of the upper back light up, but so does the core. When those groups are both working hard, I know I’m doing something right.
  • Lumbar hyperextension is pretty much impossible with this lift. Not so with the standing see-saw. This makes it a great way to work around an achy lower back, or just one, like mine, that just doesn’t like to work hard early in the morning when I tend to train.
  • No clean is needed. That’s not an advantage or disadvantage; it’s just a feature of the lift. This means it lends itself more cleanly to an upper/lower split, if you prefer that approach.
  • Perhaps because the upper back and core are so integrated, I find it also lends itself better than other press variations to grinding out a few hard reps at the end of a set, while still being safe on the shoulder joint.

This is one reason why I like it with a DeLorme Protocol-style approach:

10 reps light, or around half of 10RM
10 reps medium, or about .75 of 10RM
10 reps with more or less a 10RM

Z Saw Kettlebell Press Side view Nick Collias
Look forward or look up; either way, your postural muscles and pressing muscles will both work overtime.

Keeping a set at a 10RM or lighter also keeps you from having to figure out how to get two seriously heavy bells into position. Just curl it up and go.

One more technique note: In a recent email, Master RKC Andrea Du Cane mentioned that she recommends most people—men in particular—sit on a yoga block or something similar during Z-press variations, because otherwise they often struggle achieve a neutral pelvis and spine position on the ground. Me, I like something about half to two-thirds yoga block-height, like one of those hardcover college textbooks you haven’t done anything with in a long time. The Modern Library edition of Plutarch’s Lives of the Noble Greeks and Romans is just about perfect.

Swollias Press

This movement took on my nickname at work (I do work at Bodybuilding.com, after all), simply because I’d never seen it before, and the nomenclature alternatives are all pretty complicated. “Alternating see-saw kettlebell thruster,” anyone? No thanks. Let’s go with Swollias.

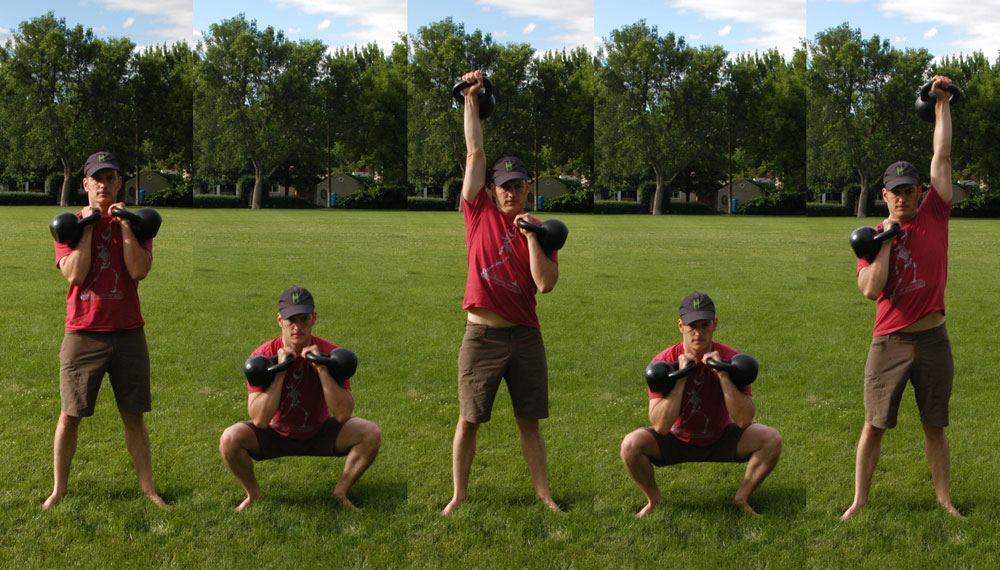
As with the Z-saw, this isn’t a new lift so much as it is a combination of existing ones. Here’s how to do it:

  1. Clean a pair of kettlebells, either from a dead stop or with a swing. You can do it with two matching weights, or two uneven ones. It works great with both.
  2. Perform a single front squat, and on the way up, press one of the kettlebells up while keeping the other in the rack.
  3. Lower the top bell into the rack. A second clean is optional here.
  4. Squat again, and on the way up, press the other bell. You can then set the kettlebells down and shake it off before going again, or you could keep piston-pumping reps as long as you want.

What’s the advantage? Well, having a bell in the rack means you’re forced to keep an upright torso and tight core. I like the single-kettlebell thruster, but find it can get a little sloppy and forward-leaning under fatigue. This variation holds a little firmer, in my experience.

"Swollias" Kettlebell Combo Sequence Nick Collias
Lots of cleans, lots of squats, lots of time in the rack. What more do you want?

On the flipside, it doesn’t require the same level of thoracic mobility as a double-kettlebell press or thruster, and once again, lumbar hyperextension is hard to slip into with this variation. Definitely not so with the double kettlebells.

With heaver weight, I like to treat these as a little mini-complex, kind of like Dan John’s “Armor-building” complex of two cleans, one press, and three squats. One round of clean, squat, press, clean (optional), squat, press every 30 seconds, or on the minute, is a great routine. Do it for 10-20 minutes, and it adds up to lots of cleans, lots of squats, lots of time in the rack.

Alternately, you could use a lighter weight, up the reps, and just see what cries “Uncle” first.

How To Use These Lifts

There’s a time to train like you’re chasing something—say, a half-bodyweight press for an RKC-II certification—and there’s a time to train like you’re not. And when I’m not chasing, I like to mix my presses up. A lot.

For the last few months, my favorite way to do this is to use Dan John’s press and suspension strap circuit from this article on Bodybuilding.com as a template, and swap out press variations based on whatever feels good that day. Both of these press variations have been regulars in the batting order.

Don’t confuse this with “program hopping,” that oft-maligned symptom of exercise ADD. The parameters and the basic movement patterns don’t change much; just the specifics do. If I want to change every workout, fine. If I want to do the same thing for three weeks, fine.

This approach keeps me excited to train, allows me to sneak into moderate rep PRs regularly, but also allows—or maybe forces—me to learn and explore new lifts, either those that I see out in the world, or that I cook up on my own in a moment of living room inspiration. These are two of the latter. Enjoy!


***

Nick Collias, RKC-II, PCC, is the executive editor at Bodybuilding.com, and the host of the Bodybuilding.com Podcast. You can read and hear more of his work at Bodybuilding.com.

Filed Under: Kettlebell Training, Mobility and Flexibility, Tutorial Tagged With: kettlebell training, kettlebell tutorial, Nick Collias, press challenge, RKC, see-saw press, straddle press

Does the Snatch Test Really Matter?

February 1, 2017 By William Sturgeon 4 Comments

Every RKC instructor has gone through the rigorous snatch test. This is five minutes of full effort—snatching a kettlebell for 100 repetitions. Ask anyone who has done it and they will tell you the joys of the test. Many RKC candidates are nervous and frightened when it comes to the snatch test. They end up putting so much effort and stress about test that they miss the big picture of what the weekend is really about—learning.

William Sturgeon Kettlebell SnatchesThe RKC is known as the School of Strength because we educate candidates on how to teach strength to others. As we all know the title of RKC instructor is not given, it’s earned. One of the requirements is the snatch test and it’s part of the right of passage to earn your title as an RKC instructor. But, I want to bring this to everyone’s attention: your ability to safely instruct kettlebell training is not related to how fast you finish your snatch test.

The biggest test that many people underestimate and under-prepare for is the coaching aspect of the certification. I can say that I fell into this when I first got certified. I put so much effort in preparing for the snatch test that I didn’t want to focus on anything else. I passed my RKC that weekend, but I wish I would have put more effort and focus on the coaching part of the weekend. As candidates, you are surrounded by other fitness professionals with years of experience—many people also undervalue this aspect of the weekend. Taking in all the cues and corrections the instructors have to offer is so important for growth as teacher of strength.

One year after my certification, I was able to attend another RKC as a volunteer. The candidate coached me though the swing and the plank. And while he used good cues and good progressions, he ultimately did not pass the snatch test. But, he wasn’t bothered by that, his focus was on passing the other two tests—the coaching test and the technique test. This was a good candidate who had his priorities straight. A year later I was able to assist at an RKC Workshop, and this was my opportunity to share with the candidates the importance of coaching. I assured them that the focus for the weekend was to learn how to teach and perform proper kettlebell technique, not to finish the five minute snatch test in four minutes. Knowing how to properly progress and regress a client means you are competent in coaching while keeping your clients safe.

William Sturgeon Get-Ups

Safety is our number one goal when we working with clients. Making sure that you put a bigger focus on the learning aspect of the weekend will lead you to a successful career in coaching. The RKC is more than just a certification, it’s a system that has principles that apply to all areas of fitness. If you place priority on passing your snatch test and not your ability to coach, you are doing yourself a disservice. Focus on reading your manual and taking notes, I have had the opportunity to assist at an RKC and an HKC, both times I advised the candidates to grab their manuals and write notes. The master instructors have been teaching for years, they will often give cues or corrections that are no in the manual that will be beneficial to remember, so make sure to take notes.

Passing your certification comes with three big tests, your ability to perform the exercises with proper technique, your ability to coach, and your snatch test. This should be the order of importance when you are preparing for your RKC. You will become a teacher of strength, and will show your clients what you learned with proper coaching. Take time to understand that the snatch test is not the most important part of becoming an RKC instructor.

Here are some of my favorite coaching cues to correct the swing:

****

William Sturgeon, RKC II trains clients at his gym, Restored Strength. Contact him through his website at RestoredStrength.com or follow him on Facebook: facebook.com/restoredstrength

Filed Under: Coaching, Kettlebell Training Tagged With: becoming an RKC, Coaching, how to become an RKC, kettlebell training, kettlebell tutorial, kettlebells, RKC Testing, RKC workshop experience, RKC workshop prep, William Sturgeon

Try This Solo Version of a Classic Kettlebell Corrective Partner Drill

December 28, 2016 By Shari Wagner 5 Comments

Shari Wagner RKC Team Leader Swing Setup

I was working with a personal training client who was having trouble packing his shoulder in the one-arm kettlebell swing, particularly in the hike pass position. He had no problems with this in his two-hand swing, it only happened when he switched to the one-arm swing. So, I used the RKC towel pull drill with him and voila! It taught him the feeling of properly loading in the hike position and it improved his shoulder packing when he went back to swings.

This client trains with me once a week to learn proper kettlebell technique, and the rest of the time he trains on his own at home. How could he duplicate this drill on his own when he didn’t have a training partner or qualified instructor to train with him at home? We needed a solution so that he could practice the drill prior to each set of one-arm swings, at least until he was able to groove the pattern in his swings.

The deadlift drag is a wonderful exercise and I use it quite often. In this drill, you set up as if to swing, but instead, you drag the kettlebell on the floor very slowly, keeping yourself in the hike position and loaded up through the posterior chain the whole time. However, I sometimes find that the deadlift drag doesn’t have the same carry-over into the swing itself. Not every drill will work for every person to correct the pattern they need to correct. In this case I wanted my client to be able to really load up in the same way we do with the towel pull drill since it really worked to help his one-arm swing. I wanted him to have his arm connected to his body as if the kettlebell were behind him like it is in the hike position of the swing.

I came up with a similar drill using a resistance band. I used a band that was about 1/2” wide, that provides about 15-30 lbs of resistance. Keep in mind that you’re using a double thickness of the band when you set it up as I have in the video below. The loading in this drill happens from the front as you are pulling the band behind you, rather than loading from the back in the towel pull drill. But, the drill still worked really well for my client. He got his shoulder packed in the hike position and felt the loading and support that comes from the shoulder position in the in the swing.

We did one set like you’ll see in the video below and it had the same positive effect on his one-arm swing technique as when we did the towel pull drill together at the gym. The best part is that he can now do the resistance band drill when he trains by himself at home. I prescribed for him to do about five pulls of the band, followed by one 10-second static hold before every set of one-arm swings.

https://youtu.be/9Ac8T1bpdpo

I did experiment with this same idea, and we turned around to try and load up from the back, in order to really try and emulate the towel pull. I personally didn’t like this as much as pulling from the front, because I felt like the resistance of the band wanted to pull me backwards and without a partner to brace against in the pull, I didn’t feel like I was in control of the movement as much. I also didn’t feel like I could engage the lats and the hips in the same way or to the same extent.

I invite you to try this drill both ways and let me know what you think in the comments section below!

Here’s a quick workout you can do using this resistance band drill, the deadlift drag, and the all-important single rep swing. Hopefully the combination will really help your one-arm swings.

  • 5 1-arm deadlift drags, left side
  • 5 single rep swings, left side
  • 5 band pulls, left side with :10 hold on last rep
  • 10 1-arm swings, left side
  • Repeat on the right

Repeat for 5-10 sets, resting as needed between sets

****

RKC Team Leader Shari Wagner, RKC-II, PCC, CK-FMS owns Iron Clad Fitness in Denver, Colorado. She can be contacted through her website at IronCladFit.com, email: info@ironcladfit.com or by phone 720-900-4766. Follow her on Facebook: facebook.com/IronCladFitness and Twitter: twitter.com/IronCladFitness.

Filed Under: Coaching, Kettlebell Training, Tutorial Tagged With: how-to, kettlebell drills, kettlebell training, kettlebell tutorial, RKC, Shari Wagner, video

Where and How To Grab The Kettlebell Handle

December 14, 2016 By Andrea Du Cane 5 Comments

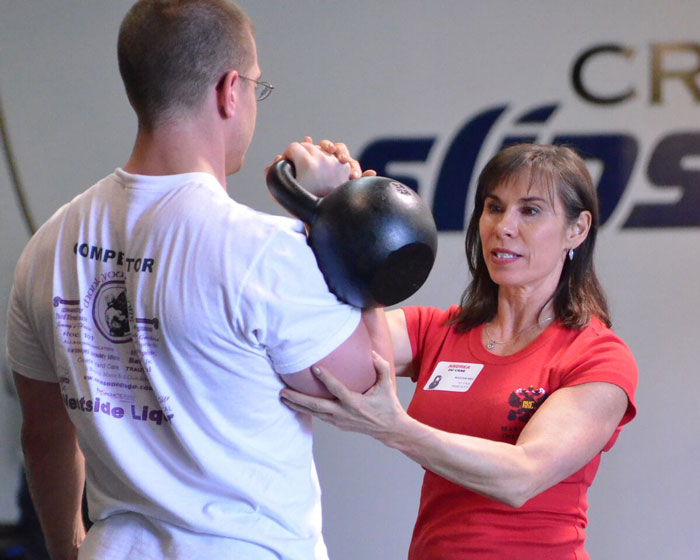
Andrea Du Cane coaching rack position

As I travel around the country, I find there is a lot of confusion about where to grab the kettlebell handle—in the middle or in the corner? It is understandable that people are confused. After all, kettlebell training is still reasonably new to the broader public and it IS a very unique training tool. I hope to clarify some of this confusion and explain why certain grips are better for certain exercises, while some are definitely not appropriate for others.

The simplest way to break it down is to look at where you grab the kettlebell on the handle: the center or the corner. I’ll refer to this as the Center Grip or the Corner Grip.

This is very important. Unfortunately, many people do not pay attention to where they are grabbing the kettlebell. This is part of what I call the “set-up”. Every single kettlebell exercise has a set-up. This is where you stop and look at your feet, then determine where you place the kettlebell—in front of you for a swing/clean, or directly between your feet for a deadlift. You need to pay attention to where you place your hand on the kettlebell handle, and this too is determined by which exercise you are planning to practice.

Let’s begin by breaking down the different kettlebell grips, their uses, and advantages.


The Center Grip or Parallel Grip:

Grab the kettlebell in the center of the handle. The handle will generally lie across your callus pads with a slight downward angle toward the pinky side of the hand.

Rule of Thumb:

Anytime a kettlebell is held overhead, the kettlebell should be gripped in the middle of the handle.

Exercises:

presses, get-ups, kettlebell carries, windmills, snatches

Instructors at the Chicago RKC demonstrate kettlebell center grip

Why to Use the Center Grip:

1) The center grip keeps the kettlebell balanced so it won’t roll in either direction around the forearm. When the kettlebell is locked out overhead, the handle should be balanced in the palm. I have seen people lose control of the kettlebell and let the kettlebell roll around the forearm, not fun!

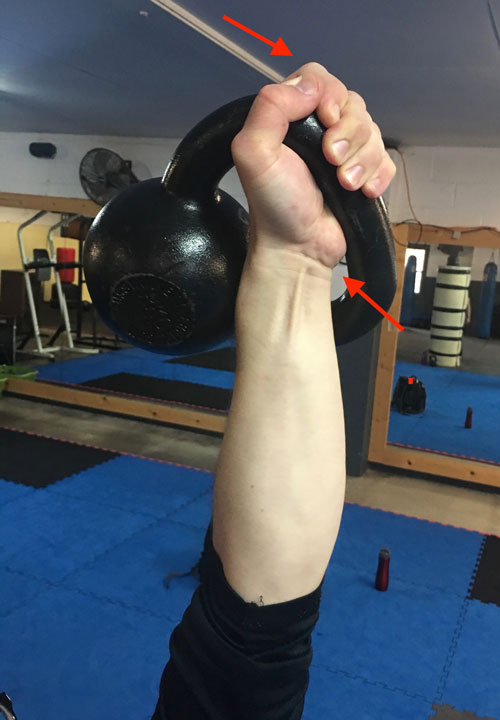
2) It helps to keep the wrist neutral. In contrast, a corner hold tends to pull the wrist into lateral flexion as well as flexion. This is very hard on the wrist. We want a strong forearm and wrist. An angled kettlebell tends to pull the wrist out of alignment.

3) During snatches a corner grip encourages the KB to spiral around the forearm, instead of the hand going through the middle and the kettlebell moving straight over the hand. A corner grip turns the snatch into a kind of GS spiral. This in turn, makes the landing less stable, the kettlebell is harder to control, and the shoulder can move around and become unpacked. Remember our snatches are Hardstyle, we use the force and speed of the hips to outrun the arm, and the fist punches through the handle fast. Once mastered, the kettlebell snatch using a center grip is both powerful and smooth, with no unnecessary movement at the lock out.

4) We need ALL our muscles to press heavy. If we hold the kettlebell at an angle during heavy presses, it puts the emphasis on the pinkie side of the palm which turns on mostly the triceps and lats. The corner grip turns off the part of the hand (thumb side) that facilitates the neurological connection with the pecs, biceps and anterior delts. When we press we don’t want to leave anything on the table, so we use the center grip.

Diagram of kettlebell corner grip
The corner grip turns off the part of the hand (thumb side) that facilitates the neurological connection with the pecs, biceps and anterior delts. When we press we don’t want to leave anything on the table, so we use the center grip.

The Neurology of Grip:

I’m sure many of you have heard about the studies that link grip strength to overall health and longevity. Because of how our bodies are wired, there is also a correlation to grip strength, shoulder health, and pressing strength.

If you’ve ever seen the picture of the Cortical Homunculus you can easily see how important the hands are. There are two particular “buttons” on the lower palm, one on the pinkie side of the fleshy palm and one on the thumb side.

The lateral side (pinkie) correlates to the triceps and lats. The medial side (thumb) relates to the pecs and biceps. When we press heavy kettlebells overhead, we want to “push all the buttons”. By grabbing the kettlebell in the center with the handle flat across the line of the calluses, we are able to activate both buttons.

Try this little exercise: Get down into a tall pushup position. Slowly lower yourself down while only contacting the ground on the outsides of your hands (pinkie), and then come back up. Next, try it again, but this time put the weight on your thumb/index side of the palm. If you listen closely to your body, the first time you tried the exercise, you should have felt more activation in your lats and triceps and the second time more muscles firing with your biceps and pecs.

Andrea Du Cane center grip rack hold

While we are on the subject of kettlebell grips, I’d like to touch on the different pressures we use:

Crush Grip: Used for heavy presses and bent presses.

Soft Grip: Used for get-ups, overhead carries, windmills. The fingers are closed around the handle and there is a light squeeze. This helps with shoulder stability and keeps control of the kettlebell on the forearm.

Closed Grip: Used for snatches and jerks. The fingers are closed around the handle with no pressure, to facilitate shoulder stability. It can also help with timing. When time is a factor as in the snatch test, keeping the fingers on the kettlebell handle will save time.

Open Grip: This is probably the most misused and misunderstood grip. There are certain populations of kettlebell lifters who will benefit from opening the fingers at the top of the snatch. When the fingers open at the top of a snatch, it allows the hand and grip to relax at the lockout. This is especially good for people with tight shoulders who need more mobility at the lockout and for high volume of snatching where the grip fatigues. And it can help while learning to snatch, for those having trouble over gripping the handle throughout the snatch.

Opening the hand at the top of a snatch rep can also help to slow people down if they are rushing through the lock-out. However, if someone is running out of time during a snatch test, make sure they keep their hands closed, as it will give back a second more for each rep.

As a side note, those who tend to over grip the kettlebell handle are often not using their hips and glutes to drive the movement, instead they are pulling with their arms and back. So fix the hips first, and that may alleviate the need to open the hand at the top of the snatch. In general, fix problems from the ground up!

Secondly, the open grip should only be used during high volume snatches, never for grinds like presses or get-ups, windmills or carries.

When pressing heavy and/or for reps, always keep the hand closed and with at least light pressure on the handle. If you open the hand at the top of a press, it signals the nervous system to relax–which we do NOT want to do during heavy presses!

The Diagonal Grip (or Corner Grip):

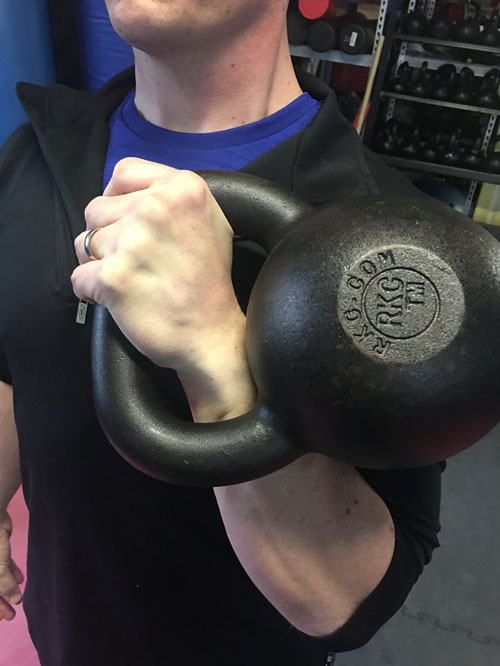
The diagonal grip is only used for cleans, or the combination of clean and squats together. Because there is no overhead holding, grinding or stability needed, the corner grip is fine—and in some cases preferred.

The corner grip is also encouraged for clean & jerks, since the triceps and lats are doing most of the overhead work to finish the lock out. For jerks and push presses, the lower body initiates the movement and drives the kettlebell overhead. You actually want the arms relaxed—because it is NOT a press.

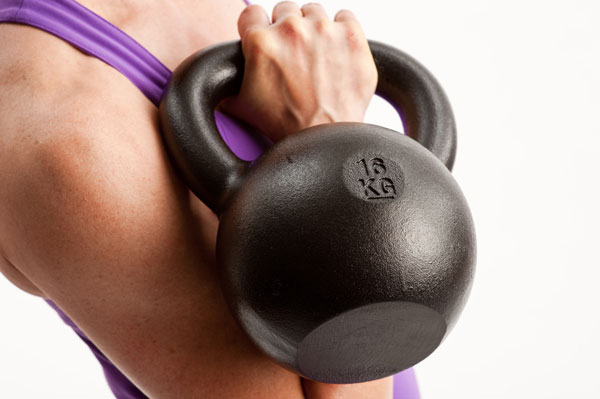
Corner grip rack hold

Forearm Discomfort—the Causes and Solutions

Lastly, I’d like to discuss the issue of discomfort on the forearm. In some cases, depending on an individual’s build and structure, adjusting the kettlebell in the hand and adopting a slightly angled hold during presses etc., may be necessary. The intention should still be to grab the kettlebell in the middle, but also allow it to angle down toward the pinky-side of the hand. It is still important to try and feel the thumb side with a solid contact as described above.

A few populations often have sensitive forearms, but there are methods to help them stay as comfortable as possible while not sacrificing technique:

The first reason for forearm discomfort is being new to kettlebell lifting. It is a new sensation and takes a bit of time to get used to pressure on the forearm. Also, because beginners are typically using smaller, lighter kettlebells which sit higher on the forearm where it is more sensitive. We used to say “If it hurts your arm, get a bigger kettlebell”. That’s not a particularly sensitive thing to say, even though it is true. But, the bigger kettlebells really do sit lower on the forearm and are more comfortable to hold in the rack and overhead.

The problem is that you have to use the appropriate size kettlebell for a given client and a given exercise. Which means beginners, or other populations will still need to use the lighter kettlebells.

In this case, the best solution will be to have your clients use wrist guards to protect the wrist and forearm. The more experienced the person becomes, the more their technique improves—and the more likely they will find a comfortable position. At the same time, they will be working up to larger kettlebells and the problem will go away.

The second and most common reason for people to have problems holding kettlebells—especially in overhead positions—is a lack of shoulder and T-spine mobility. Remember, the more vertical that the arm holding the kettlebell is (either in the rack or locked out overhead), the less weight will be placed on the forearm.

If someone’s lock out is forward of the shoulder, then most of the weight of the kettlebell will go directly into the forearm. Shoulder flexibility and T-spine mobility should be addressed as part of their daily programming. Until the mobility issues are addressed, they will continue to feel the pressure from the kettlebell on their arm.

Big-chested men and women, powerlifters or bodybuilder physiques, might find it hard to hold a kettlebell in the rack position. There is not much that can be done, because it is a structural or body-type problem. They will need to move the kettlebell around until they find the most comfortable arm angle and kettlebell placement. In some cases, the rack position will never be comfortable for them and they should limit holding the rack position for any length of time.

In all these examples, using a wrist guard can help protect the forearm and make the kettlebell position safer and more comfortable. Shoulder mobility work should be done regularly. In some instances, adjusting the grip slightly to angle it off a sensitive point can help. However, keeping good exercise technique in mind, the correct form should be followed as much as possible for safety of the client and the effectiveness of the exercise.


***

Andrea Du Cane is a Master RKC Kettlebell Instructor, CK-FMS, CICS, and RIST, ZHealth certified, she has a BA in Psychology from the University of Minnesota and is also a Pilates instructor. She is the author of several books and dvds including The Ageless Body, The Kettlebell Boomer, and The Kettlebell Goddess Workout.  She has over twenty years of aerobics, weight training and fitness experience, with an additional background in… Read more here.
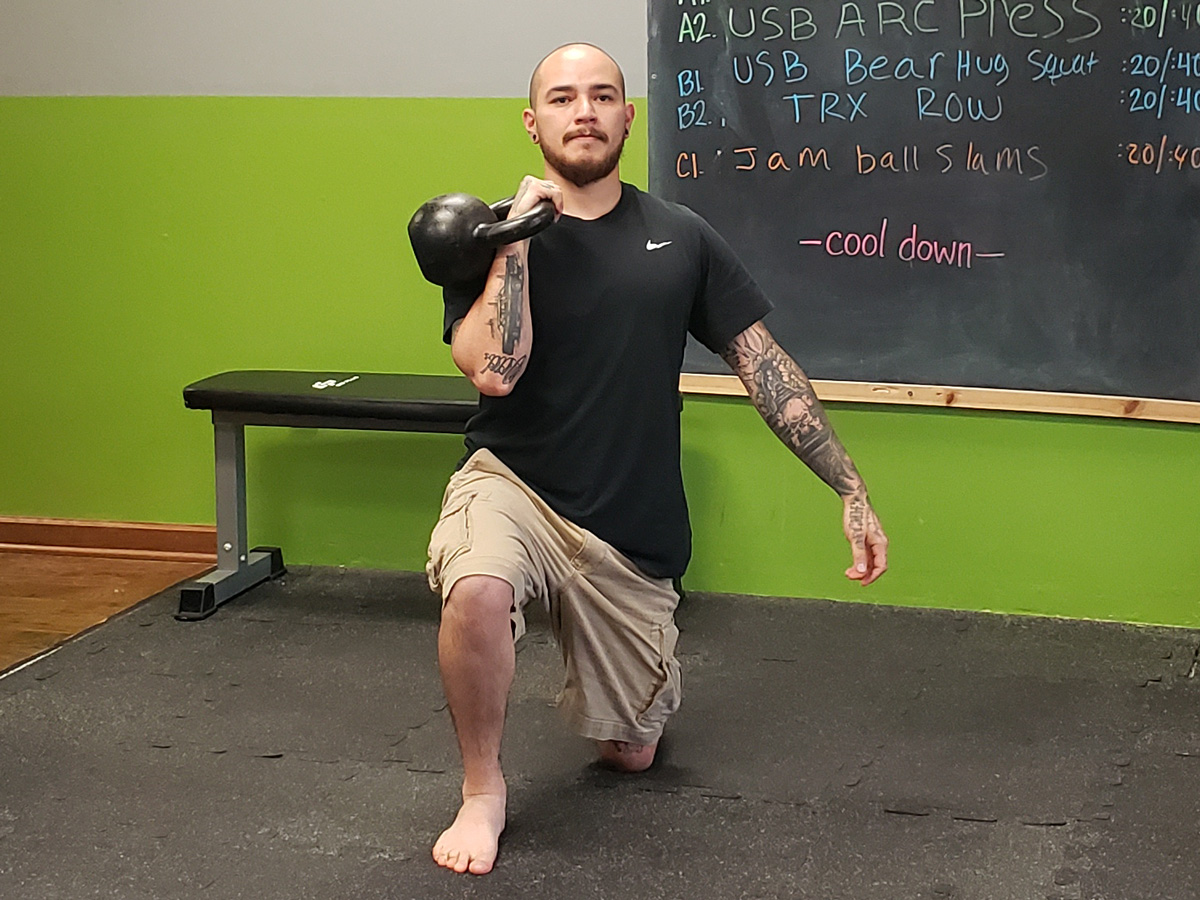
Filed Under: Kettlebell Training, Tutorial Tagged With: Andrea Du Cane, grip technique, kettlebell grip, kettlebell technique, kettlebell tutorial, Master RKC Andrea Du Cane, tutorial

The Triple Extension Swing

October 5, 2016 By Felix Sempf Leave a Comment

Felix Sempf Triple Extension Swing

For power sport athletes, jump and sprint performance are key factors for enhancing sports performance on the field. The ability to generate power has a significant effect on the athlete’s ability to perform in their respective sport (Komi, 2008). Besides mobility, and strength and conditioning work, an athletic training program should also include specific exercises for power. Since every athlete is different there is no “one-fits-all” exercise for power training. The main aspects to consider when planning a power training regimen are safety, practicability, and compliance of the athlete.

Power output in sprinting and jumping is higher if full extension is achieved at the ankle, knee and hip joint. For example, ankle plantarflexion accounts for more than 20% of vertical jump height and consequently is a key factor for maximizing power in jumping (Hubley & Wells 1983; Luthanen & Komi, 1983). Likewise, McKinley & Pedotti (1992) also showed a higher degree of plantarflexion in jump-trained individuals compared to novices. Based on these findings, a power exercise for athletes in most team sports should mimic the triple extension for best transfer effects.

The regular kettlebell swing is a relatively simple power exercise that focuses on achieving full hip and knee joint extension in a dynamic fashion. Therefore, it only targets two of the three major joints that contribute to power generation in jumping motions (Hubley & Wells 1983; Luthanen & Komi, 1983). Other studies have confirmed that jump height and power can be improved by implementing kettlebell swings in the training program (Lake & Lauder, 2012; Otto et al., 2012; Mannocchia et al., 2013; Jay et al. 2012). Despite these benefits, the regular swing does not include ankle plantarflexion and may therefore (if used excessively) negatively affect jumping mechanics by neglecting a powerful contributor. A simple solution for this is the so-called Triple Extension Swing, which also includes ankle plantarflexion.

If your regular kettlebell swing technique is solid and you are looking to improve your vertical jump, try performing the following swing variation: Move up on your toes after the extension of the hip and knee has been initiated and finish the movement with all three joints extended as pictured below. You will immediately see and feel a higher float of the kettlebell. Start with light weights, safety first.

Warning:
This advanced swing variation is not be appropriate for beginner or less experienced intermediate levels. Only attempt the triple extension swing after demonstrating proficiency with the standard RKC swing. Moving up to the toes with the triple extension swing carries the risks of losing control of the kettlebell, being pulled forward, not fully engaging the glutes, overall loss of stability, incomplete grounding, and not safely loading on the backswing.


Literature

Hubley & Wells (1983). A work-energy approach to determine individual joint contributions to vertical jump performance. European journal of applied physiology and occupational physiology. 50 (2), 247–254.

Jay et al. (2012). Effects of kettlebell training on postural coordination and jump performance: a randomized controlled trial. J Strength Cond Res. 2013 May; 27(5):1202-9.

Komi (2008). Strength and Power in Sport. Volume III of the encyclopedia of sports medicine.

Lake & Lauder (2012). Kettlebell swing training improves maximal and explosive strength. J Strength Cond Res. 2012 Aug; 26(8):2228-33.

Luhtanen & Komi (1978). Segmental contribution to forces in vertical jump. European journal of applied physiology and occupational physiology. 38 (3), 181–188.

Manocchia et al. (2013). Transference of kettlebell training to strength, power, and endurance. J Strength Cond Res. 2013 Feb; 27(2):477-84.

McKinley & Pedotti (1992). Motor strategies in landing from a jump: the role of skill in task execution. Experimental Brain Research. 90 (2), 427–440.

Otto et al. (2012). Effects of weightlifting vs. kettlebell training on vertical jump, strength, and body composition. J Strength Cond Res. 2012 May; 26(5):1199-202.

***

Felix Sempf, PhD Candidate, M.A. Sportscience, RKC, trains and instructs at the FIZ in Göttingen, Germany. He can be contacted by email at: felix.sempf@sport.uni-goettingen.de and his website: http://www.kettlebellperformance.de

Filed Under: Kettlebell Training, Tutorial Tagged With: advanced kettlebell swing, Felix Sempf, kettlebell swing, kettlebell swing variation, kettlebell tutorial

Why the Single-Leg Deadlift is a Go-To Leg Exercise

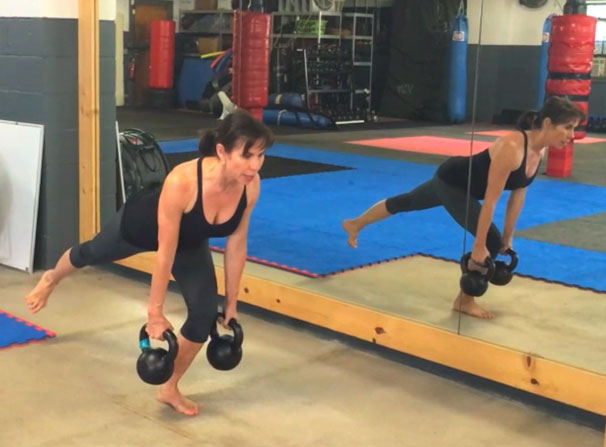
June 22, 2016 By Andrea Du Cane 2 Comments

Andrea Du Cane Single-Leg Deadlift

Why do I love single-leg deadlifts so much? For one thing, nothing works the butt and legs quite like it. Add the extra benefit to the back, core, lower legs and feet and you have a full body exercise. As Gray Cook likes to say, “Maintain your squat and TRAIN your deadlift.” I think this is especially true for the single-leg deadlift.

I have to share a personal story; I’ve had four patellar dislocations. Yes, FOUR! The first one happened after a two-hour ballet/pointe class. The second happened in the middle of a jazz dance class. The third happened when my tango partner hit my kneecap with his knee and the fourth happened when my shoe caught in an escalator and I fell. Yes, dance is a very dangerous sport!

The last two times, I popped it back in and rehabbed it myself. The single-leg deadlift was the most important exercise for strengthening and rehabbing my knee. So this is an exercise close to my heart!

Here’s why everyone should add this powerful exercise to their program:

The single-leg deadlift not only develops hip strength and power, but it also allows the muscles of the hips and legs to act as stabilizers. If you think about it, every time you stand on one leg, you’re using the same muscles for balance and stability that are generally used for force production.

Forcing the body to maintain stability on one leg allows the athlete and coach to see strength imbalances from left to right side. This is extremely important for athletes as well as special populations. And it can go a long way to help reduce injuries and improve performance.

Double Kettlebell Single-Leg Deadlifts:

Holding kettlebells in each hand is easier on your core because it balances out the load from side to side. This allows you to go heavy and train pure hip strength on one leg. You can then watch for and correct left/right strength asymmetries. The focus will be on initiating and driving forcefully with your glutes. This hip drive with stability is the same for both double kettlebells and single-arm kettlebell single-leg deadlifts.

Single-Arm Single-Leg Deadlifts:

Single-arm single-leg deadlifts have the advantage of requiring torso, pelvic, and hip stability as well as strength production. This exercise can be used as a corrective exercise because loading one size requires us to resist the rotational forces put on the body.

Holding the kettlebell on the opposite side of the working leg is the most common corrective use of the single-arm single-leg deadlift. However, holding a kettlebell on the same side as the working leg also has many benefits and challenges. Both versions of the single-arm single-leg deadlift challenge the body to restrict rotational forces from loading one side.

Interestingly, only half the people who try holding the kettlebell on the same side as the working leg will find it harder than holding it on the opposite side. And it may be different from left leg to right.

When using the single-leg deadlift as a corrective exercise, find your weakest link or most challenging combination and train the weak link 2-1.

Now let’s discuss how to perform single-leg deadlifts correctly. As I like to say, “Perfect Technique = Success”. Go to any gym and you’ll see lots of sloppy single-leg deadlifts. Are they getting the most from the exercise? Are they risking hurting themselves? The answer is “no” and “yes”, respectively.

These basics apply to both double and single arm single-leg deadlifts:

  1. The back MUST remain neutral throughout the lift. If your back rounds or flexes, you risk tweaking it. And if your back rounds or flexes, I guarantee you are not using your glutes.
  2. The hips HINGE and move back over your heels. This move is not about the torso bending forward, it’s about the hips moving backward.
  3. The front knee will bend, but it does not move forward excessively. Remember, we are deadlifting not squatting. Plus, this is not a straight-leg deadlift—straight-leg deadlifts shift the focus and load to the hamstrings and off the glutes. Think of the movement as an “elevator not a teeter-totter”.
  4. The shoulders and hips remain parallel to each other and the floor. Do not externally rotate your back leg, and don’t let your working hip sink or rise above parallel. The shoulders should also remain squared off and equal—for both the single or double arm variations.
  5. The arms move as a pendulum from the shoulders as the torso moves forward. The shoulders remain engaged at the lat, do not let your shoulders disconnect from your body as your torso moves forward. This helps the rotator cuff and shoulder stabilizers work during the movement. The elbows remain locked, no “pulling” with your biceps.
  6. The knee must track the toe; do not let the knee collapse inward or outward.
  7. The feet are active. The entire foot is loaded with a bit more weight towards the heel, with the big toe working and gripping the floor.
  8. The back foot is dorsiflexed and the toe is facing down to help keep the hips “closed”.
  9. The back leg is an extension of the spine, and the leg should not be higher or lower than the hips. The back leg should be in line with the hips, and active to help with balance.
  10. Squeeze your palms into the kettlebell handles, this increases shoulder and core stability and strength.
  11. Keep your eyes focused approximately 3-6 feet in front of you to help keep your head in alignment and to assist balance.
  12. Inhale as you stand back up. Power breathe as you drive your foot down into the ground and lift up.

All the elements listed above apply to both the two arm and single arm single-leg deadlift. For added focus, maintain level shoulders and torso at all times when performing single arm single-leg deadlift. You will need to fight the rotational pull with the weight.

A few other thoughts: If at all possible, perform your single-leg deadlifts barefoot. The proprioceptive, neurological information from your feet will assist your balance and make you stronger.

Modifications for Different Populations:

  • Use platforms to raise the kettlebell(s) so that they can be picked up safely AND with no spine flexion.
  • Start from the top instead of picking the kettlebells up from the ground. This way you are already loaded, instead of trying to find tension and stability at the bottom of the movement.
  • People with bad knees or balance issues can hold onto a wall or bar with one hand and hold the kettlebell in the other hand. They will not have to “fight” for balance and risking tweaking their knees or back.
  • Keep the back leg down as a “kick-stand”. This also helps with balance issues.
  • NEVER fight for balance! If you start to lose balance, simply place your back leg down on the ground and regroup.

When training, start with medium loads to get a feel for your weaknesses while developing single leg strength and balance. Try 6-8 reps 2-4 sets with this medium load. Then go heavy, especially with double arm single-leg deadlifts and drop the reps to 3-5.

This exercise should be performed slow and controlled—NOT fast and bouncy. If you’re bouncing up and down, you are either hiding weaknesses or you chose a kettlebell that is too light!

Here’s a short demo of a two-arm single-leg deadlift. As stated above, all points apply to using one kettlebell:

***

Andrea Du Cane is a Master RKC Kettlebell Instructor, CK-FMS, CICS, and RIST, ZHealth certified, she has a BA in Psychology from the University of Minnesota and is also a Pilates instructor. She is the author of several books and dvds including The Ageless Body, The Kettlebell Boomer, and The Kettlebell Goddess Workout.  She has over twenty years of aerobics, weight training and fitness experience, with an additional background in… Read more here.
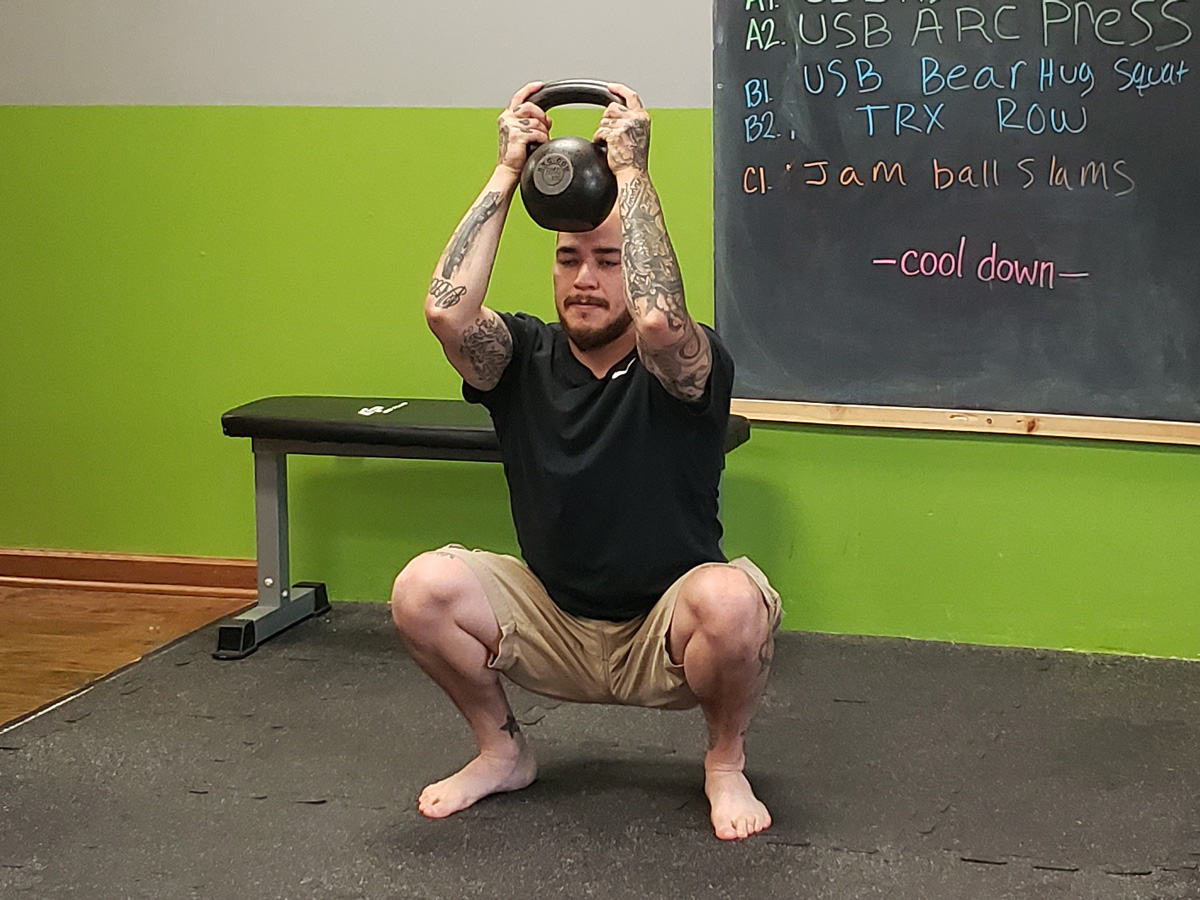
Filed Under: Kettlebell Training, Tutorial Tagged With: Andrea Du Cane, how to do a single-leg deadlift, how-to, kettlebell exercise, kettlebell tutorial, kettlebells, One leg deadlift, single leg deadlift, tutorial

Don’t Ignore These Two Common but Crucial Kettlebell Mistakes

February 3, 2016 By Keira Newton 9 Comments

Two Kettlebell Mistakes Keira Newton

As a Master RKC, I travel a lot. I love my job because I get to visit other gyms and teach people how to teach kettlebell technique according to the highest standards in the industry—RKC standards. In the past few years of teaching, I have noticed two commonly missed mistakes. These are simple fixes in my eyes, and easy to teach. So lets get started.

The Deadlift:

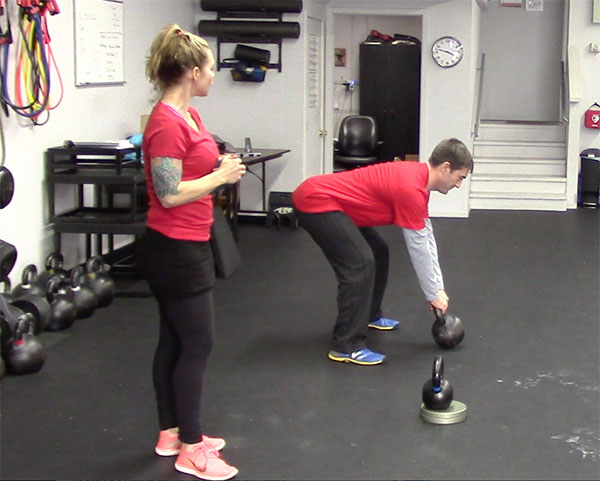
The deadlift is the basis of almost every kettlebell lift. It IS the foundation of what we do. However, I have seen people skip the deadlift altogether… (How will they learn the swing? How will that work?) Or they simply miss the most important part of the deadlift: the set up and how to work underneath the kettlebell.

In my experience, I’ve observed that people who are given a small kettlebell, are tall, tight in the hamstrings, or tight in the hips will round the low back to pick up the kettlebell. The cure for this? RAISE THE FLOOR. It’s such a simple fix, but it will help 99% of your students. I use it with almost all of my new students. The video below includes a short demo of this technique. Give it a try.

The Swing:

I think it is safe to assume we all know the kettlebell swing can be fantastic if performed correctly—and deadly if not. This is no joke. When training a client, or in your own training, you must know exactly what happens with this ballistic lift. The most common mistake I see from my clients and students (which is also the most missed among new trainers) is in the TIMING of the swing. While watching someone’s swing, if it looks like they are moving to the toes, swinging below the knees, or lifting the kettlebell with their arms, then their timing is off.

To fix the timing, tell your client to wait until the kettlebell has passed below the belly button, or their arms have touched their ribs after swinging the kettlebell forward before moving their hips back. It will seem almost as if the kettlebell will hit you where it hurts, and you get out of the way just in time. But, let’s make sure that happens okay? 🙂

Hope the video below helps you understand. Enjoy!


***

Kiera Newton, Master RKC, Level 3 Z-Health, MCT, PCC. Keira first picked up a kettlebell in 2005 when her husband challenged her to stop laughing and start swinging. She stuck with the challenge when she realized that she could get an all-in-one workout in a fraction of the time she spent at the gym. Keira was convinced… Read more here.

Filed Under: Kettlebell Training, Tutorial Tagged With: Keira Newton, kettlebell swing, kettlebell swings, kettlebell technique, kettlebell training, kettlebell troubleshooting, kettlebell tutorial, Master RKC Keira Newton, swings, tutorial

Primary Sidebar

Featured Products

previous arrow
BOOK-RKCBookofSnC
HardStyleKettlebellChallegeDanJohn700
BookCoverMasterTheKettlebell1
RKCiconKettlebell512
KettlebellGoddessdv040
next arrow

Recent Posts

  • RKC Big Six Workout
  • The Kettlebell Swing & Low Back Pain
  • Key Kettlebell Exercises To Help You Create Better Balance
  • How to Most Effectively Use Kettlebells to Meet Your New Year Goals
  • 1 Exercise That Checks All The Boxes
FOLLOW US ON TWITTER!

Archives

Copyright © 2025

Dragon Door Publications / The author(s) and publisher of this material are not responsible in any manner whatsoever for any injury that may occur through following the instructions or opinions contained in this material. The activities, physical and otherwise, described herein for informational purposes only, may be too strenuous or dangerous for some people, and the reader(s) should consult a physician before engaging in them.