• Skip to main content
  • Skip to primary sidebar
  • Home
  • Contributors
    • Matt Beecroft, Master RKC
    • Martijn Bos, Master RKC
    • Andrea Du Cane, Master RKC
    • Angelo Gala, Master RKC
    • Chris Holder, Master RKC
    • Steve Holiner, Master RKC
    • Dan John, Master RKC
    • Mike Krivka, Master RKC
    • Thomas Phillips, Master RKC
    • Robert Rimoczi, Master RKC
    • Phil Ross, Master RKC
    • Max Shank, Master RKC
  • Workshops
    • HKC Workshops
    • RKC Workshops
    • RKC-II Workshops
  • Find an RKC Instructor
  • Resources
    • Articles
    • Forums
    • Kettlebells
    • Products
  • Blogs
    • PCC Blog
    • Strong Medicine Blog
  • Archives

RKC School of Strength

Official blog of the RKC

kettlebell technique

The Single Rep Dead Stop Swing, Clean, Snatch Workout

July 1, 2015 By Andrea Du Cane 13 Comments

Master RKC Andrea Du Cane and Senior RKC Timothy Spencer Demonstrate the RKC Arm Bar

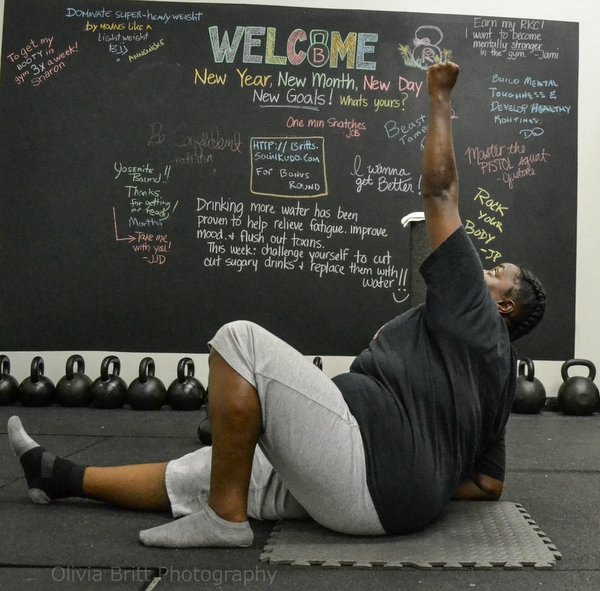
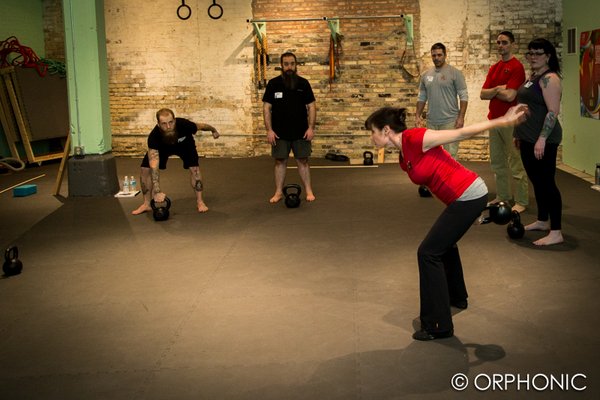
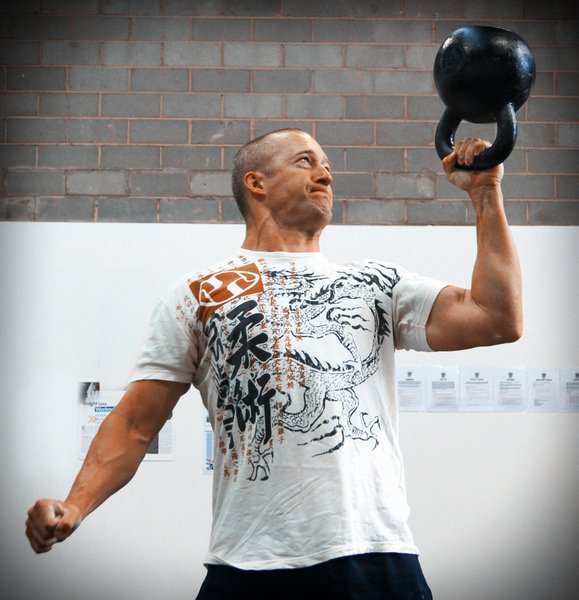
As I travel around teaching HKC and RKC workshops, I notice a common problem (theme – challenge), the sloppy start/stop of a kettlebell ballistic lift.

Imagine this scenario: someone is getting set up to swing; it doesn’t matter if it’s 2-handed, single arm or double. They stand over the kettlebell, lift it up, and rock it back a couple of times between their legs and THEN swing it back far enough to load their hips and explode up.

What’s wrong with this picture? The set-up was not correct. It was not focused or properly executed. There must be an intention and preparation before the start of the pull—before anything happens.

I like to say in regards to all kettlebell lifts, “You’re only as good as your set-up”.

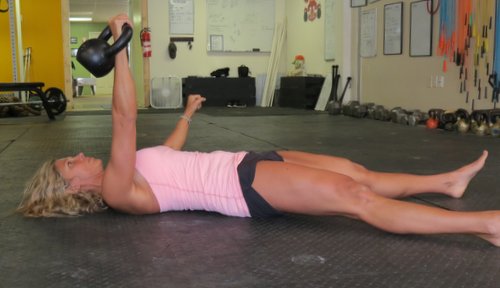
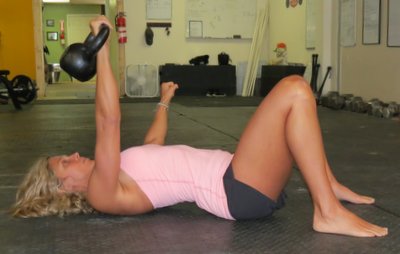
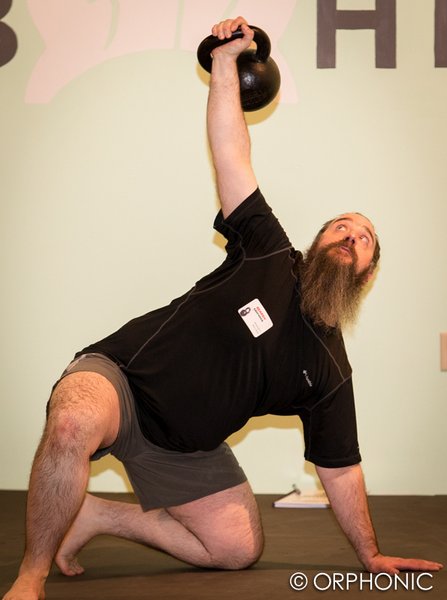
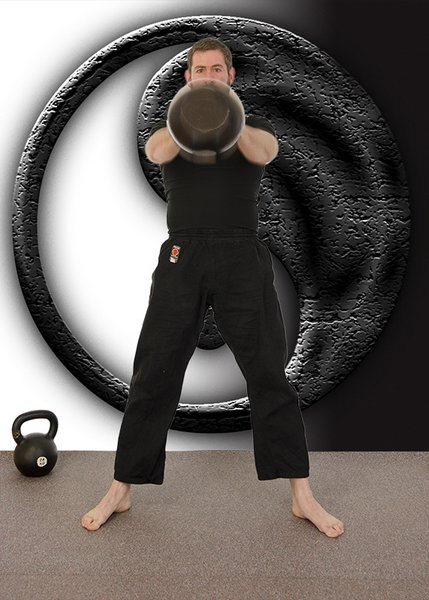
Here is the correct way to start a swing (clean or snatch):

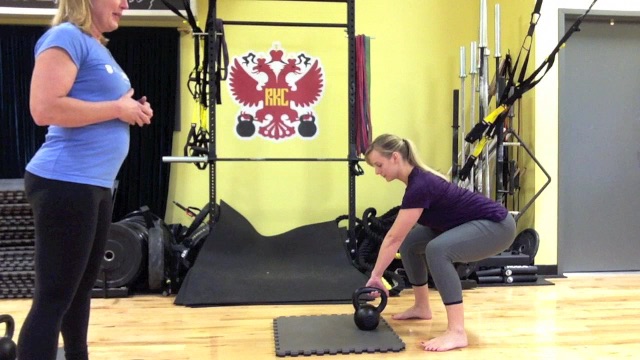
  • Place the kettlebell a foot or two in front of you.
  • Bend forward and grab the kettlebell handle.
  • Pull the kettlebell slightly toward you, while engaging your lats.
  • Set your weight way back on your heels, while keeping your feet planted & spine neutral.
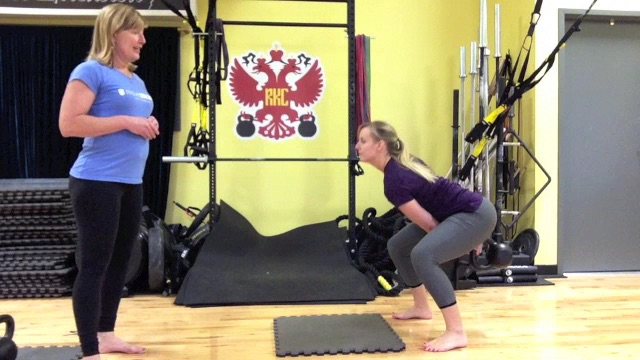
  • “Hike” the kettlebell back behind you—fast.
  • Explode your hips forward and feet down into the ground. Let your arms be propelled forward by the force of the hips.

That’s it. Simple. No lifting the kettlebell up and rocking it a couple of times before hiking it back and exploding up. One crisp explosive hike pass and forward movement is all it takes!

This is the same for ALL the kettlebell dynamic lifts; including double kettlebell swings and cleans.

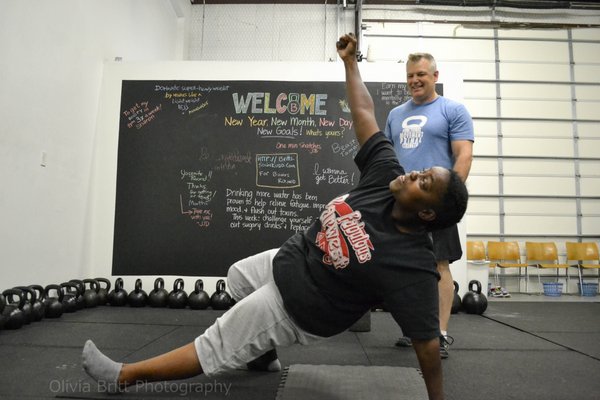
Scenario #2: someone has just finished a great set of swings, but on the last rep they fall forward while rounding their back and then dropping the bell down in front of them.  They nearly topple forward.

No further explanation is needed here, this is simply dangerous. The most common time for an injury to occur during any kettlebell exercise is on the last rep or while the kettlebell is being set down.

In both cases—the first rep or the last rep of a set—the lack of focus, intention and safety is to blame.

The answer to this problem is to training your single-rep or dead-stop swings. In essence that is what the single-rep is: the start and end of a swing, clean or snatch.

Programming single-rep sets is an easy way to reinforce good technique throughout a set of any ballistic lift.

The truth is, they are HARDER than continuous reps because you lose the assistance of gravity during the backswing. With single-rep workouts, each rep is initiated by the power of the lifter. The hips and lats have to work that much harder to generate the force to project the kettlebell up. Hence, an additional bonus is increased force production and explosive power. So this type of training is perfect for any athlete.

You can also modify single-rep workouts for any level kettlebell lifter.

Single-rep 2-handed swings are a progression to learning continuous swings, but for the advanced lifter, doing single rep heavy cleans or snatches or double swings and cleans, puts the burn in your butt!

Here are some workout examples (note: “SR” stands for Single Rep):

Beginner:

SR-Swings:   2-handed for 5 reps

Continuous:   2-handed for 10 reps

Repeat as long as you wish

OR use timed sets for 25-30 seconds of work to equal rest


Intermediate: (proficient with cleans and snatches)

SR-Swings 1-arm   5-10 reps left/right

Continuous 1-arm   10 reps left/right

SR- Cleans 1-arm   5-10 reps left/right

Continuous 1-arm   10 reps left/right

Repeat as long as desired or timed sets


2nd workout

SR-Swings 1-arm   5-10 left/right

SR- Cleans 1-arm   5-10 left/right

SR-Snatch 1-arm   5-10 left/right

Repeat as long as desired or timed sets


Advanced

SR-double swings   5-10 reps

SR-double cleans   5-10 reps

Repeat as desired or timed sets

***

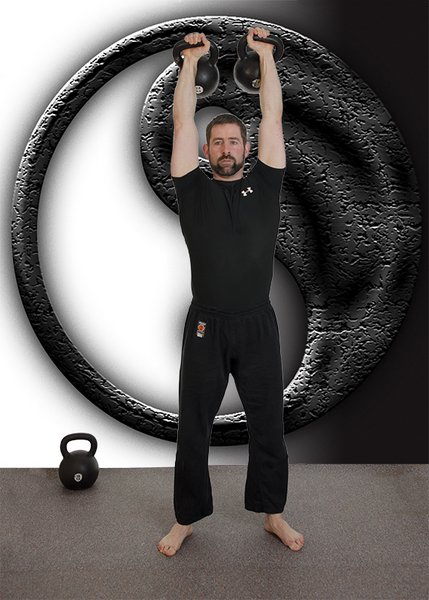
Andrea Du Cane is a Master RKC Kettlebell Instructor, CK-FMS, CICS, and RIST, ZHealth certified, she has a BA in Psychology from the University of Minnesota and is also a Pilates instructor. She is the author of several books and dvds including The Ageless Body, The Kettlebell Boomer, and The Kettlebell Goddess Workout.  She has over twenty years of aerobics, weight training and fitness experience, with an additional background in… Read more here.

Filed Under: Kettlebell Training, Tutorial, Workout of the Week Tagged With: Andrea Du Cane, dead stop swing, dead swing, hkc, kettlebell swing, kettlebell technique, kettlebell training, kettlebell workout, kettlebell workouts, kettlebells, RKC, RKC kettlebell training, workout of the week

Movement and Learning the Get-Up

June 3, 2015 By Paul Britt, DC 1 Comment

Paul Britt Coaching Get-Up

movement (ˈmuːvmənt)
noun
Movement –

  1. The act or an instance of moving; a change in place or position.
  2. A particular manner of moving.
  3. A series of actions and events taking place over a period of time and working to foster a principle or policy
  4. A tendency or trend
  5. An organized effort by supporters of a common goal.

Movement is the back bone of athleticism and life. But, as a society we do not move the way that we did in youth. We are tied to desks, vehicles, and entertainment that requires us to just sit and become one with a chair. I started this post with the definition of movement as a beginning reference point.

The first two parts (a & b) of the definition are easy to cover and understand. We all move, and each of us has a particular way of moving. The question is, are we moving well? Most people seem to live in a position of flexion. We sleep, eat, drive and watch television from a bent and hunched position. We slouch and sag all day long. Guess what? Our bodies will take the path of least resistance and will stay in the posture that we live in. We were not created to just sit around; we were created to move, run, jump and play.

The third and fourth parts (c & d) of the definition describe what we need to change. We need to change our daily actions and events so that we restore the movement potential we were given at birth. It is time to get off the couch, up from the desk and actually start moving. We need to change our daily habits to allow our bodies to re-learn the movements and positions that we were born to do. Our kids are becoming slugs, thanks in part to videogames and constant visual entertainment. I have seen some kids play twelve hours of PS3, all while slouched and bent into weird positions. What happened to being outside all day, every day until the street lights came on?

The positions that we’re in all day do not help us live a full life. They prevent us from being able to run, play catch, or to live everyday life in the most efficient manner possible. We are held back by being bent and twisted in a life of sitting down. Sitting has been shown to increase the risk of death. Research has shown that sitting is associated with a higher risk of death after controlling for factors including age, gender, smoking status, physical activity, education, body mass index, and living in an urban/city environment.

I know that everyone wants to be active with their friends and family, and stay pain free and mobile into old age. I know I do! I want to be a pain in the rear of my family as long as possible! I think the best way to do this is to be 90 and move so well that no one can catch me!

We should move as much as we possibly can. Better movement allows us to have fewer injuries, live longer and have more productive lives. It is the cornerstone for our overall health.

How Do We Improve Movement Quality?

I teach the get-up as an antidote to improper movement and posture. The get-up is one of the best ways to battle the less-than-ideal positions our bodies grow into from our daily life of texting, sitting, and while working at most jobs. I find that while the get-up works wonders as a transformational exercise, many clients have a hard time learning it.  Some even need to earn the right to perform it.

I teach the steps a little different than most trainers. I like to teach the get-up from the bottom to the middle, and from the top to bottom. This approach seems to work really well for grooving the correct patterns into the neurological system.

Get-Up Tall Sit

I start from the Pick Up to the Tall Sit position. In the first step, roll from your side to prone. This strengthens a primal rolling pattern. Rolling patterns are great tools for teaching the body how to engage the core and stabilize the body under load. Why is this important? It allows the body to develop its innate stability and to connect the lower body to the upper body for more strength.

The next step is the Tall Sit. It allows you to work on shoulder mobility and stability. It will reinforce the connection the core has with the upper body. This is often the step that most of my clients need if their mobility is compromised. I kept one client at this stage for nine months while we worked on improving his thoracic mobility and core strength. During that time, the heaviest weight he used for the training was 4kgs. If we had forced the issue, he would have been injured. He was 60 when he began, and last I checked, he was using a 20kg kettlebell for full get-ups at age 63.

I teach the Hip Lift only as part three of the movement. I find that the movement becomes a little harder for my clients to perform after that point. They cannot initially get the idea of the moving from the low sweep to half kneeling or they do not have the proprioception to make the transition.

The next step that is taught is from standing down to half-kneeling. This allows the student to develop leg strength and improve their stability. It has been my experience that many clients lack stability in the lunge position. By working from standing to half kneeling, then moving through the reverse lunge under control, you can train stability while detecting any asymmetries the student may have. This lets us correct the asymmetry before continuing and possibly causing an injury.

Coaching the Get Up

Once the student has practiced the get up from the floor to low hip lift, and standing to half kneeling, it is time to teach the entire get up. I start from the top and have the student work from the standing position to the half kneeling position. We add the low sweep to the tall sit at this time. They finish the get up to the prone position. Then, they stand back up (not doing a get-up, they simply return to a standing position) and repeat the sequence a few times on each side. The student will perform the get up from standing to prone before reversing the process and performing the get up from the pick up to standing.

I have found that this approach has helped my students learn the get up much faster. By working on these pieces as needed, their mobility and stability has improved even on their first day. This sequencing seems to be less threatening and neurologically taxing for my students, which also allows them to learn it faster.

If you look back at the definition of movement at the beginning, the get up fits it to a “T.”

***
RKC Team Leader Paul Britt has been an RKC kettlebell instructor since 2006. He trains clients at Britt’s Training Systems, his award-winning Hardstyle Kettlebell Training Facility in Rockwall, Texas. Paul has served as an assistant instructor at many RKC and HKC Courses, is a Certified Kettlebell Functional Movement Specialist (CK-FMS) and works with some of the top Chiroprators in North Texas. Please visit his website brittstrainingsystems.com for more information.

Filed Under: Coaching, Kettlebell Training Tagged With: Coaching, get up, kettlebell technique, kettlebell training, movement, Paul Britt, teaching get-up, training get-up

The Sweaty Beast Workout

May 13, 2015 By Beth Andrews 4 Comments

Beth Andrews Senior RKC

I live for a great workout. Do you? This is one of my favorite workouts and it’s a hit with my students as well. I thought I would share some of the kettlebell love and sweat with you. This workout is challenging, fun, will leave you in a pool of sweat and feeling like a beast when you’re done.

You can take this workout and grow with it by challenging yourself with heavier weight. I would first suggest you complete it with a kettlebell that’s your snatch test weight. When you can successfully do that, you can advance to the next size kettlebell.  🙂

Most people are familiar with the snatch and goblet squat, but are unfamiliar with the one arm chest press. Here are a few things to remember when performing the one arm chest press, a few options for the workout, a quick video tutorial and a demo sample of the workout.

1.There are many different ways to do the one arm chest press. My preference is to perform it with both legs down and both arms off of the floor, in the video below. This variation requires more body control/core stability. If you can’t keep your low back flat and your bum tight, bring one or both knees up. I prefer both knees up or both down.  Please option it out if needed. See pictures below.

Beth Andrews Chest Press Legs Up option
Yes! Legs up, bum tight, low back on floor.
BethAndrews Chest Press Legs Down Option
YES! Legs down, bum tight, low back on floor.
 belly button up to chin. This will help bring low back to the floor.
No! We want to prevent arching the low back.
Focusing on squeezing the glutes and pulling
belly button up to chin. This will help bring low back to the floor.

2. It can be challenging to chest press with your snatch test weight. No worries, just drop down to a lighter weight for that exercise.

3. You have 25 min to complete the workout. This workout is not about beating the clock, the timing is to keep you focused. It is all about good form, you gain nothing by racing through and taking shortcuts with form. Finish strong, my friends!

4. There are two ways I like to mix up the reps: a 10-1 countdown on all exercises, in a circuit fashion, or stay with 5 sets of 10 reps on everything for a beastlier challenge.

Check out the One-Arm Chest Press video tutorial:
(All kettlebells in the videos below are official Dragon Door kettlebells that have been painted)

Now you’re ready to give the The Sweaty Beast Workout a try! 🙂

***

Beth Andrews is a Senior RKC, PCC Team Leader, and CK-FMS. She leads HKC and RKC certifications, and assists at the PCC. She became the 5th Iron Maiden in 2013. Beth owns Maximum Body Training and a successful online training business. She has over 25 years of training experience. For online training or to host a certification, email Beth at: bethandrewsrkc@gmail.com. For more training tips and workouts subscribe to her YouTube channel, Beth Andrews RKC or visit her website at maximumbodytraining.com

Filed Under: Tutorial, Workout of the Week Tagged With: beth andrews, chest press, kettlebell technique, kettlebell training, kettlebells, one arm chest press, RKC, tutorial, video, workout, workout of the week

The Who, What, Where, When and Whys of the Hinge and Wedge

April 15, 2015 By Nick Lynch 6 Comments

Margaret Domka Goblet Squat
Margaret Domka, 2015 Women’s World Cup utilizing the Goblet Squat

Three Examples of World Class Athletes Who Hinge and Wedge:

  • As seen above, Margaret Domka is performing a kettlebell goblet squat in her training for the 2015 Women’s World Cup. Goblet squats and hill sprints. She sprints when the goblet squat is correct, but not until then. First one must obtain the wedge and a proper hinge before sprinting. Margaret has shown a proper hinge and wedge which is why she’s fast and strong and therefore, going to the 2015 Women’s World Cup. Hurrah!
  • Nathan Mackinnon is ranked as the fastest skater in the NHL. Chris Hamelin is a gold medalist in speed skating. Both of these world-class athletes faced off in a short race. Both utilize a very strong and present hip hinge. To actually see what I’m talking about, take a second to search “Nathan Mackinnon vs. Chris Hamelin”. Pause the video when both athletes are in their starting stance. Take note of the hinge!
  • Nine-time gold medalist in sprinting, Carl Lewis, clearly utilizes both the hinge and wedge. His body is connected as one. Take a second to Google Carl Lewis and you’ll see a 0:54-second video. Watch how Carl moves his lower body without breaking the hinge. Carl runs like a 9-time gold medalist, not like a bulldog.

Carl Lewis, Margaret Domka and Nathan MacKinnon are not the only great athletes to have utilized a powerful hip hinge and wedge technique. Spend a few minutes watching the greats such as Michael Jordan in his defensive position, 2014 #1 center in the NFL Alex Mack, and so on. There is a secret which has been exposed thanks to all of us and you within the RKC community and that is this; Hardstyle training works for both high level athletes and pretty much everyone else too!

What is the Hinge and Wedge?

Hinge: move through your hips with minimal flexion through the knees. Stand on your right leg and raise your left knee up to 90 degrees–that left hip would now be hinged. Optimal hinge is approximately 80 degrees as seen on the image below. We hinge to load the largest and most primary muscle groups in the body, the gluteal muscles. Because we’re utilizing primary muscle groups during a hip hinge, our explosive power is greater. Bigger muscles provide bigger output. This is also the main reason why people who use Hardstyle kettlebell training techniques burn so many calories per minute. “They were burning at least 20.2 calories per minute, which is off the charts. That’s’ equivalent to running a 6-minute mile pace.” -Dr. John Pocari, UW-Lacrosse. These large muscle groups require much higher caloric output to function.

Andrea Du Cane, the longest standing and first female Master RKC is showing an approximate 80-degrees hip hinge with the single arm swing.

Wedging: is tensing the whole body while in a standing position. Your shoulders are packed, hips and knees are locked out, and abdominals are at maximum tension. We wedge to connect our lower body with our upper body. When the lats are contracted they pull down on the shoulders and bring our upper body closer to our center of gravity and hips. Wedging connects the upper and lower body as one! Think of a standing Hardstyle plank. It’s possible to achieve an almost constant wedge-like posture throughout the movement with enough practice. You know who utilizes such a posture with sports? Only the best!

Two Awesome Exercises for Hinge and Wedge

Two exercises which enhance the hinge and wedge are the Hardstyle swing and Turkish get-up. Regardless of your skill level with kettlebells, the Hardstyle technique will enhance your overall athleticism. With 8/10 runners in America injured, it’s clear we have some serious imbalances which need fixing. First we’ll need to get strong enough to hold the wedge while running and performing other physical activities. Ever seen a bulldog walk? Ever noticed the similarities between a bulldog’s stride and someone jogging down the street? Arms are crossing over the torso while the legs are flopping all over the place. Not good!

3 Tips for Enhancing the Wedge and Hinge in the Turkish Get-up

  • Hold the each stage for 5-10 seconds while packing the shoulders and pushing your knee out
  • Shrug and re-pack each stage of the get-up
  • Squeeze the handle as hard as you can at the pause in each stage of the get-up

TGU at Milwaukee RKC Workshop

If hinging your hips and wedging your torso is good enough for the best athletes in the world, I think it’s safe to say it’s good enough for you, me and our loved ones. When I get a room full of athletes at the start of another season and tell them we’re not touching any weights until we get the hinge and wedge down they look at me like I’m nuts. But after 4-6 weeks of hinge and wedge practice they double their mobility, speed and strength. Although they still look at me like I’m nuts they’re happy with their gains. Start simple; train simple and the results will be simply amazing!

I’ll leave you with a picture from the 2014-2015 MSOE (Milwaukee School of Engineering) Men’s Hockey Team. We started the season with loads of injuries, a losing record and 14 freshmen. We’ve finished the season nationally ranked, zero injuries, beat the #1 team in the country and went to the semi-finals in the toughest conference in the country. We hinge and wedge!

MSOE Hockey Team

***

RKC Team Leader Nick Lynch is a Strength and Conditioning Coach at Milwaukee School of Engineering University (MSOE). He owns Superb Health Milwaukee, a kettlebell studio in Milwaukee, WI. Most recently, he became an RKC Team Leader. He has 13 years of full-time training and coaching experience and a lifetime of wellness education. Nick lives in Milwaukee, WI with his wife Natalie and son Weston.

Filed Under: Kettlebell Training Tagged With: athlete examples, athletes, Athletic Training, hinge, hinge and wedge, hip hinge, Kettlebell, kettlebell swing, kettlebell technique, Nick Lynch, wedge

Why We Grunt

February 25, 2015 By Felix Sempf 6 Comments

RKC Instructor Felix Sempf

When entering a room where RKC kettlebell training is in progress, one quickly notices the characteristic way people breathe while performing the exercises. Although this “grunting” may sound unfamiliar and disconcerting at first, breathing in sharply through the nose and breathing out slowly while gritting the teeth should become a part of everyone’s training routine.

In order to understand why we use the “biomechanical breathing” method for improved performance and safety, we first need to talk about the anatomy of the trunk and core. Today, most researchers agree that the lumbar region is an area that relies heavily on stability and where excessive range of motion should be avoided (Battie et al, 1990; Biering-Sorenson, 1984; Cuoto, 1995; Saal & Saal, 1989; McGill, 2010). In the original sense, the widely-used term “core stability” describes “the ability of the lumbopelvic hip complex to prevent buckling and to return to equilibrium after perturbation” (Wilson et al., 2005). In other words, core stability is the ability to produce and maintain a neutral lumbar spine (Gottlob, 2001). According to the National Institute for Occupational Safety and Health, keeping a neutral spine is recommended when lifting something heavy off the ground or being under load…

Several muscles, such as the latissimus dorsi, erector spinae, quadratus lumborum, multifidii, and obliques—but also the glutes and adductors contribute to the stability of the core (Filey, 2007). More importantly, most of these muscles are connected via the thoracolumbar fascia, thereby forming a natural weightlifting belt around the lumbar spine. In conjunction with the diaphragm and the muscles of the pelvic floor, they help to maintain or build core stability by forming a shell around the lumbar region. Contracting the core and hip muscles leads to muscular stiffness and therefore the flexibility of the shell decreases and becomes more rigid. Filling the rigid shell with air by sharply inhaling through the nose will increase the so-called intra-abdominal pressure, leading to greater compression of the spine and consequently higher intervertebral stiffness (increased lumbar spine stability).

diagram of human breathing

A sharp inhalation has the advantage of automatically contracting the core muscles, which does not happen during slow breathing. The same effect is observed when exhaling while gritting one’s teeth—sufficient intra-abdominal pressure is maintained because more air will remain in the respiratory pathways while air flow is constricted. Continuous breathing allows continuous spine stability and is therefore preferable to the “valsalva maneuver”, when performing a task for more than one repetition. In support of this theory, Stuart McGill (2007) reported that using this breathing technique—known as “kime” in martial arts—when performing swings lead to a significantly greater contraction of the obliques. Thus, safety and performance can be enhanced by just breathing the right way.

***

Felix Sempf M.A. Sportscience, RKC, FMS, PM trains and instructs at the FIZ in Göttingen, Germany. He can be contacted by email at: felix.sempf@sport.uni-goettingen.de and his website: http://www.kettlebellperformance.de

Filed Under: Kettlebell Training Tagged With: breathing, breathing technique, core stability, effective breathing, Felix Sempf, intra-abdominal pressure, kettlebell technique, RKC kettlebell training

Mental Focus: A Trainer’s Secret Weapon

February 4, 2015 By Florian Kiendl 2 Comments

Florian Kiendl double kettlebell

It is obvious that mental focus is a great asset to any athlete. If you see any high level athlete work his magic, one thing that they all have in common is the ability to get into the zone–to be 100% in the present with their mind on the task at hand. My grandmaster Son Jong Ho told me that if he performs his spectacular stone breaks with bare hands, his mind is focused 100% on the desired result. There is no room for doubt or distraction.

Often in interviews after a less than optimal performance, athletes will say that they simply lost their focus. I think we can all agree that mental focus is an indispensable skill for any athlete to learn. But why is it the same for trainers?

The Trainer’s Dilemma

Anybody who is actively training people knows the frustration of standing in the gym and watching a client performing an exercise with less than optimal technique. You have told him a dozen times how to do it right, but he simply does not get it.

In the RKC, we have detailed and tested teaching progressions to enable our students to get into the right feeling before actually performing the exercise. For instance do we teach the Hardstyle plank before the swing so our students can understand how a completely tensed body should feel.

But even with the best teaching progressions, beginners tend to get sloppy and lose their concentration. After you have shouted, “Tense your glutes!” for the fiftieth time, your students start to simply tune you out.

Your Secret Weapon

Here is your secret weapon… In the classical martial arts, where my origins lie, it is very common for a trainer not to explain the techniques during class. Some masters do not even talk while training their students. This approach has its drawbacks, but it supports the athletes in getting into the right mindset by simply copying what the master does. After training several years with my first Tae Kwon Do, teacher I became so in tune that I often knew the next exercise before we were finished with the current one–and no, my teacher did not do the same exercises every day.

You can use this mental connection with your client to help them perform on a higher level. You simply extend your mental focus to them. Please don’t take this as esoteric concept, I have used this technique both as a student and a teacher many times. Try it and see for yourself.

How To Make It Work

I cannot really explain how it works, but I can explain how you can make it work for you. First let’s have a look at the receiving end:

As a Student…

First pick a technique that you are already familiar with, but want to improve. Find somebody who is performing this technique at a significantly higher level than you and watch them perform. (It is helpful if that person’s body type is similar to yours.) You can even use YouTube for this experiment, but it is best if you can observe them in person. This is also why we expect our RKC candidates to pass a strict technique testing before we allow them to teach. 😉

While the person you are watching executes the lift, try to get the feeling of what he or she is feeling at this instant. Don’t go into too much detail or analyze, just take in the general picture. After you’ve seen the lift, grab a kettlebell that is suitable for you and try to reproduce the lift. Go by feel.

As a Trainer…

When you are watching a student perform a lift with only a minor flaw in his technique, let your mind lift with him or her. This is not telepathy. The student should have trained with you for a while, and already know the general execution of the exercise. Fixing the minor flaws in the execution of the exercise that are hard to describe make such a huge difference in the long run.

Avoid doing or mimicking the lift along with your client, just reproduce the same feeling of tension in your mind. If you do it right, you will feel your muscles activate as if you are actually moving. I have witnessed many students change their movement pattern instantly without me saying a word.

Kettlebell Class in Germany

The Limitations of This Technique

This technique is not a magic trick. It can only be performed successfully when the following conditions are true:

  • The trainer is highly skilled at the exercise.
  • The trainer has a good ability to focus his mind.
  • The student has known the trainer for some time and trust is established.
  • The student has no physical limitations that prevent correct technique.
  • The student has a basic understanding of the exercise at least.

It is no replacement for good teaching progressions like those taught at our HKC and RKC Certifications. But, this use of mental focus  is a tool that can sometimes help to save you and your students a lot of frustration.

***
RKC Team Leader Florian Kiendl is a second degree black belt in Tae Kwon Do and runs a Martial Arts Gym in a small town close to Munich (Germany). He made it his mission to help his students to improve their movement and overall health. In his search for ways to overcome the movement restrictions of his students (and his own) he found the RKC and now works together with Master RKC Robert Rimoczi and others to help as many people as possible to gain back their Strength and Agility.

He writes a regular Blog at blog.kettlebellgermany.de and offers workshops all over Germany teaching the RKC Kettlebell exercises: KettlebellGermany.de.
If you have questions or comments on the article feel free to email him at florian@kettlebellgermany.de

Filed Under: Coaching, Motivation Tagged With: Coaching, fit, fitness training, Florian Kiendl, kettlebell instructor, kettlebell technique, mental focus, mental training

Achieve Pain-Free Single Kettlebell Cleans From The Start

January 28, 2015 By Lori Crock 5 Comments

RKC Team Leader Lori Crock's Kettlebell Cleans Tutorial

I am a coach who hates to see people in pain from doing cleans.

And it doesn’t matter whether it’s a beginner, or a more advanced kettlebell athlete, the clean can be a challenge to do as effortlessly as its kindred ballistic—the swing or even the snatch.

I speak from experience—the clean was hard for me when I was preparing for the RKC-I. It wasn’t hard with the typical thump on the wrist and forearm in the catch. No. My issue was a shoulder-hike on one side as the kettlebell made its way up … which can be even worse with the trap pain and the potential for some serious asymmetry down-the-road.

To avoid this, read on!

When you are first learning the clean, it can seem mysterious as to what the hand, arm and kettlebell are doing on the way up to the racked position. It happens so fast!

Often we see the clean only as a transitory movement that prepares us for pressing, front-squatting or doing racked carries—instead of focusing on the quality of the clean—even though we know a more efficient clean results in stronger pressing and squatting. And the clean is a nice alternative to the swing or snatch for conditioning.

You might not realize the inefficiencies in your clean if you don’t train it on its own very often—until you notice bruises on your wrist or arm the next day.

So let’s review the phases of the clean to achieve pain-free cleans. Note that the coaching cues included here are phrases I use when teaching to help people remember key points. The phrases may not exactly match the words used in our RKC manual, but they are rooted in my RKC kettlebell training.

The Swing

Get your two-hand and one-hand swing down first to set your start position, hip hinge and especially a deep back swing. Use cheat cleans (two-hand cleans) while you are learning the swing to prevent grooving bad movement patterns with your single kettlebell clean.

The Setup

Clean setup is just like the swing, holding the center of the handle, except the handle is tipped vertically for internal shoulder rotation to prepare your elbow to lock into your side once your arm moves through to the front of the body.

Coaching Cue: Set up like a slingshot.

Lean back with hamstrings on, lats activated, the kettlebell is tipped toward you—the whole body is taunt and slightly leaning back—and ready to release the kettlebell into a deep back swing.

You are in this same slingshot position each time you clean, whether from the ground or in the air into another rep. This athletic, ready position also applies to the Swing and Snatch with the handle in a horizontal position … but when learning the clean, in my experience, students need a reminder about the importance of the setup because they are more focused on the finish.

Lori Crock Kettlebell Cleans Tutorial: The Setup
The Set Up

The Back Swing

Get into your best hip hinge and hike the bell back as deep as possible to load and explode out of your hips. Shortchanging the back swing means you’ll end up without the power to send the kettlebell upward; so your body may compensate by arm curling the kettlebell or hiking the shoulder to assist the kettlebell upward.

Coaching Cue: Crush the wall behind you with your tailbone and explode up.

Go back to the swing if you are having problems achieving a deep back swing and hip explosion.

Practice: Swing-Swing-Clean 3 times each side to refine the back swing for the clean.

Lori Crock Kettlebell Cleans Tutorial: The Back Swing
The Back Swing

The Breathing

Breathe in through your nose to fill the diaphragm on the back swing. Exhale as the hips snap and knees and glutes lock.

Hardstyle breathing is used for power production and safety at the concentric or positive part of the clean (and all ballistic kettlebell movements). Exhaling when the hips snap creates a powerful muscular contraction in the torso that assists the body with the movement.

Coaching Cue: Explode, exhale.

Time your exhale on the hip snap/lock—not on the catch of the kettlebell in the racked position.

The Rise

When the kettlebell enters the front of the body there is some quick work to lock the elbow against the side of the body and get the hand around the kettlebell handle with a loose grip. Do this right away after the back swing when the hand is at hip level rather than waiting until you are about to rack the kettlebell.

Coaching Cue Elbow and Arm: Hip and zip

Lock the elbow into you side above your hip, zip up your jacket; keep you hand and arm close to your chest as you guide the kettlebell upward.

Coaching Cue Hand: Houdini hands

Move your hand quickly around the kettlebell handle as soon as it enters the frontal plane; do this quick hand work at approximately hip/waist level.

Practice: Clean in front of a wall, door, or post to practice keeping the kettlebell close to the body if you tend to cast it out away from the body. Use your other hand to cover your face in case of actual impact to the wall.

The Catch

The triangle of your forearm / upper arm will receive the kettlebell and hold it with even pressure (50% pressure on forearm and 50% on your bicep), but think of the whole body as catching the kettlebell. We move into a vertical Hardstyle plank when receiving the kettlebell to help avoid high impact on the wrist and forearm.

In the racked position, the kettlebell will not be sitting on your chest; instead, the inside of your arm will connect with at the side of your torso with a vertical forearm and vertical wrist about at the level of your collarbone. Do not hold your racked arm out in space—keep it touching the body to prevent overloading the elbow joint and to engage the lats. The arm and the body are connected and working as one unit.

Coaching Cue Torso: Catch with your cylinder of strength (Thanks, Andrea Du Cane for this phrase!)

Feel the muscular sinking in of your whole body around the kettlebell (not a collapse, but a tightening) as your abdominals and glutes contract, lats engage, knee caps roll up into quads and the entire body links and locks to receive the kettlebell in the racked position.

Coaching Cue Wrist: Knuckle up!

Because we use a loose grip on the rise of the kettlebell, beginners sometimes end up catching with a ‘broken wrist’ (wrist slightly bent back) in the racked position. To avoid this, re-tighten the grip after the catch so that knuckles are flat and facing the ceiling.

Practice: 5 Cleans left and 1 Hardstyle plank for 15 seconds / repeat right.

The Drop

Tip the wrist to release the kettlebell into a downward descent with a relaxed arm, thumb down slightly and the shoulder will be slightly internally rotated. Use only enough tension to hold on to the kettlebell and guide it to the floor or into another rep. Your hips, as usual, are doing most of the work. Keep the kettlebell as close to your body as possible, with your arm still touching your body, and finish with the arm straight in the back swing position at the end of drop before setting the kettlebell gently on the ground.

Note that death-gripping the kettlebell on the drop can lead to elbow pain.

Coaching Cue: “Waterfall” the kettlebell downward.

Allow gravity to do most of the work on the descent of the kettlebell using only a light grip.

Putting it All Together

Now you are ready to put it all together and practice your (hopefully!) pain-free cleans.

The Practice

I use the clean for conditioning in complexes and chains. I also like kettlebell chains that include a clean to practice smooth transitions between movements. This complex meets both of those goals. I use one kettlebell for all movements with 1 minute of rest between 3-5 rounds.

10 Cleans left / 10 Cleans right

SA 2 Swings-2 Cleans-2 Press left

SA 2 Swing-2 Clean-2 Press right

***
By Lori Crock, RKC Team Leader, FMS II and MovNat MCT II. Lori owns MoveStrong Kettlebells in Dublin, Ohio where she teaches small group kettlebell classes to all ages and fitness levels and continues to be amazed, inspired and educated by her students. Her email address is lori@movestrongkbs.com

Filed Under: Kettlebell Training, Tutorial Tagged With: clean a kettlebell, kettlebell cleans, kettlebell how to, kettlebell instruction, kettlebell technique, kettlebell video, Lori Crock, RKC Team Leader, video

A One-Size-Fits-All Solution for Problematic Kettlebell Presses

December 10, 2014 By Andrew Read 4 Comments

Master RKC Andrew Read Performs a Kettlebell Bottoms Up Press

The learning and skill continuum that begins at HKC and progresses through RKC and RKC-II follows a fairly straight line. We begin with patterning exercises in HKC—two hand swings, the goblet squat, and the get-up—before progressing to one handed variations on these themes such as the clean and snatch, and the double kettlebell front squat at the RKC. The work done on the get-up lends itself to pressing and snatching which in turn leads to the double push press and jerk as well as the windmill and the bent press at RKC-II.

At RKC-II, people usually face one of two problems, either their thoracic mobility is poor and they struggle with the double overhead work (as well as the windmill and bent press) or they struggle to get their heavy press. As much as the old RKC saying, “To press a lot, you must press a lot” does ring true for many, it may also lead to bigger problems down the line.

About a year ago I wrote an article for Breaking Muscle (Single Kettlebell Ballistic Complexes: How to Save Your Shoulders and Still Work Overhead) which explained the three different types of AC joint set up that people have, as well as possible ways to train long term without damaging yourself. But that still doesn’t help us with the heavy press goal if we’re on our way to RKC-II, does it?

When I wrote Beast Tamer, I outlined many different press plans that could help you get through a sticking point in your press training. I’ve learnt a bit since then and want to outline a plan below that will help you get through your sticking points without risking injury.

What we need is a drill that gives us the same feel as the heavy press and the same effort—all without placing the same strain on the AC joint. This is where the bottoms-up press (BUP) comes into play. The BUP is an interesting drill. Interesting in that I have used it as a one-size-fits-all solution for a variety of problems with the press. Not gripping the kettlebell tightly? The BUP will fix that. Not staying tight in your press? The BUP will fix that too.

The BUP is ideal for our needs as it teaches great form while forcing you to use less load. That may sound problematic, but the body doesn’t register how much you lift, only how much tension you generate. If your form is even slightly off, the kettlebell will fall. This is what makes the BUP ideal as a learning tool. It is automatically apparent what needs to happen and where the point of failure is.

Imagine that the fulcrum (center of rotation) for this movement is not the delicate AC joint, but instead a point midway between the deltoid and the elbow—essentially the middle of the bicep. By focusing on having your elbow move around that point while doing a BUP you will teach your whole body to engage during the press. Likely you will find this feels significantly different to what you have been doing when overhead pressing.

One of the things to keep in mind in relation to the BUP, is that it has a great effect up to a point. I don’t believe that past 32kg they do much to boost your press as the skill becomes its own lift. Prior to that they can be a valuable tool to teach you tension and alignment. Do not make the mistake of turning the drill into an exercise. The goal is never to have the best BUP in the world, rather to use the BUP to build your press.

Low reps are a must with the BUP, as the CNS fatigue from the high grip demand is intense. 2-3 sets of 3-5 reps seem to work best prior to your limit presses for the day.

The other side of this equation is that healthy shoulders are not built from pressing alone. For every push, you must have at least one set of pulling to counteract it. While the pull up is usually the choice of functional trainers, I’ll caution against it as the lat also acts as an internal rotator of the arm, so if all you do are presses and pull ups you’re just as likely to end up with bad shoulders as if you only did presses.

At RPT, we use a variety of weighted mobility drills to achieve healthy shoulders. Here’s how a press workout might look:

Lying dislocates with weight – 3 sets of 10 reps. Paired with push-ups for 3 sets of 10-20 reps.

BUP – 2 x 5 at 50%

Y-T-Row – 2 x 5-5-10

BUP – 3 ladders of 1-2-3 reps combined with easy light two-hand swings in between to help shake the tension out.

Perform a rear support—think of it as a face up plank—for 60 seconds and then do a get-up on each side. Perform three super sets of this as a final shoulder health practice. Make sure to stretch after and “unglue” all the tension you’ve built up in these muscles during training. Pay particular attention to the triceps, lats, traps, and shoulders.

***

Andrew Read, Master RKC, Author of Beast Tamer, is head of Dragon Door Australia and Read Performance Training. Recognized as Australia’s leading functional strength trainer he is a regular contributor to Blitz, Inside MMA, International Kickboxer, Oxygen, Ultrafit and Breaking Muscle. His coaching background spans nearly twenty years having worked with many Olympic and world championship level athletes.

Filed Under: Kettlebell Training, Tutorial Tagged With: Andrew Read, Beast Tamer, bottom-up press, bottoms-up press, kettlebell drill, kettlebell press, kettlebell press drill, kettlebell press program, kettlebell technique, military press, overhead press

Kaizen–The Ancient Japanese Art of Continuous, Incremental Self-Improvement

November 5, 2014 By Florian Kiendl 6 Comments

Florian Kiendl Beast Kettlebell SwingI was introduced to this term years ago when I worked as an IT Consultant for a German automotive supplier. I learned that it was this ancient Japanese concept that transformed Toyota from a small and inefficient car manufacturer into the de facto worldwide industry leader in production efficiency and accuracy. Today virtually all major car manufacturers use the Just in Time concepts invented by Toyota to produce their products. These concepts can save tons of money in production costs while maximizing quality at the same time.

At this point you might think: “And what has this to do with me? I’m a fitness professional!”

Think again! What kind of results might a simple concept—with the power to turn a young company that started out producing the cheapest and most error prone cars on this planet into an industry leader in a few short years—produce if applied to your business or training?

Interested? Then stay with me.

What is Kaizen?
The roots of this concept lie deep in the Japanese culture. It has enabled people to create some of the most magnificent works of art and craft in history. The approach is simple and yet extremely efficient in itself.

Instead of working their butts off until a project is finished or has completely failed (as most westerners tend to do) the ancient Japanese would regularly sit down and assess the process of creation and make minor adjustments along the way. This way they can gain a much deeper understanding of the task at hand, enabling them to complete it easier with better results.

Florian Kiendl One-Arm Kettlebell Swing
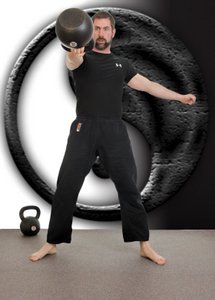
Kaizen and the Hardstyle Kettlebell
For us as Trainers…

Applied to training this might be the idea of starting out with a given program and adjusting it little by little to create the most effective version of that program along the way—instead of running a full cycle of it then looking at the results and starting over with a completely new program if they are less than satisfactory.

Kaizen is about digging deep into the process and learning how to execute it in the most efficient way during the process, rather than assessing the results and making adjustments afterwards. In a way this fits nicely to our Hardstyle approach for kettlebell training. Instead of banging out as many reps as possible and adding as much weight as possible to any given move, we try to improve the technical execution of the exercise to make it as powerful and crisp as possible.

The biggest problem with Kaizen for our western minds is that it takes more effort to track the improvement because the changes are incremental. If you improve your swing, making it more powerful while keeping the weight and reps the same, it is difficult to assess your progress. In contrast, if you step up in volume or weight, the progress can be easily seen by anybody. However, my experience tells me that stepping up in volume or weight too fast can hinder your progress—especially with the ballistics.

What can Kaizen do for your Business?
The biggest impact of using the Kaizen approach will be to your business. Whether you are an independent trainer or a gym owner you will profit from it by:

  • The almost automatic adaptation to changes in your environment.
  • You can avoid reorganizing your business, which can be a pain and will always lessen your income.
  • You will have the systems in place to respond quickly to your customer’s needs
  • Your employees will feel like they can actively influence their work environment and will be happier and more productive.

When I used to work for Microsoft as an IT Consultant, they had the policy of reorganizing the entire company every other year. Aside from the obvious—adapting to a fast changing market environment—the idea was to keep the company (and especially the employees) agile and hinder the growth of rigid structures. However the reorgs where a pain for most the employees and often did not make a lot of sense. Even a small business like a garage gym can be quite complex and it can be difficult to predict the side effects of a major change. By keeping the changes small and confined, you can avoid disturbances and more easily observe which changes are effective and which are not.

Take advantage of the Kaizen approach in 5 easy steps

Step 1: Know your Destination
This should be clear but every so often I meet trainers who do not think about what they want to achieve. We are an industry of enthusiasts, who do what we love. People whose first priority is making money work in banks or sell insurance contracts. Don’t get me wrong, doing the things you love for a living is the best thing you can do for yourself and your environment, but if you do something for a living it must sustain your lifestyle. Training 10 people in your garage gym is a nice pastime but it won’t pay your bills.

So, you need to be clear about where your business should be next year, the year after, or in five years. Knowing your destination gives you the means to navigate through the chances and risks of your daily business and eventually arrive somewhere.

If you are a trainer in a gym, you might have the feeling that this is something you don’t have to worry about. But please follow me on a little thought experiment. First take a moment to sit down and ponder the ups and downs of your daily job. Now try to picture yourself in 10 – 15 years doing the same job you do today (considering factors like family, children, getting older). If this is a pleasant thing to imagine, then congratulations on having the job of your life. If not, you need to decide where you want to go from here.

FlorianKiendl Double Kettlebell Press

Step 2: Embrace Change
There is a German saying that goes like this:

“If the wind of change is blowing, some people build walls – others build windmills”

Make sure you belong to the latter group. For many of us it is quite unsettling that everything is constantly changing. If that is the case for you, think of it this way—the only thing that is truly constant is CHANGE. If you expect and anticipate changes to happen, you can probably profit from them. If you try to keep things as they are today, it is only a question of when you will be overtaken by reality.

Step 3: Take time to analyze your situation
This is hard, but absolutely critical. If you are like me, sometimes it feels like everything happens at the same time and you have barely time to react to the most urgent demands. However you can succeed in the long run if you are reactive mode. It is absolutely critical that you make it a habit to regularly assess your situation. Only this can give you the power to improve your situation and avoid problems.

  • Actively ask for feedback. Whether they are your clients, employees, or business partners actively ask them to tell you what they like and what could be improved.
  • Make sure your clients have the means to give you anonymous feedback. If you wait until they are prepared to tell you to your face, you have probably lost them as a customer.
  • Have a regular meeting with your staff to you ask them for their take on what’s going on. In this meeting you should also collect ideas about what could be improved.
  • Take time to ponder the information you’ve gained on a regular basis. Have a scheduled time at least once a month to review all the information. This can be a done on your own, but if you have employees or coworkers it may be more productive if you have them with you.

Appreciate all feedback whether it is good or bad.
All information you gain about your business is valuable—whether or not it makes you feel good. If you follow the steps I laid out, you will soon realize that negative feedback is actually much more valuable than praise. Praise is good for marketing, but moaning and groaning improves your business.

As an RKC Instructor you will be used to receiving good Feedback from your Clients, but do not fall into the trap of assuming the few who tell you are otherwise are weirdoes or moaners – they are probably those clients who trust you most and want you to succeed.

Step 4: Act
Whenever your sources have brought something which can be improved to your attention, determine if you have the means to improve it. In many cases, it will not take a big budget or much planning to implement smaller improvements. Go for the quick wins first instead of the big projects. The bigger the change, the more risk is involved.

Florian Kiendl Board Breaking

Step 5: If you do not act, explain why.
To gain the information you need to steer your business, you rely on the people around you. It’s in your best interest that they continue sharing their opinions with you, and they will continue to if they feel their voices are heard. There is nothing more frustrating than sharing information to help the business improve only to see no improvement or reaction . Make sure you spare the people around you this frustration.

***
RKC Team Leader Florian Kiendl is a second degree black belt in Tae Kwon Do and runs a Martial Arts Gym in a small town close to Munich (Germany). He made it his mission to help his students to improve their movement and overall health. In his search for ways to overcome the movement restrictions of his students (and his own) he found the RKC and now works together with Master RKC Robert Rimoczi and others to help as many people as possible to gain back their Strength and Agility.

He writes a regular Blog at blog.kettlebellgermany.de and offers workshops all over Germany teaching the RKC Kettlebell exercises: KettlebellGermany.de.
If you have questions or comment on the article feel free to email him at florian@kettlebellgermany.de

Filed Under: Coaching, Fitness Business Tagged With: business improvement, business strategy, continuous improvement, fitness business, fitness business improvement, fitness strategy, Florian Kiendl, Kaizen, Kettlebell, kettlebell technique, self improvement, strategy, technique

  • « Go to Previous Page
  • Page 1
  • Page 2
  • Page 3

Primary Sidebar

Featured Products

previous arrow
BOOK-RKCBookofSnC
HardStyleKettlebellChallegeDanJohn700
BookCoverMasterTheKettlebell1
RKCiconKettlebell512
KettlebellGoddessdv040
next arrow

Recent Posts

  • RKC Big Six Workout
  • The Kettlebell Swing & Low Back Pain
  • Key Kettlebell Exercises To Help You Create Better Balance
  • How to Most Effectively Use Kettlebells to Meet Your New Year Goals
  • 1 Exercise That Checks All The Boxes
FOLLOW US ON TWITTER!

Archives

Copyright © 2025

Dragon Door Publications / The author(s) and publisher of this material are not responsible in any manner whatsoever for any injury that may occur through following the instructions or opinions contained in this material. The activities, physical and otherwise, described herein for informational purposes only, may be too strenuous or dangerous for some people, and the reader(s) should consult a physician before engaging in them.