• Skip to main content
  • Skip to primary sidebar
  • Home
  • Contributors
    • Matt Beecroft, Master RKC
    • Martijn Bos, Master RKC
    • Andrea Du Cane, Master RKC
    • Angelo Gala, Master RKC
    • Chris Holder, Master RKC
    • Steve Holiner, Master RKC
    • Dan John, Master RKC
    • Mike Krivka, Master RKC
    • Thomas Phillips, Master RKC
    • Robert Rimoczi, Master RKC
    • Phil Ross, Master RKC
    • Max Shank, Master RKC
  • Workshops
    • HKC Workshops
    • RKC Workshops
    • RKC-II Workshops
  • Find an RKC Instructor
  • Resources
    • Articles
    • Forums
    • Kettlebells
    • Products
  • Blogs
    • PCC Blog
    • Strong Medicine Blog
  • Archives

RKC School of Strength

Official blog of the RKC

Kettlebell Training

Kettlebell Ballistics Analyzed

December 21, 2016 By Florian Kiendl 7 Comments

RKC Team Leader Florian Kiendl Beast Swings

Like many worthwhile exercises, ballistic movements can be taught in a few hours, but need to be practiced for years on end. To stay sharp with the Hardstyle techniques we use in the RKC system, we always need to pay attention to every detail. The reason is simple yet profound: Hardstyle ballistics are self-ruining. Our central nervous system is programmed to optimize any repetitive motion for energy efficiency. Hardstyle ballistic movements are designed to do the exact opposite—create maximum power output. This is also one reason why RKC Instructors are required to recertify on a regular basis.

In this post, I will analyze the RKC kettlebell ballistic exercises step by step. It should be obvious that no ballistic exercise can ever be performed “step by step”. For example, with the kettlebell swing, the trainee does not (or at least should not) force the kettlebell back down from the top, instead they should just wait for it to come back down.

I would suggest that beginners reading this post bookmark it and save it until after finding an RKC instructor and performing at least 10,000 Hardstyle swings. My intention with this post is to go into great detail and give advanced trainees and instructors a reference. This approach is not suitable for beginners as all the details will only confuse him or her.

Hardstyle Kettlebell Ballistics Defined

The term “ballistic” describes any movement that occurs without external forces applied to the moving object. For any object on the face of the earth to move in a truly ballistic fashion, it must be accelerated with more force than gravity, and then left alone. The bigger the force and the faster the acceleration, the more kinetic energy will be stored in the object, causing the object to fly higher and farther. As soon the object enters the ballistic phase, it uses up its kinetic energy. When the kinetic energy becomes weaker than the gravitational pull, it starts to fall. Depending on the angle between the gravitational pull and the direction of the movement, the ballistic trajectory will be steep or flat. But, when all the stored energy is eventually used up, the object will fall freely towards the center of gravity.

Humans basically perform two types of ballistic movements: jumping (the human moves in a ballistic fashion) and throwing (the human moves an object in an ballistic fashion). In both cases, the human must generate the force for the acceleration and then release it. In the second example, the thrower releases the object after the acceleration phase, and there is no way to change the object’s trajectory after it has been released. When we jump, we also release control temporarily—we can’t change direction mid-jump—but we can hopefully catch ourselves on impact. Both types of “human ballistics” require speed and power at the same time.

The Kettlebell’s Little Secret

The kettlebell’s offset center of gravity allows the user to combine both forms of “human-ballistics” into a single exercise. In many ways, a kettlebell swing is almost identical to a vertical jump. The only difference is that a vertical jump is a triple extension (the hip, knee and ankle open together) while the swing is only a double extension (the hip and knee open, while the ankle does not open keeping the feet firmly on the ground). Another similarity to a jump is that all the momentum generated during the swing, must be caught during the back swing. If you were wondering how the swing is also a throw, take your kettlebell outside, do a swing and release it at its apex!

Simply put, when you train with kettlebell ballistics, you train the two most explosive and powerful movement patterns at the same time.

Ballistics Analyzed

Enough talk about why kettlebell ballistics are so cool… now, let’s analyze the motion.

Since the swing, clean and snatch are basically the same movement, and the same principles apply, I’ve tried to keep the analysis fairly generic. Significant differences will be discussed when necessary. Whenever you find something to improve in your own technique, make sure to practice and fix the least complex movements first before moving on to more difficult movements.

The ladder of complexity:

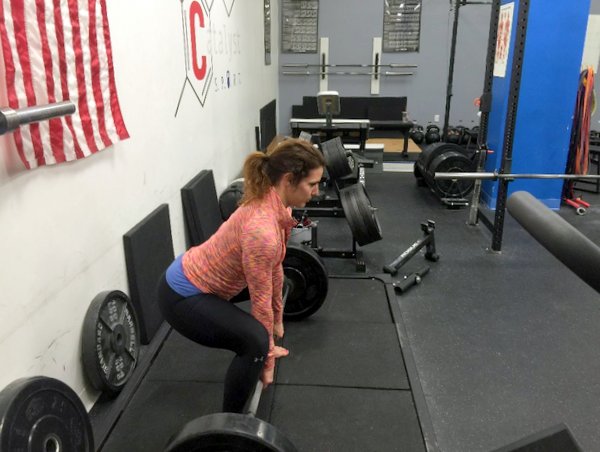
  • Kettlebell sumo deadlift: not a ballistic motion, but any problems with the hip hinge and the lockout of the hips should be fixed here first. Don’t be afraid to use really heavy kettlebells with this movement.
  • Dead stop swing: Isolated single reps of the two-hand swing force you to start strong each time and prevents the deterioration of your technique from rep to rep.
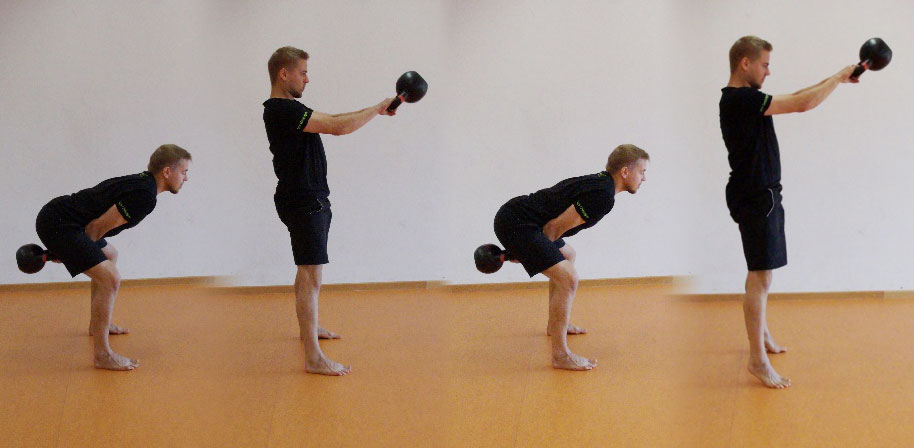
  • Two-hand swing: This is the simplest ballistic movement. It has all the aspects of force generation and deceleration, but without the anti-rotation aspects. However, if you struggle to keep your shoulders packed in the one-arm swing, first practice with the two hand version.
  • One-arm swing: This is the first step of the progression where you practice anti-rotation.
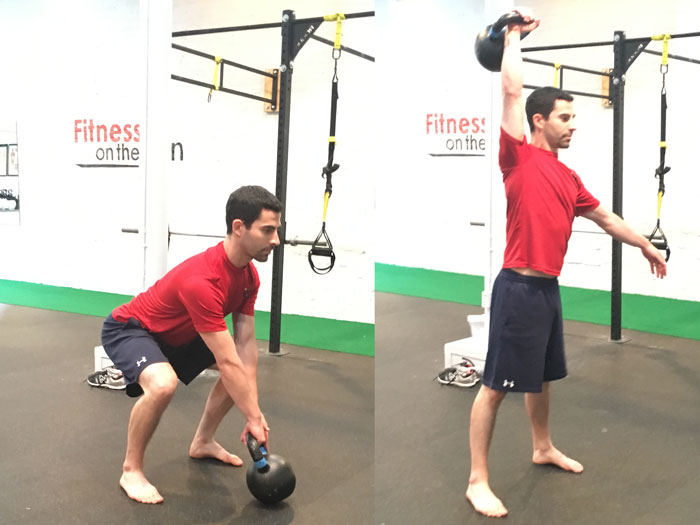
  • Snatch: This is a one-arm swing, that ends in the overhead lockout position. Safely landing the kettlebell in the overhead lockout position adds even more complexity.
  • Clean: In my experience, this is the most difficult ballistic skill to learn. With the snatch, you can usually go full throttle, but the clean requires you to use an exact amount of force so it can land crisply but cleanly in the rack position—all without changing the basic movement pattern.

Action Required:

To get the most from the above information, take a short video of your swings (film them from the side). Then, look at each part of your swing. Use an app with a slow motion feature (I use Coach’s Eye). If you struggle with other ballistic exercises, shoot videos of them as well.

Obviously, ballistic movements are fast and cannot be paused. It is also difficult—if not impossible—to control or modify the movement in real-time. So, all of the thinking has to happen before the kettlebell leaves the ground. Use your imagination and visualize the motion in vivid detail before actually executing it. This is the best way to improve your ballistic skills.

Hint for Instructors:

If you train people with kettlebells, do not correct them while they are working. Instead, have them set the kettlebell down, then explain before having them try again. Short hints usually work for people who already know the problem and only need a quick reminder. But instructions using more than four words must wait until the kettlebell is safely parked.

Mirrors:

When you train in front of a mirror—common in many gyms—refrain from analyzing your technique. I usually turn away and have my back to the mirror whenever possible. Again, if you want to know how your ballistics look, use a camera. The goal of any technique work should be that you can feel if you are doing it right rather than see your mistakes.

Notes:

Mastering ballistic drills should be thought of as a project that can never truly be completed. Striving for perfection is a worthy goal, but it is madness to expect to reach perfection. As in the martial arts, there is always something to improve. A good ballistic rep should be poetry in motion, smooth and powerful! Jerky motions should be avoided, and the kettlebell should look weightless.

Have fun practicing!

The Ballistic Phases

Once again, the following breakdown of the kettlebell ballistic movements is intended to give you a deeper understanding of the mechanics, not to teach the techniques. Some phases are long (relative to the full motion) and others happen in an instant. The length of my explanations do not correspond with the length or importance of the phase.

Loading:

Any ballistic kettlebell drill requires a deep hip hinge, for proper loading. This is why I expect all my students to start their swings, cleans and snatches with a hike pass instead of a pendulum motion. I agree with master Bruce Lee who stated, “I fear not the man who trained 10,000 kicks, but the one who trained one kick 10,000 times.” Following this train of thought, this is why I do not like the idea of starting each set with several substandard movements to gather enough momentum for cleaner technique.

After you hike the kettlebell backwards off the floor and between your legs, let the weight pull you back into a nice hip hinge. It does not matter if you work heavy or light or if you are doing swings, cleans or snatches—this stage should look always the same. Obviously, it should also look the same for every rep.
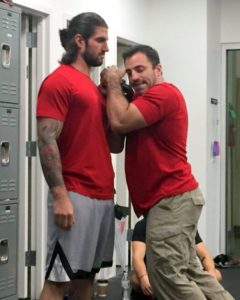
Drill:

Get into the starting position. Have a partner hold a clipboard behind your butt at a distance the size as the body of the kettlebell. In other words, in the deepest position of the back swing, the body of the kettlebell should stand out behind you while your spine stays neutral. Now hike the kettlebell back for a swing, clean or snatch and try to hit the clipboard. The goal of this drill is to hit the clipboard with each hike pass. You can do the same drill with swings, cleans or snatches.

Acceleration

If your hike pass and back swing are good, then there is not much that can go wrong while you accelerate the kettlebell. The elastic energy generated during the loading phase of the swing practically catapults the kettlebell forward. But, if you did not load your hips properly, or did not keep a neutral spine, then you will have problems.

Be very careful while learning new skills. For some reason, it’s common for someone who has already leaned to properly load his hips to forget what he learned when confronted with a more complex technique.

Whenever an advanced technique like the clean or the snatch feels overly complicated, and you have a hard time controlling the kettlebell, review the more fundamental exercises (like the swing). Often, you will find minor flaws will translate into bigger problems when the movement becomes more complex.

Force Transfer

Compared to the previous two phases, force transfer happens in an instant. It takes a trained eye to see if it was good or not. If the force transfer is weak, the whole exercise is weak, so it is important to get this one right.

Force transfer happens exactly in the instant of the upswing when your hip joint fully opens. Before that, you accelerate the kettlebell, but when your hips lock out, the kettlebell moves with the stored kinetic energy you generated during acceleration phase. You might have noticed while driving your car that the harder you hit the break, the more you get pressed into your seatbelt. This is because more of the built up kinetic energy remains in the object (you in the car or your kettlebell during the swing).

How to “hit the brakes hard” when locking out your hips:

  1. Contract your glutes as hard as possible. (Sounds familiar, right?)
  2. Simultaneously brace your abs as if you are waiting for a punch.
  3. Press your feet into the ground and contract your thighs. (Leave burning footprints!)
  4. Activate your lats and pack your shoulders.
  5. Exhale sharply through closed teeth.
  6. All of this should be happen in the instant your hips are fully open. The better your timing, the better and safer your swing will be.

Up until this step, the movement for all of the ballistic exercises is identical. No matter if you swing, clean or snatch the kettlebell, to this point all three drills look exactly the same.

The Rise

If you succeeded in passing kinetic energy to the kettlebell, the major part of your task is already done. You can not—and should not try to—do anything to give the kettlebell any more power than it has right now. However, you can still ruin the result!
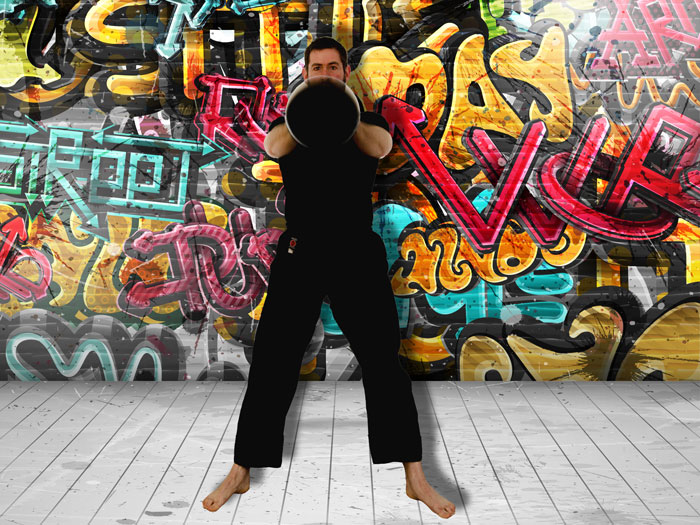
Swing

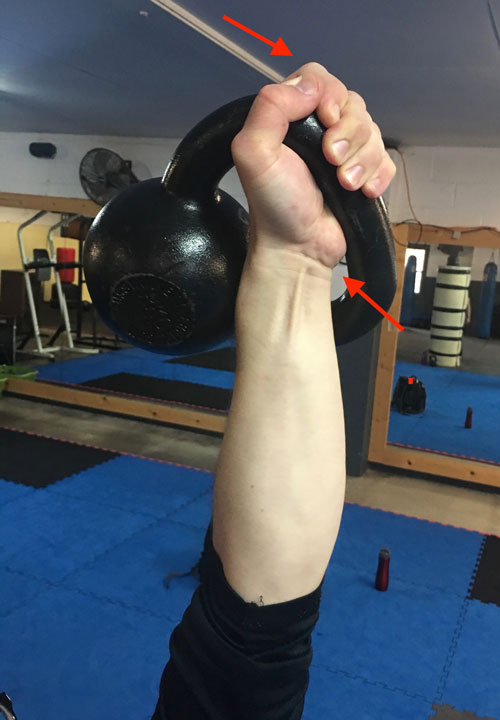
In the kettlebell swing, your only task is to stay grounded while you hold on to the kettlebell. Do this by keeping your glutes, abs, and lats tight. While staying tight, try to let your arms be as loose as possible so the kettlebell can rise freely. You will know you are doing it correctly when your body forms a straight line from heels to the top of your head and the kettlebell is in line with your arms.

If the kettlebell hangs down on the top of the swing, you are pulling with your arms. On the other hand, if the bottom of the kettlebell tilts upward, you are holding your arms too tightly, hindering the upwards movement.

How high should you swing?

Everything between chest and eye level is ok. Think of the swing as a throw: instead of swinging the kettlebell high, aim at a point several meters in front of you. It helps to imagine someone you don’t like standing there!
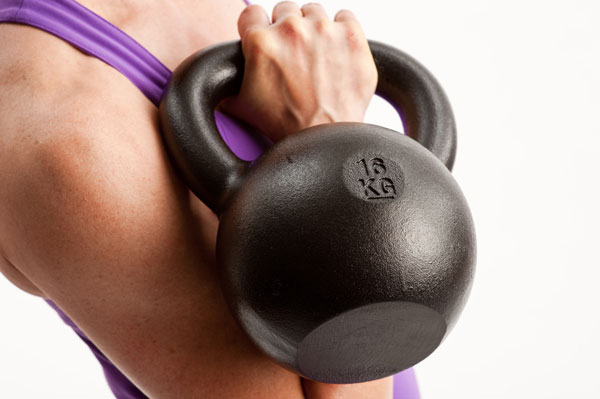
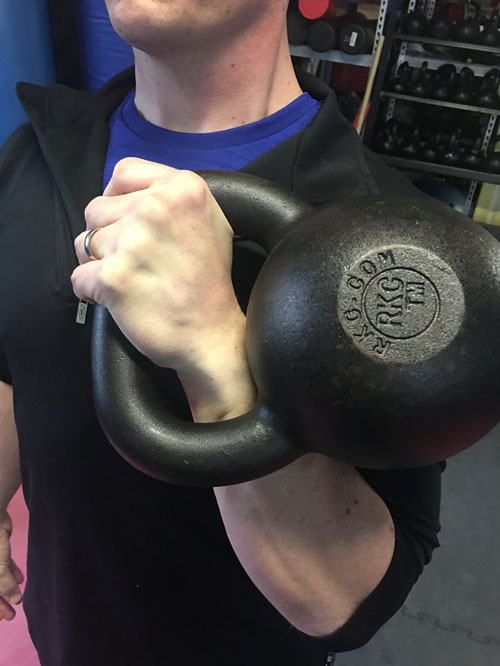
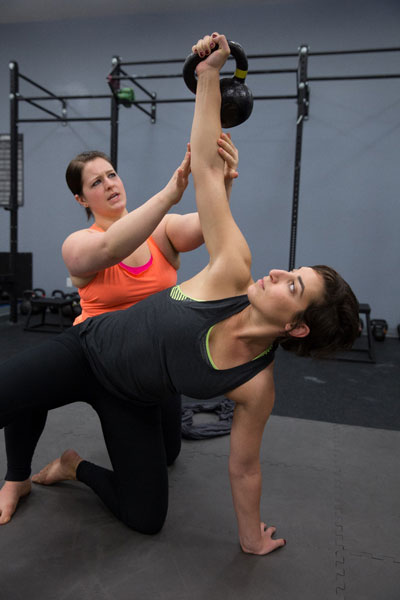
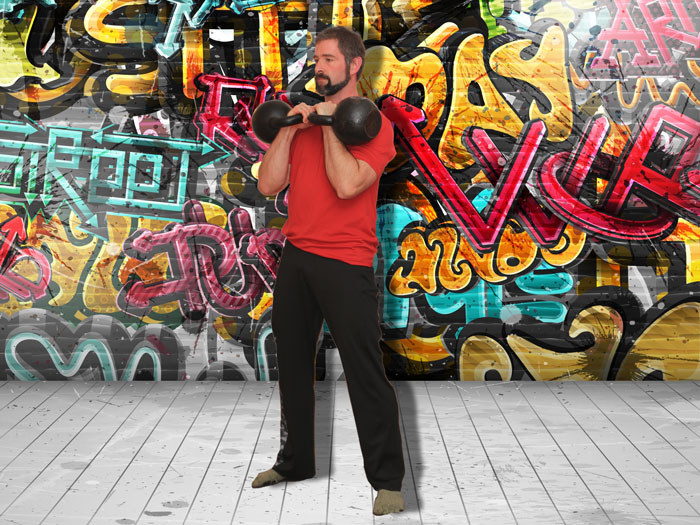
Clean and Snatch

For the clean and snatch, the task is much more complex. First you have to lead the kettlebell, instead of just letting it float upwards. Secondly, you need to maneuver your hand into the respective end position. While you practice this, make sure your swing mechanics up it this point stay constant. I often see beginners struggle with the clean and the snatch because they fail to generate enough power from the hips. I think that the clean adds more difficulty to the equation because–unlike the swing and the snatch—you need to carefully control the amount of power you generate to propel the kettlebell to the exact height of the rack position. Obviously the amount of power differs greatly when cleaning a 8kg or a 40kg kettlebell. This is also why I have my beginners practice the snatch before I teach them the clean.

Florian Kiendl double kettlebell clean

Step by Step:

After your hips lock out, the kettlebell will try to follow the same flight path as the swing. For the clean and snatch, this is not optimal, because the kettlebell would travel too far away from the body and land with too much force when it comes back. To let it rise closer to your body, hold it back as if you are doing a row.

When you have successfully modified the flight path, the next challenge is to hit the parking position before the kettlebell comes crashing down on you. To accomplish this, your hand has to travel faster than the kettlebell rises.

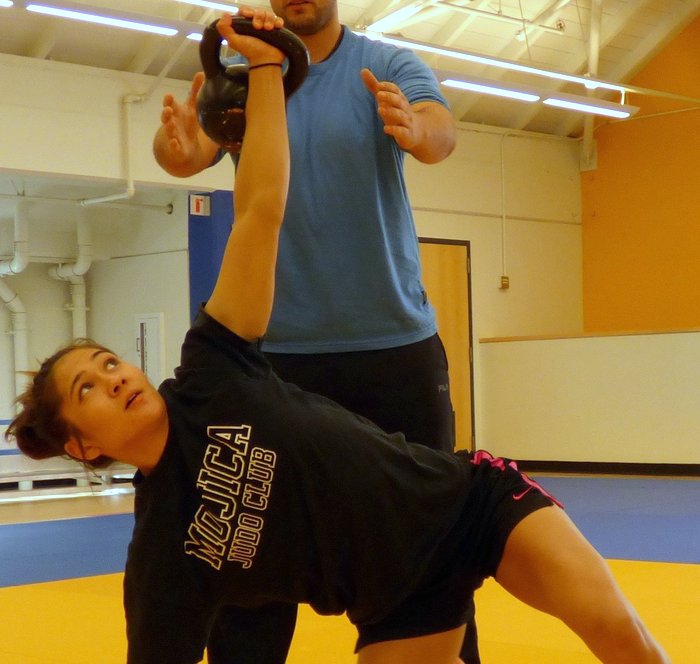
  1. In the case of the clean, you can think of it as closing a zipper. The right point to “close the zipper” is when the kettlebell passes your navel.
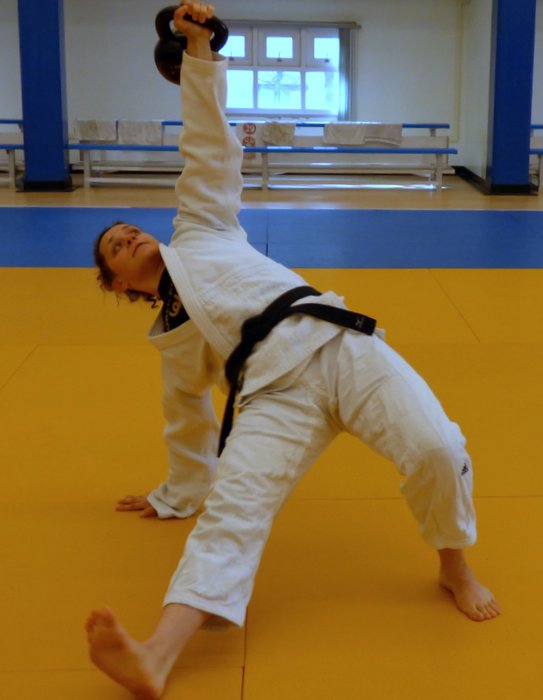
  2. For the snatch it is easier, when the kettlebell passes your line of sight, just shove your fist straight up as if you are celebrating a victory.

In both cases, you will modify the flight path right when your arm connects with the kettlebell, but before the kettlebell has stopped moving upwards. You will surely feel it when you get it right, even though it is sometimes hard to see on video.

If you follow these hints, your snatch should work quite well, but there can still be issues with the clean. Try to clean with different weights to learn how to use the right amount of power.

Warning! If taped on video, your cleans should look the same no matter what weight you use. Don’t change the movement pattern, only change the amount of power you generate.

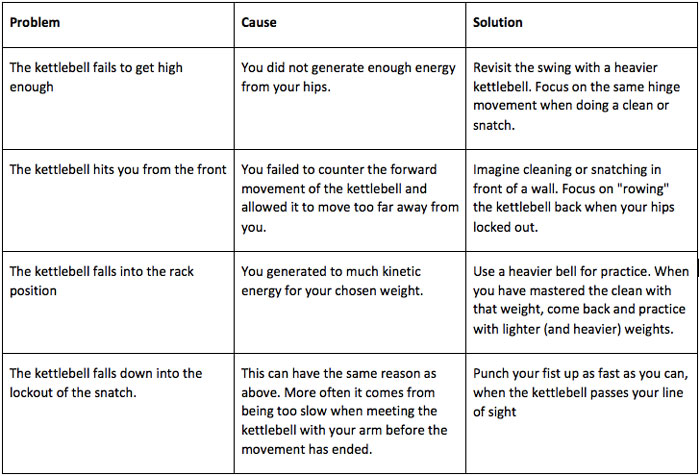
Self Diagnosis for Clean and Snatch

The following table gives you hints you can use to pin down common problems in your cleans and snatches:

kettlebell troubleshooting chart

The Apex

This phase is only relevant for the swing since in the clean and the snatch, the kettlebell rests in its respective parking position. In the swing, the kettlebell is allowed to use up its energy without user interaction. But, you can also use this instant for any interaction with the kettlebell (hand switches, flips, etc.). Everything I wrote so far impacts the behavior of the kettlebell in this phase. The kettlebell becomes still in the apex if and only if you get all of it right! If you find it difficult to pass the kettlebell from one hand to the other, try to figure out in which phase you lost (or failed to generate) tension. Practice it and when you feel you mastered it, come back and retry the hand switch. You will wonder why you ever had any problems!

Up Swing / The Drop

When the kettlebell has either used up all of its energy, or you have decided to drop it, it will fall back down towards mother earth. There’s not much more you can do to improve this, don’t even try. In case of the swing, any interference on your part will result in ruining the next rep. With the clean and snatch, there is also a high probability that you hurt your elbow. The only thing you should be doing is standing tight and wait until the kettlebell eventually tries to pull you down. Don’t resist, but break at the hips and smoothly hinge back. Make sure not to bend over, but just move your butt back while keeping your spine neutral.

The Catch / Reload

Now we have completed the full circle and are back where we started. Use the kinetic energy freed from the drop to load your hips and explode into the next rep.

Setup and Start

As already explained, you can not approach ballistics step by step. As soon as the kettlebell moves, the die is cast. Minor adjustments are still possible but if your setup sucks, your swings will too. I recommend creating your own little ritual to perform every time you approach a kettlebell.

Mine goes like this:

  1. I step up to the kettlebell and firmly plant my feet.
  2. I stand straight for a short moment and then tighten up to remind me what the top position should feel. I use this step only when I initially approach the bell, not between sets.
  3. I place the side of my hands in the creases of my hips and shove myself into the hip hinge. I do this to remind myself how the bottom position of the swing should feel (skipped between sets).
  4. I grip the handle with both hands and try to break the handle. This activates my lats. When I feel my lats, I soften the grip.
  5. If I want to work one handed, I remove one hand from the handle and center the remaining hand on the handle.
  6. At this point I lean back slightly, anchoring myself with the kettlebell (it is tilted towards me). This last step removes all the slack to avoid a jerky first rep.

You may think this sequence would take me as much as thirty seconds or more to get ready to swing, but that’s not the case. When I teach and am taking my time it only takes about 2-3 seconds. When I am training, I run through it so fast than an observer may not even notice what’s happening.

Create your own routine that gives you the best results, and practice it until it becomes second nature.

When you are set up and ready to start your swing, make sure to go all out from the first rep onward. Your set should always start with a powerful rep rather than building up speed from rep to rep. That is why I recommend the dead stop swing, it lets you practice your setup routine with every rep and you will become accustomed to starting your sets strong.


***

RKC Team Leader Florian Kiendl is a second degree black belt in Tae Kwon Do and runs a Martial Arts Gym in a small town close to Munich (Germany). He made it his mission to help his students to improve their movement and overall health. In his search for ways to overcome the movement restrictions of his students (and his own) he found the RKC and now works together with Master RKC Robert Rimoczi and others to help as many people as possible to gain back their Strength and Agility. He writes a regular Blog at blog.kettlebellgermany.de and offers workshops all over Germany teaching the RKC kettlebell exercises: KettlebellGermany.de. If you have questions or comments on the article feel free to email him at florian@kettlebellgermany.de. 

Filed Under: Kettlebell Training, Tutorial Tagged With: ballistic exercises, Florian Kiendl, kettlebell ballistics, kettlebell technique

Where and How To Grab The Kettlebell Handle

December 14, 2016 By Andrea Du Cane 5 Comments

Andrea Du Cane coaching rack position

As I travel around the country, I find there is a lot of confusion about where to grab the kettlebell handle—in the middle or in the corner? It is understandable that people are confused. After all, kettlebell training is still reasonably new to the broader public and it IS a very unique training tool. I hope to clarify some of this confusion and explain why certain grips are better for certain exercises, while some are definitely not appropriate for others.

The simplest way to break it down is to look at where you grab the kettlebell on the handle: the center or the corner. I’ll refer to this as the Center Grip or the Corner Grip.

This is very important. Unfortunately, many people do not pay attention to where they are grabbing the kettlebell. This is part of what I call the “set-up”. Every single kettlebell exercise has a set-up. This is where you stop and look at your feet, then determine where you place the kettlebell—in front of you for a swing/clean, or directly between your feet for a deadlift. You need to pay attention to where you place your hand on the kettlebell handle, and this too is determined by which exercise you are planning to practice.

Let’s begin by breaking down the different kettlebell grips, their uses, and advantages.


The Center Grip or Parallel Grip:

Grab the kettlebell in the center of the handle. The handle will generally lie across your callus pads with a slight downward angle toward the pinky side of the hand.

Rule of Thumb:

Anytime a kettlebell is held overhead, the kettlebell should be gripped in the middle of the handle.

Exercises:

presses, get-ups, kettlebell carries, windmills, snatches

Instructors at the Chicago RKC demonstrate kettlebell center grip

Why to Use the Center Grip:

1) The center grip keeps the kettlebell balanced so it won’t roll in either direction around the forearm. When the kettlebell is locked out overhead, the handle should be balanced in the palm. I have seen people lose control of the kettlebell and let the kettlebell roll around the forearm, not fun!

2) It helps to keep the wrist neutral. In contrast, a corner hold tends to pull the wrist into lateral flexion as well as flexion. This is very hard on the wrist. We want a strong forearm and wrist. An angled kettlebell tends to pull the wrist out of alignment.

3) During snatches a corner grip encourages the KB to spiral around the forearm, instead of the hand going through the middle and the kettlebell moving straight over the hand. A corner grip turns the snatch into a kind of GS spiral. This in turn, makes the landing less stable, the kettlebell is harder to control, and the shoulder can move around and become unpacked. Remember our snatches are Hardstyle, we use the force and speed of the hips to outrun the arm, and the fist punches through the handle fast. Once mastered, the kettlebell snatch using a center grip is both powerful and smooth, with no unnecessary movement at the lock out.

4) We need ALL our muscles to press heavy. If we hold the kettlebell at an angle during heavy presses, it puts the emphasis on the pinkie side of the palm which turns on mostly the triceps and lats. The corner grip turns off the part of the hand (thumb side) that facilitates the neurological connection with the pecs, biceps and anterior delts. When we press we don’t want to leave anything on the table, so we use the center grip.

Diagram of kettlebell corner grip
The corner grip turns off the part of the hand (thumb side) that facilitates the neurological connection with the pecs, biceps and anterior delts. When we press we don’t want to leave anything on the table, so we use the center grip.

The Neurology of Grip:

I’m sure many of you have heard about the studies that link grip strength to overall health and longevity. Because of how our bodies are wired, there is also a correlation to grip strength, shoulder health, and pressing strength.

If you’ve ever seen the picture of the Cortical Homunculus you can easily see how important the hands are. There are two particular “buttons” on the lower palm, one on the pinkie side of the fleshy palm and one on the thumb side.

The lateral side (pinkie) correlates to the triceps and lats. The medial side (thumb) relates to the pecs and biceps. When we press heavy kettlebells overhead, we want to “push all the buttons”. By grabbing the kettlebell in the center with the handle flat across the line of the calluses, we are able to activate both buttons.

Try this little exercise: Get down into a tall pushup position. Slowly lower yourself down while only contacting the ground on the outsides of your hands (pinkie), and then come back up. Next, try it again, but this time put the weight on your thumb/index side of the palm. If you listen closely to your body, the first time you tried the exercise, you should have felt more activation in your lats and triceps and the second time more muscles firing with your biceps and pecs.

Andrea Du Cane center grip rack hold

While we are on the subject of kettlebell grips, I’d like to touch on the different pressures we use:

Crush Grip: Used for heavy presses and bent presses.

Soft Grip: Used for get-ups, overhead carries, windmills. The fingers are closed around the handle and there is a light squeeze. This helps with shoulder stability and keeps control of the kettlebell on the forearm.

Closed Grip: Used for snatches and jerks. The fingers are closed around the handle with no pressure, to facilitate shoulder stability. It can also help with timing. When time is a factor as in the snatch test, keeping the fingers on the kettlebell handle will save time.

Open Grip: This is probably the most misused and misunderstood grip. There are certain populations of kettlebell lifters who will benefit from opening the fingers at the top of the snatch. When the fingers open at the top of a snatch, it allows the hand and grip to relax at the lockout. This is especially good for people with tight shoulders who need more mobility at the lockout and for high volume of snatching where the grip fatigues. And it can help while learning to snatch, for those having trouble over gripping the handle throughout the snatch.

Opening the hand at the top of a snatch rep can also help to slow people down if they are rushing through the lock-out. However, if someone is running out of time during a snatch test, make sure they keep their hands closed, as it will give back a second more for each rep.

As a side note, those who tend to over grip the kettlebell handle are often not using their hips and glutes to drive the movement, instead they are pulling with their arms and back. So fix the hips first, and that may alleviate the need to open the hand at the top of the snatch. In general, fix problems from the ground up!

Secondly, the open grip should only be used during high volume snatches, never for grinds like presses or get-ups, windmills or carries.

When pressing heavy and/or for reps, always keep the hand closed and with at least light pressure on the handle. If you open the hand at the top of a press, it signals the nervous system to relax–which we do NOT want to do during heavy presses!

The Diagonal Grip (or Corner Grip):

The diagonal grip is only used for cleans, or the combination of clean and squats together. Because there is no overhead holding, grinding or stability needed, the corner grip is fine—and in some cases preferred.

The corner grip is also encouraged for clean & jerks, since the triceps and lats are doing most of the overhead work to finish the lock out. For jerks and push presses, the lower body initiates the movement and drives the kettlebell overhead. You actually want the arms relaxed—because it is NOT a press.

Corner grip rack hold

Forearm Discomfort—the Causes and Solutions

Lastly, I’d like to discuss the issue of discomfort on the forearm. In some cases, depending on an individual’s build and structure, adjusting the kettlebell in the hand and adopting a slightly angled hold during presses etc., may be necessary. The intention should still be to grab the kettlebell in the middle, but also allow it to angle down toward the pinky-side of the hand. It is still important to try and feel the thumb side with a solid contact as described above.

A few populations often have sensitive forearms, but there are methods to help them stay as comfortable as possible while not sacrificing technique:

The first reason for forearm discomfort is being new to kettlebell lifting. It is a new sensation and takes a bit of time to get used to pressure on the forearm. Also, because beginners are typically using smaller, lighter kettlebells which sit higher on the forearm where it is more sensitive. We used to say “If it hurts your arm, get a bigger kettlebell”. That’s not a particularly sensitive thing to say, even though it is true. But, the bigger kettlebells really do sit lower on the forearm and are more comfortable to hold in the rack and overhead.

The problem is that you have to use the appropriate size kettlebell for a given client and a given exercise. Which means beginners, or other populations will still need to use the lighter kettlebells.

In this case, the best solution will be to have your clients use wrist guards to protect the wrist and forearm. The more experienced the person becomes, the more their technique improves—and the more likely they will find a comfortable position. At the same time, they will be working up to larger kettlebells and the problem will go away.

The second and most common reason for people to have problems holding kettlebells—especially in overhead positions—is a lack of shoulder and T-spine mobility. Remember, the more vertical that the arm holding the kettlebell is (either in the rack or locked out overhead), the less weight will be placed on the forearm.

If someone’s lock out is forward of the shoulder, then most of the weight of the kettlebell will go directly into the forearm. Shoulder flexibility and T-spine mobility should be addressed as part of their daily programming. Until the mobility issues are addressed, they will continue to feel the pressure from the kettlebell on their arm.

Big-chested men and women, powerlifters or bodybuilder physiques, might find it hard to hold a kettlebell in the rack position. There is not much that can be done, because it is a structural or body-type problem. They will need to move the kettlebell around until they find the most comfortable arm angle and kettlebell placement. In some cases, the rack position will never be comfortable for them and they should limit holding the rack position for any length of time.

In all these examples, using a wrist guard can help protect the forearm and make the kettlebell position safer and more comfortable. Shoulder mobility work should be done regularly. In some instances, adjusting the grip slightly to angle it off a sensitive point can help. However, keeping good exercise technique in mind, the correct form should be followed as much as possible for safety of the client and the effectiveness of the exercise.


***

Andrea Du Cane is a Master RKC Kettlebell Instructor, CK-FMS, CICS, and RIST, ZHealth certified, she has a BA in Psychology from the University of Minnesota and is also a Pilates instructor. She is the author of several books and dvds including The Ageless Body, The Kettlebell Boomer, and The Kettlebell Goddess Workout.  She has over twenty years of aerobics, weight training and fitness experience, with an additional background in… Read more here.

Filed Under: Kettlebell Training, Tutorial Tagged With: Andrea Du Cane, grip technique, kettlebell grip, kettlebell technique, kettlebell tutorial, Master RKC Andrea Du Cane, tutorial

The Get-Up—The Ultimate Triplanar Exercise

December 7, 2016 By Ashoka McCormick 3 Comments

training get-ups for judo athletes

When we think of Bruce Lee throwing a kick, Muhammad Ali dodging a punch, or a great wrestler like Dan Gable swiftly shooting in for a double-leg takedown and dumping his opponent on the mat, we can easily imagine strength exerted on multiple planes.  This multi-dimensional strength and stability is achieved through specific strength conditioning. It is the key for optimizing body movement and power for a combat athlete’s knock-out punch. It also provides incomparable groundwork for other athletes, too.

The majority of today’s programs favor traditional strength and conditioning approaches which are often heavily biased towards sagittal plane (forward and backward) movements. We definitely need strength in the sagittal plane, and many of the big-bang-for-the-buck exercises like squats and deadlifts occur in this plane.

But in designing our training, it is important to understand that the human body does not move in just one direction. We can also move side-to-side, forward, backward, and in rotation. Training in multiple planes, or multiple directions, helps us achieve higher levels of body awareness, balance, and coordination. This improved programing allows for quicker reaction times and more efficient neuro-motor function. Training in all the planes can help athletes and clients avoid injury and enhance their performance. It’s a required practice for any athlete determined to consistently perform on an elite level.


The Three Planes:

Sagittal Plane:

Movements in the sagittal plan move forward and back, or through the mid-line of the body. Common examples of sagittal plane movements are a biceps curl or a sit-up.

Frontal Plane:

Movements along the frontal plan can be described as side-to-side, such as abduction and adduction. Exercises that work through the frontal plane are side lunges and jumping jacks.

Transverse Plane:

Movements in the transverse plane include horizontal abduction, adduction or rotational actions. Exercise examples include the Russian twist or a cable woodchop.

One major reason most sports injuries occur in the frontal and transverse planes is that most athletes are only training in the sagittal plane. Athleticism depends on a tremendous amount of movement in different planes of action. Strength and conditioning programs for athletes should strive to include as many variations of movement as possible to train muscles in as many planes as possible (Kenn, 2003).

As trainers and coaches, we must prepare our athletes by strengthening their bodies in all three planes. If your athletes understand the difference between these three planes of movement and can develop their ability to efficiently weave their movements together, then they will be well-rounded and less prone to injury.  For example a fighter in the ring or cage spins, moves left and right, dodges kicks, pivots, punches, and is constantly tackled.  If his or her body is weak in a particular plane, the likelihood of an injury is much greater.

Most popular training methods do not use multi-planar movements. Powerlifting, Olympic lifting, CrossFit training, and bodybuilding tend to primarily work in the sagittal plane. Very few movements are in the transverse or frontal planes. Additionally, most of these training methods do not include multi-planar movements—combinations of frontal, sagittal, and transverse planes of motion. These popular training methods are still valid for training athletes, but coaches should also consider ways to train sport-specific movements that athletes will perform on the field of play (Brown, 2013).

Ashoka McCormick at the whiteboard

As strength coaches and trainers, we can create workouts that hit all of these planes, or we can select compound exercises—triplaner movements—that hit all three planes in one rep. One of the best triplanar movements of all is already a staple among RKC and HKC Instructors: the get-up

In the kettlebell community and the strength and conditioning world, the get-up is highly regarded, and with very good reason. It’s a highly functional movement and total body exercise. Its benefits include improved shoulder stability and strength, correction of left-right asymmetries, overall mobility, core strength, improved movement skills, overall proprioception / coordination, and time under tension. The get-up also teaches athletes to stabilize themselves and create whole body tension in a variety of positions.


Truly Triplanar

The above-mentioned list of benefits is more than enough justification to include the get-up in our workouts. But, I think that one of the most valuable benefits provided by the get-up is that it passes through all three movement planes from the ground up, and again on the way back down to the ground. For that reason alone, the kettlebell get-up is one of my favorite options—it forces you to work in EVERY plane of motion.

Body Awareness

The get-up provides a variety of functional movement patterns and an unmatched stimulation to our vestibular and nervous systems. Once they have mastered all the steps of the get-up, you can even lead your clients and athletes through the movement with their eyes closed for a greater nervous system challenge. The body awareness developed from practicing get-ups provides tremendous value for athletes and the general population.

Ashoka McCormick spotting kettlebell get-up

Five Minute Get-Ups

At my HKC certification in April, RKC Team Leader Chris White mentioned doing “Five Minute Get-Ups.” Since then I have added this drill into many of my programs for Judo athletes. At first, they should be practiced without weight, then balance a shoe on the fist for added challenge.  I tend to use the “Five Minute Get-Up” protocol at the beginning of our workouts, it serves as a good warm-up, and a great opportunity for skill development.

During the drill, we focus on one quality rep at a time. I encourage the athletes to take their time. You can incorporate “Five Minute Get-Ups” at the beginning of your workout, on a recovery day, or even as a stand-alone skill practice session. Advanced athletes can try it with weight. But, with or without a kettlebell, the main focus is on the fluidity of the movement.

When designing a strength and conditioning program, we need to include multi-planar movements, multi-directional movements, and various stances which are appropriate for our athletes. Exercises like the get-up will help athletes move more efficiently and will decrease their chances of injury while increasing their overall functional strength.

Winning Athletes At the podium

References:
Brown, T. (2013, September). NSCA’s Performance Training Journal, Issue 12. Retrieved November 18, 2016
Kenn, J. (2003). The Coach’s Strength Training Playbook. Monterey, CA: Coaches Choice.

****

Ashoka McCormick, HKC is a performance coach in Santa Cruz, California.

Filed Under: Coaching, Kettlebell Training Tagged With: Ashoka McCormick, Athletic Training, fitness training, get up, hkc, kettlebell get-up, kettlebell training, stength and conditioning for sports, tri-planer training, triplanar exercises, triplanar movement, triplanar training

My “Body” of Work: Part 1

December 2, 2016 By Phil Ross 5 Comments

Phil Ross One Arm Handstand

Having recently hit my 54th birthday, I can’t help but reflect on what I’ve put my body through and how lucky I was to find the RKC‘s incredible strength and mobility training. The system is truly remarkable. This is a long post, but I strongly feel that many people will benefit from this information. I also want to give hope and inspiration to those who are in pain, struggle with immobility and injuries from their “sins of the past”. More importantly, I want to help instructors, trainers, and their students (or clients) avoid injuries and set-backs. Enjoy!

For most of my life, I was a competitive combat athlete. I played contact football at age 9 and at age 13, had my first combat competition. There weren’t many junior wrestling leagues or martial arts schools around in 1975. I still spar (stand-up kickboxing) and roll (ground fighting in Jiu Jitsu), but not nearly as intensely or as often as I did from 1976 to 2011. However, I keep my skills sharp by doing a great deal of drilling and bag work. Scaling down from that level of training and giving up competition was–and still is–a difficult thing for me. But, my current situation allows me to focus my professional energies on other challenges: developing my students, growing my business, producing videos, writing books and furthering my education. I also get to spend a little more time with my family, coaching my little one and helping my older children reach their goals. This is something I cherish very much.

A couple of years ago, John Du Cane and I were talking. I told him how my kettlebell training and the other movement training I’ve learned since I started with the RKC has enabled me to move much more effectively and overcome the many injuries sustained during a lifetime of contact activities. The many years of football, wrestling and combat sports training and competition took their toll on my body, but I still workout virtually every day. I’m only able to do this is because of my kettlebell and bodyweight training regimen. John said that I should write a blog post and list all of the injuries. I agreed, and while some of the injuries haven’t had any effect on my ability to train, I’ll furnish the list of the most significant. I’ll also put forth the movements that have helped me the most.

Here’s my “Body of Work”

I won’t bore you with all the times that I’ve cracked a toe or broken a finger. I’ve had so many jams, sprains, minor dislocations, and stitches that I can’t remember them all. Many times, I’d simply pop my finger, toe–and once even my knee–back in place, throw on some tape and go back to training or back in the fight. At 17, I broke my thumb in two places while wrestling in the NJ State Freestyle Championships. But I taped it up, finished that match and wrestled in the finals. In my mind, that was “just another day at the office”.

So, we’ll start from the top…

Head:

I have had four diagnosed concussions, and several minor ones that I just shook off and either went back on the field, got back on the mat or went out for the next round. Since most of them occurred in the 70’s and 80’s, there was no real treatment, and not much time off. I took a week off when I had my worst concussion, but my eye was also swollen shut at the time and I had 17 stitches in my head and 5 more in my arm. I wasn’t going to be doing much for a few weeks anyway.

I also had my nose broken four times and had it repaired twice. This has had an adverse effect on breathing while training. At one point, one nostril was fully closed and the other operating at 50%. It was difficult not to be a “mouth breather” at that point. Getting enough oxygen into my lungs was tough for a while until my second nose operation. I still use saline spray (Xlear with xylitol) and a nasal inhaler (Oblas with menthol, and oils of peppermint, cajeput, eucalyptol) several times a day. Incidentally, this practice has also helped me avoid many colds and sinus infections. I haven’t had or needed antibiotics in years, which has further bolstered my immune system.

philrossarms

Neck:

I’ve had three memorable injuries to my neck and have experienced countless “burners” during competition or fight training. For those of you who don’t know what a “burner” or “stinger” is, it’s when your neck (or head) gets twisted, jammed or otherwise forced into a compromising position, usually very quickly and a “hot”, “shocking” or “burning” sensation runs from your neck down your arm. Generally, you experience a “flash of light” in your eyes, pain, and temporary lose the use of your arm. I’ve had this happen more than once in actual combat and had to just deal with it. I’ve experienced so many of these in training and competition that I can’t even try to remember how many times it has happened.

One of my major neck injuries occurred in a football game, and another during a wrestling match. But, the most notable injury required surgery on four levels of my neck. This injury occurred during fight training at the end of 2011, but the situation was acerbated from years of abuse. The MRI revealed two herniated and five bulging discs in my neck, spinal stenosis in many of my foramen, and an osteophyte on the inside of my spinal canal. This caused an edema (bruising/scarring) on my spinal cord, resulting in a permanent spinal cord injury. Four levels of my vertebra had their foramen removed, “windows” were put in the vertebra, and the osteophyte was removed. But, the damage had already been done.

I started my rehabilitation a little less than two weeks after the operation. For the first week, I could only do planks. I progressed to plank pull-ups (Aussie pull-ups) and incline push-ups for sets of five reps. Within five months, I was able to perform most of my movements again, and began to film The Kettlebell Workout Library. Prior to my operation, I was unable to press a 10kg kettlebell overhead. After only four months of training I was able to press a 20kg kettlebell bottoms-up. I attribute my speedy recovery to my strength and conditioning practice both prior to the operation and the RKC methodology employed afterward.

Shoulders:

I have a torn labrum (slap tear) in my right shoulder. Prior to 2006, it used to slide out on a regular basis. At that time, I had just gotten into kettlebell training–my first set of kettlebells was delivered in December 2005. I hadn’t quite developed the ability to engage my lats and pack my shoulders properly at this point. In June of 2006, I was set to shoot 3 DVDs: Fit 2 Fight, Combat Ready and Let’s Sweat. Five days before the shoot, my shoulder popped out–and stayed out. I drove myself to the hospital and they couldn’t get it to stay in. The next day, I got an ART (Active Release Technique) treatment from Dr. Michael Dworkin and my shoulder slid back into place. At first, I rehabbed it with swings while only focusing on packing my shoulders and engaging my lats. My shoulder hasn’t slid out in over 10 years!  Not only was I able to complete shooting the videos, but the new strength permitted me to get back to live grappling. I was also able to successfully compete through 2010 in submission fighting. Kettlebell training changed my life and extended my competitive career to span four decades. Very cool!

Elbows:

I’ve had an ongoing battle with my elbows. Back in the day, I used to spend endless hours pounding on the Makawara affixed to the concrete wall in my garage. As a fighter in my early twenties, I didn’t consider the long term repercussions of sending force into an object that could not give way. I just wanted to toughen my hands and hit hard. By hitting the wall-mounted striking surface, all the force that I put into the punches came back at me. All of the years spent fighting, sparring, grappling, and getting armbars finally caught up to me in 2005. I was doing heavy cable curls and the next day my forearms, particularly my brachial radiali were screaming in pain. I could barely turn a door knob, walk my dog, shovel snow off of my driveway or even start my car without an excruciating pain shooting through my arm. It was so bad that one day in 2005, I was training with Frank Shamrock and I couldn’t move my arm at all. He said, “Bro, I’d get that taken care of ASAP”. Good advice. He told me about ART and that’s how I found Dr. Mike Dworkin (the guy who fixed my shoulder).

Kettlebell training taxes your grip. Doing pull-ups and hanging abs wreaks havoc on your grip and elbows. Not to mention BJJ (Brazilian Jiu Jitsu), grappling, kickboxing and weapons training. All of the activities I love were adding to and were the root cause of my elbow pain. I tried all of the standard and non-standard treatments. Here’s what didn’t work: cortisone injections, acupuncture, prescription and a myriad of useless bands, straps and sleeves. Don’t waste your time or money. Here’s what worked: ART and Graston Technique, dry needling, oblique activation and a sound stretching regimen. I leveraged my relationships with the many professionals that I met through the RKC and put together a stretching routine for my forearms/elbows.

These are the best exercises I have found to maintain elbow and forearm health:

This first exercise is a stretch. I place my palm, fingers down, against the wall and keep my arm straight while pressing against the wall for 30 to 60 seconds. Now, I also do this stretch against a suspended, supported horizontal bar for a greater range of motion.

Back of the wrist push-ups: start on your knees if necessary, turn your hands inward and make sure that your arms are completely straight. After you become more advanced, ball your fists and press your knuckles together as you press up to full extension.

Handstands, wall handstands, crow stands, and toad stools: these movements build strength in the shoulders, arms, and core. More importantly, they de-load the the forearms. Practice these strength movements with your hands completely open and gripping the floor will do wonders to counterbalance the effects of a great deal of clenched-fist work.

For the last exercise, stand tall, pack your shoulders, and keep your neck, shoulder and arm in the same vertical plane. Grasp a small kettlebell, nothing heavier than 16kg, with your thumb facing forward. Rotate your palm so it faces forward, then bring your opposite ear to your shoulder. Be sure to maintain the same plane. For example, if you have the kettlebell in your left hand, bring your right ear toward your right shoulder while keeping all your moving parts in the same plane.

Hands:

My hands are crucial to my work, activities and life. I’ve had many fractures, jams, sprains and dislocations. Strong hands are critical. There was a time when one of my hands was so weak that I couldn’t even military press a 10kg (22lb) kettlebell. This is coming from guy who had to strict press the Bulldog (44kg – 97lbs) to attain my RKC Level-II! Yes, I was a little down.

The main exercises that helped me regain my strength are: single kettlebell deadlifts, kettlebell wrist twists, pitcher curls, bottoms-up presses, bottoms-up carries, farmers walks, Neuro-Grip push-ups and kettlebell snatches.

Single kettlebell deadlifts: keep your shoulders and hips in prefect alignment, pack your shoulders, engage your lats, grasp the kettlebell handle firmly, and lift. It’s important not to “dip” your shoulder or twist your hips. I am now up to using a 150 pound kettlebell for sets of five reps.

Kettlebell wrist twists: lay the back of your hand against the floor as you grab the kettlebell by the handle. Twist the kettlebell back and forth as you “kiss” the ground with the bell. Repeat for 5 to 10 repetitions.

Pitcher curls: grasp one or two kettlebells by the handle(s) and start with them at your thighs. Maintain a straight back with your arms held at your sides. Keep your elbows in the same position, move the kettlebell(s) upward to the bottoms up position. Repeat the movement for 5 to 10 repetitions.

Bottoms-up press: this movement is the most effective pressing motion to engage your lats and improve your overall overhead press, and it’s incredible for grip development. On a good day, I can do it with a 28kg kettlebell, but I can invariably perform this movement with a 24kg kettlebell, even on my worst day.

Bottoms-up carries: this exercise forces the recruitment of additional stabilizers, not only in the forearms, but in the whole body, and aids in discovering new neural pathways for the hands. Since several muscles in my hand not longer had a signal coming form my brain, I had to find new pathways and develop additional strength in other, previously ancillary muscles and stabilizers. This movement also creates greater muscular endurance.

Farmer’s walks: grip strength development is one of the many benefits of the farmer’s walk. I will typically do 4 to 6 minutes of farmer’s walks as the last part of my workout–as a finisher. In contrast, I generally perform the bottoms-up carries in the beginning of the session.

Neuro-Grip push-ups: I have to thank my buddy Jon Bruney for inventing this device and bringing it to Dragon Door. I love this device and use it a great deal! Grip strength, wrist strength, balance, and core recruitment are developed to such a high level with this little tool. When I first got them in, I could only do about 20 repetitions. Fast forward a year later, my PR is 57 on two hands and 5 with the one armed version. My best is two in a row on my damaged (right) side. I recommend that everyone get Neuro-Grips.

Snatches: snatches tax the grip. Even if you pop the kettlebell in your hand from palm to fingers on the downward movement, spear your hand at the top and rotate your thumb inward at the bottom. The grip will be the first thing that goes, check out people’s hands after doing their first RKC Snatch Test or after executing the V02 protocol, if you have any doubt.

There are a few other practices I employ. I use a thumbless grip whenever possible, and I focus on squeezing my pinky when I’m doing grinds with my full grip. These two variations have helped me avoid recurring elbow problems. The thumbless grip forces you to use your lats more.

There are many other exercises: hanging from a pull-up bar, rows, bottoms-up cleans. I’m not back up to pressing the 44kg yet, but I can get the 40 up on a good day and recently did a get-up with the 44kg. So four and 1/2 years after my surgery, I continue to improve!

Strength and Honor!

Coach Phil

Stay tuned for Part 2!

****

Master RKC Phil Ross is the creator of many strength and conditioning programs, including The Kettlebell Workout Library. Visit www.philross.com to learn about his programs, classes, and workshops. Subscribe to his YouTube channel for more workout and exercise info.

Filed Under: Kettlebell Training, Tutorial Tagged With: kettlebell training, Master RKC Phil Ross, mobility, phil ross, training around injuries, wellness

Olympic Lifting’s Best Companion

November 16, 2016 By Maciej Bielski 2 Comments

Maciej Bielski kettlebell press

Almost everyone knows that kettlebell training will help your progress with barbell exercises. Unfortunately it doesn’t really work the other way around, until you’ve built up monstrous levels of strength.

The ballistic nature of the kettlebell swing and the coordination and stability required for a successful heavy kettlebell get-up both feel very different when compared to barbell exercises.

As an amateur weightlifter with over 14 years of practice, I’m certainly not dismissing barbell training. My kettlebell training actually began as a supplement to my barbell lifts—and every single minute of kettlebell practice has been worth it.

Since adding heavy one-arm kettlebell swings to my training, my grip has gotten stronger than ever, and my lower back is stronger and more solid for barbell deadlifts. Bottom-up kettlebell squats have helped me stay upright and composed for very heavy barbell front squats.

Until you get hooked on kettlebells, you might not appreciate the value of using the comparatively lighter weights associated with kettlebells as compared to barbells.

Maciej coaching barbell

Like most weightlifters, I had some issues with my lifting form. In the Olympic lifts and their variations, the second pull was my nemesis. I just couldn’t get the timing right. I trained with straps, pulled from blocks, tried all kinds of variations—but I still couldn’t get it. The timing of the hip snap is so essential for a powerful acceleration of the barbell. The kettlebell cure was silently standing nearby, but I didn’t understand that until the RKC Workshop.

After the RKC certification, I devoted more time practicing what I learned at the course. Most of my life, I have practiced martial arts and knew that while the basics may be boring, they build the solid foundation of every single aspect of your training—and in life. In my own training, I have spent a lot of time on the basic kettlebell swing.

After being taught the proper kettlebell swing mechanics, I bought some heavier kettlebells and started swinging them regularly. I did sets of 10, 30 and 50—for fun and conditioning.

I focused on pulling the kettlebell behind myself, before I accelerating it with my glutes. Locking the quads and bracing the core as a split-second break at the top of the swing taught me more than the past few years of weightlifting alone. I now understood that my movement pattern had been causing the problems in my Olympic lifts. After establishing a solid foundation for the hinge—and its dynamic variations—it can easily transfer to the second pull of many Olympic barbell lifts.

Maciej with kettlebell and barbell

Since that realization, I focused on kettlebell training and stopped Olympic lifting for about three months. I practiced squats, deadlifts and presses but with minimal volume and heavier loads because I was worried that I’d lose some of my maximal output.

But, when I came back to Olympic lifting and tried barbell snatches again, the bar went up so fast on the first attempt that I almost couldn’t control it!

Since then, I’ve applied the same training plan for my clients and students. It’s worked for them as well—no one has problems with the second pull anymore. It used to be the trickiest part of many lifts, but the problems have been eliminated with our kettlebell practice.

The Hardstyle kettlebell swing is a clever teaching method for the hip snap, which is crucial for the correct mechanics on the second pull in weightlifting.

If you don’t want to struggle as long as I did with the second pull of the Olympic lifts, be sure to train with a certified RKC instructor so you can learn the right way to swing kettlebells. Soon, you’ll see the barbell fly up faster than ever before.

Maciej and Max Shank


***

Maciej Bielski, RKC is the owner and Head Coach of Crossfit Trójmiasto in Sopot, Poland. He has been very active in martial arts for most of his life. Maciej academics were specialized in physiology and physical effort biochemistry. He now is exclusively focused on coaching. He is currently the leading specialist in Athletic Training and Training Methodology in Poland. He gives lectures and teaches workshops in many locations including Mauricz Training Center. Visit his blog at Ugot2BeStrong and click here for more information about RKC in Poland

Filed Under: Kettlebell Training Tagged With: hip hinge, hip snap, kettlebell training, Maciej Bielski, Olympic lifting, RKC Poland, weightlifting

Programming the TGU

November 9, 2016 By Jason Kapnick 5 Comments

Programming the TGU by Jason Kapnick

“What sets and reps should I use to make progress on my TGU?”

This is one of the most common questions about programming kettlebell training. Finding the right scheme of sets and reps is especially challenging because the get-up doesn’t follow the same rules as any other exercise in the gym. Because a single repetition of the TGU can take roughly 30-seconds, doing “5 sets of 10” simply doesn’t make sense.

Below are a few of the strategies that I’ve found to be effective for adding the TGU into your strength training program.

1. The “3-Week Wave Cycle”

This first option is intended for intermediate to advanced kettlebell lifters, and it’s my favorite way to use the get-up as a “main lift.” In other words, this option will treat the TGU as a primary exercise. Make sure that you’re relatively fresh in your workout (I would recommend doing get-ups first), leave plenty of time, and don’t plan to do an excessive amount of assistance work afterwards. Simply put, this progression WILL produce PRs.

TGU with partner spotting

Do get-ups once per week, according to the following loading scheme:

  • Week 1 “Volume Accumulation”: 8-12 get-ups with a medium weight (a good rule of thumb is 60-70% of your best-ever TGU).
  • Week 2 “Weight Ladders”: Choose three kettlebells, a light kettlebell, a medium-heavy kettlebell (similar or slightly heavier than week 1), and a heavy kettlebell (not quite your personal best). The kettlebells should be evenly spaced about 4-8kg apart (12-16-20, or 24-32-40, for example).Perform 3 rounds of 1 TGU on each side, first with the light kettlebell, then with the medium, and finally with the heavy kettlebell. The idea is that the heavy kettlebell will show you where your technique needs work, then the light kettlebell will allow you to practice and correct technique errors or inefficiencies. The “wavy” load is also useful for learning.
  • Week 3 “Run the Rack”: On this day, you’ll start with a very light kettlebell, perform a TGU on each side, and keep working up to progressively heavier kettlebells. Once you’ve reached the heaviest kettlebell you can manage for that day (which may or may not be a personal best), work with it for a few sets. Then perform a few slightly lighter get-ups to cleanse your palate. The total number of get-ups per side for the entire workout should be 8-10.
  • Week 4: Either start at Week 1 (trying to exceed either the previous weight or number of reps from last time), or take a light week to recover.

Heavy kettlebell TGU

Here’s an example of how this program might look over a few months. In this example, the athlete’s previous personal record for the TGU is a 40kg kettlebell:

  1. 32kg x 8 reps per arm
  2. (28-32-36) x 3 cycles; 9 total get-ups per arm
    3. 16×1, 20×1, 24×1, 28×1, 32×1, 36×1, 40x1x2, 32×1
  3. 32kg x 9 reps per arm; Note that this is more than the 8 reps in week 1
    5. (28-32-36) x 3 cycles; a chance to drill technique
  4. 16×1, 20×1, 24×1, 28×1, 32×1, 36×1, 40x1x3, 32×1; On this day he manages one more rep at 40kg vs. the prior week.
  5. Rest week
  6. 32kg x 10 reps per arm; Note that this is more than the 9 reps in week 4
  7. (24-32-40) x 3 cycles; Today he feels strong and increases the top set from 36kg to 40kg, but drops the weight on light and medium bells such that he can still complete the workout comfortably.
  8. 16×1, 20×1, 24×1, 28×1, 32×1, 36×1, 40×1, 44×1 PR!, 36kgx1 32×1;Today, he sets a new personal record before dropping down!

2. The TGU as a Warm-Up

Simply perform 3-5 get-ups with a light-medium kettlebell (~50% of your best-ever get-up) before your scheduled workout. This is a great option if you’re working on a more involved bodyweight or barbell program, and don’t have the bandwidth or desire to fit a lot of get-ups into your program. This option also emphasizes the idea that the get-up is not just training, but also assessment.

A note on the get-up as assessment: While we use the TGU as a stimulus for adaptation, the TGU also has a useful role as a form of assessment. By mindfully practicing the get-up and noticing where the challenges are and how they evolve, you can gain important insights into the quality of your movement. For example, if I’m in a heavy powerlifting cycle involving high-volume bench pressing, and the “low sweep” of my get-up starts becoming challenged, I might conclude that my pectoral muscles have become tight, and that I need to spend some time mobilizing my overhead position.

TGU in group fitness

3. 10-15 Minute Practice Blocks

Simply set a timer for 10-15 minutes and practice the TGU until the time is up.

This is our preferred way to teach the get-up to novices in a personal training or semi-private training scenario. While this program works great for those working with a coach or trainer, it’s also an excellent option for self-coached kettlebell lifters. When learning, it can be useful to remove the pressure of hitting a certain weight or number of reps, and let the athlete simply explore the movement and work on technique. We usually program this towards the end of a training session.

TGU partner spotting

4. 10-15 Minute Work Capacity Blocks

This option uses exactly the same parameters are #3, except with a different purpose. Now, the goal is to perform as many get-ups as possible within the time interval, while never sacrificing quality for quantity. Record your results, and look to improve each week. This is a great option for losing weight while also improving movement quality, or for conditioning and building work-capacity.

An appropriate weight for this option is anywhere from 50-75% of your best get-up.


****

Jason Kapnick is the co-founder of Catalyst SPORT, one of New York City’s top kettlebell training facilities. He has made multiple Elite powerlifting totals, with best lifts of 545/355/660 in the 198lb weight class, and achieved the Beast Tamer Challenge at his RKC in April 2013. He can be contacted through catalystsportnyc.com .

Filed Under: Kettlebell Training, Tutorial Tagged With: fitness, fitness program, fitness programming, get up, get-up programming, Jason Kapnick, kettlebell program, kettlebell workout, TGU, turkish get up, workout

CrossFit, Kettlebell Training, Kale Salad and Donuts

October 26, 2016 By Nick Lynch 1 Comment

Nick Lynch kettlebell press

First off, I’d like to admit that I love donuts. It may or may not have been the years of skipping Sunday Boy Scouts to watch The Simpsons with my dad that programmed my subconscious to love donuts but nonetheless, I love donuts. Would I eat them all the time? Only if I wanted to be as soft and squishy as the crème filled varietal. I’ve come to learn that in order to have a donut here and there, I need to eat some kale salad. So what’s all this donut and kale salad talk have to do with CrossFit and kettlebell training? Everything…and here’s why.

I’ve learned to appreciate CrossFit over the years. Many clients that I train with participate in it, love it, and swear by it. If it weren’t for Crossfit, I’m not sure kettlebells and dinosaur training would be so popular today. CrossFit has popularized otherwise forgotten strength secrets like carrying heavy stones, pushing and pulling heavy loads, and of course, Olympic Lifting. But, it’s the Hardstyle training methods that we teach as RKCs that make these lifts safe and effective. You could say it’s a match made in heaven! So what’s with the whole kale salad and donuts analogy? Well, the vast majority of the people I know who participate in CrossFit quickly realize that they can’t only do CrossFit. They need their kale salad, which in this analogy is Hardstyle kettlebell training.

Why?

Kettlebell training serves as corrective exercise and therefore has functional carry-over to other intense physical activity, such as CrossFit. One must master his/her breath, the hinge, the wedge and gain strong grip strength in order to perform such exercises as the Hardstyle swing, strict pull-up, Turkish get-up, snatch and strict press. Guys like Bolt take home gold medals for having a strong hinge, wedge, wrists, feet and coordinated breath. When you take talent and combine the skills required of an RKC, you’re on your way to a gold medal, so to speak. You’re a strong and functional athlete.

Hinge = staying in your wedge, reach your butt towards the wall behind you without forward bending of the knees.
 Wedge = shoulders packed, pelvis neutral, glutes locked and abs flexed rock solid.

Wedge = shoulders packed, pelvis neutral, glutes locked and abs flexed rock solid.

The general population does not lead a physically challenging lifestyle. We type, we click, we press, and we swipe to “work” our grip strength. Our daily squatting happens in the form of on-and-off the toilet and up-and-down off a chair. That said, we don’t have the wrist strength and the hip/lumbar/thoracic mobility to safely barbell snatch overhead and catch the bar without something debilitating happening; hence the high injury rate associated with intense physical activities. I’ve learned that you can greatly reduce debilitating injuries during any activity simply by learning functional movement patterns and gaining strength with RKC kettlebell training. It’s fun to eat donuts just like it’s fun to snatch a barbell. But you can’t eat donuts all of the time just like you can’t snatch a barbell all of the time. You’ve got to have your kale salad just like you’ve got to have your corrective exercises.

I here’s a major example of how one can utilize Hardstyle kettlebell training as a form of corrective exercise to enhance their athletic performance at CrossFit:

Phil Ross RKC demo

Wrist strength. Many movement patterns in Olympic lifting require catching a fast moving weight with the wrists in extension. This pattern forces the body to respond with borrowed movement from the elbows, shoulders, back and knees putting the body in a dangerous and compromised position. In martial arts and fighting, this body position would require one to submit or tap out. You’re basically rendered useless as your successor could, if they wanted to, break your arm. Additionally, I want you to think for a second about how many sports and or physical activities require an emphasis on extended wrist positions. Here’s a few functionally and daily movements that DON’T require extended wrists: pull-ups, deadlifts, running, climbing, swimming, rowing, punching etc. Lifting weights in a way that means you could tear or break your arm is a bad idea unless you practice the solution!

Extended wrists in action as showcased by Jared Byczko, RKC and owner of CrossFit Naptown:

Jared CrossFit Naptown wrist extension

The solution: Hardstyle Turkish get ups, kettlebell presses, knuckle push-ups, strict pull ups and bottoms up presses. These exercises require you do the opposite of Oly lifts. In addition, the speed in which you perform such exercises is slow and focused. Wrists maintain a neutral and flexed position throughout each exercise therefore strengthening. Lastly, the body does not need to borrow movement to compensate, instead, one can utilize the wedge to support the weight. The wedge strengthens your whole torso and hips, while the neutral and flexed position of your wrists strengthens your wrists, hands, forearms, elbows, shoulders and postural chain.

RKC Workshop Jared squat

Now you can go a little more nuts next time you clean and jerk with the barbell for reps.

In the following program, I’m going to outline a simple and effective corrective exercise program that utilizes kettlebells. I’ve found that bodybuilders, CrossFitters, powerlifters, etc. all respect and enjoy this program simply because it’s difficult, yet restorative.

Day 1 – WOD – light – Practice your technique, don’t go heavy, don’t set new PRs, be mindful of form. 50-65% max

Day 2 – Hardstyle – Follow the program listed below. Ensure you practice the Hardstyle technique as it’s specifically designed to strengthen your wrists, postural chain, hands/wrists and feet.

Day 3 – WOD – medium – Same as Day 1 except go a little heavier (but not much!). 65-75% max.

Day 4 – Hardstyle – Follow the program listed below.

Day 5 – WOD – hard – heavy- 80-90% max.

Days 6 and 7 – Functional human activities such as running, jumping, swimming, climbing, carrying, etc.

You may have noticed on the hard WOD day I recommended going 80-90% max. Save your 110% effort for every 3-6 months. After all, the greats really only PR once or twice per year and that’s at a competition.

Hardstyle Program-Day 2:

Suitcase Deadlift – go heavy, 3-5 reps

Push ups – on front two knuckles if you can, otherwise on two kettlebells or Neuro-Grips

Rest 1:30

Repeat 4 sets

Farmer Carry – very heavy for 30 seconds. For extra grip strength, wrap a towel around the handle of your bell

OH Press – 3-5 per side, medium weight, stellar technique!

Rest 1:30

Repeat 4 sets

Core:

Reverse plank x10 seconds

Plank x10 seconds

Side planks, both sides, x10 seconds each

Rest 30-seconds

Repeat 2-4 sets


Hardstyle Program Day-4

Goblet Squat – heavy, 3-5 reps

OH Double press – medium, 3-5 reps

Rest 1:30

Repeat 4 sets

Pull ups – 3-5 reps

Split squat – medium, 3 reps per side

Rest 1:30

Repeat 4 sets

Core:

Log roll – 5 to the right, 5 to the left

Mtn Climbers – 20 reps

Pelvic Push Ups – 3 reps

Rest 30-seconds

Repeat 2-4 sets


***

RKC Team Leader Nick Lynch is a Strength and Conditioning Coach at Milwaukee School of Engineering University (MSOE). He owns Superb Health Milwaukee, a kettlebell studio in Milwaukee, WI. He has 13 years of full-time training and coaching experience and a lifetime of wellness education. Nick lives in Milwaukee, WI with his wife Natalie and son Weston.

Filed Under: Kettlebell Training, Workout of the Week Tagged With: CrossFit, Hardstyle, kettlebell training, kettlebell WOD, kettlebell workout, Nick Lynch, programming Hardstyle with CrossFit, RKC, WOD, workout

How to Smooth Out the Kettlebell Snatch

October 12, 2016 By Ryan Jankowitz 1 Comment

Ryan Jankowitz, RKC-II Kettlebell Snatch Drill

At first, the kettlebell snatch exercise can be daunting to learn. However, if you have a solid one-arm swing and are able to keep a kettlebell locked out overhead from a press or a get-up, then the snatch is definitely within your capabilities.

One of the most common mistakes that I’ve seen when teaching someone to snatch is not letting the elbow bend on the way up. This lack of elbow-bend will create a large arc for the kettlebell to travel—far away from the body—before landing overhead. That landing will be very jarring to the shoulder since the energy of the kettlebell will directed back behind you after traveling a large arc. Ideally, you want the energy of the kettlebell to travel a path nearly parallel to the body, then down when the kettlebell lands overhead. This path can only happen when we bend the elbow and keep the arc of the kettlebell fairly close to the body.

To teach my clients how to bend their elbow when snatching, I have them snatch a light kettlebell from the ground without using a backswing as a teaching drill. Start with the light kettlebell positioned between your feet so that it stays close to your body on the way up. From this position, explosively snap your hips forward while pulling the kettlebell straight up along your body. Punch your hand through the handle to finish in an overhead locked out position just like a standard snatch. This drill should be one smooth movement and not a clean and press.

After a few successful reps of this drill, go back to the standard RKC snatch to see how it feels. Hopefully, this will help smooth out your kettlebell snatch and make it much more comfortable on your shoulder.

Stay Strong,
Ryan Jankowitz

****

Ryan Jankowitz, RKC-II Instructor, CK-FMS, is a life-long athlete who can’t imagine sitting behind a desk. He enjoys sharing his passion for fitness and spreading the RKC knowledge. Ryan operates an online fitness coaching service and is available for private kettlebell workshops as well. You can reach him at ryan@rjkettlebell.com or through his website rjkettlebell.com. He also works with clients and teaches kettlebell classes at Fitness on the Run in Alexandria, Virginia. If you’re in the area, visit fitnessontherun.net and come swing some bells with Ryan.

Filed Under: Kettlebell Training, Tutorial Tagged With: kettlebell snatch, kettlebell technique, Ryan Jankowitz, troubleshoot kettlebell snatch

The Triple Extension Swing

October 5, 2016 By Felix Sempf Leave a Comment

Felix Sempf Triple Extension Swing

For power sport athletes, jump and sprint performance are key factors for enhancing sports performance on the field. The ability to generate power has a significant effect on the athlete’s ability to perform in their respective sport (Komi, 2008). Besides mobility, and strength and conditioning work, an athletic training program should also include specific exercises for power. Since every athlete is different there is no “one-fits-all” exercise for power training. The main aspects to consider when planning a power training regimen are safety, practicability, and compliance of the athlete.

Power output in sprinting and jumping is higher if full extension is achieved at the ankle, knee and hip joint. For example, ankle plantarflexion accounts for more than 20% of vertical jump height and consequently is a key factor for maximizing power in jumping (Hubley & Wells 1983; Luthanen & Komi, 1983). Likewise, McKinley & Pedotti (1992) also showed a higher degree of plantarflexion in jump-trained individuals compared to novices. Based on these findings, a power exercise for athletes in most team sports should mimic the triple extension for best transfer effects.

The regular kettlebell swing is a relatively simple power exercise that focuses on achieving full hip and knee joint extension in a dynamic fashion. Therefore, it only targets two of the three major joints that contribute to power generation in jumping motions (Hubley & Wells 1983; Luthanen & Komi, 1983). Other studies have confirmed that jump height and power can be improved by implementing kettlebell swings in the training program (Lake & Lauder, 2012; Otto et al., 2012; Mannocchia et al., 2013; Jay et al. 2012). Despite these benefits, the regular swing does not include ankle plantarflexion and may therefore (if used excessively) negatively affect jumping mechanics by neglecting a powerful contributor. A simple solution for this is the so-called Triple Extension Swing, which also includes ankle plantarflexion.

If your regular kettlebell swing technique is solid and you are looking to improve your vertical jump, try performing the following swing variation: Move up on your toes after the extension of the hip and knee has been initiated and finish the movement with all three joints extended as pictured below. You will immediately see and feel a higher float of the kettlebell. Start with light weights, safety first.

Warning:
This advanced swing variation is not be appropriate for beginner or less experienced intermediate levels. Only attempt the triple extension swing after demonstrating proficiency with the standard RKC swing. Moving up to the toes with the triple extension swing carries the risks of losing control of the kettlebell, being pulled forward, not fully engaging the glutes, overall loss of stability, incomplete grounding, and not safely loading on the backswing.


Literature

Hubley & Wells (1983). A work-energy approach to determine individual joint contributions to vertical jump performance. European journal of applied physiology and occupational physiology. 50 (2), 247–254.

Jay et al. (2012). Effects of kettlebell training on postural coordination and jump performance: a randomized controlled trial. J Strength Cond Res. 2013 May; 27(5):1202-9.

Komi (2008). Strength and Power in Sport. Volume III of the encyclopedia of sports medicine.

Lake & Lauder (2012). Kettlebell swing training improves maximal and explosive strength. J Strength Cond Res. 2012 Aug; 26(8):2228-33.

Luhtanen & Komi (1978). Segmental contribution to forces in vertical jump. European journal of applied physiology and occupational physiology. 38 (3), 181–188.

Manocchia et al. (2013). Transference of kettlebell training to strength, power, and endurance. J Strength Cond Res. 2013 Feb; 27(2):477-84.

McKinley & Pedotti (1992). Motor strategies in landing from a jump: the role of skill in task execution. Experimental Brain Research. 90 (2), 427–440.

Otto et al. (2012). Effects of weightlifting vs. kettlebell training on vertical jump, strength, and body composition. J Strength Cond Res. 2012 May; 26(5):1199-202.

***

Felix Sempf, PhD Candidate, M.A. Sportscience, RKC, trains and instructs at the FIZ in Göttingen, Germany. He can be contacted by email at: felix.sempf@sport.uni-goettingen.de and his website: http://www.kettlebellperformance.de

Filed Under: Kettlebell Training, Tutorial Tagged With: advanced kettlebell swing, Felix Sempf, kettlebell swing, kettlebell swing variation, kettlebell tutorial

The Barbell Strength RKC Prep Program

September 28, 2016 By Jason Kapnick 2 Comments

The instructor cadre from last year’s RKC at Catalyst SPORT.

Much has been written about the synergy of kettlebells and barbells. They complement each other’s “blind spots” extremely well. Training properly with either will make you better at both. The RKC is the world’s premier kettlebell certification, and I can tell you first-hand that the skills I learned at the RKC have made me a better powerlifter.

This program is intended for an RKC candidate who wants to keep barbells in his or her program, while still building the requisite work capacity and skill to excel at an RKC Workshop. Whether you’re a powerlifter, football player, strongman competitor, or simply a barbell enthusiast, this program will get you strong, conditioned, and ready to impress at the RKC. It is also great for would-be Beast Tamers (just add some pistol squat practice).

When preparing for the RKC, there are three Pillars of Success you must consider:

  1. Work Capacity. The RKC has evolved beyond its brutal and punishing roots, and is now more focused on teaching skills and helping you become a skilled instructor. But, it is still a challenging three days which will test your fitness. Be prepared for multiple workouts per day, interspersed with lots of drills and technique practice. And oh yeah, there’s a snatch test in there too.
  2. Maximum Strength. The role of maximum strength is less obvious than work capacity (after all, most men won’t have to handle anything larger than 24kg, and women 16kg). Being strong will make your RKC weekend so much easier. When heavy kettlebells feel light, you can more effectively focus on technique.
  3. Movement Quality. It is important to safely and effectively place kettlebells overhead, squat, and have good hip extension.
The rack position is a crucial kettlebell skill. Here the author demonstrates the “loaded clean” to drill lat engagement and rooting to the floor.
The rack position is a crucial kettlebell skill. Jason Kapnick demonstrates the “loaded clean” to drill lat engagement and rooting to the floor.

It is worth noting that I have not included “kettlebell technique” on this list. While having familiarity and skill with the kettlebell will greatly benefit you throughout the certification weekend, it is not essential to show up with PERFECT skills. The purpose of the course is to teach you these skills, and the master RKCs, team leaders and assistant instructors meet will give you all the coaching you need to pass the rigorous skills tests on the last day of the certification. The amount of progress candidates make during the RKC is nothing short of mind-blowing. So, work on your technique and get comfortable handling kettlebells, but don’t sweat it if you’re not perfect.

This program focuses on Pillars #1 and #2 (strength and work capacity), while also giving you ample time to gain familiarity and exposure to the “Big 6” kettlebell lifts tested at your RKC. While Movement Quality (Pillar #3) is absolutely crucial for success at the RKC, it mostly beyond the scope of this article. I highly recommend finding an FMS certified professional in your area for a movement screen before starting this (or any) program.

This program should be run for 6-10 weeks prior to the certification workshop.

The Program:

Day 1—KB Press & Deadlift

A1. Single Arm Press Ladder (1,2,3,4)x3
A2. (Weighted) Tactical Pull-up 3-5 sets of 5-8 reps

  1. Deadlift 5,3,2; then drop 20% and 3×5 with 2:00 rest.
  2. Kettlebell Skill Practice: 10-20 minutes

Press Ladders: Use the classic “Rite of Passage” progression. Add a ladder each week, and then once you get to 5 ladders, start adding rungs to the ladders. Build volume.

Deadlift: In week 1, pick a weight you can perform 8-10 reps with. Perform a set of 5, rest, a set of 3, rest, and then a set of 2, all with that same weight. Then, take 20% of the weight off the bar and do 3 sets of 5 with just a 2:00 rest. Each week, add 5-10lbs per week to the 5,3,2 sets.

Deadlifts are the key to unlocking maximal strength.

Day 2—Snatch Density and Work Capacity

  1. Snatch Density Training

B1. Double Kettlebell Clean 5×8
B2. Double Kettlebell Squat 5×6
B3. Rack Walk 5×10-15 yards

Farmer’s carries will build a strong grip while encouraging good posture and alignment.

C1. Farmer’s Carry 2-4 sets of 15-20 yards
C2. Hang from Bar 2-4 sets of As Long As Possible
C3. Ab Wheel 2-4 sets of 5-8


Snatch Density: Perform snatches on each arm every minute on the minute (EMOTM). Add reps each week, and decrease number of minutes as necessary. Try to “arrive” at being able to do 10 snatches per arm for 7 minutes (a snatch test plus an additional two minutes). For example:

Week 1: 5/5 x15 minutes
Week 2: 6/6 x12 minutes
Week 3: 7/7 x10 minutes
Week 4: 8/8 x10 minutes
Week 5: 9/9 x8 minutes
Week 6: 10/10 x7 minutes

In reality, your progression might not be as linear or quick.

B1-B3: Perform these as a super-set, without setting the kettlebells down. Rest a few minutes between sets.


Day 3—Swings and Get-Ups

  1. Turkish Get-Up – 8-10 Total Get-Ups. Vary the load each week (wave loading).
  2. Heavy Single Arm Swing Volume—20 minutes. Choose a kettlebell 1.5-2.0x your snatch test bell. Perform as many sets of single arm swings as you can. If you manage more than 10 sets per arm, the pick a heavier kettlebell next week.

C1. Single Arm Rack Carry
C2. Chin-Ups
C3. Bulgarian Split Squat


Day 4—Bench Press & Squat

A1. Close Grip Bench Press 5×5
A2. Chest Supported Row 5×8-12

  1. Front Squat 5×5

C1. Single Leg Deadlift 3×8
C2. Paloff Press 3×8
C3. Kettlebell Armbar 3×8-10 breaths

The author at a powerlifting meet in June 2015, where he posted a 1,555lb total, culminating with a 660lb deadlift.


***

Jason Kapnick is the co-founder of Catalyst SPORT, one of New York City’s top kettlebell training facilities. He has made multiple Elite powerlifting totals, with best lifts of 545/355/660 in the 198lb weight class, and achieved the Beast Tamer Challenge at his RKC in April 2013. He can be contacted through catalystsportnyc.com.

Filed Under: Kettlebell Training, Tutorial, Workout of the Week Tagged With: barbell lifting, barbell training, Beast Tamer, Jason Kapnick, powerlifting, RKC Prep, RKC prep program, train for the RKC, workout

  • « Go to Previous Page
  • Page 1
  • Interim pages omitted …
  • Page 6
  • Page 7
  • Page 8
  • Page 9
  • Page 10
  • Interim pages omitted …
  • Page 16
  • Go to Next Page »

Primary Sidebar

Featured Products

previous arrow
BOOK-RKCBookofSnC
HardStyleKettlebellChallegeDanJohn700
BookCoverMasterTheKettlebell1
RKCiconKettlebell512
KettlebellGoddessdv040
next arrow

Recent Posts

  • RKC Big Six Workout
  • The Kettlebell Swing & Low Back Pain
  • Key Kettlebell Exercises To Help You Create Better Balance
  • How to Most Effectively Use Kettlebells to Meet Your New Year Goals
  • 1 Exercise That Checks All The Boxes
FOLLOW US ON TWITTER!

Archives

Copyright © 2025

Dragon Door Publications / The author(s) and publisher of this material are not responsible in any manner whatsoever for any injury that may occur through following the instructions or opinions contained in this material. The activities, physical and otherwise, described herein for informational purposes only, may be too strenuous or dangerous for some people, and the reader(s) should consult a physician before engaging in them.