• Skip to main content
  • Skip to primary sidebar
  • Home
  • Contributors
    • Matt Beecroft, Master RKC
    • Martijn Bos, Master RKC
    • Andrea Du Cane, Master RKC
    • Angelo Gala, Master RKC
    • Chris Holder, Master RKC
    • Steve Holiner, Master RKC
    • Dan John, Master RKC
    • Mike Krivka, Master RKC
    • Thomas Phillips, Master RKC
    • Robert Rimoczi, Master RKC
    • Phil Ross, Master RKC
    • Max Shank, Master RKC
  • Workshops
    • HKC Workshops
    • RKC Workshops
    • RKC-II Workshops
  • Find an RKC Instructor
  • Resources
    • Articles
    • Forums
    • Kettlebells
    • Products
  • Blogs
    • PCC Blog
    • Strong Medicine Blog
  • Archives

RKC School of Strength

Official blog of the RKC

Kettlebell Training

How and Why to Practice Slow Motion Kettlebell Get-Ups

June 13, 2018 By Shari Wagner 0 Comments

Shari Wagner Slow Motion Get-up

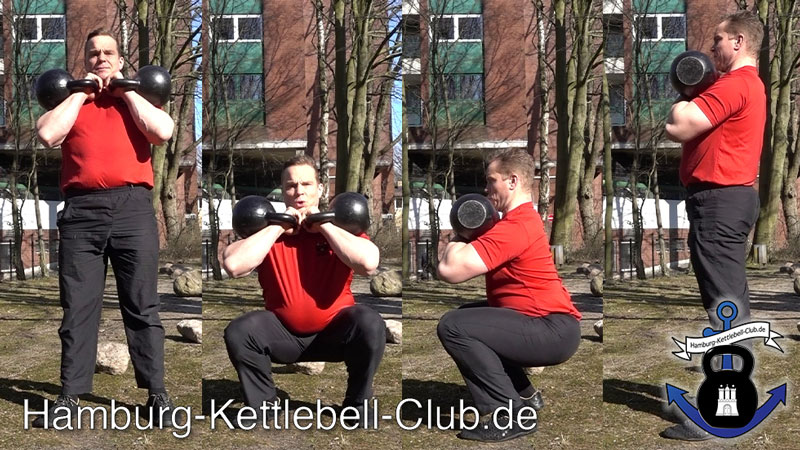
At a Dragon Door workshop back in 2010, a Senior RKC taught us how to do slow motion get-ups and my life was forever changed!

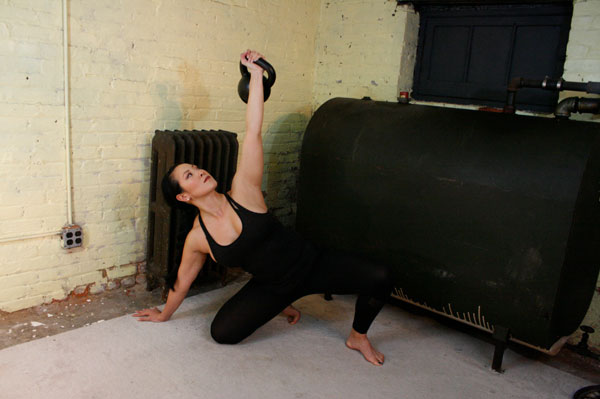
In theory, slowing down a get-up sounds simple enough—but you know what they say about “simple but not easy”! When I tried a slow motion get up for the first time, I noticed that I wanted to go through it way too fast. At the workshop, we were instructed to try and take a full minute to get from the floor to standing, and then another full minute to get back to the floor.

I was amazed. Simply slowing down the pace of the get-up amplified every nuance of each step and each movement. The weight is also amplified. At the time, I was able to do a solid get-up with a 16g kettlebell—and sometimes a 20kg. I scoffed when they told the women to use an 8kg kettlebell. Quickly, I realized that when moving slowly, an 8kg kettlebell is no joke! Time under tension is increased—and the whole move is much more difficult.

I found that certain parts of the get-up were excruciatingly had to do slowly—and that the steps requiring mobility in areas where I was tight were the most difficult of all. This slow motion drill was a great lesson. It taught me where I needed to improve my mobility, and where my strength and movement quality needed help.

Shari Wagner kettlebell Get-up
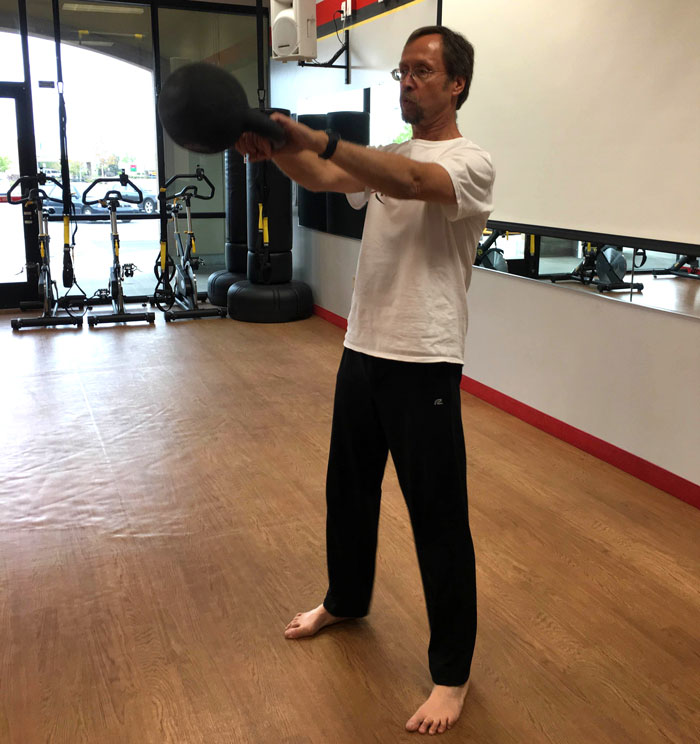
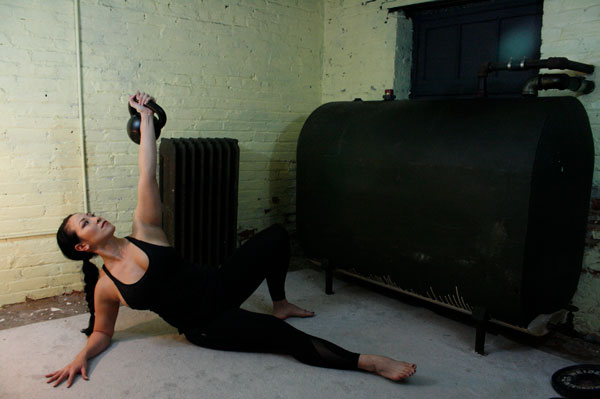
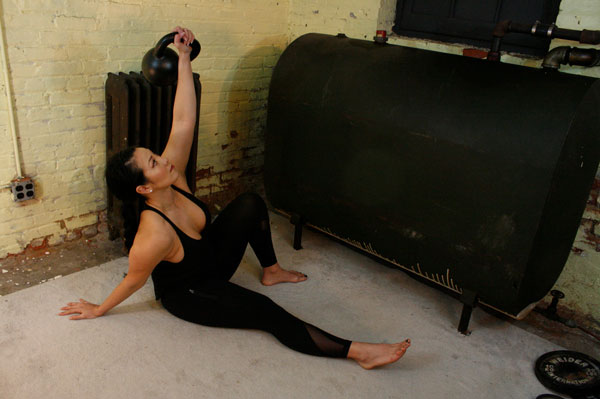
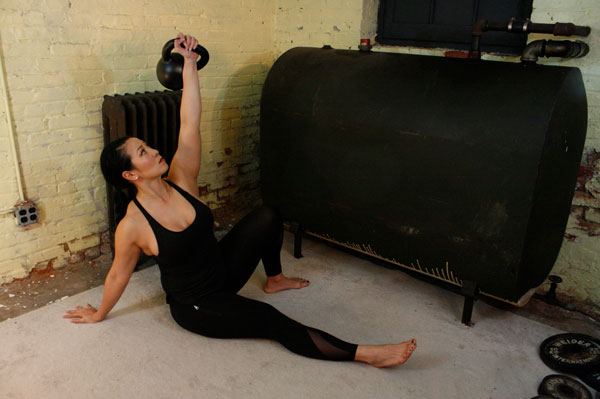
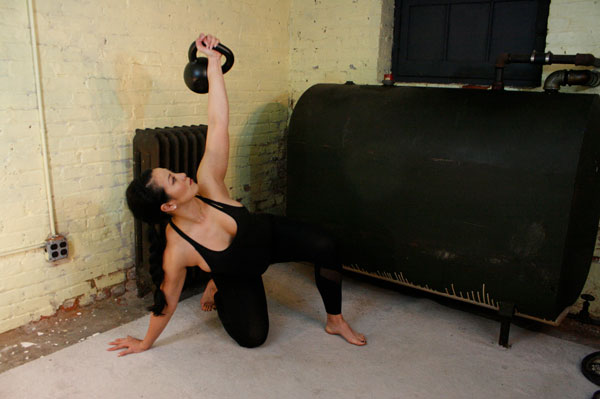
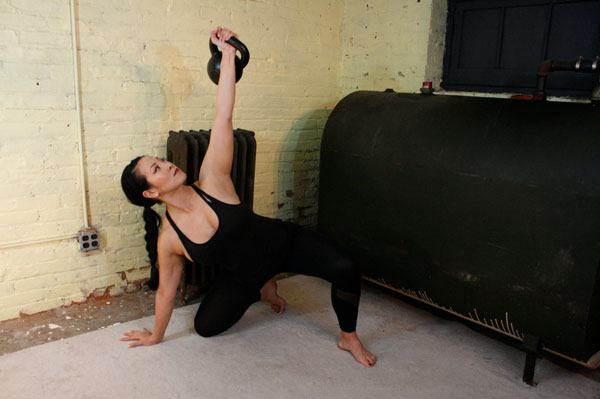
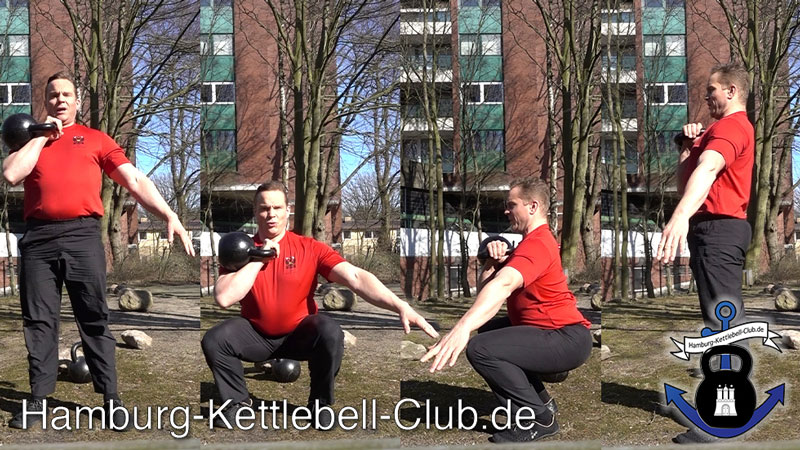
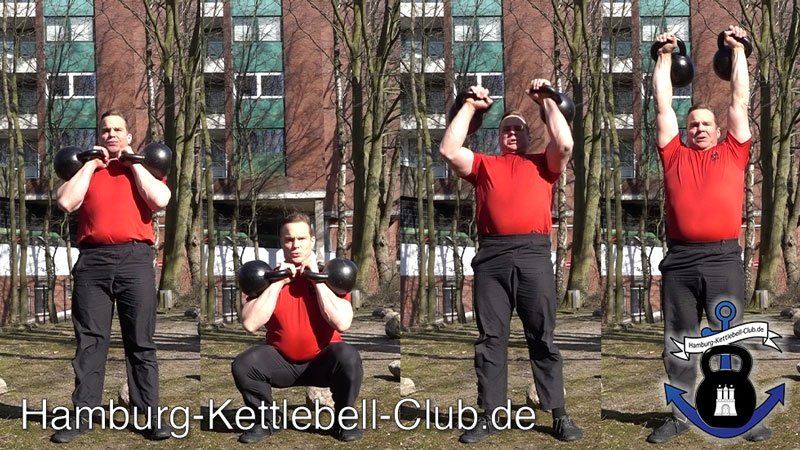
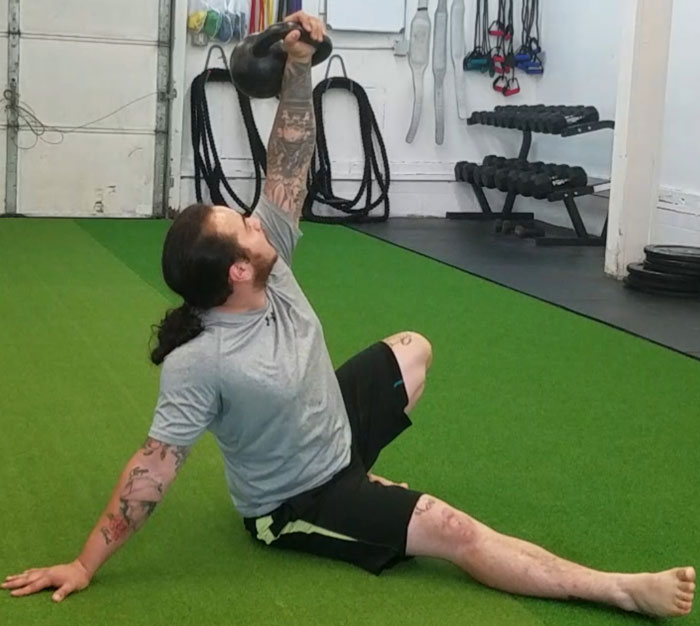
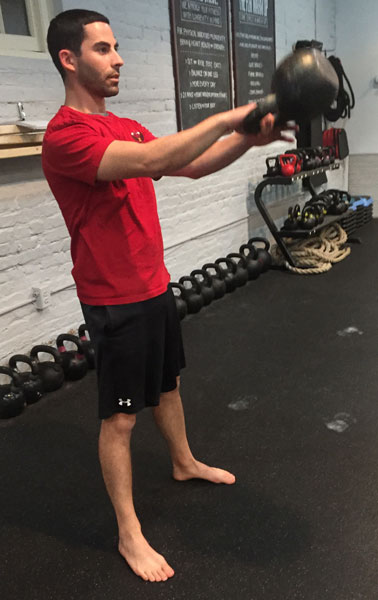
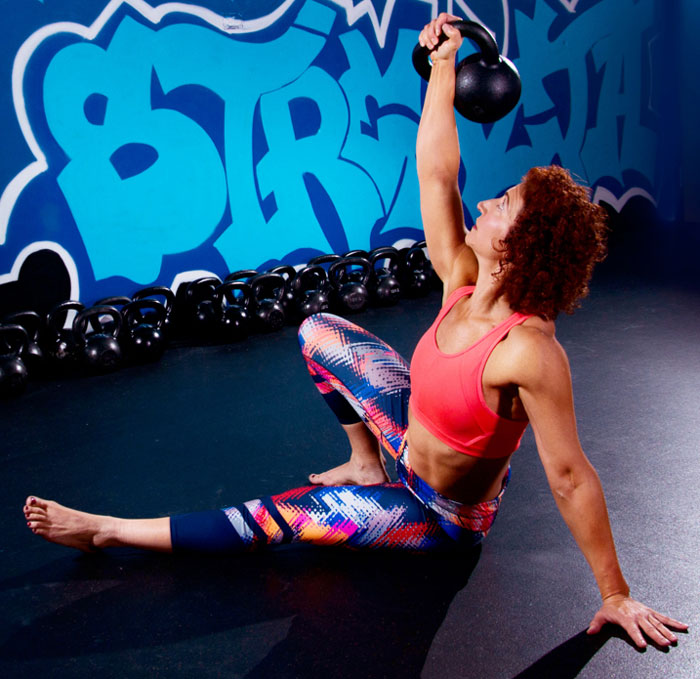
Slow motion get-ups are different than doing a get-up at a regular pace and pausing at each step. Perform a slow motion get-up as though you’re watching yourself on video, frame by frame. Definitely pause at each step to check yourself (just as you would in a regular get-up) but move in super slow motion from one step to the next. At first, you may want to try slow motion get-ups with no weight. It’s surprising how challenging this drill can be!

If you find a step where you aren’t able to move in slow motion or where you naturally speed up, then that’s an area that needs some work. You may need to mobilize your hips, shoulders, and/or your thoracic spine. Or, it may be that an area needs more strength and stability. Attack the issue from all angles, but if you feel like your body is stuck, then it’s usually because of a mobility issue.

Another way to improve your technique is to take note of asymmetries in your movements from left to right. These movement asymmetries can also be caused by immobility or lack of strength and/or stability.

Improve Mobility Challenges With These Drills:

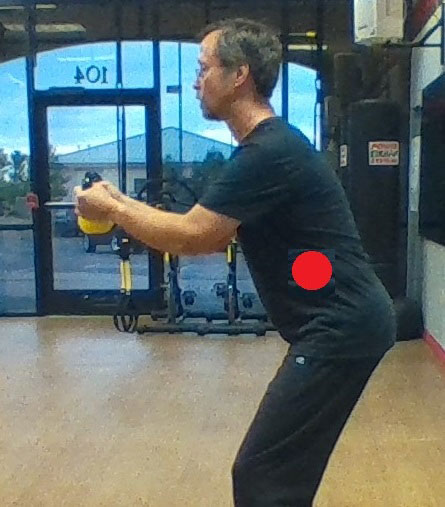
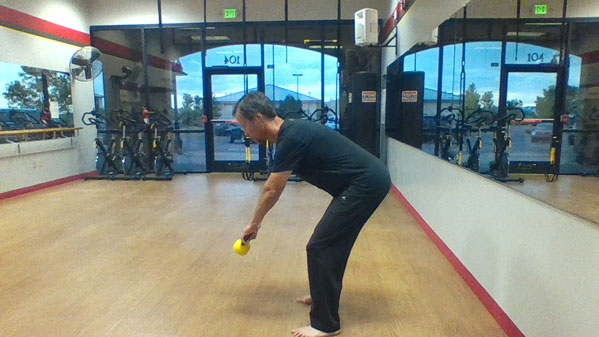
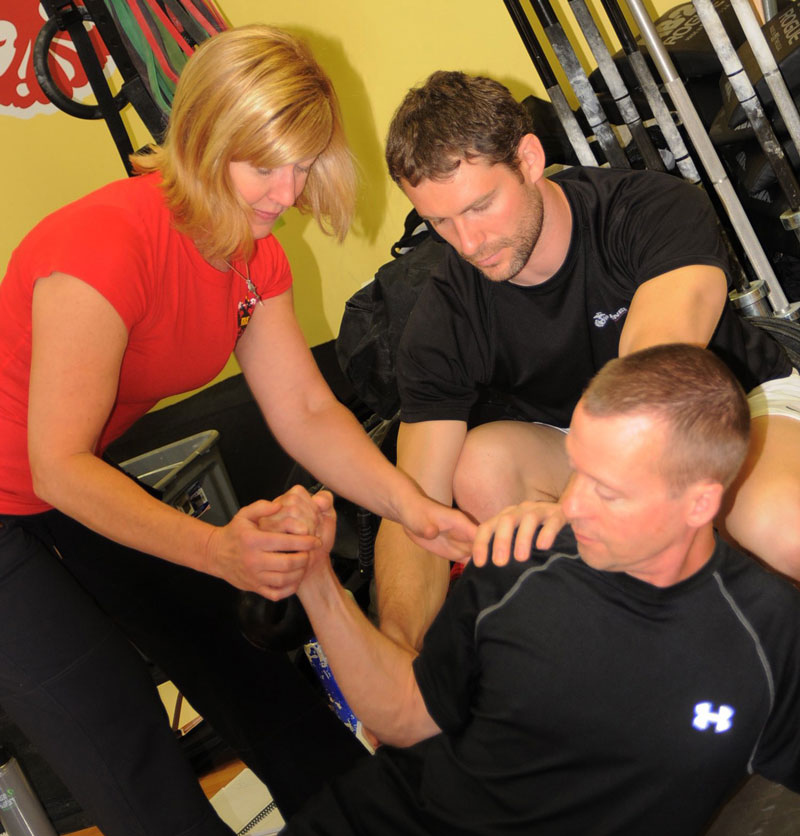
When practicing the half get-up (at the elbow or posting to the hand) insufficient thoracic mobility can cause people to slump forward or be unable to get into a tight position with the shoulders packed and the side of the body straight. Another compensation for poor thoracic mobility is compensating by arching the lower back.

Here’s one of my favorite drills to improve thoracic mobility:

Rotational thoracic mobility is also important for the get-up, since the half get-up and half windmill phases are in the transverse plane. Here’s a helpful drill:

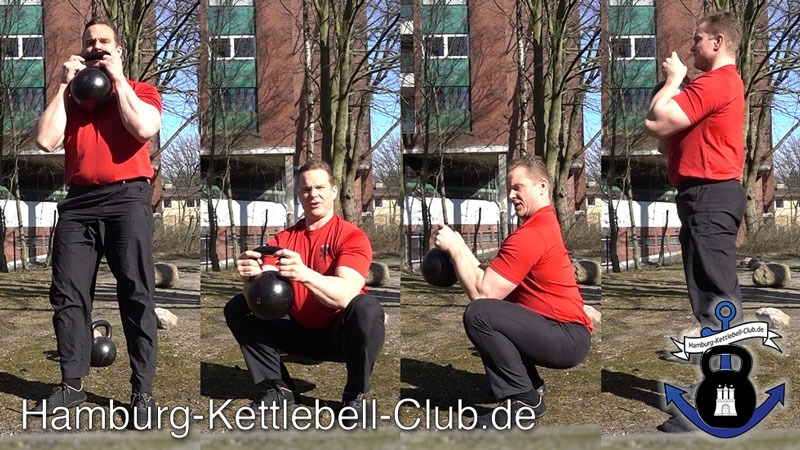
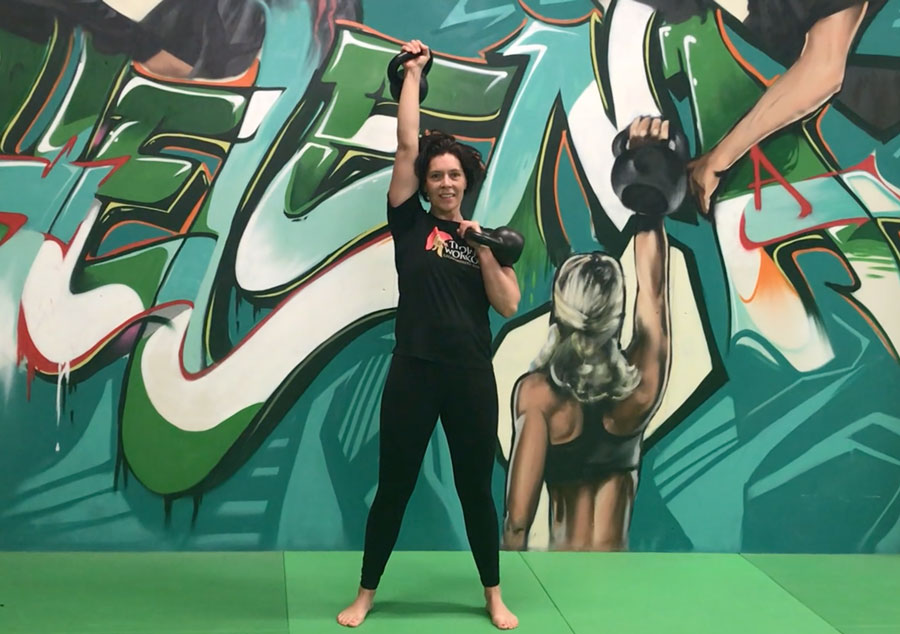
For shoulder stability, I love the simplicity of a good waiter’s walk. During the drill, really focus on using your lats to hold your arm overhead. Think about drawing your entire arm and shoulder down into the socket.

The “standing bird dog” is a great drill that delivers a double whammy of shoulder stability, core stability and strength in both areas. Dan John describes it in detail in the Hardstyle Kettlebell Challenge. Start by pressing the kettlebell overhead. Set the arm and shoulder in place, as in a waiter’s walk. Then, lift the leg on the same side (raising the knee up) and hold. When you can no longer keep your balance, put your foot back on the ground and then raise the other leg. Hold then switch the kettlebell to your other arm and repeat the drill.

Good luck with the slow motion get-up and these mobility drills. Please leave your comments below if you’ve tried them before, or if you try the drills for the first time now!

****

RKC Team Leader Shari Wagner, RKC-II, PCC, CK-FMS owns Iron Clad Fitness in Denver, Colorado. She can be contacted through her website at IronCladFit.com, email: info@ironcladfit.com or by phone 720-900-4766. Follow her on Facebook: facebook.com/IronCladFitness and Twitter: twitter.com/IronCladFitness.

Filed Under: Kettlebell Training, Mobility and Flexibility Tagged With: core stability, get up, get ups, kettlebell training, mobility, Shari Wagner, stability

Rubik’s Get-Up

May 2, 2018 By Annie Vo 3 Comments

Annie Vo Get-Up Rubiks Cube
When I first learned to perform a get-up, I was unsure of its purpose. It seemed almost like a series of random movements, ultimately resulting in getting off the floor. Of course, being able to get off the floor safely has its advantages, but even when progressing with resistance, it was still somewhat of a mystery to me.

Sometimes in order to understand new information, it is helpful to liken it to something old. The use of analogies in teaching has been shown to have a positive impact on the way we process new data. Analogies foster learning by highlighting the similarities between what we already know and that which we seek. The mind is complex.

Over the years I have come to think of the get-up like a Rubik’s Cube.

The Rubik’s Cube is a 3-D combination puzzle invented in 1974 by Hungarian sculptor and professor of architecture Erno Rubik. Originally called the Magic Cube, the goal is to align all of the color-coded squares on each side through a series of pivots. The shifts of the cube are smooth, tracking on an internal core track until the final destination is reached. The cube is considered incomplete if the sides are not aligned appropriately.

Although it is widely misreported that Dr. Rubik created “the cube” to be a teaching tool to help his students understand 3-D objects, his actual purpose was to solve the structural problems of moving parts independently—without the entire mechanism falling apart! In many ways, the get-up has the same goal.

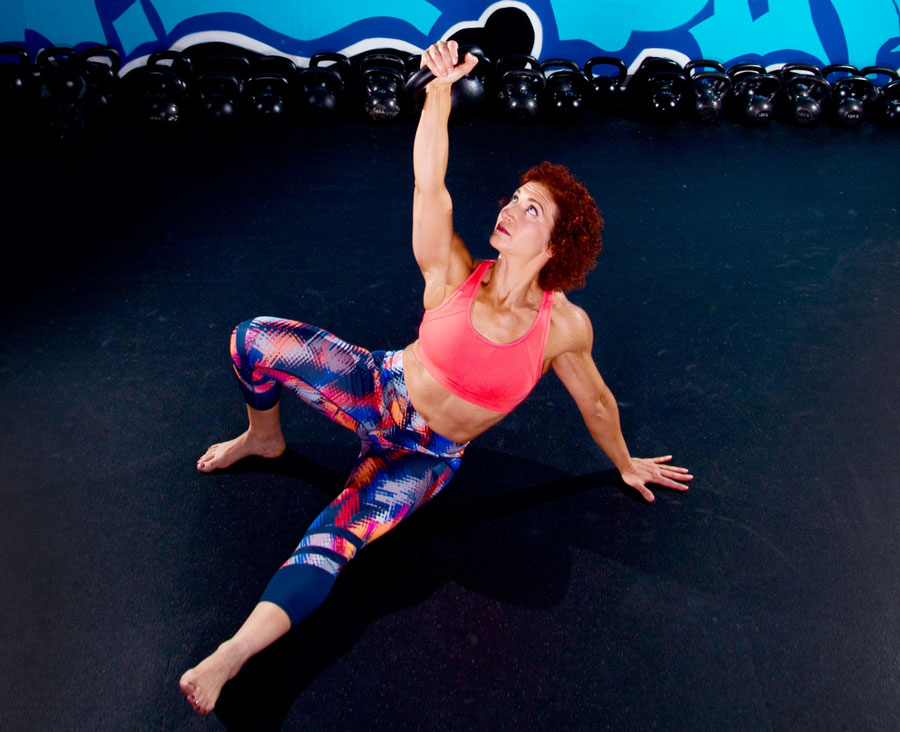
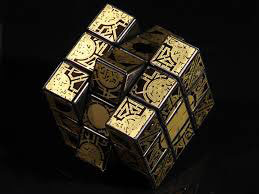
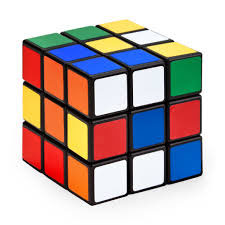
Each movement in the get-up is a pivot from the body’s core joints—the hips and shoulders. The pivoting should be smooth. Once the position is established, all “sides” of the get-up cube should also be aligned. The spine must be straight throughout the get-up. The body’s center of gravity must be balanced between the limbs. The angles of the hips and shoulders positioned to provide maximum support and stability. Each limb, joint and muscle must be arranged and coiled underneath the weight overhead to create a solid foundation.

As you develop your technique, you are likely to discover information about how you move, including strengths and weakness, balances and imbalances, and which areas should be developed. Your get-up is your sculpture. It is constantly evolving. The way you perform each pivot, swivel and shift can reveal or obscure what is truly beneath the surface. If you rush it, then you’ll miss the point.

As a Senior RKC Instructor, I’ve had the privilege of teaching the get-up to hundreds of coaches and kettlebell enthusiasts, spanning a multitude of backgrounds. Throughout my tenure, I’ve noticed that there are three common places in the get-up where symmetry and alignment tend to get neglected, even among experienced get-uppers. Here they are:

Initial Shift to the Elbow

The get-up begins in a lying position and is initiated by rolling up to your (unloaded) side. It is to be performed without any jerking or momentum. Imagine your trunk is one unbending steel rod that must be adjusted by wedging between the hip and shoulder. The result is a straight, stacked vertical line from the ground to overhead—a track as clear as the pathway of a Rubik’s Cube’s axis.

However, often the shoulder of the planted arm is forgotten in the pursuit of this vertical line, and sags forward. This is usually the result of not knowing how to find the alignment, and overcompensating. In short, it may feel like it’s lined up but it isn’t. If this is the case, there is unnecessary pressure on the front of the shoulder. To avoid this, make sure to preserve your vertical line by employing the support of the greatest shoulder stabilizer you have—the lat.

Problem shoulder position—Shoulder is rounded and relaxed.
Proper shoulder position—Shoulder is aligned and lat is packed.

Shift to the “Tall Sit”

When moving from the elbow to the straight arm seated position, the support shoulder has a tendency to rotate forward, therefore “exposing” itself and falling out of alignment. The support arm is arguably the most important part of the “tall sit” portion of the get-up because it determines whether you will be able to support your overhead weight (and bodyweight) while your legs swing under you. The support arm (and opposite leg) are responsible for supporting the body as it is lifted and rotated like a Rubik’s Cube.

To perform this transition with the greatest mechanical advantage, make sure your shoulder is in line with your planted hand and also rotated back and down, to ensure that the lat muscle is engaged.

Problem shoulder position—Shoulder is rounded forward.
Proper shoulder position—Shoulder is rounded back and in line with the hand.

Leg Sweep (both directions)

From the “tall sit” position, rotate your leg under your body, and place your knee on the ground. Sometimes people don’t bring the leg far enough under, on the way up. Remember, the angle of your hips should be roughly 90 degrees. Picture how difficult it would be to twist Dr. Rubik’s contraption if its sides were unaligned.

Conversely, a common mistake on the way down is to place the supporting hand (rather than the knee) out of alignment. It’s important to keep your grounded hand extended just beyond the knee.  A visible, vertical line should begin from the grounded hand, up through both shoulders, and overhead, ending in the kettlebell held firmly at the top.

Problem knee position—The knee is not drawn underneath far enough creating a less than 90 degree angle at the hip.
Problem hand position—The hand is placed out of alignment from the knee.
Proper hand, knee, shoulder alignment—Hips are at 90 degrees and a vertical line is created from grounded hand to KB.

These are time-tested tips to help improve your get-up. You’d be surprised how often revisiting these basics can help improve overall performance. Do not lose sight of the fact that your training is constantly evolving and never be afraid to revisit your foundation.

“Mind the edges of the cube or else Hell will literally break loose”

***

Annie Vo, Senior RKC, PCC Team Leader is a personal trainer, fitness writer and presenter in New York City. Contact her through her website annievo.com.

Filed Under: Kettlebell Training, Tutorial Tagged With: Annie Vo, fix get-up, get up, get-up tutorial, kettlebell technique, kettlebell training, tutorial

Finish Your Training Session With The Kettlebell Squat Massacre

April 25, 2018 By Frank Delventhal 3 Comments

Frank Delventhal's Kettlebell squat massacre

A great training session often ends with a crisp finisher to expend any extra energy. At the end of a recent session, my students weren’t very enthusiastic about doing Dan John’s “6 Minute Squat Challenge” (one goblet squat every 30 seconds and staying in the lower position during the break). I like Dan John’s finisher, but my students wanted something with more variety. One student commented that they’d “rather have something nice, like a mixed grill plate.” That inspired me to name their finisher “Katrins Grillteller.” (Grillteller is the German word for mixed grill plate.) When I asked them if they wanted to do the squat challenge or the “Grillteller,” the decided to choose the “Grillteller” since they didn’t know what it would be. Afterwards, they renamed it the Kettlebell Squat Massacre.

Requirements:

All participants should be proficient in the following squat variants: double kettlebell front squat, single kettlebell front squat and the goblet squat. Be sure to review the correct form for each move and ensure that everyone is safe to complete this intense workout finisher.

Directions:

Have everyone form a large circle. Since most people will accidentally decrease the size of the circle during this finisher, mark the boundaries of the circle with small items.

Each person should choose a kettlebell that they can squat with for many reps. When performing the finisher, everyone squats at the same time—down and up when the trainer instructs them to do so. When everyone is standing again while keeping their kettlebell in the rack position, they march to their next spot on the circle. When everyone is in place, everyone squats together again. If someone’s kettlebell gets too heavy, they should quickly get a lighter kettlebell and rejoin the group.

For groups of less than four people, it’s best to do two rounds, otherwise one round is often enough. Each squat should be held in the bottom position for at least one full breath. Of course longer is always more “efficient.” Staying in the bottom position of the squat for a longer duration is the first way to make the finisher more difficult.

Procedure:

Everyone squats and stands at the same time. When everyone is standing with their kettlebells held in the rack position, it’s time to move forward again. This finisher is not a race, so there is no reason to rush the movements . Be sure to remember where you started on the circle, so you know when one round is complete. If the group is struggling to stay synchronized, be sure that you are giving clear instructions so that everyone can follow your commands.

As a trainer, I like to join in with this finisher. Normally I only lead the training and do not train myself. But I have found that if a coach joins this grind, then everyone seems to be more motivated. If you are the trainer, be fair to your students and pick an appropriately heavy kettlebell. Show that you can do what you expect from your students. “Shared pain is half of the pain.” The goal is for everyone to safely reach their limits and still finish.

Kettlebell Squat Variations

Double Kettlebell Front Squat

Frank Delventhal Double Kettlebell Front Squat

In larger classes it’s not always possible for everyone to have two kettlebells, but this is a great variation when there are not too many people in the group. Fewer people also means that there will be fewer stations on the circle for this difficult squat variation.

Single Kettlebell Front Squat (Left Side)

Frank Delventhal Single Kettlebell Front Squat

Pay attention to the time spent in the squat. At first, participants can stay in the squat longer when they’re “fresh.”

Single Kettlebell Front Squat (Right Side)

As above. Adjust the time spent in the squat, so that all can still hold a correct position.

Goblet Squat

Frank Delventhal Kettlebell Goblet Squat

Since the lower position of the goblet squat is relatively easy to maintain (and also a good mobility exercise in itself), aim to stay longer in the squat. So that “nobody gets bored”, while holding the squat, I recommend trying a few “kettlebell curls” since the elbows are already on the inside of the thighs. When leading the finisher, I will do the following reps: 1, 2, 3, 3, 2, 1. Don’t overdo it. And if you can do more than three curls, the kettlebell you’ve chosen is too light for the squats!

Crawling

The kettlebells are placed inside in a circle, then everyone gets on all fours and crawl once around the circle. Knees do not touch the ground, and keep the torso parallel to the ground. Imagine that you’re a moving coffee table

(Evil) Cardio Variation

Replace each kettlebell front squat round with kettlebell thrusters.

Frank Delventhal Double Kettlebell Thrusters

For an cardio intensive version of this finisher for very fit participants, try double or single kettlebell thrusters instead of squats. To perform this movement, squat down with the kettlebell, then use the explosive power of your squat to continue through your arms, pressing the kettlebell overhead. Since the kettlebell is already in motion from the power of the squat, you can lift heavier weights overhead than with a strict military press.

After the kettlebells are thrusted overhead, lower the kettlebells back to the rack position under control, then walk to the next circle position. For an even more difficult variation, keep the kettlebells overhead (“waiter’s walk”) and walk to the next point before bringing the kettlebells down to the rack position. This challenging variation is a good way to strengthen the shoulders and the top position of the lockout.

For groups with mixed fitness levels, advanced students can opt to do the thruster variation. If it becomes too difficult, the student can just switch back to front squats and walking with the kettlebells in the rack position. Be safe and use common sense.

The Unspeakably Evil Variation:

If you do the double thruster variation, add left and right single kettlebell thrusters before doing a round with regular double kettlebell front squats. (This variation is a good way to see how stupid tough you are.)

Adjustments for making the difficulty easier or harder:

  • If your kettlebell becomes too heavy to maintain good form, get a lighter kettlebell and rejoin the group.
  • For a more difficult finisher, do more rounds for each squat variations
  • Adjust the time spent in the bottom of the squat position
  • Adjust the time spent in the rack position before squatting down
  • A larger circle is more difficult, a smaller circle can be easier
  • Replace front squat variations with thrusters (let the kettlebells sink back into the rack position and then continue)
    • To increase difficulty when doing thrusters, leave the kettlebells overhead while moving to the next spot on the circle
  • Do goblet squats with or without “kettlebell curls” at the bottom of the squat
  • For masochists, plan to do thrusters before double kettlebell front squats


Video Example (In German)

Conclusion

This is a “delicious” finisher that can be customized and made to be challenging for anyone. Even though it may sound complicated, it is in fact quite simple:

Everyone gets kettlebells and stands in a circle. They squat together, then move to the next position on the circle. When you reach the point on the circle where you started, switch down to an easier squat variation. The last round is crawling. Enjoy your “meal” and let me know how you liked it!

The original article published in German: https://hamburg-kettlebell-club.de/kettlebell-blog/144-katrins-grillteller-aka-kettlebell-squat-massaker.html


***

Frank Delventhal, RKC2, PCC, 1 Dan Aikido, performing strongman. Visit his website: https://hamburg-kettlebell-club.de/

Filed Under: Kettlebell Training, Workout of the Week Tagged With: finisher, Frank Delventhal, front squats, goblet squats, kettlebell training, kettlebells, squats, workout, workout finisher

How To Improve Your Golf Game With Kettlebell Training

April 11, 2018 By William Sturgeon 0 Comments

William Sturgeon Kettlebell Get-Up Kettlebells for golf

Whether you’re a golf athlete or enthusiast, there’s always room for improvement in your sport. While there are plenty of things you can do to improve your golf game, nothing is as powerful as strengthening your body. Strengthening and mobilizing your body will improve the quality and power of your swing. Kettlebell training can take your golf game to a new level!

Why Kettlebell Strength Training Can Improve Your Golf:

Kettlebell training has the ability to improve sports performance in many ways. Increasing your overall strength can lead to greater power for your golf swing. Strength training can help you achieve greater speed and more control over your swing. Training with kettlebells also helps you manage fatigue. Since golfers are typically in a fixed bent-over position for many hours at a time, they are at risk for a lot of stress on the lumbar spine. Lastly, kettlebell training can reduce the risk of injury and increase your playing longevity.

Common Golf Injuries:

Low Back Pain

Golfers commonly deal with low back pain. The repetitive rotational motion through the lumbar spine is often a major cause of low back pain in golfers. Having a weak low back can be dangerous since golf requires a lot of flexion and rotation through the lumbar spine. Mobilizing and strengthening the low back can reduce the risk of injury in this area.

Rotator Cuff

The rotator cuff is located within the shoulder and consists of four small muscles—the supraspinatus, infraspinatus, teres minor, and subscapularis—which stabilize the shoulders. Shoulder impingement is a common injury amongst golfers. Shoulder impingement occurs when the tendons of the rotator cuff become inflamed and irritated as they move through the subacromial space. If the shoulders are not mobilized or strong enough for the repetitive motion of the swing, then compensational movement patterns will occur. These compensational patterns cause weak, immobile shoulders and injury.

Elbow Tendonitis

The two most common instances of elbow tendonitis with golfers are tennis elbow (the outer tendon is irritated and inflamed) and golf elbow (the inflammation and irritation of the inner tendon). These injuries can be caused by the repetitive swinging motion in golf. To heal these injuries you will need to hang up the clubs for a little while to allow for a quicker recovery. But, by adding kettlebell training to your routine, you will be able to help strengthen and mobilize the shoulders and the thoracic spine to help reduce the risk of this injury.

Why Kettlebell Training?

Kettlebell training has been shown time and time again to be a very effective training modality. A single kettlebell can be used for strength training, mobility training, rehabbing injuries, and conditioning. You can even train with kettlebells at home, and at any time that fits with your schedule.

Kettlebell training for improved performance in golf does not have to be complicated or rigorous. Strength training is best kept simple and effective. At my facility, we train our “7 big rocks”: single leg, squat, hinge, trunk, mobility, upper push, and upper pull. These movement categories cover a full body approach and ensure we cover every plane of motion in our training. Full body training with kettlebells allows you to utilize your time more effectively and basically train anywhere.

Kettlebell Swings for Golf William Sturgeon
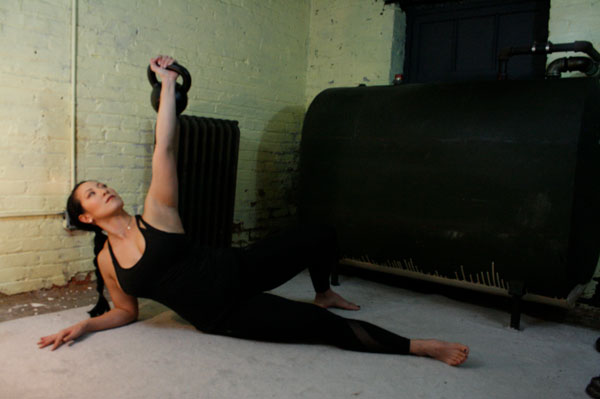
My Top Five Kettlebell Exercises for Golf:

Swing

The kettlebell swing creates powerful and explosive hips. It has been known to aid in reducing low back pain. The swing strengthens the low back and increases the strength of the glutes–the powerhouse of the hips when applied to your golf swing. Stronger, more explosive hips will aid in a stronger swing with greater distance potential.

Get-Up

The get-up is a powerful exercise that serves many purposes at once. Benefits of practicing the get-up include: scapular stability, trunk stability, cervical and thoracic mobility, upper and lower body strength, and grip strength. The get-up teaches you how to control yourself under the weight of a kettlebell, move through different ranges of motion, and gain greater stability. The get-up is great for strengthening the shoulders and trunk while mobilizing the whole body.

Bottom-Up Press

The bottom-up press is great for repairing and strengthening the shoulders and rotator cuff. When the kettlebell is in the bottom-up position, a majority of the pressure is held within the palm. This takes tension away from the shoulder and places the elbow in a better position. The challenging bottom-up press forces you to have greater core stability throughout the movement. During this press, the scapula moves through its full range of motion while requiring great control throughout the exercise.

Bottom Up Half Kneeling Kettlebell Press

Goblet Squat

The goblet squat is the best way to load the squat if you are a novice lifter. The goblet squat is user-friendly because it doesn’t force the lifter into a fixed position. By comparison, the barbell back squat requires a lot of mobility. The goblet squat strengthens the glutes, and quads along with the core. The goblet squat can benefit the golfer by strengthening the tendons and joints in the lower body which can get irritated or injured in golf.

Farmers Carries

Farmers carries build grip strength, trunk strength, and create better posture. Golf involves a lot of flexion throughout the spine. Farmers carries require extension from the spine and shoulder retraction. With the head in a neutral position, the trunk is engaged, and the kettlebells are carried at the side in neutral position as well. Practicing farmers carries can offset the typical positions required for playing golf.

A Final Word…

If you are an avid golfer who wants to increase your athleticism, begin to learn and use kettlebells in your strength training sessions. Not only will this improve your ability as a golfer, it will allow you to keep playing long term. If you are considering training with kettlebells make sure to find the nearest RKC instructor in your area to show you how to properly and effectively use them.


****

William Sturgeon, RKC II trains clients at his gym, Restored Strength. Contact him through his website at RestoredStrength.com or follow him on Facebook: facebook.com/restoredstrength

Filed Under: Kettlebell Training Tagged With: Athletic Training, bottom-up press, get up, goblet squat, golf, improve golf swing, improve your golf game, kettlebell training, kettlebell training for golf, kettlebells for golfers, William Sturgeon

Kettlebells for Life

March 28, 2018 By Lori Crock 6 Comments

Lori Crock Kettlebell cossack squat

Every Spring, I enjoy looking back and reflecting on what I am grateful for over the last year. One of those things is the RKC School of Strength and my students who enjoy using kettlebells as much as I do.

As I reflect on seven years of teaching strength and conditioning (and a dozen certifications and workshops later) I can honestly say that what has prepared me best to be a strength coach is the RKC School of Strength.

Here’s why: I don’t have to struggle to plan programming for my students. It’s all here—a way to train students to become stable, mobile, strong and flexible for life. This system is safe, interesting to the mind and body, and accessible to all fitness levels. It’s fun, time-efficient and truly a system of health that promotes longevity.

I’m grateful for my students who keep coming back for more…

At my gym, our programming is 80% kettlebells and 20% bodyweight. It’s based on both the RKC and PCC (Progressive Calisthenics) fitness systems.

Many of the students have been training with me since the beginning of my kettlebell journey more than five years ago. They keep coming back for more because the RKC School of Strength challenges both the brain and the body.

I find that students can continue to train this way for life. We can easily adapt the training to their changing personal health and fitness levels. Wherever my students are in the moment—and this true for D1 athletes, everyday working folks, or retirees—they can train optimally.

Lori Crock assisting at an RKC Workshop

The RKC system is inexhaustible—there’s always more to learn about our bodies, the movements, and kettlebells to make us better for life and sport.

The physical and mental stimulation from our training applies to everything we do: lifting, carrying, reaching, bending, sitting, getting up and down off the floor, standing, walking, running and resting. All aspects of our lives can benefit from what we learn about our bodies using the RKC system.

We do not entertain our students with workouts. The challenge of moving well under load is entertaining in itself.

Our system is a way, not a workout. Those who understand this concept can’t get enough of it! I feel blessed and grateful to retain so many students for years.

I’ll be honest. It can take time to find people who appreciate our somewhat “counter-culture” methods. We don’t promise visible abs in six weeks or make other outlandish marketing claims.

First and foremost, the student has to show up and work under the leadership of an RKC certified coach. Both parties—the coach and the student—must make a commitment to see results.

Students who commit to learning our methods stay and flourish. As a teacher, it’s exciting and incredibly rewarding to build long-term relationships with my students and help them achieve what they never dreamed possible.

Theda and Al Training Mobility

An Example Close to Home:

Before training with me and using the RKC system, my husband Al trained on his own or with his buddies. Three shoulder surgeries later—including two surgeries on one shoulder—I told him he needed to start training with me.

Now, he hasn’t had any more injuries and his shoulders are strong and stable. He consistently trains three days each week, and he improves in some way each session. Believe it or not, the strict press has become his strongest movement!

It isn’t easy to coach your own spouse, but it is a joy to watch him to lift while moving with ease and strength—especially since he’s been pain and injury free for the past five years. We both hope to train with this system for the rest of our lives.

Kettlebell Training for Life

I could share a story about each of my students and how the RKC School of Strength has helped them achieve something in their lives that they never imagined—in and outside the gym. I’m sure you can too, if you use the RKC system.

It’s a privilege to train people with a system I’m confident in—and to use honorable, time-tested methods that make people better and more courageous athletes for life and sport, at every age.

Feel free to share your “kettlebells for life” story in the comments below.


***

Lori Crock, RKC Team Leader, FMS II and MovNat MCT II. Lori owns MoveStrong Kettlebells in Dublin, Ohio where she teaches small group kettlebell classes to all ages and fitness levels and continues to be amazed, inspired and educated by her students. Her email address is lori@movestrongkbs.com

Filed Under: Kettlebell Training, Motivation Tagged With: all ages training, Athletic Training, consistent kettlebell training, group fitness, lifetime training, Lori Crock

The Happy Challenge

February 14, 2018 By Suzanne Bos-Betlem 5 Comments

Suzanne Bos-Betlem, RKC

Two things I am very passionate about are music and kettlebells. They both cheer me up incredibly and I cannot imagine my life without them. But, bring these two together… and that’s when the magic happens!

Music can be a great stimulus during a workout. It’s a powerful tool that can take your training to the next level. For quite some time, I’ve been looking for a good song-based kettlebell workout. I specifically looking for a cheerful tune—an upbeat song that could effectively brighten up your day. Even more importantly, I needed a song that would respect the kettlebell principles I strongly believe in. So, there would be no rushing or pushing through with sloppy technique, definitely no reps over form. I was looking for a happy song that would help you rather than hurt you while working with kettlebells. And I found it! The universe gave me…. “HAPPY”, the Pharrell Williams song that was released in 2013 and featured on the soundtrack of Despicable Me 2.

Here’s the workout I designed to go with the song, AKA The Happy Challenge:

Start off with double kettlebells in the rack position. This is your basic position throughout the song.

Each time you hear the word “Happy,” you perform a military press on one side. Alternate sides with each “Happy.”

No need to rush. The “Happy” part (including “clap along…”) allows plenty of time to press your kettlebell up and bring it back down to rack. That’s the beauty of the song!

Between the presses, maintain the basic position (double kettlebells in the rack position) solid and strong. At Trainingscentrum Helena, we also call this double kettlebell rack position the Trojan Pose.

At the song’s bridge, Pharrell sings “Bring me down”. When you hear this part, perform a double kettlebell front squat. This will come to eight squats in the first bridge and four more during the second.

At the end of the song (in just under four minutes) you will have done 24 military presses (12 on each side), 12 squats and a lot of static rack holds. That doesn’t sound too bad, does it? Give it go and let me know what you think in the comments below!

P.S. In my classes, I give my clients the option to switch to push-presses if they lose form on their military presses. If they fail a press entirely during the workout, I’ll tell them to put the kettlebells down and continue with “imaginary” heavy kettlebells.


 ***

Suzanne Bos-Betlem is a PCC, RKC and Trojan Workout certified trainer in Haarlem, The Netherlands. In addition to bodyweight and kettlebell training, she is an enthusiastic Krav Maga practitioner and yoga-lover.

Filed Under: Kettlebell Training, Workout of the Week Tagged With: double kettlebell, double kettlebell workout, kettlebell workout, RKC, Suzanne Bos-Betlem, workout, WOTW

Shoulder “Packing”—The Right Way

January 24, 2018 By Matt Beecroft 0 Comments

Matt Beecroft Shoulder Coaching

The kettlebell community has taught the concept of shoulder packing to stabilize the shoulder for a very long time. I have seen it cued, taught, and discussed for about 14 years! As a Master RKC, I see this concept taught worldwide. But for a long time I’ve wondered if everyone really understands the cues.

The premise of “shoulder packing” is to prevent the shoulders from rising towards the ear at the beginning and end of the press—and to keep the shoulder from excessive elevation during the lock out and overhead lifts. The use of the cue “pack the shoulder” or “engage the lats as you initiate the press” is a simplification for the average client. It cues them to avoid excessively using the upper traps and levators to initiate the press. Instead, they should keep the shoulder stable by engaging all four shoulder rotators, the lower traps, and the subclavius (which helps to seat the clavicle in the sternoclavicular joint).

Most clients are desk athletes that come into our gyms with protracted shoulders and a forward head position. Many of them are also upper trap dominant and have poor T-spine mobility. The easiest cue to help someone keep their shoulders from rising to their ears, and thereby risking shoulder impingement and injury has often been: “pack your shoulders by engaging your lats”. But, a better cue might be to engage your entire mid-back along with the shoulder muscles. And it’s also important to remember that over cueing or using unnecessary cues can lead to other shoulder movement problems and issues.

Let’s explore how the lat attaches to the body from a textbook anatomy perspective. Then from a functional anatomy perspective, we can see what it actually does.

Attachment: Function: Requirements for a great press:
Thoracolumbar fascia: 4-8 vertebrae or illium Humeral extension /adduction Humerus flexion/abduction
Ribs Internal rotation Ext rotation for healthy position
Scapula (40% of population ) Weak horizontal abduction Upward rotation and slight posterior tilt of scapula
Intertubercular groove of humerus Lumber extension Stable core
(can differ for people) Lateral flexion Rib cage in neutral alignment
Involved in core, neck and respiration


In the last column above, I’ve described what happens when we press overhead or hold a weight overhead. Activating the lat strongly does the exact opposite of what we want to do when we press or go overhead. When we use the cue “pack the shoulders with the lat”, we can cause scapula depression because of all of its attachment points—which will force the downward rotation of the scapula. This is in direct opposition to the upward rotation of scapula required in an overhead lift. If we “pack the shoulder with the lat” we close the space in the AC joint, and since the lat is also responsible for internal rotation, we are more likely to get some cuff impingement.

Upward rotation of the scapula is perfectly normal and healthy as long as the person has good T-spine mobility and sufficient external rotation of the humerus. In fact, many people need to focus on external rotation when pressing overhead so that they naturally and unconsciously fire the lats, rotator cuff, rhomboids and lower and middle traps in a perfectly synchronized and sequenced way.

Remember, head forward position, poor motor control with the external rotators, and poor T-spine mobility are often the causes of shoulder impingement. When someone performs a good overhead press, they should also have a stable core and neutral rib cage, with no rib flare.

An important component of healthy overhead lifting is unconsciously activating the pesky lower traps in your mid back. While they have no direct control of the humerus, they are an integral part of upward scapular rotation. They are also responsible for some posterior tilt and retraction of the scapula required for correct overhead mechanics.

The activation of the lower trap along with the muscles of the rotator cuff, serratus anterior, rhomboids and lats in the correct sequencing actually helps clear the space in the shoulder for the humerus to move. When we see someone’s shoulder come back to its optimal position, we usually see the upper back contract very subtly. Perhaps the correct strategy for optimal shoulder position is firing the lower traps-not the lats.

The shoulder “packing” cue needs to be used very carefully—much like the cues “pull the belly button in” for core activation (when the core unconsciously fires in a perfectly healthy person), pushing the knees out for correct knee and toe alignment (even when alignment is fine, hence sending someone into varus—the opposite of “valgus” collapse) or the “big chest” cue that can cause undesirable rib flare in some lifts. Trainers should not cue clients on autopilot without observing the actual situation.

Matt Beecroft Shoulder Coaching

Trainers using cues unnecessarily, misunderstanding the nuance and subtleties of the cues, or not understanding the logic behind cues can cause real problems. Better education and understanding of why specific cues are given needs to happen so we can all abide by the first rule of training others: do no harm. Perhaps the cue should be to “activate” the upper back to keep the shoulder in a natural position without overly sucking it down or packing it down. Or maybe some clients would better respond to the cue: “relax the shoulder away from the ear”. Regardless the words chosen, we should only use cues when necessary, not all the time.

Many haphazardly overused cues in the fitness industry also expose a poor understanding of functional anatomy and nuance. Without that understanding, we could be creating some long term negative effects with incorrect cuing. When the shoulder “packs” naturally, it’s a very subtle movement. The human body is amazing, and sometimes trying to outsmart it to make it better can have the opposite result.


***

Matt Beecroft is a Master RKC, PCC Team Leader and CK-FMS instructor with over 17 years as a personal trainer. He is a national fitness presenter with Thump Boxing, an Expert Level 2 Krav Maga instructor with KMG, Muay Thai coach and movement specialist in systems such as CST, Ground Force Method and Animal Flow. He writes for various publications including Breaking Muscle and Blitz Magazine and can be contacted by his Facebook page https://www.facebook.com/MeetLifeHeadOn/ or his website https://www.realitysdc.com.au/

Filed Under: Coaching, Kettlebell Training Tagged With: Coaching, correct cueing, cuing, Matt Beecroft, shoulder health, shoulder mobility, shoulder packing

Breathing, Backswings and Ballistics

December 13, 2017 By Ryan Jankowitz 3 Comments

Happy New Year 2018

I really love teaching others how to train with kettlebells; it’s what I’ve become most passionate about as a fitness professional. Whether online or in-person, I get a deep sense of satisfaction when a client learns a new movement or refines their technique.

Ryan Jankowitz 1-Arm Swing
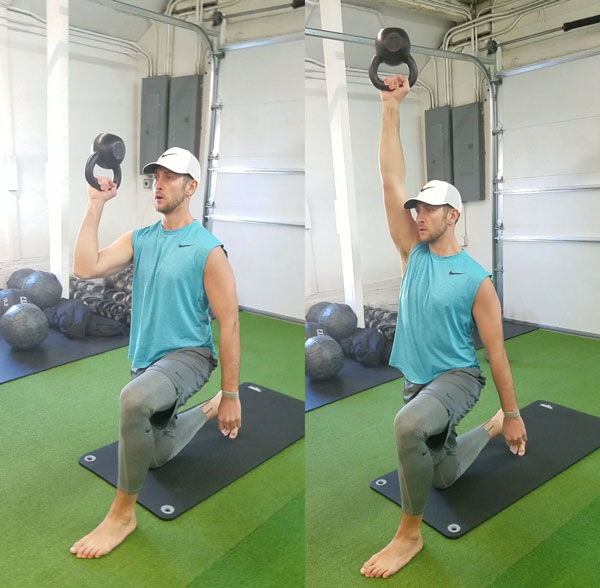
While it can be exhilarating to learn new kettlebell drills or refine your technique, retaining so much new information—and then applying it to your training can be daunting!

My goal with this post is to create a simple connection between all of the RKC ballistic exercises (swings, cleans, snatches) so that you can easily apply the same knowledge and techniques to all of the movements.

First, let’s start with the timing of the breath. Breathing is one of the most important functions of training and life. At the top of the swing, when the glutes and quads contract, a sharp exhalation is performed. This sharp exhalation helps to compress the midsection and direct more power into the kettlebell. Again, it is coordinated with the glutes and quads forcefully contracting.

The timing of the exhalation remains the same when performing a clean and a snatch. Although the kettlebell will still be traveling after the exhalation has occurred in both the clean and snatch, it still happens when the glutes and quads contract. The exhale acts almost like a rocket booster, propelling the kettlebell into the rack or overhead position with relative ease. If your exhalation occurs when the clean or snatch is in the finished position, then you’ve lost the benefit of the “rocket booster”.

The backswing is another important part of all ballistic movements—and it should be exactly the same from technique to technique. You should be able to smoothly transition from one movement to another without changing your backswing.

Ryan Jankowitz Kettlebell Backswing

Focus on these backswing concepts/tips for one-arm swings, cleans and snatches:

  • The handle of the kettlebell passes above your knees
  • Your forearm connects high up on your inner thigh
  • Your upper arm connects to your ribcage
  • Your hips flex to a greater degree than your knees
  • There is a slight internal rotation of the thumb
  • This is where you inhale
  • Spine is neutral

Ryan Jankowitz kettlebell clean

I hope these tips have given you some good “food for thought” for your training. If you experience an “aha” moment or were able to improve a technique, then drop me a line and let me know what you experienced.

Stay Strong,
Ryan Jankowitz, RKC-II


****

Ryan Jankowitz, RKC-II Instructor, CK-FMS, is a life-long athlete who can’t imagine sitting behind a desk. He enjoys sharing his passion for fitness and spreading the RKC knowledge. Ryan provides online personal training for busy people who want to improve their health and kettlebell training for fitness professionals who want to refine their technique and/or train for a certification. He is available for private kettlebell workshops as well. You can reach him at ryan@rjkettlebell.com or through his website rjkettlebell.com. He also works with clients and teaches kettlebell classes at Fitness on the Run in Alexandria, Virginia. If you’re in the area, visit fitnessontherun.net and come swing some bells with Ryan.

Filed Under: Kettlebell Training, Tutorial

How to Replace Expensive Equipment With Kettlebells Part 2

August 16, 2017 By Laurel Blackburn 1 Comment

In How to Replace Expensive Equipment With Kettlebells Part 1, I showed you how to make your own sleds with just a tow strap, belt and kettlebells. I also included a bunch of different exercises and workouts you can do on your own or with your clients.

I am always looking to add new tools to my boot camp and kettlebell classes, without spending a fortune.

I love coming up with creative ways to make my own equipment. If you want to add some new tools to your workouts or your gym but are on a budget, then this blog is for you.

Last year I purchased an Earthquake bar for my other gym, The Tallahassee Strength Club. It was expensive but I knew my members would love it. I spent well over $200. Online you will find prices from $269 up to over $300.

On one of my visits with my physical therapist, he showed me how he uses the bar to rehab his client’s shoulder injuries. The instability of the bar (while doing simple bench presses and shoulder presses) works and strengthens all of the stabilizer muscles in the shoulder. I couldn’t believe how challenging this was–and I was using very light weights.

After I balked at the price, he showed me a rod he got at Lowes. I can’t remember exactly what it was but either a steel fence post or a strong metal closet rod. I did the same exercises with the rod and didn’t notice much of a difference between it and the expensive Earthquake bar. He gave me the fence post to use at my gym.

My trainers and I played around with the bar using kettlebells attached to the ends with small jump stretch bands

We started with simple overhead holds. It was unbelievably challenging. Every muscle in my body had to work to keep the bar stable. We got a little more daring, which is common when we get together. We did overhead squats, deadlifts, single leg deadlifts, overhead walking, bench press and of course, I had to try a get-up.

You can modify the exercises with the placement of the kettlebells and the length of the band. The closer the weight is to the center of the bar, the more stable it will be. The band length can be shortened to make it easier or long, to make it much more challenging.

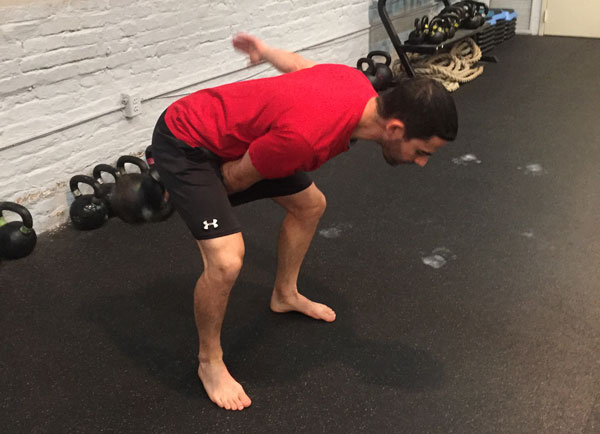
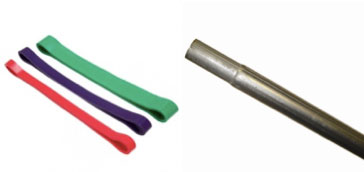
It’s an amazing, challenging tool and super simple to set up. You’ll need a fence post top. For a more challenging workout, get a pvc pipe.

You can get a fence post top at Lowes for less than $12
A piece of PVC pipe is even cheaper for around $10.00
Jump Stretch mini bands on Amazon start at $7.95

You can also use rope or chain to hook your kettlebells to the bar. Go way lighter than you think you would because these are no joke.

Give these a try and let me know what you think in the comments below.

****

Senior RKC, Laurel Blackburn owns Boot Camp Fitness and Training and Tallahassee Kettlebells.  Look for Laurel at www.bootcampstogo.com or www.tallahasseekettlebells.com.

In her early fifties, Laurel is out to prove that age is just a number. Her goal is to motivate and inspire people everywhere, both young and old that strength, flexibility and mobility can get better with age. Follow her adventures on her blog: www.SuperStrongNana.com.

Filed Under: Kettlebell Training, Tutorial Tagged With: DIY fitness equipment, fitness equipment, group fitness training, kettlebells, Laurel Blackburn, unusual uses for kettlebells

How To Avoid Back Pain From Kettlebell Swings

July 26, 2017 By Wayne Pallas 4 Comments

Wayne Pallas HKC, Swinging A Kettlebell

I earned my HKC in April of 2016, and began working with clients shortly afterward. The most common complaint I have heard has been lower back pain after swinging. Since I have always been careful to teach proper technique (e.g. packed shoulder blades, loading the glutes, keeping the head up, etc.), I was puzzled and decided to figure out what was causing this problem.

One possible cause is over-lordosis, arching the back at the top of the swing. I think the best remedy is to teach and practice a vertical plank. Full body tension, especially in the core, helps keep the back properly aligned.

I also noticed is that swinging with a kettlebell is different than practicing the hip hinge without weight. Weight changes the way the upper body moves during the hip hinge. The heavier the weight, the greater the risk that it will alter a proper hip hinge, putting more stress on the lower back (see photo below), especially if you keep your arms perpendicular to your torso on the way down.

Lower Back Stress From Incorrect Swing
The heavier the weight, the greater the risk that it will alter a proper hip hinge, putting more stress on the lower back, especially if you keep your arms perpendicular to your torso on the way down.

If you think of the upper body as a lever, with the navel area as the fulcrum, the weight of a kettlebell during a swing or snatch will tend to pull the shoulders down and in turn, move the hips up, which engages the lower back (see photo below). The solution I came up with is to “sit” into the hinge more, which feels like you are moving closer to a squat than a hinge, but relieves lower back stress.

Upper Body As A Lever
If you think of the upper body as a lever, with the navel area as the fulcrum, the weight of a kettlebell during a swing or snatch will tend to pull the shoulders down and in turn, move the hips up, which engages the lower back.

You can experiment with adjusting your hip hinge while moving or you can adjust your technique statically. Hold a fairly heavy kettlebell as you would for a squat and assume a hip hinge stance. Bend forward slightly visualizing your immobile upper body moving around a fulcrum (the red dot in the photos above). You should be able to feel your lower back reacting to the weight. From there, rotate your shoulders up (and hips down) until the back stress disappears (see example below). This approximates the proper stance while swinging with weight.

Lower Back Swing Experiment
Rotate your shoulders up (and hips down) until the back stress disappears.

After adjusting the hip hinge using weight, my clients and I have become more aware of our posture, and have been able to adjust it even while swinging, avoiding back pain.

****

Wayne Pallas, HKC is a retired Colorado teacher (40 years, math/music), avid runner, personal trainer, and former martial artist. Over the past five years, he has sent out a monthly general fitness newsletter, Wayne’s Fitness Tips & Tricks, to several hundred readers. He is currently training for the Denver RKC in September.

Filed Under: Kettlebell Training, Tutorial Tagged With: hkc, HKC Instructor, kettlebell swing, kettlebell swing basics, Wayne Pallas

  • « Go to Previous Page
  • Page 1
  • Interim pages omitted …
  • Page 3
  • Page 4
  • Page 5
  • Page 6
  • Page 7
  • Interim pages omitted …
  • Page 16
  • Go to Next Page »

Primary Sidebar

Featured Products

previous arrow
BOOK-RKCBookofSnC
HardStyleKettlebellChallegeDanJohn700
BookCoverMasterTheKettlebell1
RKCiconKettlebell512
KettlebellGoddessdv040
next arrow

Recent Posts

  • RKC Big Six Workout
  • The Kettlebell Swing & Low Back Pain
  • Key Kettlebell Exercises To Help You Create Better Balance
  • How to Most Effectively Use Kettlebells to Meet Your New Year Goals
  • 1 Exercise That Checks All The Boxes
FOLLOW US ON TWITTER!

Archives

Copyright © 2025

Dragon Door Publications / The author(s) and publisher of this material are not responsible in any manner whatsoever for any injury that may occur through following the instructions or opinions contained in this material. The activities, physical and otherwise, described herein for informational purposes only, may be too strenuous or dangerous for some people, and the reader(s) should consult a physician before engaging in them.