• Skip to main content
  • Skip to primary sidebar
  • Home
  • Contributors
    • Matt Beecroft, Master RKC
    • Martijn Bos, Master RKC
    • Andrea Du Cane, Master RKC
    • Angelo Gala, Master RKC
    • Chris Holder, Master RKC
    • Steve Holiner, Master RKC
    • Dan John, Master RKC
    • Mike Krivka, Master RKC
    • Thomas Phillips, Master RKC
    • Robert Rimoczi, Master RKC
    • Phil Ross, Master RKC
    • Max Shank, Master RKC
  • Workshops
    • HKC Workshops
    • RKC Workshops
    • RKC-II Workshops
  • Find an RKC Instructor
  • Resources
    • Articles
    • Forums
    • Kettlebells
    • Products
  • Blogs
    • PCC Blog
    • Strong Medicine Blog
  • Archives

RKC School of Strength

Official blog of the RKC

Two Quick, Easy and Effective Kettlebell Exercises for Any Population

May 4, 2016 By Andrea Du Cane Leave a Comment

Andrea Du Cane, Master RKC

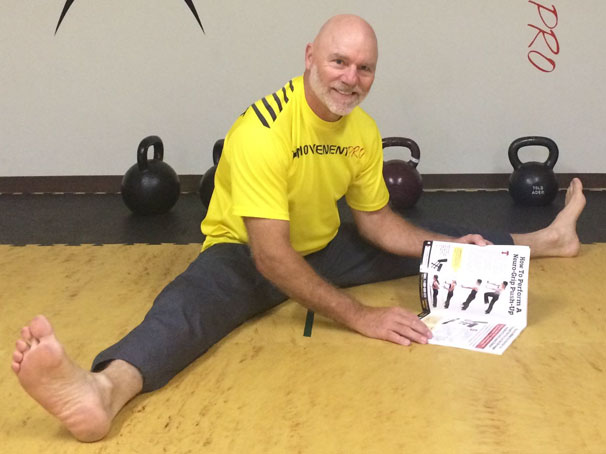
There is something to be said about simplicity of movement and reinforcing the fundamental patterns of our kettlebell lifting.

I’ve taken two basic exercises and by using two kettlebells and focusing on the correct alignment and movement, I have turned them into simple and effective exercises for all populations—including your brand new clients, older clients and those recovering from certain injuries.

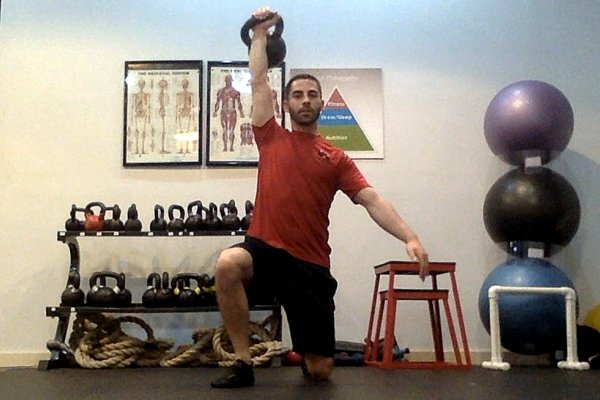
Double Kettlebell Deadlift Drag

The first drill is a double kettlebell deadlift drag. Normally we do this exercise with one heavy kettlebell. By using two medium to heavy kettlebells (heavy enough to complete the movement correctly with each arm), you open up the upper body kinetic chain. This will illuminate asymmetries from one side of the body to the other. It also allows you to strengthen the weaker side. Start with the same size kettlebell in each hand and then use a kettlebell one size larger on the weaker side.

For the purposes of this article and video, I will be using the same size kettlebell.

Get into the set up position. The kettlebells are approximately an arm’s length in front of you. Grab the kettlebells and pull yourself back toward your heels. You should feel as though you would fall back on your butt if you let go of the kettlebells. Lock your lats down into a packed position and maintain a long and neutral spine. SLOWLY drag the kettlebells back towards your heels with your elbows straight. Feel how the movement is initiated by the lats and the triceps. Do not let your hips drop below your knees, and do not let your spine flex at all!

The key is to not use any momentum. In fact, it is best if the floor you are using is sticky or rubber—the more resistance the floor offers the better.

If you feel most of the tension in the quads, then you are not getting your hips back far enough and are trying to hold your position with your quads instead of your glutes and hammies. The abs must be braced the entire time, and you should use a long firm exhale as you drag the kettlebells back. Release, step back, and re-set for the next rep.

I go the length of my gym, or at least 8-10 drags. Repeat for 1 or 2 more sets as desired. Remember, never let your back round into flexion at any time during this exercise!

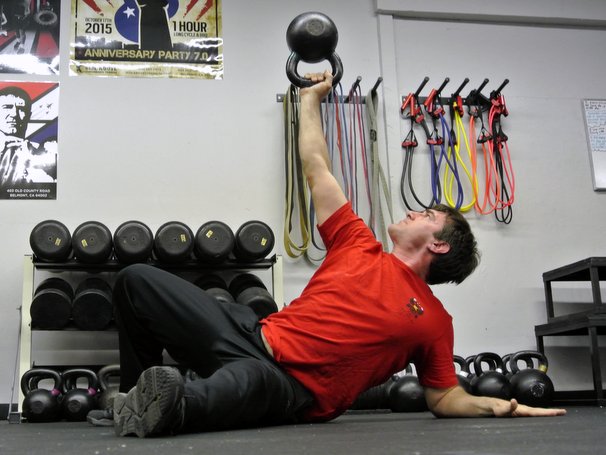
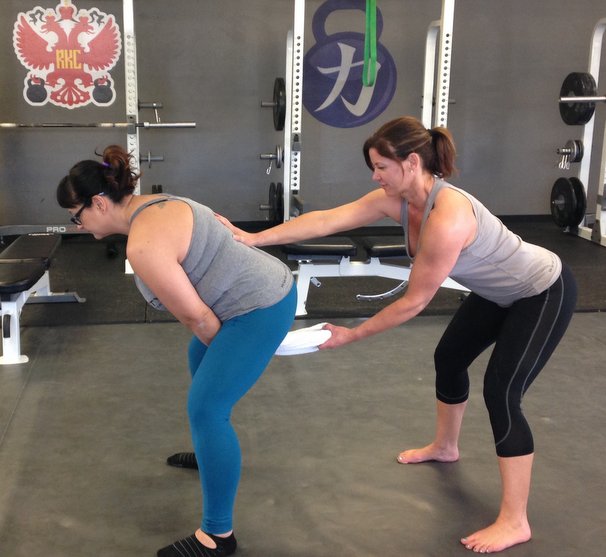
Double Kettlebell Straight-Leg Deadlift

The double kettlebell straight-leg deadlift, is another simple but effective exercise to challenge the posterior chain. It is an excellent exercise for the hamstrings and glutes. And as in the deadlift drag above, it utilizes the lats.

There is an interesting difference between these two exercises. The deadlift drag uses the lats to do the work by pulling the kettlebells back toward the heels, while the hips and legs maintain stable strength. With the straight-leg deadlift, the lats are held stable while the hips and hammies initiate the movement through hinging. In other words, the movements and stabilization are reversed, but both are working the same muscles. Pretty cool huh!

Here’s how to do the double kettlebell straight-leg deadlift:

Pick up two moderately heavy kettlebells using good deadlift technique. Stand with your feet between hip and shoulder width apart. Keep your elbows straight and locked, and your lats retracted and contracted. Begin to send your hips back into a hinge. Keep your knees as straight as you can manage while maintaining a neutral spine at all times.

The amount of knee flexion and the depth of your torso forward relate to your hamstring flexibility. The more flexible you are, the straighter you can keep your knees and the lower you can fold forward without any flexion in your spine.

Inhale into your belly as your chest comes forward. Pause briefly at the bottom, keeping the glutes and hamstrings contracted. Tighten a little more and then exhale as you come back up to the starting position.

You will feel a deep stretch/contraction from your glutes down through your hamstrings. This exercise can be considered a loaded stretch for the glutes and hamstrings. It is a very powerful hamstring developer.

As usual, there should be NO flexion in the spine. Start with a limited range of motion until you can use the full range of motion with a neutral spine. You can adjust the amount of knee flexion as well—just don’t allow yourself to turn it into a regular deadlift, you’ll be cheating yourself out of the main benefit of this exercise.

As I mentioned above, the lats, back and core are working very hard to stabilize during this exercise, so they are benefiting too!

Start with 3 sets of 8 moving slow and controlled.


****

Andrea Du Cane is a Master RKC Kettlebell Instructor, CK-FMS, CICS, and RIST, ZHealth certified, she has a BA in Psychology from the University of Minnesota and is also a Pilates instructor. She is the author of several books and dvds including The Ageless Body, The Kettlebell Boomer, and The Kettlebell Goddess Workout.  She has over twenty years of aerobics, weight training and fitness experience, with an additional background in… Read more here.

Filed Under: Kettlebell Training, Tutorial Tagged With: Andrea Du Cane, deadlift, deadlift drag, double kettlebell, kettlebell drills, kettlebells, master rkc, Master RKC Andrea Du Cane, straight leg deadlift, tutorial, video

How to Increase Your Grip Strength for Better Kettlebell Swings and Snatches

April 27, 2016 By Doug Fioranelli 4 Comments

Doug Fioranelli, RKC-II, Bottoms-Up Get-Up

Train Your Weakest Link…

If I had a quarter for every person I’ve trained who blurted out, “That wasn’t too hard, I could have done more but my grip was giving out,” after a difficult set, then I would have enough money to pack a pair of shorts, my 32kg kettlebell, and then swing my way through retirement on a sandy beach.

As the true professional I (mostly) am, I simply smile to give a false sense of empathy. But, grip strength is a foundational component of strength. It’s the balancing point which determines our success with many movements.

In the past—especially with assisted weight machines—grip strength was not required or emphasized, so many people forgot its importance. Grip strength is often the weakest link that determines if someone will have difficulty performing pull-ups, kettlebell swings—or even passing the legendary RKC Snatch Test.

If their grip wasn’t holding them back, most people are strong enough to pull themselves up over a bar repeatedly. Their legs and cardiovascular systems are also more than capable of performing hundreds of swings and snatches with a sub-maximal weight. Grip is the foundation for many upper body and repetitive dynamic exercises, and shouldn’t just be an afterthought.

Grip strength can be the limiting factor that rears its ugly head to compromise your technique and cut your sets short. Or it can be the bedrock of strength, something to train so that you are stronger, fitter, and more successful at the gym.

In this post, I will present some strategies for focusing on grip strength in your training so that you can do more kettlebell swings and snatches. I will explain two types of grip training: one focused on increasing strength and the other on endurance. Both types should be in your program to ensure success.

Use Your Grip

If you are a true practitioner of Dragon Door Hardstyle training, using your grip should be a common occurrence. Whether you are performing a kettlebell exercise or practicing traditional weight training, your grip should be engaged.

At the gym, it’s common to see people loosely holding their dumbbells when lunging, performing step ups, and even during rows! The idea is simple—when you are moving, grip the weight and engage as many muscles as possible. Not only is this safer because you body will be in a more stable position, it will make you stronger by activating more muscles to assist in every lift.

Adopt this training principle: anytime you grab a bar or weight, make sure your grip is prioritized and utilized throughout the movement.

Ditch the Two-Arm Swing

This might sound a bit blasphemous, but hear me out! Yes the two-arm kettlebell swing is an excellent movement for learning the proper hip hinging movement, and the safest way to dynamically move a relatively heavy weight. But it can sacrifice grip strength—if it’s the only swing we do.

When learning the two-arm kettlebell swing, the grip is involved. But as we become more proficient, grip strength becomes a secondary focus, and takes a back seat to the hip drive and timing of the movement. You might be surprised at your lack of grip strength development if you do too many two-arm swings instead of the one-arm variety.

Most of us have a finite amount of time to train. And since I am a “training simpleton” I want to get the most “bang-for-my-buck”. One-arm swings provide that for me. Whether you use one kettlebell at a time, or one in each hand, the one-arm swing is the foundation for many exercises since it can easily transition to the clean or snatch.

The one-arm swing also calls for more grip activation, since you are no longer relying on two arms. The one-arm kettlebell swing also allows the trainees to train each side individually. Similarly, you will do your leg strength a huge disservice by performing only squats and deadlifts without challenging your strength and stability with lunges and step ups. Training with only two-arm swings will not balance your grip strength in each hand.

If your time is tight and your goal is to perform more swings or to pass an endurance event like the RKC Snatch Test, it is in your best interest to focus more on the one-arm swing and its variants.

Doug Fioranelli, RKC-II, Bottoms-Up Press

Utilize the Magnificent Versatility of the Kettlebell

Even though it is fairly obvious that kettlebells are more versatile that dumbbells, how many of us actually take advantage of this fact? We all know that a kettlebell military press builds a strong shoulder joint and works the grip. Even though the weight is held in a slightly different way, the same effect is achieved by performing the movement with a dumbbell.

A kettlebell is very versatile, you can flip it upside down and perform bottoms-up presses, which are a whole new ball game. I have seen strong individuals easily press a 32kg kettlebell overhead—only to be completely unable to do a 16kg bottoms-up press. This usually happens because of a lack of grip strength. Someone may have the strength to press the kettlebell upward, but when their grips gives out, the kettlebell flops over like a deflated balloon.

Add bottoms-up presses to your routine to strengthen your grip. Instead of overdoing them, simply add in one set after your regular sets of presses as a finisher. If you’re a real glutton for punishment, try the bottoms-up variations of other classic kettlebell exercises like farmers walks, windmills and the get-up. Be careful and consider the risk-to-reward ratio—when grip strength fails, the kettlebells fall in a hurry. A good benchmark goal is to bottoms-up press a kettlebell that’s one half the weight of your standard military press weight.

Don’t Neglect Endurance

When I was training for a kettlebell sport competition last year, I signed up for a biathlon event—five minutes of double kettlebell jerks, then five minutes of snatches with a 24kg kettlebell. I am usually better at snatches than double jerks, but doing them after the jerks when I was tired presented a new problem. My grip was fatigued, and I could not do as many snatches as when I was fresh.

After one of my workouts, my coach, John Wild Buckley, said to do a six minute double kettlebell farmer’s walk with the competition weight. In my mind, I didn’t want to do it because it would be painful, but I knew that it was exactly what I needed to do.

Adding grip endurance sets are not technically difficult, and they substantially challenge and train the grip along with your mental fortitude. I added most of my endurance sets at the end of my workout or I did shorter endurance sets after a set of squats or deadlifts.

I found the farmer’s walks with the kettlebells to be a great grip strength builder along with bar hangs. I switched grips in both, sometimes using a bottoms-up kettlebell position for the farmer’s walk and alternating between an over and underhand grip for the bar hangs. If you can perform one-minute endurance sets with farmer’s walks or bar hangs, your grip endurance will significantly improve.

Now you have some ideas on how to increase your grip strength and turn a potentially weak link into an asset. For more information, check out the video below:

***

Doug Fioranelli, RKC II, PCC, holds a Master’s degree in Kinesiology and is the owner of Rise Above Performance Training™ in Belmont, CA. Check out his blog for more training articles and videos at DougFioranelli.com

Filed Under: Kettlebell Training, Tutorial Tagged With: advanced drills, Doug Fioranelli, grip strength, grip training, kettlebell grip training, kettlebell technique, Rise Above Performance Training

How to Dominate the RKC Snatch Test

April 20, 2016 By Frank Delventhal 7 Comments

Frank Delventhal Snatch Test

For many, the Snatch Test is a fearsome obstacle to RKC certification. But it does not have to be that way. When you start training frequently enough and have acquired good technique, you will be able to beat the challenge. It’s like learning vocabulary in school—you know what is expected of you, so it becomes more a question of diligence than talent.

What is the RKC Snatch Test?

You must snatch your kettlebell 100 times in 5 minutes. The weight of the kettlebell depends on your bodyweight, age and gender. The average gentleman will use a 24kg and the average lady usually uses a 16kg kettlebell (be sure to check the rules link below to find your exact weight class)

You are allowed to switch hands as often as you like, and can even (carefully) rest the kettlebell on the floor. Click here for the exact rules and kettlebell weight requirements.

What are the Prerequisites for the Snatch Test?

Before you attempt to snatch a kettlebell, you need a solid foundation in the two-hand Hardstyle swing, the one-arm swing, and the clean. These are the preliminary steps of the snatch. “OK” is not good enough—you must be good at these before you begin training for the Snatch Test.

As a general rule you should be able to do 100 one-arm swings within 5 minutes, with a kettlebell at or close to the weight of the kettlebell required for your test. For example, If you have to use a 24kg kettlebell for your test, you should be able to do 100 swings with a 20kg before you begin to specifically train for the snatch.

What Equipment Do I Need?

  • Assorted kettlebells ranging from very light up to your goal-sized kettlebell. (Hopefully your gym is well stocked and also has an RKC-Certified Instructor!)
  • Chalk
  • Optional hand protection: socks, tape, Dragon Skins™, minimalist gloves (cotton gardening gloves)
  • Optional sweat bands for the wrists
  • Your soundtrack
  • Hand care items for after training
  • You may not use belts, thick or padded-gloves, wrist wraps or any other equipment designed to support your body

Chalk

When doing 100 snatches, your hands will need to withstand a lot of friction. A little chalk can help, and will also dry your skin. If you have sweaty hands during the test, you can end up with “burger meat” for hands without chalk. But, too much chalk is also not good, so be sure to discover the right amount that just keeps your hands dry enough. I found that I do very well with just a couple of drops of liquid chalk or by rubbing a piece of chalk. Since chalk generally dries up your skin, it can cause excessive calluses—see the hand care section below.

Socks, Tape, Dragon Skins™, Minimalist Gloves

You are allowed to use sock strips, tape, DragonSkins™, or minimalist gloves (cotton gardening gloves) to protect your hands. If you really need them, that’s ok, but honestly I do better without them. I think you trade an important tactile connection for a little extra protection. But, I also have relatively tough hands that are conditioned to take a beating!

You may not even need these protective items if you train with the following method: begin with a very light weight and slowly progress to heavier weights (which also create more friction) so that your hands have plenty of time to adapt.

Thin Sweatbands or Long Sleeves

I sweat a lot during the test, so I need to wear sweatbands on my wrists—when I don’t have them sweat floods down my arms onto my hands, turning them to “burger meat” by the end of the test. Remember that wraps to protect or support the wrist are not allowed, so make sure that you only use thin sweatbands. Be sure to ask your instructor or judge at the RKC if your sweat bands are ok.

Alternately, you may want to wear a long sleeve compression shirt. The instructor must be able to see if your elbow is really locked out, so make sure that your compression shirt is extremely light and thin. It’s also common sense to use a dry shirt, not one already quenched in your own sweat!

Your Personal “Snatch Test Soundtrack”

The right music can give you extra power. My favorite track has plenty of power, but is not too fast. It’s 5:12 long, so I figured out exactly when to start during the song’s intro.

Listen to that song every time you practice the test. That has nothing to do with enjoying the music, it’s more about training your subconscious to feel the passing time. The song will also help you focus, giving you additional power. Each time you hear the song or imagine it in your head, you’ll KNOW that you will pass the snatch test. If you’re interested in learning more about the mental side of training, check out Logan Christopher’s Mental Muscle. Even though your snatch test at the RKC will be without music, all you need to do is hum the first notes of your song, and you are ready to rock and roll.

Hand Care After Training

The snatch test is also challenging for your hands. Be sure to start your training soon enough before the RKC workshop so that your hands have plenty of time to adapt.

After every workout, check to see if your calluses are hardening. These hardened areas must be removed carefully with a callus remover. Please make sure that you only remove the hard spots. The callus itself is important because it protects your hands from friction and pressure. If you used chalk (especially liquid chalk) you may also want to use a drop of lotion to soften up your hands.

Frank Delventhal Swings

Why should I train specifically for the Snatch Test? Isn’t it enough to prepare with plenty of swings?

This is a question of faith, and it is possible to gain enough power with swings to pass the test. In an objective comparison of the swing and snatch, you will discover that the swing is safer than the snatch. Using the swing to train is generally justified. Additionally, some argue that the Snatch Test is so strenuous that you should not do it very often. Under certain circumstances, I agree with that argument, especially when the student starts with his snatch size kettlebell and tries to work up to the volume of the test. But the title of this post is “How to DOMINATE the Snatch Test”! So, I have a “secret” training plan for you. 😉

Train Success

Start with a kettlebell that you can snatch 100 times in 5 minutes. It doesn’t matter if the kettlebell is very light—even as light as 6kg! The key is to practice the test two to three times a week after your normal workout, and you must succeed each and every time.

Before you do the 100 snatches, take 3 to 5 minutes to actively relax your muscles and visualize completing the test. The more detail you can imagine in your mind, the better. Mentally, you have already finished the test, before you even touch the kettlebell.

It is essential that you succeed each and every time! The goal is to become so accustomed to doing 100 snatches that it nearly becomes boring.

Frank Delventhal InstructingSnatch as precisely as Swiss Clockwork

Watch your form. Every “no count” is discouraging, and many candidates have lost their focus during the test because of it. Take care that you practice strict form. Take a mini break at the top lockout position, when the kettlebell is held over your head. You will have a small rest, and the instructor watching will absolutely know that you are in control of the movement. Your arm should point straight at the ceiling. Your wrist must be straight, and your legs have to be locked out as well. You will look like a “hardcore version of the Statue of Liberty” holding a kettlebell instead of a torch. 😉

Pull your shoulder down to stabilize it. Normally I do not like mirrors while training, but they can be useful for checking your lockout position.

A Tip For the Overhead Lockout Position

If it is difficult to hold the correct overhead arm position, try the “downward dog” yoga pose. Let the tips of your thumbs touch each other, this will increase your mobility—and the ability hold your arms straight overhead. While a yogi will straighten their legs in “downward dog”, that isn’t necessary for our purposes. We want a straight line from the wrists on the floor towards the hips. It takes some practice to achieve that position (at least for most males, the ladies are generally better at this). If you can maintain that straight line, push your shoulders to the floor and over time, increase your range of motion. Improvement may take five minutes to several months, depending on your general mobility.

Changing Hands

Changing hands uses up precious time. It is an advantage if you can use fewer changes—but that also requires more conditioning. Fortunately with kettlebells, you can train cardio and power at the same time! Work up to more reps before switching hands slowly over time. It doesn’t make sense to do more than 20 snatches with one arm before you switch, as that would be unnecessarily fatiguing.

During the live test, your instructor will count for you. While you train, you should have enough concentration to count for yourself. When in doubt, just do ten extra reps.

Rep Schemes

Use your strong hand last as a “secret weapon”. This will make the end of the test will be much easier for you. For example, I am right handed, so I start with my left hand and finish the test with my right hand.

Scheme A: 9 Hand Changes

Let’s start simply. Do 10 snatches, then change hands until you reach 100 reps. If you can complete this scheme in under 4:30, then try Scheme B.

  • 10/10 (10 left / 10 right)
  • 10/10
  • 10/10
  • 10/10
  • 10/10

Scheme B: 7 Hand Changes

This scheme is slightly more challenging, but if you have completed Scheme A with enough spare time, the extra challenge will only be marginal.

  • 15/15
  • 15/15
  • 10/10
  • 10/10

Scheme C: 7 Hand Changes

This scheme allows you to complete 20 snatches with one arm safely. It is possible that you do not need this scheme, and can jump directly to Scheme D, but try it out at least once. As it gets progressively easier, many people like it.

  • 20/20
  • 15/15
  • 10/10
  • 5/5

Scheme D: 5 Hand Changes

The “master level”

  • 20/20
  • 20/20
  • 10/10

When you can easily complete the test with this scheme, and your time is always somewhere between 4:00-4:30 minutes, then you can progress to the next heavier kettlebell. You will probably be faster just because you need fewer hand changes. With the heavier kettlebell, start with the 10 x 10 (Scheme A). It will be more difficult, but you can do it. Progress the same way until you reach your goal weight kettlebell. Do not rush, just use a weight that allows you to succeed every time and the Snatch Test will become easy for you!

Create a Cardio Surplus

Even with your snatch size kettlebell, you should be able to complete scheme D. With extra gas in your tank, you can do the snatch test any time. If you have a bad day (or a cold), just drop to an easier scheme (such as C).

Does it make sense to use a kettlebell heaver than required by the test? No, and I would advise against using a much heavier kettlebell. “Enough is enough!” (Thank you Dan John.)

The RKC certification requirements include more than just the Snatch Test, so use your energy wisely. After you can do scheme D, only train the test once a week or every two weeks to maintain your skill and conditioning.

After your RKC certification workshop, you can work up to more if you want. Now you know how!

Good Luck!

You will greatly benefit from preparing for the test, whether you want to pass it as a personal goal or for your certification. Now that you know how to tackle it, it isn’t a “boss battle”.

Understand that just watching a video about snatching on YouTube does not mean that you can do a snatch! Get an RKC instructor to teach you the right technique. This is safer and saves time. The snatch is the last exercise of the RKC Big Six (swing, get-up, clean, military press, squat, snatch) because the other five build the essential foundation. Enjoy your journey.

“First use your brain, then train!” 😉

Frank Delventhal, RKC-II

***

Frank Delventhal, RKC2, PCC, 1 Dan Aikido. Visit his website: https://hamburg-kettlebell-club.de/

Filed Under: Kettlebell Training, Tutorial Tagged With: Frank Delventhal, kettlbell snatch test, Kettlebell, passing the RKC, RKC snatch test, RKC workshop prep, Snatch Test

Dan John, Dr. Chris Holder and Chris White instruct at the San Jose RKC

April 15, 2016 By John Du Cane, CEO and founder, Dragon Door 5 Comments

SanJoseRKCGroup

I recently saw a terrific movie at one of our local Indie theaters, called Tangerine by Sean Baker (who has now become one of my favorite directors).

Tangerine is about transgender prostitutes in Los Angeles. Shot in a raw, neo-realistic, “street-doc” style, it’s funny, endearing, soulful, sad and enlightening. And beautifully shot. I loved it!

All very wonderful…but what has Tangerine got to do with kettlebells and the RKC?

Answer: it inspired me to start filming RKC and PCC events that I attended…

Why?

Because Tangerine was filmed entirely on an iPhone—and still looked fantastic on the big screen!

So I bought an iPhone 6 and shot with it at the recent San Jose RKC, taught by Dan John, Chris Holder and Chris White. I handed over all the footage to Adrienne Harvey and asked her to compose an initial short video—to give you a taste of the RKC culture in action.

Here it is:

You can see that Adrienne did a fantastic job editing from the mass of footage I dumped on her… 🙂

We hope to use more of the footage in future blogs and articles. But this is a start…

Filed Under: Kettlebell Training, Workshop Experiences Tagged With: Chris Holder, Chris White, Dan John, John Du Cane, RKC, RKC Workshop, Russian Kettlebell Certification, San Jose RKC, video, Video recap, workshop experience

The Standing Power Band Plank

April 13, 2016 By Robin Sinclear 2 Comments

Robin Sinclear Standing Band Plank

Solidifying the top and bottom positions of the kettlebell swing are key components to teaching someone to swing correctly. I have two go-to drills: one is part of the RKC manual and curriculum (the towel pull drill), and the other is something I had been using as a core activation drill. I found the standing power band plank had a lot of carryover for teaching the top position of the swing.

The Standing Power Band Plank:

With good cueing and proper positioning, this drill can teach rooting to the floor, solid core engagement, shoulder packing, and how to “breathe behind the shield”.

Here’s how to do it:

Loop a thick resistance band around a pull-up bar. Stand facing the resistance band with your feet hip distance apart. With your arms extended straight out in front, place your hands inside the band with your palms facing down—just like they are at the top of the swing. From this point, the cueing is nearly identical as for the Hardstyle plank.

  1. Your body should form a straight line from the top of your head down to your heels.
  2. Flatten your lower back. Imagine that you are bringing the tailbone and belly button together. Lift the pelvic floor.
  3. Squeeze your glutes tight.
  4. Pull up your kneecaps, and tighten your quads.
  5. Now, engage the lats and upper back by pressing down on the band, while packing and pressing the shoulders down and away from the ears.
  6. Breathe shallowly into a tight stomach.
  7. Hold this position for 10- 30 seconds.

Follow the standing power band plank with an isometric hold of the towel-pull drill from the RKC manual.

Quick review of the towel-pull drill:

Robin Sinclear Towel Pull Drill

Have the student hold each end of a towel and pass the center section of the towel between their legs, pretending they are on the backswing. The instructor grabs the center section of the towel. Using one hand to brace the student on the low back (so they don’t fall backward), the instructor pulls the towel until the student’s hips are fully loaded and most of their weight shifts toward their heels. Holding this isometric contraction for ten seconds or more can help the student feel where the bottom position of the swing should be. You would also choose the towel-pull drill as a corrective for someone who fails to load the hips and hamstrings.

Use the standing power band plank as a corrective drill for anyone who is…

  1. Not contracting their glutes maximally at the top of the swing
  2. Leaning back at the top of the swing
  3. Not packing the shoulders
  4. Using their arms to lift the kettlebell

After teaching the hip hinge and deadlift, performing a few isometric holds of these drills can help lock in the proper top and bottom positions of the kettlebell swing. Incorporate some one-arm isometric holds as well. Happy swinging!


***

Robin Sinclear, RKC-II, is the co-owner of Velocity Strength and Fitness in Chico, California. Her website is VelocityChico.com. She can be reached by email at velocitystrong@gmail.com or by phone at 530-520-2297. Follow Velocity Strength and Fitness on Facebook, Instagram, and Twitter.

Filed Under: Kettlebell Training, Tutorial Tagged With: core activation, corrective exercises, kettlebell cues, kettlebell technique, RKC technique, Robin Sinclear, standing plank, standing power band plank, teaching cues, towel-pull drill

HardStyle Breathing: On and Off

April 6, 2016 By Florian Kiendl 16 Comments

Florian Kiendl breathing

Breathing is an important key to performance. If you neglect it, you leave a big piece of the performance puzzle on the table.

If your mission (like mine) is to reach the apex of your physical potential—or get as close as possible—you should consciously use your breathing to reach your goals.

Why is breathing so important?

Our nervous system is divided in two parts: the autonomous nervous system and the cerebrospinal nervous system. These are complicated words for a fairly simple distinction. The autonomous nervous system (ANS) basically works on its own. Some of the tasks of the autonomous nervous system include your heartbeat, digestion, metabolism and the workings of your internal organs.

The other part of the nervous system, the cerebrospinal nervous system, is the part we are concerned with in our training. It enables us to consciously interact by:

  • Perceiving our surroundings with our senses
  • Reacting with the muscles in our bodies

If you ask a doctor, he probably will tell you that breathing is a function of autonomous nervous system that runs quite fine without conscious interaction on your part. While this is an objectively correct answer, it is not the whole picture. Unfortunately, many trainers leave it at this, and are ignoring the huge potential for performance enhancement.

The problem is, your autonomous nervous system does not know about your plans or your situation. The ANS reacts instinctively on perceived threats—if you encounter a dangerous situation, the ANS releases adrenaline to raise your heart rate, increase your breathing frequency, and to prime your muscles for the fight and flight response. This mechanism helped our ancestors survive to produce the next generation. However, the ANS reaction is not always the best option—especially not for athletic endeavors where energy management is often critical for success.

The RKC Snatch Test is one of those situations where breathing can easily fail you, if don’t take control. Anybody who has taken it knows that it is a staggering experience. Your energy consumption suddenly goes through the roof as a heavy iron kettlebell beats down on your body. If you are not accustomed to it, your nervous system will perceive the situation as an immediate threat, and trigger an adrenaline reaction. Initially, this will help you to use more of your strength. But if you do not take control, you will overexert yourself in the first three minutes, and probably fail in the end—or at least it will make it all much harder than necessary.

The benefits of taking control of your breathing:

  • It allows you to consciously manipulate certain functions of your autonomous nervous system (i.e. keep your heart rate down).
  • It ensures you do not prematurely overexert yourself.
  • It gives you extra power when you need it.
  • It helps you to relax.
  • It quickens your recovery.

How to do it correctly…

In the RKC, we have explicit instructions for breathing in each of our main exercises. The basic idea is to inhale during the negative phase of a movement, where the least power and stabilization is needed. The short and forceful exhalation should optimally be timed with the moment of highest demand in power and/or stability during the active phase. This principle creates a very distinct rhythm for each exercise. The two major categories to differentiate exercises are ballistics and grinds, but individual exercises also benefit if the breathing pattern matches the exact demands.

The Inhale:

There is a saying in the martial arts:
“When your opponent inhales through his mouth, victory is almost yours.”

I’ve made this observation in many sparring matches. Whenever I see my opponent’s mouth opening, I throw a few fast kicks and punches his way. Usually, the match will be over in seconds. My Taekwondo grandmaster, Son Jong Ho, even stated only the first and last breath should be through the mouth.

Practice nose breathing deeply into the abdomen to create pressure below your navel. When you use this technique in a kettlebell session, you will be able to keep your heart rate much lower, which will give you more endurance and power. When you begin to practice nose breathing, you will soon feel the urge to open your mouth, but try to resist it! The longer you practice, the better it will feel.

A little experiment: Lie on your stomach with your forehead resting on your hands. Inhale deeply through your mouth. You will feel your chest expanding during each breath. Now switch to breathing through the nose. You will immediately feel your belly pressing into the floor and your chest will stop heaving. The difference is that while breathing through the nose, your diaphragm will pull your lungs down into your abdomen, increasing the pressure in your lower abdomen. If your core muscles are engaged—as they should be whenever you touch a kettlebell, this will lead to much more core stability and therefore safety. On the other hand, an inhalation through the mouth mainly engages the chest and shoulders. If those muscles are tensed during a kettlebell swing, your breathing will be severely constricted. If you need more oxygen while breathing through the mouth, you will need to inhale more often, reducing the time oxygen will be processed in your lungs. Eventually, this will lead to hyperventilation and a breakdown of your performance.

Pressurized Exhalations

Breathing is a very versatile tool. When used correctly, it can benefit you in many different situations. For our purposes, we need it to enhance stability and power during our kettlebell workouts.

We use short, pressurized exhales like hisses or shouts to increase tension and avoid losing too much air. If you fully exhale, your abdomen is completely emptied and your core muscles have nothing to hold against. Imagine a car tire. When it is filled with the correct pressure, it is hard and sturdy, but the stability goes away when it starts losing air. Stability is completely lost when it is empty.

When exhaling during kettlebell drills, do it with your lips almost closed and the tongue pressed against the roof of your mouth behind your teeth. If this makes a hissing sound, you are doing it right.

Breathing Patterns for the RKC Kettlebell Exercises

As each exercise demands a different pattern of stability and power, the optimal breathing pattern for each exercise will also be different.

Breathing for Swings

The most basic ballistic kettlebell exercise is obviously the swing. This exercise gives the kettlebell its unmatched effectiveness and safety.

The passive phase of the swing, when the kettlebell drops freely from the apex of the swing, requires almost no effort until it is caught in a deep hip hinge. Therefore, this is the time for a deep inhale to the lower abdomen, the area where we need the most internal pressure. This also provides the necessary stability during the catch. For the optimal intra-abdominal pressure, you will need to inhale through the nose. When you start practicing this, you might get the impression that you are not getting enough oxygen, so take your time and adjust the intensity of your training. With practice, you will find that you can inhale much more deeply and get much more oxygen.

When catching the kettlebell from the drop, hold your breath for maximum intra-abdominal pressure. The exhalation should be as short and forceful as you can make it and timed exactly for the moment when your hips lock out at the top of the swing. In the kettlebell swing, the time between the hip snap and the moment when the kettlebell reaches its apex is almost identical. It will be more explosive if you focus on synchronizing the exhale with your hip snap.

Breathing for Cleans and Snatches

The basic movement pattern of the clean and snatch should be identical to the swing. The inhalation and exhalation also follows the exact same principle. Be aware that with the snatch (especially) there is significant time between the hip snap and the arrival of the kettlebell in the overhead lock out. The right timing will make an even bigger difference than in the swing.

But, there is also another difference between the swing, and the clean and snatch that we need to consider for the optimal breathing pattern. This difference is the built-in pause at the top position of both exercises. While the swing is a closed-chain exercise (meaning that every rep is immediately followed by the next without a discernible pause), the clean and snatch are not. After the initial rep, which starts on the floor, each clean or snatch starts and ends at the top. How you handle breathing with this pause will depend on the context of your workout and the exercise.

If you do short sets of snatches for instance, you can simply hold the air and wait for the drop. In a situation where you are doing many snatches in a short time (i.e. Snatch Test) you might need to use this pause to exhale more, thus enabling you to refill with more fresh oxygen. You could even decide to prolong the pause for additional breathing cycles to combat oxygen debt.

If you clean for reps, then you can use the same strategies as in the snatch. If you clean for squats or presses, you should hold your breath in the top position to conserve the tension from the clean.

Breathing for the Get-Up

The get-up is an exercise category in itself, and it needs it very own strategy for breathing. The first challenge is that the get-up (including get down) takes at least 30 seconds (though 60 seconds is recommended). Either way, you will obviously need to breathe several times during one single rep. The second challenge is not to lose tension within the entire rep. To accommodate both demands, you need to shallow breathe while keeping your abs tight at all times (breathing behind the shield). The hardest parts of the get-up are the transitions from one position to the next. To give you the necessary strength, time small but pressurized exhalations with each transition. Refill (inhale) through the nose when you are in a static holding position.

Florian Kiendl split press

Breathing for Presses

Military presses are high tension drills. The more tension you generate, the stronger your press. As already mentioned in the section on the clean, it is essential to conserve the tension generated from a good clean for your press. Make sure not to exhale while you catch the kettlebell in the rack position. Depending on the cardiovascular effort, you may wish to refill your lungs by inhaling again before you actually start the press.

For the press itself, the breathing pattern will depends on your objective:

  • If you press a light to medium kettlebell for high reps, exhale on the way up, and inhale on the way down.
  • If you are working with a heavy weight, exhale on the way up, inhale while the bell rests in the lock out, then exhale again while you are actively pulling the kettlebell down. Obviously, you will need to inhale again before you start the next rep.

The inhalation for the press should be through the nose to the lower abdomen as already explained for the other exercises.

The exhalation will last longer than in the ballistic exercises, but will require even more pressure. Make sure not to lose too much pressure!

Breathing for Squats

For a fairly simple exercise like the squat, it is funny that the breathing pattern is (in my opinion) the most complicated for all RKC drills!

First, let’s analyze the squat:

  • Usually you start with a clean. Do not lose air while catching the kettlebell.
  • Lower yourself into the squat.
  • Hold the lowest position until the downward momentum dissipates.
  • Press yourself back up to the standing position.

The moment you start to rise from the deep squat position (like in the deadlift) is when you need to get the dead weight moving again. It is also when you need to be strongest. To give you some extra tension, initiate the ascent with a forceful grunt followed by a short pressured exhale on the way up.

The purpose of the grunt becomes obvious when you squat heavy, but practice it even with light weights, so you build a habit for when it counts.

During the descent, you will need the least strength. But to best prepare yourself for the ascent, your abdomen should already be pressurized, and you need to get as tight possible. It is easier to fill your abdomen while it is not under strain, so inhale deeply while still standing then hold your breath during the descent.

Breathing During Rests

In the last section, I wrote about breathing while performing kettlebell exercises. If you did not control your breathing during your kettlebell work until now, using the above information will improve your performance considerably. However, there may still be a missing link to your overall performance: breathing patterns for rest periods or in between sets.

The better your breathing pattern fits the demands of your chosen exercise, the more power you can produce and the more continuous reps can you do.

When you set the kettlebell down and release the tension, your body will immediately try to reduce the oxygen debt. For reasons unknown to me, the preferred method to increase the oxygen intake is to suck in air through the mouth. The higher your oxygen debt is, the faster your breath will come. The problem with this method is that it leaves you winded until your oxygen has leveled out. For a martial artist, this would be a good way to lose an encounter. In kettlebell training, it leads to longer recovery periods and a reduced overall work capacity.

Whenever a candidate decides to set the kettlebell down during the RKC Snatch Test, breath control is the crucial factor for the outcome of the test. Almost all candidates who give in to the reflex of sucking air in through the mouth will fail their test because it will take them longer to start snatching again.

Between Sets

Immediately after you set the kettlebell down, the need to suck in air is the strongest. You may even have a sensation of choking! If you open your mouth and start sucking in air, the feeling subsides almost immediately, but it becomes very difficult to return to controlled breathing once you let that happen.

My suggestion is to leave your mouth shut and inhale deeply from the nose down into your groin. If you can stand it, also exhale through the nose. If not, let the air out from your mouth, but close it again before the next inhalation.

With this strategy you can start your next set much faster and keep your heart rate considerably lower.

After Your Training Session or Long Rest

If you opt for longer rest times or have finished today’s workout, the goal is not to start your next set sooner, but to get the most out of your recovery time and release the tension you accumulated. When your oxygen level is back to normal, keep breathing deeply, inhale into the groin and try to exhale slowly while letting loose all tension. You can even close your eyes and focus completely on the airflow through your nose. This will speed up your recovery.

HardStyle Breathing

The techniques I described in this article are by no means the ultimate solution or the only right way to breathe. As mentioned above, breathing is an incredibly versatile tool. There are many breathing techniques out there that do wonders if executed properly for the right purpose. The techniques I’ve described are explicitly aimed to make your kettlebell training safer and more effective.

Please share your experiences down in the comment section below.

Train safe, stay healthy – Florian.

***

RKC Team Leader Florian Kiendl is a second degree black belt in Tae Kwon Do and runs a Martial Arts Gym in a small town close to Munich (Germany). He made it his mission to help his students to improve their movement and overall health. In his search for ways to overcome the movement restrictions of his students (and his own) he found the RKC and now works together with Master RKC Robert Rimoczi and others to help as many people as possible to gain back their Strength and Agility. He writes a regular Blog at blog.kettlebellgermany.de and offers workshops all over Germany teaching the RKC kettlebell exercises: KettlebellGermany.de. If you have questions or comments on the article feel free to email him at florian@kettlebellgermany.de. 

Filed Under: Kettlebell Training Tagged With: breathing, Florian Kiendl, HardStyle Breathing, kettlebell breathing, kettlebell technique, kettlebells, RKC HardStyle

The Journey Doesn’t End with the Title

March 30, 2016 By Shari Wagner 11 Comments

Shari Wagner RKC Team Leader
My RKC workshop was in April 2009, and I didn’t pass at the workshop due to a failed snatch test. I submitted a video one week later to earn my RKC title. I recently stumbled across that fateful video and of course, I watched it.

I watched it with a little bit of shock and awe at the poor technique I displayed. I also watched it with a lot of pride. Pride for the hard work I have put in to improve my technique since then and pride for all I have accomplished over the years.

When I first learned the snatch, it was in the days of first learning the high pull. This caused me to have a very significant corkscrew. I worked and worked at fixing this corkscrew before attending the RKC to no avail, and it was one of the biggest worries I had going in to the workshop. It wasn’t the typical worry of not completing the reps, my worry was all about the technique.

I did improve my technique at my RKC workshop, but I still had some of that darn corkscrew. At the time, while not ideal, it was still considered passable technique. I kept plugging away at the technique, but that corkscrew still remained.

I eventually sought out some additional instruction, which helped quite a bit. I also started watching videos of other instructors doing the snatch. I watched the timing very intently, along with the arm position and the path the kettlebell took. I noticed that when they snatched, you could see the bottom of the kettlebell as it flipped over and it looked so smooth and effortless. When I snatched with the corkscrew, my arm was turning out the side, therefore the bottom of the kettlebell was turning out to the side. It also looked anything but smooth and effortless. It certainly felt like a lot more effort too.

I took all of these visual and verbal cues and turned them inward, so I could feel it and visualize what it should look like. I snatched in front of the mirror because at the time I didn’t have a way to video myself. The short story is that it worked! I was finally able to snatch without a corkscrew. However…

I still had work to do to improve my technique. I was now keeping my arm a bit too straight and casting the kettlebell out a bit too much. More training and more work ahead, but I took it all in and worked hard because I was determined to get better. Being a type-A perfectionist and a Capricorn served me well in this case. Not only would this extra work help me get better, but it would help me help my students.

I later assisted at an RKC for the first time and it was the first time with the new RKC. When I tested my requirements for Keira Newton, she gave me a few additional tips that added to the improvements I had already made.

Then I witnessed how we now teach the snatch from the top down. I was amazed at its simplicity, yet it was extremely effective. It seemed so much easier to learn and to teach others this way. I even told the participants how lucky I thought they were to now be taught this way.

Each of these improvements I learned and made over the years has helped make the snatch feel more fluid yet more powerful. My big a-ha with the cumulative effects of each of these improvements is in how much it has helped the efficiency in my movements. I was expending so much additional energy in the way I was snatching before. Watching that video from 2009 now, I can see that so clearly. It honestly looks painful to me.

My moral of this story is that our journey of learning and improving doesn’t stop once we earn our RKC. The RKC helps give us our foundation and our starting point for teaching. But there is so much more to learn and so much more to do after we become an RKC. What makes us really good instructors is our quest to always do more, always be better and always serve our students.

Keeping our certification current is not about paying money to re-certify and keep the letters behind our name. We must improve our own skills, which in turn helps make us better instructors. We can only help our students improve when we help ourselves improve. We can also better help our students when we have access to the most current teaching standards, combined with all the tools we learned before.

If I had never learned the current way of teaching the snatch and if I had never corrected my own technique, I certainly could have still taught people. But I believe that I wouldn’t be serving my students to the best of my ability. That is, after all, the reason why we seek out those 3 letters in the first place, right? Never give up, never stop trying to improve and don’t let the journey end with the letters.

****

Shari Wagner, RKC-II, CK-FMS owns Iron Clad Fitness in Denver, Colorado. She can be contacted through her website at IronCladFit.com, email: info@ironcladfit.com or by phone 720-900-4766. Follow her on Facebook: facebook.com/IronCladFitness and Twitter: twitter.com/IronCladFitness.

Filed Under: Kettlebell Training, Motivation Tagged With: Kettlebell, kettlebell certification, kettlebells, RKC, RKC Workshop, Shari Wagner, Snatch Test, workshop experience

How Are Your Ankles?

March 23, 2016 By Paul Britt, DC 16 Comments

Paul Britt Ankle Mobility

Have you played a lot of sports?

Do you wear high heels?

If so, how do you think your ankles are doing?

I have found that most of the people who I train tend to lack ankle mobility. This can be the first kink in the movement chain, and lead to further issues within the whole body. Ankle mobility issues can lead to knee, hip, and even shoulder mobility issues. These issues can also travel down that same path from shoulder to ankle. To find out what is ultimately causing the use, see your doctor and/or be screened by someone who is FMS certified. If you have pain, see your doctor first to be cleared.

The following is a quick ankle mobility series that we use in our gym. Everyone who trains with me has been screened with the FMS/SFMA and if they have pain have been evaluated by their doctor.

I don’t show it in the video below, but everything starts with diaphragmatic breathing. We will typically breathe for a couple minutes to transition from work/life stress so we can train mindfully.

We start out by foam rolling the shin area. We work the anterior tibialis, the band of muscle on the outside of the shin. We are using small strokes to locate areas that are tender or tight. We then will make several passes over that area.

Next, we roll out our calves. While it is possible to do that with the foam roller, I like The Stick for this. It allows for adjustable tension on the calf, and requires less force to work on any trigger points/tender areas. I tell my students to only use about 7-10lb of force while rolling. If The Stick looks like a horseshoe, you are using too much force.

Then, we move onto direct ankle work. There are two different versions on the video. The first version—the field expedient manner—requires no equipment. It is performed in a half-kneeling stance. If the right knee is up, take your right hand and cup the right heel. The left hand will cover the toes. The goal is to keep your heel planted as you progress through the motion. Utilizing diaphragmatic breathing, apply some pressure on your right knee with the right elbow as you move back and forth through the movement. I find the normal rep range for the best results is about 10 reps per side. Perform this on both sides.

The second version is very similar except that you are using a stick and moving the knee to the outside of it. You only go as far as you can while still keeping your heel flat on the ground.

The last movement is the heel sit. Sit back on your heels with a little bit of a backwards lean. Tighten your thighs and think about driving your shins into the ground, then relax. You should feel your feet flatten out as you perform 3-5 reps of this sequence.

This quick and easy series is beneficial for restoring mobility to your ankles and improving your kettlebell training.

***
Senior RKC Paul Britt has been an RKC kettlebell instructor since 2006. He trains clients at Britt’s Training Systems, his award-winning Hardstyle Kettlebell Training Facility in Rockwall, Texas. Paul has served as an assistant instructor at many RKC and HKC Courses, is a Certified Kettlebell Functional Movement Specialist (CK-FMS) and works with some of the top Chiroprators in North Texas. Please visit his website brittstrainingsystems.com for more information.

Filed Under: Mobility and Flexibility, Tutorial Tagged With: ankle mobility, mobility sequence, mobility training, mobility video, Paul Britt

The Clean Viking Salute, a New Spin on a Kettlebell Classic

March 16, 2016 By Ryan Jankowitz 5 Comments

Ryan Jankowitz Kettlebell Clean Viking Salute

As a kettlebell instructor, I love performing kettlebell complexes and chains. I also enjoy putting my clients through complexes and chains—though they may not love them as much as I do.

Complexes and chains allow you to string several movements together without putting the kettlebell down. Complexes and chains create a very time efficient, heart-pumping workout that hits many different movement patterns. Not only do we train several different movement patterns, but we are also able to explore the “time under tension” concept. The more time we spend holding tension, the stronger we become.

With that being said, I want to share one of my favorite chains. Gus Petersen’s “Viking Salute Workouts”, from the RKC Book of Strength and Conditioning, inspired this chain.

Gus Petersen’s Viking Salute Chain:

  • Snatch x 1
  • Overhead Lunge x 1
  • ½ Kneeling Press x 1
  • Overhead Lunge back to standing x 1
  • Repeat

If you have not read the RKC Book of Strength and Conditioning, I highly recommend you pick it up. It contains some really great programs and workouts that will spice up your training.

Gus Petersen’s “Viking Salute Workout” is great for intermediate to advanced kettlebell practitioners, but what about beginners?

My variation may work very well for those new to kettlebells, or instructors working with beginner clients. Instead of performing a snatch to start the chain, we begin with a clean.

Here’s the Clean Viking Salute chain:

  • Clean x 1
  • Rack Lunge x 1
  • ½ Kneeling Press x 1
  • Rack Lunge back to standing x 1
  • Repeat

I have used this chain successfully with individual clients and classes alike. With this chain, we explore a pull, hinge, lunge and vertical push all within one workout. I usually have my clients perform 5 reps on each side and anywhere from 3-5 sets in a training session.

Feel free to get creative with this chain and turn it into a complex or even add some rack carries. Give this workout a whirl and let me know what you think.

Stay Strong.

****

Ryan Jankowitz, RKC-II Instructor, CK-FMS, is a life-long athlete who can’t imagine sitting behind a desk. He enjoys sharing his passion for fitness and spreading the RKC knowledge. Ryan operates a remote fitness coaching service and is available for private kettlebell workshops as well. You can reach him at ryan@rjkettlebell.com or through his website rjkettlebell.com. He also works with clients and teaches kettlebell classes at Fitness on the Run in Alexandria, Virginia. If you’re in the area, visit fitnessontherun.net and come swing some bells with Ryan.

Filed Under: Kettlebell Training, Workout of the Week Tagged With: Gus Petersen, kettlebell chain, kettlebell complex, kettlebell video, kettlebell workout, kettlebell workout video, kettlebells, RKC, Ryan Jankowitz, video, viking salute

It Isn’t Sitting, It’s the Chair

March 9, 2016 By Jay Armstrong 10 Comments

Jay Armstrong Sitting Stretching

We have all heard about the bad things that happen to our bodies as a result of sitting in a chair—slumped shoulders, collapsed ribcages, tight hip flexors, weak abs, etc. Yet, if you want to improve your flexibility, I recommend you sit down. However, instead of sitting on your soft, comfy couch with a tv remote in one hand, your assignment is to sit on the floor.

The typical armchair encourages you to pour yourself into the seat, completely disengaging your glutes and abs. Then, a pair of armrests beg you to round your shoulders forward and flare your elbows outward—all while collapsing your ribcage. With your ribcage collapsed, your breathing will be compromised. In this position, your head will jut in front of your shoulders, and stress will begin to creep into your neck.

Nothing about the “armchair seated position” resembles quality postural alignment.

Prior to the invention of these cushy posture-destroying chairs, human beings were forced to sit differently. If, after miles of walking, you decided to rest on the side of the trail, you probably would have looked to rest your buns on a rock. In this position, you still need to maintain control to keep from falling off the rock. You’ll probably need to sit with a relatively erect posture, while keeping your head over your shoulders. After all, you are simply resting your legs and not your entire body. The only time you are supposed to be completely relaxed is while lying down.

Sitting Cross-Legged
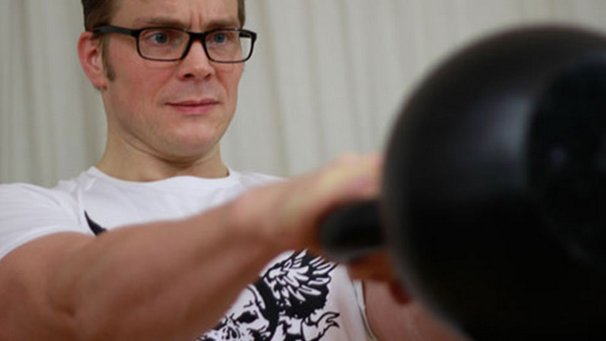
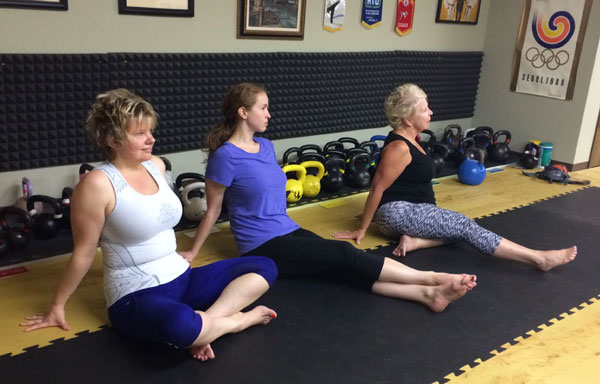
In our convenient Western lifestyle, we tend to stay further and further away from the ground. We don’t lie down or sit on the ground. However, sitting on the ground will potentially improve your flexibility for many other movements. I’ve outlined several ways to sit which can help improve posture, flexibility, and overall fitness.

Sitting Cross-Legged

When we sit in the cross-legged position, the femurs of upper legs are moved into external rotation. Sitting this way may also automatically encourage you to open your chest and properly align your spine.

Sitting On Heels
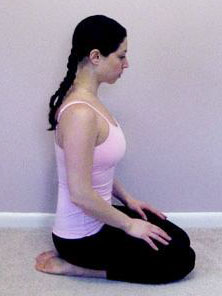
Sitting on Your Heels

When we sit on our heels, we’re obviously putting our knees into maximum flexion. Simultaneously, our feet will usually move into complete plantar flexion. Once again this position automatically encourages us to sit with an erect posture, activating the muscles which stabilize the spine.

Sitting with Internal Leg Rotation

Most people have a tough time moving their upper legs into significant internal rotation. However, if you can flex your knees, move your knees apart and sit between them, you will greatly improve your ability to internally rotate your hip joints. The little guy in the picture has a rather extreme range of motion and may actually prefer to sit in this position.

Sitting With Internal Rotation

Sitting with Your Arms Behind You

The soft, cushy armchair combined with computer work constantly places our shoulders in front of our chest or sternum—encouraging internal rotation of the shoulder joint. When we sit on the floor and place one or both arms behind us, we externally rotate the upper arm and open the chest. This is an excellent corrective position.

Sitting With Arms Behind

Sitting with One or Both Legs Straight

If you want to improve your hamstring flexibility, or desire to do the splits, sitting with one or both legs straight is the ticket. Any method of sitting with one or both legs straight (see photo at the beginning of this post) will provide at least a little stretching of the straight leg. So, “stretching” doesn’t need to be just an activity within your kettlebell workout. You can just sit on the floor while working or watching television. More time spent in these positions will make them feel more natural. If you watch television—and I encourage you to find something else to do with your valuable time—start by sitting on the floor from one commercial break to the next. While you’re seated on the floor, increase your awareness of the position of your ribcage, head, and spine. You may be surprised by the intensity of the stretching sensations you feel from just spending time close to the earth.

***

Jay Armstrong is a Senior RKC, 6 Degree Black Belt TKD, and Master Z-Health Trainer.  The past 30 years have been dedicated to helping others develop confidence through increased strength and pain-free, exceptional mobility.  His quest for knowledge continues.  He runs The Kettlebell Club in Houston, Texas.

Filed Under: Mobility and Flexibility, Tutorial Tagged With: flexibility, Jay Armstrong, lower body, mobility, sitting

  • « Go to Previous Page
  • Page 1
  • Interim pages omitted …
  • Page 10
  • Page 11
  • Page 12
  • Page 13
  • Page 14
  • Interim pages omitted …
  • Page 30
  • Go to Next Page »

Primary Sidebar

Featured Products

previous arrow
BOOK-RKCBookofSnC
HardStyleKettlebellChallegeDanJohn700
BookCoverMasterTheKettlebell1
RKCiconKettlebell512
KettlebellGoddessdv040
next arrow

Recent Posts

  • RKC Big Six Workout
  • The Kettlebell Swing & Low Back Pain
  • Key Kettlebell Exercises To Help You Create Better Balance
  • How to Most Effectively Use Kettlebells to Meet Your New Year Goals
  • 1 Exercise That Checks All The Boxes
FOLLOW US ON TWITTER!

Archives

Copyright © 2025

Dragon Door Publications / The author(s) and publisher of this material are not responsible in any manner whatsoever for any injury that may occur through following the instructions or opinions contained in this material. The activities, physical and otherwise, described herein for informational purposes only, may be too strenuous or dangerous for some people, and the reader(s) should consult a physician before engaging in them.