• Skip to main content
  • Skip to primary sidebar
  • Home
  • Contributors
    • Matt Beecroft, Master RKC
    • Martijn Bos, Master RKC
    • Andrea Du Cane, Master RKC
    • Angelo Gala, Master RKC
    • Chris Holder, Master RKC
    • Steve Holiner, Master RKC
    • Dan John, Master RKC
    • Mike Krivka, Master RKC
    • Thomas Phillips, Master RKC
    • Robert Rimoczi, Master RKC
    • Phil Ross, Master RKC
    • Max Shank, Master RKC
  • Workshops
    • HKC Workshops
    • RKC Workshops
    • RKC-II Workshops
  • Find an RKC Instructor
  • Resources
    • Articles
    • Forums
    • Kettlebells
    • Products
  • Blogs
    • PCC Blog
    • Strong Medicine Blog
  • Archives

RKC School of Strength

Official blog of the RKC

Tutorial

Deadlift Variations with One Kettlebell

November 18, 2020 By Ryan Jankowitz Leave a Comment

Ryan Jankowitz Single Leg Deadlift

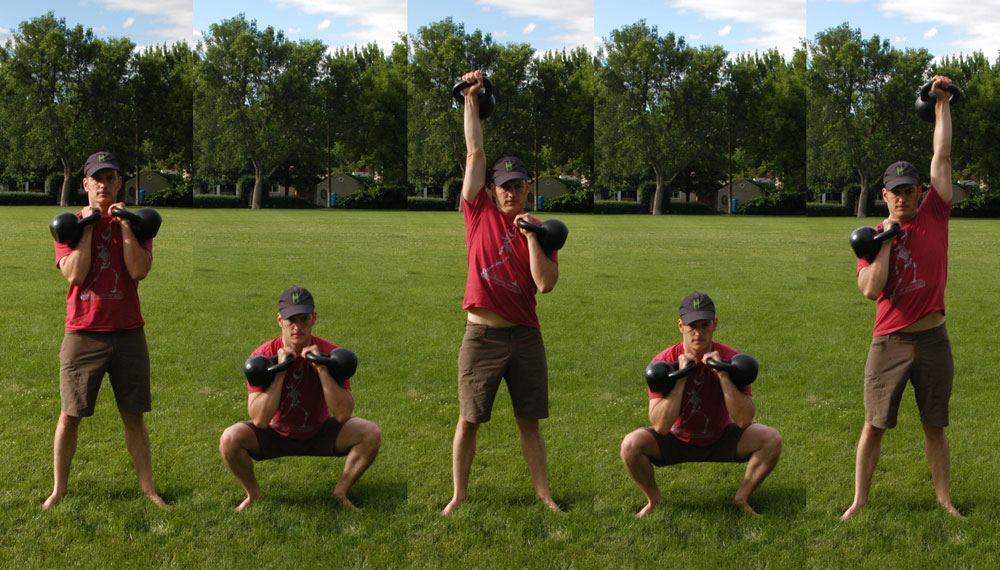
Even though I’m writing this blog post during a global pandemic, I’m not trying to scare you into working out with kettlebells. However, kettlebell training will make you stronger and more resilient. My goal with this post is to give you a few new ideas for your kettlebell workouts because kettlebells and other fitness equipment have been hard to find recently. You may have just one kettlebell or several kettlebells and no matching pairs—but you can still do kettlebell deadlifts.
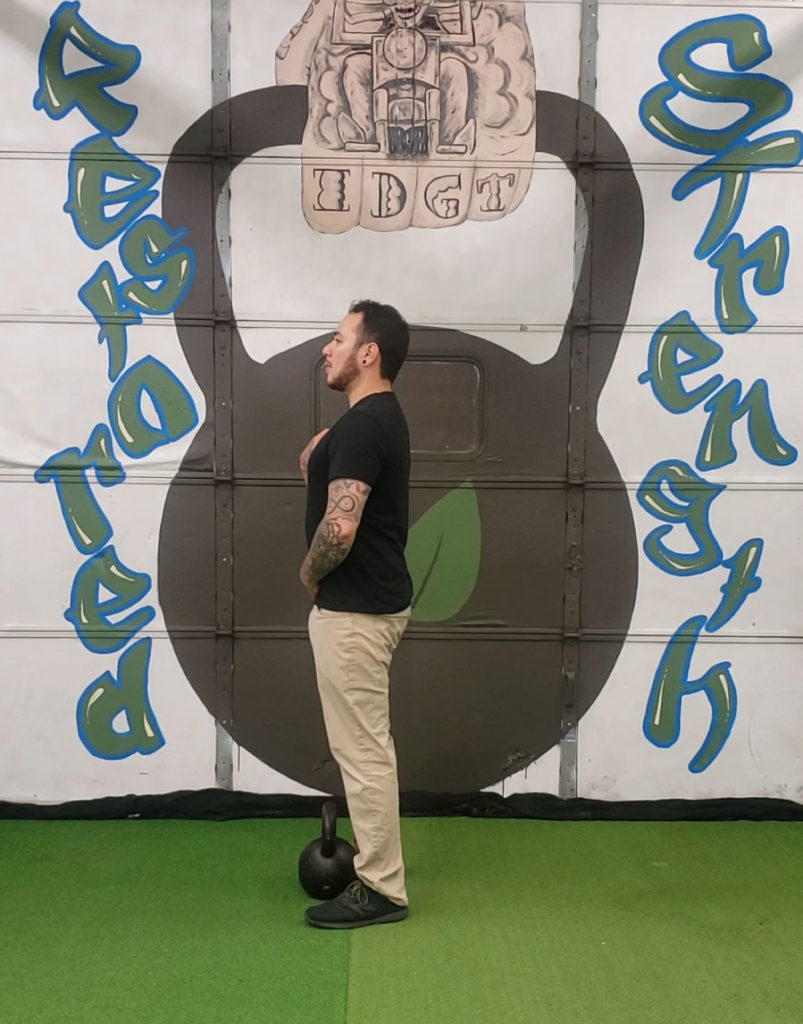
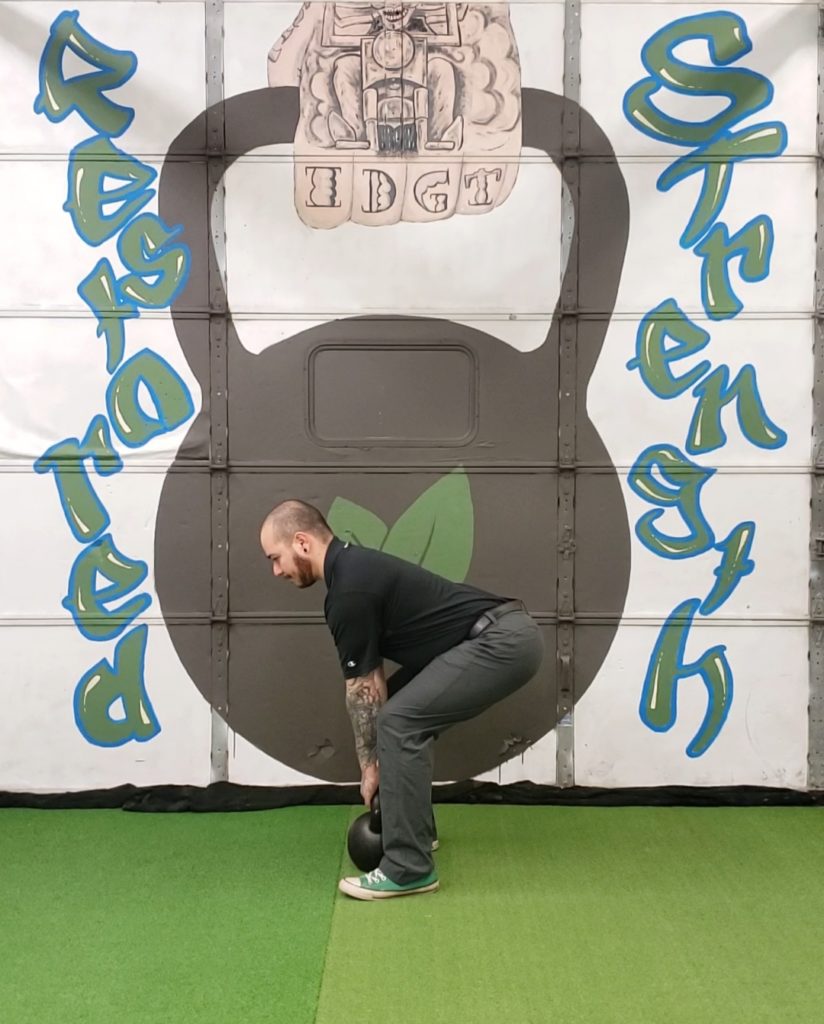
TRyan Jankowitz Kettlebell Deadlift
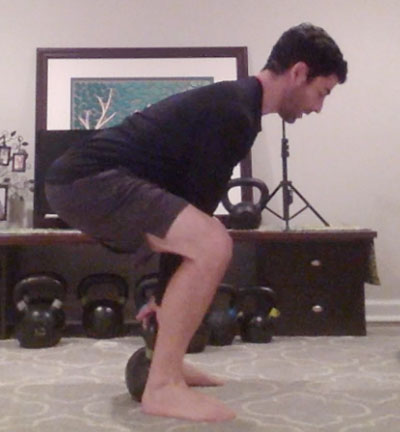
he deadlift is arguably the king of strength building exercises. Not only is it great for getting stronger, but it can improve your posture and strengthen your hips. When performed correctly, the deadlift can alleviate back pain.

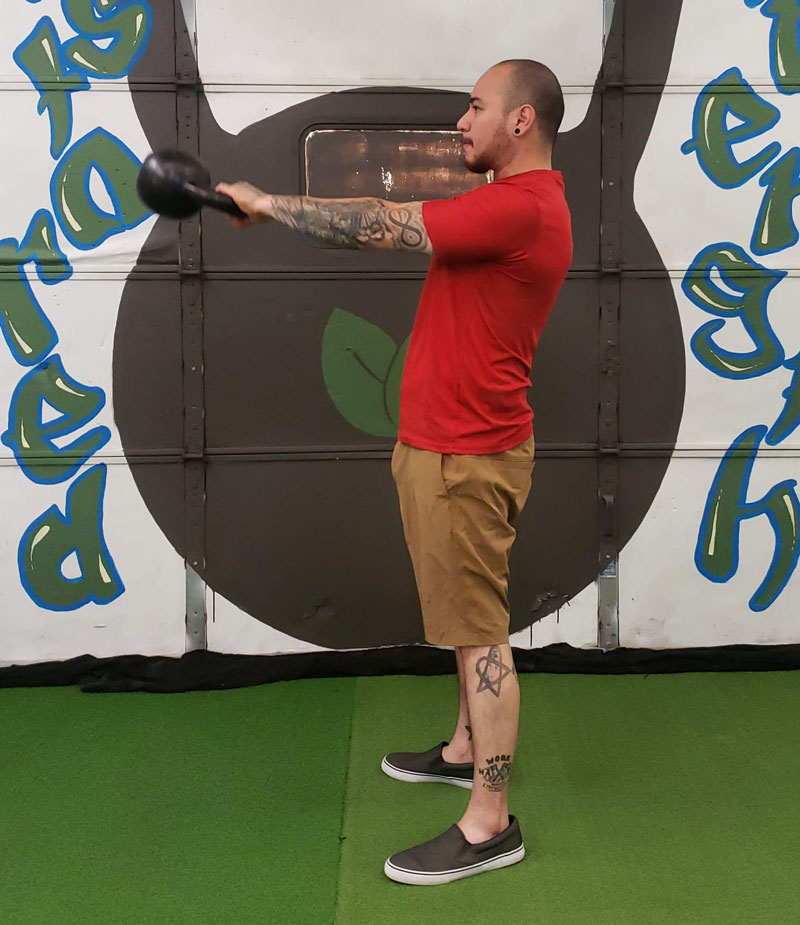
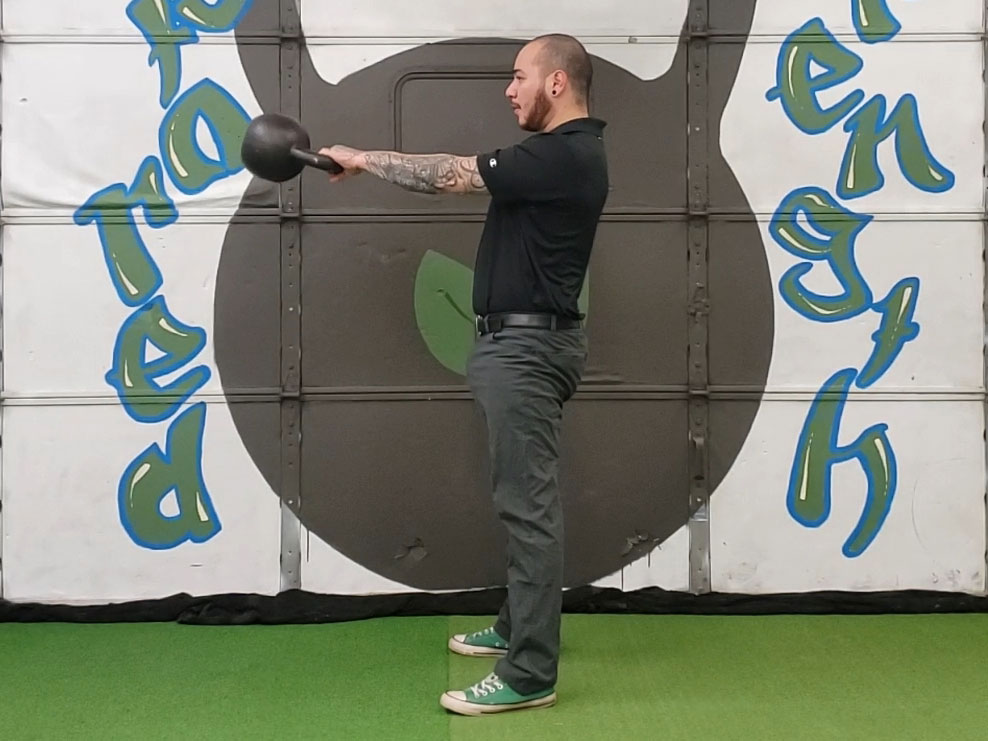
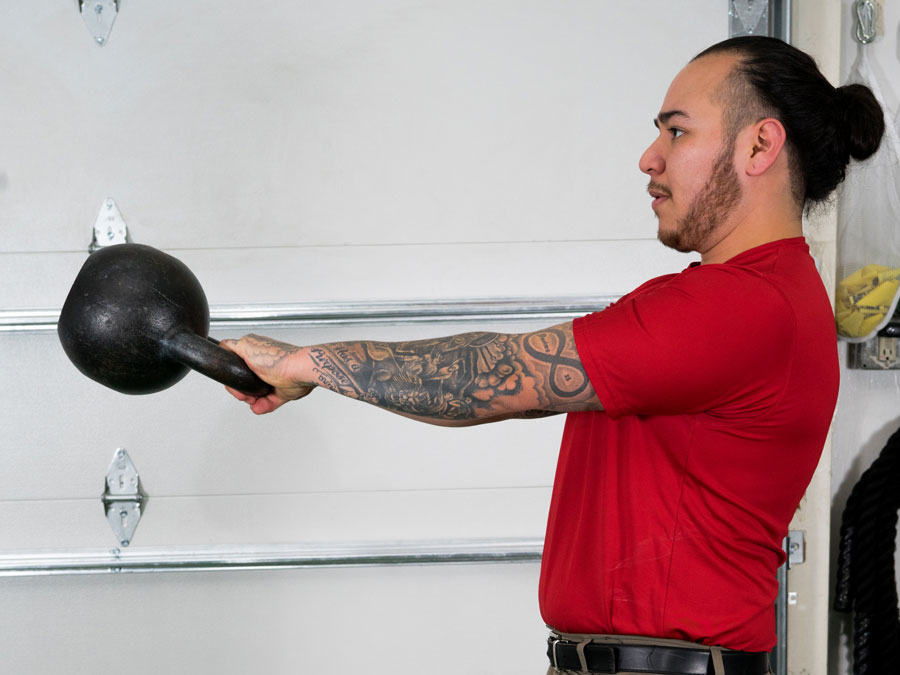
Additionally, mastering the kettlebell deadlift will allow you to transition to the Hardstyle kettlebell swing. From there, a whole world of kettlebell exercises await.

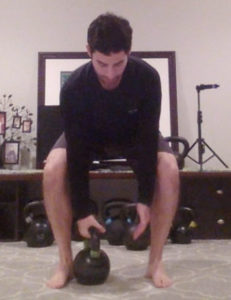
First, you must master the standard kettlebell deadlift and understand the hip hinge.

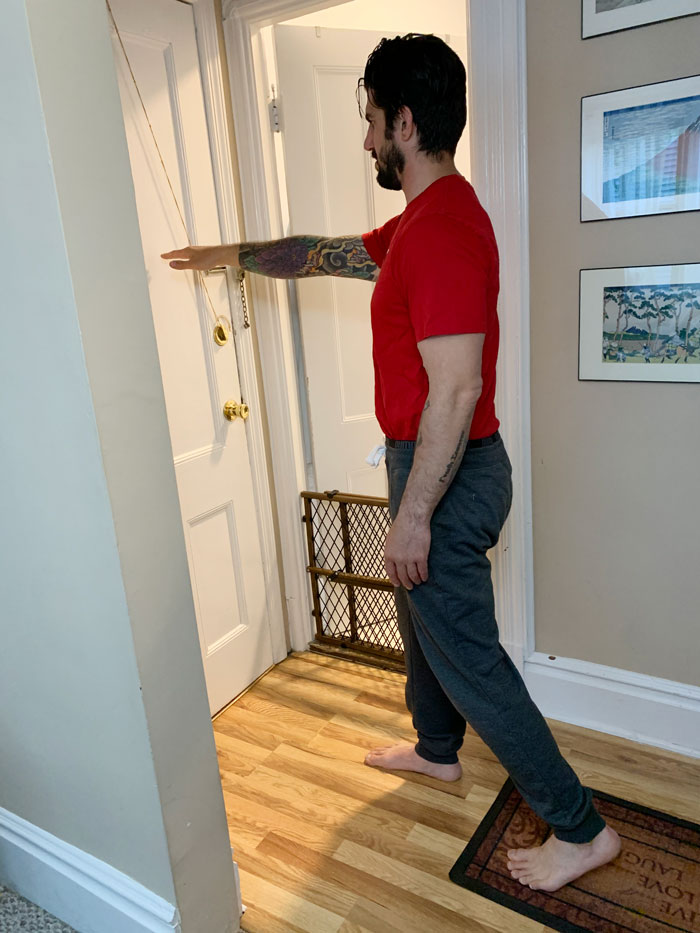
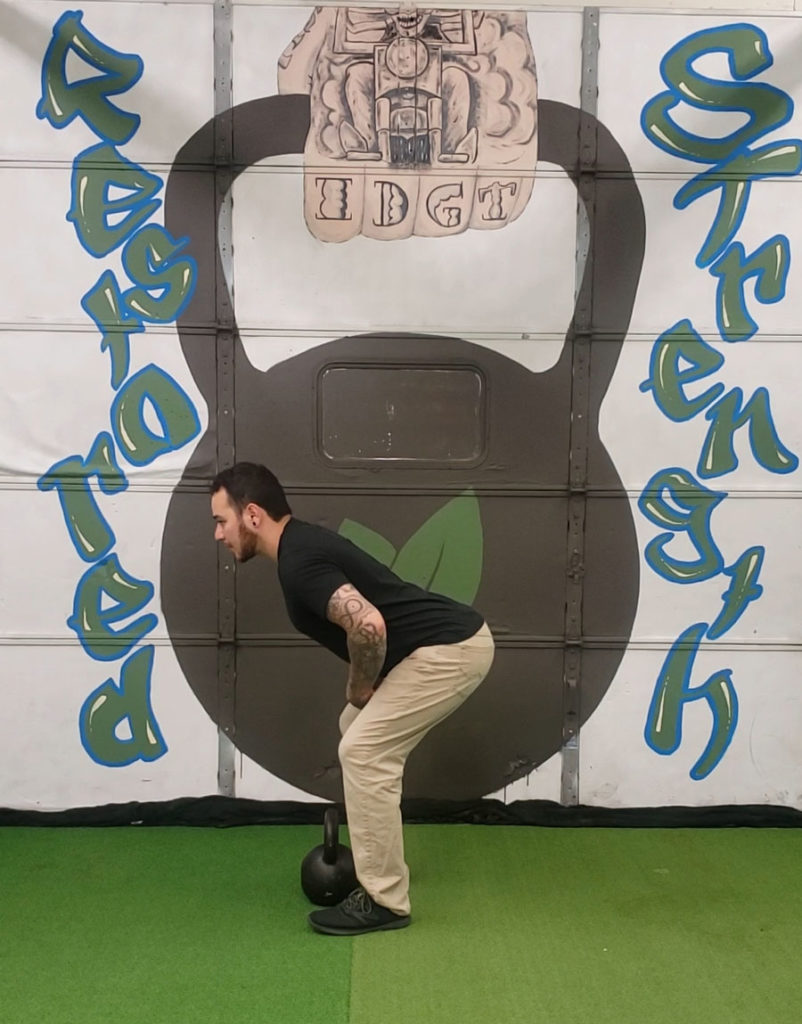
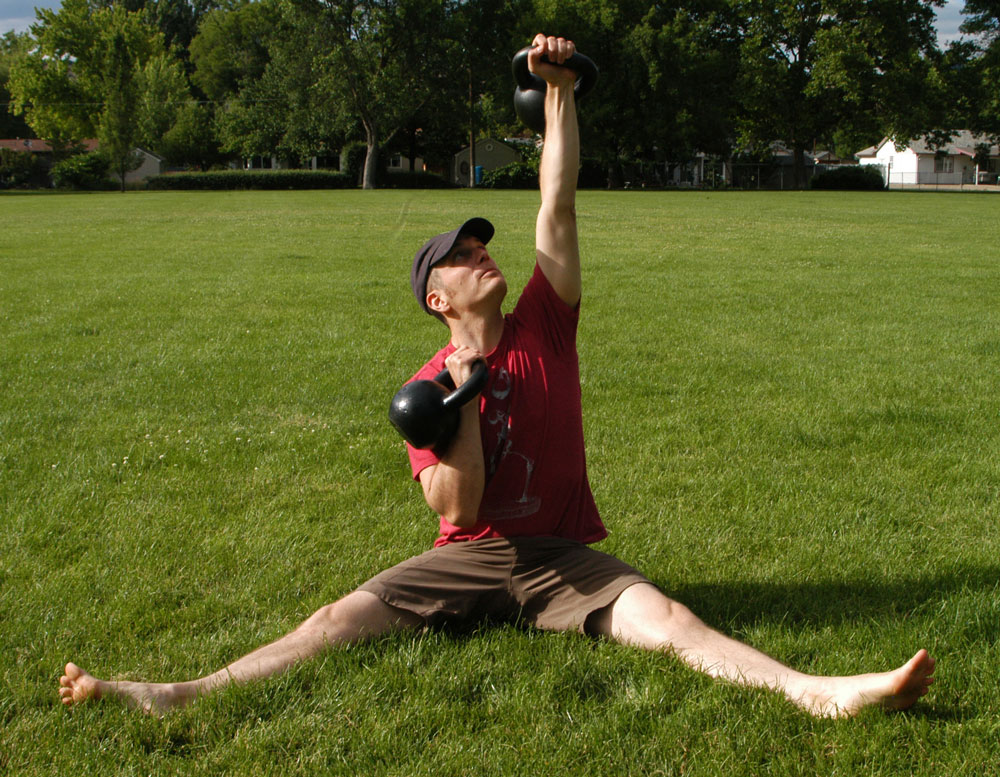
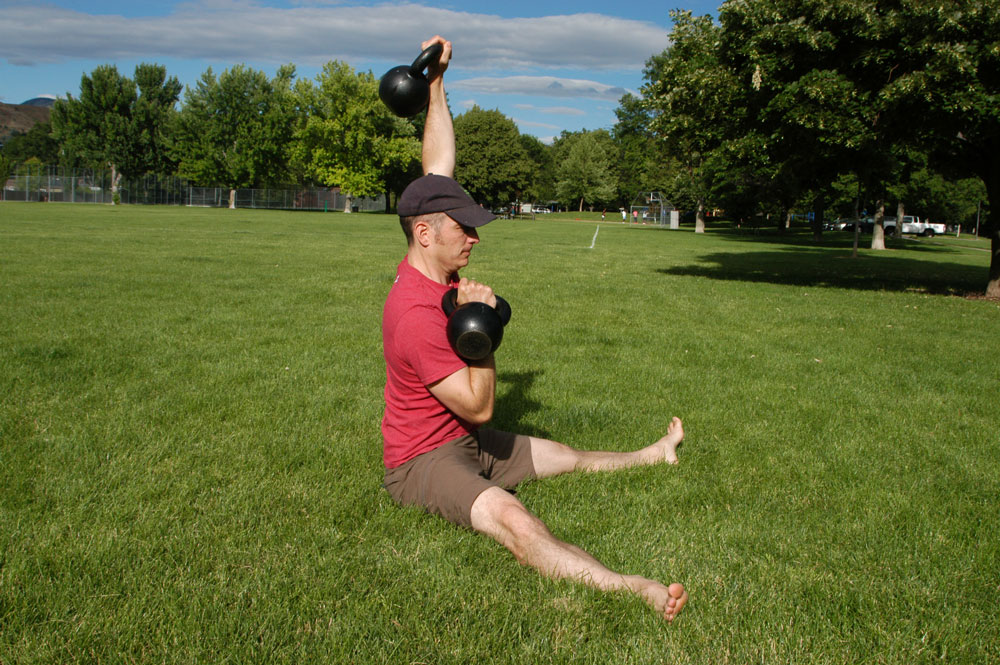
The hip hinge means that you move from your hips, the strongest set of muscles in your body, while keeping your spine straight or neutral. Once you’ve mastered the standard kettlebell deadlift, you can begin training with a number of exciting variations. Here are a few to get you started:

Let’s Get Asymmetrical!

Ryan Jankowitz Suitcase Deadlift

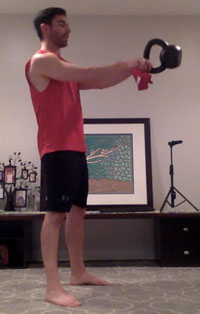
Now we can unevenly load the body—for greater core engagement—by learning two different one-arm kettlebell deadlift techniques.

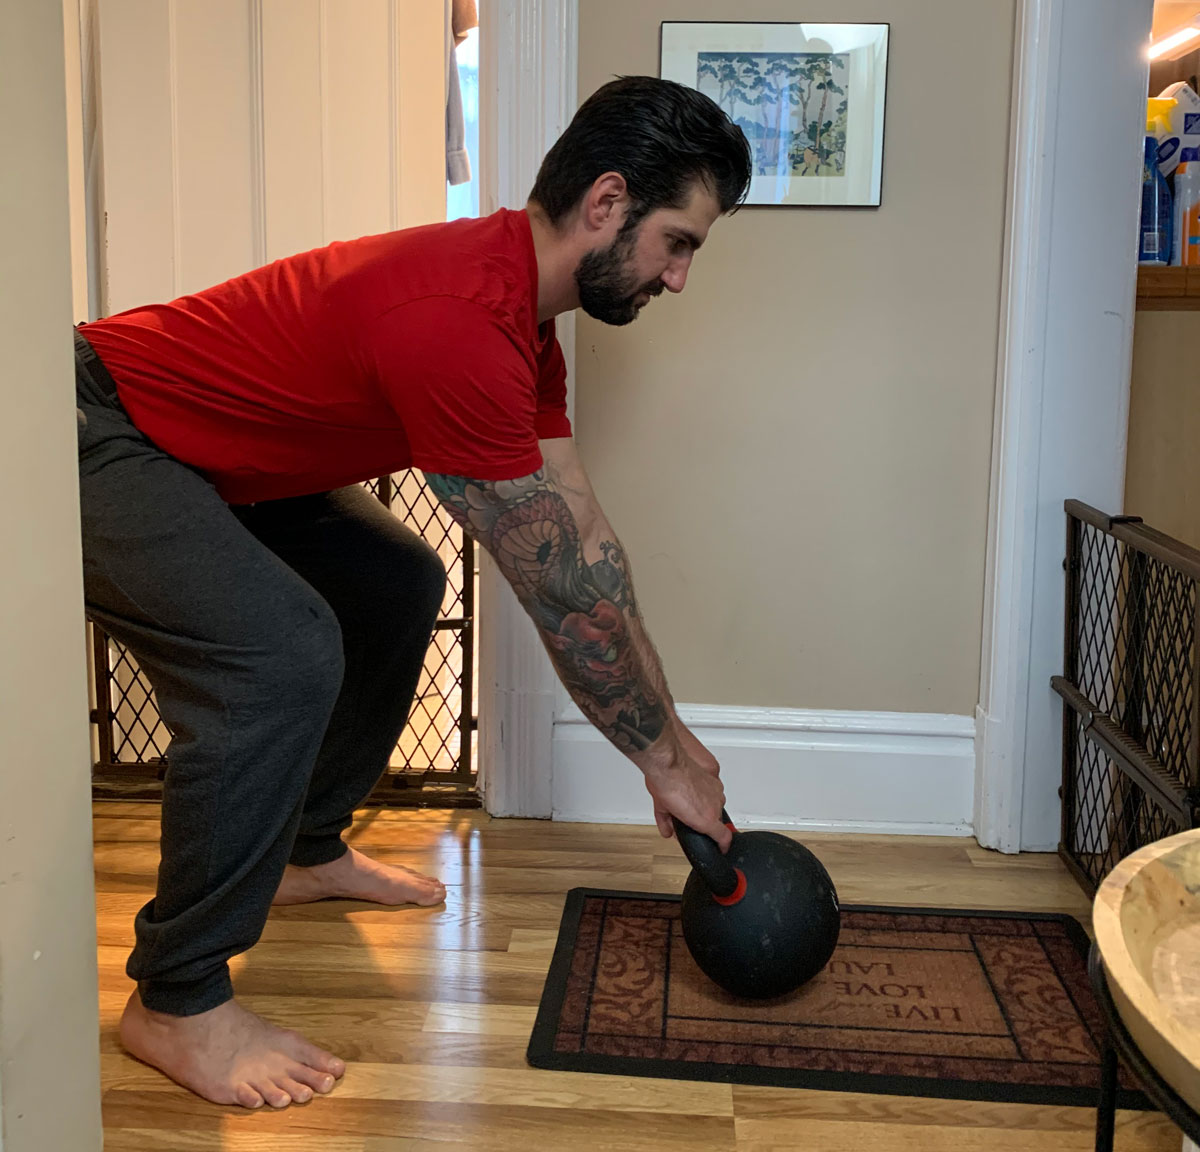
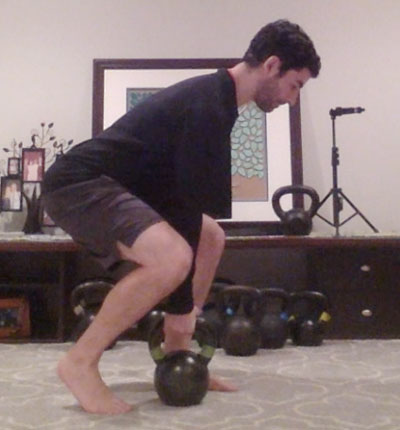
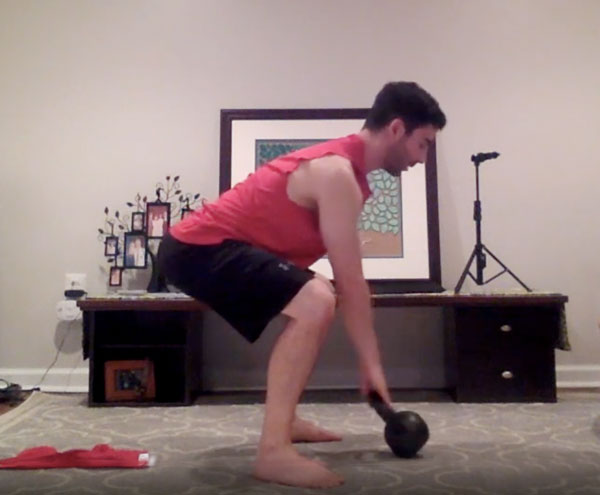
1. The kettlebell suitcase deadlift places the kettlebell outside one of your feet. This deadlift variation is great for grip strength because you’re only using one hand to grip the kettlebell handle. Make sure that you don’t lean or rotate toward the kettlebell as you move in and out of your hip hinge. Stay square all the way through the movement.

Ryan Jankowitz One Arm Deadlift

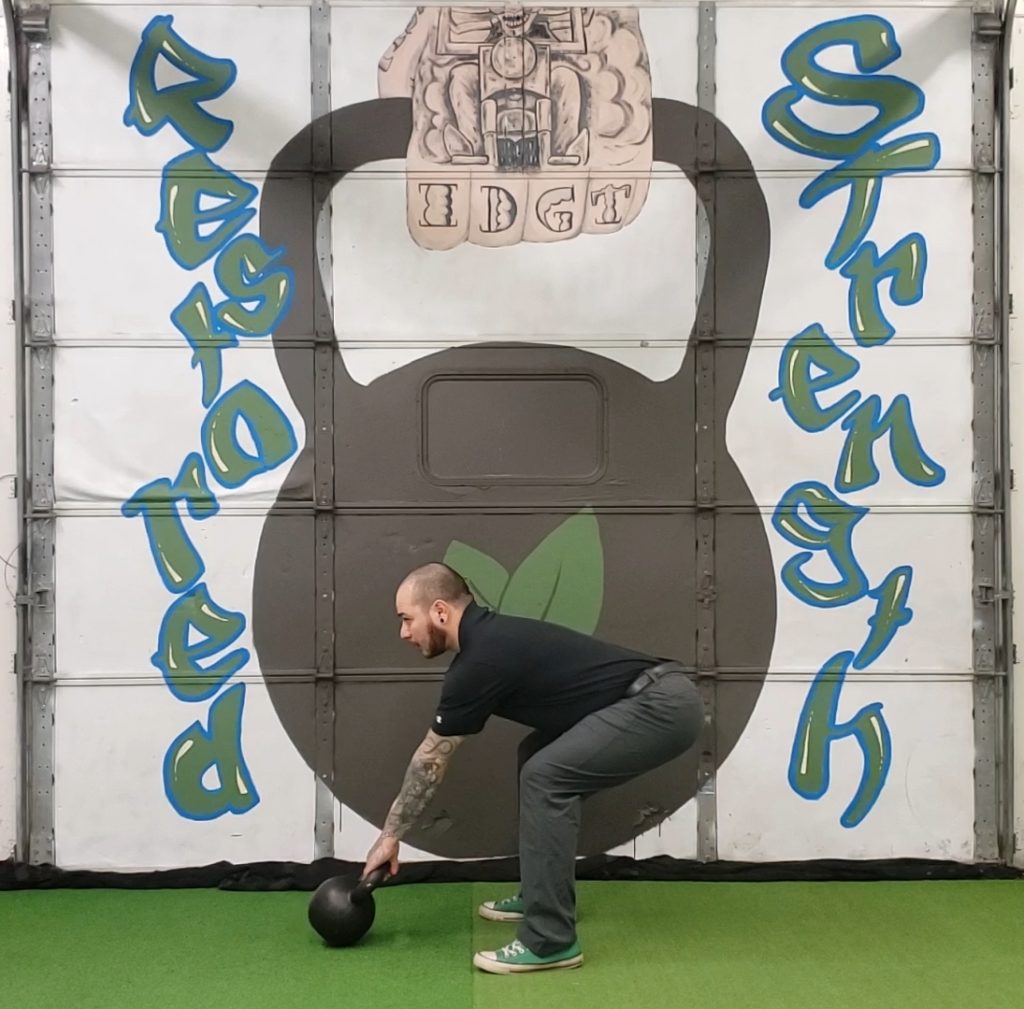
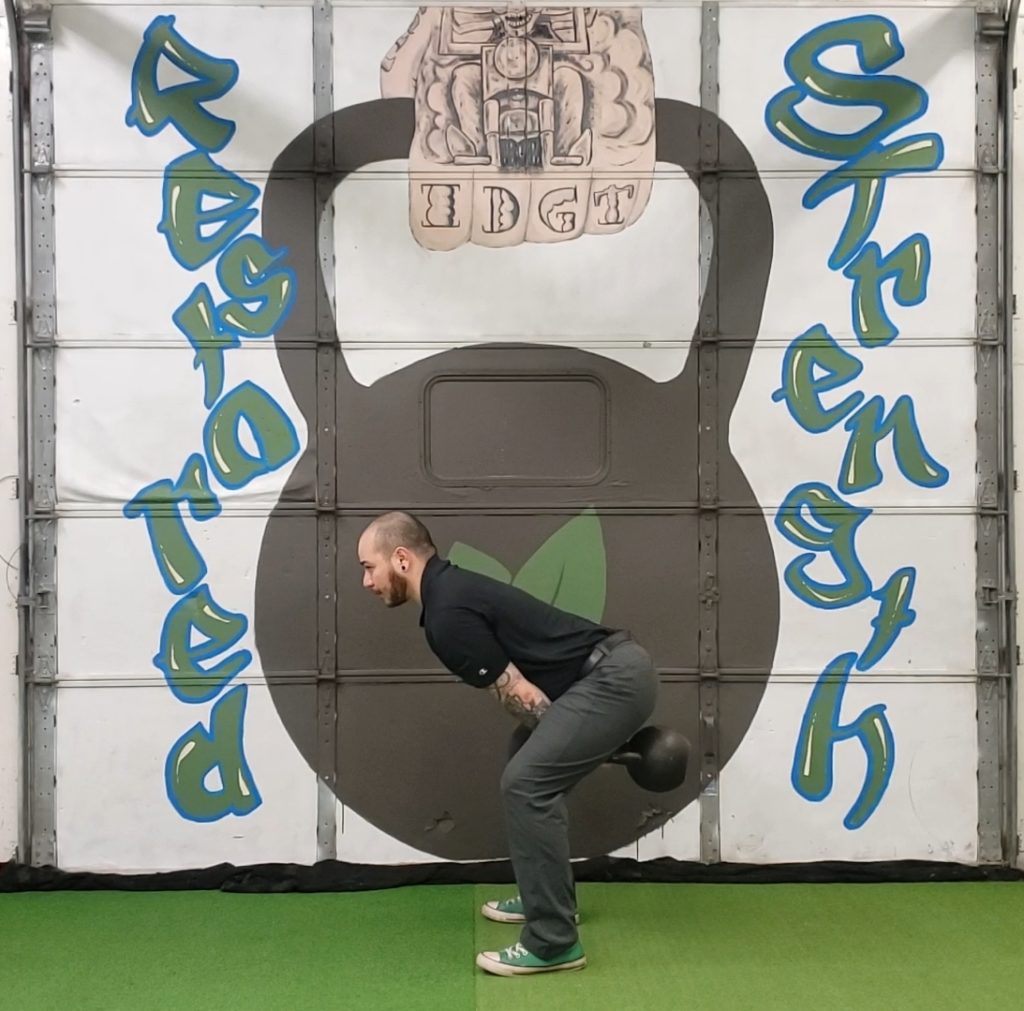
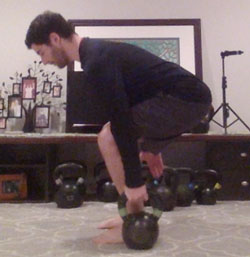
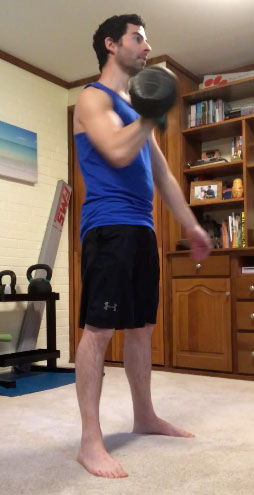
2. The kettlebell one-arm deadlift is fairly self-explanatory. The kettlebell will be between your feet but toward the hand that will be grabbing it.  Stay square all the way through the movement and don’t lean or rotate toward the kettlebell.  Again, grabbing the kettlebell with one hand will improve your grip strength and the offset load will really engage your core.

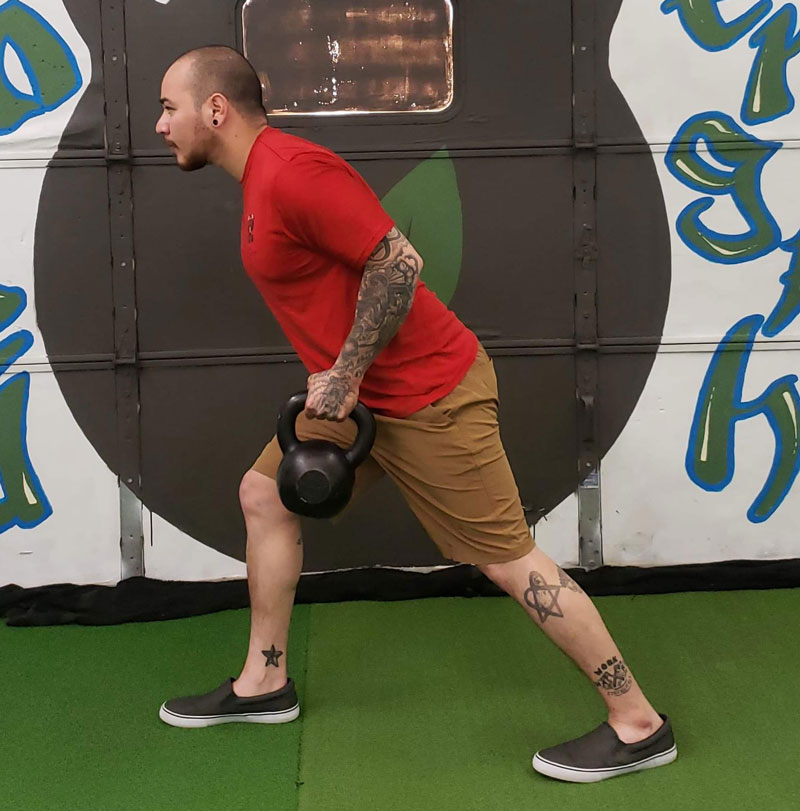
3. The kettlebell staggered stance deadlift is a unique variation because you use one hand—and also load one leg more than the other. You can practice this move with your opposite arm and leg, or by holding the kettlebell with the arm on the same side as the loaded leg.

Ryan Jankowitz Staggered Stance Deadlift
Staggered Stance Deadlift

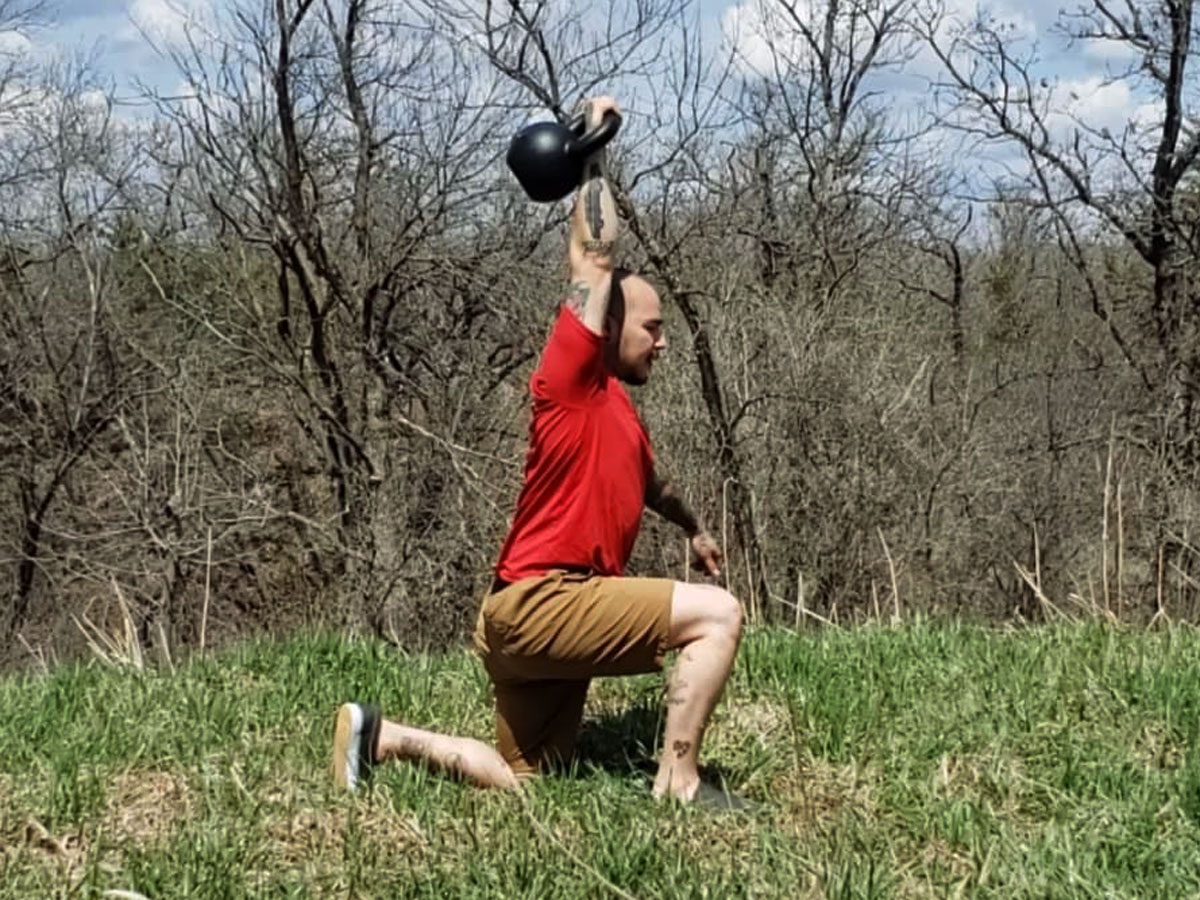
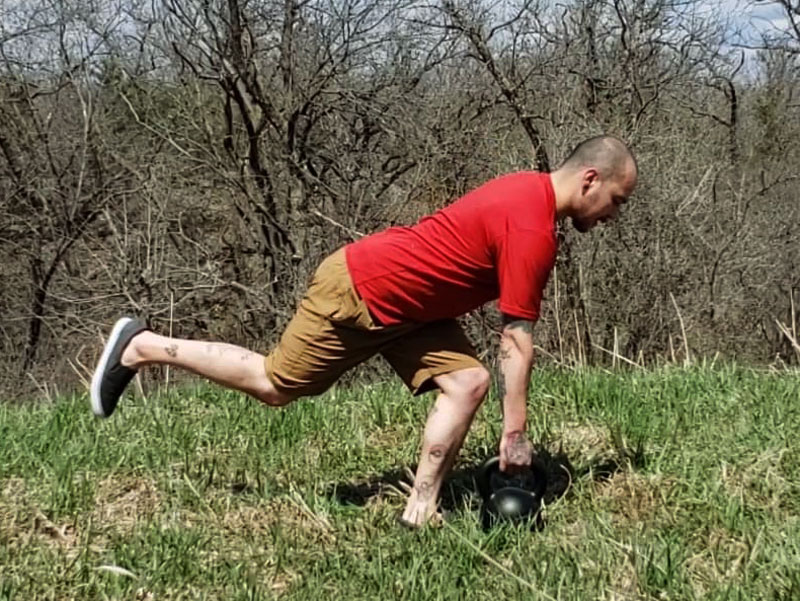
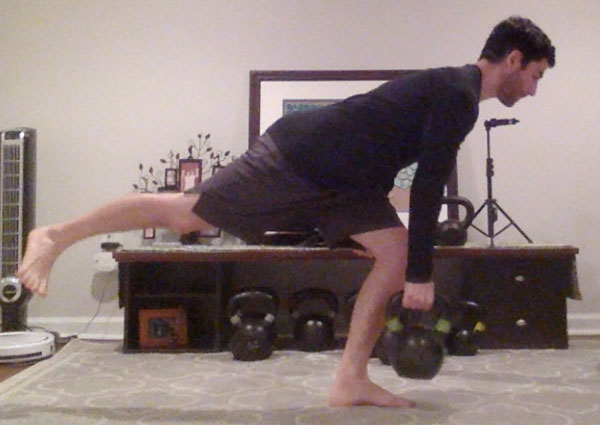
4. The last variation I want to share is the kettlebell single leg deadlift. This deadlift is performed while balancing on one leg. The kettlebell single leg deadlift improves balance and is great for your feet and ankles.  This move is challenging, so take your time when performing it and move slowly with purpose.  You can hold the kettlebell in the opposing hand, or on the same side as the working (standing) leg.

Watch this video for demonstrations of each kettlebell deadlift variation mentioned in this post.

Stay Strong and Safe!

***

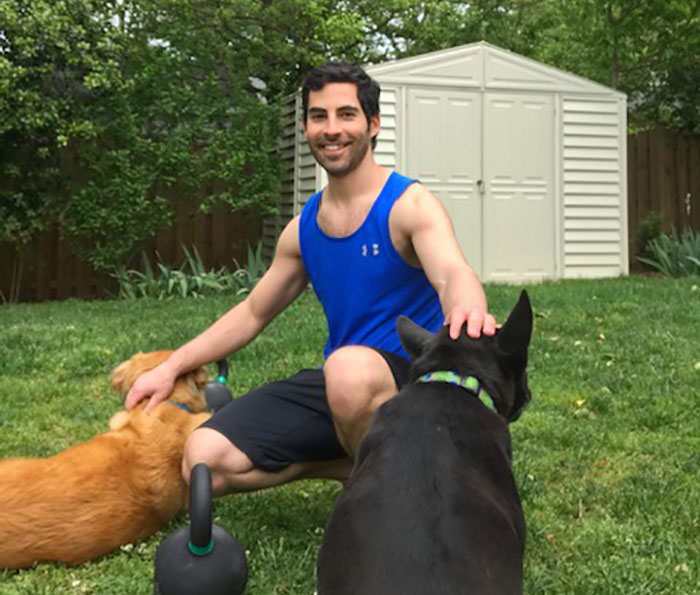
Ryan Jankowitz, RKC II lives in Maryland with his wife and two dogs. They love to go hiking and spend time on the beach.  When he’s not telling his dogs to stop chasing squirrels, Ryan enjoys spreading the RKC message and teaching others how to train with kettlebells.  He’s got a 90-day kettlebell transformation program that helps busy adults lose 10-15lbs., shed their spare tire and build lean muscle so that they look great naked and move like they did in their 20’s.  Click here to schedule a free call with Ryan.

Filed Under: Kettlebell Training, Tutorial Tagged With: balance training, core stability, deadlift variations, kettlebell deadlift, kettlebell deadlift variations, one arm deadlift, One leg deadlift, Ryan Jankowitz, staggered stance

How To Fix 4 Common Kettlebell Swing Mistakes

September 4, 2020 By Ryan Jankowitz 1 Comment

How To Fix 4 Common Kettlebell Mistakes

The kettlebell swing is a phenomenal exercise. I think it should be part of every training program. It addresses explosive power, the posterior chain, anaerobic conditioning and even grip strength. The kettlebell swing has many awesome qualities!

It’s also the foundation for more advanced kettlebell movements like one-arm swings, cleans and snatches. Before progressing to those more advanced movements, make sure that your two-hand swing is dialed in and that you can maintain proper technique with heavy kettlebells and high reps.

Let’s dial in our kettlebell swing technique by avoiding these four common mistakes.

Common Kettlebell Swing Mistake #1:
Poor Setup

There are several key concepts to remember for the kettlebell swing setup.

How far away are you from the kettlebell? If you’re too far from the bell, then you might shift too much weight forward and shrug your shoulders up to your ears while reaching for the bell.

Ideally, you want to sit back with your shoulders pulled down and the kettlebell tilted toward you.

Also, make sure that your hips are below your shoulders. If your hips are too high, then you may not be able to generate a lot of power with your first rep. And the swing is all about power.

Common Kettlebell Swing Mistake #2:
Arms Disconnected from the Body with Wrong Hip Hinge Timing

This mistake can cause discomfort or even injury to your lower back, so let’s dial this one in!

Each time the kettlebell is swung between your legs, even from the initial hike, your arms should connect to your torso. Upper arms connect to your ribcage and forearms connect to your inner thighs.

This will allow the hips to propel the kettlebell forward creating much more power.

Once you’ve reached the top of the swing, you want to stay standing tall for as long as possible while the kettlebell comes back down. Essentially, you’re playing chicken with the kettlebell.

Pushing your hips back too soon—while the kettlebell is still out in front of you—can cause unnecessary stress on the lower back.

The hips push the arms forward, the arms push the hips back.

Towel swing drill

Common Kettlebell Swing Mistake #3:
Using Your Arms and Shoulders to Raise the Kettlebell

The kettlebell swing is an explosive hip hinge, not a shoulder raise or shrug.

If the kettlebell is drooping at the top of the swing, or your shoulders and neck are feeling it, then you’re using your upper body way too much.

The arms are simply a tether holding onto the kettlebell. They shouldn’t do the heavy lifting. If you’re having issues with this, then check out the towel swing drill in the video below.

Common Kettlebell Swing Mistake #4:
Not Fully Locking Out Your hips or Knees at the Top of the Swing

In order to fully express your power, you must have full extension from the hips and knees. This doesn’t mean hyper-extending your knees, rather straightening your knees by flexing your quads.

You also don’t want to leave your hips back. You MUST contract your glutes hard at the top of the swing for maximum power and to protect your lower back.

Watch this video to see each mistake and correction.

I hope these tips help you master your kettlebell swing. When you get the swing dialed in, it’s one of the best exercises you can do for your fitness.

Keep Swingin’!
Ryan Jankowitz, RKC II

***

Ryan lives in Maryland with his wife and two dogs.  They love to go hiking and spend time on the beach.  When he’s not telling his dogs to stop chasing squirrels, Ryan enjoys spreading the RKC message and teaching others how to train with kettlebells.  He’s got a 90-day coaching program that helps busy adults get into shape, look and feel better by working out with kettlebells and eating healthier so they can elevate their self-esteem. Visit his website rjkettlebell.com or schedule a free call with Ryan: https://go.oncehub.com/RyanJankowitz

Filed Under: Kettlebell Training, Tutorial Tagged With: coaching kettlebell swing, common mistakes, fix kettlebell swing mistakes, fix the kettlebell swing, kettlebell swing, kettlebell swing technique, kettlebell technique, Ryan Jankowitz, troubleshooting kettlebell swing

How To Work Out At Home With Your Kettlebell

July 13, 2020 By Ryan Jankowitz Leave a Comment

Ryan Jankowitz Outdoor Home Workout

We are living in uncertain times right now, and it’s more important than ever to focus on our health and fitness. For better or worse, working from home does have its advantages. I haven’t missed commuting. And working from home has allowed me to get higher quality workouts as I now have more time each day.

Even though I just have a few kettlebells, but I’m still crushing my workouts and feel as strong as ever.

So, I wanted to share my workout formula, so you can experience the joy of kettlebell training at home—even if you only have one kettlebell. I didn’t invent this formula, but it has worked time after time for me and my clients. We will be doing total body workouts to save time and to promote general athleticism.

The simplest way to design full body workouts is to choose a pulling and a pushing exercise.  This also creates balance and symmetry. We can get more creative by dividing the pushing and pulling into upper and lower body so that we’ll have upper body pulling, lower body pulling, upper body pushing and lower body pushing.

Ryan Jankowitz Kettlebell Home WorkoutPulling and Pushing Exercise Examples

Upper Body Pulling:

  • Kettlebell rows
  • Kettlebell cleans
  • Kettlebell snatches

Lower Body Pulling:

  • Kettlebell deadlifts
  • Single leg deadlifts
  • Suitcase deadlifts
  • Kettlebell swing variations

Upper Body Pushing:

  • Push-ups
  • Military press
  • Get-ups (can also be used as a lower body pushing exercise)

Lower Body Pushing:

  • Goblet squats
  • Kettlebell front squats
  • Kettlebell lunges

These basic exercises can build a foundation of strength and athleticism and can be used in many different combinations to keep training fun.

The basic formula I use for creating workouts:

Warm-up for 5-10 minutes (get your heart rate up and muscles warm)

Strength Block One:
(3-5x Sets)

  • Lower body pulling exercise
  • Upper body pushing exercise
  • Core exercise

Strength Block Two:
(3-5x Sets)

  • Lower body pushing exercise
  • Upper body pulling exercise
  • Core exercise

Conditioning:
(choose one exercise or create your own combination)

  • Swings
  • Sprints
  • Jump Rope
  • Burpees
  • Jumping Jacks

Cool down (light stretching, easy walk)

This formula has served me and my clients well for years. I would love to hear about the workout combinations you create with this formula in the comments section below.

Stay Strong and Safe,
Ryan Jankowitz, RKC II

***

Ryan lives in Maryland with his wife and two dogs.  They love to go hiking and spend time on the beach.  When he’s not telling his dogs to stop chasing squirrels, Ryan enjoys spreading the RKC message and teaching others how to train with kettlebells.  He’s got a 90-day coaching program that helps busy adults get into shape, look and feel better by working out with kettlebells and eating healthier so they can elevate their self-esteem.  Schedule a free call with Ryan: https://go.oncehub.com/RyanJankowitz


Filed Under: Kettlebell Training, Tutorial, Workout of the Week Tagged With: full body workout, home workout, home workouts, kettlebell workout, kettlebell workouts at home, push and pull, Ryan Jankowitz, work out at home, workout design, workout formula

To Open or Not to Open? A Georgia Gym Owner’s Dilemma and The Story So Far…

May 25, 2020 By Kristy Agan Leave a Comment

Kristy Agan Georgia Gym Group Session Re-opening coronavirus2020

Regardless where you find yourself politically, our current culture is turbulent for everyone. Business owners are faced with very tough decisions right now. We risk alienating some, or possibly losing our livelihood. In recent weeks I have found myself struggling with how to make the best decision for everyone involved. I reached a profound conclusion…you can’t please everyone. And, if you are like me, you are in the same seemingly unwinnable spot.

My decision came down to choice. I had to choose whether or not to open my business back up and provide people the opportunity to make a decision for themselves. At the end of the day it doesn’t matter what political party you are a part of, or if you’re part of one at all, but I believe we all have a choice. My choice is still to provide my clients with a safe environment for them to be able to continue their journey that we have been on for a very long time.

Many of my clients are choosing to stay home and I will continue to send them programming until they are ready to return. But those who choose to come to my facility are now allowed to do so. This decision has warranted some heated debates & comments from some that I was putting people’s health at risk. Trust me, as the mother of a child with a weakened immune system I understand the risks. But I also understand the risks of not taking care of ourselves physically and mentally.

I do not own a mega gym. My facility is small, easy to control, and easier to keep clean then larger facilities. With that said, I do feel like I am at an advantage compared to larger corporate gyms who are facing an uphill battle keeping facilities clean and managing social distancing guidelines.

For the eight weeks that I was closed, I taught my clients online or sent them workouts for them to do at home. But the number one thing I heard every day was how they missed the personal interaction with me and with their fellow gym members. I’m not sure at the end of the day what is special about me, but that was the common thread. People wanted me there with them on their journey.

While online training is a great option during times like these for many people, humans by nature are a social species. Because of this need for human connection, nothing replaces in-person quality training. For this very reason, I made the decision to open as soon as my state allowed me to do so.

My clients are more than a paycheck. They are an extension of my family and my goal every day is to take care of my family. Despite this, I still struggled with my decision to open. I knew there would be clients (and people in my city) who would not support my decision. I also knew there would be many who would.

At the end of each day, it still feels like a massive balancing act between providing a safe/clean environment, being vigilant to not put people at more risk, being sensitive to those who aren’t ready to return, answering questions & comments from those who don’t support my decisions, and still providing good solid programming for those who step through my doors.

No one will know whether or not we as business owners are making the right decisions. Those answers may not be clear this month, next month, or next year. But I do believe that we have to keep moving forward. Moving forward will look different depending on what set of lenses you are viewing your world through and your individual circumstances. Either way, what better way to keep moving forward then with people you trust. At the end of each day, I feel like that’s what I have…people who trust me.

Our Experience So Far…

Since my re-opening three weeks ago, things have gradually started to come to life as expected. I have seen a handful of clients quit completely, for fear of being at the gym with other people. I have a few clients who are remaining at home due to current health issues, or the health issues of a family member, but I am providing them with online workouts for as long as they need them.

But thankfully, the majority have returned to their normal training times at the gym. The ones who have chosen to return are all very respectful of people’s space and everyone is pitching in to help clean up equipment between classes. My facility is around 4500 square feet and classes usually range from 5 to 12 people so we have plenty of space to spread out. I have three hours between each group training session which allows us to clean after each use.  Being a smaller facility definitely provides me with an advantage as I can more easily control my headcount and keep the facility much cleaner than if I had a larger space.

If you are a gym owner who is struggling with the decision of opening your business, I can’t make that decision for you. Depending on where you live, staying closed may be the best decision. For some of you, the best decision may be to open. But that decision is now left up to you and you alone.

Do some soul-searching, and determine what path is best for you and your clients. If your clients are as invested in you as mine are in me, they will support you regardless of what path you take.

Kristy Agan Georgia Gym Reopened Private Session coronavirus 2020

7 Guidelines for Keeping it Safe

If you are thinking of opening your doors here are a few things that I do on a daily basis to keep my clients safe:

  1. Keep a certain number of people in the building based on square footage. Check your State/Country’s social distancing guidelines and then follow them.
  2. Clean equipment between every group training session or private client. Although this means more expenses for cleaning supplies, It will go a long way towards making your clients feel safer.
  3. Provide training times for the clients who feel comfortable coming in, but be willing to also provide online programming for those who just aren’t ready yet. These workouts need to be simple and easy to do with little to no equipment. During times of stress your clients do not need workouts that will just put more stress on their bodies.
  4. Provide them with plenty of bodyweight or kettlebell workouts if they have the equipment, but make sure to include lots of mobility or yoga that will address mobility/stress issues.Right now many people are working from home and sitting even more than normal so mobility segments are more crucial than ever before.
  5. Do not allow children to come into the gym. It will keep head count lower and leave more room for clients.
  6. Require clients to wash their hands before and after their workouts as well as wipe down any equipment that they use before they leave.
  7. Provide disinfectant wipes throughout the gym for cleaning equipment, as well as, have hand sanitizer dispensers mounted in the front and rear of the gym.

At the end of the day, how we tackle this new normal of ours should be up to us as individuals. Some of you reading this article do not feel comfortable opening your business and I believe it is your right to remain closed. Some you want, or need to open, and I believe it is your right to do so. But throughout your decision-making process, be sensitive to your clients expectations, fears, and the world around you. Be smart and provide your clients with a clean and safe environment, as well as, provide options for training at home should they need or choose to do so.

Regardless of what side you find yourself on amid this chaos, let’s choose to encourage each other and support each other as gym owners, as trainers, and as citizens. We are, and will remain, stronger together.

Wondering how my clients have felt about the reopening experience?

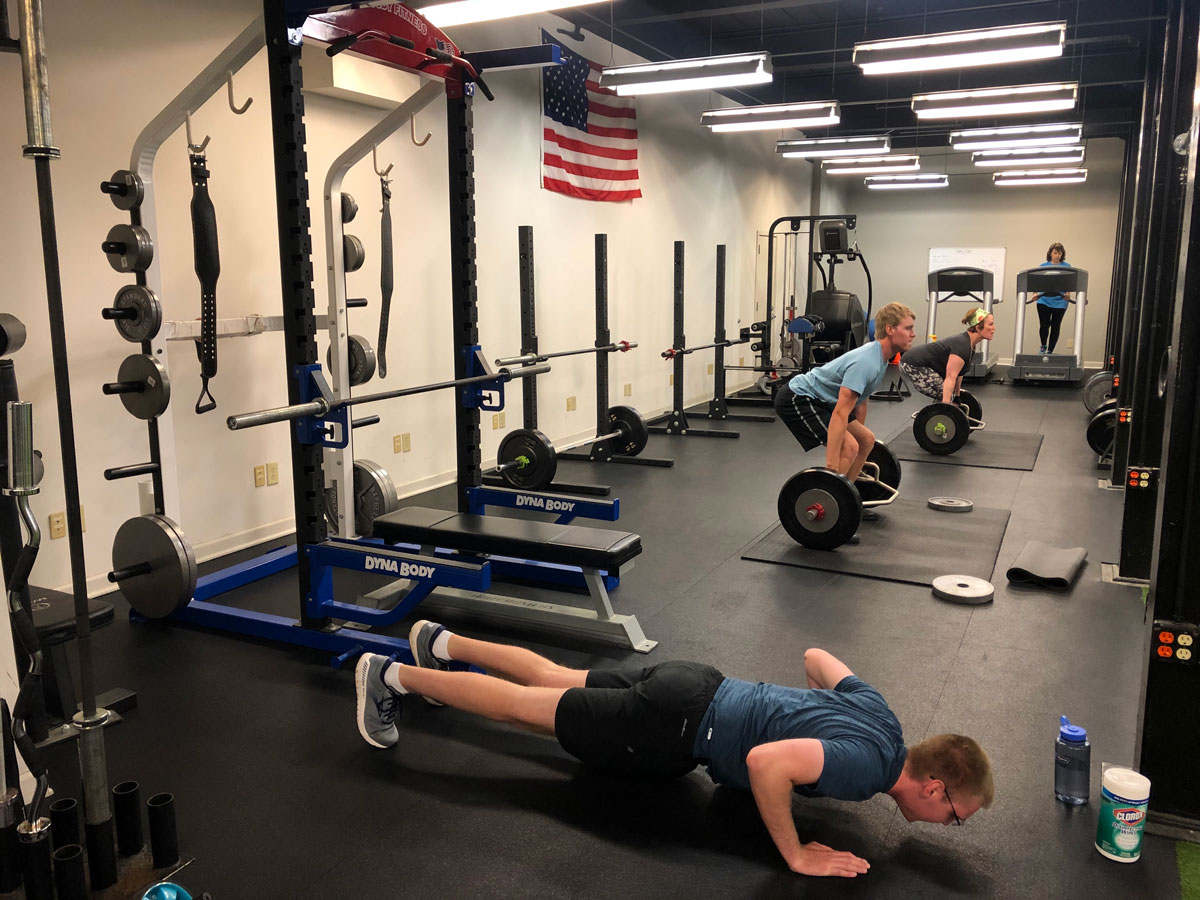
I asked! And some of them have been kind enough to comment:

“COVID-19 has definitely changed the way a lot of us live our lives. From the way we shop, interact with others and travel our lives have been altered due to this pandemic. One thing that has stayed the same through all of this is my love for KA Athletics. When I walk through the doors of KA I am greeted by Kristy whom has the warmest smile and makes her gym feel like the safest but deadliest place all at the same time.

As soon as KA was able to open those doors again I came running. I knew before this pandemic that Kristy’s gym was clean and safe due to her dedication to her gym and community she’s created. Those four walls might be just a “gym” to some but to Kristy that’s her passion, livelihood, heart and soul. There was no doubt in my mind her space was as clean as it possibly could be. The only thing dirty in her gym were the looks I might give her and her workouts on the board. To add though like most people I go to the gym to better myself and my body. Although my body needed the gym after quarantine, my mind needed it just as well.” — Carly Duke

“I don’t mind saying I have been cautious, not because I’m afraid, but because of immunosuppressant medication. Your online workouts have been my connection to physical wellness….I am so thankful for those! I desperately miss you, my trainer and my workout buddies! I will be back the beginning of June and can’t wait! Thank you for your support through this whole process!!!!” — Pam Green

“Kristy is fanatic about keeping the gym clean. After working out with her through Zoom, I jumped at the chance to get back into the gym as I knew she would take every precaution to keep her space clean for us. She genuinely cares for us like she does her own family. I am grateful for her courage to open back up amidst the controversy of doing such. And my body feels so much better.” — Ashlie Harper

“I have been training with Kristy for many years, and she is the absolute best. This is not only because of her knowledge and passion for training, but she really loves and gets to know her clients individually. I have a very medically fragile daughter who depends 100% on me to meet her daily and living needs, so I am unable to step foot in public right now. My anxiety and stress levels have been triggered more and more lately, and I am so grateful to Kristy for providing me with home workouts each day. Not only do they help with my mental health, but she keeps me accountable and on track with my health and fitness goals, even during this difficult time.” — Jenn Morash

“Until I had to stop attending the gym due to COVID-19, I didn’t realize how much working out with Kristy Agan and my gym family contributed to my overall mental health. The comradery of the people I work out with and Kristy at the helm provided much more than a “workout “. As soon as I heard she was opening back up, I did not hesitate to return as I knew she was going to take the strictest precautions to protect us. Although she provided online workouts, returning to the gym was a relief mentally and felt like a big family reunion!!” — Emily Kitchens

“Thank you for a great workout this morning! I’ll admit I was nervous but after seeing the precautions and small group I felt better.  I would not have gone to just any gym, and that’s the beauty of KA. I know the small group of people, I know you and I know we are all trying to be safe and sensible.” — Jennifer and Andy Bressette

***

Kristy is a Senior RKC and PCC Instructor with DragonDoor. She also owns and operates KA Athletics in Rome, GA where she is joined by her husband, Joe Agan (PCC, RKC, HKC) and Donna Martin (HKC, RKC).

You can follow Kristy on Instagram & Twitter @kristyagan and Facebook @Kristy.Agan.Trainer. And don’t forget to follow KA Athletics on Facebook, Instragram, and Twitter @ka_athletics to stay updated on gym events.

Filed Under: Fitness Business, Tutorial Tagged With: coronavirus, CV-19, fitness business, Georgia, group fitness, Gym owner, Kristy Agan, personal trainer, reopening gym, sanitation, small business

5 Important Considerations For At-Home Kettlebells Workouts

May 20, 2020 By Joe Boffi Leave a Comment

Joe Boffi, RKC Team Leader Home Kettlebell Workouts

As a co-founder of Catalyst SPORT in NYC, I’ve been exposed to many different people—people just like you.

One of the most common questions I get from both fitness professionals and enthusiasts is, “What is the best piece of equipment I can buy for a home workout?” Being a long-time martial artist, athlete, and strength coach, I have used a plethora of exercise equipment (in the gym and at home). Without a doubt, my answer is always a KETTLEBELL.

With that choice, I wanted to add my top five things to consider for kettlebell workouts at home.

Space & Obstructions:

A significant concern for effective in-home workouts is the amount of physical space required. But, the beauty of using a kettlebell instead of something like a 7.2’ barbell is that you don’t need much space for most of the exercises in your repertoire. If you can lay on your floor with your arms stretched out over your head, you have enough space to do most kettlebell exercises. This much space will be enough for swings, cleans, squats, and most variations of those movements.

To set up for a swing based exercise, I like to consider whatever object (such as a wall or bookcase) which may be confining my space. I walk up to the wall with my arm and hand extended. When my fingertips touch the object, I take a big step back. I’ve now verified that I have the minimum required space in front of me for swinging a kettlebell.

Next, I need to make sure I have enough room behind me for the backswing. To do this, I turn around in place, then reach forward with my arm and fingers. If I cannot touch anything, I have enough space for backswings. Now, you can turn back around and safely swing, clean, and squat away!

Joe Boffi RKC Team Leader Indoor Kettlebell Swings Measurement

Practicing kettlebell snatches requires one more overhead measurement. If you’re a tall person and have low ceilings (or you just aren’t sure), I would always recommend to err on the side of caution and be precise by making an actual measurement. You’ll need a kettlebell, a helper, a tape measure, and a chair. Stand with your arm overhead and your hand open (fingertips facing upward). Have your helper stand on the chair behind you and measure the distance from your middle finger to the ceiling. Record that number. Now measure the height of your kettlebells. Place your kettlebell on its base and measure the height of the bell from the floor to the top of the handle. Comparing your first measure and the height of your kettlebells. Any kettlebell that measures at least an inch or two shorter than the first number you recorded will give you enough clearance to do snatches.

Normally, this should provide you with plenty of extra space overhead, but make sure there are no light fixtures or any obstructions hanging down from the ceiling in the path of your snatch. I always say, better safe than a hole in your ceiling.

Finally, what about the get-up? This one is pretty easy. Lay on the floor and open your legs more than 45 degrees on both sides, then reach your arms out straight from your sides. If you don’t touch or kick anything, then you’re good! Reaching your arms out entirely to the sides may not be necessary, but if you lose control of the kettlebell, you’ll be at less risk of putting a hole in your wall. Next, you need to measure the space above you by standing up with your arm overhead and your hand in a fist. If you don’t touch the ceiling, you have enough room.

Joe Boffi RKC Team Leader Getup Measurement

Floor Surface:

You may not have too many floor options in your home, but here are some ideas to keep in mind. Generally, any exercise you do standing, you can do on a hard surface like wood, stone, or tile. A hard surface to stand on will give your brain feedback from your feet and the floor. You will also have a stable platform for producing maximal tension and force.

Remember, you are in your home. Try not to aggressively drag or plop your bell down on these surfaces because you may damage them. I suggest standing on the hard surface and placing an area rug, yoga mat, or towel on the floor in front of you; this can serve as a runway for you to start and park your bell.

If you have a room that has a hard rug, this will work as well. My living room (where I do my home workouts) is a hard-packed rug.

It’s a good idea to avoid very thick and squishy rugs. These surfaces make finding the stability you need for a safe workout a difficult, and the feedback from the ground to your feet and brain gets a little lost.

Sweat:

Be aware while working out on hardwood, linoleum, or any shiny floor, your perspiration will make the floor slippery. Have a hand towel ready to help clean up between sets. Conversely, working out on a rug won’t become slippery, but it is more difficult to clean up, so wiping yourself often and doing get-ups on a couple of mats is a good option.

Shake, Rattle & Oops:

When we are doing ballistic movements like swings, cleans, and snatches, we are producing a lot of force right into the floor. In a structure like a house or an apartment, force travels through the floor and will cause items in your room or even rooms next to you to shake. I recommend doing a couple of reps and listening closely for anything that rattles. If you hear something rattle, move or secure that item. On two separate occasions, in two different apartments, I have rattled picture frames off the wall, and one of my wife’s little trinkets off a shelf.

Weight & Exercise Selection:

While working out in your home, choosing the right weight for you, the exercise, and your environment is extra important. I recommend using a weight that you really OWN—or possibly only slightly heavier—during an exercise, so that you don’t lose control or have to bail out of a movement.

The get-up provides an excellent example of why careful weight selection is essential for safe home workouts. Performing a get-up with a bell that is going to be a personal record (PR) or something that you’ve had extreme difficulty completing may not be the best idea at home. For one, you most likely won’t have a spotter, and second, if you do safely bail out, you will probably damage the floor and anything else in the surrounding area that the kettlebell hits. Ouch.

Similar rules apply for your exercise selections. Doing a V02 max style kettlebell snatch workout in your hallway is not a good idea. Remember that unsafe slippery sweat I mentioned before? You probably will not have enough time to catch your breath, let alone responsibly clean up sweat on the floor or yourself. If you lose the kettlebell because of your max output, then where will it go?

Now don’t get me wrong, I want you to work hard and do swings, snatches, and get-ups. I am just telling you to be smart about your weight and exercise selection. If you can workout outside in your yard, then go HAM! But if you are in your hallway or living room, just dial it back a little.

Working out at home is an excellent alternative to the gym. It may seem like you don’t have enough space or equipment, but all you need is a little guidance (which hopefully this article provided) and a kettlebell.

Be safe, aware of your surroundings, and work hard.

***

Joe Boffi, RKC Team Leader can be contacted at Joe@catalystsport.com. For more in-depth guidance from Joe for your workouts, sign-up for Catalyst’s Online Programming.

Filed Under: Kettlebell Training, Tutorial Tagged With: home kettlebell workouts, home workout, Joe Boffi, kettlebell safety, kettlebell workouts, working out at home, workout safety, workouts at home

8 Essential Kettlebell Exercises for Hikers

May 1, 2020 By William Sturgeon Leave a Comment

Kettlebell Get-up William Sturgeon, RKC Team Leader

With summer right around the corner and hikers getting ready to hit the trails, it’s important that we maintain our strength to enhance our time trekking. Hiking can be an exhausting hobby that demands a great amount of strength and conditioning. Using these eight kettlebell exercises will help you set yourself up for a great hiking season.

Kettlebell Swing

The kettlebell swing is a great exercise to help with conditioning the body for those long treks. Using the kettlebell swing as a conditioning tool will help build up the lung capacity needed for the trails.

William Sturgeon Kettlebell Swings

Goblet Split Squat

Hiking is a unilateral sport, meaning we are working one leg at a time. The goblet split squat is going to help strengthen your quads to face those tall hikes.

Kettlebell Press

Trekking poles can be a great tool to use when hiking, but they may also require a little more upper body strength. Practicing the kettlebell press will help you strengthen your shoulders.

Single Arm Row

Carrying a backpack around for long periods of time can take a toll on the upper back. Using the kettlebell row will help your posture and strengthen your back.

William Sturgeon, RKC Team Leader - Kettlebell Rows

Single Deadlift

The single leg deadlift will help strengthen your ankle and glutes. This greater stability can help reduce injuries on the trail.

William Sturgeon RKC Team Leader, one leg kettlebell deadlift

Kettlebell Get-Up

Being on the trail all day long while carrying a bag can be very taxing, use the Get-Up to help build a stronger core from all angles.

Halo

The halo is a simple kettlebell exercise for creating greater shoulder mobility. This will help you when climbing and/or carrying your bag.

Kettlebell Half Kneeling Stretch

Ankle and calves can get really tight from long treks. Be sure to use this exercise to help mobilize the joint and stretch the muscle.


***

William Sturgeon, RKC Team Leader, RKC II trains clients at his gym, Restored Strength. Contact him through his website at RestoredStrength.com or follow him on Facebook: facebook.com/restoredstrength

Filed Under: Kettlebell Training, Tutorial Tagged With: hikers, hiking, kettlebell exercises, kettlebells for hiking, William Sturgeon

4 Standards To Master The Kettlebell Swing

February 27, 2020 By William Sturgeon Leave a Comment

Four Standards For Mastering the Kettlebell Swing by William Sturgeon

To begin learning how to perform a kettlebell swing, you must master the most fundamental movement of the exercise—the hip hinge. Learning how to properly hip hinge, hike pass, deadlift and perform a dead-stop swing will set you up for guaranteed success with the kettlebell swing.

Master Your Hinge:

The foundation of the kettlebell swing is built off a strong hip hinge. When you are able to teach your clients how to optimally use their hips, they will get the full benefits for the proper muscles used in the swing. You will also keep your clients safe and reduce their exposure to injury.

Use these coaching cues:

  • Start in a tall & tight position with your feet shoulder width apart.
  • Have a slight bend in your knees.
  • Reach your hips back.
  • Drive your hips forward and stand tall.
Stand tall & tight
Reach your hips back

Master Your Hike Pass:

The next step in the kettlebell swing is to master the hike pass. This motion begins to teach you the momentum of the swing. Learning the hike pass teaches you how to properly propel the kettlebell behind you. The back of the hike pass shows you what the bottom position of the kettlebell swing looks like.

Use these coaching cues

  • Get into your hip hinge.
  • Tilt the kettlebell towards you and break the handle in half.
  • Sit into your hips and toss the bell high into the thigh.
  • Keep your chest up & eyes forward.
Tilt the bell towards you and break the handle in half.
Sit into your hips and toss the bell high into the thigh.

Master Your Deadlift:

Next is the deadlift. When teaching the deadlift, you are helping your client understand how to properly load the hips. The deadlift teaches you to snap the hips and fully lock out at the top. This is important because this teaches how you should be at the top of the swing.

Use these coaching cues

  • Start with the kettlebell between your feet.
  • Go into your hip hinge.
  • Break the handle in half.
  • Punch your feet into the ground and snap your hips forward.
Go into your hip hinge.
Snap the hips and fully lock out at the top.

Master Your Dead Stop Swing:

The last step in mastering the kettlebell swing is the dead stop swing. Mastering the dead stop swing puts all of the other steps into one. You begin by starting in a hip hinge position, next you go into your hike pass, and lastly you go into your dead lift. Each rep is initially starting the swing back over and enforcing all the skills you have learned prior to this step.

Use these coaching cues

  • Start in your hike pass position.
  • Toss the bell back.
  • Explode through the hips and let the bell float up.
  • Wait for the bell to push your hips back and park the bell.
Sit into your hips and toss the bell high into the thigh.
Explode through the hips and let the bell float up.

To get the most out of your swing and master the basics, review and practice each of these steps.

***

William Sturgeon, RKC Team Leader, RKC II trains clients at his gym, Restored Strength. Contact him through his website at RestoredStrength.com or follow him on Facebook: facebook.com/restoredstrength


Filed Under: Kettlebell Training, Tutorial Tagged With: kettlebell swing, kettlebell swing technique, kettlebell technique, swing standards, video, video tutorial, William Sturgeon

Putting the Power into the Power Swing

January 2, 2019 By Kristy Agan Leave a Comment

Kristy Agan RKC Team Leader Power Kettlebell Swing

When I was introduced to kettlebells in 2006, how to start the kettlebell swing was not something that I was taught. Upon entering the world of RKC, I learned the importance of the beginning of the swing. I was amazed by the instant improvement in my technique from solely focusing on how I started my swing. After all, the start of the swing is where we generate all of our power. If we don’t learn how to begin the swing, then we only end up with terrible looking, inefficient swings. In this blog post, I want to specifically discuss the power swing, sometimes known as the dead start swing. The power swing is a drill that I love to use in my own training and with my clients. Unfortunately, and even after a workshop, it’s easy to forget this humble but effective drill. So, we should revisit and use it that much more in our training.

What is a Power Swing?

In short, it is the “hike to stand” and “back to the start” portions of the swing, repeated for reps.

The power swing is super effective for teaching solid swings because it:

  • Teaches and reinforces the “hinge” and “back swing”.
  • Teaches us to create “pulling” power from the lats.
  • Strengthens the hike to stand portion of the swing—which is where all the power for the rest of our swings in the set comes from.
  • Increases strength in the hamstring & glutes—much like deadlifts and power cleans.
  • Correct posture issues in the start position, or will very quickly reveal weaknesses that need to be addressed ASAP to avoid potential injury.
  • Crosses over to stronger lifts, specifically the barbell deadlift.
  • Carries over into stronger plyometric movements such as jumping and sprinting, making it essential for athletes.
  • Teaches a strong start of the swing leading to stronger cleans and snatches.

The power swing can be taught to and used with clients when they are just learning or even struggling with their technique. I like to use “fast and loose” intervals for active recovery when teaching the power swing. It keeps my clients moving, but allows extra recovery time for the hips, hamstrings, and glutes.

If you have clients who especially need to work on their mobility, try super sets of power swings with a mobility drill. They’ll be able to address the mobility issues revealed during their practice sets.

Here are some examples of mobility drills to super set with power swings:

  1. If the client has a rounded back, use the wall hinge drill or thoracic bridge.
  2. If the client doesn’t finish through with their hips at top of the swing, superset with the RKC hip flexor stretch, bridge, or frog stretch.
  3. If the client pulls the kettlebell up with their shoulders instead of snapping their hips, superset the power swings with the towel drill.

How to Teach the Power Swing

  • Set hike position
  • Swing once and return to start

Repeat up to 10 rounds depending on the client’s fitness level and technique issues. Add in mobility and/or corrective drills between rounds as necessary.

For high performing clients, you can turn power swings into a grueling strength workout by increasing rounds and/or number of reps per round. Be sure to design the workout with the safety and skill level of the client or group in mind.

In the video below, I purposefully selected a wide range of clients to show how a power swing routine can work for a group with a variety of fitness levels—which most trainers will see any given day. The clients in the video range in age from 18 to 62. Both men and women are following the routine. The group also includes a breast cancer survivor, a client who had hip labrum surgery, a few HKC certified instructors, and a few beginners who learned to swing kettlebells only a week before this video. The finisher in the video is also suitable for a mixed group. Obviously, I can make it much harder for my advanced clients, but for the sake of this video I kept it simple. We focused on the power swings with a few short breaks.

For more specialized groups—martial artists, youth athletes, advanced adults, pair higher rep (or heavier kettlebell) power swings with tougher movements such as burpees, full bridges, advanced push-up variations, renegade rows, heavy kettlebell floor presses, fast & loose drills, and/or sport specific drills.

Below is a short clip of my husband and I demonstrating a ladder routine with power swings and push-ups. Before you begin the routine, line up three kettlebells from light to heavy. Perform three swings with the light kettlebell, two swings with the middle kettlebell, one swing with the heavier kettlebell, and finally one push-up. Each round, increase the push-up reps each round. Set a timer for ten minutes and see how many rounds you can do well. It’s simple, but effective.

Our swings are only as good as the power we are able to create from the ground up. Just like with any sport, teaching and drilling the fundamentals are how star athletes are born. When we forget the fundamentals, we lose our edge. The power swing is a fundamental element many of us are missing in our Hardstyle kettlebell training. It’s time to go back to the fundamentals that made us the solid RKC instructors we are today. It’s time to practice the power swing!

***

RKC Team Leader Kristy Agan is also a PCC Instructor, American Council of Exercise (ACE) and TRX qualified personal trainer. She owns and operates KA Athletics in Rome, Georgia. Kristy also maintains an online training business kristyagan.com. Follow Kristy on Instagram @kristyagan and Twitter @kristyagan or on Facebook at https://www.facebook.com/Kristy.Agan.Trainer

Filed Under: Kettlebell Training, Tutorial Tagged With: dead swing, how to do a power swing, how to swing a kettlebell, kettlebell swing tutorial, kettlebell swings, kettlebell technique, kettlebell training, Kristy Agan, power swing, start stop swing

Three Ways to Reinforce Tension

October 24, 2018 By William Sturgeon Leave a Comment

William Sturgeon Kettlebell Swing

We commonly coach our clients to create tension with cues such as “brace the core”, “tighten the glutes”, “crush the handle”, etc.  These phrases can help get clients to create tension in their lifts. You may see the specific group of muscles tighten, or a change in your client’s face when you ask them to create more tension.

Deconditioned clients are often unable to create tension through a specific area at first. It’s important that we spend time teaching them certain drills and use different cues to help them find the ability to create tension. It can be challenging to teach people how to apply tension during a lift.

Why Reinforcing Tension is an Important Skill to Practice and Teach:

Tension Keeps You Safe
Ballistic movements like the kettlebell swing require that we move rapidly—and if the movement is done incorrectly it can lead to injury. Kettlebells are not unsafe tools—users with bad technique are unsafe. Placing an emphasis on stressing the muscle with tension will allow you and your clients to work on technique without irritating the joints as much.

Tension Builds Strength
Your muscles recognize tension, not load—this is why we should focus on contracting the muscle before and during the exercise. Using “time under tension” (TUT), you can stimulate the muscle for greater growth. The denser the muscle, the stronger the body. Producing more tension throughout your lifts can also help generate more force.

Tension Stimulates Muscle Growth
Creating mechanical tension is one the of the primary factors associated with muscle growth. Mechanical tension is created by stressing the muscle throughout its full range of motion during an exercise. The phrase “time under tension” (or ‘TUT’ as referenced in the paragraph above) relates to the amount of time we’re stressing the muscle during an exercise. The more tension created during an exercise, the more muscle that will be recruited to perform the task. In turn, this gives the muscle a greater growth stimulus.

Drills That Teach How to Create and Reinforce Tension:

Hardstyle Plank
The RKC Hardstyle plank is the traditional plank’s older, much cooler brother. While a traditional plank is good for teaching a client to engage or brace their core, the client can still perform it poorly or fall short of the correct amount of tension we are looking to create. The Hardstyle plank creates a lot more tension than a regular plank. Most regular planks are held for 30 seconds or more, but the more intense Hardstyle plank is held for a much shorter amount of time maximizing the body’s full strength potential.

How to perform the Hardstyle Plank:

Isometrics
During isometric exercises, the muscle tenses but its length remains the same. A good example of an isometric exercise is an RKC drill we use to help pry open the hips. We place the client in the bottom position of a kettlebell goblet squat, then ask them to create a great amount of tension while forcing “prying” the hips out—all while keeping the hips in place. This powerful drill can help your clients find their glutes while understanding the amount of tension they need to create at the top position of their squat.

How to Perform an Isometric Hip Prying Drill

Time Under Tension
Time under tension is one of the greatest tools for helping our clients create or reinforce tension. Coach the client through a “grind” exercise—such as a kettlebell press—during a set amount of time. The kettlebell press can be performed and progressed in many ways, though most people will immediately want to just increase the weight. But, if we apply “time under tension” to the kettlebell press, we can make a lighter kettlebell feel far heavier. This can help a client spend more “time under tension” while safely finetuning their technique.

The Time Under Tension Kettlebell Press


****

William Sturgeon, RKC II trains clients at his gym, Restored Strength. Contact him through his website at RestoredStrength.com or follow him on Facebook: facebook.com/restoredstrength

Filed Under: Coaching, Kettlebell Training, Tutorial Tagged With: Hardstyle Plank, isometric, isometric exercises, kettlebell press, RKC, strength, strength training, tension, Time under tension, William Sturgeon

Beyond the See-Saw Press: Two New Variations

August 8, 2018 By Nick Collias Leave a Comment

Z-Saw Kettlebell Press Nick Collias
Some lifts just never feel quite right, no matter how hard we try to force them to do so. Others are a willing dance partner from the first rep. And from the first time I tried it, the see-saw press just felt right.

Unlike the single-arm press, which took months (er, years) to share the ideal groove, the see-saw offered it up instantly. And because it’s a rhythmic push with a bit of a pull (or an eccentric push that feels like a pull), it demands that all manner of anterior, posterior, lateral, and deep core muscles get in the game of tug-o-war. Any experienced RKC can tell you that this extra activation usually allows you to get 2-3 extra reps, maybe more, with any given weight than what you’d manage with either single-arm or double-arm presses.

That translates to extra strength, extra volume, extra activation, and extra-efficient training. Extra awesome.

Those are all reasons to try the see-saw press. But they’re also reasons to explore different variations of the movement. Here are two variations that have quickly become my two favorite presses, period.

To be clear, I make no claim to inventing either of them. Somebody else probably did long ago. I just happened across them in my training, picked them up, and am now passing them along.

Z-Saw Press

This is nothing more than a seated see-saw press in a straddle position, or what is known as a Z-press. But that alteration changes the lift dramatically.

What I dig about it:

  • Sure, it brings the wicked shoulder pump, but it also ties in more total upper body musculature than any press I’ve tried—even more than the standing see-saw press. All the postural muscles of the upper back light up, but so does the core. When those groups are both working hard, I know I’m doing something right.
  • Lumbar hyperextension is pretty much impossible with this lift. Not so with the standing see-saw. This makes it a great way to work around an achy lower back, or just one, like mine, that just doesn’t like to work hard early in the morning when I tend to train.
  • No clean is needed. That’s not an advantage or disadvantage; it’s just a feature of the lift. This means it lends itself more cleanly to an upper/lower split, if you prefer that approach.
  • Perhaps because the upper back and core are so integrated, I find it also lends itself better than other press variations to grinding out a few hard reps at the end of a set, while still being safe on the shoulder joint.

This is one reason why I like it with a DeLorme Protocol-style approach:

10 reps light, or around half of 10RM
10 reps medium, or about .75 of 10RM
10 reps with more or less a 10RM

Z Saw Kettlebell Press Side view Nick Collias
Look forward or look up; either way, your postural muscles and pressing muscles will both work overtime.

Keeping a set at a 10RM or lighter also keeps you from having to figure out how to get two seriously heavy bells into position. Just curl it up and go.

One more technique note: In a recent email, Master RKC Andrea Du Cane mentioned that she recommends most people—men in particular—sit on a yoga block or something similar during Z-press variations, because otherwise they often struggle achieve a neutral pelvis and spine position on the ground. Me, I like something about half to two-thirds yoga block-height, like one of those hardcover college textbooks you haven’t done anything with in a long time. The Modern Library edition of Plutarch’s Lives of the Noble Greeks and Romans is just about perfect.

Swollias Press

This movement took on my nickname at work (I do work at Bodybuilding.com, after all), simply because I’d never seen it before, and the nomenclature alternatives are all pretty complicated. “Alternating see-saw kettlebell thruster,” anyone? No thanks. Let’s go with Swollias.

As with the Z-saw, this isn’t a new lift so much as it is a combination of existing ones. Here’s how to do it:

  1. Clean a pair of kettlebells, either from a dead stop or with a swing. You can do it with two matching weights, or two uneven ones. It works great with both.
  2. Perform a single front squat, and on the way up, press one of the kettlebells up while keeping the other in the rack.
  3. Lower the top bell into the rack. A second clean is optional here.
  4. Squat again, and on the way up, press the other bell. You can then set the kettlebells down and shake it off before going again, or you could keep piston-pumping reps as long as you want.

What’s the advantage? Well, having a bell in the rack means you’re forced to keep an upright torso and tight core. I like the single-kettlebell thruster, but find it can get a little sloppy and forward-leaning under fatigue. This variation holds a little firmer, in my experience.

"Swollias" Kettlebell Combo Sequence Nick Collias
Lots of cleans, lots of squats, lots of time in the rack. What more do you want?

On the flipside, it doesn’t require the same level of thoracic mobility as a double-kettlebell press or thruster, and once again, lumbar hyperextension is hard to slip into with this variation. Definitely not so with the double kettlebells.

With heaver weight, I like to treat these as a little mini-complex, kind of like Dan John’s “Armor-building” complex of two cleans, one press, and three squats. One round of clean, squat, press, clean (optional), squat, press every 30 seconds, or on the minute, is a great routine. Do it for 10-20 minutes, and it adds up to lots of cleans, lots of squats, lots of time in the rack.

Alternately, you could use a lighter weight, up the reps, and just see what cries “Uncle” first.

How To Use These Lifts

There’s a time to train like you’re chasing something—say, a half-bodyweight press for an RKC-II certification—and there’s a time to train like you’re not. And when I’m not chasing, I like to mix my presses up. A lot.

For the last few months, my favorite way to do this is to use Dan John’s press and suspension strap circuit from this article on Bodybuilding.com as a template, and swap out press variations based on whatever feels good that day. Both of these press variations have been regulars in the batting order.

Don’t confuse this with “program hopping,” that oft-maligned symptom of exercise ADD. The parameters and the basic movement patterns don’t change much; just the specifics do. If I want to change every workout, fine. If I want to do the same thing for three weeks, fine.

This approach keeps me excited to train, allows me to sneak into moderate rep PRs regularly, but also allows—or maybe forces—me to learn and explore new lifts, either those that I see out in the world, or that I cook up on my own in a moment of living room inspiration. These are two of the latter. Enjoy!


***

Nick Collias, RKC-II, PCC, is the executive editor at Bodybuilding.com, and the host of the Bodybuilding.com Podcast. You can read and hear more of his work at Bodybuilding.com.

Filed Under: Kettlebell Training, Mobility and Flexibility, Tutorial Tagged With: kettlebell training, kettlebell tutorial, Nick Collias, press challenge, RKC, see-saw press, straddle press

  • « Go to Previous Page
  • Page 1
  • Page 2
  • Page 3
  • Page 4
  • Interim pages omitted …
  • Page 8
  • Go to Next Page »

Primary Sidebar

Featured Products

previous arrow
BOOK-RKCBookofSnC
HardStyleKettlebellChallegeDanJohn700
BookCoverMasterTheKettlebell1
RKCiconKettlebell512
KettlebellGoddessdv040
next arrow

Recent Posts

  • RKC Big Six Workout
  • The Kettlebell Swing & Low Back Pain
  • Key Kettlebell Exercises To Help You Create Better Balance
  • How to Most Effectively Use Kettlebells to Meet Your New Year Goals
  • 1 Exercise That Checks All The Boxes
FOLLOW US ON TWITTER!

Archives

Copyright © 2025

Dragon Door Publications / The author(s) and publisher of this material are not responsible in any manner whatsoever for any injury that may occur through following the instructions or opinions contained in this material. The activities, physical and otherwise, described herein for informational purposes only, may be too strenuous or dangerous for some people, and the reader(s) should consult a physician before engaging in them.