• Skip to main content
  • Skip to primary sidebar
  • Home
  • Contributors
    • Matt Beecroft, Master RKC
    • Martijn Bos, Master RKC
    • Andrea Du Cane, Master RKC
    • Angelo Gala, Master RKC
    • Chris Holder, Master RKC
    • Steve Holiner, Master RKC
    • Dan John, Master RKC
    • Mike Krivka, Master RKC
    • Thomas Phillips, Master RKC
    • Robert Rimoczi, Master RKC
    • Phil Ross, Master RKC
    • Max Shank, Master RKC
  • Workshops
    • HKC Workshops
    • RKC Workshops
    • RKC-II Workshops
  • Find an RKC Instructor
  • Resources
    • Articles
    • Forums
    • Kettlebells
    • Products
  • Blogs
    • PCC Blog
    • Strong Medicine Blog
  • Archives

RKC School of Strength

Official blog of the RKC

Kettlebell Training

Kettlebells and Mountain Marathons

April 8, 2015 By Michael Kruse 4 Comments

Michael Kruse Mountain Marathon
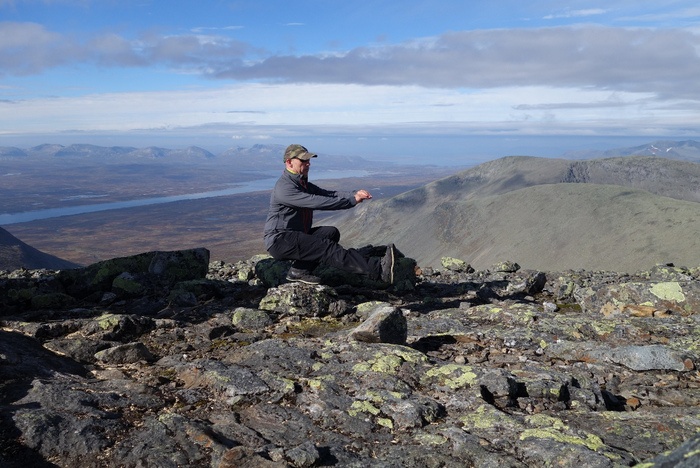
Soon I will be 55 years old, and have decided to step out of my “comfort zone” in my training. Unfortunately an old shoulder injury prevents me from choosing some of the most daring adventures. After some thinking, I decided to choose a Spartan Race or a mountain marathon. Since I love being out in nature, I decided to train for a mountain marathon.

What is a Mountain Marathon?

As the name implies, it is a run of a marathon or longer in a mountainous environment. Around the world there are many of these races. The oldest and most famous one in Sweden is Björkliden Arctic Mountain Marathon (BAMM).

The BAMM competition is special because it is a two day event—and you must carry all the gear and food needed for surviving those two days on the mountain. Teams of two people compete and run nearly 25 miles each day while climbing approximately 4,900 feet in altitude—each day.

To prepare mentally and physically while testing equipment, I will also participate in a tour around Sweden´s highest mountain, Kebnekaise. The Keb Classic Summer contest is Sweden’s slowest marathon, but perhaps the toughest. Running a marathon with a large part of the race in rocky terrain with a climb of more than 4,600 feet requires a lot of preparation.

Requirements for the Challenges

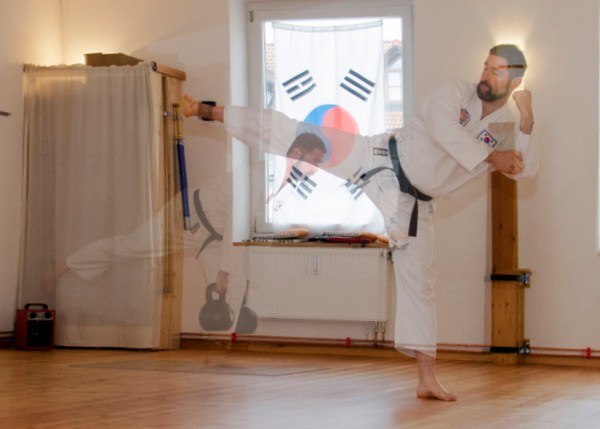
I will be running in two different types of competitions, one with a backpack and one without. Mountain races place the most strain on the ankle, knee and hip. You must be strong from many different angles due to the substrate, and obviously have tremendous endurance. I will also need to train and practice running on flat land and inclines.

Training Examples

A normal week of training from March:
Monday morning: Running 1 hour
Monday evening: Kettlebell training 1 hour
Tuesday: Interval uphill running 1 hour
Wednesday: Kettlebell training 1 hour
Thursday: Downhill running 1 hour
Friday: Kettlebell training 1 hour
Saturday: Rest
Sunday: Long run with backpack 2-3 hours
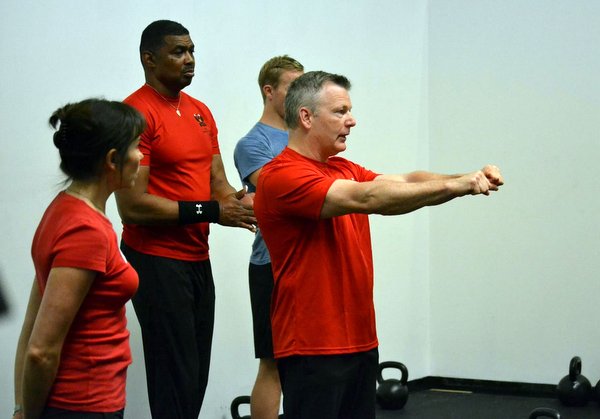
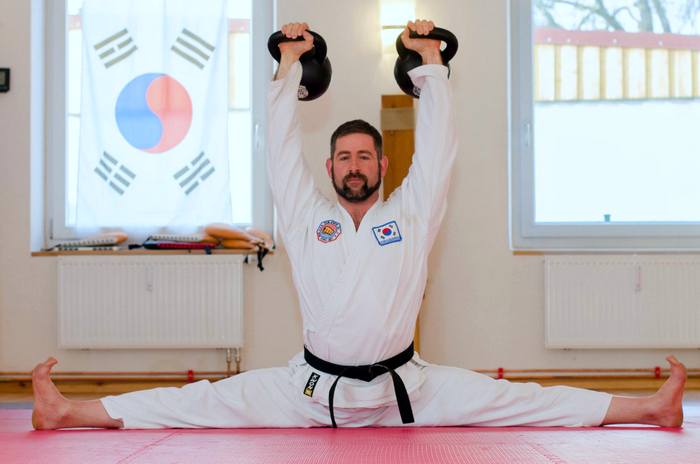
Kettlebell Training

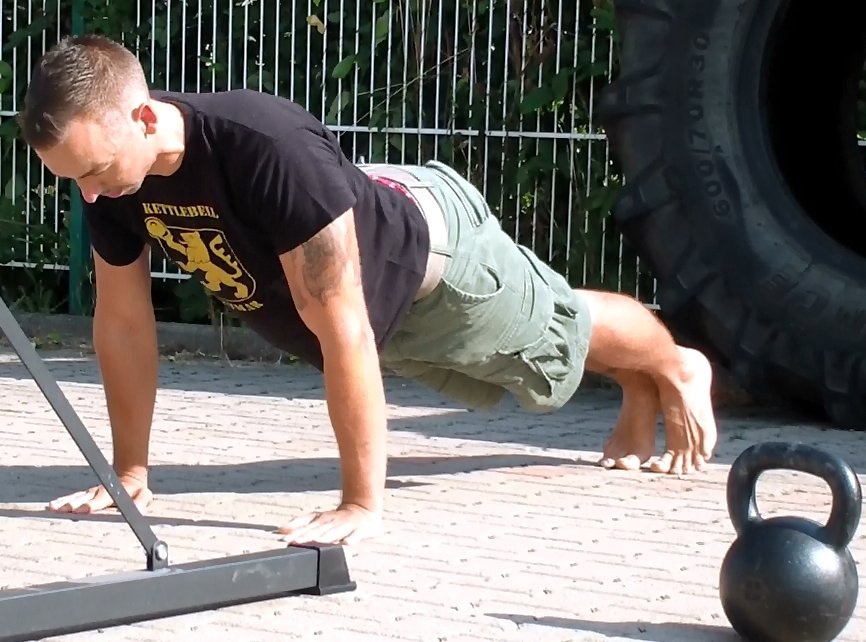
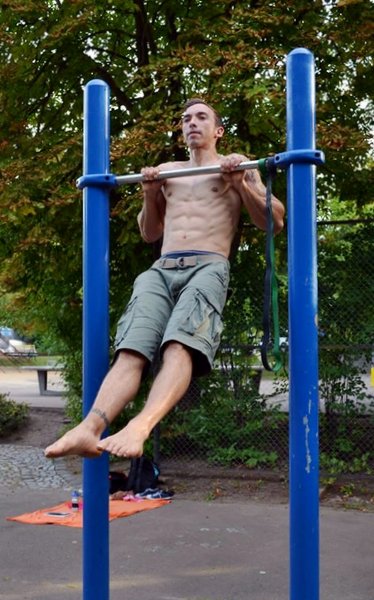
All strength training is done with kettlebells or bodyweight exercises only. Since I will constantly be in motion, except when reading maps, it is important to choose the right exercises.

Here are my three areas of focus and kettlebell exercise choices:

  • Endurance: One arm swing, two arm swing and snatch
  • Unilateral Stability: Single leg deadlift, airborne lunge, front squat, single arm row, reverse lunges
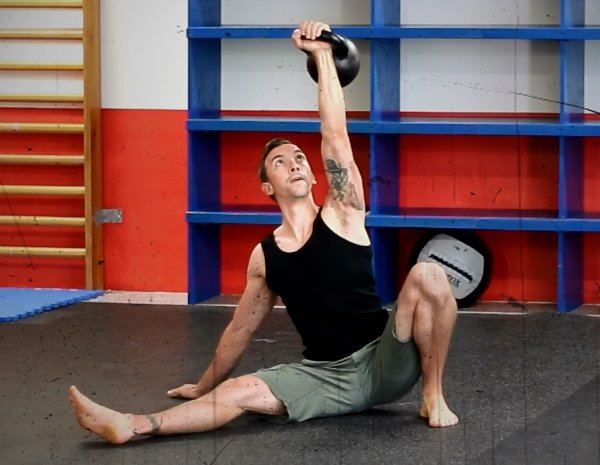
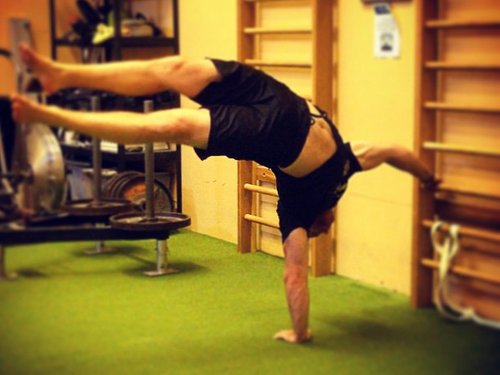
  • Whole body: Turkish get-up, carry

Example Session:

Warm up 10-20 min
Mobility + TGU

Block 1: 15 minutes
Single leg deadlift 5 reps (posterior strength)
Bottom up press 5 reps

Block 2: 15 minutes (on the minute)
One arm swing (posterior explosivity)
Thoracic bridge

Block 3: 10 minutes
Different types of carries

Depending on how my body feels, I will run various types of workouts with unilateral training. If I feel a bit tired, I extend the warm-up and run a pure endurance workout in 15-20min instead.

Workout 2 for Triathletes and Runners 15 Twoarmsving 10 Front Squat left 5 KB Row left switch side 1 min rest, 3-6 rounds

A video posted by Kettlebellspecialisten (@kettlebellspecialisten) on Feb 20, 2015 at 1:37pm PST

To avoid injuries, I almost never go “all out” when doing any of my workouts. The closer you are to your 1 rep max, the higher the risk of injury. A suitable load for the strength training exercises listed above is around 75% -80% of 1RM.

Recovery

For the training to have its maximum effect, you must know the importance of recovery. I can also attest that recovery is even more important as you get older. To tolerate a workout volume of 8-10 hours a week, I have to make sure that my sleep and diet is as good as possible.

Wish me luck with the mountain marathons, I will need it ☺
Michael Kruse

****

Michael Kruse, RKC, PCC instructor believes that age is just a number ☺ he can be contacted by email at kettlebellspecialisten@gmail.com, follow him on Instagram @kettlebellspecialisten

Filed Under: Kettlebell Training, Motivation Tagged With: Athletic Training, Distance Running, fitness goals, goals, kettlebelll training, Michael Kruse, mountain marathon, performance goals, recovery, running, training programs

Practical Programming

April 1, 2015 By Max Shank 10 Comments

Max Shank Teaching In Germany

Programming is a scary word for coaches, trainers, and exercisers. There seems to be this mystic fog of confusion centered around the idea that the way you put an exercise plan together will completely make or break your gains. Obviously we are all afraid of wasting our time in the gym, so it’s natural for us to feel this way about it–we want optimal results!

There has been a ludicrous amount of time, energy, and experimentation in trying to determine some of the best training plans and methods. You can take a simple idea: “Exercise=good” and after years and years of research, start to worry about whether you did enough transverse plane movements at 85% of your 1RM on Day 4 in week 3 of your 12-week periodized program within a 3 year macrocycle.

Confused yet? Yeah I know.

Here’s the thing, there is a decent amount of science and experimentation to back this stuff up, so in theory it makes sense.

However, my two main issues with complicated programming are centered around the following:

1) Reality
2) Who is this for again?

In a land where unicorns roam free and butterflies kiss the cheek of every child, maybe these intricate plans make sense. However, we live in the real world. We get in an argument with the wife, the kids keep you up all night, you’re stressed out at work, maybe you got super drunk last weekend or didn’t get enough sleep the night before. Whatever it is, we are not consistent nor are we precisely linear. A good plan allows for wiggle room based on how you feel on a given day. Trying to force a certain amount of reps/sets or movements on a day where you maybe shouldn’t is a surefire way to injure yourself. Don’t force square pegs into round holes. Take advantage of the days when you feel good, and don’t push your luck on the days where you don’t.

Most of the best-known and revered programs in the world all center around heavily specified activities like powerlifting/Olympic lifting or gymnastics. What we fail to remember is that these programs are geared toward PROFESSIONALS in these SPECIFIC sports. Last I checked, most of us are just trying to feel better, look better, and then perform better. I don’t know about you but I don’t get paid by the pound when I do a deadlift. The issue here is that we are sacrificing the main goal (better health and fitness) for the secondary cause (lifting more weight). I know that we love measuring things, and it’s a very efficient metric, but let’s not forget why we are lifting weights or training in the first place!

Professional athletes sacrifice health for performance all the time–because they are paid to do so. If you’re not getting paid to lift more weight, you might want to rethink using a program that is built for those who do.

Here’s some parting wisdom when it comes to putting a plan together.

Your nervous system likes frequency over intensity, so train full body workouts and hit all the main patterns every session.

  • Upper Push
  • Upper Pull
  • Lower Push
  • Lower Pull

Be flexible. When you feel super strong, throw on some extra weight. When you don’t feel 100% focus more on things like flexibility and medium weights.

Max Shank Twisted Flagstand

Build your plan around the rest of your life.

One of the biggest problems with any plan is consistency. So take a look at your schedule for the week and find the BEST times where training will fit around that–you want to remove as many barriers as possible when it comes to working up the motivation to work out. Have a plan for when you can’t make it to the gym so you can still train at home or at the park–it’s always good to have a plan B.

The challenge is not in lifting the weight, the challenge is in having the resolve and forethought to be consistent over the long term.

Better every day.
-Max

***
Master RKC Instructor Max Shank is the owner of Ambition Athletics in Encintas, California. He is very active in martial arts, competes in the Highland Games, and promotes a holistic approach to overall fitness. For more information about Max please visit www.maxshank.com.

Max Shank is the author of Master the Kettlebell, now available in paperback and ebook format.

He has also recently released Ultimate Athleticism, an ebook and training program.

Filed Under: Coaching, Kettlebell Training Tagged With: challenges, Coaching, consistency, exercise programming, fitness programming, fitness training, Master the Kettlebell, max shank, programming

Combining Ancient Practice and Modern Sports Science

March 18, 2015 By Florian Kiendl Leave a Comment

RKC Team Leader Florian Kiendl KB Split

Because I come from a classical, non-contact school of Tae Kwon Do, the RKC has caused huge a paradigm shift in the way I approach my training. Many classical martial arts have a Zen like approach—just do the movements and see what they will teach you over time.

A fellow taekwondo friend, Valentino Solinas from Italy, recently posted a quote that sums up this idea:

“You may begin the study of martial arts and you may quit the study of martial arts, but you can never complete the study of martial arts…”

Training with this mindset can eliminate potential frustration if results are not coming easily or quickly. This mindset also reduces competitiveness among students which can sometimes otherwise lead to hubris and all its related problems.

Even if progress seems stifled, training with this mindset can be very rewarding over many years—regardless of one’s physical condition at the beginning. I have witnessed my former teacher’s mother start practicing Tae Kwon Do several times a week even though she is well over 70 years old and has a medical history that could fill a book. She once told me if she had known how good this training would make her feel, she would have started much earlier and that it might have prevented many of her health concerns. There’s no way she would ever learn to kick to head level or do a controlled spin kick, but it did not matter. She trained with beginners and black belts—and I think she taught everyone a lesson for life. Her last training session was one day before she died.

My RKC Epiphany

When I was introduced to RKC kettlebell training in 2009, I had the martial arts mindset. It struck me from the beginning when many concepts I had intuitively grasped over many years of training were explained to me in mere minutes in plain and simple words. How much easier could I make it for my students if I used the RKC teaching concepts? With a deep understanding of human movement, training progress can be planned and obstacles avoided before they even show their ugly faces. To me this was an epiphany and it immediately changed my views on training. I started learning and experimenting with it and continue to today.

In recent years, I learned how to integrate both systems to fill gaps or avoid roadblocks for my students and I. I want to give two examples—one I use in my own training sessions and one I use to teach my students how to perform better kicks.

Integrating Taekwondo Forms in Kettlebell Sessions

One example of combining my martial arts practice with my kettlebell training is to use Tae Kwon Do Hyongs as a warm up or in between my strength sets as physical and mental resets.

Florian Kiendl Hyong

Hyongs are predefined sets of movements that simulate combat against several attackers. The higher the form, the more difficult and complex it is—some forms have more than 100 movements. Hyongs present a martial arts movement flow that allows a student who has mastered the general flow of the form to immerse himself in the movements. The student will also learn to understand the movements in the context of a fight. There is a massive difference between performing a single strike, blow or block in practice and performing the same movement in context of a series of attacks and parries. In the time before protective gear was available, these forms presented the only option for practicing combat situations with full force without risking injury to oneself or a sparring partner.

By integrating Hyongs into my kettlebell sessions I gain big benefits:

  • Most of the movements are performed over a full range of motion, and work as a complete reset of all major joints.
  • All movements are executed with full force, but without any external resistance or long isometric contractions. Every muscle is activated without getting fatigued.
  • The quick movements ensure that I don’t get tight or stiff.
  • I get to practice my Hyongs more often 😉
  • The average Hyong takes 30 or more seconds to perform and is non-taxing aerobic activity between sets.
  • Most forms are complex enough to require enough concentration that an advanced practitioner will enter an almost meditative state of mind. This works as an effective mental reset, if the last set did not go well and my mind is distracted, the forms will help me avoid a downward spiral.

Using Tension Techniques to Teach Better Kicks

From all martial arts I know, Tae Kwon Do has the highest physical demand. Bringing your leg to head level with force and accuracy takes extreme mobility, crazy-strong hips and superb coordination. All these perquisites don’t come easy, especially if you start past your twenties.

Florian Kiendl SLDL

For years I watched new students explore these new movements with varying success—some are naturals who walk in the Dojang and start training as if they never did anything else, and they are a pleasure to teach. On the other hand, some train for years and years with dedication and simply do not progress past a very basic level. When I started holding Tae Kwon Do lessons in my first teacher’s school, I assumed that it was something genetic, a Tae Kwon Do gene that made the difference!

After learning and understanding the concept of tension, I made an effort to integrate the drills and techniques we use in the RKC for teaching a good swing, snatch or military press in my Tae Kwon Do lessons to facilitate good kicking mechanics.

The fundamental concept is the same for kettlebell swing and high kicks—the tighter we stay while only moving the necessary joints to accomplish the task, the more force we can generate.

By adding the RKC tension techniques to my Tae Kwon Do sessions, I managed to create “aha”-moments for my students so the would know how it feels when the technique is executed correctly.

Here’s how:

  • I demonstrate a drill or technique and have my students practice it for a while.
  • As soon as they have the general idea, I let them practice on their own or with a partner and observe which problems occur.
  • Usually I find a pattern that could be improved and I try to figure out which drills could help.
  • I stop the practice and have them do the drill that I assume will help the most.
  • Immediately afterwards we return to the original exercise and see if it worked.
  • Sometimes it takes several attempts to find the drill that will work best or we may use more than one to address the different issues.

Using this approach, black belts have come to me after the session saying things like, “I finally understand how to execute this technique!”

Conclusion

Don’t see the RKC System as a closed environment, or the drills we use as special and exclusive to the kettlebell. Experiment with different combinations and observe the results. The RKC System is designed to improve any athletic endeavor. Be creative and learn the best ways to improve your game.

Have Fun.

***
RKC Team Leader Florian Kiendl is a second degree black belt in Tae Kwon Do and runs a Martial Arts Gym in a small town close to Munich (Germany). He made it his mission to help his students to improve their movement and overall health. In his search for ways to overcome the movement restrictions of his students (and his own) he found the RKC and now works together with Master RKC Robert Rimoczi and others to help as many people as possible to gain back their Strength and Agility.

He writes a regular Blog at blog.kettlebellgermany.de and offers workshops all over Germany teaching the RKC Kettlebell exercises: KettlebellGermany.de.
If you have questions or comments on the article feel free to email him at florian@kettlebellgermany.de

Filed Under: Coaching, Kettlebell Training Tagged With: Coaching, Florian Kiendl, kettlebell training, kettlebells, martial arts, mental training, mindset, tae kwon do

Getting the Most Out of Your Turkish Get-Up

March 11, 2015 By Sebastian Müller 11 Comments

Sebastian Muller Kettlebell get up

The Turkish get-up… beginners hate it and experienced kettlebellers praise it. The TGU is one of the most fundamental movements because it progresses from lying to standing with a kettlebell. Along with the Hardstyle kettlebell swing, the TGU is one of the basic exercises which will prepare you well for all of the other exercises of the RKC training system.

My earlier post about the get-up was more philosophical and discussed the five things the get-up teaches you about life. Today’s post focuses more on the practical aspects of this movement pattern and how you can implement it in your training to get the most out of it.

Coach Gini performs a kettlebell get up
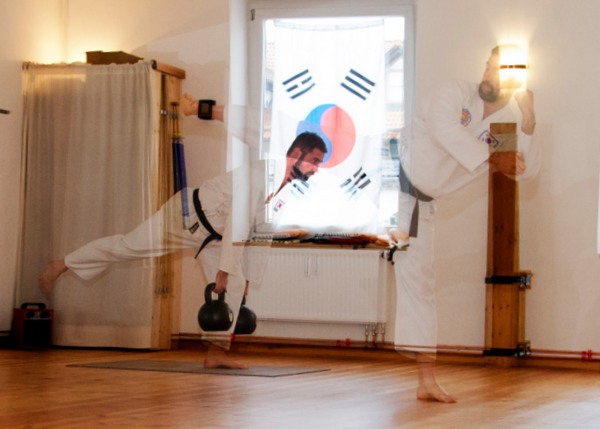
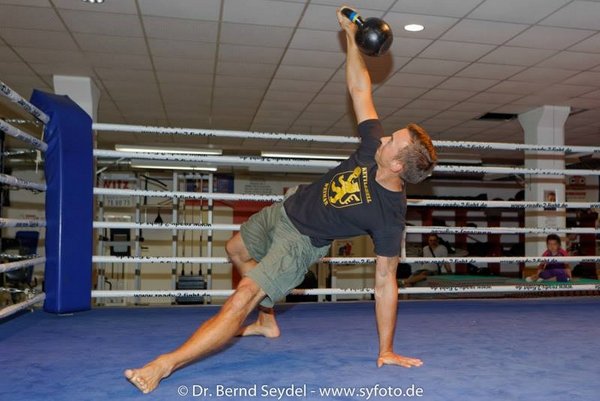
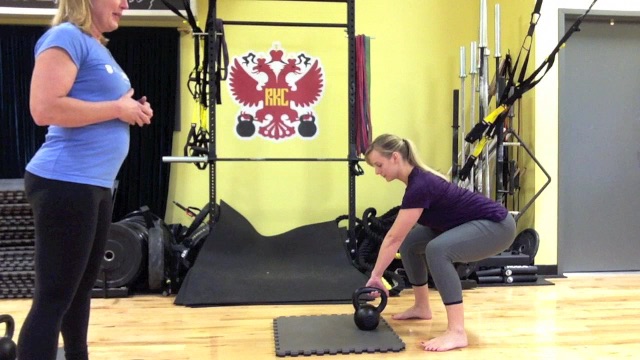
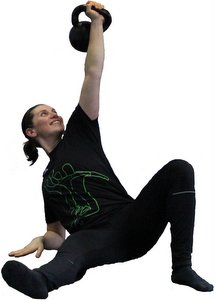
Your body learns to work as a whole unit when performing a Turkish get-up.

This exercise integrates every muscle in your body. If there’s a weak spot somewhere, you will find it very quickly—this is also one of the reasons why beginners especially have a hard time with the TGU. The same goes for athletes who are used to training isolated muscles. I have seen many trained 100 kg guys struggling to do their get-ups with a 12 kg kettlebell.

But, this is also what experienced kettlebellers love about the TGU: when you take the time to learn this movement pattern and can flawlessly perform get-ups with a 24 kg kettlebell, many good changes have already happened within your body. The TGU creates flexibility and mobility in the joints along with the basic strength you need to playfully get up from the ground with weight.

Over 200 years ago, Turkish wrestlers already knew that the TGU could prepare them for many things in life. Back then, wrestlers were required to get up while holding half of their body weight in one hand before they could even consider participating in training specific to wrestling. This is also why the get-up is often called the Turkish get-up.

The TGU Consists of 9 Positions, Making It a Complex Exercise.

Take a look at this video of Gini, one of our coaches, doing a 32kg (50% of her body weight) TGU:

What will you gain from frequently practicing and performing Turkish get-ups?

  • Improved shoulder stability and flexibility
  • The ability to train the whole body as one unit
  • A strengthened mid-section improving the reflexive stability of the core, and providing improved injury prevention
  • Improved interaction of the muscular chains, intramuscular coordination, and improved interaction between the brain and muscles
  • Improved fat burning capacity as large muscle groups are activated causing high calorie demands

Gray Cook, physical therapist and co-founder of Functional Movement Systems refers to the Turkish get-up as “Loaded Yoga”.

There are Tons of Possibilities for Using Turkish Get-Ups in Your Training.

Performing the TGU without weight or with a light weight is a perfect warm-up exercise, or as a component of active recovery/regeneration days. Performed under heavy load, the TGU is one of the best full body strengthening exercises on the planet. For men, a goal of 50% body weight and for women 33% of body weight are absolutely realistic. But as you saw in the video above, these guidelines are relative and can be exceeded!

Another thing that I really like about the get up is how it allows you to lift a weight overhead that you might not be able to press yet. Here is a get-up variation that can help you prepare for heavy presses: choose a weight you can’t (yet) press and bring it over your head by performing a Turkish get-up. Now go take a walk with the weight overhead. By doing this, your body gets used to the weight being in lock-out position overhead and will automatically learn how to stabilize it.

There are tons of get-up variations which provide different focuses on many training aspects. Another variation is performing a bottom-up Turkish get-up to challenge and improve your grip. Hold the kettlebell in a pistol grip (the bottom of the kettlebell will be pointing at the ceiling) and get up from the ground. This is also a great variation for using kettlebells which would ordinarily be too light for your training.

Finally, I have a variation perfect for everyone who has just learned the TGU. This variation will help to “grind” the single positions—it is called the Pyramid. You’ll only need a light kettlebell for it, because you will perform each position repeatedly. Also, be sure to always move into each single position perfectly, and always work in a very controlled manner.

Generally, the Turkish get-up is About Working Slowly and Controlled, Eventually Under a Great Load.

Maybe the get-up is simultaneously so loved and hated is because it can help you get a great deal better, stronger and healthier while rigorously pointing out issues that still need work. Together with the Hardstyle kettlebell swing, it can help you to constantly get constantly stronger, more flexible and even improve your overall endurance.

Hopefully my examples have shown you what an incredibly versatile exercise the TGU is, and that it’s always a good thing to continue improving your get-up.

***

Sebastian Müller, RKC Team Leader, PCC Instructor, FMS, and Primal Move Instructor, trains and instructs at the KRABA location in Wiemar, Germany. He can be contacted by email at: info@kraba-erfurt.de and his website: http://www.kraba-erfurt.de. His Blog is Vereinfachedeintraining.com

Filed Under: Kettlebell Training Tagged With: coordination, flexibility, full body exercise, get up, get-up variations, grip strength, kettlebell training, Sebastian Muller, turkish get up

Why We Grunt

February 25, 2015 By Felix Sempf 6 Comments

RKC Instructor Felix Sempf

When entering a room where RKC kettlebell training is in progress, one quickly notices the characteristic way people breathe while performing the exercises. Although this “grunting” may sound unfamiliar and disconcerting at first, breathing in sharply through the nose and breathing out slowly while gritting the teeth should become a part of everyone’s training routine.

In order to understand why we use the “biomechanical breathing” method for improved performance and safety, we first need to talk about the anatomy of the trunk and core. Today, most researchers agree that the lumbar region is an area that relies heavily on stability and where excessive range of motion should be avoided (Battie et al, 1990; Biering-Sorenson, 1984; Cuoto, 1995; Saal & Saal, 1989; McGill, 2010). In the original sense, the widely-used term “core stability” describes “the ability of the lumbopelvic hip complex to prevent buckling and to return to equilibrium after perturbation” (Wilson et al., 2005). In other words, core stability is the ability to produce and maintain a neutral lumbar spine (Gottlob, 2001). According to the National Institute for Occupational Safety and Health, keeping a neutral spine is recommended when lifting something heavy off the ground or being under load…

Several muscles, such as the latissimus dorsi, erector spinae, quadratus lumborum, multifidii, and obliques—but also the glutes and adductors contribute to the stability of the core (Filey, 2007). More importantly, most of these muscles are connected via the thoracolumbar fascia, thereby forming a natural weightlifting belt around the lumbar spine. In conjunction with the diaphragm and the muscles of the pelvic floor, they help to maintain or build core stability by forming a shell around the lumbar region. Contracting the core and hip muscles leads to muscular stiffness and therefore the flexibility of the shell decreases and becomes more rigid. Filling the rigid shell with air by sharply inhaling through the nose will increase the so-called intra-abdominal pressure, leading to greater compression of the spine and consequently higher intervertebral stiffness (increased lumbar spine stability).

diagram of human breathing

A sharp inhalation has the advantage of automatically contracting the core muscles, which does not happen during slow breathing. The same effect is observed when exhaling while gritting one’s teeth—sufficient intra-abdominal pressure is maintained because more air will remain in the respiratory pathways while air flow is constricted. Continuous breathing allows continuous spine stability and is therefore preferable to the “valsalva maneuver”, when performing a task for more than one repetition. In support of this theory, Stuart McGill (2007) reported that using this breathing technique—known as “kime” in martial arts—when performing swings lead to a significantly greater contraction of the obliques. Thus, safety and performance can be enhanced by just breathing the right way.

***

Felix Sempf M.A. Sportscience, RKC, FMS, PM trains and instructs at the FIZ in Göttingen, Germany. He can be contacted by email at: felix.sempf@sport.uni-goettingen.de and his website: http://www.kettlebellperformance.de

Filed Under: Kettlebell Training Tagged With: breathing, breathing technique, core stability, effective breathing, Felix Sempf, intra-abdominal pressure, kettlebell technique, RKC kettlebell training

Fundamental Human Movements and Training in Opposite Planes of Motion

February 11, 2015 By Sebastian Müller 7 Comments

Sebastian Muller Push Up

There are many philosophies out there when it comes to improving performance and mastering training efficiency. The following post is about two things that changed my life completely.

Part 1: Fundamental Human Movements

When I stumbled upon kettlebells a few years ago on the Internet, one thing came to mind–kettlebell training is always training of the entire body. Back then, like many people, I used to train isolated muscles and had felt okay doing this for about ten years. When I heard ‘full body training’ I immediately thought about training schedules for beginners. In every forum it seemed like beginners started their training with full body exercises and then switched to split training later. The most popular splits were chest and biceps. On certain days, you only attack biceps and/or chest muscles nicely isolated with tons of exercises.

Through constant research about kettlebell training, one day I stumbled upon Dan John’s The Fundamental Human Movements. His philosophy was suddenly all about training movements instead of training muscles.

Train movements instead of muscles!

At first this didn’t make any sense to me at all. How exactly am I supposed to train movements? It took me a while to understand what he was writing about, and the advantages of this training philosophy. How could these movements be all you ever need to become more fit than the average Joe or Jane?

Here’s the “secret”:

The fundamental movements are push, pull, hinge, squat and loaded carries.

But isn’t this another split and you’ll train isolated muscles again? Not really. Take a look at the recommended exercises for each movement and you’ll see that your entire body is always incorporated and trained, only the focus changes. Here are these fundamental movements and some exercise examples:

Push: push up, military press, push press,

Pull: row, pull up

Hinge: hinge with added weight (sandbag, kettlebell, etc.), deadlift, one-legged deadlift, kettlebell swing, clean, snatch, jumps (vertical and horizontal)

Squat: goblet squat, front squat with kettlebells, squats with barbells

Loaded Carries: waiters walk, suitcase walk, rack walk, press walk, farmers walk, double rack walk, pulling or pushing sleds, cars, etc.

As you might imagine, “push” exercises are mostly favored by everybody. Bench pressing is likely to be a lot of people’s favorite exercise and unfortunately always has priority before squats, pull ups and hinges. Just take a look around in your local fitness studio and try to find out which machine is most frequented.

As for most of the people who hear about the fundamental movements for the first time, it’s now time to get back into balance. It was also like that for me in the beginning. Dan John recommends prioritizing the fundamental movements like this:

  1. Loaded carries
  2. Squat
  3. Hinge
  4. Pull
  5. Push

He argues that he can change your life with loaded carries in three weeks. Here is an example: in his book Intervention he describes a client who was already close to mastering all of the fundamental movements. Dan John could only teach him a little bit here and there about a few movements. But, when it came to loaded carries, it turned out that this athlete had never trained with them before. So they worked together on loaded carries and the results were extreme in a very short time. Near the end of my “traditional” training time in a fitness studio, I always brought my own kettlebell with me. I used to work in a studio as a trainer for rehabilitation and every time I finished working, I fetched two kettlebells and carried them across the studio. I trained in the evenings and the girls and guys on their ergometers were always giving me puzzled looks!

But back then, I recognized that I was getting the same performance improvements that Dan John describes in his book. This is one of the reasons I fell in love with kettlebell training and how this training philosophy changed my life.

But, you don’t have to just carry a kettlebell! Go out there and look for something that you can lift and carry and then do it! Do this for three weeks and see if your life changes.

Part II: Training in Opposite Planes of Motion

Sebastian Muller Pull Up

Hearing about the five fundamental human movements is a good start, but only pays half of your rent (German saying). If you ask yourself how you can use these movements together into an effective training schedule, carry on, because:

Training in opposite planes of motion is the most effective way to make your training more efficient!

Why? Because you will learn to do more and how to do it more efficiently in the same amount of time!

What are the planes of motion? Basically you have top and bottom, front and back, up and down and reverse.

Once you understand which direction, plane and axis corresponds with each fundamental movement, you are the big time winner. With this, you can easily combine the right exercises to train the whole body without ever missing any part of your body.

Here is a list of some exercises split into the fundamental movements. The phase where the most strength is required defines the direction.

Push

  • Focus on the front of the upper body
  • Directions: forward (push up), up (kettlebell press)

Pull

  • Focus on the back of the upper body
  • Directions: back (rows), down (pull ups)

Hinge

  • Focus on the back of the lower body
  • Directions: forward (deadlifts)

Squat

  • Focus on front of the lower body
  • Directions: up (front squat)

Loaded Carries and Groundwork

  • Focus on total muscle interaction from up to downwards and front to backwards

How can you use these movements and planes to make your training (more) efficient?

The answer is supersets, they are the best way to save time during training efficiently. Supersets are movements or exercises executed consecutively without a break between them. Here is an example of a superset, where lower and upper body alternate and frontside and backside are focused in turns.

Example: Deadlift (backside lower body) in a superset with press (frontside upper body)

So although you train your whole body with these two exercises, the focus alternates between these two, giving you ‘active rest’ from each fundamental movement in between.

Put a corrective movement into the breaks between the sets and you will attack the next set fresh and recovered.

Sebastian Muller Kettlebell Swing
Sebastian swings a Dragon Door kettlebell custom painted with his gym’s logo

Example of an entire training session with kettlebells and bodyweight using the fundamental movements:

1. Turkish Get Up 1/1 x5 (Groundwork)

2a. Double Front Squat 5×3 (Squat)

2b. Pull up 5×3 (Pull)

Break:  2 minutes – corrective movement: mobilizing t-spine

3a. Swings 10×5 (Hinge)

3b. Push up 5×5 (Push)

Break: 2 minutes – corrective movement: hip flexor stretching

4. Farmers Walk (Loaded Carries)

The plan above contains almost all fundamental movements except the horizontal pull and the vertical press.

According to how many training days your weekly plan involves, it’s always possible to do fewer exercises in one set on some and more on other days. A lot of people split the focus on lower and upper body for example. You could do Monday and Thursday movements with focus on lower body, Tuesday and Friday focus on upper body. This way it would still be effective because you would intensely train the different planes of motion while still having two recovery days.

How the distribution comes out in the end depends on your own personal training goals and your current fitness level. Nothing is carved into stone, but hands-on-heart:

Knowledge about the fundamental movement patterns combined with the different planes of motion is an immensely powerful tool to shorten your total training time while make training more intense.

Give it a try and let me know how it works out for you!

Filed Under: Kettlebell Training, Tutorial Tagged With: kettlebell workouts, movement, movement training, planes of motion, Sebastian Muller, workout design

Achieve Pain-Free Single Kettlebell Cleans From The Start

January 28, 2015 By Lori Crock 5 Comments

RKC Team Leader Lori Crock's Kettlebell Cleans Tutorial

I am a coach who hates to see people in pain from doing cleans.

And it doesn’t matter whether it’s a beginner, or a more advanced kettlebell athlete, the clean can be a challenge to do as effortlessly as its kindred ballistic—the swing or even the snatch.

I speak from experience—the clean was hard for me when I was preparing for the RKC-I. It wasn’t hard with the typical thump on the wrist and forearm in the catch. No. My issue was a shoulder-hike on one side as the kettlebell made its way up … which can be even worse with the trap pain and the potential for some serious asymmetry down-the-road.

To avoid this, read on!

When you are first learning the clean, it can seem mysterious as to what the hand, arm and kettlebell are doing on the way up to the racked position. It happens so fast!

Often we see the clean only as a transitory movement that prepares us for pressing, front-squatting or doing racked carries—instead of focusing on the quality of the clean—even though we know a more efficient clean results in stronger pressing and squatting. And the clean is a nice alternative to the swing or snatch for conditioning.

You might not realize the inefficiencies in your clean if you don’t train it on its own very often—until you notice bruises on your wrist or arm the next day.

So let’s review the phases of the clean to achieve pain-free cleans. Note that the coaching cues included here are phrases I use when teaching to help people remember key points. The phrases may not exactly match the words used in our RKC manual, but they are rooted in my RKC kettlebell training.

The Swing

Get your two-hand and one-hand swing down first to set your start position, hip hinge and especially a deep back swing. Use cheat cleans (two-hand cleans) while you are learning the swing to prevent grooving bad movement patterns with your single kettlebell clean.

The Setup

Clean setup is just like the swing, holding the center of the handle, except the handle is tipped vertically for internal shoulder rotation to prepare your elbow to lock into your side once your arm moves through to the front of the body.

Coaching Cue: Set up like a slingshot.

Lean back with hamstrings on, lats activated, the kettlebell is tipped toward you—the whole body is taunt and slightly leaning back—and ready to release the kettlebell into a deep back swing.

You are in this same slingshot position each time you clean, whether from the ground or in the air into another rep. This athletic, ready position also applies to the Swing and Snatch with the handle in a horizontal position … but when learning the clean, in my experience, students need a reminder about the importance of the setup because they are more focused on the finish.

Lori Crock Kettlebell Cleans Tutorial: The Setup
The Set Up

The Back Swing

Get into your best hip hinge and hike the bell back as deep as possible to load and explode out of your hips. Shortchanging the back swing means you’ll end up without the power to send the kettlebell upward; so your body may compensate by arm curling the kettlebell or hiking the shoulder to assist the kettlebell upward.

Coaching Cue: Crush the wall behind you with your tailbone and explode up.

Go back to the swing if you are having problems achieving a deep back swing and hip explosion.

Practice: Swing-Swing-Clean 3 times each side to refine the back swing for the clean.

Lori Crock Kettlebell Cleans Tutorial: The Back Swing
The Back Swing

The Breathing

Breathe in through your nose to fill the diaphragm on the back swing. Exhale as the hips snap and knees and glutes lock.

Hardstyle breathing is used for power production and safety at the concentric or positive part of the clean (and all ballistic kettlebell movements). Exhaling when the hips snap creates a powerful muscular contraction in the torso that assists the body with the movement.

Coaching Cue: Explode, exhale.

Time your exhale on the hip snap/lock—not on the catch of the kettlebell in the racked position.

The Rise

When the kettlebell enters the front of the body there is some quick work to lock the elbow against the side of the body and get the hand around the kettlebell handle with a loose grip. Do this right away after the back swing when the hand is at hip level rather than waiting until you are about to rack the kettlebell.

Coaching Cue Elbow and Arm: Hip and zip

Lock the elbow into you side above your hip, zip up your jacket; keep you hand and arm close to your chest as you guide the kettlebell upward.

Coaching Cue Hand: Houdini hands

Move your hand quickly around the kettlebell handle as soon as it enters the frontal plane; do this quick hand work at approximately hip/waist level.

Practice: Clean in front of a wall, door, or post to practice keeping the kettlebell close to the body if you tend to cast it out away from the body. Use your other hand to cover your face in case of actual impact to the wall.

The Catch

The triangle of your forearm / upper arm will receive the kettlebell and hold it with even pressure (50% pressure on forearm and 50% on your bicep), but think of the whole body as catching the kettlebell. We move into a vertical Hardstyle plank when receiving the kettlebell to help avoid high impact on the wrist and forearm.

In the racked position, the kettlebell will not be sitting on your chest; instead, the inside of your arm will connect with at the side of your torso with a vertical forearm and vertical wrist about at the level of your collarbone. Do not hold your racked arm out in space—keep it touching the body to prevent overloading the elbow joint and to engage the lats. The arm and the body are connected and working as one unit.

Coaching Cue Torso: Catch with your cylinder of strength (Thanks, Andrea Du Cane for this phrase!)

Feel the muscular sinking in of your whole body around the kettlebell (not a collapse, but a tightening) as your abdominals and glutes contract, lats engage, knee caps roll up into quads and the entire body links and locks to receive the kettlebell in the racked position.

Coaching Cue Wrist: Knuckle up!

Because we use a loose grip on the rise of the kettlebell, beginners sometimes end up catching with a ‘broken wrist’ (wrist slightly bent back) in the racked position. To avoid this, re-tighten the grip after the catch so that knuckles are flat and facing the ceiling.

Practice: 5 Cleans left and 1 Hardstyle plank for 15 seconds / repeat right.

The Drop

Tip the wrist to release the kettlebell into a downward descent with a relaxed arm, thumb down slightly and the shoulder will be slightly internally rotated. Use only enough tension to hold on to the kettlebell and guide it to the floor or into another rep. Your hips, as usual, are doing most of the work. Keep the kettlebell as close to your body as possible, with your arm still touching your body, and finish with the arm straight in the back swing position at the end of drop before setting the kettlebell gently on the ground.

Note that death-gripping the kettlebell on the drop can lead to elbow pain.

Coaching Cue: “Waterfall” the kettlebell downward.

Allow gravity to do most of the work on the descent of the kettlebell using only a light grip.

Putting it All Together

Now you are ready to put it all together and practice your (hopefully!) pain-free cleans.

The Practice

I use the clean for conditioning in complexes and chains. I also like kettlebell chains that include a clean to practice smooth transitions between movements. This complex meets both of those goals. I use one kettlebell for all movements with 1 minute of rest between 3-5 rounds.

10 Cleans left / 10 Cleans right

SA 2 Swings-2 Cleans-2 Press left

SA 2 Swing-2 Clean-2 Press right

***
By Lori Crock, RKC Team Leader, FMS II and MovNat MCT II. Lori owns MoveStrong Kettlebells in Dublin, Ohio where she teaches small group kettlebell classes to all ages and fitness levels and continues to be amazed, inspired and educated by her students. Her email address is lori@movestrongkbs.com

Filed Under: Kettlebell Training, Tutorial Tagged With: clean a kettlebell, kettlebell cleans, kettlebell how to, kettlebell instruction, kettlebell technique, kettlebell video, Lori Crock, RKC Team Leader, video

Five Things The Turkish Get-Up Teaches You About Life

January 14, 2015 By Sebastian Müller 7 Comments

RKC Team Leader Sebastian Muller performs a TGU

Try to imagine an exercise that could make your life easier—a “magical” exercise that improves your response to everyday challenges and can make you into a better human being? Would you include it in your training?

That exercise exists, it’s the kettlebell Turkish get-up.

For more than four years, I’ve been doing heavy Turkish get-ups with kettlebells at least once a week. Besides the Hardstyle kettlebell swing, the Turkish get-up is a basic exercise in RKC kettlebell training and one of the reasons I ending up training with kettlebells.

Even though it is pure fun and constantly provides new training stimuli, over time I became aware of the other benefits of the get-up, that also apply to life in general.

  • You’ll need to be flexible and work on your weaknesses
  • You’ll learn to set up for the next step, instead of just staying put
  • The more resistance you encounter, the stronger you’ll get
  • Consistency and discipline always pay off
  • Training is life

These are all things you need to realize when working on a solid and strong Turkish get-up and these same ideas also help in everyday life.

Be Flexible and Work on Your Deficits

If you’re thinking about performing a Turkish get-up with half of your body weight, everything must fit. You need to be flexible and stable in your joints, and have the necessary strength—along with a strong will.

If one of these things is problematic, it will pay off in multitudes if you work on that deficit. Otherwise, you’ll probably plateau at some one point or weight weight sooner or later.

Two personal examples:

With Turkish get-ups, my thoracic spine mobility has always been a problem, but now it is almost perfect because I kept specifically working on it for a long time.

Another thing – when I started kettlebell training over five years ago, the English language was a big problem for me. There were practically no articles about kettlebells written in German. Even now, I almost exclusively read in English, and not just about training. Now I have completed many certifications in English and have even held entire training sessions in English. Working on these deficits paid off very well and made me a lot better.

Learn to Set Up for the Next Step Instead of Just Staying Put

Eventually, after the floor press (you’ve pushed the kettlebell overhead with your arm) you need to decide whether you want to stand up or to stay put. If you decide to get up, you have many exhausting steps ahead of you. You’ll need to get up from a prone to standing position with a kettlebell overhead making it difficult for you. There are no exits and no shortcuts.

The same is true in life. Will you stand still or take the next step forward? One thing is for sure, the more resistance you meet, the more it usually pays off if you keep going forward. This brings us to our next point…

The More Resistance You Meet, the Stronger You’ll Get

If you use a heavier weight with your Turkish get-up, you’ll get stronger. “Progressive (Capacity) Overload” are the magic words with this concept. If you keep working with the same weight all the time, you’ll get used to it, and it will no longer be a challenge. Your body won’t receive new stimuli to force it to become stronger. You strength will plateau, because there is no reason for your body to adapt to a new task.

There is some truth to the German saying, “You grow with your tasks”. When you stop facing new challenges in life, you will stop growing. Of course it’s nice and safe in your comfort zone, but that doesn’t mean you should make yourself comfortable in it.

Heavy Turkish get-ups will be mostly outside your comfort zone, and the feeling of accomplishing these challenges is awesome. It’s just the same in life!

Consistency and Discipline Always Pay Off

I want to be straight with you, to conquer a half body weight Turkish get-up won’t happen overnight. You’ll definitely need to be persistent. If you’re not afraid of that, it will eventually pay off, guaranteed! There will be days when it’ll be hard for you, and days when everything will happen easily. The most important thing is to stay persistent. The best part of all this is the journey itself—your way, your personal records, and the moment you realize the little improvements toward your goal.

Sebastian Muller Spotting Student performing a get up

A Turkish get-up with half your body weight is an absolutely realistic aim, but it doesn’t have to stop there!

While you should celebrate your small, but important achievements in training, you should also do the same thing in your life! Focus on your goal, but be aware of all the things you have already achieved on your way to get there. This is an incredibly important thing to do! Be thankful for what you have already mastered, then it will be easier to focus on the bigger goals in the future.

Training is Life

At this point, you should have realized one thing, training is life or should be at least be a regular part of it. You probably also noted that the individual components of training and life have a lot in common, and together they form a bigger picture. Just like the Turkish get-up—where all muscles need to work together as a unit and you need to consider every aspect on your way to more weight—it should be the same in your life. Take a look at the whole picture. Everything is part of your life—work, training, spending time with your family, and the time you’re on your own. If you harmonize these things, nothing in life can stop you.

The Turkish get-up taught me many things during the past few years. Today I train my body as a whole, and according to how I use it in everyday challenges. I train my body because it is a part of me and therefore a part of my life.

***

Sebastian Müller, RKC Team Leader, PCC Instructor, FMS, and Primal Move Instructor, trains and instructs at the KRABA location in Wiemar, Germany. He can be contacted by email at: info@kraba-erfurt.de and his website: http://www.kraba-erfurt.de. His Blog is Vereinfachedeintraining.com

Filed Under: Kettlebell Training, Motivation Tagged With: fitness, fitness goals, get up, goals, half body weight get-up, kettlebell training, life lessons, lifestyle, mental training, Sebastian Muller, turkish get up

Advanced Kettlebell Workout: Forget the Snatch

December 24, 2014 By Beth Andrews 9 Comments

Senior RKC Beth Andrews

Are you a good snatcher? Is your kettlebell snatch effortless and smooth? If you love to snatch try this combo. Add a lunge to the snatch. Your concentration will heighten with the multiple movements. This combo will set your heart rate on fire, scorch your legs and challenge your mind. You’ll actually forget that you are snatching. Start with a light kettlebell to groove the pattern then go as heavy as you can handle.

One of my favorite workouts is to clock in for 15 min. Or my goal would be to do a 10-1 countdown of the lunge snatch and combine it with goblets squats 10-1. As always, form is more important than time or weight. Let me know how your legs feel after this workout!

IMPORTANT:
* This is an advanced combination move for both the Lunge and Snatch technique. Be aware of the hip power and extension throughout the exercise. Make sure your Lunge and Snatch form are spot on before attempting the combination exercise.
** The kettlebells used in the video are official Dragon Door kettlebells I color coded by different sizes.

Watch the video to get the finer points. Have FUN…see you on the other side…

***
Beth Andrews is a Senior RKC Instructor, PCC Team Leader, CK-FMS, and Primal Move Instructor. She became the 5th Iron Maiden in 2013. Beth is the owner of Maximum Body Training and has over 20 years of training experience. She also has a successful on-line training business. For on-line training or to host an HKC or RKC certification workshop with Beth, email her at: bethandrewsrkc@gmail.com. For training tips and workouts visit her Youtube channel or her website at http://www.maximumbodytraining.com

Filed Under: Kettlebell Training, Workout of the Week Tagged With: advanced techniques, Advanced workout, beth andrews, combination workout, kettlebell lunge, kettlebell snatches, kettlebells, lunge, RKC, senior rkc, snatching

From Broken to Team Leader

December 17, 2014 By Paul Britt, DC 2 Comments

Paul Britt Double Press At RKC

I was broken in October 2012 at the RKC-II. It happened because I was stupid and I let my ego get the best of me at the certification. I thought that I only had a minor training injury prior to arriving in St. Paul for the workshop. I had been working on heavy double presses on a day that I was tired, but due to having to attend this particular cert, I stayed with my “program”. In the middle of my final set, I felt a sharp pain on my left hip and back. I dropped the kettlebells and decided to take a few days off. It was still bugging me a few days later, so I went to a chiropractor. The consensus was that it was just a minor strain and that I would be okay to attend the certification. So off I went, with some kineseo tape to hold me together for the three days ahead of me.

I knew the snatch test would probably put too much stress on my back, so decided that I would wait till the last day to take it. I was able to get through all of my Level 1 skills and the half-body weight press on day 1 without too much trouble. But, I had a few problems with stability that I should have paid more attention to during the skills test. I noticed that I struggled with my foot on the left side for the get-up as it did not want to stay locked down as I moved through the different parts of the movement.

I initially started out with lighter weights than normal, just to allow me to get through the certification. I had a past Master RKC give me a hard time about the weight and I let my ego override what little sense I had and I bumped my weights up. Sometime during the day, I felt a pop in my back on the left side. I did not really feel a lot of pain at the time, so I kept on training. I got back to the hotel in a lot of pain and barely slept. When I got up the next morning, I literally had to drag my leg as I walked down the hall to find some Advil. I ended up buying eight packages and using four to get to breakfast and the first half of the cert. I had to take the other four to get through the rest of the day. The last day was even worse, I thought about just quitting, and I should have. Unfortunately, I am a little stubborn and hate to give up. At that point, nobody really knew what was going to happen to the RKC after that weekend, so in my head, I had to get through the weekend and earn what could possibly be the last RKC-II certification. So I pushed through and passed all of the tests except for the Jerk and the Snatch test. I knew that I had 90 days to send the video into someone to pass those two skills. Turns out that was not going to happen for a long time.

I knew as soon as I got off the airplane in Dallas that I was not right. I struggled to get out of the seat, get to my bags and walk to my car. I ended up getting home and telling my wife that I had screwed up and was badly injured. The pain was pretty constant, so I took off from all training for what was supposed to just be November, but it ended up being a nine month break. I had to train my lead coach, Justine Deets RKC, to pass her HKC and RKC skills without being able to perform them myself. She was my gym replacement while I was recovering. I hosted an HKC in January, but was unable to assist because even picking up 12kgs caused me a lot of pain.

I was not healing, so after the first of the year, it was time to see someone about it. I ended up being referred to the top spine doctor in the area. At my appointment he told me that I had herniated discs at L4-L5 and L5-S1, both on the left side. He informed me that it was a lifelong injury and that my days of heavy lifting were over. To say that I was not thrilled by that was an understatement, so I decided to show him that I would be back to heavy lifting again. I went with a non-surgical solution for the problem and had a series of injections into my back that gave some minor relief. While the injections did not allow me to start lifting again, they did allow me regain some everyday quality of life. It was at that time I met Dr. Steve Horwitz, DC (and now RKC instructor). Dr. Horwitz worked with me on my nutrition and showed me how to ease the inflammation and pain with proper supplementation. Once my nutrition was dealt with, I was able to start healing and training again.

I had scheduled an HKC/Primal Move Certification Weekend with Master RKC, Andrea Du Cane and Senior RKC Jay Armstrong, but was not really doing much in the way of training yet. Andrea knew about the injury, so she would not let me do much during the HKC. I was the ‘go-fer.” While I was finally moving better, I was still in pain with bad movement patterns most of the time. I was able to participate in the Primal Move Certification that weekend and found that it was life changing for me. I was able to go through the workshop pain free. It was amazing how much better I felt just going through the workshop. The one day workshop was like a reset button. It was the first time I was pain free during my day to day activities of living. It improved my movement, eased my pain and that definitely helped my outlook. I had been in a depression since being injured because I was unable to train and burn through my day to day frustrations.

Andrea and Jay also showed me a few drills, including pendulum swings. I also started playing with Figure 8’s as they allowed me to strengthen my posterior chain without moving through painful patterns and positions. I also went to town with Primal Move and added in Convict Conditioning on a daily basis. I would train something every day, but never to failure or into pain. That was my training program for about 3 months and every day I felt better, moved better and got stronger. My focus was on healing and avoiding pain. I spent lots of time on the pullup bar, doing handstand pushups and Convict Conditioning skills on top of daily Primal Move work.

In October of 2013, I hosted an RKC with Andrea Du Cane, Master RKC leading the workshop. She asked to see my skills as an Assistant. I hadn’t trained with any weight over 16kgs in any of the RKC Basics prior to the certification weekend. This was one year after blowing out my back and I figured that it would be ugly. I had not even attempted any of the skills with my snatch test weight prior to this attempt. I was actually scared when I was asked to do it as I knew it was going to be a hot mess. I was pain free and nailed my skills test. After that it was as if I had been freed from a dark hole. Andrea had to keep me reined in all weekend because I was so excited that I was able to train again. She told Shane England RKC, that they had “unleashed a monster”, I could not stop playing around with the kettlebells. I participated in as many of the drills as the attendees did as I tried to fix the bad habits that got me into the position I was in.

After that weekend I continued to train and work on a lot of rehab style work to get back to a decent level of strength. In that time, I was able to host and assist at several HKC’s and RKC’s. I improved my skills and movement at every event I attended. Andrea let me assist at every event and she helped me improve my skills at every certification. If it had not been for her friendship and mentoring, I would not have been able to train or teach at the level I am at now. In July, I was promoted to RKC Team Leader, based in part on my ability to come back as a better instructor because of my injury. It forced me to re-evaluate everything that I was doing as an RKC. Prior to this, my skills were not as good as they should have been. The injury made me a better coach, and I became stronger because of it. I have to use the RKC Principles correctly to avoid being injured again.

Paul Britt Coaching

I was able to get to the point where I was able to press half bodyweight again and knew that I had to try RKC-II again. In October, I hosted the RKC-II at my gym. We had a great group of strong people in attendance. Like the last time, Day 1 was RKC I and our strength requirement test. I felt that it was the easiest and best RKC recert test that I have ever performed. My skills were dialed in and the snatch test was by far my best one that I have ever completed, it was almost easy (the snatch test is never really easy). I passed RKC-II after a long weekend of heavy lifting. I had gone into the weekend with some trepidation, because I had been hurt. It was probably harder for me mentally than physically due to my last attempt ending so badly. I was nervous going into the testing as I did not fully believe that I could get through it without being injured, but I only had a slight issue with my left side pistol stability.

RKC-II Group Photo in Texas

What did I learn from all of this? I learned a lot, though I wish I had learned it without being injured. I was once taught that experience came after you needed it. I hope that someone uses mine to avoid taking the same path. Do not terrain into pain. If you are injured and your life is not in danger, take a break and heal. Do not let your ego cause you to do stupid stuff. There is no certification that is worth permanent injury and we hold a lot of certifications during the year. That is why I am glad that I chose to stay with the RKC. Dragon Door and the RKC’s focus on being a great instructor and their focus on the safe building of your skills is why I am proud to be a part of this community.

What’s next? I am training for the Beast Tamer. The plan is to do it for my 48th birthday at the October 2015 RKC led by Master RKC Andrew Read. There is still room and time to sign up for that certification.

***
RKC Team Leader Paul Britt has been an RKC kettlebell instructor since 2006. He trains clients at Britt’s Training Systems, his award-winning Hardstyle Kettlebell Training Facility in Rockwall, Texas. Paul has served as an assistant instructor at many RKC and HKC Courses, is a Certified Kettlebell Functional Movement Specialist (CK-FMS) and works with some of the top Chiroprators in North Texas. Please visit his website brittstrainingsystems.com for more information.

Filed Under: Kettlebell Training Tagged With: hosting workshop, injury recovery, kettlebell training, mobility, Paul Britt, recovery, RKC, RKC Principles, RKC Team Leader, RKC-II, Texas, workshop experience

  • « Go to Previous Page
  • Page 1
  • Interim pages omitted …
  • Page 13
  • Page 14
  • Page 15
  • Page 16
  • Go to Next Page »

Primary Sidebar

Featured Products

previous arrow
BOOK-RKCBookofSnC
HardStyleKettlebellChallegeDanJohn700
BookCoverMasterTheKettlebell1
RKCiconKettlebell512
KettlebellGoddessdv040
next arrow

Recent Posts

  • RKC Big Six Workout
  • The Kettlebell Swing & Low Back Pain
  • Key Kettlebell Exercises To Help You Create Better Balance
  • How to Most Effectively Use Kettlebells to Meet Your New Year Goals
  • 1 Exercise That Checks All The Boxes
FOLLOW US ON TWITTER!

Archives

Copyright © 2025

Dragon Door Publications / The author(s) and publisher of this material are not responsible in any manner whatsoever for any injury that may occur through following the instructions or opinions contained in this material. The activities, physical and otherwise, described herein for informational purposes only, may be too strenuous or dangerous for some people, and the reader(s) should consult a physician before engaging in them.