• Skip to main content
  • Skip to primary sidebar
  • Home
  • Contributors
    • Matt Beecroft, Master RKC
    • Martijn Bos, Master RKC
    • Andrea Du Cane, Master RKC
    • Angelo Gala, Master RKC
    • Chris Holder, Master RKC
    • Steve Holiner, Master RKC
    • Dan John, Master RKC
    • Mike Krivka, Master RKC
    • Thomas Phillips, Master RKC
    • Robert Rimoczi, Master RKC
    • Phil Ross, Master RKC
    • Max Shank, Master RKC
  • Workshops
    • HKC Workshops
    • RKC Workshops
    • RKC-II Workshops
  • Find an RKC Instructor
  • Resources
    • Articles
    • Forums
    • Kettlebells
    • Products
  • Blogs
    • PCC Blog
    • Strong Medicine Blog
  • Archives

RKC School of Strength

Official blog of the RKC

Archives for March 2017

How to Run Injury Free Using Kettlebells

March 29, 2017 By William Sturgeon 2 Comments

William Sturgeon running and kettlebell training

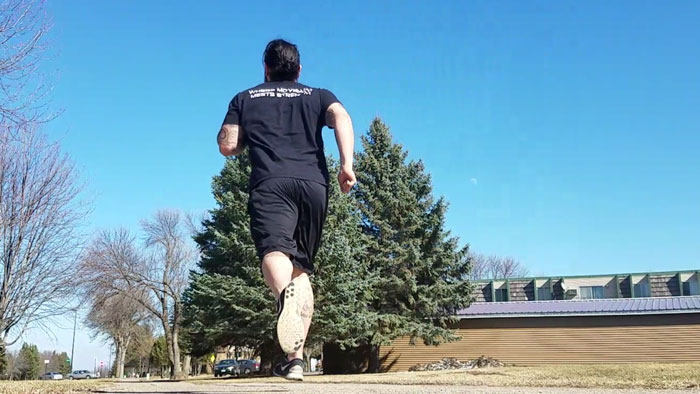
Let’s clear this up right now, strength training and running go together, it’s not one or the other. Most runners avoid strength training for fear of being bulky, or because they’re afraid it will decrease their run time. Runners need to understand that strength training can improve their run time and increase their work capacity. If that’s not convincing, then consider that runners are prone to injuries such as patellofemoral pain syndrome, plantar fasciitis, stress fractures, as well as hip, low back, and shoulder pain. Quite an extensive list. We can prevent these issues by introducing kettlebells into our training.

Why Kettlebells?

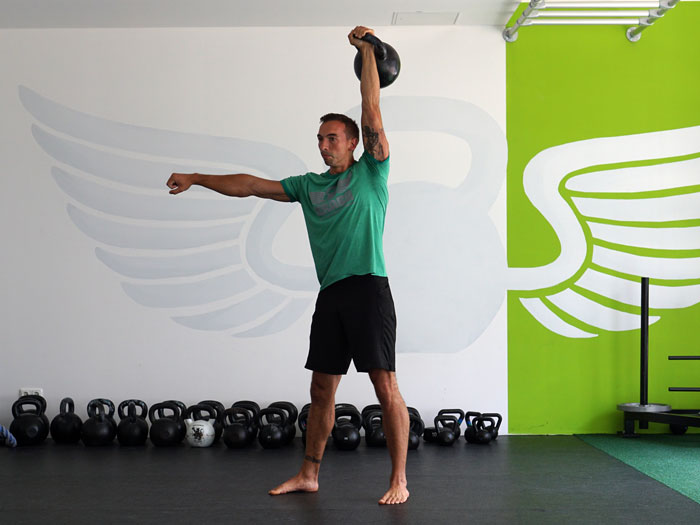
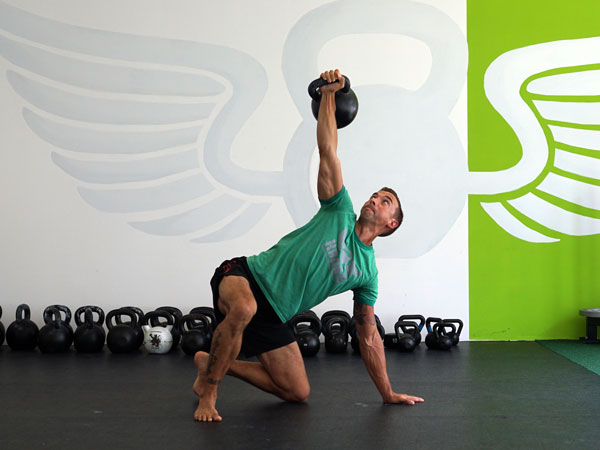
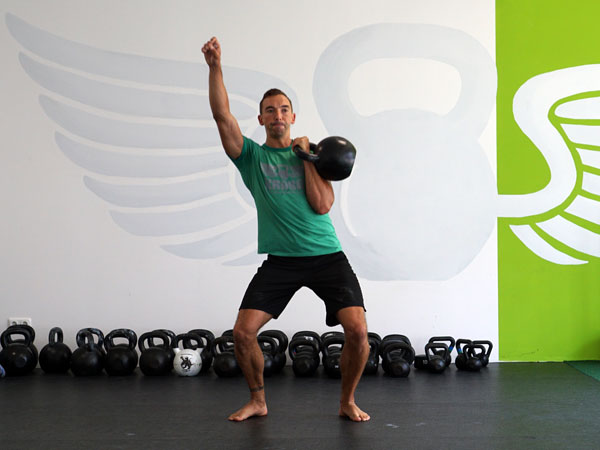
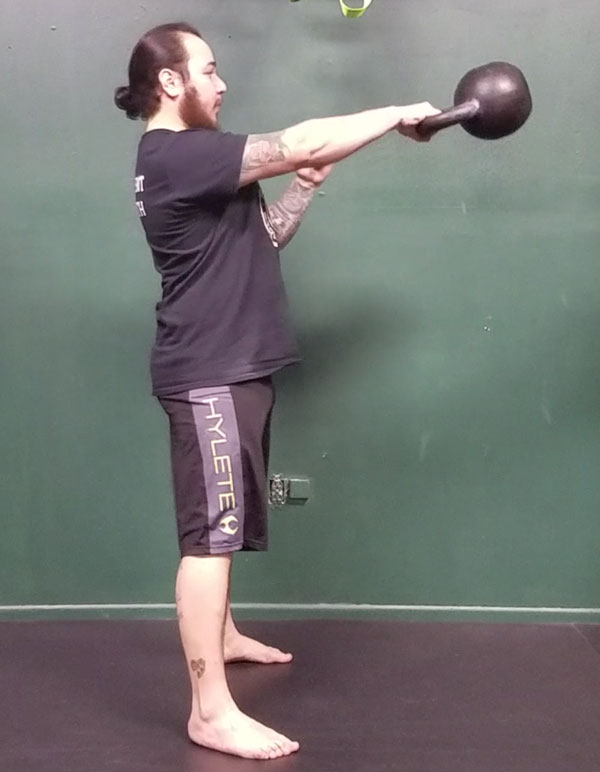
The kettlebell is the Swiss Army knife of fitness—you can train for strength, conditioning, mobility, power, etc. with just one tool. A tool that serves multiple purposes is great if you have limited time or not enough space for bigger equipment like barbells or racks of dumbbells. Kettlebells give you the ability to exert a maximum muscular contraction instantly in an explosive power burst. Using exercises like the kettlebell swing or kettlebell snatch will train you to build a lot of power. The amount of tension, speed, and force needed to complete a swing or a snatch is very high, and the benefits carry over into the production of power. Kettlebell exercises have been known to help athletes improve their performance by increasing their power output—this also allows runners to excel in their races.

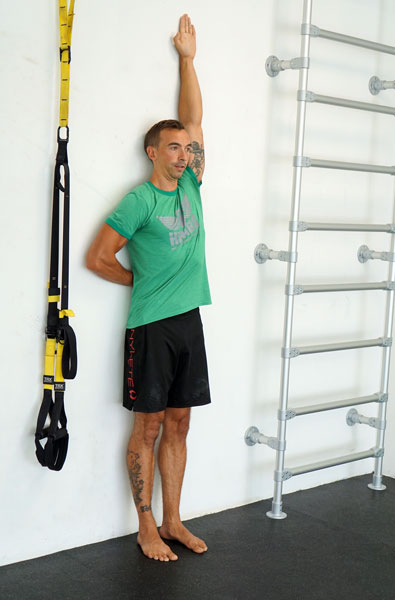
When training with kettlebells, we are often barefoot or wear minimalistic shoes. At my facility Restored Strength, we highly recommend that our members do not wear shoes. We are in shoes all of the time, and wearing shoes while training puts the foot in a plantar flexed position because the heal is elevated. Because of compression from the shoes they can also restrict the range of motion in the ankle. The freedom of being barefoot allows the ankle to have a greater range of motion. Training barefoot will also raise your kinesthetic awareness by allowing the proprioceptors in the foot to have greater exposure. The benefits can transfer over to your running, when you are not constricted by your shoes.

William Sturgeon Kettlebell Swings

Why Strength Training Can Prevent Injuries

The RKC is well known for being The School of Strength. We promote the importance of strength in a purposeful manner. While strength training has many applications, let’s discuss why it is essential to be a strong runner. When you begin to introduce strength training into your program, you get physically stronger and there’s a physiological aspect as well. Strength training promotes greater bone density which reduces the likelihood of hair line fractures. You will also strengthen the ligaments, tendons, and muscles—which hold and secure joints in proper alignments. If you are not strength training, the certain areas in the body will become weak. Being weak is dangerous since weak muscles and bones are fragile and susceptible to injuries.

Strength training can increase your muscular work capacity, which can improve your running technique. You’re less likely to fatigue, and when your muscles are stronger, you can maintain proper mechanics for longer periods of time. Stronger muscles will decrease the likelihood of fatigue during a race, and strength training helps increase the type 2 (fast twitch) muscle fibers. Focusing on the big five major muscle groups—knees, hamstrings, glutes, trunk, back—used when running will make strength training less daunting.

What to Train

Glutes: The glutes are the key muscle group in the mechanics of running. The gluteus medius will be the main focus, as this muscle is the rotator cuff of the lower body. When you move, it’s the first muscle to quickly contract, and it stabilizes your body when you are on one leg. Running is a unilateral activity—a single leg is in motion—which is why it’s crucial to strengthen and stabilize the gluteus medius in unilateral exercises.

Hamstrings: These bad boys strengthen your lower back. When they contract, they flex the knees, the repetitive motion in running. Your heel should reach your glutes during the back-swing motion, this allows for greater power output when running. With stronger hamstrings, you will be able to produce greater force output when running. Having strong hamstrings will complement your glutes—the two together will prevent low back pain and allow your running to be less strenuous on the posterior chain.

Quadriceps: Runners usually have overdeveloped quadriceps, but it is still worthwhile to train them. The quadriceps are responsible for two major movements in running, knee extension and hip flexion. These actions cause the leg to swing forward when running. The insertion of the quadriceps is located on the tibial tuberosity, the boney projection below the knee. Having stronger quadriceps will assist in maintaining knee position. One muscle of the quadriceps, the vastus medialis, helps stabilize the patella and the knee joints when we run.

Trunk: The trunk is a fancy word for abdominals. The trunk maintains your posture and keeps you upright. When we run, we want to maintain a tall posture and make sure that we are as tall as we can get, allowing us to have a greater range of motion through the hips. We won’t be able to maintain that tall position while running with a weak trunk. Strengthening the abdominals will allow for greater stability. Stronger abdominals also reduce the wobbly feeling when running. If you are wobbling from side to side when you run, then you have an energy leak slowing you down.

Back: The back is the last key player for strong running. Like the trunk, the back has the same role of keeping your body upright. Having a stronger back will help retract the shoulder blades, which prevents the shoulders from rolling forward. Good posture carries over to proper mechanics when running. If you find it difficult to maintain your posture, then you will need to improve your back strength. A strong back can prevent energy leaks through the upper body, and make sure you’re carrying your arms in an optimal way while running. A strong spine complemented by strong mid and lower backs will stabilize the spine and the pelvis.

How to Train

When we train, we want to train movements rather than muscles. The big movements are lower body pushing and pulling, upper body pushing and pulling (vertical and horizontal), trunk work, carries, and unilateral upper and lower body movements. I make mobility training a staple in my programming as well. It is a mixture of movement and strength—you need to be mobile to be strong and you need to be strong to be mobile.

In my opinion, the push/pull upper body/lower body approach is the most optimal way to train. It conserves time and targets every area. Using this type of training will also reduce the amount of training sessions each week. I recommend two to four days each week, depending on your training.

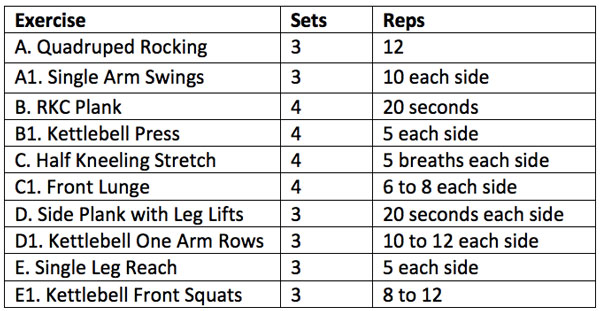
Training day example:
Kettlebell Running Training Day Chart

Conclusion

Strength training can undoubtedly improve your run time and prevent injuries if done correctly. There are many different modalities of training, and kettlebells have been the most useful for me. To help your athletic performance, make sure to include kettlebell training in your program. If you are unfamiliar with kettlebell training, find yourself a certified RKC instructor to take your training further.

****

William Sturgeon, RKC II trains clients at his gym, Restored Strength. Contact him through his website at RestoredStrength.com or follow him on Facebook: facebook.com/restoredstrength

Filed Under: Kettlebell Training, Mobility and Flexibility Tagged With: Distance Running, kettlebell training, runners, running, running and kettlebells, William Sturgeon

Warm Up and Cool Down Flow

March 22, 2017 By Paul Britt, DC 10 Comments

Senior RKC Paul Britt

How do you warm up for training? Is there a flow and/or pattern to it? How about the cool down afterwards? I like to consider economy of movement in my warm-ups because it tends to speed up my prep and my cool down. I want the warm-up to systematically prepare me for the session ahead—and I have designed it to work on my mobility and stability issues. In our modern society, we all seem to have similar thoracic restrictions, core stability, active straight leg raise restriction, and toe touch difficulties.

I perform the warm-up in a circuit for one or two sets. Even though one set is typically enough, if I am not warmed up appropriately when I get to the end of the first set, I will add a second. I want to make sure that nothing is left out of my full-body warm-up. The same goes for the cool down—I want to make sure that I hit all my issues that need work. I use this particular flow because my issues are thoracic mobility restriction, ankle mobility. Since I am sitting a lot in class, those are the areas where I concentrate at the start and finish of my workout session.

I start my warm-up with a minute or two on the foam roller. If you have to spend a lot of time on your foam roller or if you’ve named it, get checked out by a professional of some type. I really do a quick run through with it to scan and work through any major trigger points. After the roller, it is time to start moving and warming up.

Perform the following in a circuit:

  • Tall kneeling halo x 10 each way with a light kettlebell
  • 1 RKC armbar on each side
  • Bretzel left and right
  • Pump stretch x 10
  • 1 Get-up on each side
  • 5 Prying goblet squats with same weight as the Halo

After one or two times through my warm-up circuit, I perform five kettlebell deadlifts. I stand up and reset on each lift to perfectly set the groove. In general with my warm-up, everything starts on the ground and moves upward. It is easy to transition from tall kneeling to lying to the deadlifts at the end. It tends to flow well for me.

My cool down follows the same progression, and also moves from the ground up:

  • Supine piriformis stretch, 10 seconds left and right
  • Bretzel left and right
  • Shin box stretch (video)
  • Heel sit stretch
  • Child pose
  • Frog stretch
  • RKC hip flexor stretch
  • Hip flexor stretch with a twist
  • Elongated hip flexor stretch
  • Standing hamstring stretch
  • Cossack stretch
  • Shoulder stretch left and right
  • Pull-up bar hang

Just like the warm-up, I like to move in a flow from the ground up. I did not specify any particular reps for the cool down, instead I typically use my breath to move through the stretches. I find that 3-5 diaphragmatic breaths will safely move me to the edge of my range of motion. I designed the warm-up and the cool down to flow from one position to the next with economy, this makes it faster than if I just did random stretches and warm-ups. Find out the issues you need to address and create a flow that allows you to move smoothly and quickly through the series.

If you are pinched for time, for a workout you could actually load the get-up and squat with a kettlebell and move through the circuit several times. You will benefit from the mobility work and build strength on an open frame. But only load those two exercises in the series. The kettlebell halo and RKC armbar are not strength exercises, they are movement prep and mobility/stability work, so a heavy load is not appropriate or safe.


***

Senior RKC Paul Britt has been an RKC kettlebell instructor since 2006. Paul trains people at workshops and privately. Paul is currently attending Parker University working on his Doctor of Chiropractic degree Paul has served as an assistant instructor at many RKC and HKC Courses, is a Certified Kettlebell Functional Movement Specialist (CK-FMS) and works with some of the top Chiropractors in North Texas. Please visit his website for more information or to contact him

Filed Under: Kettlebell Training, Mobility and Flexibility Tagged With: cooldown, flexibility, flow, mobility, movement prep, Paul Britt, RKC, warm-up

Getting Strong Fast: Four Effective Overhead Kettlebell Exercises

March 15, 2017 By Sebastian Müller 12 Comments

Sebastian Muller Overhead 40kg kettlebell press

Kettlebell exercises are much more common in fitness these days because of the RKC, CrossFit, strongman and functional training. But, only truly strong athletes will be able to lift heavy kettlebells overhead without risking injury.

When I began my training a few years ago, I hated it. No matter where I looked, everybody was stronger than me—at least that’s what I thought when I saw what others were lifting. But, the further I went down the path of strength training, I discovered a real secret. I learned why—after months of training—I still lifted lighter weights than the other guys (and girls).

The difference was that I pressed the weights with very strict form. I would clean a kettlebell and then press it until my arm was straight overhead. While this is an extremely effective way to train your body, it is not really useful for lifting very heavy weights.

If you want to move big kettlebells, you have to be creative. You’ll need to look for effective exercises and movements that allow you to use more of your muscles. This post will outline the four best exercises I’ve found for this purpose.

1. The Get-Up

Turkish wrestlers and aspiring athletes who trained with them used this exercise to prepare for the hard and demanding sport-specific wrestling training. If an athlete couldn’t “get up” with at least half of his body weight, he wasn’t allowed to participate in wrestling training. Being able to lift a lot of weight is just one advantage of the get-up. Your body will learn to work as a unit, and every muscle is involved with this movement. When I first did the get-up with a kettlebell, I chose the same weight I was using for strict presses. After a few weeks, I increased that weight by 100%.

Since one arm is holding the weight straight overhead during the entire get-up exercise, it strengthens and stabilizes your shoulder muscles. When you’re able to do the movement correctly and smoothly, then the goal of using half your body weight is absolutely realistic.

Sebastian Muller 40kg Get-Up

Performing the Get-Up

  • Start on your back, lying on the ground.
  • Safely pick up the weight, and extend your arm to press the weight overhead.
  • Push with your supporting leg to the side and roll up on your elbow.
  • Sit up straight.
  • Bring the knee of the extended leg under your hip.
  • Be sure your upper body is upright, and rotate it straight forward.
  • Stand up into a shoulder-width stance.

2. Bent Press (Advanced)

Old time strongmen and athletes of the 19th century did tremendous feats of strength with this exercise. You don’t see it very much these days, despite its many advantages. (The bent press is a very advanced exercise and should only be attempted when the kettlebell lifter is ready. Find an RKC-II instructor near you for help and coaching with this movement.)

But, if it is safe and appropriate for the trainee, the carryover from the bent press to other movements is gigantic. It also enormously improves hip and thoracic spine mobility. Another special thing about the bent press is that it has no “perfect form”. Everyone does it a bit differently. Although the process is always the same, there are three options: hip dominant (similar to the windmill), thigh dominant (closer to a squatting pattern), or a version that incorporates both movement patterns.

Sebastian Muller Bent Press 40kg

Performing the Bent Press:

  • Bring the weight up to the chest safely (the “rack position”).
  • Position your arm onto your big back muscles and let it remain there.
  • “Sit” under the weight by opening or hinging the hip and rotating the upper body until the arm holding the kettlebell is completely straight.
  • Straighten the hip and legs to return to the standing position.

3. Push Press

The push press bears the most resemblance to the strict press. But with the push-press, the upper body muscles only start to work when the kettlebell is already on its way up. The force of the push press comes from the legs and the hips. A small knee dip followed by an explosive hip extension transfers the force to propel the kettlebell overhead.

Sebastian Muller Push Press Bump with 40kg kettlebell

Performing the Push Press:

  • Bring the weight up to the chest safely (the “rack position”).
  • Hinge the hips and bend your knees slightly (about one quarter of a squat).
  • Explosively extend legs and hips (“bump” see the photo above).
  • Straighten the arm. After the bump, the handle of the kettlebell should be at about the height of your forehead, before you straighten the arm.

4. Jerk

The jerk is an exercise to bring up the most weight overhead with two kettlebells. It takes the upper body muscles responsible for the press almost completely out of the game. Everything in the jerk is similar to the push press up until the bump. When the kettlebells are forehead height, you have to do another dip with the knees and hips—and simultaneously extend both arms.

This exercise is super complex, but also allows you to use a lot of weight.

Performing the Jerk

  • Safely clean the kettlebells up to the chest (the “rack position”).
  • Hinge the hips and slightly bend your knees (about one quarter of a squat).
  • Explosively extend your legs and hips (“bump”).
  • Bend your knees and hinge your hips again when the kettlebell reaches your forehead. Simultaneously extend your arm.
  • Extend your legs and hips to stand up straight with the weight overhead.

Prerequisite Requirements for Safely Lifting Heavy Kettlebells Overhead:

Before you try these exercises, there are prerequisite requirements for lifting heavy kettlebells overhead—which include a certain level of mobility and stability to prevent overtraining or injury.

Sebastian Muller Overhead Reach Test

Test your overhead lockout position:

  • Stand with your back facing a wall with your heels about 5cm (about 2 inches) from the wall.
  • Your buttocks, upper back, shoulders and back of your head are touching the wall.
  • Hinge the hip so that you ‘’pinch’’ your hand to the wall. The pressure on the hand should be there during the entire exercise.
  • Put your other hand straight up overhead.

When the wrist of your fully extended arm touches the wall while your back remains stable, you will have fulfilled the mobility requirements. If you’ve run into trouble here, first work on your thoracic spine mobility and shoulder joints. To safely lift heavy kettlebells overhead, you will also need stable shoulder joints and a strong core musculature. You should have also mastered the basic kettlebell movements: swing, get-up, clean, press, squat, snatch.

The get-up is the best exercise to prepare your shoulders for heavy weights. When you master the get up, you will build a strong foundation for lifting heavy kettlebells. You can even increase the effectiveness of the exercise by adding overhead walks to your get-up sessions. For example, walk with the kettlebell overhead every time you are in the standing position of the get-up.

When a get-up with half your bodyweight is no problem for you anymore, and you are safe in the kettlebell basics, you are ready for the bent press, push press and jerk.

When Training with Heavy Kettlebells, Movement Quality is Essential

The movement patterns of the get-up, bent press, push press and jerk are complex. Many joints and big muscle groups have to work together perfectly. Before you can load these movement patterns with heavy kettlebells, you should master the movements. You simply can’t afford to stop and think about what you have to do next while you are holding a heavy kettlebell. The best way to avoid mistakes is to do everything correctly from the start. Be a professional and learn the exercises from a qualified coach.

Sebastian Muller Rack Position 40kg

How to Use These Exercises:

The movements we’ve discussed in this blog post can be divided into two categories: skill and power. Skill and power exercises belong at the beginning of your training routine. They require high focus, and we want to lift heavy kettlebells with these exercises. It’s a bad idea to tackle this combination while fatigued.

The get-up and bent press are in the skill category. They are complex movements that involve many muscle groups and joints. They are also performed slowly and under high tension. After warming up, do perfect repetitions in turns, always starting with your less strong side. One to a maximum of five sets will do a fine job. After ten total repetitions (five for each side), move on to other exercises.

The push press and jerk are power exercises. While these movement patterns are less complex, you need a lot of explosiveness and power. After warming up, do perfect repetitions in turns, always starting with your less strong side. One to a maximum of five sets will do a fine job. After ten total repetitions (five for each side), move on to other exercises.

Important Rules:

  • Be sure to fulfill the stability and mobility requirements for the overhead movements before attempting them—especially with heavy kettlebells.
  • Master the basics!
  • Learn all of the described movements from a qualified coach.
  • Always practice while fresh, with high focus. Aim to improve a little at every training session.

If you follow these rules, you will surely draw the admiration of others and have the best workouts of your life. Now that you know four exercises for lifting heavy kettlebells, go and lift your training skills to the next level.


***

Sebastian Müller, RKC Team Leader, and PCC Instructor is a personal trainer in Erfurt (Germany) and teaches seminars all over Germany. After 16 years of training he founded the first kettlebell studio in his federal state. He is the head coach of KRABA Erfurt (“Strength and Movement Academy”) and a passionate blogger. His focus lies on what he enjoys the most: to inspire people for simple training and making it an important part of their lives!  Translation by Martin Breternitz HKC, KRABA Erfurt

Filed Under: Kettlebell Training, Tutorial Tagged With: advanced kettlebell exercises, bent press, get up, heavy kettlebells, jerk, kettlebell training, kettlebells, push press, Sebastian Muller, tutorial

Primary Sidebar

Featured Products

previous arrow
BOOK-RKCBookofSnC
HardStyleKettlebellChallegeDanJohn700
BookCoverMasterTheKettlebell1
RKCiconKettlebell512
KettlebellGoddessdv040
next arrow

Recent Posts

  • RKC Big Six Workout
  • The Kettlebell Swing & Low Back Pain
  • Key Kettlebell Exercises To Help You Create Better Balance
  • How to Most Effectively Use Kettlebells to Meet Your New Year Goals
  • 1 Exercise That Checks All The Boxes
FOLLOW US ON TWITTER!

Archives

Copyright © 2025

Dragon Door Publications / The author(s) and publisher of this material are not responsible in any manner whatsoever for any injury that may occur through following the instructions or opinions contained in this material. The activities, physical and otherwise, described herein for informational purposes only, may be too strenuous or dangerous for some people, and the reader(s) should consult a physician before engaging in them.