• Skip to main content
  • Skip to primary sidebar
  • Home
  • Contributors
    • Matt Beecroft, Master RKC
    • Martijn Bos, Master RKC
    • Andrea Du Cane, Master RKC
    • Angelo Gala, Master RKC
    • Chris Holder, Master RKC
    • Steve Holiner, Master RKC
    • Dan John, Master RKC
    • Mike Krivka, Master RKC
    • Thomas Phillips, Master RKC
    • Robert Rimoczi, Master RKC
    • Phil Ross, Master RKC
    • Max Shank, Master RKC
  • Workshops
    • HKC Workshops
    • RKC Workshops
    • RKC-II Workshops
  • Find an RKC Instructor
  • Resources
    • Articles
    • Forums
    • Kettlebells
    • Products
  • Blogs
    • PCC Blog
    • Strong Medicine Blog
  • Archives

RKC School of Strength

Official blog of the RKC

William Sturgeon

4 Standards To Master The Kettlebell Swing

February 27, 2020 By William Sturgeon Leave a Comment

Four Standards For Mastering the Kettlebell Swing by William Sturgeon

To begin learning how to perform a kettlebell swing, you must master the most fundamental movement of the exercise—the hip hinge. Learning how to properly hip hinge, hike pass, deadlift and perform a dead-stop swing will set you up for guaranteed success with the kettlebell swing.

Master Your Hinge:

The foundation of the kettlebell swing is built off a strong hip hinge. When you are able to teach your clients how to optimally use their hips, they will get the full benefits for the proper muscles used in the swing. You will also keep your clients safe and reduce their exposure to injury.

Use these coaching cues:

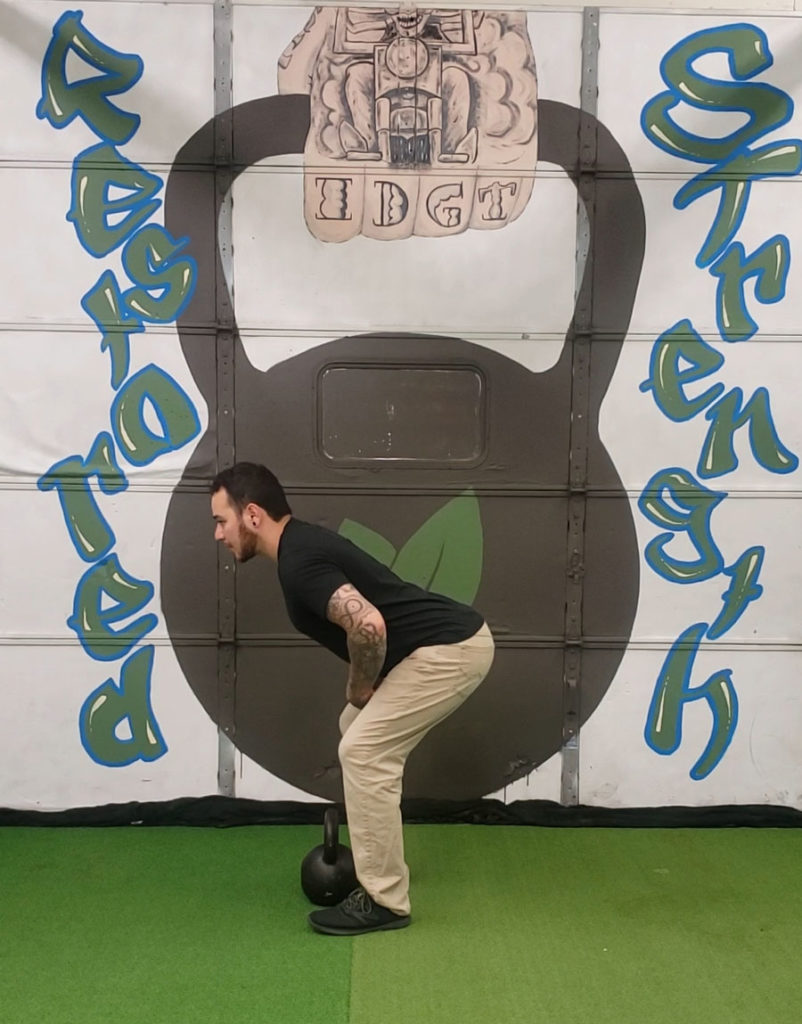
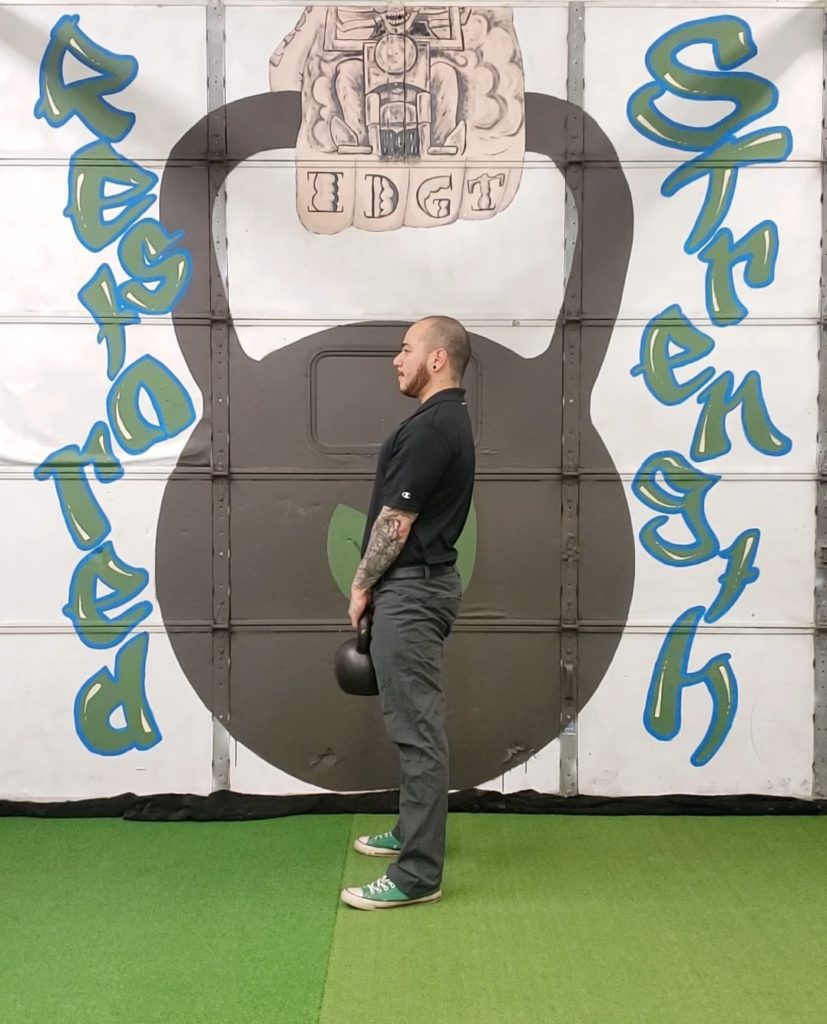
  • Start in a tall & tight position with your feet shoulder width apart.
  • Have a slight bend in your knees.
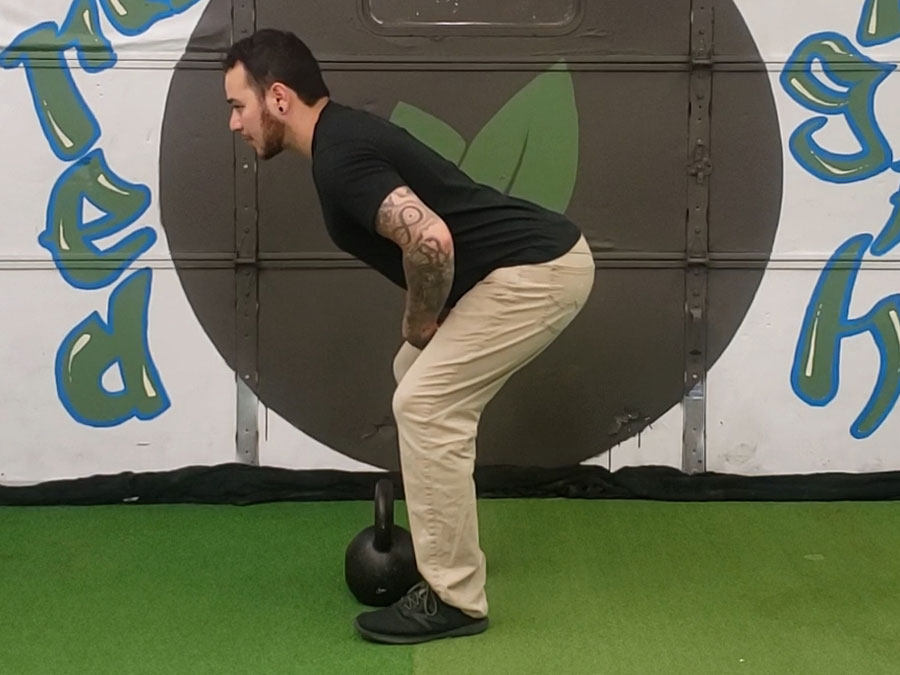
  • Reach your hips back.
  • Drive your hips forward and stand tall.
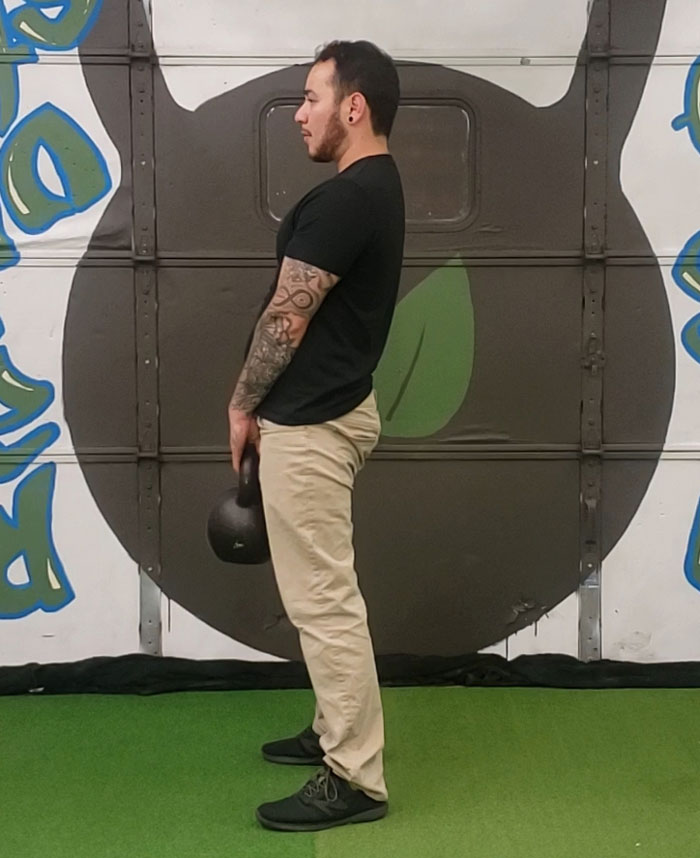
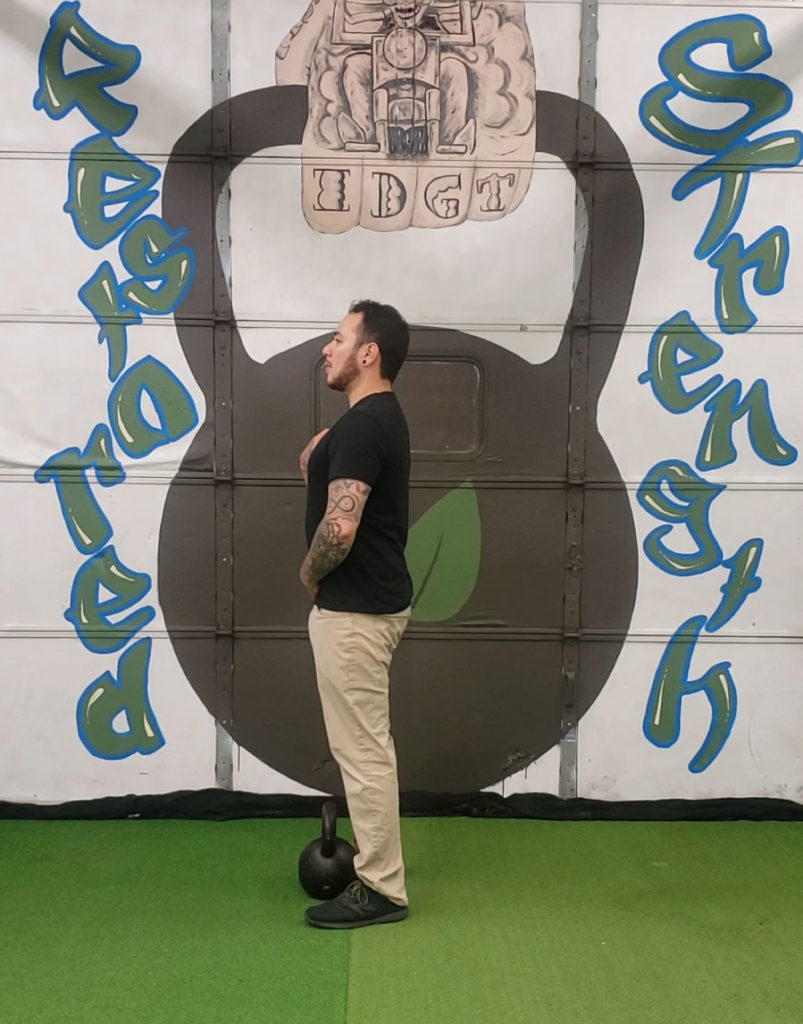
Stand tall & tight
Reach your hips back

Master Your Hike Pass:

The next step in the kettlebell swing is to master the hike pass. This motion begins to teach you the momentum of the swing. Learning the hike pass teaches you how to properly propel the kettlebell behind you. The back of the hike pass shows you what the bottom position of the kettlebell swing looks like.

Use these coaching cues

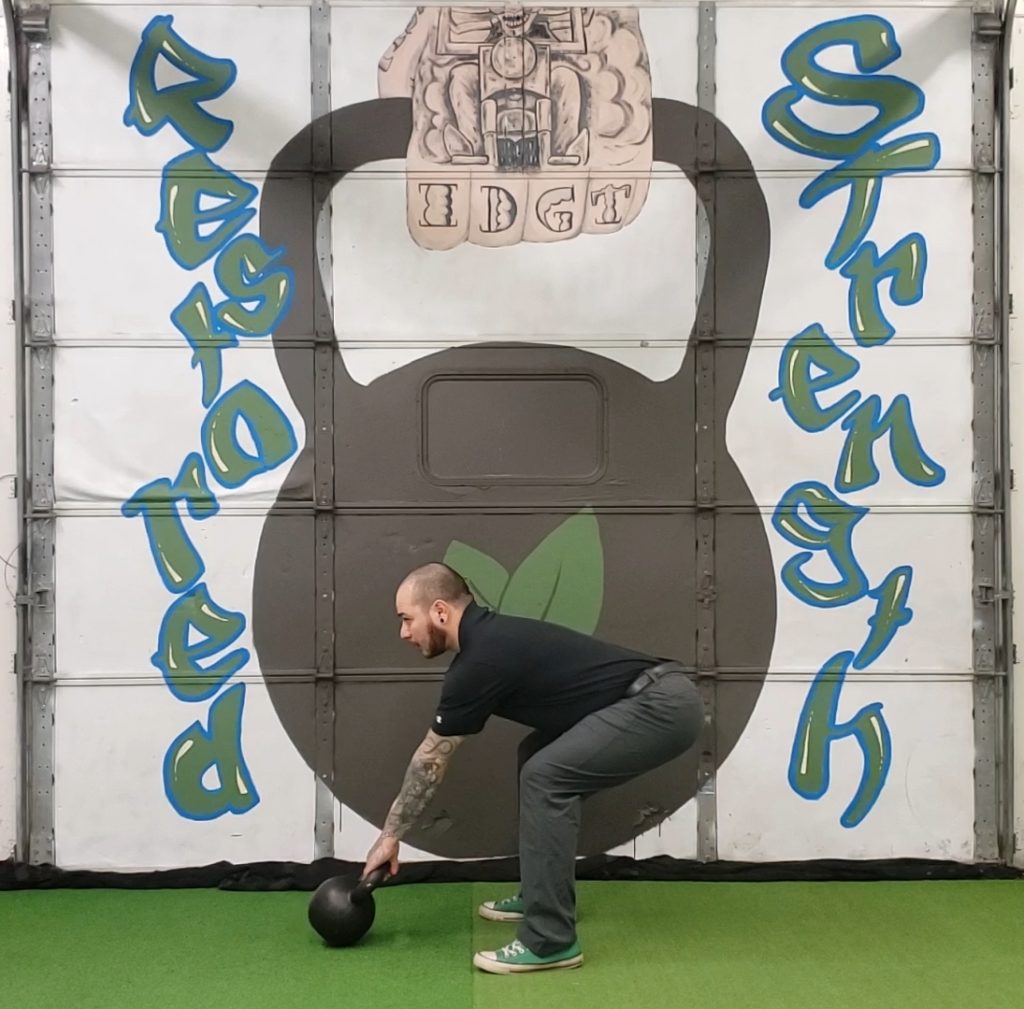
  • Get into your hip hinge.
  • Tilt the kettlebell towards you and break the handle in half.
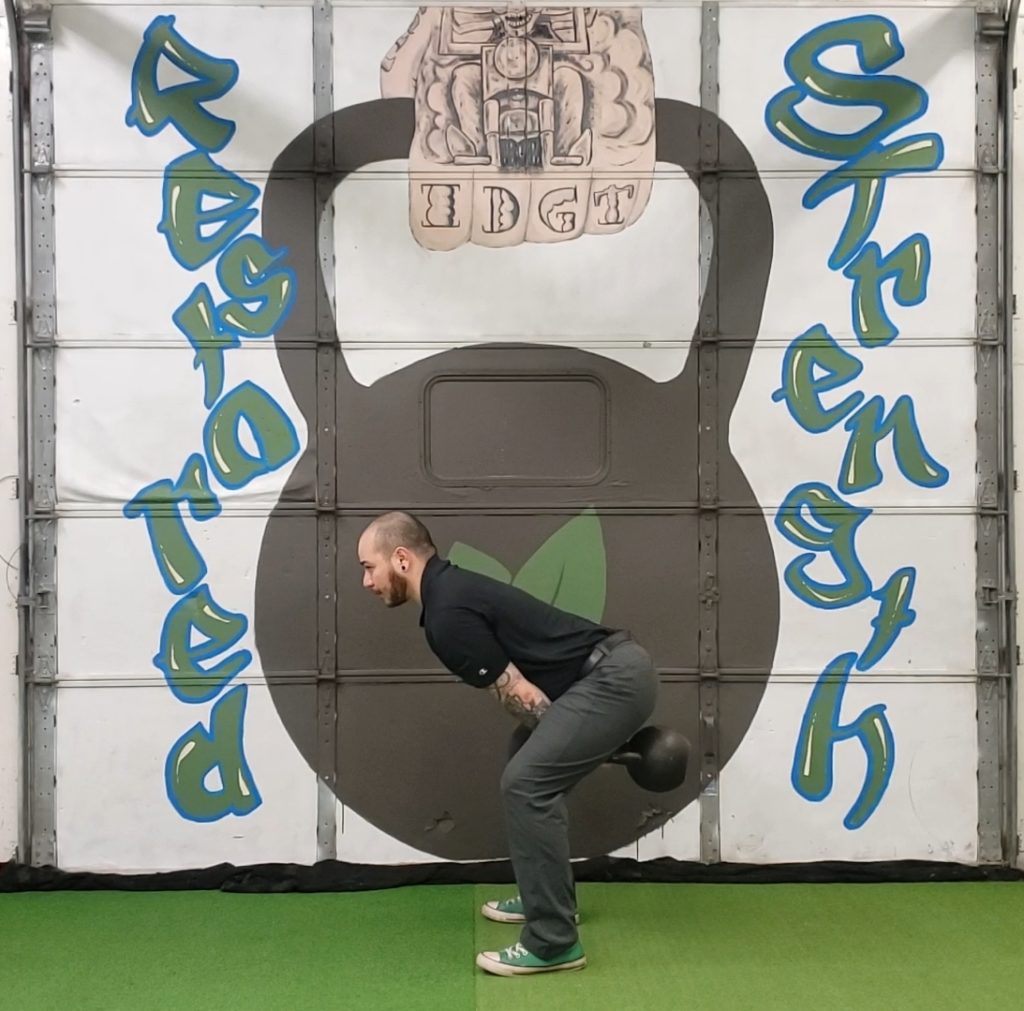
  • Sit into your hips and toss the bell high into the thigh.
  • Keep your chest up & eyes forward.
Tilt the bell towards you and break the handle in half.
Sit into your hips and toss the bell high into the thigh.

Master Your Deadlift:

Next is the deadlift. When teaching the deadlift, you are helping your client understand how to properly load the hips. The deadlift teaches you to snap the hips and fully lock out at the top. This is important because this teaches how you should be at the top of the swing.

Use these coaching cues

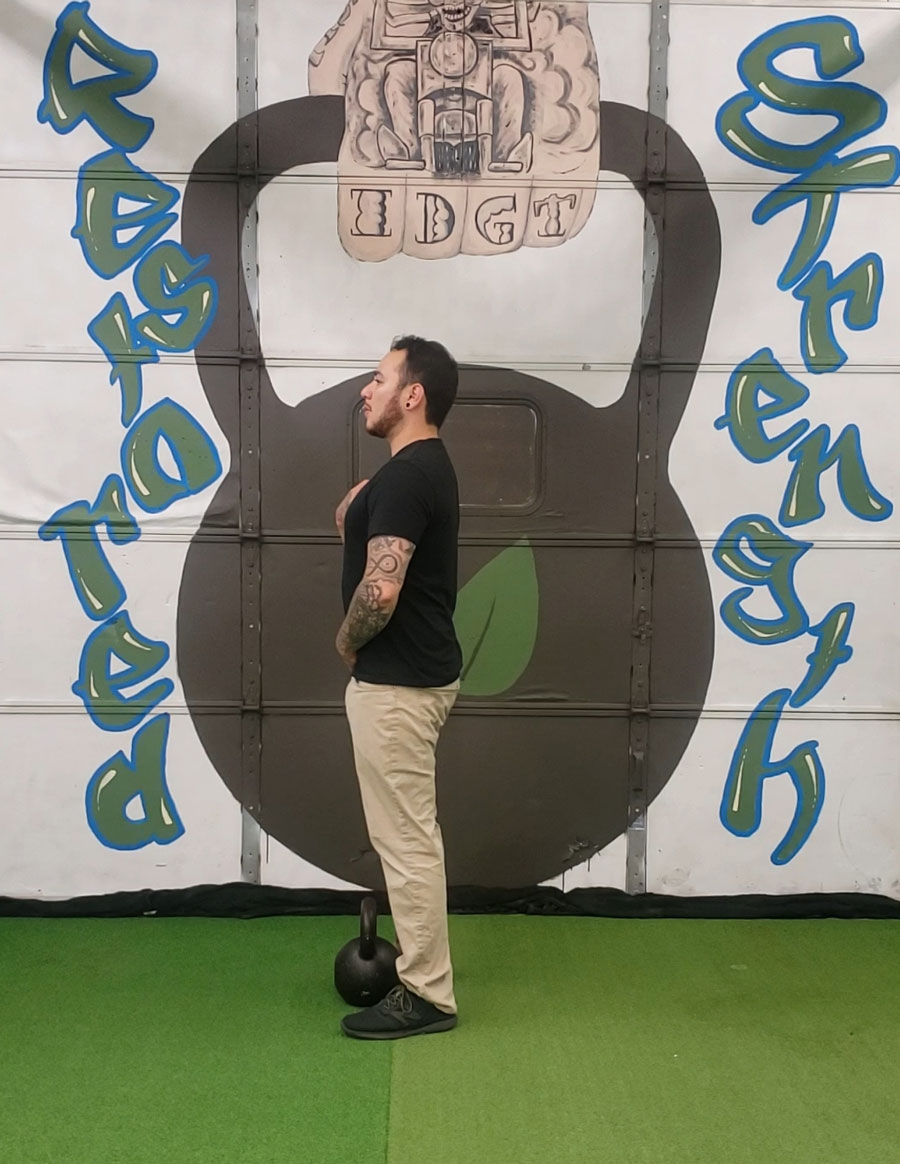
  • Start with the kettlebell between your feet.
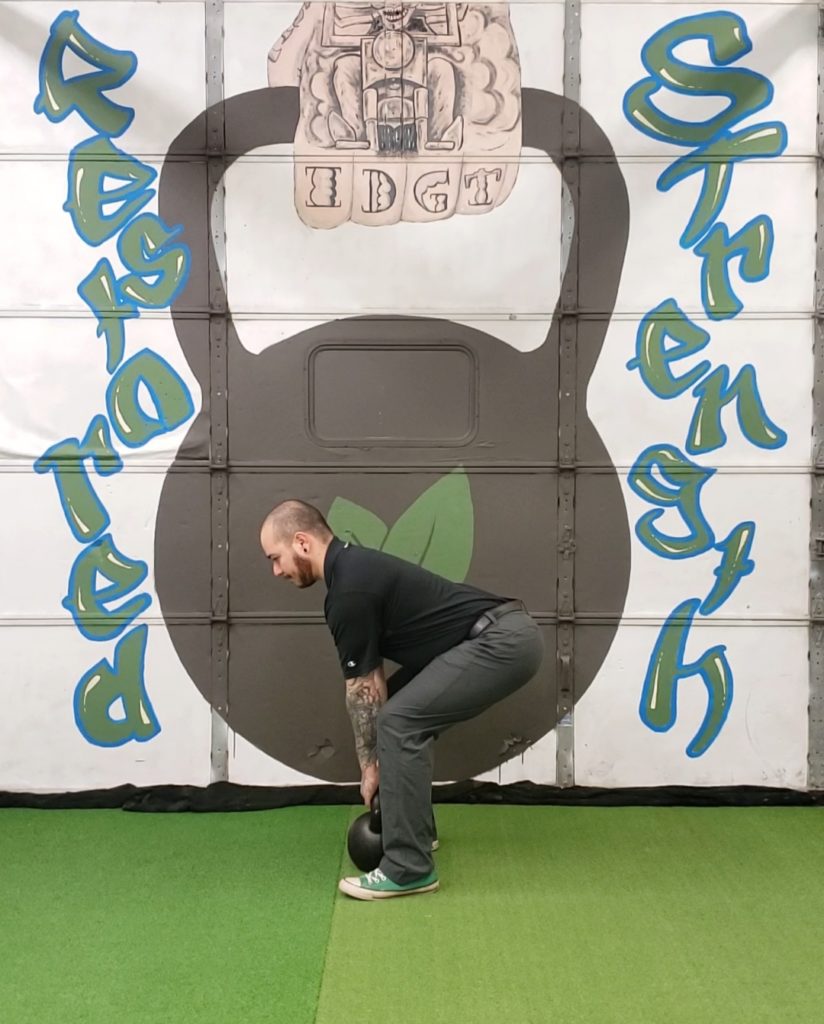
  • Go into your hip hinge.
  • Break the handle in half.
  • Punch your feet into the ground and snap your hips forward.
Go into your hip hinge.
Snap the hips and fully lock out at the top.

Master Your Dead Stop Swing:

The last step in mastering the kettlebell swing is the dead stop swing. Mastering the dead stop swing puts all of the other steps into one. You begin by starting in a hip hinge position, next you go into your hike pass, and lastly you go into your dead lift. Each rep is initially starting the swing back over and enforcing all the skills you have learned prior to this step.

Use these coaching cues

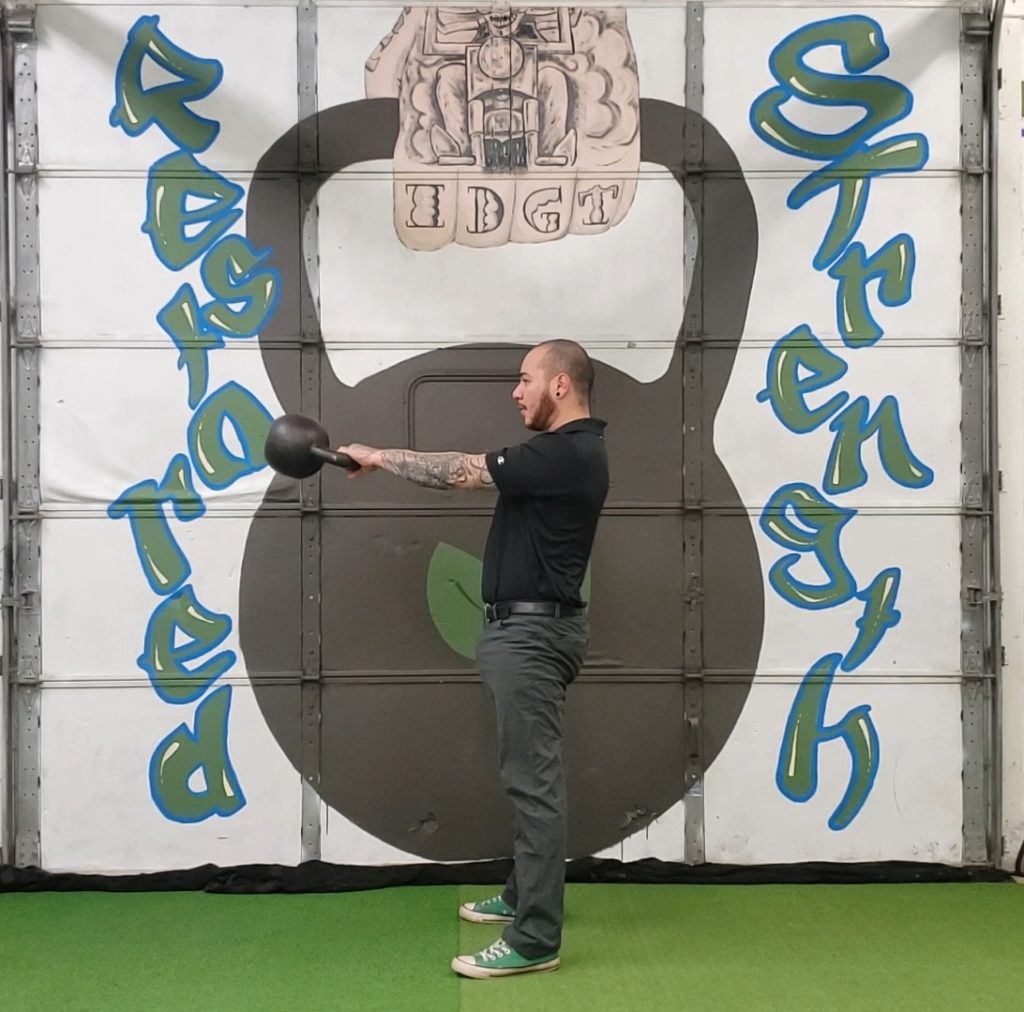
  • Start in your hike pass position.
  • Toss the bell back.
  • Explode through the hips and let the bell float up.
  • Wait for the bell to push your hips back and park the bell.
Sit into your hips and toss the bell high into the thigh.
Explode through the hips and let the bell float up.

To get the most out of your swing and master the basics, review and practice each of these steps.

***

William Sturgeon, RKC Team Leader, RKC II trains clients at his gym, Restored Strength. Contact him through his website at RestoredStrength.com or follow him on Facebook: facebook.com/restoredstrength
 

Filed Under: Kettlebell Training, Tutorial Tagged With: kettlebell swing, kettlebell swing technique, kettlebell technique, swing standards, video, video tutorial, William Sturgeon

Use These 3 Cues to Teach The Deadlift

August 21, 2019 By William Sturgeon Leave a Comment

William Sturgeon Deadlift Coaching Cues

When teaching a client how to deadlift, we must first help them master the hip hinge. Often when we begin to teach someone how to hinge we use the following cues: “keep a slight bend in the knees, push your hips back, keep your back straight, pack the shoulders, push your hips forward and stand tall…”

These cues are effective, but when someone has never done a hip hinge before, all these words may be too overwhelming.

When we’re working with a client, we always want to make sure that they are not confused. We want to make our instructions as clear as possible so that they are set up for success.

Start by teaching your client a tall & tight position.

Tall & Tight

  • This position begins standing with feet shoulder width apart. Then, instruct your client to pull their hips slightly forward. Tell them to imagine pulling their belt buckle to their chin.
  • Next teach the tight position. This begins by tucking the ribs down and pinching the shoulders back.
  • The tall & tight position teaches how to maintain a neutral spine while maintaining tension in the core.

Reach Your Hips Back

Next we are going to teach our client how to reach their hips back. “Begin with a slight bend in the knees. Reach your hips back by trying to touch your butt towards the wall behind you, while keeping the tall and tight position.” These instructions can get complicated quickly, so I use the following cues instead:

  • I begin by helping people understand this movement by instructing them to place their fists on their hips.
  • Then I tell them to imagine their body is a can crusher—the upper body being the top half and the lower body being the bottom half of the machine.
  • Next, I ask them to reach their hips back and “crush their cans.”

Drive Through Your Hips

Lastly we will review “driving through the hips” to finish the exercise.

  • While maintaining a tall and tight position, push through the hips to the starting position.
  • Next, think about punching your feet into the ground, while thrusting your hips forward.

Once you’ve mastered this fundamental skill you can now progress to loading your client for a deadlift.

Just remember: tall & tight, reach your hips back, and drive through the hips.

****

William Sturgeon, RKC II trains clients at his gym, Restored Strength. Contact him through his website at RestoredStrength.com or follow him on Facebook: facebook.com/restoredstrength
Filed Under: Coaching, Kettlebell Training, Mobility and Flexibility Tagged With: coaching cues, coaching deadlift, deadlift, how to do a kettlebell deadlift, kettlebell deadlift, William Sturgeon

How to Coach Effective Group Kettlebell Training

February 13, 2019 By William Sturgeon Leave a Comment

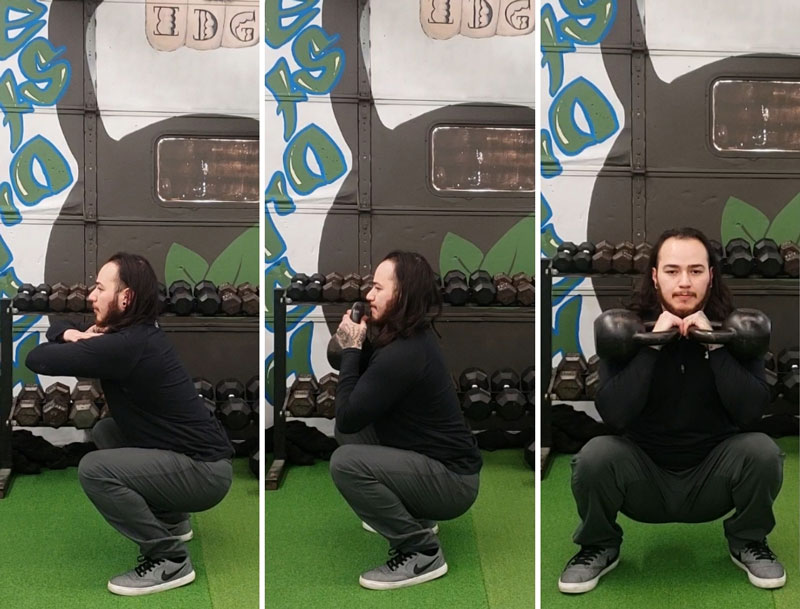
William Sturgeon, RKC-II Squat Progression

We can all agree that group training can come with inherent risks if the participants are not coached effectively. Unfortunately, we have all also seen group fitness classes where students are performing rough looking swings, squatting with all of their weight on their toes, or deadlifting like frightened cats!

As coaches, it’s our responsibility to make sure that we always prioritize the safety of our clients and set them up for success in their training. It can be difficult to accomplish a level of high quality training in large groups—especially since groups tend to include people with different skill and fitness levels, past injuries, learning styles and other variables.

So, how do we control the chaos in group training—especially if we are using kettlebells? We begin by learning to regress and progress movements and exercises for our clients. Many coaches will choose a baseline exercise—and also have a regression and progression on hand to modify the workout or program as necessary.

How to Regress and Progress Kettlebell Exercises

Regressing and progressing an exercise for a given client can be complicated if you are not prepared. During an RKC certification workshop, you will learn many ways to regress and progress the Big Six for a variety of a clients. With the information from the weekend workshop—and reviewing your RKC manual—you’ll have many ways to cue, correct, and ultimately guide your clients through the progressions of the Big Six.

To begin, choose a baseline exercise—for example, a kettlebell deadlift, assuming a majority of your clients in class can do it. From the baseline exercise, choose one regression and one progression.

With our kettlebell deadlift example, the regressions might be raising the kettlebell on a yoga block, having practice an RDL, or if they’re absolute beginners or very deconditioned, they could work on fully mastering the hip hinge. You are the chef in your own kitchen and must decide what is best for your situation.

To progress the kettlebell deadlift, we can have clients perform double kettlebell deadlifts, eccentric deadlifts, explosive deadlifts, and many other advanced variations which can make this exercise more challenging. It’s always less of a mental challenge to make an exercise more difficult—it’s much more challenging to make exercises easier. Develop a collection of progressions and regressions to commonly use with your clients then modify them as needed for your specific group setting(s).

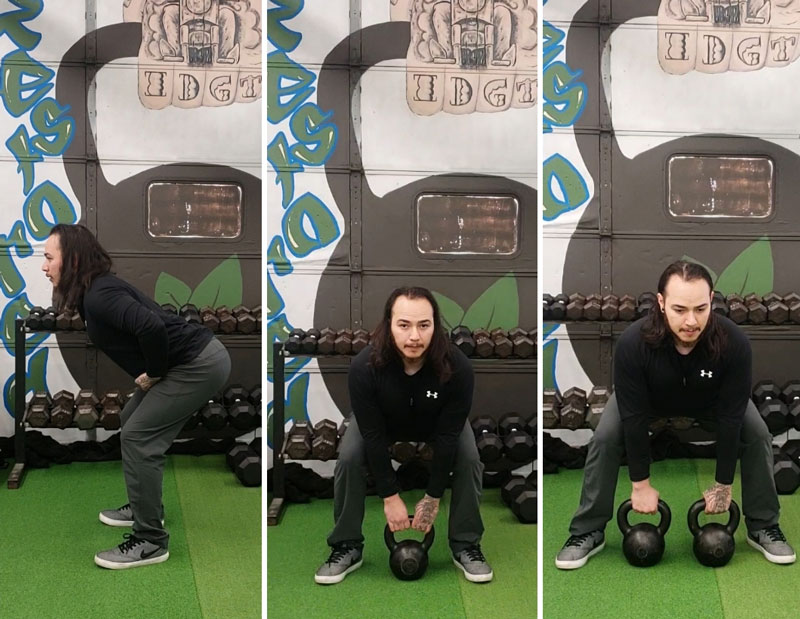
William Sturgeon, RKC-II, Hinge And Deadlift Progressions

Selecting the Correct Exercises

Choosing appropriate exercises is crucial for designing and evaluating your programs. While there are thousands of exercises you can choose for training your clients, all of the different tools and implements can lead to overly complicated workouts.

To simplify this process, begin by categorizing the exercises under consideration by movement pattern. For example, I might consider an exercise to be one of the following: lower body pull, upper body push, lower body push, upper body pull, mobility, single leg knee/hip, or core/carry. There are other classifications you can use, but this is what I use for my business.

Instead of trying to include every exercise you can think of, consider the population you are serving and their needs. Also take a look at what exercises you are typically programming for them. Keep it simple. If you’re work with general populations, your exercise selection will be minimal. This is extremely helpful when working with a group of clients who have different athletic abilities. Some clients will be more advanced than others, and some may have never touched a kettlebell before! It’s useful to have a systematic approach for running your classes.

Using Timed Blocks

When I first started leading group classes, I had a difficult time programming the workouts with just straight sets. The participants all moved at different paces, some people needed more coaching while others rushed through the workouts. There’s nothing wrong programming straight sets, but it can be difficult in a group class with a variety of fitness levels.

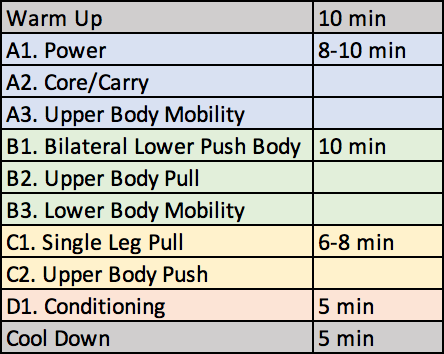
William Sturgeon Training Template

Using set blocks of time can help create a controlled environment for smoothly running classes. Set blocks of time allow you to attend to those who need extra coaching or attention, while allowing for clients moving at a faster pace to get more volume in their workouts—instead of finishing their set and waiting to move on.

Timed Training Session Example:

  • Warm Up together, 10 minutes
  • Block A 8 minutes
  • Block B 10 minutes
  • Block C 6 minutes
  • Block D 5 minutes
  • Cool Down, 5 minutes

While this example works very well for my group classes, please be sure to consider the individuals you are training in your group(s).

Having systems and structures to organize your programming is essential to running an effective kettlebell group class. Begin by choosing appropriate baseline exercises, choosing progressions and regressions for each, then breaking the session into timed intervals.

****

William Sturgeon, RKC II trains clients at his gym, Restored Strength. Contact him through his website at RestoredStrength.com or follow him on Facebook: facebook.com/restoredstrength
Filed Under: Coaching, Kettlebell Training Tagged With: group fitness, group fitness instructor, group training, kettlebel training, kettlebell coaching, kettlebell group training, progressions, regressions, timed sets, William Sturgeon

Three Ways to Reinforce Tension

October 24, 2018 By William Sturgeon Leave a Comment

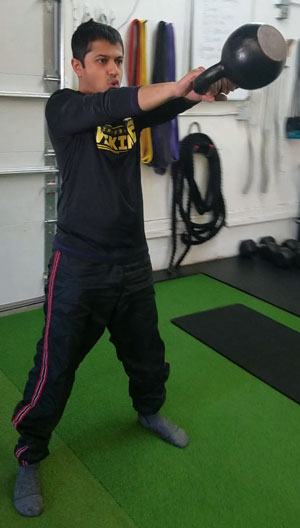
William Sturgeon Kettlebell Swing

We commonly coach our clients to create tension with cues such as “brace the core”, “tighten the glutes”, “crush the handle”, etc.  These phrases can help get clients to create tension in their lifts. You may see the specific group of muscles tighten, or a change in your client’s face when you ask them to create more tension.

Deconditioned clients are often unable to create tension through a specific area at first. It’s important that we spend time teaching them certain drills and use different cues to help them find the ability to create tension. It can be challenging to teach people how to apply tension during a lift.

Why Reinforcing Tension is an Important Skill to Practice and Teach:

Tension Keeps You Safe
Ballistic movements like the kettlebell swing require that we move rapidly—and if the movement is done incorrectly it can lead to injury. Kettlebells are not unsafe tools—users with bad technique are unsafe. Placing an emphasis on stressing the muscle with tension will allow you and your clients to work on technique without irritating the joints as much.

Tension Builds Strength
Your muscles recognize tension, not load—this is why we should focus on contracting the muscle before and during the exercise. Using “time under tension” (TUT), you can stimulate the muscle for greater growth. The denser the muscle, the stronger the body. Producing more tension throughout your lifts can also help generate more force.

Tension Stimulates Muscle Growth
Creating mechanical tension is one the of the primary factors associated with muscle growth. Mechanical tension is created by stressing the muscle throughout its full range of motion during an exercise. The phrase “time under tension” (or ‘TUT’ as referenced in the paragraph above) relates to the amount of time we’re stressing the muscle during an exercise. The more tension created during an exercise, the more muscle that will be recruited to perform the task. In turn, this gives the muscle a greater growth stimulus.

Drills That Teach How to Create and Reinforce Tension:

Hardstyle Plank
The RKC Hardstyle plank is the traditional plank’s older, much cooler brother. While a traditional plank is good for teaching a client to engage or brace their core, the client can still perform it poorly or fall short of the correct amount of tension we are looking to create. The Hardstyle plank creates a lot more tension than a regular plank. Most regular planks are held for 30 seconds or more, but the more intense Hardstyle plank is held for a much shorter amount of time maximizing the body’s full strength potential.

How to perform the Hardstyle Plank:

Isometrics
During isometric exercises, the muscle tenses but its length remains the same. A good example of an isometric exercise is an RKC drill we use to help pry open the hips. We place the client in the bottom position of a kettlebell goblet squat, then ask them to create a great amount of tension while forcing “prying” the hips out—all while keeping the hips in place. This powerful drill can help your clients find their glutes while understanding the amount of tension they need to create at the top position of their squat.

How to Perform an Isometric Hip Prying Drill

Time Under Tension
Time under tension is one of the greatest tools for helping our clients create or reinforce tension. Coach the client through a “grind” exercise—such as a kettlebell press—during a set amount of time. The kettlebell press can be performed and progressed in many ways, though most people will immediately want to just increase the weight. But, if we apply “time under tension” to the kettlebell press, we can make a lighter kettlebell feel far heavier. This can help a client spend more “time under tension” while safely finetuning their technique.

The Time Under Tension Kettlebell Press


****

William Sturgeon, RKC II trains clients at his gym, Restored Strength. Contact him through his website at RestoredStrength.com or follow him on Facebook: facebook.com/restoredstrength
Filed Under: Coaching, Kettlebell Training, Tutorial Tagged With: Hardstyle Plank, isometric, isometric exercises, kettlebell press, RKC, strength, strength training, tension, Time under tension, William Sturgeon

The Importance of Single Leg Training

August 15, 2018 By William Sturgeon Leave a Comment

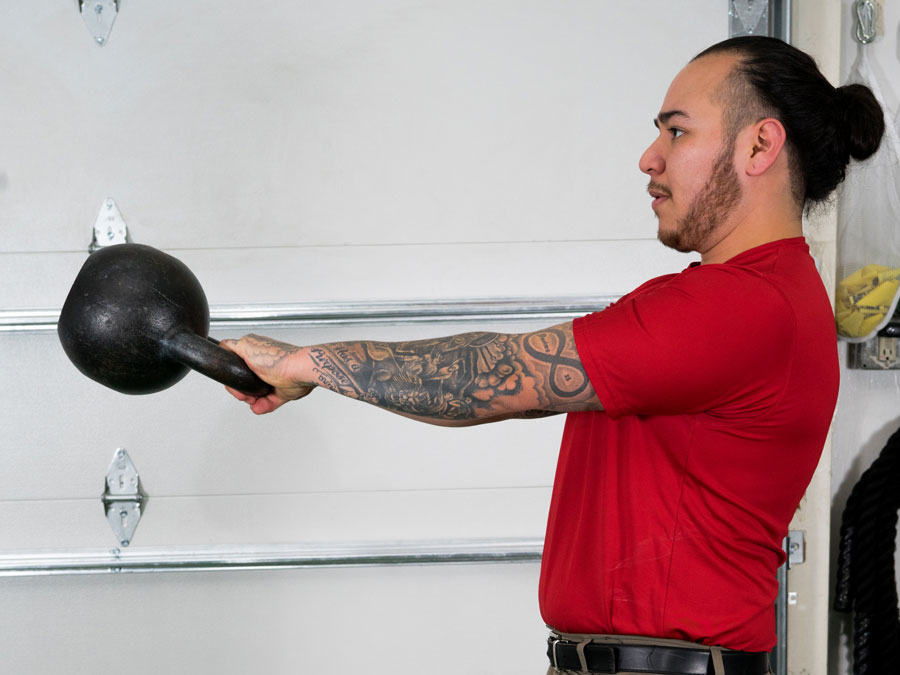
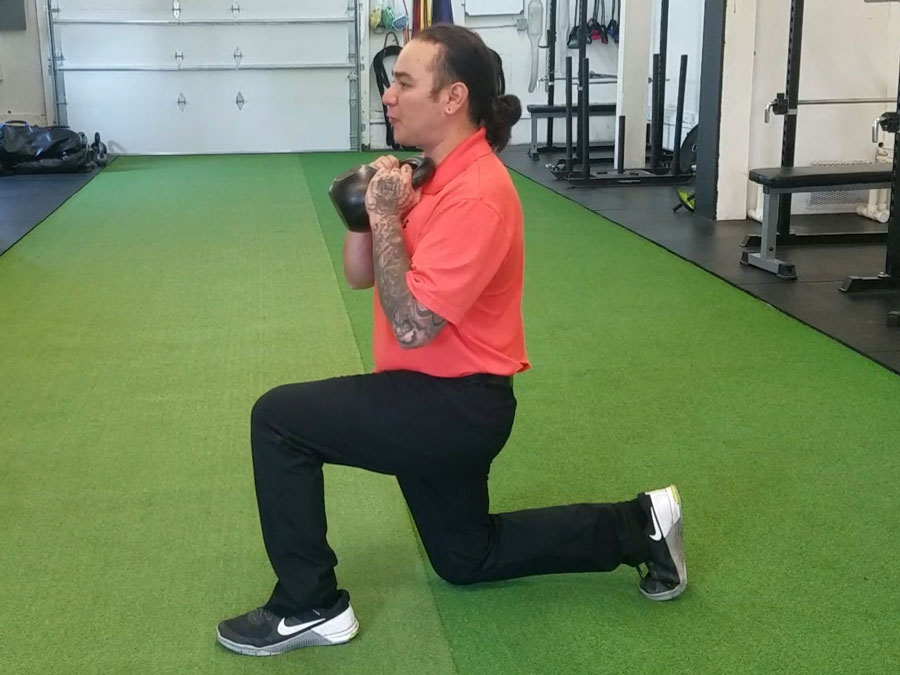
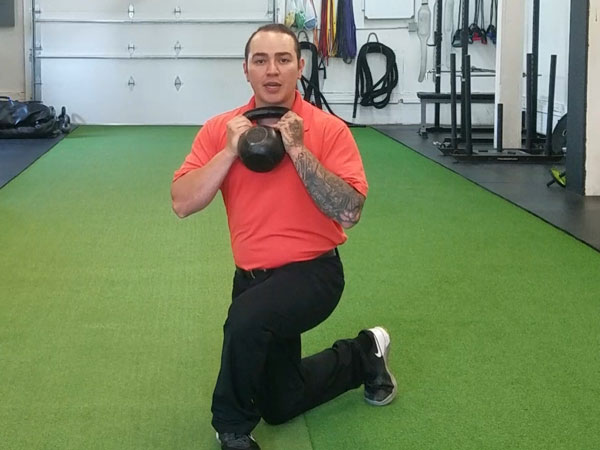
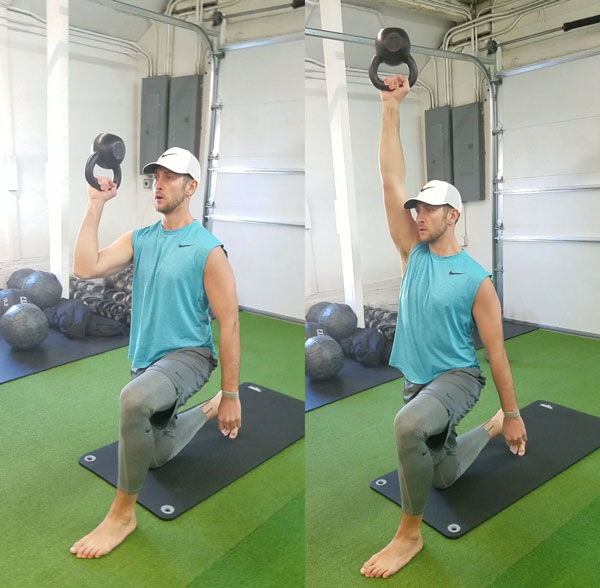
William Sturgeon, RKC-II Split Squat

We spend a lot of time training our clients with bilateral movements, such as squatting and hinging. These dynamic and explosive movements are done in a stationary position. When we choose exercises for our clients—or for our own training—the exercises should always be purposeful movements applicable to their lifestyle and goals. Whether you coach athletes or the general population, everyone moves unilaterally.

Whenever moving in any plane of motion, we move by stepping with one foot first. We move unilaterally throughout our whole day. Unless we’re stationary for a while, we do not spend much time in a bilateral stance. Knowing that all movement is initiated with one foot, why do we place such an emphasis on bilateral movements when training our clients?

There are many reasons to include unilateral exercises in our training programs. But, one of the main reasons I include single leg training is to allow me to train my clients’ weaknesses. While it is easy to temporarily correct a client out of a knee valgus during a squat with the cue “spread the knees apart,” it doesn’t really fix the problem. By including single leg exercises you can help strengthen your client’s asymmetrical weaknesses—which will also strengthen their bilateral movements.

Another reason I favor unilateral movements, is because they can help rehab and prevent injuries. If you train athletes or the general population, your job is to help them reach their goals—and keep them safe during their training. Another great benefit unilateral exercises offer over bilateral exercises is that they promote even more ankle stability and strength. Strengthening the ankles can reduce the chance of ankle injuries—which often lead to knee and hip pain.

The following are a few of my favorite single leg exercises:

Split Squat (see photo at beginning of post)

  • Start at the bottom of a split squat position.
  • Hold a kettlebell as if you were about to do a goblet squat (place the kettlebell near the collar bone).
  • Push evenly with the foot—through the ball of the foot and the heel to stand.
  • Lock the knee at the top of the movement while squeezing the glutes.
  • Lower yourself down slowly, and do not let the knee bang against the ground.

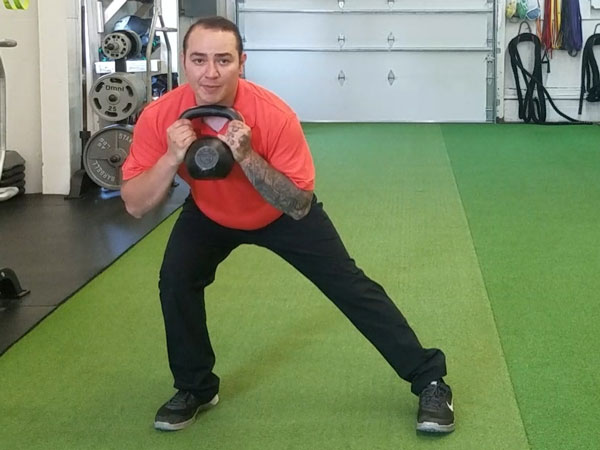
Lateral Lunge

William Sturgeon RKC-II Lateral Lunge

  • Start by holding the kettlebell in the rack position, or at the chest (the goblet squat position).
  • Take a large step to the side.
  • Bend your knees and push your hips back.
  • Return to the starting position by pushing through the inside of the foot you used to step to the side.

Curtsy Lunge

William Sturgeon RKC-II, Curtsy Lunge

  • Start by holding the kettlebell at the chest (the goblet squat position).
  • Step back and behind your other leg.
  • Slowly lower your hips until the knee lightly touches the ground.
  • Push through the front leg, and return to the starting position.

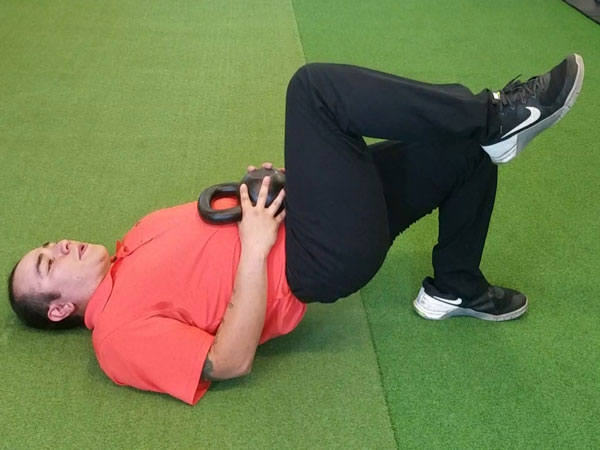
Weighted Single Leg Glute Bridge

Weighted Single Leg Glute Bridge

  • Begin on your back, and hold a kettlebell at your belt line.
  • Raise one leg off the ground by lifting the knee.
  • Tuck your chin and rib cage down as you press the heel of the other foot into the ground
  • Raise the hips up and squeeze the glutes.
  • Lower yourself down slowly and return to the starting position.

Single Leg Rear Deadlift (RDL)

  • Place both hands on the kettlebell handle.
  • Keep a slight bend in the knee and push your hips back.
  • Keep a straight spine and lower the kettlebell below the knee by bending with the hips.
  • Return to the starting position by pulling your chest and hips up as you stand tall.

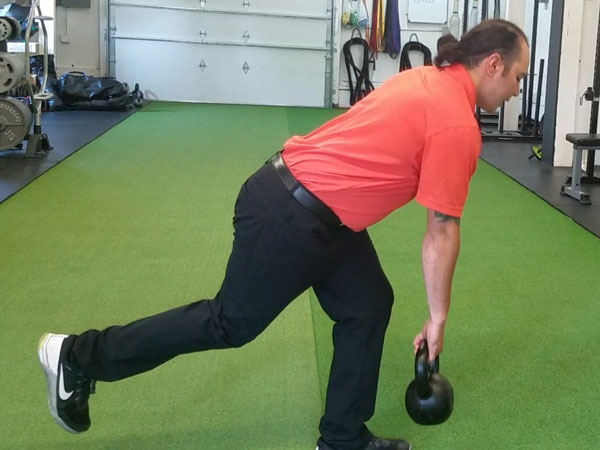
Single Leg Deadlift

William Sturgeon, Single Leg Deadlift

  • Begin with the kettlebell on the ground in line with your toes.
  • Bend at one knee and begin to hinge down while pushing your hips towards the wall.
  • Keep your chest up while lowering yourself through the hips.
  • Return to the starting position by standing tall.

Single leg exercises are essential moves to consider in your kettlebell training.

****

William Sturgeon, RKC II trains clients at his gym, Restored Strength. Contact him through his website at RestoredStrength.com or follow him on Facebook: facebook.com/restoredstrength
Filed Under: Kettlebell Training, Mobility and Flexibility Tagged With: kettlebells, leg exercises, single leg exercises, unilateral training, William Sturgeon

How To Improve Your Golf Game With Kettlebell Training

April 11, 2018 By William Sturgeon Leave a Comment

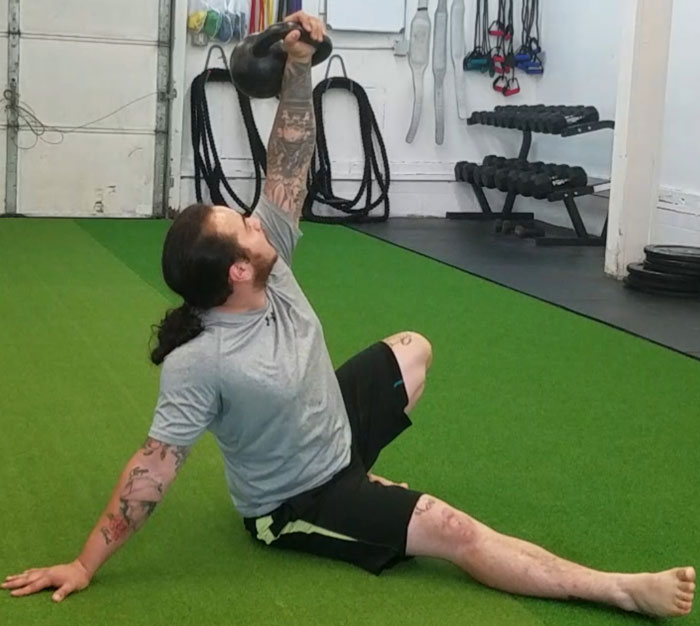
William Sturgeon Kettlebell Get-Up Kettlebells for golf

Whether you’re a golf athlete or enthusiast, there’s always room for improvement in your sport. While there are plenty of things you can do to improve your golf game, nothing is as powerful as strengthening your body. Strengthening and mobilizing your body will improve the quality and power of your swing. Kettlebell training can take your golf game to a new level!

Why Kettlebell Strength Training Can Improve Your Golf:

Kettlebell training has the ability to improve sports performance in many ways. Increasing your overall strength can lead to greater power for your golf swing. Strength training can help you achieve greater speed and more control over your swing. Training with kettlebells also helps you manage fatigue. Since golfers are typically in a fixed bent-over position for many hours at a time, they are at risk for a lot of stress on the lumbar spine. Lastly, kettlebell training can reduce the risk of injury and increase your playing longevity.

Common Golf Injuries:

Low Back Pain

Golfers commonly deal with low back pain. The repetitive rotational motion through the lumbar spine is often a major cause of low back pain in golfers. Having a weak low back can be dangerous since golf requires a lot of flexion and rotation through the lumbar spine. Mobilizing and strengthening the low back can reduce the risk of injury in this area.

Rotator Cuff

The rotator cuff is located within the shoulder and consists of four small muscles—the supraspinatus, infraspinatus, teres minor, and subscapularis—which stabilize the shoulders. Shoulder impingement is a common injury amongst golfers. Shoulder impingement occurs when the tendons of the rotator cuff become inflamed and irritated as they move through the subacromial space. If the shoulders are not mobilized or strong enough for the repetitive motion of the swing, then compensational movement patterns will occur. These compensational patterns cause weak, immobile shoulders and injury.

Elbow Tendonitis

The two most common instances of elbow tendonitis with golfers are tennis elbow (the outer tendon is irritated and inflamed) and golf elbow (the inflammation and irritation of the inner tendon). These injuries can be caused by the repetitive swinging motion in golf. To heal these injuries you will need to hang up the clubs for a little while to allow for a quicker recovery. But, by adding kettlebell training to your routine, you will be able to help strengthen and mobilize the shoulders and the thoracic spine to help reduce the risk of this injury.

Why Kettlebell Training?

Kettlebell training has been shown time and time again to be a very effective training modality. A single kettlebell can be used for strength training, mobility training, rehabbing injuries, and conditioning. You can even train with kettlebells at home, and at any time that fits with your schedule.

Kettlebell training for improved performance in golf does not have to be complicated or rigorous. Strength training is best kept simple and effective. At my facility, we train our “7 big rocks”: single leg, squat, hinge, trunk, mobility, upper push, and upper pull. These movement categories cover a full body approach and ensure we cover every plane of motion in our training. Full body training with kettlebells allows you to utilize your time more effectively and basically train anywhere.

Kettlebell Swings for Golf William SturgeonMy Top Five Kettlebell Exercises for Golf:

Swing

The kettlebell swing creates powerful and explosive hips. It has been known to aid in reducing low back pain. The swing strengthens the low back and increases the strength of the glutes–the powerhouse of the hips when applied to your golf swing. Stronger, more explosive hips will aid in a stronger swing with greater distance potential.

Get-Up

The get-up is a powerful exercise that serves many purposes at once. Benefits of practicing the get-up include: scapular stability, trunk stability, cervical and thoracic mobility, upper and lower body strength, and grip strength. The get-up teaches you how to control yourself under the weight of a kettlebell, move through different ranges of motion, and gain greater stability. The get-up is great for strengthening the shoulders and trunk while mobilizing the whole body.

Bottom-Up Press

The bottom-up press is great for repairing and strengthening the shoulders and rotator cuff. When the kettlebell is in the bottom-up position, a majority of the pressure is held within the palm. This takes tension away from the shoulder and places the elbow in a better position. The challenging bottom-up press forces you to have greater core stability throughout the movement. During this press, the scapula moves through its full range of motion while requiring great control throughout the exercise.

Bottom Up Half Kneeling Kettlebell Press

Goblet Squat

The goblet squat is the best way to load the squat if you are a novice lifter. The goblet squat is user-friendly because it doesn’t force the lifter into a fixed position. By comparison, the barbell back squat requires a lot of mobility. The goblet squat strengthens the glutes, and quads along with the core. The goblet squat can benefit the golfer by strengthening the tendons and joints in the lower body which can get irritated or injured in golf.

Farmers Carries

Farmers carries build grip strength, trunk strength, and create better posture. Golf involves a lot of flexion throughout the spine. Farmers carries require extension from the spine and shoulder retraction. With the head in a neutral position, the trunk is engaged, and the kettlebells are carried at the side in neutral position as well. Practicing farmers carries can offset the typical positions required for playing golf.

A Final Word…

If you are an avid golfer who wants to increase your athleticism, begin to learn and use kettlebells in your strength training sessions. Not only will this improve your ability as a golfer, it will allow you to keep playing long term. If you are considering training with kettlebells make sure to find the nearest RKC instructor in your area to show you how to properly and effectively use them.


****

William Sturgeon, RKC II trains clients at his gym, Restored Strength. Contact him through his website at RestoredStrength.com or follow him on Facebook: facebook.com/restoredstrength
Filed Under: Kettlebell Training Tagged With: Athletic Training, bottom-up press, get up, goblet squat, golf, improve golf swing, improve your golf game, kettlebell training, kettlebell training for golf, kettlebells for golfers, William Sturgeon

RKC: The Community of Fitness

May 10, 2017 By William Sturgeon 4 Comments

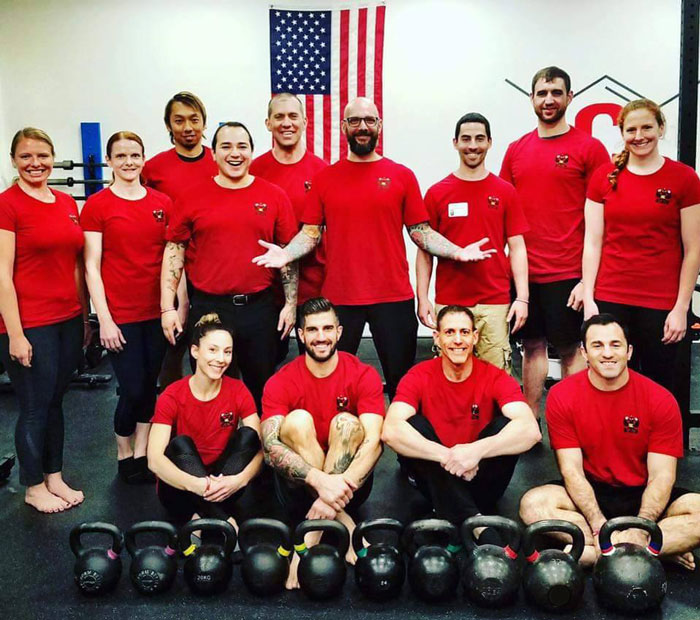
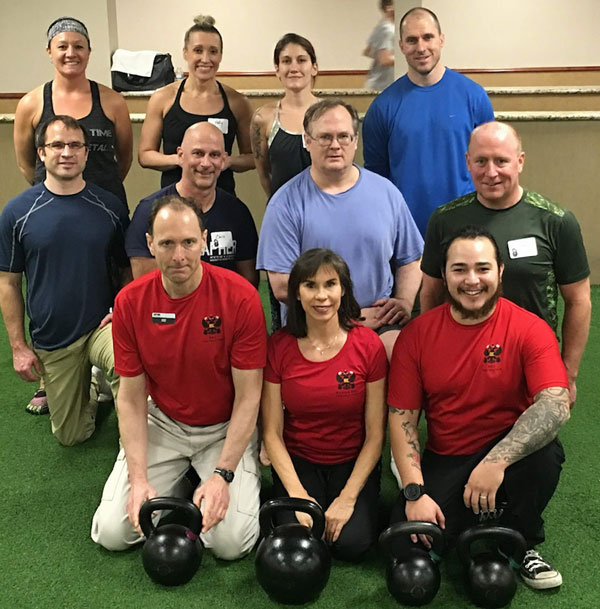
RKC-II NYC at Catalyst With Steve Holiner

I recently assisted at an RKC Level Two certification in New York at Catalyst Sport with Master RKC Steve “Coach Fury” Holiner. This was a unique event—of the ten candidates in attendance, Steve knew all but three of them. Seven had attended the previous RKC with Steve or had worked with him in the past. In a matter of minutes, Steve approached these three new faces and made them feel as welcome as if they were long lost friends. I love and admire the sense of community and belonging in the RKC.

The workshops offer more than just a learning experience for candidates wishing to understand how to coach and teach kettlebells, everyone also has the opportunity to learn from other coaches. The RKC is a great way to grow your network and learn from other professionals in the field. Each time I have either assisted or attended an RKC workshop, I have always been able to learn something useful from someone else in attendance. I’ve learned new drills to help correct common flaws, or a different cue to coach an exercise. Everyone will have a different perspective on teaching, even if the end result is the same. Learning from each other is very beneficial because it gives you more tools to add into your coaching tool box.

Along with the coaching aspects of the weekend, strong relationships develop between all the candidates and instructors. The instructors and assistants are at your side throughout the weekend to help better yourself. We are never intentionally trying to fail you, we want to make sure we are delivering the best possible education. We want to help you become the best teacher you can be, so you can better serve your clients. I am always amazed at how willing the instructors at RKC certifications are in giving candidates opportunities to ask—and answer—any questions they may have about coaching, programming, client interactions, business and more.

The RKC is a mentally and physically challenging weekend, but what stands out is how supportive everyone is of each other. During the snatch test you will be encouraged by your colleagues, because they want you to succeed. Then, during the coaching drills, you will interact and help each other learn, which is great since backgrounds range from coaching, training, physical therapy, chiropractic, and sometimes even psychology. Regardless of these different backgrounds, the setting allows you all to interact as equals—we are all here to learn and become better. This is an environment of great knowledge and solid support. This is what we should bring back with us when the weekend is over.

When I went through my first RKC in 2014, I specifically remember going through the graduation workout and hearing one of the candidates I had worked with that weekend yell out “Keep it up guys, you can do this, we are in this together!” (Cue High School Musical soundtrack). Those words have stuck in my head since that day. That challenging rite of passage was tough, but knowing that everyone else was experiencing it too encouraged me to succeed. Even before the grad workout, hearing the encouragement from my peers during my testing was comforting. If I hadn’t passed that weekend, I would have been completely okay with it because I would have still left with a lot of knowledge and many new friends.

William Sturgeon's First RKC Workshop

Many people still think that the RKC has a military style of training, but we have separated ourselves from that image and now have a greater emphasis on education and practical purpose. Our focus is to educate and help people. Instructors and assistants will not be impressed by a 3:30 snatch test or a 44kg kettlebell press, but they will be impressed by how well you demonstrate an exercise and how well you can coach. The other feats are impressive, but they do not show us how well you can teach.

There is a greater sense of belonging when you treat the candidates as family, just like Steve did with the candidates he didn’t already know. Most new candidates come in with big knots of fear in their stomachs because of the testing. But when the instructors take the time to get to know the candidates while being sure to teach in the areas where they need help, the stress of testing lowers automatically. When you find a community that welcomes you with open arms and a willingness to give you everything in their power to help you succeed, you know that you are in the right place. We want to set up all of our candidates for success, so we take the extra time to review techniques or drills so everyone fully understands.

The RKC community has some of the nicest, most helpful people I have ever had the pleasure of meeting. When I started the process of opening my facility, Restored Strength, I reached to some RKCs who own their own businesses, and they were willing to take the time to answer my emails and phone calls. Some of these people I have only met on social media, but I also knew them as a part of the RKC community. Without hesitation, everyone I reached out to responded to my questions, and shared what had and had not worked for them when opening their facilities. Where else can you speak to nationally known coaches and get advice like this?

When I assisted at the RKC-II Steve taught, he offered to host me at his place for the weekend. We’ve known each for a few months because he has been coaching me online. He invited me to assist him and offered to let me stay with him. This is the type of community that’s a family with the same goal in mind: helping others. It really connected with me when he said, “It’s amazing how many people I get to reach. If I work with ten coaches and they each work with thirty people that means I have connected with 300 people in some way”. The power to teach and influence this many people is tremendous.

Becoming an RKC is more than just earning a certification, it’s about becoming part of a family with a common goal in mind: educating the world with proper kettlebell training. We spend hours with strangers who become friends with the shared experience of becoming educators in strength. You are never alone while earning your certification, you have the support of a strong community which wants you to succeed more than you know. We all return from these weekends with many memories and stories to share. Each time I have had the privilege to assist, I end up with more friends to add to this extended family.

****

William Sturgeon, RKC II trains clients at his gym, Restored Strength. Contact him through his website at RestoredStrength.com or follow him on Facebook: facebook.com/restoredstrength
Filed Under: Kettlebell Training, Workshop Experiences Tagged With: kettlebell certification, NYC workshop, RKC, RKC Community, RKC Workshop, RKC-II, RKC-II Workshop, Russian Kettlebell Certification, Steve Holiner, William Sturgeon, workshop experience

How to Run Injury Free Using Kettlebells

March 29, 2017 By William Sturgeon 2 Comments

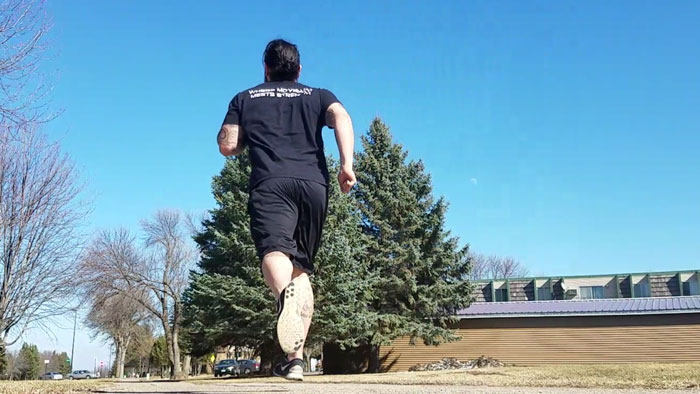
William Sturgeon running and kettlebell training

Let’s clear this up right now, strength training and running go together, it’s not one or the other. Most runners avoid strength training for fear of being bulky, or because they’re afraid it will decrease their run time. Runners need to understand that strength training can improve their run time and increase their work capacity. If that’s not convincing, then consider that runners are prone to injuries such as patellofemoral pain syndrome, plantar fasciitis, stress fractures, as well as hip, low back, and shoulder pain. Quite an extensive list. We can prevent these issues by introducing kettlebells into our training.

Why Kettlebells?

The kettlebell is the Swiss Army knife of fitness—you can train for strength, conditioning, mobility, power, etc. with just one tool. A tool that serves multiple purposes is great if you have limited time or not enough space for bigger equipment like barbells or racks of dumbbells. Kettlebells give you the ability to exert a maximum muscular contraction instantly in an explosive power burst. Using exercises like the kettlebell swing or kettlebell snatch will train you to build a lot of power. The amount of tension, speed, and force needed to complete a swing or a snatch is very high, and the benefits carry over into the production of power. Kettlebell exercises have been known to help athletes improve their performance by increasing their power output—this also allows runners to excel in their races.

When training with kettlebells, we are often barefoot or wear minimalistic shoes. At my facility Restored Strength, we highly recommend that our members do not wear shoes. We are in shoes all of the time, and wearing shoes while training puts the foot in a plantar flexed position because the heal is elevated. Because of compression from the shoes they can also restrict the range of motion in the ankle. The freedom of being barefoot allows the ankle to have a greater range of motion. Training barefoot will also raise your kinesthetic awareness by allowing the proprioceptors in the foot to have greater exposure. The benefits can transfer over to your running, when you are not constricted by your shoes.

William Sturgeon Kettlebell Swings

Why Strength Training Can Prevent Injuries

The RKC is well known for being The School of Strength. We promote the importance of strength in a purposeful manner. While strength training has many applications, let’s discuss why it is essential to be a strong runner. When you begin to introduce strength training into your program, you get physically stronger and there’s a physiological aspect as well. Strength training promotes greater bone density which reduces the likelihood of hair line fractures. You will also strengthen the ligaments, tendons, and muscles—which hold and secure joints in proper alignments. If you are not strength training, the certain areas in the body will become weak. Being weak is dangerous since weak muscles and bones are fragile and susceptible to injuries.

Strength training can increase your muscular work capacity, which can improve your running technique. You’re less likely to fatigue, and when your muscles are stronger, you can maintain proper mechanics for longer periods of time. Stronger muscles will decrease the likelihood of fatigue during a race, and strength training helps increase the type 2 (fast twitch) muscle fibers. Focusing on the big five major muscle groups—knees, hamstrings, glutes, trunk, back—used when running will make strength training less daunting.

What to Train

Glutes: The glutes are the key muscle group in the mechanics of running. The gluteus medius will be the main focus, as this muscle is the rotator cuff of the lower body. When you move, it’s the first muscle to quickly contract, and it stabilizes your body when you are on one leg. Running is a unilateral activity—a single leg is in motion—which is why it’s crucial to strengthen and stabilize the gluteus medius in unilateral exercises.

Hamstrings: These bad boys strengthen your lower back. When they contract, they flex the knees, the repetitive motion in running. Your heel should reach your glutes during the back-swing motion, this allows for greater power output when running. With stronger hamstrings, you will be able to produce greater force output when running. Having strong hamstrings will complement your glutes—the two together will prevent low back pain and allow your running to be less strenuous on the posterior chain.

Quadriceps: Runners usually have overdeveloped quadriceps, but it is still worthwhile to train them. The quadriceps are responsible for two major movements in running, knee extension and hip flexion. These actions cause the leg to swing forward when running. The insertion of the quadriceps is located on the tibial tuberosity, the boney projection below the knee. Having stronger quadriceps will assist in maintaining knee position. One muscle of the quadriceps, the vastus medialis, helps stabilize the patella and the knee joints when we run.

Trunk: The trunk is a fancy word for abdominals. The trunk maintains your posture and keeps you upright. When we run, we want to maintain a tall posture and make sure that we are as tall as we can get, allowing us to have a greater range of motion through the hips. We won’t be able to maintain that tall position while running with a weak trunk. Strengthening the abdominals will allow for greater stability. Stronger abdominals also reduce the wobbly feeling when running. If you are wobbling from side to side when you run, then you have an energy leak slowing you down.

Back: The back is the last key player for strong running. Like the trunk, the back has the same role of keeping your body upright. Having a stronger back will help retract the shoulder blades, which prevents the shoulders from rolling forward. Good posture carries over to proper mechanics when running. If you find it difficult to maintain your posture, then you will need to improve your back strength. A strong back can prevent energy leaks through the upper body, and make sure you’re carrying your arms in an optimal way while running. A strong spine complemented by strong mid and lower backs will stabilize the spine and the pelvis.

How to Train

When we train, we want to train movements rather than muscles. The big movements are lower body pushing and pulling, upper body pushing and pulling (vertical and horizontal), trunk work, carries, and unilateral upper and lower body movements. I make mobility training a staple in my programming as well. It is a mixture of movement and strength—you need to be mobile to be strong and you need to be strong to be mobile.

In my opinion, the push/pull upper body/lower body approach is the most optimal way to train. It conserves time and targets every area. Using this type of training will also reduce the amount of training sessions each week. I recommend two to four days each week, depending on your training.

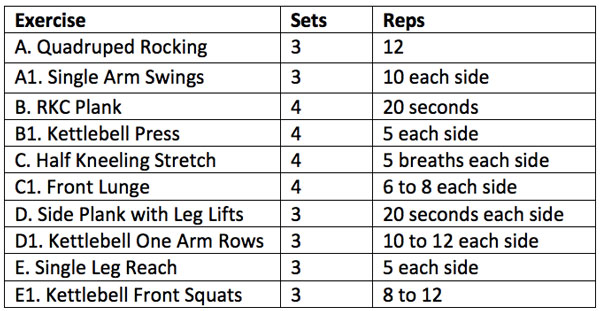
Training day example:
Kettlebell Running Training Day Chart

Conclusion

Strength training can undoubtedly improve your run time and prevent injuries if done correctly. There are many different modalities of training, and kettlebells have been the most useful for me. To help your athletic performance, make sure to include kettlebell training in your program. If you are unfamiliar with kettlebell training, find yourself a certified RKC instructor to take your training further.

****

William Sturgeon, RKC II trains clients at his gym, Restored Strength. Contact him through his website at RestoredStrength.com or follow him on Facebook: facebook.com/restoredstrength
Filed Under: Kettlebell Training, Mobility and Flexibility Tagged With: Distance Running, kettlebell training, runners, running, running and kettlebells, William Sturgeon

Does the Snatch Test Really Matter?

February 1, 2017 By William Sturgeon 4 Comments

Every RKC instructor has gone through the rigorous snatch test. This is five minutes of full effort—snatching a kettlebell for 100 repetitions. Ask anyone who has done it and they will tell you the joys of the test. Many RKC candidates are nervous and frightened when it comes to the snatch test. They end up putting so much effort and stress about test that they miss the big picture of what the weekend is really about—learning.

William Sturgeon Kettlebell SnatchesThe RKC is known as the School of Strength because we educate candidates on how to teach strength to others. As we all know the title of RKC instructor is not given, it’s earned. One of the requirements is the snatch test and it’s part of the right of passage to earn your title as an RKC instructor. But, I want to bring this to everyone’s attention: your ability to safely instruct kettlebell training is not related to how fast you finish your snatch test.

The biggest test that many people underestimate and under-prepare for is the coaching aspect of the certification. I can say that I fell into this when I first got certified. I put so much effort in preparing for the snatch test that I didn’t want to focus on anything else. I passed my RKC that weekend, but I wish I would have put more effort and focus on the coaching part of the weekend. As candidates, you are surrounded by other fitness professionals with years of experience—many people also undervalue this aspect of the weekend. Taking in all the cues and corrections the instructors have to offer is so important for growth as teacher of strength.

One year after my certification, I was able to attend another RKC as a volunteer. The candidate coached me though the swing and the plank. And while he used good cues and good progressions, he ultimately did not pass the snatch test. But, he wasn’t bothered by that, his focus was on passing the other two tests—the coaching test and the technique test. This was a good candidate who had his priorities straight. A year later I was able to assist at an RKC Workshop, and this was my opportunity to share with the candidates the importance of coaching. I assured them that the focus for the weekend was to learn how to teach and perform proper kettlebell technique, not to finish the five minute snatch test in four minutes. Knowing how to properly progress and regress a client means you are competent in coaching while keeping your clients safe.

William Sturgeon Get-Ups

Safety is our number one goal when we working with clients. Making sure that you put a bigger focus on the learning aspect of the weekend will lead you to a successful career in coaching. The RKC is more than just a certification, it’s a system that has principles that apply to all areas of fitness. If you place priority on passing your snatch test and not your ability to coach, you are doing yourself a disservice. Focus on reading your manual and taking notes, I have had the opportunity to assist at an RKC and an HKC, both times I advised the candidates to grab their manuals and write notes. The master instructors have been teaching for years, they will often give cues or corrections that are no in the manual that will be beneficial to remember, so make sure to take notes.

Passing your certification comes with three big tests, your ability to perform the exercises with proper technique, your ability to coach, and your snatch test. This should be the order of importance when you are preparing for your RKC. You will become a teacher of strength, and will show your clients what you learned with proper coaching. Take time to understand that the snatch test is not the most important part of becoming an RKC instructor.

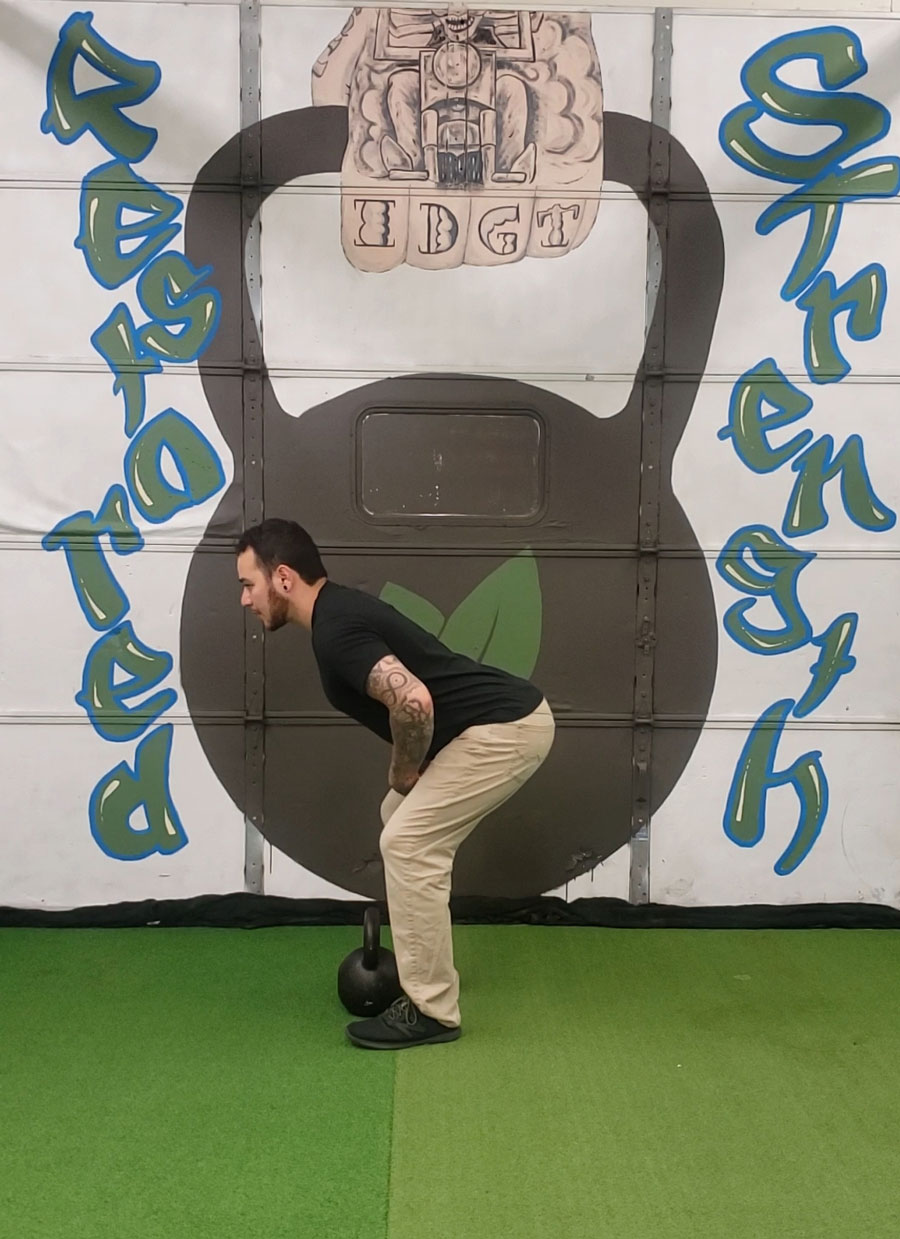
Here are some of my favorite coaching cues to correct the swing:

****

William Sturgeon, RKC II trains clients at his gym, Restored Strength. Contact him through his website at RestoredStrength.com or follow him on Facebook: facebook.com/restoredstrength
Filed Under: Coaching, Kettlebell Training Tagged With: becoming an RKC, Coaching, how to become an RKC, kettlebell training, kettlebell tutorial, kettlebells, RKC Testing, RKC workshop experience, RKC workshop prep, William Sturgeon

  • « Go to Previous Page
  • Page 1
  • Page 2

Primary Sidebar

Featured Products

previous arrow
BOOK-RKCBookofSnC
HardStyleKettlebellChallegeDanJohn700
BookCoverMasterTheKettlebell1
RKCiconKettlebell512
KettlebellGoddessdv040
next arrow

Recent Posts

  • RKC Big Six Workout
  • The Kettlebell Swing & Low Back Pain
  • Key Kettlebell Exercises To Help You Create Better Balance
  • How to Most Effectively Use Kettlebells to Meet Your New Year Goals
  • 1 Exercise That Checks All The Boxes
FOLLOW US ON TWITTER!

Archives

Copyright © 2025

Dragon Door Publications / The author(s) and publisher of this material are not responsible in any manner whatsoever for any injury that may occur through following the instructions or opinions contained in this material. The activities, physical and otherwise, described herein for informational purposes only, may be too strenuous or dangerous for some people, and the reader(s) should consult a physician before engaging in them.