• Skip to main content
  • Skip to primary sidebar
  • Home
  • Contributors
    • Matt Beecroft, Master RKC
    • Martijn Bos, Master RKC
    • Andrea Du Cane, Master RKC
    • Angelo Gala, Master RKC
    • Chris Holder, Master RKC
    • Steve Holiner, Master RKC
    • Dan John, Master RKC
    • Mike Krivka, Master RKC
    • Thomas Phillips, Master RKC
    • Robert Rimoczi, Master RKC
    • Phil Ross, Master RKC
    • Max Shank, Master RKC
  • Workshops
    • HKC Workshops
    • RKC Workshops
    • RKC-II Workshops
  • Find an RKC Instructor
  • Resources
    • Articles
    • Forums
    • Kettlebells
    • Products
  • Blogs
    • PCC Blog
    • Strong Medicine Blog
  • Archives

RKC School of Strength

Official blog of the RKC

Ryan Jankowitz

How I Finished Rehabbing My Shoulder Using Kettlebells

April 13, 2022 By Ryan Jankowitz 3 Comments

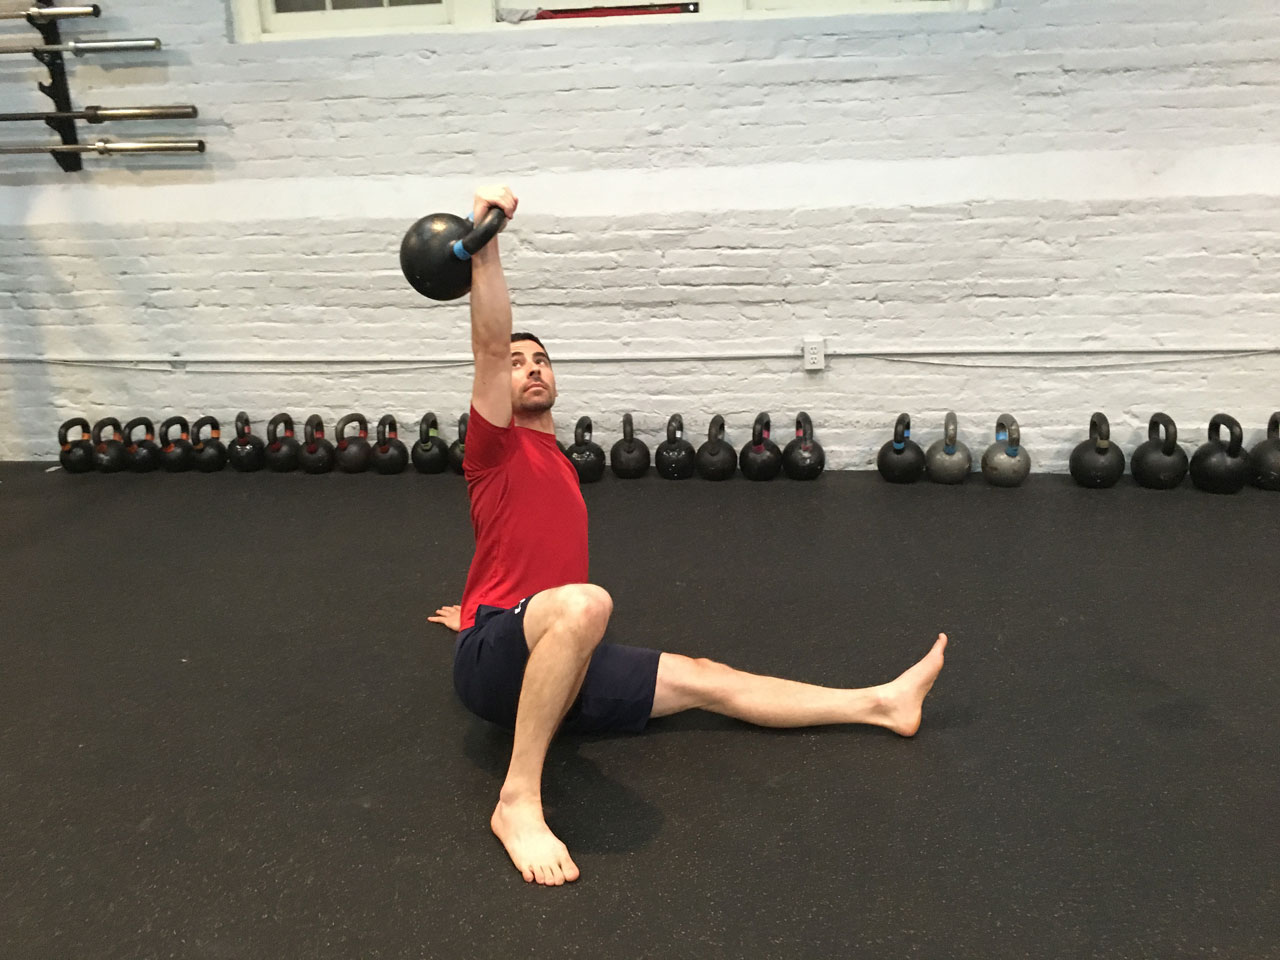
Ryan Jankowitz, RKC-II performs a kettlebell getup

Disclaimer: This is Ryan Jankowitz’s personal shoulder recovery program. What worked for him may not be safe or appropriate for anyone else. If you are experiencing any shoulder pain, see a medical professional for a clear diagnosis and PT program for your injury.

In the Fall of 2021, I started experiencing pain in my left shoulder during presses and Turkish get-ups. I took a month off from practicing those exercises, hoping that rest would be enough to heal my shoulder. But, while the pain decreased, I still couldn’t perform those movements.

Finally, I decided to schedule time with a physical therapist. I was diagnosed with shoulder impingement. The physical therapist scheduled me to come to the office twice a week, plus exercises to do every day at home.

I paid very close attention to the work I was doing with the physical therapist. Soon after, I began to formulate my own program to follow after my course of physical therapy.

Here Are My Five Main Takeaways:

1. Work on Shoulder Blade Retraction

Part of the reason I developed shoulder impingement was because my shoulder blade was not tracking along my ribcage properly. My shoulder blade was “winging”, and I had to strengthen the muscles around my shoulder blade. I could accomplish this by practicing kettlebell rows, farmer’s walks, suitcase carries, and rack carries.

2. Strengthen the Core

I was shocked at how much trouble I had with side planks on my left shoulder. Adding side planks to my training had an immediate positive impact on my shoulder and became a must-have in my program.

3. Improve Shoulder Stability

At physical therapy, we did a lot of shoulder stability work in the tall plank position, and I could tell that this exercise was beneficial. We also practiced lateral moving tall planks and shoulder taps. I decided these side plank variations would be an integral part of my program and would work well in my mobility warm-up.

4. Work on Thoracic Spine Mobility

My physical therapist noted that my ability to rotate from my thoracic spine was quite different on my right side to the left. This may have played a role in how I developed the shoulder impingement. Luckily, the RKC program teaches several exercises and mobility drills which can improve t-spine mobility: Turkish get-ups, windmills, bent presses, and the RKC arm bar. I felt that single kettlebell overhead squats could also improve my shoulder stability.
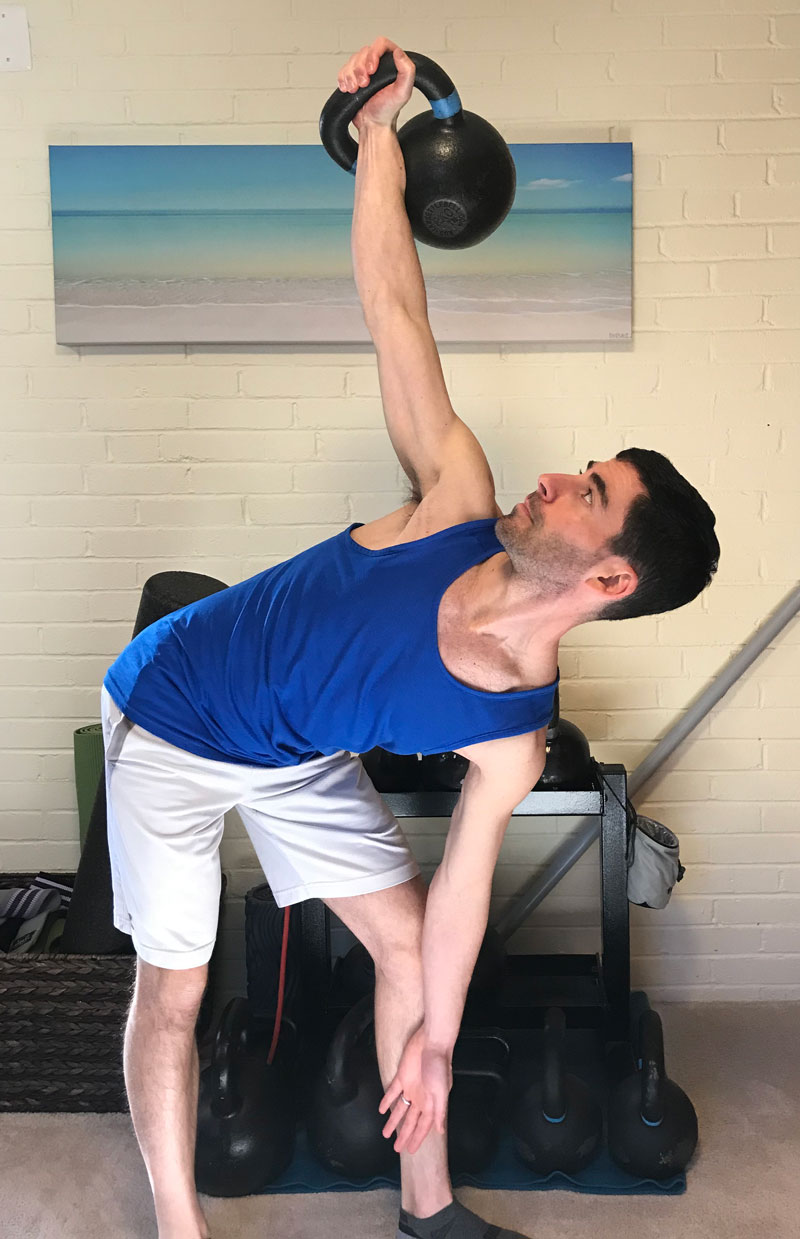
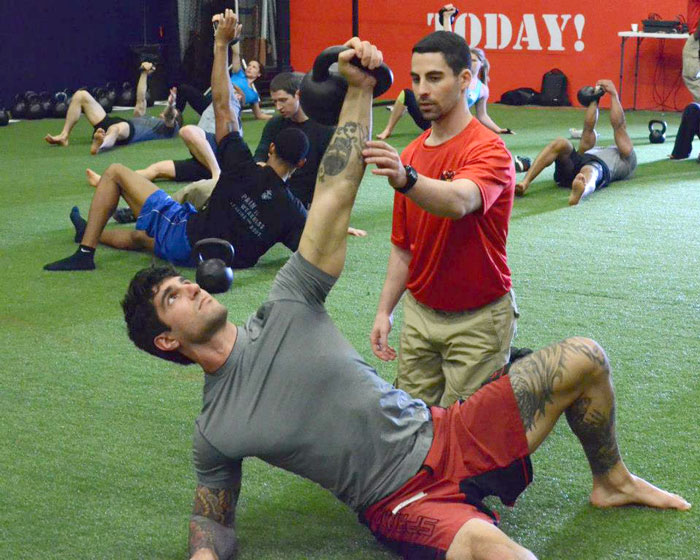
Ryan Jankowitz, RKC-II performing a kettlebell windmill

5. Increase Grip Strength with Bottom-Up Kettlebell Exercises

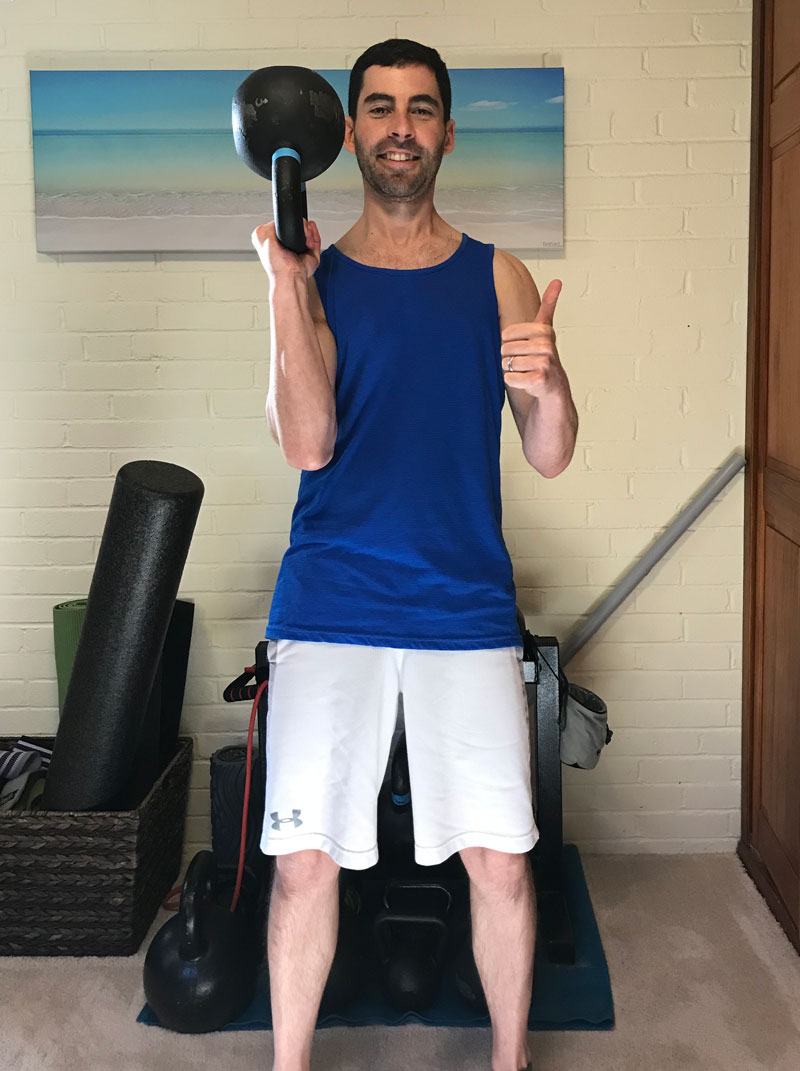
I remember reading that grip strength and shoulder health were related. I noticed that I had trouble doing even light bottom-up kettlebell exercises on my left arm and was determined to fix this! Oddly enough, even though they were difficult, I could do bottom-up presses without pain. So, I decided to include bottom-up presses along with rack carries in my program.


After six weeks of physical therapy, I was pain free and able to practice presses and get-ups with light kettlebells. I was determined to continue my progress by developing my own post-rehab strength program based on what I did in physical therapy and my RKC knowledge.

Here’s the 8-week strength program I created to address my needs and goals:

Day 1:

Mobility warm-up:
Combination of physical therapy and primal movements to activate my core and shoulder. And to raise my heart rate.

Strength Block 1:
Overhead Squat
Kettlebell Row
Plank variation
x 3 sets

Strength Block 2:
Single Leg Deadlift
Bottom-Up Press
Loaded Carry
x 3 sets

Conditioning:
1 Arm Swings

Day 2:

Mobility warm-up:
Combination of physical therapy and primal movements to activate my core and shoulder and get my heart rate up.

Strength Block 1:
Overhead Lunge
Kettlebell Row
Plank variation
x 3 sets

Strength Block 2:
Suitcase Deadlift
Turkish Getup
Loaded Carry
x 3 sets

Conditioning:
1 Arm Swings

Day 3:

Mobility warm-up:
Combination of physical therapy and primal movements to activate my core and shoulder and get my heart rate up.

Strength Block 1:
Overhead Squat
Kettlebell Row
Plank variation
x 3 sets

Strength Block 2:
Single Leg Deadlift
Bottom-Up Press or Getup
Loaded Carry
x 3 sets

Conditioning:
1 Arm Swings

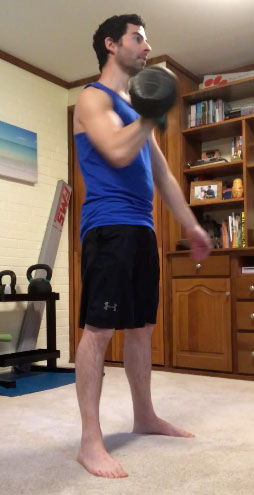
Ryan Jankowitz performing a bottom-up kettlebell press

Goals and Progressions

I also created a few milestone goals for myself, so I could recognize when it was time to move up to the next size kettlebell or movement progression.

Overhead Squat Progression: I started with a dowel and built up to 10 reps before moving to a single kettlebell. Once I could do 5 reps/side, I moved up to next kettlebell. Once I could do 5 reps with a 16kg kettlebell, I switched to practicing windmills.

Kettlebell Row: I worked up to 10 reps/set before moving up to the next kettlebell.

Single Leg Deadlift: I worked up to doing 5 reps/leg with 32kg, once I could do that I started practicing with double kettlebells.

Bottom-Up Press: I started with a 10kg kettlebell and gradually built up to 5 reps.  Once I could do 5 reps, I moved up to next kettlebell.

Turkish Get-up: My first goal was to comfortably complete 3 reps/side starting with a 16kg kettlebell. Once I could do 3 reps per side, I moved up to the next kettlebell.

Overhead Lunges: I started with 16kg and built up to 5 reps/side. Once I could do 5x per side with a 20kg kettlebell, I switched to practicing the Bent Press.

1 Arm Swings: Start with 16kg and build up to 5 sets x 10R, 10L.  Once 100 reps achieved, move up to next bell.


I followed this program for 8 weeks and made substantial progress without experiencing pain. I’ve now moved into a double kettlebell program that I created for myself to bring my skills back to where they need to be for my RKC Level 2 requirements. Ya gotta stay sharp!

This was an interesting learning experience for me. I learned that if I’m in pain, I  need to go see a medical professional sooner rather than later. This experience also reinforced the notion that kettlebell training should be considered to be a practice, not just a workout. A practice requires patience—but this will result in developing greater skills. Sometimes it’s important to slow down to go faster.

Stay Strong.

***

Ryan Jankowitz, RKC II, CK-FMS Owner of RJ Kettlebell. Ryan is on a mission helping busy men and women lose weight and gain more self-confidence using kettlebells.  He enjoys spreading the RKC message and teaching others.  If you’re new to kettlebells or you just need some guidance, download his FREE 5-Day Kettlebell Workout Plan.
Filed Under: Tutorial Tagged With: kettlebell exercises, kettlebell shoulder stability exercises, Ryan Jankowitz, shoulder exercises, shoulder health, shoulder stability

When to Breathe During Different Kettlebell Exercises

July 29, 2021 By Ryan Jankowitz 0 Comments

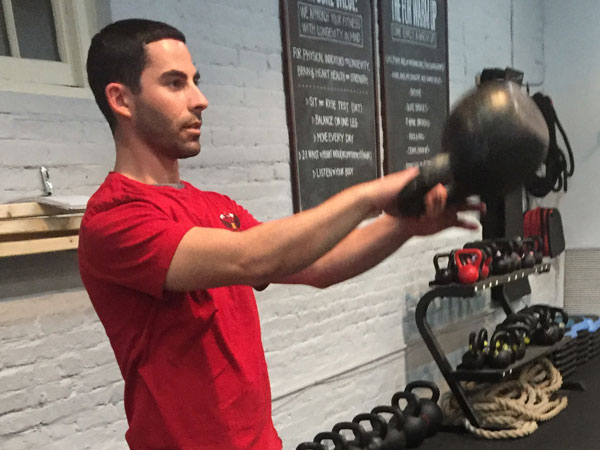
Ryan Jankowitz, RKC-II performing a kettlebell get-up

Kettlebell Technique Includes Breathing Technique

The fact that you’re reading this post means that you take your health and fitness seriously–this is also why I’m so excited to share this information with you.

Often, people who are new to kettlebells don’t realize how important breathing is during a workout.

Learning how to breathe correctly for kettlebell training will allow you to produce more power and contract your core properly, which will also protect your back. Correct breathing will also allow you to get oxygen to your brain, so you don’t pass out.

In the RKC, we use a breathing technique called “Hardstyle Breathing” for power and safety.

It’s a very distinctive hissing sound that may sound a little silly, but it’s vital!

This hissing sound is applied differently depending on which type of kettlebell exercise you’re doing.

Hardstyle Kettlebell Exercises are Categorized as Ballistics or Grinds:

  1. Ballistic exercises are explosive and fast (kettlebell swings, cleans, and snatches).
  2. Grind exercises require lots of tension and are generally performed more slowly (presses, squats, deadlifts).

Breathing for Ballistic Kettlebell Exercises

When you’re doing a ballistic exercise, the exhale is much shorter compared to the exhale during a grind exercise.

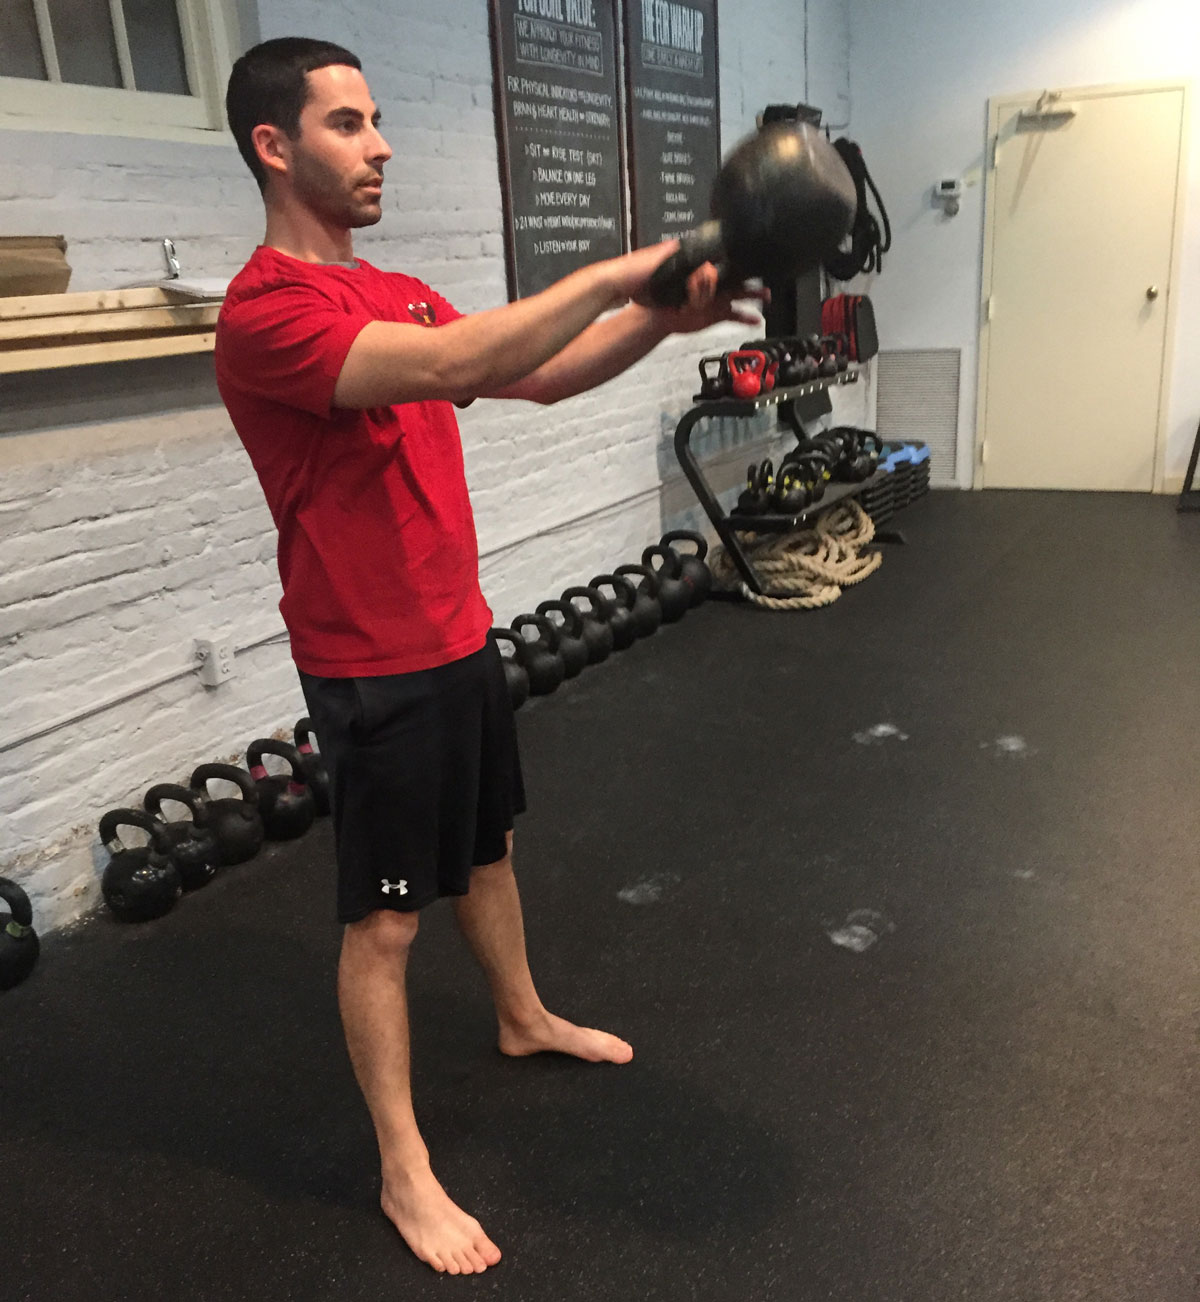
For example, during a swing, clean, or snatch the exhale happens at the same time that your glutes and quads contract, or when you stand straight up. It’s a short, sharp exhale that generates more power, which will help the kettlebell float.

Ryan Jankowitz easily switches hands at the top of a one arm kettlebell swing during the "float"
Ryan easily switches hands at the top of a one arm kettlebell swing during the “float”

This short exhale will also contract your abs, which will prevent you from leaning back and placing stress on your lower back. Think of the exhale as a way to brace your abs for an incoming punch.

As the kettlebell goes into the backswing part of a swing, clean, or snatch, quickly sniff in through your nose filling your belly with air.

Breathing for Kettlebell Grinds

Kettlebell grinds are slower and require more tension. Similarly, your inhale and exhale will be longer to match each part of the movement.

For example, during an overhead kettlebell press, you will exhale through your teeth as you press the kettlebell overhead. Then, inhale through your nose as you pull the kettlebell back down to the rack position.

Using Hardstyle breathing during grind exercises will help you keep your core tight, so you don’t hurt your back, and will help you generate more power.

I hope this information helps you in your quest to get into better shape using kettlebells.

Stay Strong,

Ryan Jankowitz, RKC II, CK-FMS

***

Ryan Jankowitz, RKC II, CK-FMS is the owner of RJ Kettlebell. He’s on a mission to help busy men and women get into better shape using kettlebells. He enjoys spreading the RKC message and teaching others. If you’re new to kettlebells or you just need some guidance, try his FREE 5-Day Kettlebell Workout Plan.
Filed Under: Kettlebell Training, Tutorial Tagged With: ballistic exercises, breathing, breathing technique, grind exercises, HardStyle Breathing, kettlebell ballistics, kettlebell breathing, kettlebell exercises, kettlebell grinds, kettlebell technique, Ryan Jankowitz

The Kettlebell Get-up in Detail Part 2

May 6, 2021 By Ryan Jankowitz 0 Comments


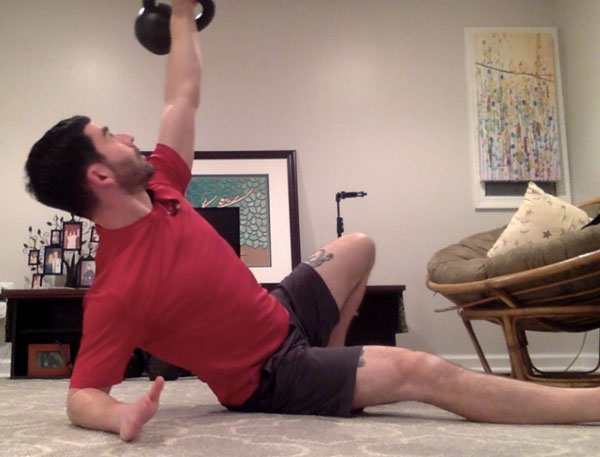
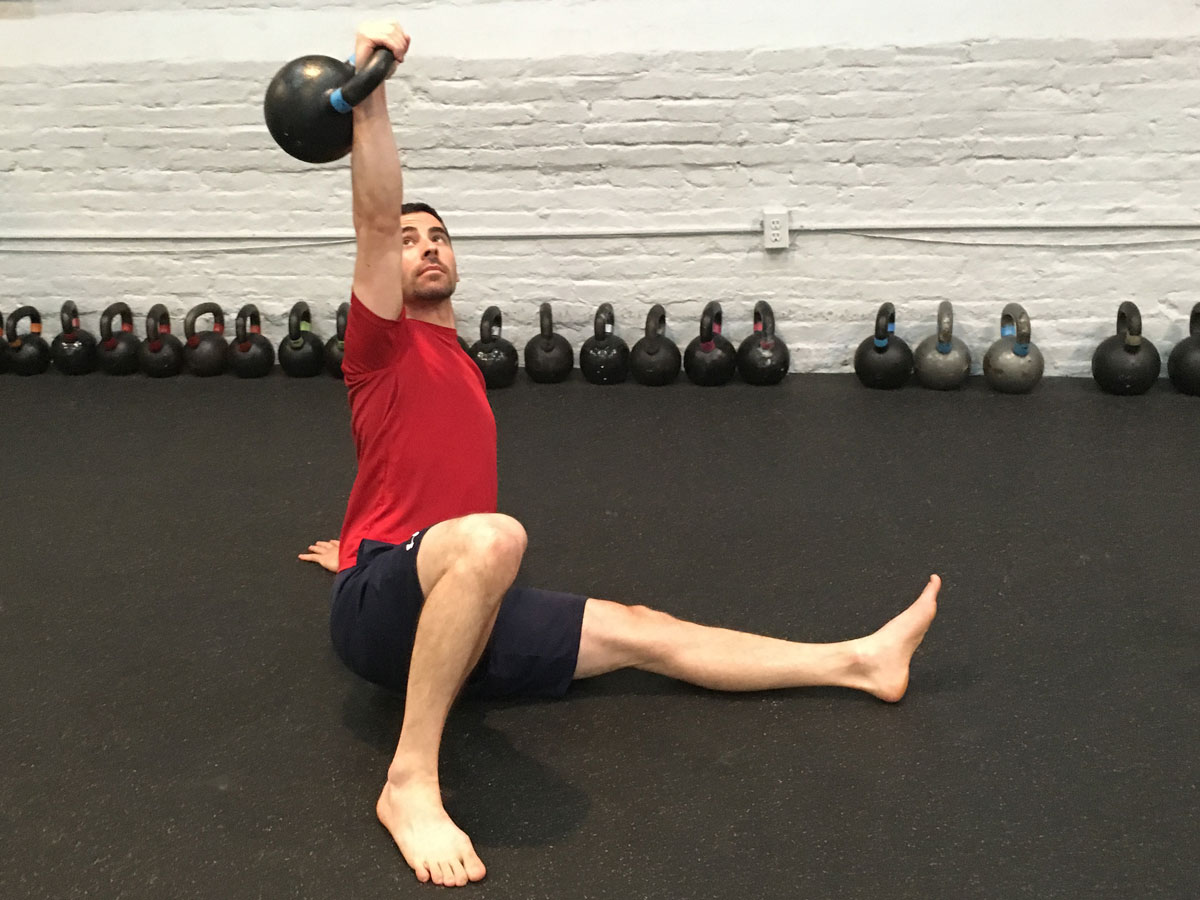
Ryan Jankowitz Demonstrating the move between the tall sit and the half windmill - kettlebell Get-Up Tutorial Part Two

Welcome back to my 3-part series on the kettlebell get-up! While my last post focused on the set-up, roll to elbow and the tall sit, today I’m going to focus on the leg sweep to windmill, lunge and stand up.

Once you’ve achieved the tall sit position, the next step is to sweep your leg back underneath you into the kneeling windmill position.

Some people may get confused at this part of the get-up because they are not sure how high they should bridge their hips before sweeping their leg back. This is mostly a matter of personal preference, however, I’ve found that with heavy get-ups doing a small bridge is the safest and most effective way to start the leg sweep. If you’re warming up with naked (no weight) get-ups or using a light kettlebell, then a high bridge can be okay. Just do what feels most safe and appropriate.

When you sweep your leg back, aim to line up your wrist, knee and ankle. A nice straight line here will allow you to load your hips and use your torso to straighten up to the kneeling position.  Also, make sure to tuck your toe under (dorsiflex) after you sweep your leg back and keep your toe tucked in order to help you with the lunge.

Be aware that if you don’t bring their knee back far enough, you will not be able to properly use your hips and torso to straighten up. When this happens, the arm on the ground and the lower back are overused—and at risk of injury.

Now that you’ve straightened up, you must put yourself into a lunge position. Here are the two different ways to do this:

  1. “Windshield wiper” your back leg
  2. Step across with your front leg

When teaching the get-up at the HKC and RKC, the “windshield wiper” method is taught first. This movement can sometimes be uncomfortable for people who have had a knee injury, knee surgery, or their knee just doesn’t like this type of movement. In this case, step your front leg across to move into a lunge position.

At this point, the arm holding the kettlebell should be vertical. The kettlebell should be behind your head so that if you were to look up you wouldn’t see the kettlebell in front of you. Now, you’re ready to stand up from the lunge. Push both feet powerfully into the floor to help you stand up. When you bring your legs together, hit your Hardstyle plank by contracting your glutes, quads and abs.

To see all of these steps in action, please watch this video:

Focus on improving these steps to gain the strength and confidence to perform the get-up with heavier kettlebells.

Stay tuned for my third and final blog post about the kettlebell get-up.

Stay Strong,
Ryan Jankowitz, RKC II

 ***

Ryan Jankowitz, RKC-II and owner of RJ Kettlebell, lives in Maryland with his wife and two dogs. They love to go hiking and spend time on the beach. When he’s not telling his dogs to stop chasing squirrels, Ryan enjoys spreading the RKC message and teaching others how to train with kettlebells. Try his 2-week advanced kettlebell plan: https://rj-kettlebell.ck.page/b59325e156

Filed Under: Kettlebell Training, Tutorial Tagged With: get-up tutorial, kettlebell get-up, kettlebell technique, kettlebell training, Ryan Jankowitz, turkish get up, tutorial

The Kettlebell Get-up in Detail Part 1

February 25, 2021 By Ryan Jankowitz 1 Comment

Ryan Jankowitz Get-Up Setup, Elbow, Tall Sit

If you’re doing Kettlebell Turkish Get-ups, then you’ve clearly invested time and energy in your health and strength.

The get-up is one of the best exercises you can do for total body strength and to prolong your life. Studies have shown that older adults who can “get up” off the floor easily will more likely avoid falls and live longer than adults who need help getting up from the ground.

There are many steps to learn with the get-up, but once you’ve learned the basic movements you can dive deeper and fine tune the exercise for greater strength and safety.

In order to communicate all of the information I want to share with you, I’ve decided to make this a 3-part series:

    1. Set-up, roll to elbow, tall sit (this post)
    2. Leg sweep to windmill and lunge, stand up
    3. Get back down through all transitions, parking the kettlebell, switching sides, and eye position

This post will be a dive deep into the set-up, rolling up to your elbow and the tall sit position. Improving movements will help take your get-ups to the next level.

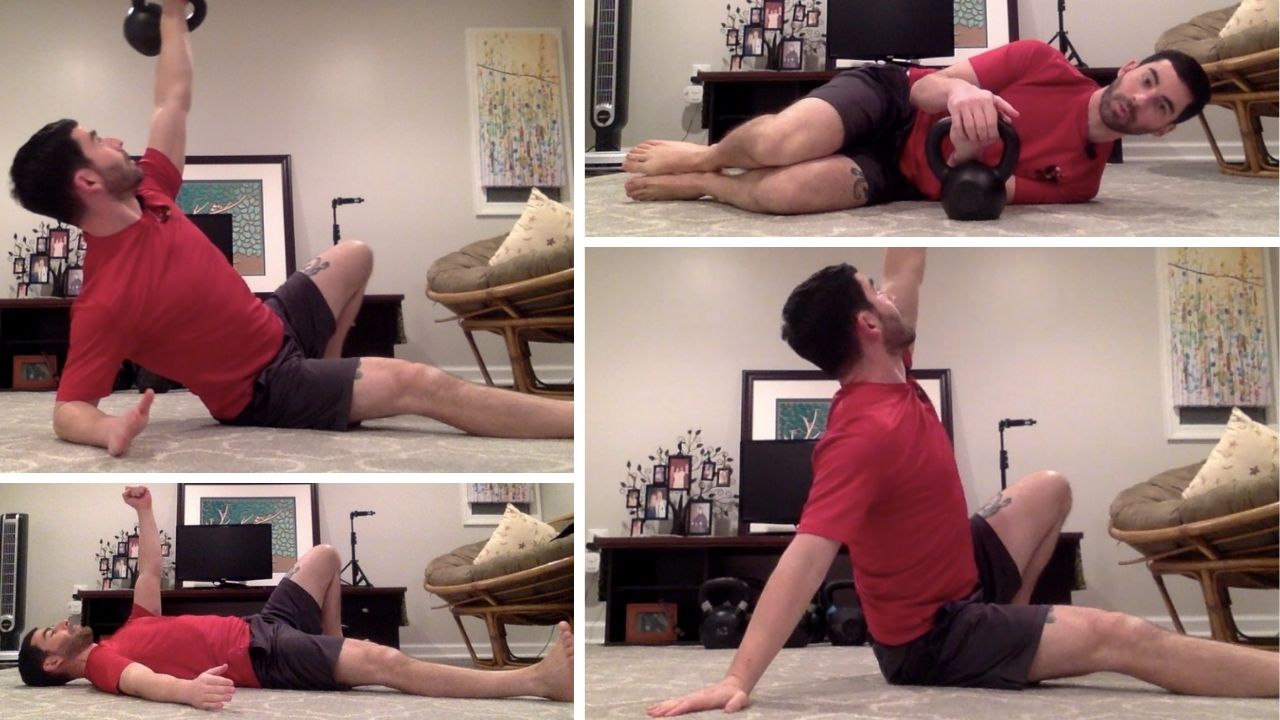
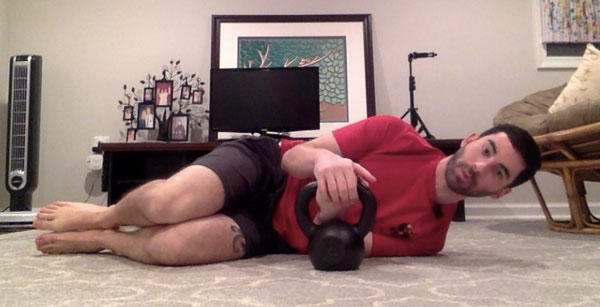
The get-up actually starts from the fetal position with both hands wrapped around the kettlebell handle. Use the weight of your body to roll into position while bringing the kettlebell with you. Don’t try to “arm wrestle” the kettlebell.

Ryan Jankowitz kettlebell-Get-Up beginning at fetal position

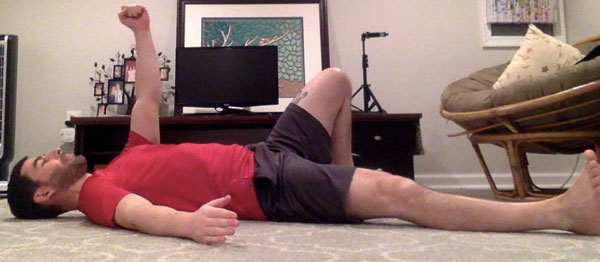
Once you’ve pressed the kettlebell over your chest and locked out your arm, you must put your limbs opposite the kettlebell in the right spot on the floor. Place your unloaded arm (not holding the kettlebell) on the ground about 45 degrees from your body. This will ensure that when you come up to your elbow, your elbow will be right under your shoulder. From there, you will give you a strong base to work from.

Ryan Jankowitz Turkish Get-up unloaded limbs

Your legs should form the letter “V”. Bend the leg that is on the same side as the kettlebell and place your foot on the ground.

Now that you’re setup, you can focus on generating tension. Most of the tension you create will be on the side of the kettlebell. You will pack your shoulder supporting the kettlebell by pulling your shoulder down away from your ear and squeezing your armpit. This will also keep the tension out of your neck.

Next, you will start to crunch your obliques on the side that’s holding the kettlebell. The bent leg can then start contracting the glute and hamstring as you push your foot into the floor—this will help roll you up to your elbow.

Finally, push through your heel and flex your quad on the straight leg, which will help keep the leg down on the ground as you sit up to your elbow.

Okay, now that you’re set up, it’s time to roll up to your elbow. Think of this movement as a diagonal crunch where you’re trying to bring your shoulder closer to your opposite hip.

If you’ve set up correctly, then your shoulder should be stacked over your elbow when you roll up. This will give you a solid base to work from.

In this position, make sure to squeeze your shoulder blades together and push your chest up to the sky. This will help keep the tension out of your neck.

RyanJankowitz Get-Up to elbow

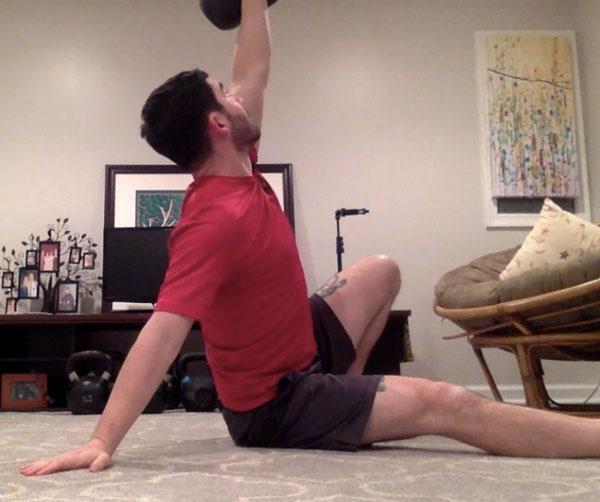
Once you’ve established a solid position on your elbow you can then sit up to your hand. This is known as the tall sit position.

I like to rotate my hand back slightly as I transition to my hand because it allows me to open up my chest and squeeze my shoulder blades together, which will prevent shrugging the shoulder up to the ear and putting tension in the neck.

Ryan Jankowitz Get-Up tall sit

Make sure to lock out your elbow. Imagine flexing your triceps and then pinching your triceps and lat together to create a solid base.

To see all these steps in action, please watch this video:

If you take the time to incorporate these tips into your kettlebell Turkish get-ups, then I know you’ll feel the changes taking place.

Stay tuned over the next few weeks for the next blog post in my get-up series.

Stay Strong,
Ryan Jankowitz, RKC II


 ***

Ryan Jankowitz, RKC-II and owner of RJ Kettlebell, lives in Maryland with his wife and two dogs. They love to go hiking and spend time on the beach. When he’s not telling his dogs to stop chasing squirrels, Ryan enjoys spreading the RKC message and teaching others how to train with kettlebells. Try his 2-week advanced kettlebell plan: https://rj-kettlebell.ck.page/b59325e156

Filed Under: Kettlebell Training, Tutorial Tagged With: get up, get-up setup, get-up tutorial, how do to a get-up, kettlebell grind, kettlebell training, Ryan Jankowitz, turkish get up

How To Burn Fat With Kettlebell Swings

January 27, 2021 By Ryan Jankowitz 1 Comment

How To Burn Fat With Kettlebell Swings by Ryan Jankowitz

If you work out with kettlebells, then you’re probably doing swings… lots of swings.

The kettlebell swing sets the foundation for learning more advanced movements and is a simple way to increase your strength and conditioning.

You may have gotten into kettlebells because you want to get stronger, improve your athletic performance or lose weight. Whatever your goal may be the Kettlebell Swing can help get you there.

Today, I want to talk about how the Hardstyle kettlebell swing can be used to help you burn fat.

Studies have shown that interval training is highly effective for weight loss. Alternating between brief periods of intense exercise and rest/relief is an effective way to burn a lot of calories and increase your stamina.

Using the Hardstyle swing for your intense exercise is a no-brainer because of its effect on your heart rate, low impact on your joints, and the number of muscle groups it engages. Plus, when done correctly it can alleviate back pain.

Hopefully, I’ve made my case for using this exercise as a great tool to help shed fat (along with a healthy diet of course).

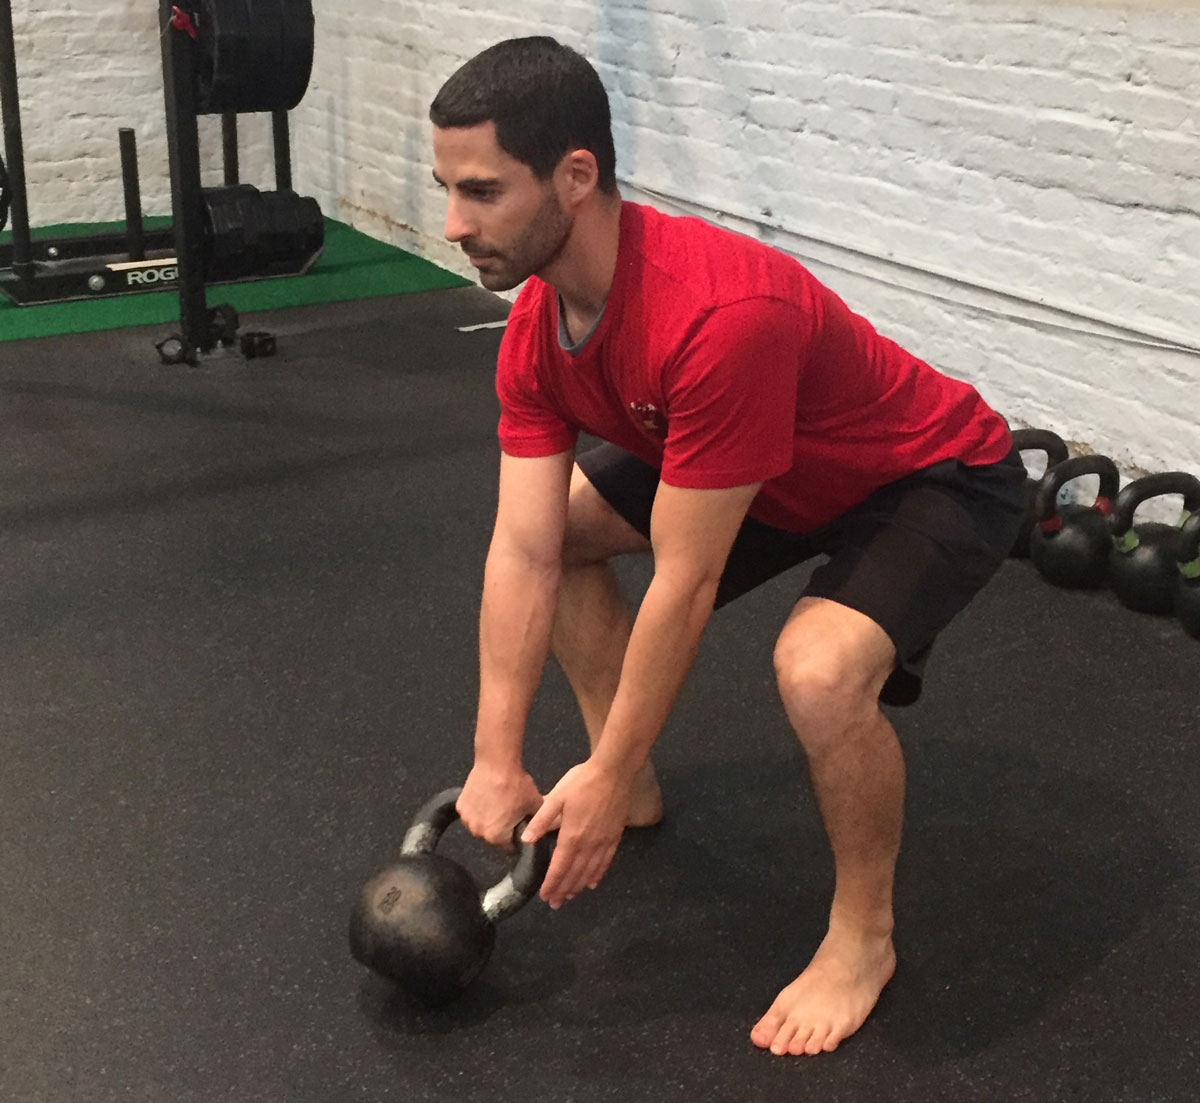
Kettlebell swing set up
Effective kettlebell swings begin with a correct setup.

Now, let’s dive into the numbers so you can dial in your workouts and figure out the best combination of reps and rest periods.

In order to create an interval style workout that will promote fat loss you should try and aim for a 1-to-1 or a 2-to-1 work to rest ratio.

So, let’s assume 10 swings take approximately 15 seconds. If you’re using the 1-to-1 work to rest ratio, then you would do 10 kettlebell swings, then rest for 15 seconds. You would keep this interval up for as long as you can maintain good form and power.

If you’re more advanced or you have a higher conditioning level, you can use a 2-to-1 work to rest ratio. That could be 20 kettlebell swings followed by 15 seconds of rest or 10 swings followed by 7 seconds of rest.

You can use these swing intervals at the end of a workout for conditioning or have an entire workout dedicated to this type of training. The choice is yours!

I would love to know what you think and if you find this effective!

Stay Strong and Safe,
Ryan Jankowitz, RKC II

***

Ryan lives in Maryland with his wife and two dogs. They love to go hiking and spend time on the beach. When he’s not telling his dogs to stop chasing squirrels, Ryan enjoys spreading the RKC message and teaching others how to train with kettlebells. He has a 90-day kettlebell program (online) that helps busy adults get into shape and look and feel better by working out effectively and eating healthier so they can boost their energy levels, elevate their self-confidence and look good in their underwear. If you’d like to learn more about it, click here to set up a time to chat with Ryan.

Filed Under: Coaching, Kettlebell Training Tagged With: fat loss, fat loss with kettlebells, Hardstyle Kettlebell Swing, interval training, kettlebell fat loss, kettlebell fat loss workout, kettlebell swings, kettlebell training, kettlebell workouts, RKC, Ryan Jankowitz

Deadlift Variations with One Kettlebell

November 18, 2020 By Ryan Jankowitz 0 Comments

Ryan Jankowitz Single Leg Deadlift

Even though I’m writing this blog post during a global pandemic, I’m not trying to scare you into working out with kettlebells. However, kettlebell training will make you stronger and more resilient. My goal with this post is to give you a few new ideas for your kettlebell workouts because kettlebells and other fitness equipment have been hard to find recently. You may have just one kettlebell or several kettlebells and no matching pairs—but you can still do kettlebell deadlifts.

TRyan Jankowitz Kettlebell Deadlifthe deadlift is arguably the king of strength building exercises. Not only is it great for getting stronger, but it can improve your posture and strengthen your hips. When performed correctly, the deadlift can alleviate back pain.
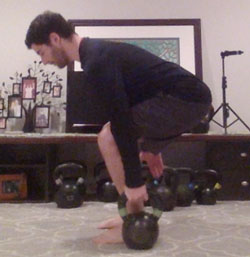
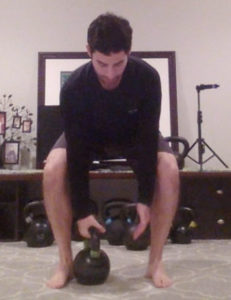
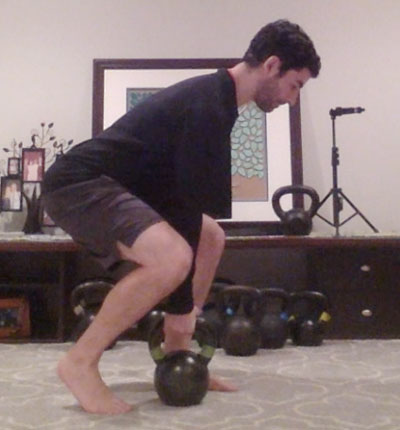
Additionally, mastering the kettlebell deadlift will allow you to transition to the Hardstyle kettlebell swing. From there, a whole world of kettlebell exercises await.

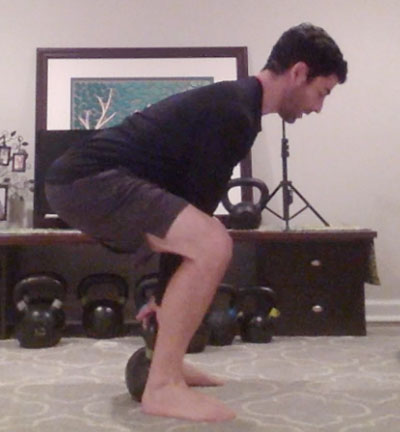
First, you must master the standard kettlebell deadlift and understand the hip hinge.

The hip hinge means that you move from your hips, the strongest set of muscles in your body, while keeping your spine straight or neutral. Once you’ve mastered the standard kettlebell deadlift, you can begin training with a number of exciting variations. Here are a few to get you started:

Let’s Get Asymmetrical!

Ryan Jankowitz Suitcase Deadlift

Now we can unevenly load the body—for greater core engagement—by learning two different one-arm kettlebell deadlift techniques.

1. The kettlebell suitcase deadlift places the kettlebell outside one of your feet. This deadlift variation is great for grip strength because you’re only using one hand to grip the kettlebell handle. Make sure that you don’t lean or rotate toward the kettlebell as you move in and out of your hip hinge. Stay square all the way through the movement.

Ryan Jankowitz One Arm Deadlift

2. The kettlebell one-arm deadlift is fairly self-explanatory. The kettlebell will be between your feet but toward the hand that will be grabbing it.  Stay square all the way through the movement and don’t lean or rotate toward the kettlebell.  Again, grabbing the kettlebell with one hand will improve your grip strength and the offset load will really engage your core.

3. The kettlebell staggered stance deadlift is a unique variation because you use one hand—and also load one leg more than the other. You can practice this move with your opposite arm and leg, or by holding the kettlebell with the arm on the same side as the loaded leg.

Ryan Jankowitz Staggered Stance Deadlift
Staggered Stance Deadlift

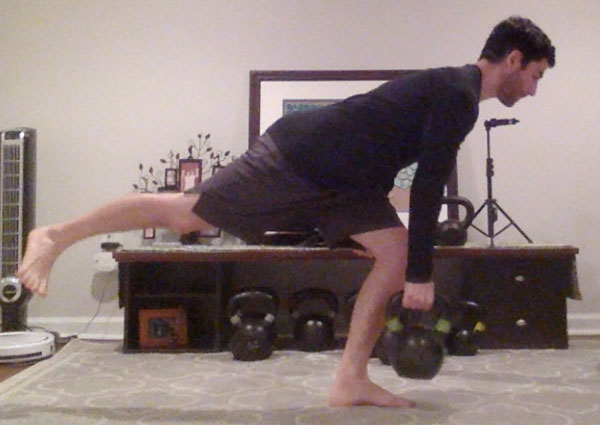
4. The last variation I want to share is the kettlebell single leg deadlift. This deadlift is performed while balancing on one leg. The kettlebell single leg deadlift improves balance and is great for your feet and ankles.  This move is challenging, so take your time when performing it and move slowly with purpose.  You can hold the kettlebell in the opposing hand, or on the same side as the working (standing) leg.

Watch this video for demonstrations of each kettlebell deadlift variation mentioned in this post.

Stay Strong and Safe!

***

Ryan Jankowitz, RKC II lives in Maryland with his wife and two dogs. They love to go hiking and spend time on the beach.  When he’s not telling his dogs to stop chasing squirrels, Ryan enjoys spreading the RKC message and teaching others how to train with kettlebells.  He’s got a 90-day kettlebell transformation program that helps busy adults lose 10-15lbs., shed their spare tire and build lean muscle so that they look great naked and move like they did in their 20’s.  Click here to schedule a free call with Ryan.

Filed Under: Kettlebell Training, Tutorial Tagged With: balance training, core stability, deadlift variations, kettlebell deadlift, kettlebell deadlift variations, one arm deadlift, One leg deadlift, Ryan Jankowitz, staggered stance

How To Fix 4 Common Kettlebell Swing Mistakes

September 4, 2020 By Ryan Jankowitz 0 Comments

How To Fix 4 Common Kettlebell Mistakes

The kettlebell swing is a phenomenal exercise. I think it should be part of every training program. It addresses explosive power, the posterior chain, anaerobic conditioning and even grip strength. The kettlebell swing has many awesome qualities!

It’s also the foundation for more advanced kettlebell movements like one-arm swings, cleans and snatches. Before progressing to those more advanced movements, make sure that your two-hand swing is dialed in and that you can maintain proper technique with heavy kettlebells and high reps.

Let’s dial in our kettlebell swing technique by avoiding these four common mistakes.

Common Kettlebell Swing Mistake #1:
Poor Setup

There are several key concepts to remember for the kettlebell swing setup.

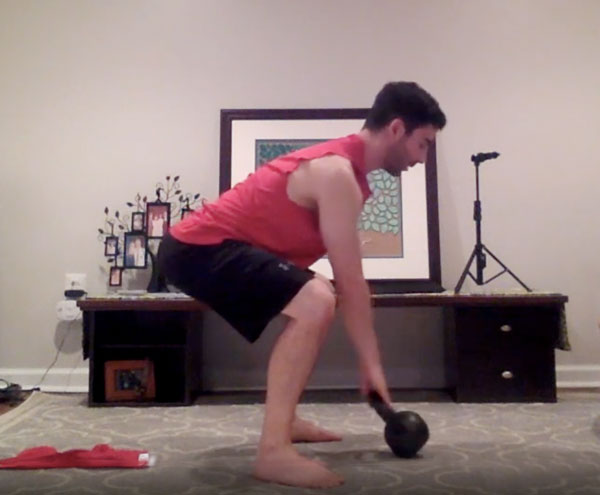
How far away are you from the kettlebell? If you’re too far from the bell, then you might shift too much weight forward and shrug your shoulders up to your ears while reaching for the bell.

Ideally, you want to sit back with your shoulders pulled down and the kettlebell tilted toward you.

Also, make sure that your hips are below your shoulders. If your hips are too high, then you may not be able to generate a lot of power with your first rep. And the swing is all about power.

Common Kettlebell Swing Mistake #2:
Arms Disconnected from the Body with Wrong Hip Hinge Timing

This mistake can cause discomfort or even injury to your lower back, so let’s dial this one in!

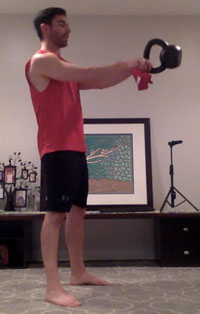
Each time the kettlebell is swung between your legs, even from the initial hike, your arms should connect to your torso. Upper arms connect to your ribcage and forearms connect to your inner thighs.

This will allow the hips to propel the kettlebell forward creating much more power.

Once you’ve reached the top of the swing, you want to stay standing tall for as long as possible while the kettlebell comes back down. Essentially, you’re playing chicken with the kettlebell.

Pushing your hips back too soon—while the kettlebell is still out in front of you—can cause unnecessary stress on the lower back.

The hips push the arms forward, the arms push the hips back.

Towel swing drill

Common Kettlebell Swing Mistake #3:
Using Your Arms and Shoulders to Raise the Kettlebell

The kettlebell swing is an explosive hip hinge, not a shoulder raise or shrug.

If the kettlebell is drooping at the top of the swing, or your shoulders and neck are feeling it, then you’re using your upper body way too much.

The arms are simply a tether holding onto the kettlebell. They shouldn’t do the heavy lifting. If you’re having issues with this, then check out the towel swing drill in the video below.

Common Kettlebell Swing Mistake #4:
Not Fully Locking Out Your hips or Knees at the Top of the Swing

In order to fully express your power, you must have full extension from the hips and knees. This doesn’t mean hyper-extending your knees, rather straightening your knees by flexing your quads.

You also don’t want to leave your hips back. You MUST contract your glutes hard at the top of the swing for maximum power and to protect your lower back.

Watch this video to see each mistake and correction.

I hope these tips help you master your kettlebell swing. When you get the swing dialed in, it’s one of the best exercises you can do for your fitness.

Keep Swingin’!
Ryan Jankowitz, RKC II

***

Ryan lives in Maryland with his wife and two dogs.  They love to go hiking and spend time on the beach.  When he’s not telling his dogs to stop chasing squirrels, Ryan enjoys spreading the RKC message and teaching others how to train with kettlebells.  He’s got a 90-day coaching program that helps busy adults get into shape, look and feel better by working out with kettlebells and eating healthier so they can elevate their self-esteem. Visit his website rjkettlebell.com or schedule a free call with Ryan: https://go.oncehub.com/RyanJankowitz

Filed Under: Kettlebell Training, Tutorial Tagged With: coaching kettlebell swing, common mistakes, fix kettlebell swing mistakes, fix the kettlebell swing, kettlebell swing, kettlebell swing technique, kettlebell technique, Ryan Jankowitz, troubleshooting kettlebell swing

How To Work Out At Home With Your Kettlebell

July 13, 2020 By Ryan Jankowitz 2 Comments

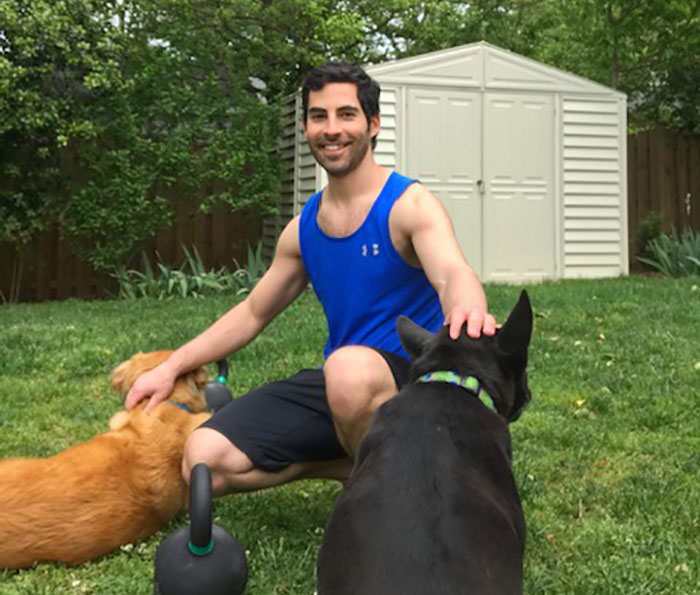
Ryan Jankowitz Outdoor Home Workout

We are living in uncertain times right now, and it’s more important than ever to focus on our health and fitness. For better or worse, working from home does have its advantages. I haven’t missed commuting. And working from home has allowed me to get higher quality workouts as I now have more time each day.

Even though I just have a few kettlebells, but I’m still crushing my workouts and feel as strong as ever.

So, I wanted to share my workout formula, so you can experience the joy of kettlebell training at home—even if you only have one kettlebell. I didn’t invent this formula, but it has worked time after time for me and my clients. We will be doing total body workouts to save time and to promote general athleticism.

The simplest way to design full body workouts is to choose a pulling and a pushing exercise.  This also creates balance and symmetry. We can get more creative by dividing the pushing and pulling into upper and lower body so that we’ll have upper body pulling, lower body pulling, upper body pushing and lower body pushing.

Ryan Jankowitz Kettlebell Home WorkoutPulling and Pushing Exercise Examples
Upper Body Pulling:

  • Kettlebell rows
  • Kettlebell cleans
  • Kettlebell snatches

Lower Body Pulling:

  • Kettlebell deadlifts
  • Single leg deadlifts
  • Suitcase deadlifts
  • Kettlebell swing variations

Upper Body Pushing:

  • Push-ups
  • Military press
  • Get-ups (can also be used as a lower body pushing exercise)

Lower Body Pushing:

  • Goblet squats
  • Kettlebell front squats
  • Kettlebell lunges

These basic exercises can build a foundation of strength and athleticism and can be used in many different combinations to keep training fun.

The basic formula I use for creating workouts:

Warm-up for 5-10 minutes (get your heart rate up and muscles warm)

Strength Block One:
(3-5x Sets)

  • Lower body pulling exercise
  • Upper body pushing exercise
  • Core exercise

Strength Block Two:
(3-5x Sets)

  • Lower body pushing exercise
  • Upper body pulling exercise
  • Core exercise

Conditioning:
(choose one exercise or create your own combination)

  • Swings
  • Sprints
  • Jump Rope
  • Burpees
  • Jumping Jacks

Cool down (light stretching, easy walk)

This formula has served me and my clients well for years. I would love to hear about the workout combinations you create with this formula in the comments section below.

Stay Strong and Safe,
Ryan Jankowitz, RKC II

***

Ryan lives in Maryland with his wife and two dogs.  They love to go hiking and spend time on the beach.  When he’s not telling his dogs to stop chasing squirrels, Ryan enjoys spreading the RKC message and teaching others how to train with kettlebells.  He’s got a 90-day coaching program that helps busy adults get into shape, look and feel better by working out with kettlebells and eating healthier so they can elevate their self-esteem.  Schedule a free call with Ryan: https://go.oncehub.com/RyanJankowitz


Filed Under: Kettlebell Training, Tutorial, Workout of the Week Tagged With: full body workout, home workout, home workouts, kettlebell workout, kettlebell workouts at home, push and pull, Ryan Jankowitz, work out at home, workout design, workout formula

How Long Should It Take To Do One Kettlebell Get-Up?

August 29, 2018 By Ryan Jankowitz 6 Comments

Ryan Jankowitz, RKC-II Coaching Getup Practice

Occasionally, trainees ask me how long a get-up should take when they’re first learning how to do one. I think it’s a really great question and I’m glad when they ask it—because it means that they are probably starting to really dig kettlebell training. But, my answer always seems to surprise them just a bit. When I tell them that a solid get-up takes at least 30 seconds per side, they start to realize that this exercise requires patience.

My best get-ups tend to take around 36 seconds (clearly, I love to time things). It seems to take about 36 seconds for me to feel like I am owning each stage of the get-up while taking my time.

Each stage of the get-up is equally important and demands equal attention. If one stage is rushed or not performed well, that weak link may negatively impact the rest of the movement. There’s nothing worse than trying to adjust your position while holding a heavy hunk of iron over your head.

I’ve found that going back to naked (no weight) get-ups or using a very light kettlebell with a 3-5 second pause at each stage for several reps is a great drill for reinforcing patience. These drills also allow you or your client to get very familiar with how each stage of the get-up should feel.

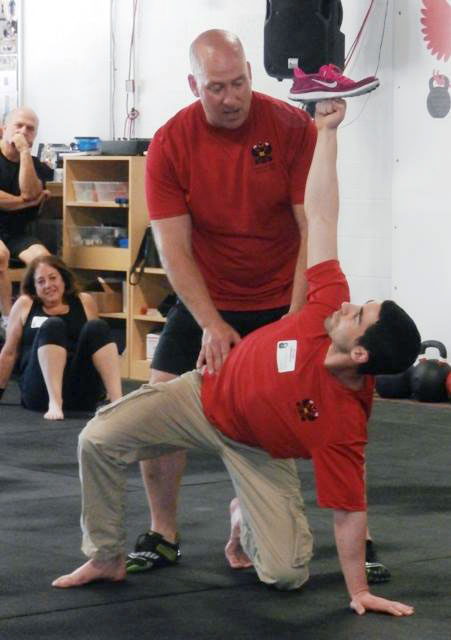
Ryan Jankowitz, RKC-II and Master RKC Michael Krivka demonstrate the get-up at a recent HKC workshop in Gathersburg, MD.
Ryan Jankowitz, RKC-II and Master RKC Michael Krivka demonstrate the get-up at a recent HKC workshop in Gaithersburg, MD.

My intent in writing this blog post was to create a discussion and learn what other kettlebell instructors and enthusiasts think about the timing of a get-up. Have you found an optimal time for the get-up? How long do you think a kettlebell get-up should take? Please leave your answers in the comments section at the end of this post.

I feel that being patient with kettlebell training pays off big time in the long term. In a time when people want to do more exercises faster and faster, sometimes slowing down is actually the best approach.

Performing one repetition of the get-up masterfully is far superior to performing ten sloppy reps. Really, this can be said for any exercise—quality over quantity. If you take your time and master the basics, the rest will fall into place.

All of my best kettlebell lifts and personal goals have come years after I first picked up a kettlebell. I’m in this for the long haul and sometimes I have to remind myself to slow down.

Please leave a comment and let me know your thoughts!

Stay Strong.

***

Ryan Jankowitz, RKC-II Instructor, CK-FMS, is a life-long athlete who can’t imagine sitting behind a desk. He enjoys sharing his passion for fitness and spreading the RKC knowledge. Ryan provides online kettlebell training and in-person training in the DC Metro area. You can reach him at ryan@rjkettlebell.com or through his website rjkettlebell.com.

Filed Under: Kettlebell Training Tagged With: Coaching, get up, how to do a get-up, kettlebell training, Ryan Jankowitz, Ryan Jankowitz RKC-II

How to Use RKC Level-II Skills with Everyday Clients

May 17, 2017 By Ryan Jankowitz 0 Comments

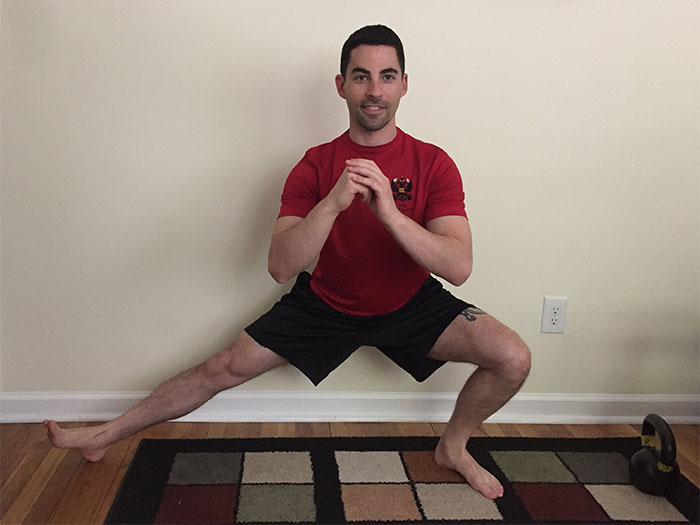
Ryan Jankowitz Cossack Squat with Kettlebell

I’m writing this blog while on a train back to DC from New York where I had the privilege of assisting Steve “Coach Fury” Holiner at the RKC-II at Catalyst Sport. The weekend before, I had just recertified as an RKC-II in Atlanta with Andrea Du Cane. This has been a whirlwind “East Coast RKC-II tour” and I’ve loved every minute. Needless to say, I have absorbed a lot of great information from many great people, which has given me plenty of food for thought.

One of the many things I really enjoyed during my recent RKC-II experiences was the programming aspect of the course. During my RKC-II recertification, I was tasked with designing a program for a fellow attendee who is within a demographic I usually don’t train—powerlifters. This challenging assignment forced me out of my wheelhouse to look at programming from a different angle. Then I was also able to hear many different program explanations from great minds in the fitness industry. I came away with many ideas and an interesting question for myself: “Ryan, how will you incorporate this awesome RKC-II information into a typical client’s workout program?”

My typical client is a working professional whose goals might include:

  • Getting out of pain
  • Preparing for a 5k
  • Losing weight and improving muscle definition

The client may be dealing with one or several of the following challenges:

  • Lack of mobility/tightness
  • Stress
  • Lack of time

I wanted to know how to incorporate challenging moves like tactical pull-ups, pistols, windmills, or jerks into a program for my clients. The answer lies in the progressions toward these technical and demanding movements.

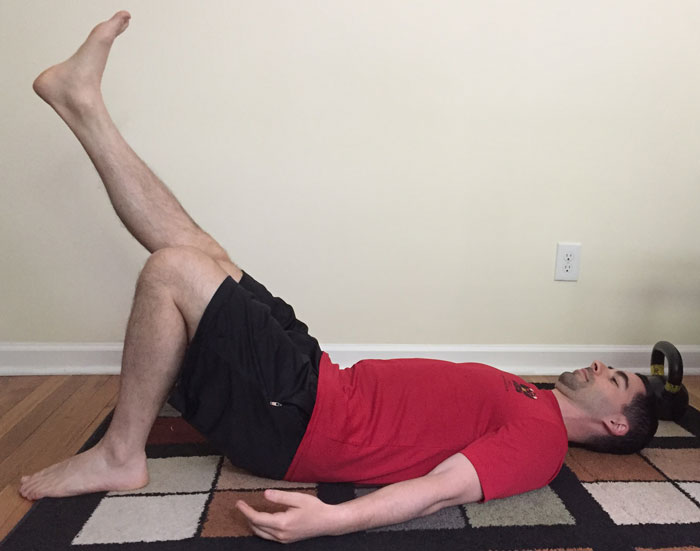
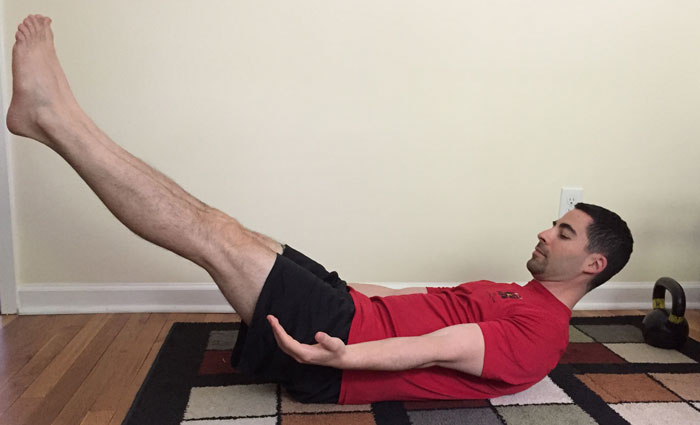
For example, the tactical pull-up is a movement many of my clients can’t do yet, or aren’t interested in learning—and that’s okay. But, the different hollow positions on the ground are great for EVERY SINGLE CLIENT. My clients want core work and I want them to create a solid cylinder of muscle. Boom, done! When the time is right to approach the bar for hollow hangs, leg raises or pull-ups, they will already understand how to stay tight.

Ryan Jankowitz Hollow Hold
Hollow hold
Ryan Jankowitz Back pressure crunch with leg raise
Back pressure crunch with leg raised.

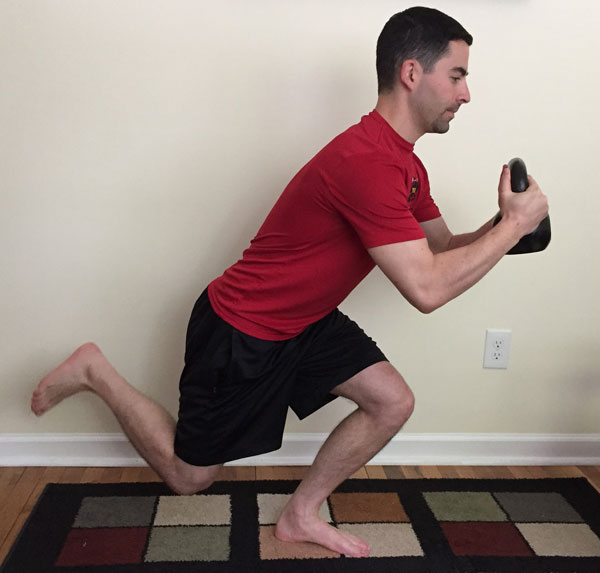
The pistol is an awesome movement for developing serious leg strength and it’s a great party trick. But, is it a goal that my clients want to achieve? Unfortunately not, and no one has ever told me they wanted to learn the pistol. However, the progressions leading up to the pistol are fantastic for many clients. The Cossack squat and close stance squat both provide new challenges to the squat pattern and add variety to our training sessions. I really love the airborne lunge in every form—assisted, counter balanced with a kettlebell, and bodyweight. It’s a challenging movement that requires focus and balance. The movement also requires hip dissociation—one hip goes into flexion while the other is extended. Since everyone experiences hip dissociation when they walk or run, training the airborne lunge can help improve our clients’ gait patterns.

Ryan Jankowitz Airborne Lunge

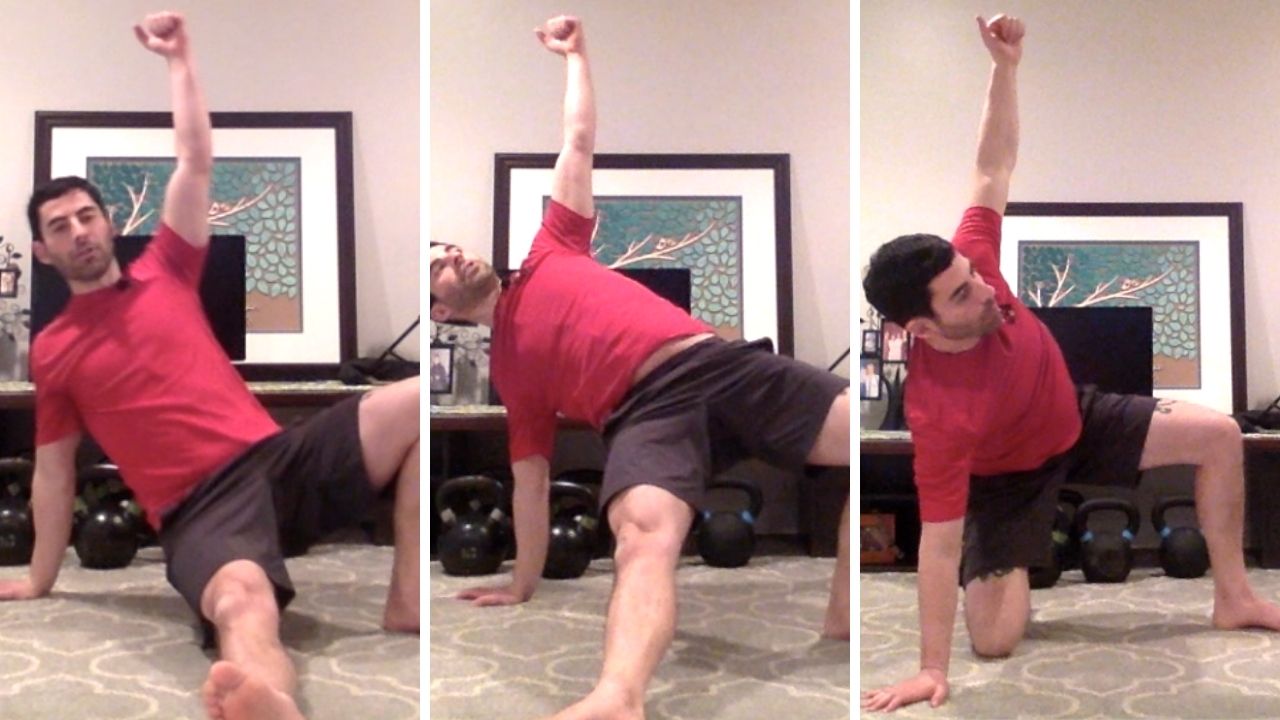
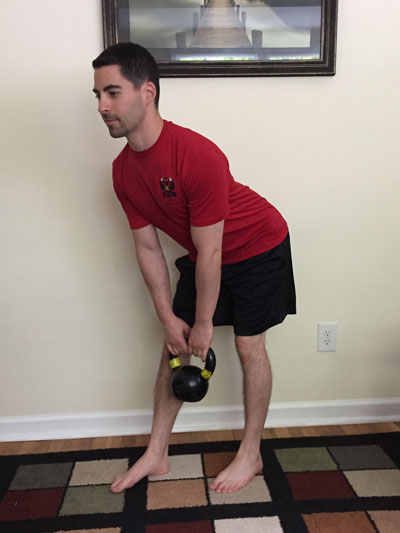
The windmill is a fantastic movement for improving hip and thoracic spine mobility while stabilizing the shoulder. I love the progressions because they can be easily added to any warm-up. These thoracic spine mobility drills can be done on the floor without any equipment and added to a naked get-up practice. The good morning stretch—with feet forward and pointed at 45 degrees—is a valuable drill since it really stretches the hamstrings and calves while preparing the lower body for any hinge movements in the session.

Ryan Jankowitz Good Morning

Lastly, the jerk has quickly become one of my favorite exercises due to its high metabolic demand on the body and required athleticism. The jerk can be a challenging movement to learn, but again the progressions are useful for everyday clients. I have successfully taught the long push press and push press to the many clients who have owned the front squat and overhead press. While these progressions are definitely for clients with an advanced skill level, that skill level is absolutely attainable for those who have built a solid foundation of strength and mobility.

As a fitness professional I feel that it’s important to evolve, expand my knowledge, and add more tools to my “toolbox”. The RKC-II curriculum has done just that for me and I highly recommend pursuing this great certification.

Stay Strong,
Ryan Jankowitz

***

Ryan Jankowitz, RKC-II Instructor, CK-FMS, is a life-long athlete who can’t imagine sitting behind a desk. He enjoys sharing his passion for fitness and spreading the RKC knowledge. Ryan operates a remote fitness coaching service, RJ Kettlebell, and is available for private kettlebell workshops as well. You can reach him at rjankowitz@gmail.com. He also works with clients and teaches kettlebell classes at Fitness on the Run in Alexandria, Virginia. If you’re in the area, come swing some bells with Ryan.

Filed Under: Coaching, Kettlebell Training Tagged With: Coaching, everyday clients, kettlebell coaching, personal trainer, personal training, progression and regression, RKC Level 2, RKC Level II, RKC-II, RKC2, Ryan Jankowitz

  • Page 1
  • Page 2
  • Go to Next Page »

Primary Sidebar

Featured Products

previous arrow
BOOK-RKCBookofSnC
HardStyleKettlebellChallegeDanJohn700
BookCoverMasterTheKettlebell1
RKCiconKettlebell512
KettlebellGoddessdv040
next arrow

Recent Posts

  • RKC Big Six Workout
  • The Kettlebell Swing & Low Back Pain
  • Key Kettlebell Exercises To Help You Create Better Balance
  • How to Most Effectively Use Kettlebells to Meet Your New Year Goals
  • 1 Exercise That Checks All The Boxes
FOLLOW US ON TWITTER!

Archives

Copyright © 2025

Dragon Door Publications / The author(s) and publisher of this material are not responsible in any manner whatsoever for any injury that may occur through following the instructions or opinions contained in this material. The activities, physical and otherwise, described herein for informational purposes only, may be too strenuous or dangerous for some people, and the reader(s) should consult a physician before engaging in them.