• Skip to main content
  • Skip to primary sidebar
  • Home
  • Contributors
    • Matt Beecroft, Master RKC
    • Martijn Bos, Master RKC
    • Andrea Du Cane, Master RKC
    • Angelo Gala, Master RKC
    • Chris Holder, Master RKC
    • Steve Holiner, Master RKC
    • Dan John, Master RKC
    • Mike Krivka, Master RKC
    • Thomas Phillips, Master RKC
    • Robert Rimoczi, Master RKC
    • Phil Ross, Master RKC
    • Max Shank, Master RKC
  • Workshops
    • HKC Workshops
    • RKC Workshops
    • RKC-II Workshops
  • Find an RKC Instructor
  • Resources
    • Articles
    • Forums
    • Kettlebells
    • Products
  • Blogs
    • PCC Blog
    • Strong Medicine Blog
  • Archives

RKC School of Strength

Official blog of the RKC

kettlebell training

Olympic Lifting’s Best Companion

November 16, 2016 By Maciej Bielski 2 Comments

Maciej Bielski kettlebell press

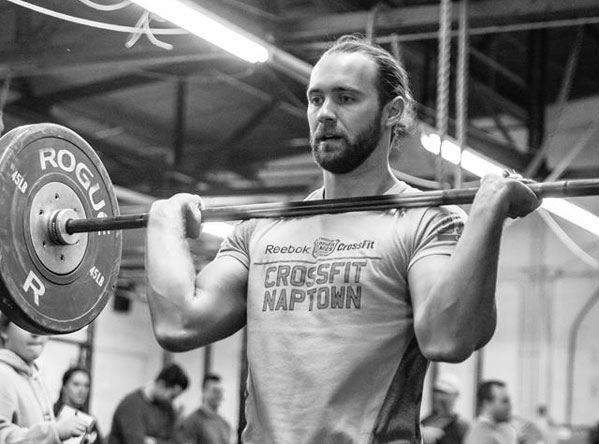
Almost everyone knows that kettlebell training will help your progress with barbell exercises. Unfortunately it doesn’t really work the other way around, until you’ve built up monstrous levels of strength.

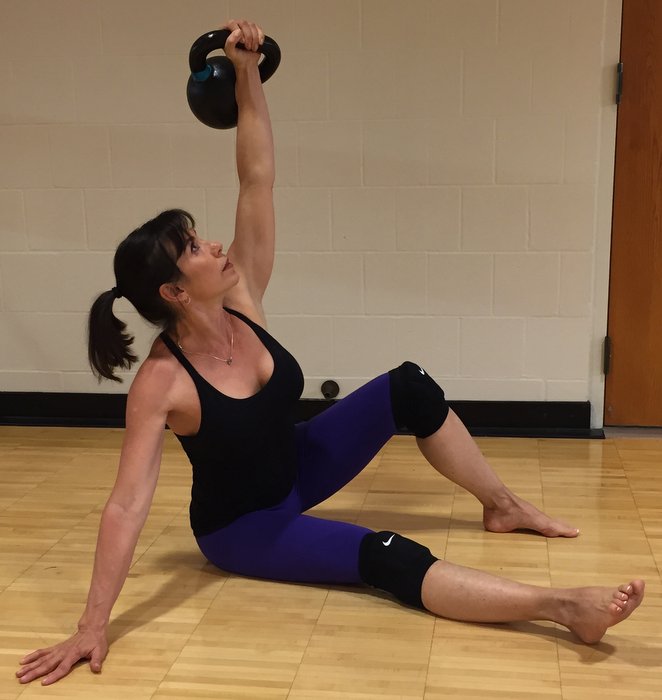
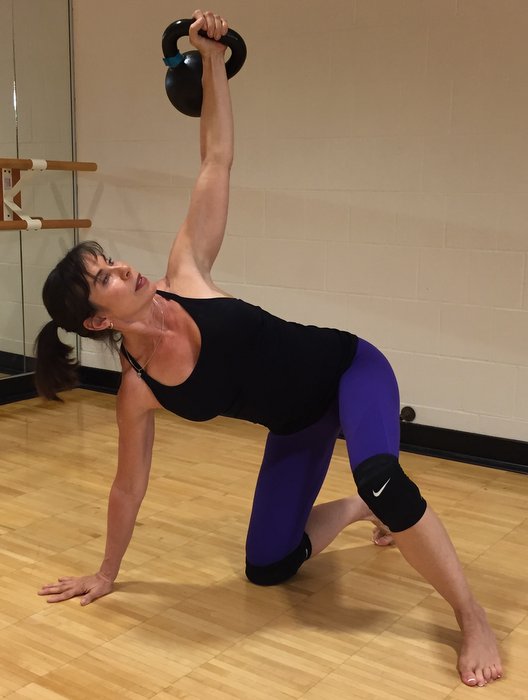
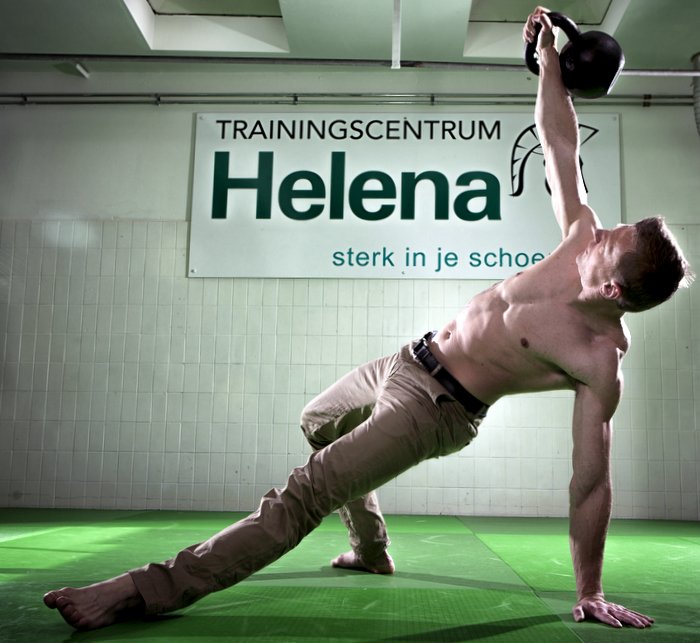
The ballistic nature of the kettlebell swing and the coordination and stability required for a successful heavy kettlebell get-up both feel very different when compared to barbell exercises.

As an amateur weightlifter with over 14 years of practice, I’m certainly not dismissing barbell training. My kettlebell training actually began as a supplement to my barbell lifts—and every single minute of kettlebell practice has been worth it.

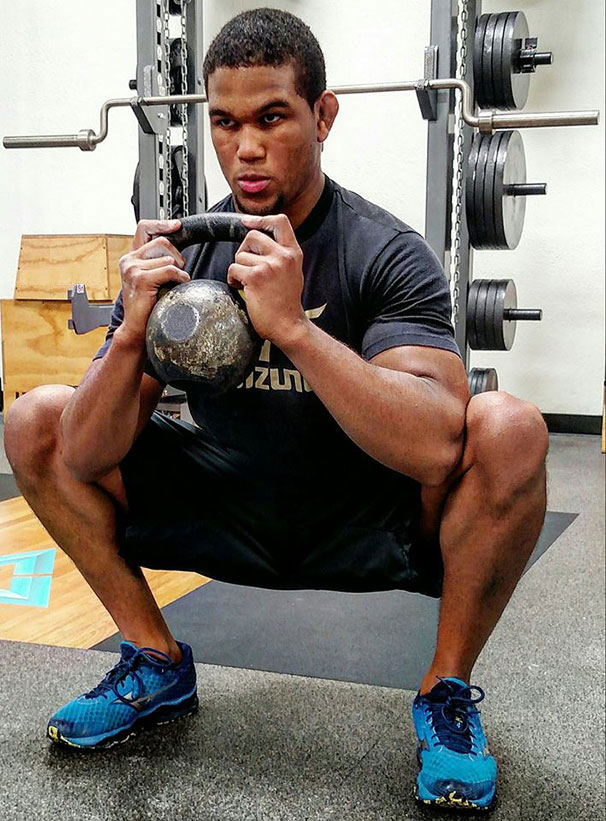
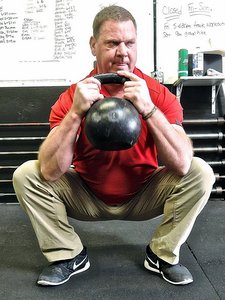
Since adding heavy one-arm kettlebell swings to my training, my grip has gotten stronger than ever, and my lower back is stronger and more solid for barbell deadlifts. Bottom-up kettlebell squats have helped me stay upright and composed for very heavy barbell front squats.

Until you get hooked on kettlebells, you might not appreciate the value of using the comparatively lighter weights associated with kettlebells as compared to barbells.

Maciej coaching barbell

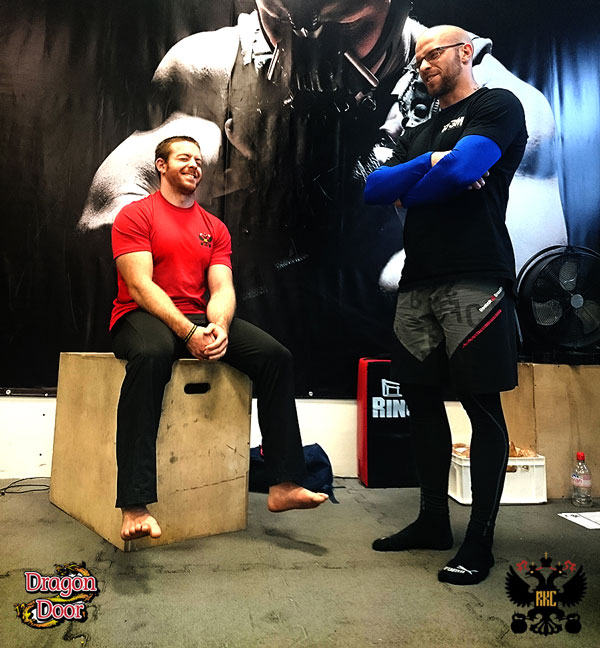
Like most weightlifters, I had some issues with my lifting form. In the Olympic lifts and their variations, the second pull was my nemesis. I just couldn’t get the timing right. I trained with straps, pulled from blocks, tried all kinds of variations—but I still couldn’t get it. The timing of the hip snap is so essential for a powerful acceleration of the barbell. The kettlebell cure was silently standing nearby, but I didn’t understand that until the RKC Workshop.

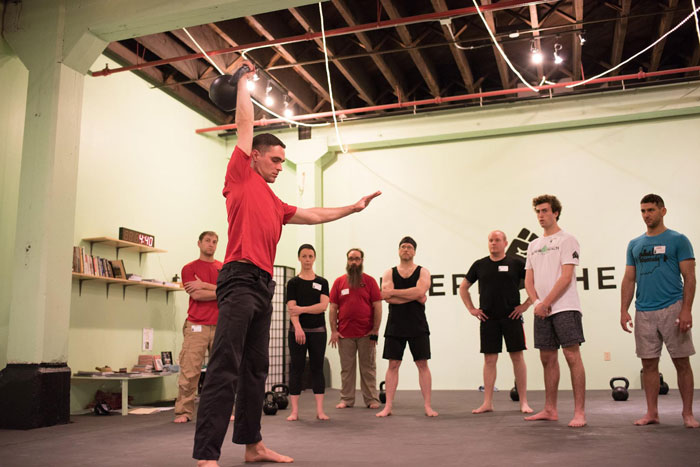
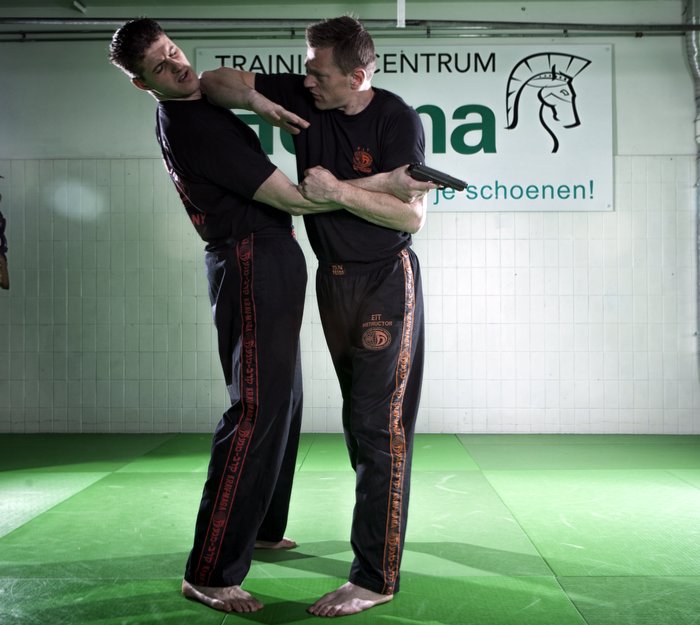
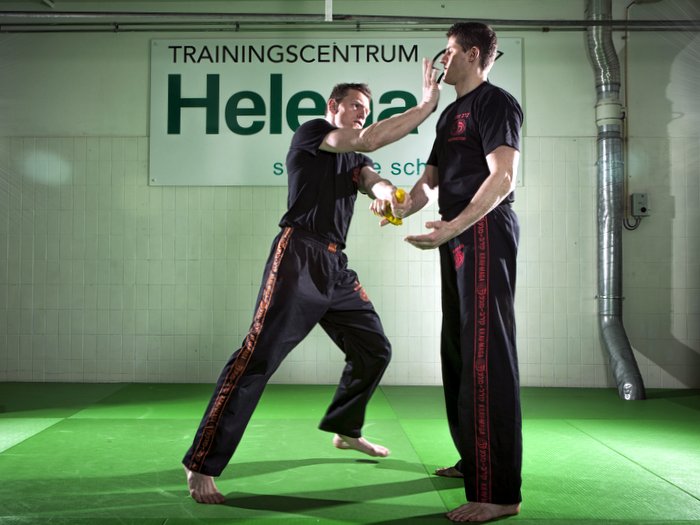
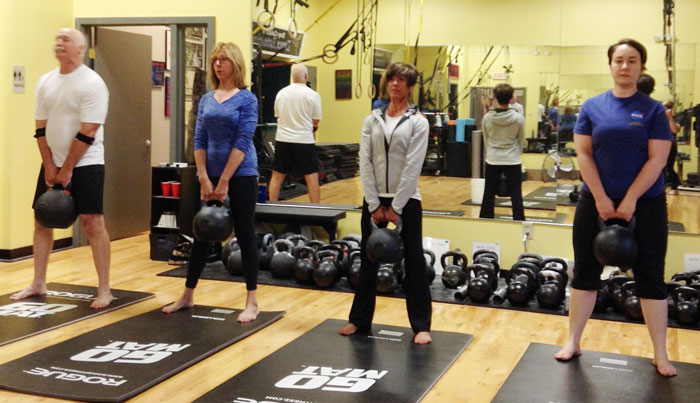
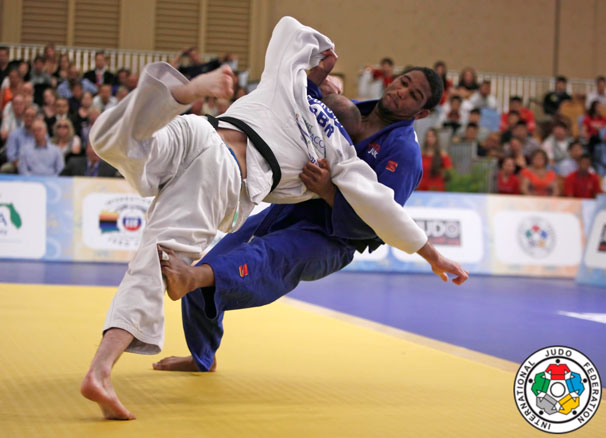
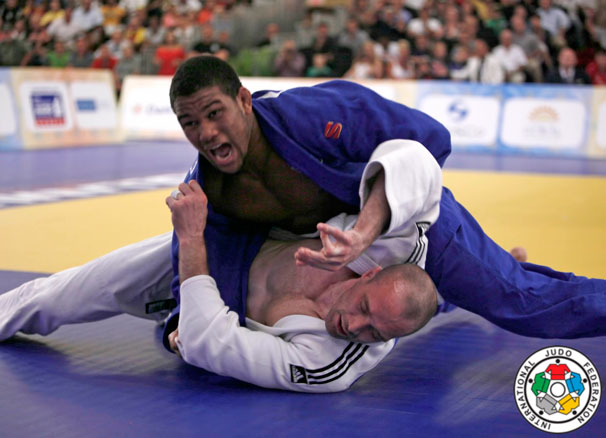
After the RKC certification, I devoted more time practicing what I learned at the course. Most of my life, I have practiced martial arts and knew that while the basics may be boring, they build the solid foundation of every single aspect of your training—and in life. In my own training, I have spent a lot of time on the basic kettlebell swing.

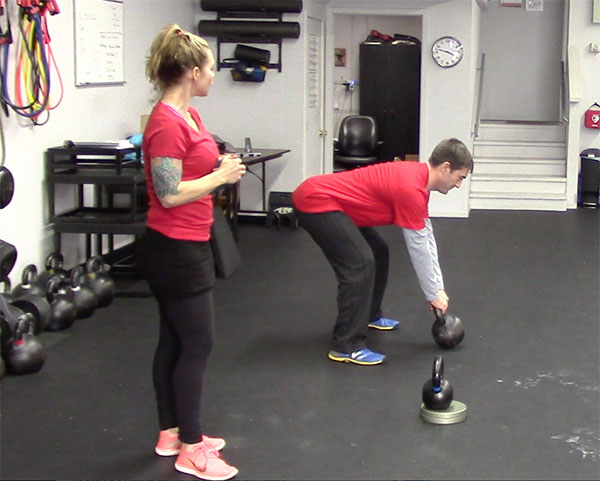
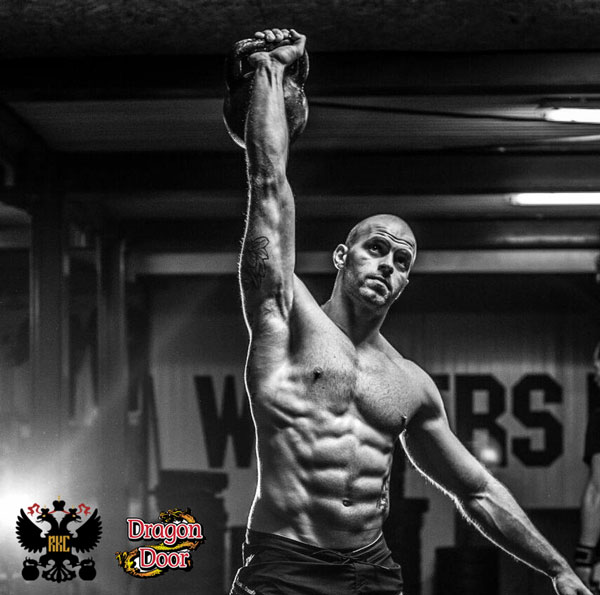
After being taught the proper kettlebell swing mechanics, I bought some heavier kettlebells and started swinging them regularly. I did sets of 10, 30 and 50—for fun and conditioning.

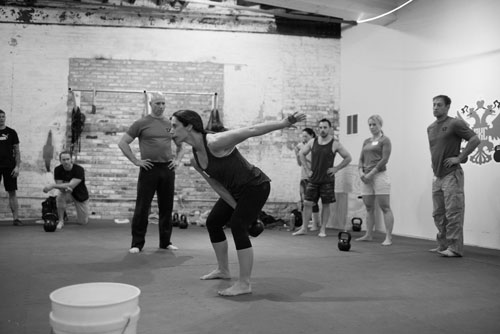
I focused on pulling the kettlebell behind myself, before I accelerating it with my glutes. Locking the quads and bracing the core as a split-second break at the top of the swing taught me more than the past few years of weightlifting alone. I now understood that my movement pattern had been causing the problems in my Olympic lifts. After establishing a solid foundation for the hinge—and its dynamic variations—it can easily transfer to the second pull of many Olympic barbell lifts.

Maciej with kettlebell and barbell

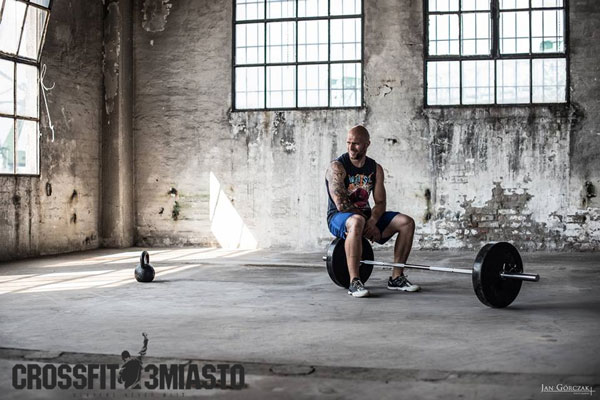
Since that realization, I focused on kettlebell training and stopped Olympic lifting for about three months. I practiced squats, deadlifts and presses but with minimal volume and heavier loads because I was worried that I’d lose some of my maximal output.

But, when I came back to Olympic lifting and tried barbell snatches again, the bar went up so fast on the first attempt that I almost couldn’t control it!

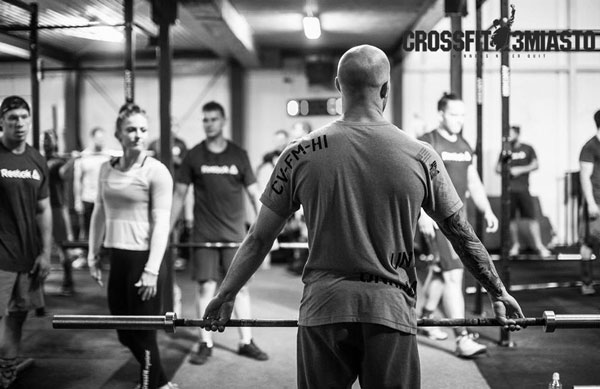
Since then, I’ve applied the same training plan for my clients and students. It’s worked for them as well—no one has problems with the second pull anymore. It used to be the trickiest part of many lifts, but the problems have been eliminated with our kettlebell practice.

The Hardstyle kettlebell swing is a clever teaching method for the hip snap, which is crucial for the correct mechanics on the second pull in weightlifting.

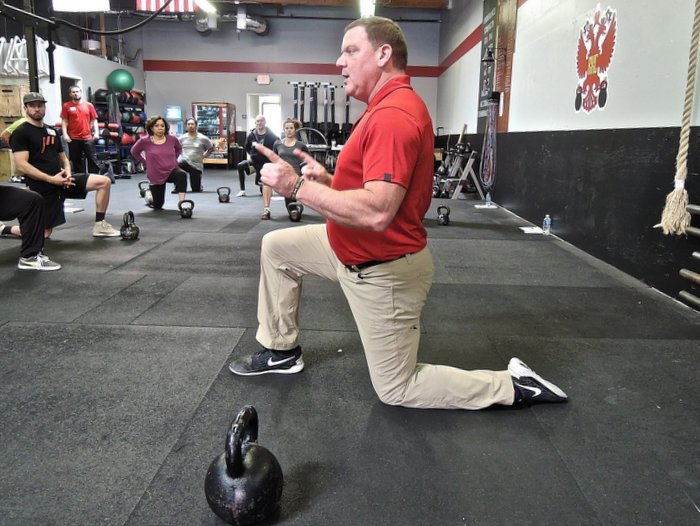
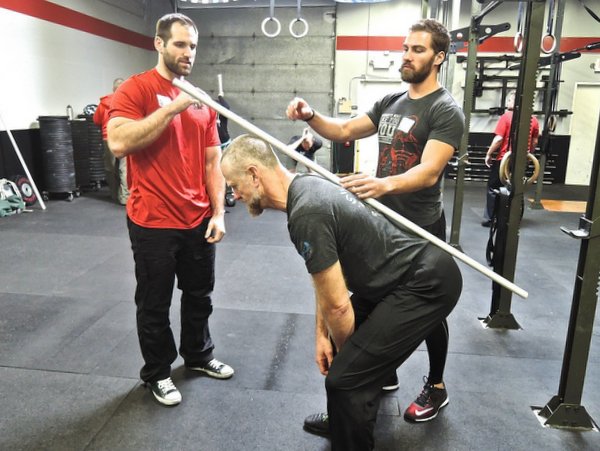
If you don’t want to struggle as long as I did with the second pull of the Olympic lifts, be sure to train with a certified RKC instructor so you can learn the right way to swing kettlebells. Soon, you’ll see the barbell fly up faster than ever before.

Maciej and Max Shank


***

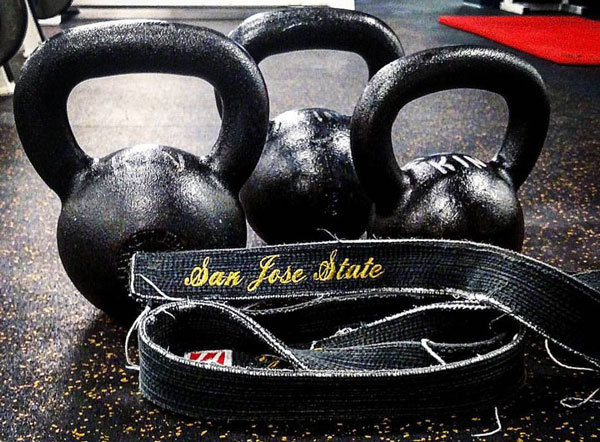
Maciej Bielski, RKC is the owner and Head Coach of Crossfit Trójmiasto in Sopot, Poland. He has been very active in martial arts for most of his life. Maciej academics were specialized in physiology and physical effort biochemistry. He now is exclusively focused on coaching. He is currently the leading specialist in Athletic Training and Training Methodology in Poland. He gives lectures and teaches workshops in many locations including Mauricz Training Center. Visit his blog at Ugot2BeStrong and click here for more information about RKC in Poland

Filed Under: Kettlebell Training Tagged With: hip hinge, hip snap, kettlebell training, Maciej Bielski, Olympic lifting, RKC Poland, weightlifting

CrossFit, Kettlebell Training, Kale Salad and Donuts

October 26, 2016 By Nick Lynch 1 Comment

Nick Lynch kettlebell press

First off, I’d like to admit that I love donuts. It may or may not have been the years of skipping Sunday Boy Scouts to watch The Simpsons with my dad that programmed my subconscious to love donuts but nonetheless, I love donuts. Would I eat them all the time? Only if I wanted to be as soft and squishy as the crème filled varietal. I’ve come to learn that in order to have a donut here and there, I need to eat some kale salad. So what’s all this donut and kale salad talk have to do with CrossFit and kettlebell training? Everything…and here’s why.

I’ve learned to appreciate CrossFit over the years. Many clients that I train with participate in it, love it, and swear by it. If it weren’t for Crossfit, I’m not sure kettlebells and dinosaur training would be so popular today. CrossFit has popularized otherwise forgotten strength secrets like carrying heavy stones, pushing and pulling heavy loads, and of course, Olympic Lifting. But, it’s the Hardstyle training methods that we teach as RKCs that make these lifts safe and effective. You could say it’s a match made in heaven! So what’s with the whole kale salad and donuts analogy? Well, the vast majority of the people I know who participate in CrossFit quickly realize that they can’t only do CrossFit. They need their kale salad, which in this analogy is Hardstyle kettlebell training.

Why?

Kettlebell training serves as corrective exercise and therefore has functional carry-over to other intense physical activity, such as CrossFit. One must master his/her breath, the hinge, the wedge and gain strong grip strength in order to perform such exercises as the Hardstyle swing, strict pull-up, Turkish get-up, snatch and strict press. Guys like Bolt take home gold medals for having a strong hinge, wedge, wrists, feet and coordinated breath. When you take talent and combine the skills required of an RKC, you’re on your way to a gold medal, so to speak. You’re a strong and functional athlete.

Hinge = staying in your wedge, reach your butt towards the wall behind you without forward bending of the knees.
 Wedge = shoulders packed, pelvis neutral, glutes locked and abs flexed rock solid.

Wedge = shoulders packed, pelvis neutral, glutes locked and abs flexed rock solid.

The general population does not lead a physically challenging lifestyle. We type, we click, we press, and we swipe to “work” our grip strength. Our daily squatting happens in the form of on-and-off the toilet and up-and-down off a chair. That said, we don’t have the wrist strength and the hip/lumbar/thoracic mobility to safely barbell snatch overhead and catch the bar without something debilitating happening; hence the high injury rate associated with intense physical activities. I’ve learned that you can greatly reduce debilitating injuries during any activity simply by learning functional movement patterns and gaining strength with RKC kettlebell training. It’s fun to eat donuts just like it’s fun to snatch a barbell. But you can’t eat donuts all of the time just like you can’t snatch a barbell all of the time. You’ve got to have your kale salad just like you’ve got to have your corrective exercises.

I here’s a major example of how one can utilize Hardstyle kettlebell training as a form of corrective exercise to enhance their athletic performance at CrossFit:

Phil Ross RKC demo

Wrist strength. Many movement patterns in Olympic lifting require catching a fast moving weight with the wrists in extension. This pattern forces the body to respond with borrowed movement from the elbows, shoulders, back and knees putting the body in a dangerous and compromised position. In martial arts and fighting, this body position would require one to submit or tap out. You’re basically rendered useless as your successor could, if they wanted to, break your arm. Additionally, I want you to think for a second about how many sports and or physical activities require an emphasis on extended wrist positions. Here’s a few functionally and daily movements that DON’T require extended wrists: pull-ups, deadlifts, running, climbing, swimming, rowing, punching etc. Lifting weights in a way that means you could tear or break your arm is a bad idea unless you practice the solution!

Extended wrists in action as showcased by Jared Byczko, RKC and owner of CrossFit Naptown:

Jared CrossFit Naptown wrist extension

The solution: Hardstyle Turkish get ups, kettlebell presses, knuckle push-ups, strict pull ups and bottoms up presses. These exercises require you do the opposite of Oly lifts. In addition, the speed in which you perform such exercises is slow and focused. Wrists maintain a neutral and flexed position throughout each exercise therefore strengthening. Lastly, the body does not need to borrow movement to compensate, instead, one can utilize the wedge to support the weight. The wedge strengthens your whole torso and hips, while the neutral and flexed position of your wrists strengthens your wrists, hands, forearms, elbows, shoulders and postural chain.

RKC Workshop Jared squat

Now you can go a little more nuts next time you clean and jerk with the barbell for reps.

In the following program, I’m going to outline a simple and effective corrective exercise program that utilizes kettlebells. I’ve found that bodybuilders, CrossFitters, powerlifters, etc. all respect and enjoy this program simply because it’s difficult, yet restorative.

Day 1 – WOD – light – Practice your technique, don’t go heavy, don’t set new PRs, be mindful of form. 50-65% max

Day 2 – Hardstyle – Follow the program listed below. Ensure you practice the Hardstyle technique as it’s specifically designed to strengthen your wrists, postural chain, hands/wrists and feet.

Day 3 – WOD – medium – Same as Day 1 except go a little heavier (but not much!). 65-75% max.

Day 4 – Hardstyle – Follow the program listed below.

Day 5 – WOD – hard – heavy- 80-90% max.

Days 6 and 7 – Functional human activities such as running, jumping, swimming, climbing, carrying, etc.

You may have noticed on the hard WOD day I recommended going 80-90% max. Save your 110% effort for every 3-6 months. After all, the greats really only PR once or twice per year and that’s at a competition.

Hardstyle Program-Day 2:

Suitcase Deadlift – go heavy, 3-5 reps

Push ups – on front two knuckles if you can, otherwise on two kettlebells or Neuro-Grips

Rest 1:30

Repeat 4 sets

Farmer Carry – very heavy for 30 seconds. For extra grip strength, wrap a towel around the handle of your bell

OH Press – 3-5 per side, medium weight, stellar technique!

Rest 1:30

Repeat 4 sets

Core:

Reverse plank x10 seconds

Plank x10 seconds

Side planks, both sides, x10 seconds each

Rest 30-seconds

Repeat 2-4 sets


Hardstyle Program Day-4

Goblet Squat – heavy, 3-5 reps

OH Double press – medium, 3-5 reps

Rest 1:30

Repeat 4 sets

Pull ups – 3-5 reps

Split squat – medium, 3 reps per side

Rest 1:30

Repeat 4 sets

Core:

Log roll – 5 to the right, 5 to the left

Mtn Climbers – 20 reps

Pelvic Push Ups – 3 reps

Rest 30-seconds

Repeat 2-4 sets


***

RKC Team Leader Nick Lynch is a Strength and Conditioning Coach at Milwaukee School of Engineering University (MSOE). He owns Superb Health Milwaukee, a kettlebell studio in Milwaukee, WI. He has 13 years of full-time training and coaching experience and a lifetime of wellness education. Nick lives in Milwaukee, WI with his wife Natalie and son Weston.

Filed Under: Kettlebell Training, Workout of the Week Tagged With: CrossFit, Hardstyle, kettlebell training, kettlebell WOD, kettlebell workout, Nick Lynch, programming Hardstyle with CrossFit, RKC, WOD, workout

Awareness and Kettlebell Training

September 7, 2016 By Martijn Bos 1 Comment

Martijn Bos Awarness Krav Maga

I have been a Krav Maga practitioner and instructor for over fifteen years—I also work as a mental coach, and teach physical training. To me, these are not separate disciplines. I am not a “jack-of-all-trades”. In fact, I feel very strongly about the logical, natural synergy between mental strength, physical strength and effective self-defense. In this blog post, I will describe this synergy and explain how kettlebell training will help your Krav Maga skills so you can defend yourself more effectively against punches, kicks, throws and even attacks with weapons.

First let me explain a little about Krav Maga. Krav Maga is a self-defense system developed in the Israeli army. A self-defense system. Krav Maga is neither a martial art nor a sport.

Martial arts were originally developed for self-defense but over time and due to various factors—spiritual/religious beliefs, politics, egos—most martial arts disciplines lost track of their primary goals. They stopped developing and gradually became outdated. As a result, they are hardly suitable for counteracting modern day threats. Most martial arts techniques are just too complex to use in stressful situations.

On the other hand, fighting as a sport is a great way to determine who is the better fighter. But as with any sport, rules and regulations apply. When entering a competition, there’s a set time frame, a single opponent, a referee to ensure fair play, etc. Running away is not a viable option. After all, the object is to fight, not to increase your well-being or safety.

In contrast, Krav Maga is about coping with real-life threats. Krav Maga is about defending yourself when confronted with an armed attack. The attack may come from the front, side, or the rear. It could happen when you are standing up or lying on the ground. You may be in your house or on the street. You might face one or many attackers. The bottom line is that an attack will almost always surprise you. In an extremely stressful situation, you must be able to apply the techniques you were taught.

In Krav Maga you train for these situations so you can remain unharmed or at least avoid getting seriously hurt. It could be the difference between life and death. The reward is not a trophy, it’s your life, your safety, and your health. The only rules you need to follow are the rules of the law (interestingly, these only seem to apply to you and not your attacker, but that’s another topic). Do you see the difference?

Safety is a double-edged sword. Let me explain. I am one of the highest ranking Krav Maga instructors in the world, and the first ever EIT (Expert Instructor Team) of the International Krav Maga Federation (IKMF). Over the last 12 years I have operated a successful business—Trainingscentrum Helena—with over 500 members at 4 different locations, where we teach Krav Maga, along with mental and physical training. Last year I taught in Holland, Belgium, Germany, Greece, Czech Republic, Israel and China.

Even though I instruct and train at the highest level—and do it a lot—I hardly ever have injuries during my classes or trainings. I have always felt very strongly that it is both very ironic and senseless to get injured during training that should prepare you to stay safe in your daily life. I carry this philosophy with me every time I teach or prepare for a class—whether it is Krav Maga or kettlebell training.

I want to share the lessons I’ve learned as a Krav Maga instructor and how they can benefit your kettlebell training. I also want to inspire people who train or teach Krav Maga to start using kettlebells. Kettlebells provide many benefits in Krav Maga training and in real life situations. Lastly, I wish to encourage everyone to take responsibility for their own safety.

Martijn Bos Kettlebell Get-Up

Safety First… Always

In Krav Maga we always put safety first. If you can avoid a fight, it is safer than trying to win a fight. So, run away whenever you can! If you don’t trust somebody, you don’t have to be nice or even polite. If you are going out on a date or having drinks with friends, plan ahead for how you will get home. Be sensible. Safety first!

The same goes for kettlebell training. The kettlebell can help you to become a better Kravist. The functional strength and cardio that you develop with kettlebell training will help you perform harder, better, faster, stronger. In kettlebell training, you have to do everything yourself, with no support from machines. You will improve your basic motor-skills for stability, develop solid movement patterns, and lose body fat. Kettlebell training will also help you with an explosive hip-drive for stronger kicks and punches, better grip strength for dealing with knife/gun threats, and the strength and stability in your midsection for efficient ground fighting. Last but not least, kettlebell training builds a durable body with strong ligaments. A body that can take a hit.

All these benefits can be yours, but only if you put safety first! Before you start training with kettlebells, you will need to learn how. In ancient times, knowledge was considered a secret, only to be shared among the elite. Luckily, times have changed. Today, everybody can learn how to defend him/herself and how to use a kettlebell. Be sensible and look for an RKC certified trainer (or IKMF in the case of Krav Maga), join a HKC workshop or become a professional at an RKC certification. Save yourself the trouble of trying to reinvent the wheel or copying YouTube amateurs. You can only learn safe and effective training with the right guidance, direct feedback and coaching.


Fighting Through Resistance

Every movement is preceded by a mental trigger. The brain moves the body and any physical movement is first a mental intention to act. Tough kettlebell workouts teach us how to “fight” ourselves through resistance. Your body feels tired and wants you to stop. Your mind gets distracted and starts thinking, “It’s enough”, “Why am I doing this?” or “I still have other things to do”. The mind is trying to convince you to quit. Your mindset—the conscious and trainable part of the brain—can convince you to finish your workout, manage your emotions, and keep you focused. These same exact qualities also make a difference when fighting for your life.

If you are unable to manage your emotions, you are more likely to quit working out when it gets hard. You might not even start the workout in the first place. You definitely won’t last in a fight; you will freeze or simply give up straight away when under attack. Fighting mental and physical resistance will make you strong! As your confidence grows, you will be less of an easy target, increasing your personal safety. Remember, you don’t have to outrun a lion, you just need to be faster than the other prey. If you don’t appear to be an easy target on the street, predators are more likely to look for someone else to harass. It’s a bitter fact, but it’s a jungle out there. Be clever, be strong.

Martijn Bos Krav Maga

Technical, Not Emotional

Many people have difficulty adding regular workouts to their busy schedule. And even if they’ve found the time, they allow themselves to get distracted during the workout. They might not feel “in the mood” and start negotiating how to cut back this particular workout. Working out without letting your mind wander can be a challenge when emotions get involved. Emotions play a big role when you are trying to keep your focus. Similarly, when you are involved in a conflict—internal or with other people—always try to keep things technical, not emotional. Emotions will make you feel more stressed and will compromise your performance. You will also make bad decisions.

When defending yourself, the choice is simple—it’s him or you. No feelings are involved. If you let fear, frustration, or anger get the best of you when dealing with an attacker, saving yourself will get much harder. Consider your training an opportunity for learning how to make technical decisions and how to manage your emotions. Decide what you want to do—without letting emotions get involved—and then go for it. Do this with every workout from now on. You will be rewarded!


Working Under Stress

In Krav Maga, we understand how the right mindset can enhance your performance. However, when confronted with violence, one will always experience a certain amount of stress. The heart rate increase will affect your coordination, no matter how strong your mindset is. This is a main reason Krav Maga never incorporates fine motor skills in its techniques. With a heart rate of 140bpm and higher, your coordination skills will be seriously compromised. Try running up a few flights of stairs, then opening a locked door with a key. When your life is at risk, it’s not uncommon for your heart rate to be above 200 beats per minute. Plus, adrenaline rushes through your body, making you alert, but also giving you the shakes. You’ll start to sweat and feel like you’re losing control. Similar responses occur when you’re in a car accident or when you lose your balance at a great height. These are completely natural responses from the body that provide you with extra energy to save yourself. These responses elevate the heart rate, increase blood flow, and provide oxygen to the body. But this feeling can also overwhelm you and keep you from taking action. Unless you train yourself to deal with it, you may freeze and do nothing at all.

Many methods can teach you how to relax, but unless you also practice them under pressure, they won’t help you in stressful situations. For example, yoga will help you release stress and tension, but yoga is also usually performed in a relaxed and safe environment. It won’t teach you how to perform under extreme and violent circumstances. I believe it’s important to go beyond just trying to stay relaxed and avoid stress. Stressful situations will occur in life and it is healthy to accept and prepare to perform in these moments.

If you need to perform under stress, you will have to train your skills under a similar type of stress. So when you get nervous about making a big presentation at work, you shouldn’t just practice relaxation exercises. You must also practice the presentation for a group of critical strangers. If you feel intimidated by an audience, then you should prepare in front of an audience. When you are competing, stress can also help you, if you use it well. You should make friends with the stress first—before you marry it. Training under stress is an important principle in Krav Maga training.

Examples of how I increase stress for my students:

  • Social stress: Perform in front of a group. Doing a test in public creates a lot of stress for people who don’t like to be judged or who always want to stay in control.
  • Decision stress: Make multiple decisions in a short time frame. In Krav Maga, you need to learn how to fight multiple attackers. Prioritizing is an essential skill. Drills involving hand and leg attacks, grabs and weapons in a single defense exercise, are good training methods.
  • Insecurity stress: Starting training with eyes closed or in low-light circumstances. We will not know what attacks are coming.
  • Physical stress: Simulate a physical stress reaction by making the body work hard, elevating the heart rate etc. by working with a kettlebell.

Kettlebell swings, get-ups or presses combined with practicing Krav Maga techniques simulates the feeling of being under real pressure. People will learn to recognize attacks quicker and will perform much better because they’ve learned to operate under stress.

Martijn Bos Kettlebell Press

Example Workouts

I’m pretty sure the example workouts below will give you the desired effect. They should help you create a stressed body for your Krav Maga drills, and develop a stronger mind and body that can take a hit. The workouts will also improve your overall fitness.

If you are training alone: Do one arm swing, then the Hardstyle planks followed by precision punching. You can use a heavy bag and mark the different spots you will strike. You can also use a paperclip, string, and a piece of paper. Try to hit the paper fast, without letting the paper touch you back—and without losing your balance.

A1 OA swing HS plank Precision striking Sets
10 L/R @32kg 10 sec 90 sec 3-5 sets
A2
Press * Bottom position Squat, elbows 90* Precision kicking Sets
5-8 @28kg 20-30 sec @16kg 90 sec 3-5 sets
     
A3 Sit-up, press up Press Getting away from ground-position Sets
5 L @24kg 5-8 L @24kg a.s.a.p. 3 sets
5 R @24kg 5-8 R @24kg a.s.a.p. 3 sets

* Missing in the video below

If you are training with a partner:

A1 Farmer walk Trojan Pose with kettlebell Choke releases Sets
50m L/R bottom up @24kg
or double @60kg
16kg, 10- 15 sec. 90 sec. 3-5 sets
A2 OA swings Push-ups without breathing
(10 deep breaths, start after br. out*)
Hand defenses vs. hand/ leg attacks Sets
10 L/ 10 R @24kg 10-20 60-90 sec. 3-5 sets
A3 TGU Sprint with kettlebell in front, arms extended at 90* Ground releases/ fighting on the ground against a standing opponent Sets
1 L/R @32kg 12kg 60-90 sec. 3 sets

*This drill takes some practice, but it will teach you how to recover more quickly. You will find that breathing in and holding for the push-ups will be easier.

***

Martijn Bos, Senior RKC Instructor, PCC Instructor is one of the highest ranking Krav Maga instructors in the world, and the first ever EIT (Expert Instructor Team) of the International Krav Maga Federation (IKMF). He owns and operates Trainingscentrum Helena. He can can be contacted through his website: http://www.trainingscentrumhelena.nl

Filed Under: Kettlebell Training, Workout of the Week Tagged With: kettlebell and Krav Maga workouts, kettlebell training, Krav Maga, Martijn Bos, mindset, self-defense, stress, training for stressful situations, workout video

How to Lead the 10,000 Swing Challenge with Small Group Classes

August 3, 2016 By Lori Crock 9 Comments

Lori Crock MoveStrong Kettlebells

You may be familiar with the 10,000 Swing Challenge shared by Master RKC Dan John. In the challenge, you complete 500 kettlebell swings per day, five days a week, in a 30-day period.

In this post, I will share how I’ve adapted the 10,000 Swing Challenge for a small group class environment. My version of the plan lasts for a few months since my students are typically in the gym for class 2, 3 or 4 times each week. We do 100 to 300 kettlebell swings per class, so depending on how often they train per week, it will take 5-6 months for the average student to complete 10,000 swings.

In a 45-minute class, we prioritize swings but include many other lifts and movements such as the press, snatch, clean, squat, and Turkish get-ups. We also do carries and bodyweight movements such as planks, push-ups and pull-ups along with kettlebell and barbell deadlifts. Mobility is a high priority. We allot 10-15 minutes of class time for mobility drills relevant to the work we’re doing that day.

I like the 10,000 swing program for a small group class environment for three key reasons:

  1. The challenge builds excitement for kettlebell swings and helps people set goals in a competitive but good-natured environment. We can see everyone’s swing totals on a white board, so we encourage, cajole and challenge each other to keep going strong. People often start doing swings outside of the gym when they can’t make it to class.
  1. Everyone’s kettlebell swing technique improves dramatically, and that makes everything else we do in the gym better. Swings are fabulous for hip mobility, glute, back and abdominal strength, cardiovascular endurance, and overall strength and conditioning for life and sport.
  1. Our other lifts and movements naturally get stronger when we do more swings. When we do barbell deadlifts every two weeks, we see PRs nearly every time when we have increased swing training. Snatches are easier, cleans are stronger, grip improves, and torso strength goes through the roof.

In my experience, there is no downside to this program as long as students learn safe technique from an RKC instructor. Students must also be careful to keep up with mobilizing tight muscles, continuing to train other lifts and movements and not to overtrain.

Lori Crock Group Kettlebell swings

Programming Guidelines:

  • Use one and two arm kettlebell swings as the base of the program. Include hand-to-hand swings, too.
  • Use other types of swings, but less often—examples include low swings, pendulum, eccentric, walking, double kettlebell, dead-stop, and mixed double kettlebell swings.
  • Have students perform their swings individually, or with a partner (or in two groups) using a you-go-and-I-go format. Try a “swing wave”: when one person finishes their swing, the next person starts their kettlebell swing.
  • Use complexes, chains, ladders, pyramids, and AMRAP (as many reps as possible; we use 2-10 minute sets) workout formats to create challenging sessions.
  • Encourage your students to swing different weights. Do sets of 30-50 swings with light kettlebells, and sets of 20 with moderate weight kettlebells. Use heavier kettlebells for sets of 5, 10, or 15 swings with 30 to 60 seconds of rest. Try swinging heavy, medium and light kettlebells in succession. There are no rules or limits other than to simply be smart and don’t overdo it.
  • Use “duos” to practice other skills at the same time with these combinations: swing-snatch, swing-clean, swing-squat, and swing-high pull.
  • Pair mobility work with swings for practice and recovery; see the get-up and swing training example below.

Lori Crock Leading Group Mobility

Small Group 10,000 Kettlebell Swing Challenge Training Examples

Deadlifts, Get-Up Mobility, and 120 Kettlebell Swings

Warm-up: T-spine mobility, RKC hip flexor stretch, and RKC arm bar

Sumo deadlifts: 5 sets of 5 reps, then 5 sets of 8 reps while progressively increasing the weight

  • Get-up to post 3L + 3R
  • 3 x 10 two-hand heavy kettlebell swings
  • Get-up leg sweep and crooked arm bar in half-kneeling 3L + 3R
  • 3 x 10 two-hand heavy kettlebell swings
  • Get-up high bridge 3L + 3R
  • 3 x 10 two-hand heavy kettlebell swings
  • Get-up step-back lunge and step up with kettlebell overhead 3L + 3R
  • 3 x 10 two-hand heavy kettlebell swings

Mobility cool down: 5-10 minutes (include a full get-up on each side)


Work-Rest Interval Kettlebell Lifts, Carries and 160 Swings

Warm-up: Squat mobility, hip openers, shoulder circles, lunging, skipping and crawling

  • Goblet squats: 30 seconds on, 20 seconds off x6
  • Carry: goblet lunges x10
  • Two-arm kettlebell swings: 20 seconds on, 15 seconds off x 6
  • Carry: single kettlebell suitcase walk or lunge 10L + 10R
  • Push-press: 30 seconds on, 15 seconds off x6
  • Carry: single kettlebell overhead walk or lunge 10L + 10R
  • Clean: 20 seconds on, 15 seconds off x6
  • Carry: single kettlebell racked walk up to 2 minutes on the left side then repeat on the right

Finisher: 100 hand-to-hand swings

Mobility cool down: 5-10 minutes


Swings, Squats, Push-ups, and 200 Kettlebell Swings

5 rounds:

  • Two-hand walking kettlebell swings: 10 reps, active rest with fast & loose, 10 more reps
  • Single kettlebell racked squat, 5L + 5R
  • Push-ups: knee or strict 1-20 reps (or Hardstyle plank or tall plank for 30 seconds)

5 rounds:

  • Single-arm kettlebell swings 10L + 10R

Mobility cool down: 5-10 minutes


Bottoms-Up and Swing Variations with 300+ Kettlebell Swings

Warm-up: choose a light kettlebell for halos, good mornings, French press, prying goblet squat, RKC hip bridge, planks, t-spine bridge. Include wrist and finger mobility, and shoulder rolls

3 rounds:

  • Bottoms-up cleans: 5L + 5R
  • Bottoms-up clean to squat: 3L + 3R
  • Bottoms-up clean to squat to press: 3L + 3R

5 rounds:

  • Two-arm pendulum swings: 20 reps

Complete the following sequence of two-arm kettlebell swings without putting the kettlebell down:

  • 5 reps low swings
  • 5 reps standard swings
  • 5 reps eccentric over-speed swings

6 rounds:

  • Windmills for recovery (choose a light kettlebell or no weight): 3L + 3R

AMRAP kettlebell swings: do as many single-arm swing variations as possible in 5 minutes. Choose standard, pendulum, hand-to-hand, low and dead-stop swings with various kettlebells.

Lori Crock Group Kettlebell deadlifts

If you’ve used the 10,000 kettlebell swing challenge with your clients in a small group format, please comment below to share your experience.

****

Lori Crock is an RKC Team Leader, PCC instructor, FMS-I & II, USAW-I and owner of MoveStrong Kettlebells in Dublin, Ohio. Lori teaches small group kettlebell, bodyweight and mobility classes to all ages and fitness levels. Lori can be reached at lori@movestrongkbs.com, www.movestrongkbs.com and on Facebook https://www.facebook.com/MoveStrongKBs/


Filed Under: Kettlebell Training, Workout of the Week Tagged With: 10000 kettlebell swing challenge, 10000 swing challenge, group fitness, group program, group swing challenge, group training, kettlebell swing challenge, kettlebell training, kettlebell workout, kettlebells, Lori Crock, small group, swing challenge, workout

Training an Olympic Judoka with Kettlebell Swings and the Goblet Squat

June 15, 2016 By Ashoka McCormick 2 Comments

Colton Brown Goblet Squat

10,000 athletes compete in the Summer Olympics. Colton Brown, age 23, was ranked number 1 in the USA (and 27th in the world) in the Men’s 90 Kilogram Judo Black Belt Division on May 30, 2016. Now, Colton is heading to the 2016 Summer Olympics in Rio De Janeiro to represent the USA.

The road to Rio was not easy, but Colton’s USA Olympic Judo Team qualification was one of the proudest moments in my young career as a strength coach. After four years of hard work, Colton has manifested a dream he’s had since age 12.

Colton had just returned from competing in the World Judo Championships in Rio De Janeiro, Brazil when I first began working with him in August of 2013. I had just begun my coaching career by volunteering as the Spartan Judo Team strength coach at San Jose State University. As a dominant collegiate Judo athlete and 2-time All American, Colton had his sights set on becoming an Olympian. After the World Judo Championships, Colton wanted to gain muscle mass. We spent the Fall semester in the weight-room working on a basic hypertrophy program. With the 2016 Olympic qualification period nine months away, we planned to spend two-thirds of the year on strength and hypertrophy. By mid-November, Colton had made significant strength and size gains.

Colton then traveled to Texas and Japan, two of 2013’s last important tournaments. At the Tokyo Grand Slam Tournament, he reported standing toe to toe with the number four competitor in the world—and he only lost by a penalty. Colton won six matches and took the gold medal at the Dallas Open. He credits our weight training program for helping him become the best player in the country.

After the tournaments, Colton kept training on campus at San Jose State, he also trained with me privately two to three times each week at the facility. Even before he began working with me, Colton already had a great deadlift, crushed pull-ups, and push-ups with ease. But, Colton’s weakest lift was the squat. While we had addressed his movement patterns and mobility, the exercise which ultimately helped Colton improve his squat was the goblet squat.

Since late 2014, the goblet squat has been a staple of Colton’s training. At first, I used it as a tool to teach Colton to squat more efficiently, and to build a strong foundation. Next, we progressed to the barbell back squat, double kettlebell front squat, and many others. I believe goblet squats are a great exercise for athletic movement preparation, or as a stand-alone drill for mobility.

Most importantly, the goblet squat is a great in-season squat patterning exercise for all athletes. Judo athletes face a unique programming challenge—their entire year is “in-season”. There’s no true “off season”, especially at the international level. Judo athletes compete and train on a regular basis. Even during the “slower” parts of the year, they practice on the mat twice a day, for five to six days each week. During the qualification period, they frequently travel for qualifying tournaments and required training camps. Extra travel is another unique programming challenge.

Goblet squats have a high benefit to low-risk ratio. I am not comfortable placing a lot of load on my Judo athletes during certain times of the year with barbell back squats, or front squats. Regardless of the competition calendar, I can always turn to the goblet squat—it’s safe, effective, and works well in our training program.

Colton Brown Judo Throw

The Road to Rio

In April 2014, Colton won his third consecutive title at the National Collegiate Judo Championships and continued to establishing himself as the one of the best Judo players in the USA. Shortly after, the Olympic qualification period began in May 30, 2014 and lasted until May 30, 2016. Prior to qualification, we made sure to build a solid base of strength. With more travel, we adjusted the volume of Colton’s program while he competed all over the world.

The World Tour is tough on Judo athletes. It’s stressful, and while they get to see the world, it’s not a vacation. Standing are constantly changing, qualification points are on the line—along with the demands of competing and traveling in vastly different environments all over the world. It’s a grind.

During the two-year qualification period, I added kettlebell training to many of Colton’s workouts. The kettlebell can profoundly benefit elite level Judo athletes. Kettlebell training is one of the most important ingredients in our recipe for success. While I don’t use kettlebells exclusively in my programs, they have proven time and time again to benefit our athletes on the Judo mat. Kettlebell swings may be one of the best movements a Judoka can perform in the weight room. Since adding more swings to Colton’s training sessions in the Spring of 2014, they have remained a staple in his training as a go-to power exercise.

We needed to train Colton to be as strong and healthy as possible to endure the intense training camps and international Judo tournaments. While Colton had less time to train with me, our general programming template remained the same. For the three years we’ve been training, I’ve tried to use as many “big bang for your buck” movements in his training—no matter what tool we use.

Big Bang For Your Buck Movements

  • Push (horizontal and vertical)
  • Pull (horizontal and vertical)
  • Hinge (bilateral and unilateral)
  • Squat (bilateral and unilateral)
  • Crawling (side to side, forwards, backwards)
  • Core training
  • Movement in the sagittal, frontal, and transverse planes

Colton’s programs included balanced workouts with a wide variety of exercises with barbells, TRX, medicine balls, dumbbells, and kettlebells. For example, in one workout we would focus on a hinge movement and a pushing movement, then the next workout would feature a squatting movement and a pulling movement. I also included mobility, core training, and accessory movements in every session. Occasionally, we took the training to the beach or park. I think it’s important to include variety in your training and training environment. Another reason I love the kettlebell is you can work out with it almost anywhere.

Making the USA Olympic Judo Team

Colton continued to train relentlessly both on and off the Judo mat during the qualification period. During that time, he won a Gold Medal in the Pan American Open in San Salvador, Silver Medals at the European Open in Glasgow and African Open in Tunis, and placed at many other renowned tournaments throughout the world.

At the prestigious Pan American Championships in Havana, Cuba in May 2016, Colton earned three wins with one loss, capturing a Silver Medal after finishing in fifth-place for the previous two years. Now, Colton will be one of only three men representing the United States Judo Team in Rio De Janeiro this August.

Daily, Colton spends countless hours on the mats perfecting his judo technique, dialing in his nutrition, practicing mental visualization, planning his recovery, and studying his opponents. He also gives his best in every strength and conditioning session.

Kettlebell Swings and the Goblet Squat for Judo Performance

The Goblet Squat

The goblet squat is a staple in almost all of Colton’s strength and conditioning programs for the past two and a half years. Since there’s no true off-season in Judo, I have to be smart about loading him up. While we use other squat variations with the barbell, the goblet squat is our go-to.

Goblet Squat Prying

After a two to three week hiatus due to travel, goblet squat prying was an excellent choice to help open his hips. Flying has a direct physical impact. Sitting can cause the hip flexors and hamstrings to get tight and stiff. It can also take a toll on the spine, hips, and shoulders. Long flights leave your legs tight and your glutes inactive. One of the mobility drills I learned at the HKC is goblet squat prying, and it is incredibly effective for loosening up the hips.

I instruct the athlete to breathe deeply while maintaining their posture. As they begin to loosen up, I will instruct them to go deeper into the squat while wiggling the hips from side to side and in a small figure-8 as taught at the HKC. Alternately, I will instruct them to hold the bottom of the goblet squat position for a count of 10 breaths. We often superset the prying goblet squat with the RKC hip flexor stretch. These two exercises can do wonders for the hips, especially after a long flight. Adding a few sets of mini band activation exercises such as bent knee lateral walks, and mini band glute bridges ensure glute engagement. After opening up the hips, stretching the hip flexors, and turning on the glutes, the athlete is ready for a more productive training session.

The Goblet Squat as a “Mini Screen”

While I’m certified to use the FMS screen and administer it throughout the year, I also use the goblet squat in warm-ups and as a quick daily screen. Goblet squats how me how the athlete is moving during that particular training session. Basic movements like lunges, push ups, and squatting patterns can be used as movement preparation for the training session and as “mini screens”. I want to get a picture of where the athlete is on that given day, along with any flaws or leaks in the movement.

The Goblet Squat as a Teaching Aide

The goblet squat reinforces correct squatting mechanics. Colton’s squatting pattern, squat depth, and mobility immediately improved after adding the goblet squat to his program. The goblet squat is one of the best tools for helping my Judo athletes develop movement competency in the squatting pattern. I’m more confident when progressing them to advanced squatting variations such as barbell front squats, or racked kettlebell front squats.

San Jose Judo Kettlebells

The Kettlebell Swing

Powerful hip hinging movements teach athletes how to load their hips rather than their spine. They learn better ground force production while building a strong posterior chain (back, butt, abs, and hamstrings). For these reasons alone, the swing is always at the top of my exercise selection list for Judo athletes. I almost always some type of kettlebell swing in their programs. Russian wrestlers have used kettlebells for years and recognized the carryover onto the wrestling mats. I think the kettlebell swing is one of the best conditioning choices for grapplers and other combat sport athletes.

Hip Hinge

Moving comfortably and efficiently from the hip is important for the proper execution of throws and other movements in Judo. The main movements in the hip hinge are bending (flexion) and straightening (hip extension) when standing back up. A good Judo athlete must be able to properly hinge from the hips when setting up for or defending a takedown. I have seen a direct carryover from the explosive hip snap action of swinging kettlebells to the mat, especially for throwing.

Colton told me, “Judo is 90% hips, so when there’s a lot of kettlebell swings in my program my hips feel powerful—especially in my defense. When guys come in and try to throw me forward, I’m able to use my hips to block throws a lot more effectively.” Every time Colton sets up for kettlebell swings, he has to start from an athletic position before hiking the kettlebell back. Anytime your athletes can practice getting into the athletic position during training you’re on to something good. In grappling, the athletic position is critical for defending and blocking throws.

Grip

A kettlebell’s thick handle challenges the grip—another reason that kettlebells can greatly benefit the Judoka. If you’re doing a lot of swings, you’re also spending a lot of time building a vise-like grip. I experienced kettlebell-enhanced grip strength in my own Jiu-Jitsu practice when gripping my opponent’s gi. During the months of preparation leading up the HKC, I developed a better grip which was immediately apparent at my Jiu-Jitsu class.

Colton Brown Judo Pin

There are many ways to grip the gi in Judo and Jiu-Jitsu not only on the lapel and sleeves, but also on the pants and various parts of the jacket—sometimes even the belt. Once you achieve a good grip, you don’t want to lose it. “Without a good grip, Judo does not work” (Pedro, 2001 p48). Swings are just one of many kettlebell exercises (loaded carries, heavy get ups, presses, etc.) you can use to develop a strong grip. It is important to note that you can have the strongest grip in the world, but if you’re holding on to the wrong things, it does not help in Judo. Efficient gripping is addressed in the specific physical preparation of Judo practice, and should be complemented with supplemental grip strengthening exercises in a strength and conditioning program.

Tension and Relaxation

Some Judokas are too relaxed—and they are easily thrown. Others aren’t relaxed enough, and they ultimately burn more energy and fatigue more quickly than their opponent during the match. At the top of the kettlebell swing, all of your muscles must contract to allow the kettlebell to float briefly and then quickly relax so you can begin the backswing. The tension/relaxation principle taught in Hardstyle kettlebell training is incredibly valuable for the Judoka. Throughout a Judo match there is a constant—almost yin and yang like—balance between relaxation and tension. When working with Colton on his swings, I regularly reminded him to create tension at the top of each swing with the cues “tight abs” and “tight glutes”. At the same time I also checked for a full exhale, and during the backswing I would remind him to “relax”.

One principle from Hardstyle kettlebell training that I continually drive home with my Judo athletes is the transition between tension and relaxation. Kettlebell swings allow athletes to quickly create maximal amounts of tension followed by relaxation. This is a skill that can be transferred into almost any throw attempted on the mat.

Final Thoughts

Kettlebell training has played a big part in Colton Brown’s physical preparation for the Olympics, and I believe that kettlebell training is of particular benefit for anyone involved in martial arts such as Judo, Brazilian Jiu-Jitsu, and Muay Thai. This also holds true for any other type of combat sport like wrestling, boxing, or MMA.


Resources:

  1. Bakken, J. (2012, July 23). A journey of Olympic proportions begins with a determined step. Retrieved June 03, 2016, from https://www.uab.edu/news/latest/item/2599-a-journey-of-olympic-proportions-begins-with-a-determined-step
  1. Pedro, J., & Durbin, W. (2001). Judo techniques & tactics. Champaign, IL: Human Kinetics.

More about Judo Athlete Colton Brown:

  • NBC Biography of Colton Brown
  • USA Judo Team Announcement
  • Video about Colton’s Olympic Qualification

****

Ashoka McCormick, HKC, NASM-CPT, FMSC, CFSC works at Paradigm Sport Elite Athlete Training Center in Santa Cruz, CA, and he also serves as the Volunteer Strength & Conditioning Coach for SJSU Judo. He can be contacted at coachashoka@gmail.com. Please mention HKC in the subject. Connect with Ashoka McCormick on LinkedIn or follow him on Instagram: @ashoka_trains

Filed Under: Coaching, Kettlebell Training Tagged With: Ashoka McCormick, Colton Brown, hkc, Judo, Judo athletes, Judo players, kettlebell training, kettlebells, Olympian, Olympic Judo, Olympic Judoka, strength and conditioning, training an Olympic athlete

Rowing and Kettlebells

June 1, 2016 By Kathryn Taylor 2 Comments

Kathryn Taylor Kettlebells and Rowing

Indoor rowing is one of the fastest growing fitness trends in the US. Head to any major city and you’ll find rowing gyms. Even the local YMCAs are taking the rowing machines out of the corner and moving them to a prominent spot. But, with the rise of rowing, we also find many people rowing with poor technique. In addition to holding an RKC certification and regularly teaching kettlebells at FitWit Studio, I also started to teach rowing this past year and became a certified rowing instructor through UCanRow2. Many of my clients already have a background in kettlebells, and I’ve found that kettlebells can be a highly effective method to teach rowing.

First, a little bit about rowing… You may have seen athletes at the gym leaning all the way back at the end of a stroke and moving with lightning speed up and down the slide. For the most part, you’ve probably observed very poor form. Rowing, like kettlebell training, is highly technical. The power of the stroke comes from the push-back (legs) and the movement forward is all recovery. A goal is to set up for a strong push during the recovery. Basically, the movement pattern starting from the front of the erg is to push back with the legs, then the body goes back at a “one o’clock” position while the arms pull in. Return to the front of the erg by straightening the arms, hinging at the hips to the “eleven o’clock” position, before moving forward on the erg to the start or “catch” position. The order of the movement: legs, body, arms, arms, body, legs. Repeat this pattern one million times and you are rowing!

As I began to teach clients the rowing technique, I found myself moving them off the erg and over to the kettlebell so they could really learn how to properly row using the deadlift, goblet squat, and swing.

Kettlebell Deadlift: Hinge

When rowing, the body closely mimics the deadlift position. But, since it’s often difficult for clients to understand the concept of the hinge while on the machine, we practice our kettlebell deadlift set-up. We work on the hinge, and use the power of the legs to drive the kettlebell up. Then we get back on the erg and mimic the same position. The deadlift also helps clients really understand the correct shoulder position—rather than allowing the shoulders to round forward at the end of each stroke, they learn to keep their back in a strong position.

Kathryn Taylor Goblet Squat and Rowing

The Goblet Squat: Drive

Because most new rowers think that the power comes from the arms, it’s really important to teach them how to drive from their feet, and engage their glutes to push themselves back. I’ve used the goblet squat to reinforce this idea. My clients start with a fairly light kettlebell, and go deep into a goblet squat. They pause for 2-3 seconds at the bottom before standing up by driving hard thorough their feet. They do 5 reps, then do the next set with a heavier kettlebell. We repeat this process 2-3 times. The goal for this drill is to teach them that with heavier weight, they need to drive harder into the ground to stand up. After this drill, we get on the erg and practice the drive.

The Kettlebell Swing: Rhythm

Rowing has a certain rhythm to the stroke. You press back hard and fast, then recover slowly. Each individual has to find the right rhythm (stroke rate) for their most efficient row. If you go too quickly, your heart rate will spike too high. But if you go too slowly, you’ll burn out your legs. The kettlebell swing mimics the same rhythm that we are trying to find on the erg. A hard, fast drive gets the kettlebell up, before we allow the kettlebell to fall back down as we recover. All of the work happens on the way up. The swing has the additional benefit of reinforcing the hip hinge of the deadlift.

I’ve found that people who have practiced kettlebell training for a year or more tend to pick up rowing technique faster than those who haven’t. If you’re looking for a new cardio workout to add to your routine, I suggest trying rowing.

****

Kathryn Taylor, RKC, ACE-CPT, Oh Baby Fitness!, UcanRow2, TRX Level 1, is Studio Manager of FitWit Studio in Kirkwood/Decatur, Georgia.

Filed Under: Kettlebell Training, Tutorial Tagged With: Athletic Training, erg rowing, indoor rowing, Kathryn Taylor, kettlebell deadlift, kettlebell technique, kettlebell training, rowing

Why Recertify?

May 18, 2016 By Dan John 5 Comments

Dan John Instructing at the 2016 San Jose RKC

As I review my half-century in the weightroom (I started lifting in 1965), I begin to see our world of strength through the lens of something Arthur Schopenhauer noted:

“When you look back on your life, it looks as though it were a plot, but when you are into it, it’s a mess: just one surprise after another. Then, later, you see it was perfect.”

With my massive collection of Strength and Health magazines and the short-lived American Athlete magazine, I can pick up an issue from just after World War II and see articles about how to repair the wounded warriors. The training presented for injured veterans was just like what most people now consider training: laying down on machines, isolation work and a few sets of about eight to ten reps. While that kind of training is perfect for someone with compromised health and fitness, it’s not optimal for elite sports performance!

I can read articles from the 1950s and see kettlebells used for leverage work, curls and grip training. I have found swing articles from the 1960s that emphasize dangerous overflexion at the hinge and overextension at the plank.

Yes, kettlebell work had basically devolved into a mess. Powerlifting had pushed Olympic lifting out of the way, and the bench press became the answer to every question. It wasn’t a good answer. Some excellent coaches and trainers were pushing the strength envelope, but others were bogging us down. Speaking of bogging us down in the mess, one famous strength coach advocated using mud as resistance and noted “progress will be made.” It works for pigs, so why not?

“Whadduya bench?” became the fitness standard. We saw the rise of the machines for leg training—as if leg presses indicated anything in the field of play or nature. The world of lifting was a mess.

Dan John's Goblet Squat
Dan John’s Goblet Squat

And then, the kettlebell returned and all credit—all credit—goes to Dragon Door if you wish to be historically sincere. As an Olympic lifter, I couldn’t fathom how these kettlebells could help me. I was surprised when I learned that the swing (done correctly and not how I first did it) made me a better Olympic lifter when I better understood the hinge. As much as I knew how to coach the squat, the horns on the kettlebell allowed me to teach pushing out the knees with the elbows. And, I invented the goblet squat.

One arm pressing trumped most of the overhead work I was doing with throwers as it demanded the hard work of the whole chain of anti-rotation muscles.

I became a better coach with kettlebells. But, I wouldn’t have been ready for them when I first saw them in Strength and Health.

As if kettlebells were a part of my coaching life’s plot, they arrived exactly when they needed to arrive…like what Gandalf says about wizards.

I learned enough to fill my head at my RKC certification in San Jose in 2008. Oddly, I learned even more a few months later as an assistant at an RKC at UCLA. And, I learned more again and again and again…

I started coaching in 1979, and thirty years later my head was being filled again!


I tell people all the time, you can’t think through a ballistic movement. To understand the swing, snatch and clean, you need to “hear” the standards, drills, corrections, and the insights several times before it “clicks.” Oddly, your technique might be seamless, but you might not be able to coach someone who has a simple error in their technique. Or, you might be able to “see” the problem, but your own technique is muddled.

When it comes to the goblet squat, get-up and press, are you really prying, packing or patterning the correct path? Or, are you just getting the reps in? Are you putting the kettlebell down like a professional every single time? How is your breathing? Your tension?

Hip Hinge Coaching San Jose RKC

You need other eyes. You need community.

You need to recertify!

I work with a handful of RKCs daily. It is a rare few weeks, when someone does NOT take me aside and point out that I’m making a basic error. On paper, I am a Master RKC—but in my own training, I am just another person swinging a kettlebell. I try not to get lazy. I try to stay packed and attack the hinge.

…but sometimes I don’t.

Over time, skills degrade. “Safety is part of performance,” except when we get tired, lazy or pressed for time. There are no excuses for lack of safety!

Dan John Coaching San Jose RKCRecertifying will get eyes on you again. Recertifying for $500 means three days of expert teaching and evaluation from at least three people, if not many, many more. This is a bargain compared to hiring a personal trainer.

Whenever anyone returns from a retreat, a clinic, conference, or workshop, the enthusiasm and excitement drips off of them. They have clear eyes and a missionary zeal.

When I first embarked on my RKC journey, I came home and converted everyone I knew to the “Kettlebell Crusade”.

But, like all things, this wanes over time. It’s not bad or good, but without community, without an ongoing dialogue, the battery runs out of excitement.

Outside of an annual visit to “Kettlebell Kamp”, the best thing I can recommend is recertifying.

For as much as I learn during the day, I think I learn more at night. At dinner, we exchange emails, gym insights, training mistakes, and fixes. A wealth of information seems to fit perfectly on a napkin. My favorite RKC dinner moments are when John Du Cane gives me a “MUST” read book recommendations. I am forever grateful for his recommendations.

JDC does an interesting thing, when he asks for my book recommendations, he opens his phone and buys the books as I list them. If you believe in Shark Habits (“One bite!”) like I do, then this is a good example to follow.

It’s a rare day when I do NOT get a text, email, post, or message from someone I met at an RKC. It’s nice to recommit to the shared experience. But, people still move on, drop off and walk away. Recertify your way into a new group of people who can walk the walk with you.

For example, if you were certified before 2008, you missed the goblet squat. Since then, the get-up has been revamped several times. Finally, I think we’re teaching it with the appropriate steps, corrections, and drills. The sections on programming are tighter and clearer with more actual programs.

San Jose RKC Seth Munsey Group Getup

There are more swing drills and clearer correctives. In other words, the RKC is evolving. There was nothing wrong with the Sig Klein articles in Strength and Health, but kettlebells and kettlebell training has evolved. I rarely wear leopard skin and lace up boots when I train. (Note: I said when I train. My gym is judgment free, so you would be welcome to do what you need to do.)

I enjoy being part of this evolution. As much as I loved the original notion of the “kettlebell revolution”, the kettlebell won. If you are keeping score, I enjoy the kettlebell evolution ever more. Hundreds of people teaching thousands of clients with millions of swings will produce new insights, new ways of teaching and greater clarity with problems and issues.

I believe in investing in my continuing education. I sit in the front row at workshops and sign up for a weekend certification or conference at least once a year. It’s hard to find a better deal than the $500 for the three-day RKC recertification.

In 1993, with two little girls in the house, I flew out for a week-long discus camp at Dennison University. For that week, Tiffini worked full-time along with fulfilling full-time mommy and daddy work. It cost a lot—money we didn’t have—and it was a ton of work for me.

But, it changed my life. I have gone back every year since. It sharpened my coaching toolkit, opened my mind to new possibilities, and honed my own techniques.

We have earned back, in every way, this investment.

Look at recertification with the same lens: for $500, you are recertified for three years. More importantly, you’ll have a chance to fill your quiver of arrows, add new tools to your toolkit, experience a dynamic new community, learn new and evolving information, and get new sets of eyes on your technique.

The question shouldn’t be “why recertify?,” it should be “why not?”

It is the perfect way to plot your career.

****

Master RKC, Dan John is the author of numerous fitness titles including the best selling Never Let Go and Easy Strength.

Dan has spent his life with one foot in the world of lifting and throwing, and the other foot in academia. An All-American discus thrower, Dan has also competed at the highest levels of Olympic lifting, Highland Games and the Weight Pentathlon, an event in which he holds the American record.

Dan spends his work life blending weekly workshops and lectures with full-time writing, and is also an online religious studies instructor for Columbia College of Missouri. As a Fulbright Scholar, he toured the Middle East exploring the foundations of religious education systems. For more information visit: http://danjohn.net


From the RKC manual:
There are four compelling reasons to recertify and keep your RKC status.

The number one reason to recertify is to keep your skill level up to the current standards of the RKC. This signifies the importance you place on continuing your education and keeping your personal athletic skills sharp.

The second reason to recertify is the obvious benefit you receive from the Dragon Door marketing machine, by being listed as an RKC on the DragonDoor.com website. This can lead potential clients to you and give you a presence within and outside your on community.

The third reason to recertify is the ability to network with like-minded trainers. This is an extremely valuable tool to help keep you current, offer support and advice in all manners of kettlebell training and professional issues.

The fourth reason, is to continue to receive a discount on purchases of kettlebell and Dragon Door kettlebell products. Orders can be placed by logging you’re your instructor account online, where qualifying products are automatically discounted, or by calling DragonDoor.com customer service at 1-800-899-5111 or internationally 214-258-0134. Identifying yourself as a currently certified instructor is required, so the phone agents know to use your account to place your order.

Filed Under: Coaching, Kettlebell Training, Motivation Tagged With: Dan John, kettlebell training, Master RKC Dan John, recert, recert RKC, recertification, why recert

Don’t Ignore These Two Common but Crucial Kettlebell Mistakes

February 3, 2016 By Keira Newton 9 Comments

Two Kettlebell Mistakes Keira Newton

As a Master RKC, I travel a lot. I love my job because I get to visit other gyms and teach people how to teach kettlebell technique according to the highest standards in the industry—RKC standards. In the past few years of teaching, I have noticed two commonly missed mistakes. These are simple fixes in my eyes, and easy to teach. So lets get started.

The Deadlift:

The deadlift is the basis of almost every kettlebell lift. It IS the foundation of what we do. However, I have seen people skip the deadlift altogether… (How will they learn the swing? How will that work?) Or they simply miss the most important part of the deadlift: the set up and how to work underneath the kettlebell.

In my experience, I’ve observed that people who are given a small kettlebell, are tall, tight in the hamstrings, or tight in the hips will round the low back to pick up the kettlebell. The cure for this? RAISE THE FLOOR. It’s such a simple fix, but it will help 99% of your students. I use it with almost all of my new students. The video below includes a short demo of this technique. Give it a try.

The Swing:

I think it is safe to assume we all know the kettlebell swing can be fantastic if performed correctly—and deadly if not. This is no joke. When training a client, or in your own training, you must know exactly what happens with this ballistic lift. The most common mistake I see from my clients and students (which is also the most missed among new trainers) is in the TIMING of the swing. While watching someone’s swing, if it looks like they are moving to the toes, swinging below the knees, or lifting the kettlebell with their arms, then their timing is off.

To fix the timing, tell your client to wait until the kettlebell has passed below the belly button, or their arms have touched their ribs after swinging the kettlebell forward before moving their hips back. It will seem almost as if the kettlebell will hit you where it hurts, and you get out of the way just in time. But, let’s make sure that happens okay? 🙂

Hope the video below helps you understand. Enjoy!


***

Kiera Newton, Master RKC, Level 3 Z-Health, MCT, PCC. Keira first picked up a kettlebell in 2005 when her husband challenged her to stop laughing and start swinging. She stuck with the challenge when she realized that she could get an all-in-one workout in a fraction of the time she spent at the gym. Keira was convinced… Read more here.

Filed Under: Kettlebell Training, Tutorial Tagged With: Keira Newton, kettlebell swing, kettlebell swings, kettlebell technique, kettlebell training, kettlebell troubleshooting, kettlebell tutorial, Master RKC Keira Newton, swings, tutorial

Fine-Tuning the Get-Up

January 27, 2016 By Andrea Du Cane 14 Comments

Master RKC Andrea Du Cane Get-Up Lead Photo

How and when to use the high bridge and when to use the “step-across” instead of the “windshield wiper”

At every HKC and RKC, I’m asked why we test the low sweep instead of the high-bridge. I also get a lot of questions regarding the “windshield wiper” vs. the “step-across” to transition in and out of the kneeling windmill to the lunge position. It’s time to explore each movement and gain a deeper understanding of some of the benefits of the get-up.

When I first became certified and started teaching the get-up, it was referred to as the “Turkish get-up”. Here’s the criteria that was given and tested at that time:

  1. Keep both shoulders packed.
  2. Keep the wrists neutral at all times.
  3. Keep the elbow locked at all times.
  4. Keep your eyes on the kettlebell.

Oh and well…. get-up! That was it, get up anyway you can.

Let’s just say the get-up has come a long way, baby. It’s transitioned from having very little explanation and direction to (for a time) elaborate direction, with a focus on corrective uses and advanced movement patterning.

You can say that now we have found a happy medium, erring on the side of explanation and points of movement. But, we have also found a good balance and an easier way to teach the get-up to newer kettlebell instructors and users.

The High Bridge or the Low Sweep

One area of confusion with the get-up is whether to use the high bridge or low sweep.

First, let me explain where the high bridge came from, and why it was initially introduced as a teaching and testing skill. The high bridge came from the FMS concept of using movement as a screen. When it was first introduced into the RKC curriculum, the high bridge was used as a screen for tight hip flexors. However, we began to notice that when people were doing the high bridge, their lumbar spine was actually in hyper-extension instead of full hip extension. I remember discussing this with Gray Cook, and he agreed with that it was one problem with using the high bridge as a screen, since it is easily cheated. It does not actually demonstrate whether the person is in full hip-extension or hyper-extension of the lumbar spine.

Secondly—and more importantly—you would not put a client, with a kettlebell in their hands, into a high bridge and then say, “Aha! You have tight hip-flexors”. Of course not. Long before they do that high bridge, you have deduced that they have tight hip-flexors from other screens. And from a safety perspective, you would not let someone perform a high bridge until they had opened up their hip flexors and could perform the movement correctly without a kettlebell.

Since one of the end goals of the get-up is to go heavy, for the purpose of safety and efficiency, you will want to pull your leg back and get your hips under the load as quickly as possible. The high bridge takes unnecessary risks with a heavy load during the transition.

That said, the high bridge is great with a moderate to light weight for a more advanced kettlebell user. Done correctly, it demonstrates shoulder stability, hip flexibility and control.

Master RKC Andrea Du Cane Get-Up Kneeling Windmill

Performance Tip: Think of the high bridge and sweep through as a tall side plank. When moving into a high bridge, post over towards the side, your shoulders should be stacked over each other. The hips will rotate slightly upwards, but the shoulders and t-spine are stacked vertically. Practice lots of side planks from the elbow and tall side planks, before moving onto the high bridge.

The “Step Across” Variation

Moving on to the next modification, using the “step across” instead of a windshield wiper. As stated earlier, the body needs to transition from the tall-sit position smoothly and with control all the way to lunge. That means the hips need to get under the kettlebell as quickly and safely as possible—this includes the sweep through and transitioning to the lunge.

From the kneeling windmill position, the torso is moving from a horizontal position to upright, as the hips are coming under the torso and kettlebell. The hips need to fully extend with the glutes tight as you move into the lunge position. That’s a LOT of movement happening at the same time. The more stable and connected to the ground the body is, the safer and smoother the transition.

That is why the windshield wiper is taught and tested. Both legs remain firmly on the ground and the hips easily and fully extend.

Performance Tip: think about finishing at the top of a swing. The glutes contract hard and fast and the hips fully extend, allowing your body to find stability in the lunge position as soon as you hit it.

A potential problem with this movement is the pressure and friction placed on the knee. Obviously, if the knee is feeling pain, this could jeopardize the movement. The ground you are training on becomes an issue, and individual knee sensitivities should be taken into account as well.

One way to solve the issue is to use the “step-across” modification. From the kneeling windmill, you simply lift your torso up and then step your loaded foot across into a lunge position. This will take the windshield wiper out of the movement and “save” the knee.

The downside to this modification is the inherent lack of stability as you lift your loaded leg up and step it across. You are also changing the orientation of your head and body, which can also cause us to lose stability and control.   Lastly, it is much harder to keep your glute and hip tight and contracted as you move the leg, leading to another possible loss of control.

As we say in the RKC, “safety trumps performance”, so if you have sensitive knees or are training on a hard or rough surface, the step-across is a modification you can use to protect your knee and stay in control.

My personal recommendation is to buy a $20 pair of knee pads or have your clients purchase them for training. I do a lot of kneeling training and take knee pads with me everywhere to use for all kneeling training and stretching. $20 knee pads are a cheap and easy way to protect your knees and increase the effectiveness of your kettlebell training.

****

Andrea Du Cane is a Master RKC Kettlebell Instructor, CK-FMS, CICS, and RIST, ZHealth certified, she has a BA in Psychology from the University of Minnesota and is also a Pilates instructor. She is the author of several books and dvds including The Ageless Body, The Kettlebell Boomer, and The Kettlebell Goddess Workout.  She has over twenty years of aerobics, weight training and fitness experience, with an additional background in… Read more here.

Filed Under: Coaching, Kettlebell Training, Tutorial Tagged With: Andrea Du Cane, get up, get ups, Getup, kettlebell technique, kettlebell training, RKC, RKC kettlebell training

Simple Hand Training Drills To Compliment Your Kettlebell Training

January 20, 2016 By Ryan Jankowitz 2 Comments

Ryan Jankowitz, RKC-II

Full disclosure—I love kettlebells. With that out of the way, I can share a few tips I’ve learned along my fitness journey. Some of these things I’ve learned through positive experiences, like reading a book, attending a certification, or studying martial arts. Other things I’ve learned through injury.

Let’s talk about the importance of training your hands to support and enhance your kettlebell training. If you are wondering how to train your hands and why, I will do my best to enlighten you. When I train my clients or myself, a lot of the movements we perform involve gripping the kettlebell, barbell, pull-up bar, etc. The amount of time we spend with our hands open pales in comparison to how much time we spend gripping objects. That alone is reason enough to keep performing push-ups and crawling movements. If we spend so much time gripping, then we may unknowingly create an imbalance. I learned this first hand after straining a muscle in my inner forearm—an injury which put me on the shelf for a couple weeks. (My massage therapist discovered the imbalance in my forearm.)

That injury occurred several years ago and I vowed to not let it happen again. So far I have been successful and would like to share the simple drills I use to train my hands and forearms so that you can also avoid this annoying injury.

Drill #1 – Wrist Circles

I first learned this drill while studying Kung Fu. It was part of our joint mobility warm-up. I was pleasantly surprised when we went through a similar mobility complex during my RKC Level 1 back in 2011. This is another example of the many parallels between martial arts and kettlebell training. If you look at your RKC or HKC manual, then you will see that this is the second drill in the mobility complex section. I do this drill every morning as part of a quick 8 to 10-minute Qigong Recharge. This drill gently works the wrists through their full range of motion, lubricates the joints, and brings healthy blood flow to the wrists.

I have also taught this drill to clients with carpal tunnel or who experience discomfort in their wrists. The results have been either positive or no change in discomfort—both of which are certainly better than a negative result.

To perform this drill, start by interlocking your fingers and bringing your palms together in front of your chest. Gently roll your wrists around, making sure to also reverse the direction.

Drill #2 – Wrist Flexion and Extension

This is another drill that I learned from studying Kung Fu. It was one of many hand-training drills we practiced. Now, I find this drill to be very beneficial for my clients and myself. The stretch is amazing and it hits parts of my forearm that I had usually neglected. In one instance, I actually cured a client’s wrist pain with just 5 reps of this drill!

To perform this drill, straighten your arms and bring them up and out in front at chest level. As you straighten your arms, push through the heel of your palms and try to pull your fingers back toward your face. Hold for just a few seconds, then start to pull your arms back into your body by bending your elbows. As your elbows bend, bring all of your fingers together to form a crane’s beak, then try to bring all of your fingers to the inner part of your forearm. That’s one rep. Perform 5-10 total reps.

https://youtu.be/H20gV0h9Ork

Drill #3 – Hand Whipping

This is yet another drill that I learned from Kung Fu. I also read about a similar drill called “shaking out” in an old Dragon Door book, Beyond Stretching: Russian Flexibility Breakthroughs, that employs the same technique for strengthening the tendons and ligaments in your legs. This drill is a bit more advanced than the previous two, but definitely worth trying.

Begin the drill with your arms relaxed by your sides. Slowly bring your hands up to your body and when your hands reach your chest, quickly whip them out in front of you. Although you are moving very fast, try to stay as relaxed as possible.

https://youtu.be/FbF1q2sBWKo

Thank you for reading my first RKC Blog post! Try these drills and let me know what you experience.

Stay Strong!

****

Ryan Jankowitz, RKC-II Instructor, CK-FMS, is a life-long athlete who can’t imagine sitting behind a desk. He enjoys sharing his passion for fitness and spreading the RKC knowledge. Ryan operates a remote fitness coaching service and is available for private kettlebell workshops as well. You can reach him at ryan@rjkettlebell.com or through his website rjkettlebell.com. He also works with clients and teaches kettlebell classes at Fitness on the Run in Alexandria, Virginia. If you’re in the area, visit fitnessontherun.net and come swing some bells with Ryan.

Filed Under: Kettlebell Training, Tutorial Tagged With: hand drills, hand training, injury prevention, injury recovery, kettlebell training, Ryan Jankowitz, wrist drills, wrist stretches

  • « Go to Previous Page
  • Page 1
  • Page 2
  • Page 3
  • Page 4
  • Page 5
  • Page 6
  • Page 7
  • Go to Next Page »

Primary Sidebar

Featured Products

previous arrow
BOOK-RKCBookofSnC
HardStyleKettlebellChallegeDanJohn700
BookCoverMasterTheKettlebell1
RKCiconKettlebell512
KettlebellGoddessdv040
next arrow

Recent Posts

  • RKC Big Six Workout
  • The Kettlebell Swing & Low Back Pain
  • Key Kettlebell Exercises To Help You Create Better Balance
  • How to Most Effectively Use Kettlebells to Meet Your New Year Goals
  • 1 Exercise That Checks All The Boxes
FOLLOW US ON TWITTER!

Archives

Copyright © 2025

Dragon Door Publications / The author(s) and publisher of this material are not responsible in any manner whatsoever for any injury that may occur through following the instructions or opinions contained in this material. The activities, physical and otherwise, described herein for informational purposes only, may be too strenuous or dangerous for some people, and the reader(s) should consult a physician before engaging in them.