• Skip to main content
  • Skip to primary sidebar
  • Home
  • Contributors
    • Matt Beecroft, Master RKC
    • Martijn Bos, Master RKC
    • Andrea Du Cane, Master RKC
    • Angelo Gala, Master RKC
    • Chris Holder, Master RKC
    • Steve Holiner, Master RKC
    • Dan John, Master RKC
    • Mike Krivka, Master RKC
    • Thomas Phillips, Master RKC
    • Robert Rimoczi, Master RKC
    • Phil Ross, Master RKC
    • Max Shank, Master RKC
  • Workshops
    • HKC Workshops
    • RKC Workshops
    • RKC-II Workshops
  • Find an RKC Instructor
  • Resources
    • Articles
    • Forums
    • Kettlebells
    • Products
  • Blogs
    • PCC Blog
    • Strong Medicine Blog
  • Archives

RKC School of Strength

Official blog of the RKC

Kettlebell

How to Replace Expensive Equipment with Kettlebells

June 21, 2017 By Laurel Blackburn 4 Comments

Laurel Blackburn and Adrienne Harvey Diy Fitness

I started my boot camp business in 2005 on a little patch of grass in front of a gymnastics gym. I didn’t have much money and spent what little I had on a few bands. Our workouts were mostly bodyweight with a few exercises done on the picnic table in front of the gym.

I had to be creative and think outside of the box. Before the TRX came out, I was already doing many of the exercises with beach towels wrapped around trees. I also bought PVC pipes and filled them with sand to use for presses, squats and deadlifts.

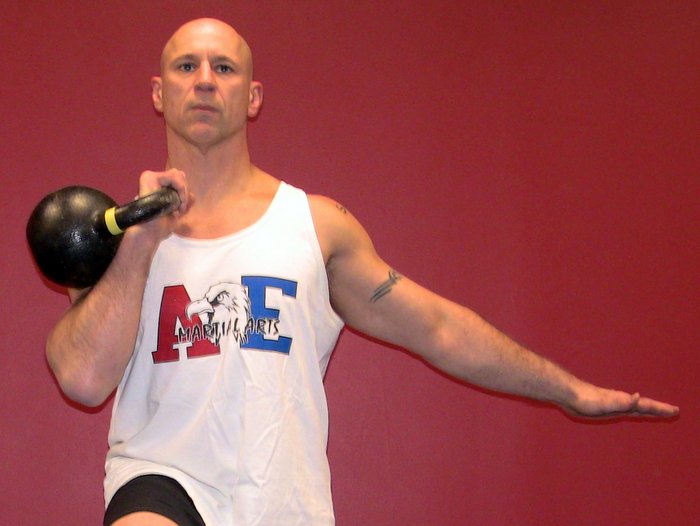
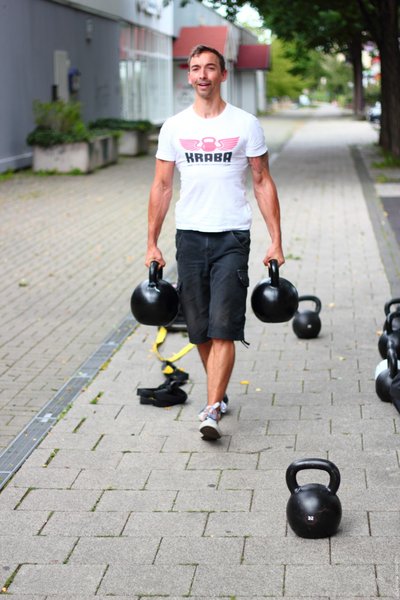
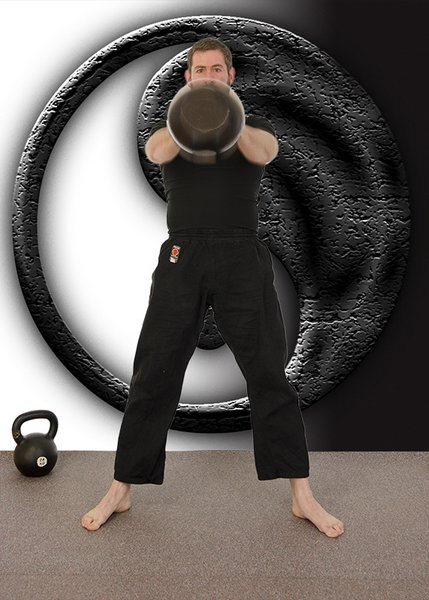
As my business grew, I spent almost all of my money on purchasing more equipment. I bought some kettlebells, I picked up logs on the street, and used whatever else I could find as exercise equipment.

Slowly as I earned more money, I bought more equipment. Once we moved from the patch of grass into an 800sqft space, I bought a few more kettlebells, some medicine balls, and I had a friend build a pull up bar.

After a year, we outgrew that space and I moved to a 2,100sqft building—then we moved up to my current 5,000sqft location. Now, I was able to buy a lot of equipment and I spent a fortune on stocking my gym. Every cent I made went back into the gym as I bought more equipment.

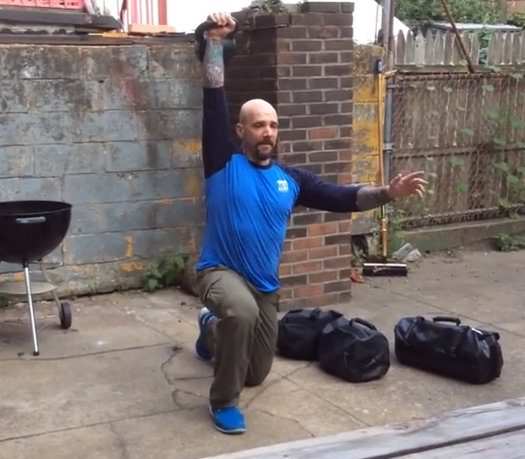
As a fitness professional and gym owner, I constantly receive tons of catalogs in the mail full of equipment to buy. I started looking at how I could use what I had to replicate new exercises but at a fraction of the cost. Soon, I became a regular at Home Depot and Lowes!

I found that I could replace everything from sleds to the popular earthquake bars dirt cheap.

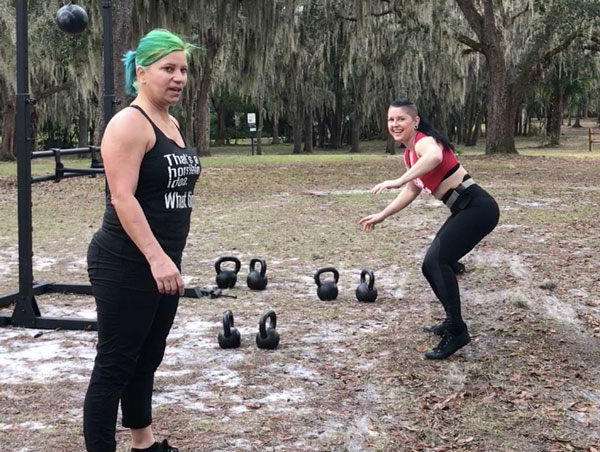
A couple of months ago, I went to Orlando and met up with Adrienne Harvey. I packed my car with name brand portable sleds, my earthquake bar, kettlebells and my homemade equipment.

Adrienne and I filmed exercises using my expensive equipment and then filmed the same exercises with better options using my homemade equipment and kettlebells.

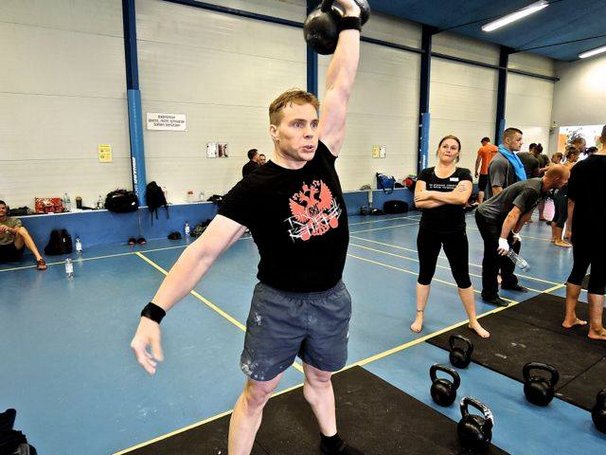
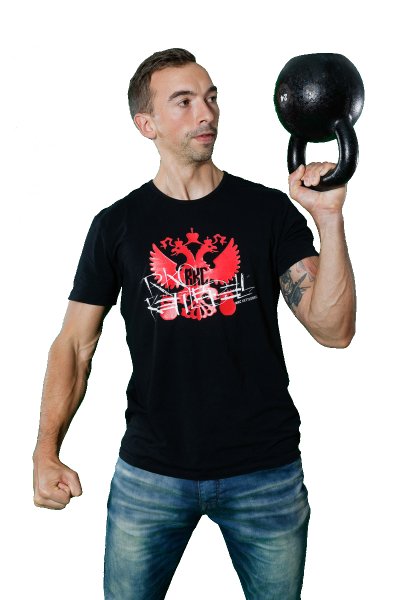
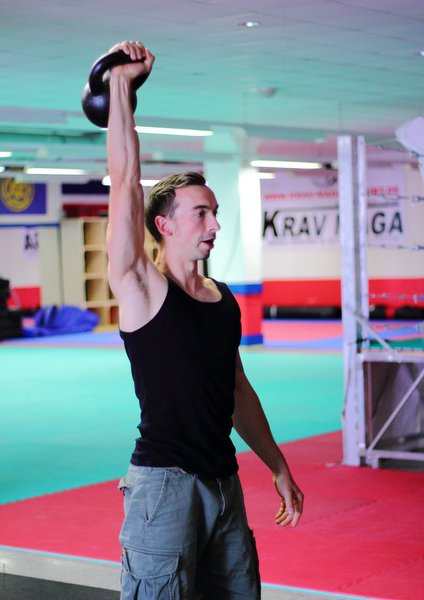
I wanted to show gym owners and exercise enthusiasts how they can get creative on the cheap by using kettlebells and a few items from a hardware store.

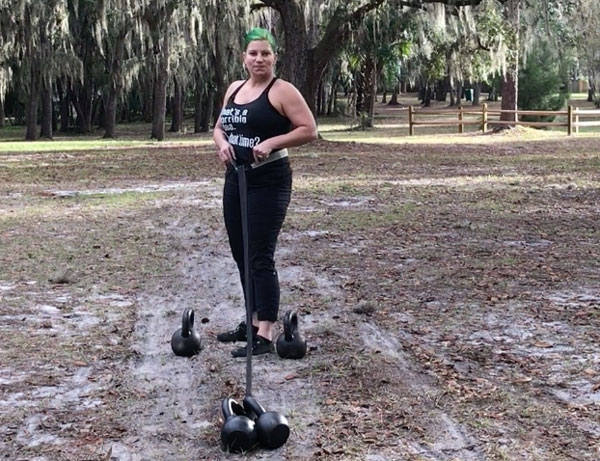
Here is what I used to make the equipment I used for part 1 of this series.

For sleds:

Lowes SmartStraps 2-in x 20-ft Tie Down ($19.98)

Watch the video, go to the hardware store, grab some kettlebells and get creative.

I’d love to hear how you’ve improvised, created new exercises and workouts with your kettlebells.

Stay tuned for part 2. I will show you how to make your own earthquake bars at 1/8th of the cost.


****

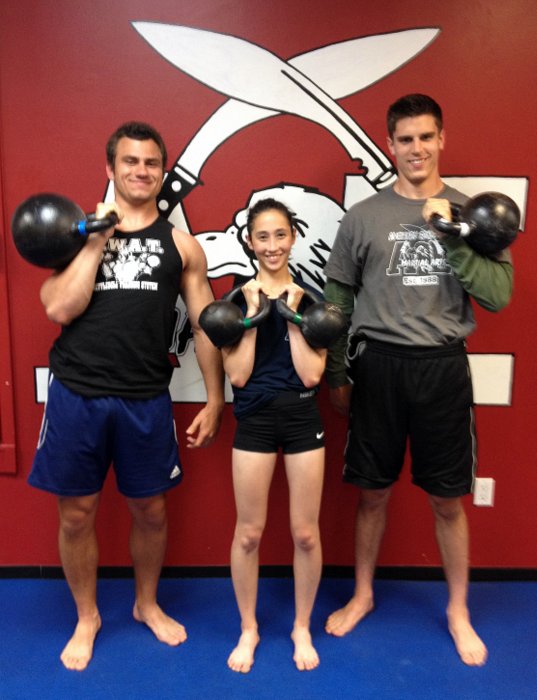
Senior RKC, Laurel Blackburn owns Boot Camp Fitness and Training and Tallahassee Kettlebells.  Look for Laurel at www.bootcampstogo.com or www.tallahasseekettlebells.com.

In her early fifties, Laurel is out to prove that age is just a number. Her goal is to motivate and inspire people everywhere, both young and old that strength, flexibility and mobility can get better with age. Follow her adventures on her blog: www.SuperStrongNana.com.

Filed Under: Fitness Business, Kettlebell Training, Tutorial Tagged With: creative fitness, creative training, DIY fitness equipment, DIY sled, fitness equipment, Kettlebell, kettlebells, Laurel Blackburn, Senior RKC Laurel Blackburn

Improve Your Posture with the RKC Kettlebell Swing

June 8, 2016 By Beth Andrews and Jay Armstrong 7 Comments

Senior RKC Beth Andrews Kettlebell Swings

Postural correction is a hot topic. Spending too much time in a seated position while driving or working on a computer will adversely affect our ability to stand up straight.

Wouldn’t it be great if there was a time-efficient exercise that could counteract all the time you’ve spent in the seated position and help you develop good posture?

That exercise exists—it’s the kettlebell swing.

Swinging a kettlebell will help you develop strong muscles, bones, tendons and ligaments. It will also improve your endurance. But, one of the biggest benefits of the kettlebell swing is improvement in your posture. The kettlebell swing is a naturally corrective exercise which will help undo the maladaptive effects of too much sitting slumped over with a computer, tablet, or phone.

The following are some of the key postural issues that the RKC kettlebell swing can correct:

Problem #1: Your glutes are not working

Sitting down turns off your glutes. The RKC kettlebell swing includes a “hip drive” or “pop” that moves the tailbone under and drives the hips forward. The hips are a primary source of athletic power for many sports such as golf, tennis, baseball and boxing. This hip drive is fueled by a rapid and intense contraction of the glutes. Swinging a kettlebell can help you reactivate your glutes. Active glutes will also put the pelvis in a neutral position, increasing your athleticism and reducing your chances of developing chronic back pain.

Problem #2: Your back is rounded, and shoulders are hunched forward

When using a computer or driving a car, your arms are front of your body while you’re seated. This inevitably leads to the shoulders internally rotating and the chest collapsing. For most people, this also means they will look like a caveman when they finally stand up. The finish, or top position, of the RKC kettlebell swing features “packed” shoulders. This means that the shoulders are pulled back and down, the lats are activated, and the thoracic spine is in a neutral position.

The kettlebell swing also has the added advantage of teaching you to bend over and stand up into a correct postural position time after time, rep after rep. And each effort is performed under load. Using a weight means that the adaptive changes will take place faster. Even a short RKC kettlebell swing practice session will greatly improve your ability to go from a seated, computer desk position to an erect, well aligned standing position.

Problem #3 – Your core is weak and you cannot contract your abdominal muscles

Bad Computer Posture

Modern office furniture encourages us to relax everything while we type at the computer. This muscular relaxation includes the core and abs. But, when you stand up, your abs remain relaxed, your pelvis tips forward and all of your guts try to fall forward! Not very attractive. At the top position of the kettlebell swing, the spine is lengthened and aligned. In order to accomplish this alignment, the core must be stabilized with a balance of posterior and anterior tension. This simply means that the abs must be strongly contracted for a split second at the top of each swing. What could be a better way to relearn how to stabilize your core and contract your abs then to do this time after time with your RKC kettlebell swing.

One step we use while teaching the kettlebell swing is the RKC plank. Notice that opening your chest, contracting your abs, tightening your glutes and lengthening your spine into an ideal postural position are all part of the RKC plank exercise. The top position of a kettlebell swing should mimic the total body tension and spinal alignment of the RKC plank.

Beth Andrews RKC Plank

Focus on these points as you perform your RKC kettlebell swing. You will see fast and enormous postural improvements.

Stand tall my friend.

Beth Andrews and Jay Armstrong

****

Beth Andrews is a Senior RKC, PCC Team Leader, and CK-FMS. She leads HKC and RKC certifications, and assists at the PCC. She became the 5th Iron Maiden in 2013. Beth owns Maximum Body Training and a successful online training business. She has over 25 years of training experience. For online training or to host a certification, email Beth at: bethandrewsrkc@gmail.com. For more training tips and workouts subscribe to her YouTube channel, Beth Andrews RKC or visit her website at maximumbodytraining.com

Jay Armstrong is a Senior RKC, 6 Degree Black Belt TKD, and Master Z-Health Trainer.  The past 30 years have been dedicated to helping others develop confidence through increased strength and pain-free, exceptional mobility.  His quest for knowledge continues.  He runs The Kettlebell Club in Houston, Texas.

Filed Under: Kettlebell Training, Mobility and Flexibility, Tutorial Tagged With: beth andrews, Jay Armstrong, Kettlebell, kettlebell swing, kettlebell swings, kettlebells, plank, posture, posture correction, RKC, RKC plank

How to Dominate the RKC Snatch Test

April 20, 2016 By Frank Delventhal 7 Comments

Frank Delventhal Snatch Test

For many, the Snatch Test is a fearsome obstacle to RKC certification. But it does not have to be that way. When you start training frequently enough and have acquired good technique, you will be able to beat the challenge. It’s like learning vocabulary in school—you know what is expected of you, so it becomes more a question of diligence than talent.

What is the RKC Snatch Test?

You must snatch your kettlebell 100 times in 5 minutes. The weight of the kettlebell depends on your bodyweight, age and gender. The average gentleman will use a 24kg and the average lady usually uses a 16kg kettlebell (be sure to check the rules link below to find your exact weight class)

You are allowed to switch hands as often as you like, and can even (carefully) rest the kettlebell on the floor. Click here for the exact rules and kettlebell weight requirements.

What are the Prerequisites for the Snatch Test?

Before you attempt to snatch a kettlebell, you need a solid foundation in the two-hand Hardstyle swing, the one-arm swing, and the clean. These are the preliminary steps of the snatch. “OK” is not good enough—you must be good at these before you begin training for the Snatch Test.

As a general rule you should be able to do 100 one-arm swings within 5 minutes, with a kettlebell at or close to the weight of the kettlebell required for your test. For example, If you have to use a 24kg kettlebell for your test, you should be able to do 100 swings with a 20kg before you begin to specifically train for the snatch.

What Equipment Do I Need?

  • Assorted kettlebells ranging from very light up to your goal-sized kettlebell. (Hopefully your gym is well stocked and also has an RKC-Certified Instructor!)
  • Chalk
  • Optional hand protection: socks, tape, Dragon Skins™, minimalist gloves (cotton gardening gloves)
  • Optional sweat bands for the wrists
  • Your soundtrack
  • Hand care items for after training
  • You may not use belts, thick or padded-gloves, wrist wraps or any other equipment designed to support your body

Chalk

When doing 100 snatches, your hands will need to withstand a lot of friction. A little chalk can help, and will also dry your skin. If you have sweaty hands during the test, you can end up with “burger meat” for hands without chalk. But, too much chalk is also not good, so be sure to discover the right amount that just keeps your hands dry enough. I found that I do very well with just a couple of drops of liquid chalk or by rubbing a piece of chalk. Since chalk generally dries up your skin, it can cause excessive calluses—see the hand care section below.

Socks, Tape, Dragon Skins™, Minimalist Gloves

You are allowed to use sock strips, tape, DragonSkins™, or minimalist gloves (cotton gardening gloves) to protect your hands. If you really need them, that’s ok, but honestly I do better without them. I think you trade an important tactile connection for a little extra protection. But, I also have relatively tough hands that are conditioned to take a beating!

You may not even need these protective items if you train with the following method: begin with a very light weight and slowly progress to heavier weights (which also create more friction) so that your hands have plenty of time to adapt.

Thin Sweatbands or Long Sleeves

I sweat a lot during the test, so I need to wear sweatbands on my wrists—when I don’t have them sweat floods down my arms onto my hands, turning them to “burger meat” by the end of the test. Remember that wraps to protect or support the wrist are not allowed, so make sure that you only use thin sweatbands. Be sure to ask your instructor or judge at the RKC if your sweat bands are ok.

Alternately, you may want to wear a long sleeve compression shirt. The instructor must be able to see if your elbow is really locked out, so make sure that your compression shirt is extremely light and thin. It’s also common sense to use a dry shirt, not one already quenched in your own sweat!

Your Personal “Snatch Test Soundtrack”

The right music can give you extra power. My favorite track has plenty of power, but is not too fast. It’s 5:12 long, so I figured out exactly when to start during the song’s intro.

Listen to that song every time you practice the test. That has nothing to do with enjoying the music, it’s more about training your subconscious to feel the passing time. The song will also help you focus, giving you additional power. Each time you hear the song or imagine it in your head, you’ll KNOW that you will pass the snatch test. If you’re interested in learning more about the mental side of training, check out Logan Christopher’s Mental Muscle. Even though your snatch test at the RKC will be without music, all you need to do is hum the first notes of your song, and you are ready to rock and roll.

Hand Care After Training

The snatch test is also challenging for your hands. Be sure to start your training soon enough before the RKC workshop so that your hands have plenty of time to adapt.

After every workout, check to see if your calluses are hardening. These hardened areas must be removed carefully with a callus remover. Please make sure that you only remove the hard spots. The callus itself is important because it protects your hands from friction and pressure. If you used chalk (especially liquid chalk) you may also want to use a drop of lotion to soften up your hands.

Frank Delventhal Swings

Why should I train specifically for the Snatch Test? Isn’t it enough to prepare with plenty of swings?

This is a question of faith, and it is possible to gain enough power with swings to pass the test. In an objective comparison of the swing and snatch, you will discover that the swing is safer than the snatch. Using the swing to train is generally justified. Additionally, some argue that the Snatch Test is so strenuous that you should not do it very often. Under certain circumstances, I agree with that argument, especially when the student starts with his snatch size kettlebell and tries to work up to the volume of the test. But the title of this post is “How to DOMINATE the Snatch Test”! So, I have a “secret” training plan for you. 😉

Train Success

Start with a kettlebell that you can snatch 100 times in 5 minutes. It doesn’t matter if the kettlebell is very light—even as light as 6kg! The key is to practice the test two to three times a week after your normal workout, and you must succeed each and every time.

Before you do the 100 snatches, take 3 to 5 minutes to actively relax your muscles and visualize completing the test. The more detail you can imagine in your mind, the better. Mentally, you have already finished the test, before you even touch the kettlebell.

It is essential that you succeed each and every time! The goal is to become so accustomed to doing 100 snatches that it nearly becomes boring.

Frank Delventhal Instructing
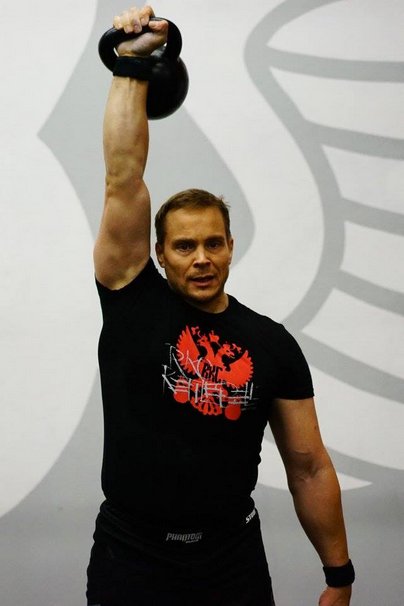
Snatch as precisely as Swiss Clockwork

Watch your form. Every “no count” is discouraging, and many candidates have lost their focus during the test because of it. Take care that you practice strict form. Take a mini break at the top lockout position, when the kettlebell is held over your head. You will have a small rest, and the instructor watching will absolutely know that you are in control of the movement. Your arm should point straight at the ceiling. Your wrist must be straight, and your legs have to be locked out as well. You will look like a “hardcore version of the Statue of Liberty” holding a kettlebell instead of a torch. 😉

Pull your shoulder down to stabilize it. Normally I do not like mirrors while training, but they can be useful for checking your lockout position.

A Tip For the Overhead Lockout Position

If it is difficult to hold the correct overhead arm position, try the “downward dog” yoga pose. Let the tips of your thumbs touch each other, this will increase your mobility—and the ability hold your arms straight overhead. While a yogi will straighten their legs in “downward dog”, that isn’t necessary for our purposes. We want a straight line from the wrists on the floor towards the hips. It takes some practice to achieve that position (at least for most males, the ladies are generally better at this). If you can maintain that straight line, push your shoulders to the floor and over time, increase your range of motion. Improvement may take five minutes to several months, depending on your general mobility.

Changing Hands

Changing hands uses up precious time. It is an advantage if you can use fewer changes—but that also requires more conditioning. Fortunately with kettlebells, you can train cardio and power at the same time! Work up to more reps before switching hands slowly over time. It doesn’t make sense to do more than 20 snatches with one arm before you switch, as that would be unnecessarily fatiguing.

During the live test, your instructor will count for you. While you train, you should have enough concentration to count for yourself. When in doubt, just do ten extra reps.

Rep Schemes

Use your strong hand last as a “secret weapon”. This will make the end of the test will be much easier for you. For example, I am right handed, so I start with my left hand and finish the test with my right hand.

Scheme A: 9 Hand Changes

Let’s start simply. Do 10 snatches, then change hands until you reach 100 reps. If you can complete this scheme in under 4:30, then try Scheme B.

  • 10/10 (10 left / 10 right)
  • 10/10
  • 10/10
  • 10/10
  • 10/10

Scheme B: 7 Hand Changes

This scheme is slightly more challenging, but if you have completed Scheme A with enough spare time, the extra challenge will only be marginal.

  • 15/15
  • 15/15
  • 10/10
  • 10/10

Scheme C: 7 Hand Changes

This scheme allows you to complete 20 snatches with one arm safely. It is possible that you do not need this scheme, and can jump directly to Scheme D, but try it out at least once. As it gets progressively easier, many people like it.

  • 20/20
  • 15/15
  • 10/10
  • 5/5

Scheme D: 5 Hand Changes

The “master level”

  • 20/20
  • 20/20
  • 10/10

When you can easily complete the test with this scheme, and your time is always somewhere between 4:00-4:30 minutes, then you can progress to the next heavier kettlebell. You will probably be faster just because you need fewer hand changes. With the heavier kettlebell, start with the 10 x 10 (Scheme A). It will be more difficult, but you can do it. Progress the same way until you reach your goal weight kettlebell. Do not rush, just use a weight that allows you to succeed every time and the Snatch Test will become easy for you!

Create a Cardio Surplus

Even with your snatch size kettlebell, you should be able to complete scheme D. With extra gas in your tank, you can do the snatch test any time. If you have a bad day (or a cold), just drop to an easier scheme (such as C).

Does it make sense to use a kettlebell heaver than required by the test? No, and I would advise against using a much heavier kettlebell. “Enough is enough!” (Thank you Dan John.)

The RKC certification requirements include more than just the Snatch Test, so use your energy wisely. After you can do scheme D, only train the test once a week or every two weeks to maintain your skill and conditioning.

After your RKC certification workshop, you can work up to more if you want. Now you know how!

Good Luck!

You will greatly benefit from preparing for the test, whether you want to pass it as a personal goal or for your certification. Now that you know how to tackle it, it isn’t a “boss battle”.

Understand that just watching a video about snatching on YouTube does not mean that you can do a snatch! Get an RKC instructor to teach you the right technique. This is safer and saves time. The snatch is the last exercise of the RKC Big Six (swing, get-up, clean, military press, squat, snatch) because the other five build the essential foundation. Enjoy your journey.

“First use your brain, then train!” 😉

Frank Delventhal, RKC-II

***

Frank Delventhal, RKC2, PCC, 1 Dan Aikido. Visit his website: https://hamburg-kettlebell-club.de/

Filed Under: Kettlebell Training, Tutorial Tagged With: Frank Delventhal, kettlbell snatch test, Kettlebell, passing the RKC, RKC snatch test, RKC workshop prep, Snatch Test

The Journey Doesn’t End with the Title

March 30, 2016 By Shari Wagner 11 Comments

Shari Wagner RKC Team Leader
My RKC workshop was in April 2009, and I didn’t pass at the workshop due to a failed snatch test. I submitted a video one week later to earn my RKC title. I recently stumbled across that fateful video and of course, I watched it.

I watched it with a little bit of shock and awe at the poor technique I displayed. I also watched it with a lot of pride. Pride for the hard work I have put in to improve my technique since then and pride for all I have accomplished over the years.

When I first learned the snatch, it was in the days of first learning the high pull. This caused me to have a very significant corkscrew. I worked and worked at fixing this corkscrew before attending the RKC to no avail, and it was one of the biggest worries I had going in to the workshop. It wasn’t the typical worry of not completing the reps, my worry was all about the technique.

I did improve my technique at my RKC workshop, but I still had some of that darn corkscrew. At the time, while not ideal, it was still considered passable technique. I kept plugging away at the technique, but that corkscrew still remained.

I eventually sought out some additional instruction, which helped quite a bit. I also started watching videos of other instructors doing the snatch. I watched the timing very intently, along with the arm position and the path the kettlebell took. I noticed that when they snatched, you could see the bottom of the kettlebell as it flipped over and it looked so smooth and effortless. When I snatched with the corkscrew, my arm was turning out the side, therefore the bottom of the kettlebell was turning out to the side. It also looked anything but smooth and effortless. It certainly felt like a lot more effort too.

I took all of these visual and verbal cues and turned them inward, so I could feel it and visualize what it should look like. I snatched in front of the mirror because at the time I didn’t have a way to video myself. The short story is that it worked! I was finally able to snatch without a corkscrew. However…

I still had work to do to improve my technique. I was now keeping my arm a bit too straight and casting the kettlebell out a bit too much. More training and more work ahead, but I took it all in and worked hard because I was determined to get better. Being a type-A perfectionist and a Capricorn served me well in this case. Not only would this extra work help me get better, but it would help me help my students.

I later assisted at an RKC for the first time and it was the first time with the new RKC. When I tested my requirements for Keira Newton, she gave me a few additional tips that added to the improvements I had already made.

Then I witnessed how we now teach the snatch from the top down. I was amazed at its simplicity, yet it was extremely effective. It seemed so much easier to learn and to teach others this way. I even told the participants how lucky I thought they were to now be taught this way.

Each of these improvements I learned and made over the years has helped make the snatch feel more fluid yet more powerful. My big a-ha with the cumulative effects of each of these improvements is in how much it has helped the efficiency in my movements. I was expending so much additional energy in the way I was snatching before. Watching that video from 2009 now, I can see that so clearly. It honestly looks painful to me.

My moral of this story is that our journey of learning and improving doesn’t stop once we earn our RKC. The RKC helps give us our foundation and our starting point for teaching. But there is so much more to learn and so much more to do after we become an RKC. What makes us really good instructors is our quest to always do more, always be better and always serve our students.

Keeping our certification current is not about paying money to re-certify and keep the letters behind our name. We must improve our own skills, which in turn helps make us better instructors. We can only help our students improve when we help ourselves improve. We can also better help our students when we have access to the most current teaching standards, combined with all the tools we learned before.

If I had never learned the current way of teaching the snatch and if I had never corrected my own technique, I certainly could have still taught people. But I believe that I wouldn’t be serving my students to the best of my ability. That is, after all, the reason why we seek out those 3 letters in the first place, right? Never give up, never stop trying to improve and don’t let the journey end with the letters.

****

Shari Wagner, RKC-II, CK-FMS owns Iron Clad Fitness in Denver, Colorado. She can be contacted through her website at IronCladFit.com, email: info@ironcladfit.com or by phone 720-900-4766. Follow her on Facebook: facebook.com/IronCladFitness and Twitter: twitter.com/IronCladFitness.

Filed Under: Kettlebell Training, Motivation Tagged With: Kettlebell, kettlebell certification, kettlebells, RKC, RKC Workshop, Shari Wagner, Snatch Test, workshop experience

How to Turbo Charge Your Big Six

September 23, 2015 By Phil Ross 4 Comments

Master RKC Phil Ross Kettlebell Split Squat

There are so many workouts, so many movements, and so many choices… So, what’s the best way to train? Variety is the spice of life, but is it necessary for achieving optimal fitness levels? As humans, we tend to get bored, so we are on a continuous quest for something different, something better. But on the other hand, we are also creatures of habit. We tend to go to the same restaurants, buy the same type of car or get the same breed of dog. We like a certain level of comfort and familiarity. Yet, we still yearn for the exotic, the different. This is part of the Human Condition. What does this have to do with training? Everything. 

We can achieve both with our training and quench the desire for both the exotic and the basic. I wanted to shock my system (and my students’) with the basics. Most people might think, “WHAT? With the basics? To shock our bodies, we need variety! We need to keep it off-guard! I’ve been doing kettlebells for years, show me some new moves!” Au contraire my friends, try the workouts below and treat yourself to some very basic movements performed in a method that will blow you away!

Even though the movements on the whole are very basic, the delivery and the proper execution of the sets require a great deal of skill. Due to the density and intensity required, these workouts are designed for a more experienced Girevik.

You have to be prepared to challenge yourself weight-wise as well. Your snatch test size kettlebell or heavier is required as a starting point for the workouts. Get set to challenge yourself with these basic routines… or are they really so basic???

We start all of our classes by jumping rope for 3 to 5 minutes. Then we perform a myriad of mobility, stretching and tension movements with the bo staff (dowel). After that, we perform some freehand stretching, crawling patterns or primal movements. But even then we are still not ready to put some iron in our hands.

Instead, we will generally perform three sets of three different bodyweight exercises. Some examples would be as follows:

  1. Scapular push-ups (20 reps), thoracic bridge (5 each side) & deck squats (10).
  2. Deep squats (20), pull-ups (80%), planks (various)
  3. Handstands or crow stands (1 minute), Table top bridges (10), Skewed squats (10 each side)
  4. 10 Ninja push-ups (push-up, table top bridge and frog squat)

When starting the cycle, I begin with the overall basics tested in the RKC Level 1. Then I move to the next workout and so on. Do them in the order prescribed for the best results.

Workout 1: RKC Basics:

Armbar, Lying side press and kettlebell pullover, 2 sets, 10 reps of each (each side, when applicable).

Now we perform the RKC Basics Complex. Do anywhere from 3 to 5 sets.

Phil Ross Backswing
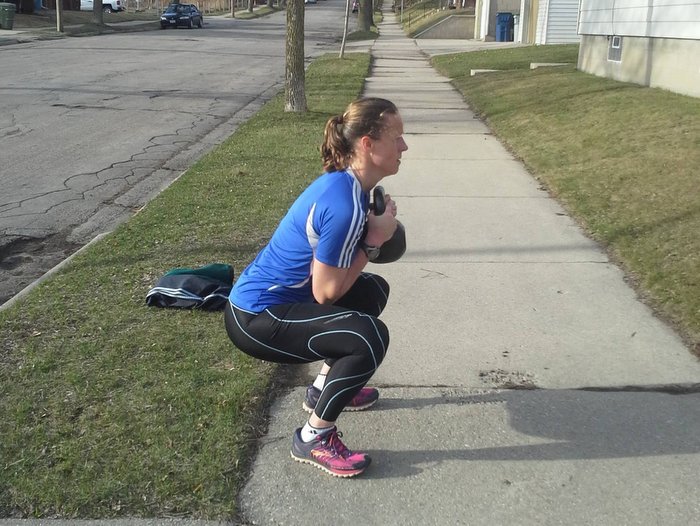
Perform these as one big complex, moving from one exercise to the next without rest. Take a one minute rest period between the rotations. This is a great method for prepping for your RKC Level 1, a re-certification, and it is also a good way to prepare for part of your RKC-2.

RKC Basics Complex: Use RKC Snatch Test sized kettlebells or larger

  • 1 Heavy get-up each side
  • 10 Double kettlebell swings
  • 5 Double kettlebell cleans
  • 5 Double kettlebell presses
  • 5 Double kettlebell front squats
  • 10 Snatches each side

Once you are done (with your 3 to 5 sets), do 3 sets of the following:

10 reps of single kettlebell split squats, followed by 10 reps of single kettlebell rows. Finish one side and then do the other. Rest for one minute between sets.

Cool down and stretch

Workout #2: TGU Pyramid and Swing Ladder

Once you have completed one of the warm-up circuits, preferably one including arm bars, we need to make certain that our shoulders and hips are prepped for the task ahead.

Phil Ross Get Up
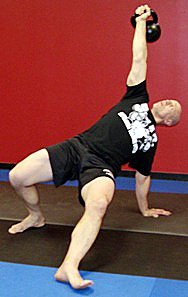
Get-Up Pyramid. Begin with your snatch test size kettlebell. Perform 5 reps on each side. Move up to the next sized kettlebell and do 4 reps on each side. Repeat this with 3 reps at with a heavier kettlebell, 2 reps with the next heavier kettlebell and then one rep with the heaviest kettlebell you are able to use. Once you’ve gone up, go down repeating the sequence in reverse. This will yield 60 repetitions. If you are not able to increase on every set, use good judgment and only use a kettlebell that you are able to safely perform the get-ups with proper form.

Next, we will perform a swing ladder. 5 reps of each, for 10 sets. Start with the snatch test sized kettlebell and move up each set while maintaining the same amount of repetitions.

I happen to have a plethora of kettlebells (well in excess of 100), so it’s easy for my students and I to change kettlebell sizes. Depending on your circumstances, you may have to improvise by doubling up kettlebells (double kettlebell swings, for example) or doing two sets at the same weight before moving on.

We will now work on our push-ups to round off the session. We do one set of standard push-ups, generally between 20 and 50 reps, depending upon your fitness level. Follow this up with 2 sets of plyometric push-ups, anywhere from 10 to 20 reps.

Cool down with some restorative stretching and you’re done.

Stay tuned for Part 2 of the Turbo Charged Series…..

Strength & Honor,
Coach Phil Ross

****

For more information on Master RKC, 8th Degree Black Belt, and Bodyweight Specialist Phil Ross’s strength and conditioning programs, videos (including The Kettlebell Workout Library), and workshops, please visit www.philross.com.

Filed Under: Kettlebell Training, Workout of the Week Tagged With: double kettlebell workout, Kettlebell, kettlebell workout, kettlebells, phil ross, RKC 6, Turbo Charge Your Big Six Series

Kettlebell Training, the Secret to an All American Distance Runner’s Success

September 9, 2015 By Phil Ross 3 Comments

Carleen Jeffers Running Track

Over the past 22 months, Carleen Jeffers has amassed an incredible amount of championships—and has set distance running high school and county records that were previously unbroken for decades. Brown University bound, Jeffers didn’t even consider long distance running until the summer of 2013. But in the fall of that same year, she earned the honor of First Team All County for Cross Country in the incredibly competitive county of Bergen, NJ—population, one million. During her first season, she went from not running track to First Team All County! Some top-shelf athletes train their whole lives and never achieve that level of success in our county. Prior to running, Carleen played softball, trained in the martial arts for many years, and began swinging kettlebells about a year before track.

Many distance runners don’t like the idea of resistance training, but they need strength! While bodybuilding routines or powerlifting will usually be counter-productive, kettlebells and bodyweight training can also provide relief from the repetitive movements of running. Tendons and ligaments will also become stronger which can prevent injuries and/or lessen their severity. Diaphragm strength also increases, and will supply the muscles with more oxygen. The body will process lactic acid more efficiently, allowing an athlete to have a stronger kick at the end of a race. Becoming stronger also has psychological advantages. Obviously, kettlebell and bodyweight training makes a lot of sense for runners.

Even during her highest mileage training of more than 60 miles a week, Carleen was able to maintain her muscle mass and avoid injury. While teammates suffered from stress fractures, shin splits and other common overuse injuries, her season was uninterrupted.

Carleen Jeffers With Kettlebell

She completed her senior year by placing 4th in the New Balance National High School track meet on June 19th, 2015, earning her High School All American status. Her performance of 16.58 in the 5K smashed both the former Bergen County and Ridgewood High School records and earned her Track Athlete of the Year for Northern New Jersey. That’s quite a few accomplishments for an athlete in a sport for only 22 months.

Carleen’s coach, Jacob C. Brown, of Ridgewood High School, is a coaching legend in the world of women’s track. He’s coached more champions and championship teams than virtually any other coach in the state of New Jersey. He advised her to keep training with kettlebells while she is in college—even if the college strength program doesn’t call for it. Coach Brown and I agree that that Carleen’s kettlebell training was the major differentiator in her success as a runner.

How did a 97 pound, 5’ 4” high school distance runner quickly achieve such a high level of success? Normally in track and field, athletes rarely improve from one contest to another, especially at higher levels of competition. The goal is to stay healthy while peaking for the States, Nationals or Worlds.

Carleen Jeffers Trail Running

Many runners—along with many in the general population—have rounded shoulders and poor thoracic mobility. And this situation is acerbated by the form these athletes adopt while running. Instead, they need to open up their chests to expand their lung capacity and increase blood flow.

The following are examples of Carleen’s training with kettlebells as a track athlete. We generally cycle our weekly training.

Warm-Up and Mobility:
Each session includes a warm up of jumping rope for 3-5 minutes, and a mobility sequence. The mobility portion includes six posterior chain and shoulder mobility exercises performed with a bo staff or dowel, armbars, thoracic bridges, deck squats or some other squat, hip opening movements, zombie rolls, and push-ups, to name a few. We also employed crawling movements along with quad and hamstring stretching.

Power Days:
Heavy lifting with sets of 5 to 10 reps. We have Power Days within three or more days before an event. If it’s a major event, we’ll leave a week between power sessions. These sessions include heavy swings, sumo squats, double kettlebell squats and heavy presses, bottoms-up presses, heavy get-ups, floor presses, heavy rows, kettlebell carries, and complexes. We also perform low rep plyometric versions of some of these movements.

Endurance Days:
Endurance days include chains with 30 to 40 reps, and weighted plyometrics of 10 to 20 reps per set. With kettlebells, we perform walking figure-8 lunges, walking swings, over-speed eccentric swings, ladders, and VO2Max snatch workouts. If we don’t do a VO2Max workout, we’ll end with “6 Minutes of Hell” or 5 minutes of kettlebell snatches (similar to part of the RKC Workshop testing requirements).

An example of a “6 Minutes of Hell” variation: Perform a clean, press, and a squat as a chain for one minute on one side, then change to the other side for the next minute. Repeat this for 6 minutes.

After an endurance day, we would make sure to have at least two days of rest before an event. Sometimes we might do an endurance day workout the day before an event, but with reduced weights, so the athletes would not be too sore to compete. However, we wouldn’t have an endurance day before a big meet.

PowerDure Days:
A good 40 to 50% of our weekly workouts are based on the PowerDure method. We perform the first half of the workout using mid-range power sets. We’ll do 3 to 4 sets of a mobility exercise along with an upper body push and pull, and lower body push and pull. 8 to 10 reps per set. Sometimes unilateral, other times bilateral.

In PowerDure, grinds are our primary focus. The second half of the session is dedicated to muscular endurance, while maintaining our bracing and the lock and pop of our ballistic movements. We focus on chains and circuits using workouts like our “Warrior’s Challenge”, “Scrambled Eggs” (see example below), and Tabatas. Heart rates are high and so is the sweat production! Afterwards, we cool down with mobility and flexibility training. I have a pool of several hundred workouts in the PowerDure category.

Bodyweight Days: These are performed once a week, especially close to the meets and sometimes the day before. We will either train with low reps (1 to 5) for strength or we will use timed circuits, moving from one exercise to the next while trying to hit 80% of our max reps. Generally, our bodyweight circuits are timed at 50 seconds on, 10 seconds off. We usually do 9 exercises for 5 rotations. During strength (low rep) days, we’ll challenge ourselves with the most difficult exercises. On bodyweight days, we always revert to regressions when the reps of the more difficult movements are no longer achievable. I find the bodyweight-only days round out the training since bodyweight exercises also improve balance and overall coordination.

Bergen County Track Stars 2014
Bergen County Track Stars

Example PowerDure workout with an intermediate variation of “Scrambled Eggs”

Our “Scrambled Eggs” circuit requires anywhere from 6 to 8 minutes to complete prior to the 1 minute rest between sets. There is no rest between the exercises, only one minute rest at the end of each set. This type of training prepares the body to deal with the lactic acid produced during sports or other strenuous activities.

Circuit 1: 2 sets

  • Two-hand kettlebell swings: 50 reps
  • Armbars: 10 each side
  • Side Press: 10 each side

Scrambled Eggs (1 kettlebell): 3 sets

  • Two-hand swings: 20 reps
  • Hand-to-hand swing: 10 reps each side
  • Snatches: 10 each side
  • High pulls: 10 each side
  • Swing squats: 10 reps
  • Waiter press: 5 each side
  • Single-leg deadlift: 5 reps each side
  • Bottoms-up press: 5 reps each side
  • One minute of rest


Strength and Honor!
Coach Phil

****

For more information on Master RKC Phil Ross’s strength and conditioning programs, videos (including The Kettlebell Workout Library), and workshops, please visit www.philross.com. Coach Jacob Brown’s website is available at jacobbrown.com. View Carleen Jeffers’ MileSplit profile.

Filed Under: Kettlebell Training, Workout of the Week Tagged With: Athletic Training, endurance athletes, fitness, Kettlebell, kettlebell workout, kettlebell workouts, phil ross, track and field, workout

The Who, What, Where, When and Whys of the Hinge and Wedge

April 15, 2015 By Nick Lynch 6 Comments

Margaret Domka Goblet Squat
Margaret Domka, 2015 Women’s World Cup utilizing the Goblet Squat

Three Examples of World Class Athletes Who Hinge and Wedge:

  • As seen above, Margaret Domka is performing a kettlebell goblet squat in her training for the 2015 Women’s World Cup. Goblet squats and hill sprints. She sprints when the goblet squat is correct, but not until then. First one must obtain the wedge and a proper hinge before sprinting. Margaret has shown a proper hinge and wedge which is why she’s fast and strong and therefore, going to the 2015 Women’s World Cup. Hurrah!
  • Nathan Mackinnon is ranked as the fastest skater in the NHL. Chris Hamelin is a gold medalist in speed skating. Both of these world-class athletes faced off in a short race. Both utilize a very strong and present hip hinge. To actually see what I’m talking about, take a second to search “Nathan Mackinnon vs. Chris Hamelin”. Pause the video when both athletes are in their starting stance. Take note of the hinge!
  • Nine-time gold medalist in sprinting, Carl Lewis, clearly utilizes both the hinge and wedge. His body is connected as one. Take a second to Google Carl Lewis and you’ll see a 0:54-second video. Watch how Carl moves his lower body without breaking the hinge. Carl runs like a 9-time gold medalist, not like a bulldog.

Carl Lewis, Margaret Domka and Nathan MacKinnon are not the only great athletes to have utilized a powerful hip hinge and wedge technique. Spend a few minutes watching the greats such as Michael Jordan in his defensive position, 2014 #1 center in the NFL Alex Mack, and so on. There is a secret which has been exposed thanks to all of us and you within the RKC community and that is this; Hardstyle training works for both high level athletes and pretty much everyone else too!

What is the Hinge and Wedge?

Hinge: move through your hips with minimal flexion through the knees. Stand on your right leg and raise your left knee up to 90 degrees–that left hip would now be hinged. Optimal hinge is approximately 80 degrees as seen on the image below. We hinge to load the largest and most primary muscle groups in the body, the gluteal muscles. Because we’re utilizing primary muscle groups during a hip hinge, our explosive power is greater. Bigger muscles provide bigger output. This is also the main reason why people who use Hardstyle kettlebell training techniques burn so many calories per minute. “They were burning at least 20.2 calories per minute, which is off the charts. That’s’ equivalent to running a 6-minute mile pace.” -Dr. John Pocari, UW-Lacrosse. These large muscle groups require much higher caloric output to function.

Andrea Du Cane, the longest standing and first female Master RKC is showing an approximate 80-degrees hip hinge with the single arm swing.

Wedging: is tensing the whole body while in a standing position. Your shoulders are packed, hips and knees are locked out, and abdominals are at maximum tension. We wedge to connect our lower body with our upper body. When the lats are contracted they pull down on the shoulders and bring our upper body closer to our center of gravity and hips. Wedging connects the upper and lower body as one! Think of a standing Hardstyle plank. It’s possible to achieve an almost constant wedge-like posture throughout the movement with enough practice. You know who utilizes such a posture with sports? Only the best!

Two Awesome Exercises for Hinge and Wedge

Two exercises which enhance the hinge and wedge are the Hardstyle swing and Turkish get-up. Regardless of your skill level with kettlebells, the Hardstyle technique will enhance your overall athleticism. With 8/10 runners in America injured, it’s clear we have some serious imbalances which need fixing. First we’ll need to get strong enough to hold the wedge while running and performing other physical activities. Ever seen a bulldog walk? Ever noticed the similarities between a bulldog’s stride and someone jogging down the street? Arms are crossing over the torso while the legs are flopping all over the place. Not good!

3 Tips for Enhancing the Wedge and Hinge in the Turkish Get-up

  • Hold the each stage for 5-10 seconds while packing the shoulders and pushing your knee out
  • Shrug and re-pack each stage of the get-up
  • Squeeze the handle as hard as you can at the pause in each stage of the get-up

TGU at Milwaukee RKC Workshop

If hinging your hips and wedging your torso is good enough for the best athletes in the world, I think it’s safe to say it’s good enough for you, me and our loved ones. When I get a room full of athletes at the start of another season and tell them we’re not touching any weights until we get the hinge and wedge down they look at me like I’m nuts. But after 4-6 weeks of hinge and wedge practice they double their mobility, speed and strength. Although they still look at me like I’m nuts they’re happy with their gains. Start simple; train simple and the results will be simply amazing!

I’ll leave you with a picture from the 2014-2015 MSOE (Milwaukee School of Engineering) Men’s Hockey Team. We started the season with loads of injuries, a losing record and 14 freshmen. We’ve finished the season nationally ranked, zero injuries, beat the #1 team in the country and went to the semi-finals in the toughest conference in the country. We hinge and wedge!

MSOE Hockey Team

***

RKC Team Leader Nick Lynch is a Strength and Conditioning Coach at Milwaukee School of Engineering University (MSOE). He owns Superb Health Milwaukee, a kettlebell studio in Milwaukee, WI. Most recently, he became an RKC Team Leader. He has 13 years of full-time training and coaching experience and a lifetime of wellness education. Nick lives in Milwaukee, WI with his wife Natalie and son Weston.

Filed Under: Kettlebell Training Tagged With: athlete examples, athletes, Athletic Training, hinge, hinge and wedge, hip hinge, Kettlebell, kettlebell swing, kettlebell technique, Nick Lynch, wedge

Successful Training with Kettlebells–Four Things to Consider

December 3, 2014 By Sebastian Müller 6 Comments

Sebastian Muller Kettlebell Bottom Up

When I started training with kettlebells, and right after I went to a beginner’s kettlebell seminar, it was really frustrating for me to only have a very restricted number of exercises for my training.

I asked myself, “How can I train my whole body with only these few exercises?”

Well, back then I had no clue and had not yet learned the “real” kettlebell training principles. I was taught the basics at the seminar, but I didn’t totally comprehend them. Understanding them took a much longer time.

So I started training by myself, and it ended up taking me a year or longer to fully understand kettlebell training and how I could really use it.

Here are four things that helped me get much more out of my kettlebell training:

1. Strength is a skill.

“How obvious is that slogan?” I thought when I’ve heard it for the first time. Of course, strength is a skill, just like endurance, speed, and mobility. It’s also a matter of how in shape or fit you are. Why are the guys making such a fuss about it?

“Train with kettlebells and you’ll become stronger”, I always thought. But when I understood that I had to train the skill of “strength” to become strong, that’s when I started to get the real benefits from the training. I stopped counting sets and reps and started to practice, to grind movement patterns. I worked on improving my technique and listening to my body while I was practicing.

A good example to explain this “skill” approach is the handstand. When I want to start training handstands, I can’t just start off with the idea like, “Today I’ll do 3 reps of handstands, where I stand for 30 seconds unsupported in the middle of a room”. That’s not how it works. Instead, you should practice handstands. You need to feel what’s important for doing a handstand—when, where and what muscles need to be used. Even if that means 20 attempts at 3 seconds against a wall in the beginning. If you are paying attention, you’ll know when you need to stop, your body will tell you the exact moment (and I don’t mean total muscle failure).

It’s the same with kettlebell strength exercises. If you want to improve your strength efficiently, you need to first master the movement itself. When you’ve learned what and when to contract, and how this movement pattern feels with a certain weight, it is easy to develop strength. If you can’t press one weight it means you’re only allowed to practice that movement with lighter weights.

2. Quality before quantity.

Quality before quantity counts especially when practicing. Once you’ve mastered a movement with weights, movement quality should always be at the forefront. If quantity is more important to you, then reps and sets will always be more important to you than the quality of the movement and body perception.

If you are doing 1 set of 10 reps with a perfect technique, followed by 2 sets with 10 miserable reps just to get to 30 reps, what will your body learn from this session?

I’ll tell you. Your body will get really good at forcing itself through routines. No matter if it needs to compensate here or there, over time, the faulty pattern will be reinforced. Unfortunately, that’s exactly what you see with many recreational athletes. This quantity approach will work until the unavoidable injury and then it’s too late.

What the head commands, the body will always carry out!

So, practice and train smart. Quality is king!

3. Kettlebell training trains the entire body.

At first, I always thought that many different exercises were necessary to ideally train the whole body. That was why I was not satisfied after my beginner kettlebell course. This idea mainly came from my own training history. Today, I know that I can train my entire body with just a few exercises with better results than when I was using 10 different exercises for the same purpose.

There is a big difference in knowing that kettlebell training equals training the entire body and understanding kettlebell training equals training the entire body.

Often, people will ask for more exercises after a few reps of double swings followed by double clean & presses. Instead they should relax, because they have already trained their whole body.

I can’t stress that idea enough—if you practice and train correctly, you are using your whole body on each kettlebell exercise. All muscles need to work together efficiently. Sure, you can always focus on a specific body part, but you are always demanding your body as a whole.

Sebastian Muller Kettlebell Press

4. 80% is enough.

This concept is from Master RKC Max Shank and it changed my training forever.

If you can do 5 reps, only do 4. If you can do 10 reps, leave it with 8. Unfortunately, when I write about not training to muscle failure, people sometimes take that literally and just put themselves into their comfort zone. Then 80% quickly become 50% or less.

When I write about 4 instead of 5 reps, I mean your absolute maximum of possible repetitions. If you can do 5 repetitions and not a single one more, then these are your maximum repetitions in this progression or exercise. Or, 100%.

I keep seeing clients who sometimes spare one rep of their 50% maximum. That’s unfortunately not how this principle works, and it often happens subconsciously. If you don’t know your numbers, it’s hard to know where you stand.

For that reason, it’s a good thing to test where your maximum is once in a while (always with a good spotter, please). Otherwise, it’s very likely that you will keep the reps you do too low, which is as counterproductive as always training to 100%.

Earlier, I wrote about the meaning of practicing, and here, the 80% idea works perfectly. Listen to your body. Sets and repetitions are overrated. I would view them more as flexible guidelines and not carved into stone. Your condition on a given day will always effect your training, and should not be ignored.

If you grimace horribly during training, can’t breathe during an exercise, or your technique falls apart, chances are you were training to your 101%. Pay attention and stop before this happens. Just because your plan was to do 5 sets of 5 reps with weigh X today, it doesn’t mean your condition on that day will allows it to happen.

Let me tell you something—you will still have a good session if you only do only 4 reps in the third set and possibly two in the last two sets. If these reps were your 80%, then congratulations, you suppressed your ego and trained intelligently. And another thing, the kettlebell does not excuse foolishness.

Sebastian Muller Challenge

Save your 100% for competitions or challenges when it’s all or nothing, and perform your training sessions at 80%. If you are not in a competition sport, challenge yourself once a month. Try to set a record on an exercise. That will also help you to know your numbers. You are keeping a training journal, right?

It took me forever to incorporate these points into my kettlebell training, which was probably due to my training history and ego. Maybe you’re not as spoiled and have an ego knows it’s place in everyday life. If so, then get going, get yourself a kettlebell, learn the techniques, and start training!

***

Sebastian Müller, RKC Team Leader, PCC Instructor, FMS, and Primal Move Instructor, trains and instructs at the KRABA location in Wiemar, Germany. He can be contacted by email at: info@kraba-erfurt.de and his website: http://www.kraba-erfurt.de.  His Blog is Vereinfachedeintraining.com

Filed Under: Kettlebell Training, Tutorial Tagged With: full body training, importance of practice, Kettlebell, kettlebell training, kettlebell training principles, KRABA, Sebastian Muller, training strategy

Kaizen–The Ancient Japanese Art of Continuous, Incremental Self-Improvement

November 5, 2014 By Florian Kiendl 6 Comments

Florian Kiendl Beast Kettlebell SwingI was introduced to this term years ago when I worked as an IT Consultant for a German automotive supplier. I learned that it was this ancient Japanese concept that transformed Toyota from a small and inefficient car manufacturer into the de facto worldwide industry leader in production efficiency and accuracy. Today virtually all major car manufacturers use the Just in Time concepts invented by Toyota to produce their products. These concepts can save tons of money in production costs while maximizing quality at the same time.

At this point you might think: “And what has this to do with me? I’m a fitness professional!”

Think again! What kind of results might a simple concept—with the power to turn a young company that started out producing the cheapest and most error prone cars on this planet into an industry leader in a few short years—produce if applied to your business or training?

Interested? Then stay with me.

What is Kaizen?
The roots of this concept lie deep in the Japanese culture. It has enabled people to create some of the most magnificent works of art and craft in history. The approach is simple and yet extremely efficient in itself.

Instead of working their butts off until a project is finished or has completely failed (as most westerners tend to do) the ancient Japanese would regularly sit down and assess the process of creation and make minor adjustments along the way. This way they can gain a much deeper understanding of the task at hand, enabling them to complete it easier with better results.

Florian Kiendl One-Arm Kettlebell SwingKaizen and the Hardstyle Kettlebell
For us as Trainers…

Applied to training this might be the idea of starting out with a given program and adjusting it little by little to create the most effective version of that program along the way—instead of running a full cycle of it then looking at the results and starting over with a completely new program if they are less than satisfactory.

Kaizen is about digging deep into the process and learning how to execute it in the most efficient way during the process, rather than assessing the results and making adjustments afterwards. In a way this fits nicely to our Hardstyle approach for kettlebell training. Instead of banging out as many reps as possible and adding as much weight as possible to any given move, we try to improve the technical execution of the exercise to make it as powerful and crisp as possible.

The biggest problem with Kaizen for our western minds is that it takes more effort to track the improvement because the changes are incremental. If you improve your swing, making it more powerful while keeping the weight and reps the same, it is difficult to assess your progress. In contrast, if you step up in volume or weight, the progress can be easily seen by anybody. However, my experience tells me that stepping up in volume or weight too fast can hinder your progress—especially with the ballistics.

What can Kaizen do for your Business?
The biggest impact of using the Kaizen approach will be to your business. Whether you are an independent trainer or a gym owner you will profit from it by:

  • The almost automatic adaptation to changes in your environment.
  • You can avoid reorganizing your business, which can be a pain and will always lessen your income.
  • You will have the systems in place to respond quickly to your customer’s needs
  • Your employees will feel like they can actively influence their work environment and will be happier and more productive.

When I used to work for Microsoft as an IT Consultant, they had the policy of reorganizing the entire company every other year. Aside from the obvious—adapting to a fast changing market environment—the idea was to keep the company (and especially the employees) agile and hinder the growth of rigid structures. However the reorgs where a pain for most the employees and often did not make a lot of sense. Even a small business like a garage gym can be quite complex and it can be difficult to predict the side effects of a major change. By keeping the changes small and confined, you can avoid disturbances and more easily observe which changes are effective and which are not.

Take advantage of the Kaizen approach in 5 easy steps

Step 1: Know your Destination
This should be clear but every so often I meet trainers who do not think about what they want to achieve. We are an industry of enthusiasts, who do what we love. People whose first priority is making money work in banks or sell insurance contracts. Don’t get me wrong, doing the things you love for a living is the best thing you can do for yourself and your environment, but if you do something for a living it must sustain your lifestyle. Training 10 people in your garage gym is a nice pastime but it won’t pay your bills.

So, you need to be clear about where your business should be next year, the year after, or in five years. Knowing your destination gives you the means to navigate through the chances and risks of your daily business and eventually arrive somewhere.

If you are a trainer in a gym, you might have the feeling that this is something you don’t have to worry about. But please follow me on a little thought experiment. First take a moment to sit down and ponder the ups and downs of your daily job. Now try to picture yourself in 10 – 15 years doing the same job you do today (considering factors like family, children, getting older). If this is a pleasant thing to imagine, then congratulations on having the job of your life. If not, you need to decide where you want to go from here.

FlorianKiendl Double Kettlebell Press

Step 2: Embrace Change
There is a German saying that goes like this:

“If the wind of change is blowing, some people build walls – others build windmills”

Make sure you belong to the latter group. For many of us it is quite unsettling that everything is constantly changing. If that is the case for you, think of it this way—the only thing that is truly constant is CHANGE. If you expect and anticipate changes to happen, you can probably profit from them. If you try to keep things as they are today, it is only a question of when you will be overtaken by reality.

Step 3: Take time to analyze your situation
This is hard, but absolutely critical. If you are like me, sometimes it feels like everything happens at the same time and you have barely time to react to the most urgent demands. However you can succeed in the long run if you are reactive mode. It is absolutely critical that you make it a habit to regularly assess your situation. Only this can give you the power to improve your situation and avoid problems.

  • Actively ask for feedback. Whether they are your clients, employees, or business partners actively ask them to tell you what they like and what could be improved.
  • Make sure your clients have the means to give you anonymous feedback. If you wait until they are prepared to tell you to your face, you have probably lost them as a customer.
  • Have a regular meeting with your staff to you ask them for their take on what’s going on. In this meeting you should also collect ideas about what could be improved.
  • Take time to ponder the information you’ve gained on a regular basis. Have a scheduled time at least once a month to review all the information. This can be a done on your own, but if you have employees or coworkers it may be more productive if you have them with you.

Appreciate all feedback whether it is good or bad.
All information you gain about your business is valuable—whether or not it makes you feel good. If you follow the steps I laid out, you will soon realize that negative feedback is actually much more valuable than praise. Praise is good for marketing, but moaning and groaning improves your business.

As an RKC Instructor you will be used to receiving good Feedback from your Clients, but do not fall into the trap of assuming the few who tell you are otherwise are weirdoes or moaners – they are probably those clients who trust you most and want you to succeed.

Step 4: Act
Whenever your sources have brought something which can be improved to your attention, determine if you have the means to improve it. In many cases, it will not take a big budget or much planning to implement smaller improvements. Go for the quick wins first instead of the big projects. The bigger the change, the more risk is involved.

Florian Kiendl Board Breaking

Step 5: If you do not act, explain why.
To gain the information you need to steer your business, you rely on the people around you. It’s in your best interest that they continue sharing their opinions with you, and they will continue to if they feel their voices are heard. There is nothing more frustrating than sharing information to help the business improve only to see no improvement or reaction . Make sure you spare the people around you this frustration.

***
RKC Team Leader Florian Kiendl is a second degree black belt in Tae Kwon Do and runs a Martial Arts Gym in a small town close to Munich (Germany). He made it his mission to help his students to improve their movement and overall health. In his search for ways to overcome the movement restrictions of his students (and his own) he found the RKC and now works together with Master RKC Robert Rimoczi and others to help as many people as possible to gain back their Strength and Agility.

He writes a regular Blog at blog.kettlebellgermany.de and offers workshops all over Germany teaching the RKC Kettlebell exercises: KettlebellGermany.de.
If you have questions or comment on the article feel free to email him at florian@kettlebellgermany.de

Filed Under: Coaching, Fitness Business Tagged With: business improvement, business strategy, continuous improvement, fitness business, fitness business improvement, fitness strategy, Florian Kiendl, Kaizen, Kettlebell, kettlebell technique, self improvement, strategy, technique

Using DVRT Training to Improve Your Turkish Get-Ups

August 13, 2014 By Steve "Coach Fury" Holiner 2 Comments

Coach Fury Kettlebell Get-Up

It’s time for another fitness tip from your man Fury. The Turkish get-up is one of my all time favorite lifts. The relative simplicity and overall impact of the TGU make it an absolute desert island movement in my book. Few things get me more excited than a beautifully executed TGU (especially when heavy). Sometimes we fall short of beautiful and need to think “out of the box” on how to hit that high standard we strive for. This is where Dynamic Variable Resistance Training (DVRT) and the Ultimate Sandbag (USB) comes into play.

Coach Fury TGU with Human Weight
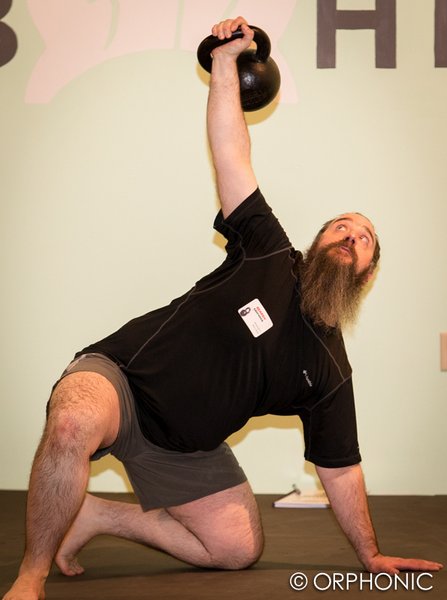
Personally, I find the three hardest parts of a get-up (regardless of weight) to be the initial roll to elbow, the half kneeling to stand and the final roll from elbow to your back. Whether it’s a kettlebell, barbell or the occasional human being (not recommended), I usually know I’ll make it (or come close) if I get to the elbow. The half kneel to stand will usually by my next sticking point. The roll back down from the elbow is often more nerve racking from a self preservation standpoint.

I think most will agree with me on these three positions within the TGU sequence. Here are three DVRT Ultimate Sandbag Training exercises that will help the cause.

1. Ultimate Sandbag TGU. In the DVRT TGU, the USB is loaded over the shoulder and it will drape over part of the back and chest as you move. Some key points here. Being shoulder loaded removes the leverage generally provided by the locked out arm of the kettlebell TGU. The USB is literally pushing you directly into the floor while sand in the front and back of the USB is pulling downward too. The USB is doing it’s best to keep you on your back. What’s awesome about this, is that you truly have to develop the rolling pattern to get to the elbow. You are forced to get that proper diagonal roll from the shoulder to opposite elbow. Given proper thoracic mobility and the ability to lockout the arm, a kettlebell TGU to elbow will feel easier after nailing this down. This delivers the same payday on the descending elbow to back roll. The USB TGU also removes all fear of dropping a bell on your head while training the roll to and from elbow. Strength+Safety=Glory.

2. USB Lateral Lunges. Damn you sagittal plane! That half kneeling lunge to stand is a stability monster when you’re doing a TGU. Sometimes, instead of stepping back from a problem it is best to step sideways. There are a bunch of killer USB Lateral Lunge exercises and any of them will help with your half kneel to stand. Training your lunges within the frontal plane (side to side) will help you build some untapped stability. Spend some time with USB Lateral Lunges and watch how your half kneel to stand becomes a thing to be feared.

3. Rotational Lunge. This move delivers similar benefits to the lateral lunges but now we’re moving in even more plains of motions. Transverse much yo! This will bullet proof your TGU. Ever feel those legs and hips wobble under a heavy getup? Get good at rotational lunges with a USB and see how they feel know. The RT adds another killer bonus: by snapping the hips similar to a swing, but within a lunge pattern, you will very likely find it easier to simply stand up a helluva lot quicker in your TGU.

Now those are three ways to use DVRT/Ultimate Sandbag Training to help your Turkish get-up. I’d bet these lifts would help your deadliest, squat and press too. Doubt me? Try it. These aren’t meant to be quick fixes or voodoo tricks. Step away from your TGU for 1-3 weeks and focus on one or more of these DVRT exercises. Then check out their impact on your TGU and smile big in the post PR selfie you just took.

Please keep me posted on your progress.

I suggest digging deeper into the DVRT Training system by attending a workshop or one of our certifications. Click here to find dates and locations. Yours truly will be leading a DVRT Level I Cert and an HKC Kettlebell Cert at Kathy Dooley, Joe Boffi and Jason Kapnick’s place Catalyst S.P.O.R.T. in NYC on November 1 and 2nd. You can register for one or both (big discount on both) through the link.

I hope to see you there.

-Fury out

Steve “Coach Fury” Holiner, DVRT Master Instructor, Senior RKC, Original Strength Instructor, is a proud member of the Ninja Army training staff at Mark Fisher Fitness in NYC. Fury is available for classes, semi-privates, instructor training and programming at MFF. He also has availability for private training at Five Points Academy and Catalyst S.P.O.R.T. Check out www.coachfury.com, facebook.com/coachfury and Twitter @coachfury for more info.

Filed Under: Tutorial Tagged With: Coach Fury, corrective exercise, dvrt, get up, how-to, Kettlebell, Steve Holiner, turkish get up, tutorial, video tutorial

  • Page 1
  • Page 2
  • Page 3
  • Interim pages omitted …
  • Page 5
  • Go to Next Page »

Primary Sidebar

Featured Products

previous arrow
BOOK-RKCBookofSnC
HardStyleKettlebellChallegeDanJohn700
BookCoverMasterTheKettlebell1
RKCiconKettlebell512
KettlebellGoddessdv040
next arrow

Recent Posts

  • RKC Big Six Workout
  • The Kettlebell Swing & Low Back Pain
  • Key Kettlebell Exercises To Help You Create Better Balance
  • How to Most Effectively Use Kettlebells to Meet Your New Year Goals
  • 1 Exercise That Checks All The Boxes
FOLLOW US ON TWITTER!

Archives

Copyright © 2025

Dragon Door Publications / The author(s) and publisher of this material are not responsible in any manner whatsoever for any injury that may occur through following the instructions or opinions contained in this material. The activities, physical and otherwise, described herein for informational purposes only, may be too strenuous or dangerous for some people, and the reader(s) should consult a physician before engaging in them.