• Skip to main content
  • Skip to primary sidebar
  • Home
  • Contributors
    • Matt Beecroft, Master RKC
    • Martijn Bos, Master RKC
    • Andrea Du Cane, Master RKC
    • Angelo Gala, Master RKC
    • Chris Holder, Master RKC
    • Steve Holiner, Master RKC
    • Dan John, Master RKC
    • Mike Krivka, Master RKC
    • Thomas Phillips, Master RKC
    • Robert Rimoczi, Master RKC
    • Phil Ross, Master RKC
    • Max Shank, Master RKC
  • Workshops
    • HKC Workshops
    • RKC Workshops
    • RKC-II Workshops
  • Find an RKC Instructor
  • Resources
    • Articles
    • Forums
    • Kettlebells
    • Products
  • Blogs
    • PCC Blog
    • Strong Medicine Blog
  • Archives

RKC School of Strength

Official blog of the RKC

get-up tutorial

The Turkish Get Down Press and the Road to Windmills and Bent Presses

November 12, 2021 By Dan John 2 Comments

Dan John Performs a Kettlebell Get Down Press

Let me cut straight to the point, something I rarely do: the Turkish Get Down Press (TGDP) has allowed me to speed up the teaching process of three of the most difficult kettlebell exercises to teach and master:

  • The Turkish Get Up
  • The Windmill “Family”
  • The Bent Press

Actually, the TGDP has helped me speed up the teaching of the entire pressing family, too, but I like my world to fit neatly in threes. Certainly, you may know the exercise, but like The Rock’s world in Jungle Cruise, there seems a whole lot more to discover

I liked the movie. Just saying.

Committing to a few rounds of this lift might save you a lot of time and energy later trying to explain the hows and whys of doing the movement.

If you know how my brain works, you also know that this “all starts with a story.” We, my morning training corps (my Intentional Community), were having a typical gym discussion about what to do next in the workout. For the record, not EVERY thing we do in training is computer generated perfection.

Actually, the BEST things we do are usually cobbled together. Not every group can handle a Jazz Improv training program but it seems to work with us as we are a mix of ages, occupations and experience.

I had just returned from a workshop. At said workshop, someone asked about having a workout with just a single kettlebell and a basic knowledge of Tim Anderson’s Original Strength. (I include an example at the end) and we talked about how much I love, love I tell you, doing the Half-Kneeling Press for home trainees. Including me.

Done correctly, with the 90-degree angles at the knees and a tall position of the body, the Half-Kneeling Press stretches, mobilizes, and strengthens a host of bodyparts and “just feels good.”

And, of course, the question came up.

“Which hand with which knee?”

You see, with this press varietal, you have some options. You can press with one arm…or two. You can have your left knee down or your right knee. As you know, in lifting there are three knees:

  • The Left Knee
  • The Right Knee
  • The Hiney

I crack myself up. By the way, spellcheck does NOT like my spelling of “hiney.” For your illumination, I give you the dictionary explanation of my awful joke:

The first records of hiney come from the first half of the 1900s. It is derived from words based on the root word hind, meaning “the back,” as in behind (another euphemism for the buttocks) and hindquarters. The suffix -y or -ie is used to add an endearing or euphemistic quality to words—to make them cuter or more familiar, as in granny and doggie.

Dan John Demonstrates part of the Get-Down Press Sequence with a light kettlebell

We came to a decision as a group that the left knee should be down if pressing with the right hand and the right knee should be down if pressing with the left hand.

Why?

The Turkish Get Up!!!

Actually, one would learn this doing a correct Turkish Get Down. And, for total candor, it is the Turkish Get Down Press that got us thinking of this reason.

You don’t know the Turkish Get Down Press? Let me say this: for speeding up the teaching of the TGU, I have yet to find anything better than the TGD Press. It’s very simple:

At each step of the TG Down, add a press. I am telling you this now also: go lighter than you think.

Simply, here you go:

  1. I suggest snatching the bell up to the top. You can certainly clean and press but that adds an additional press to a lot of presses.
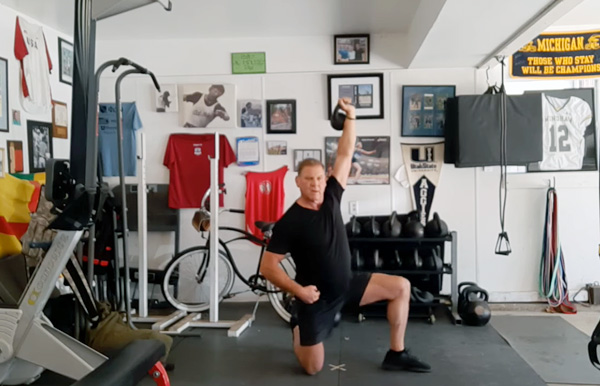
  2. Standing tall, press the bell.
  3. Step back with the foot opposite the bell into what I call the Cross Country Ski Position. For the record, the “key” to the TGD is a longish step back as it gives you space to move later. The knee will get close to touching the ground, but don’t let it touch. Press the kettlebell.
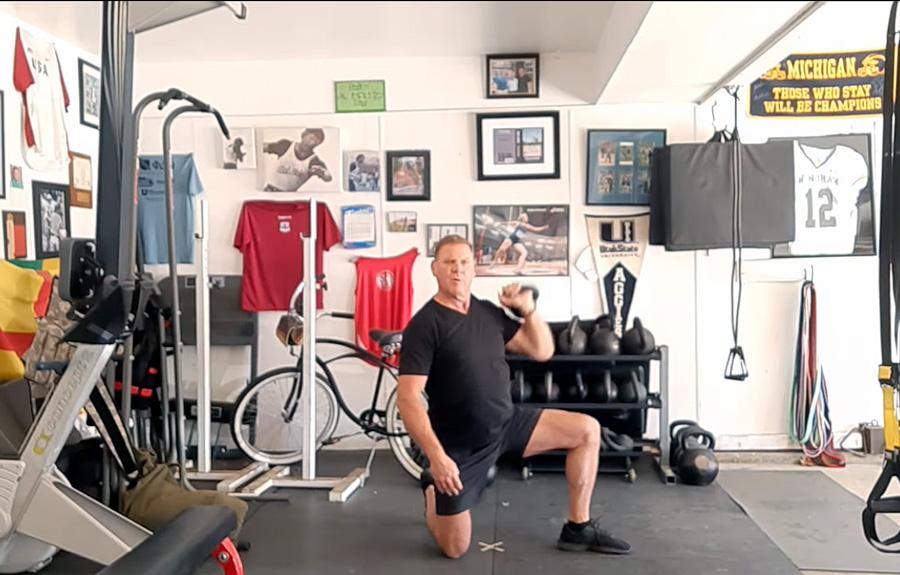
  4. Bring the knee down to the Half-Kneeling position. Press the bell.
  5. Windshield Wiper the front foot. I recommend pressing the bell here, too.
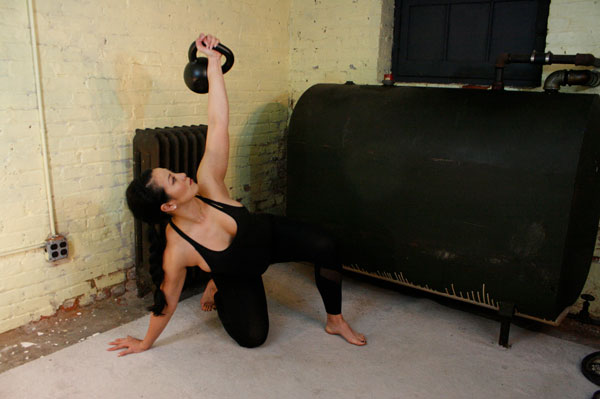
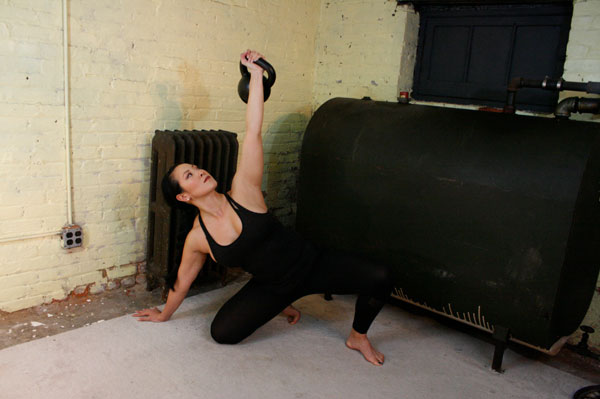
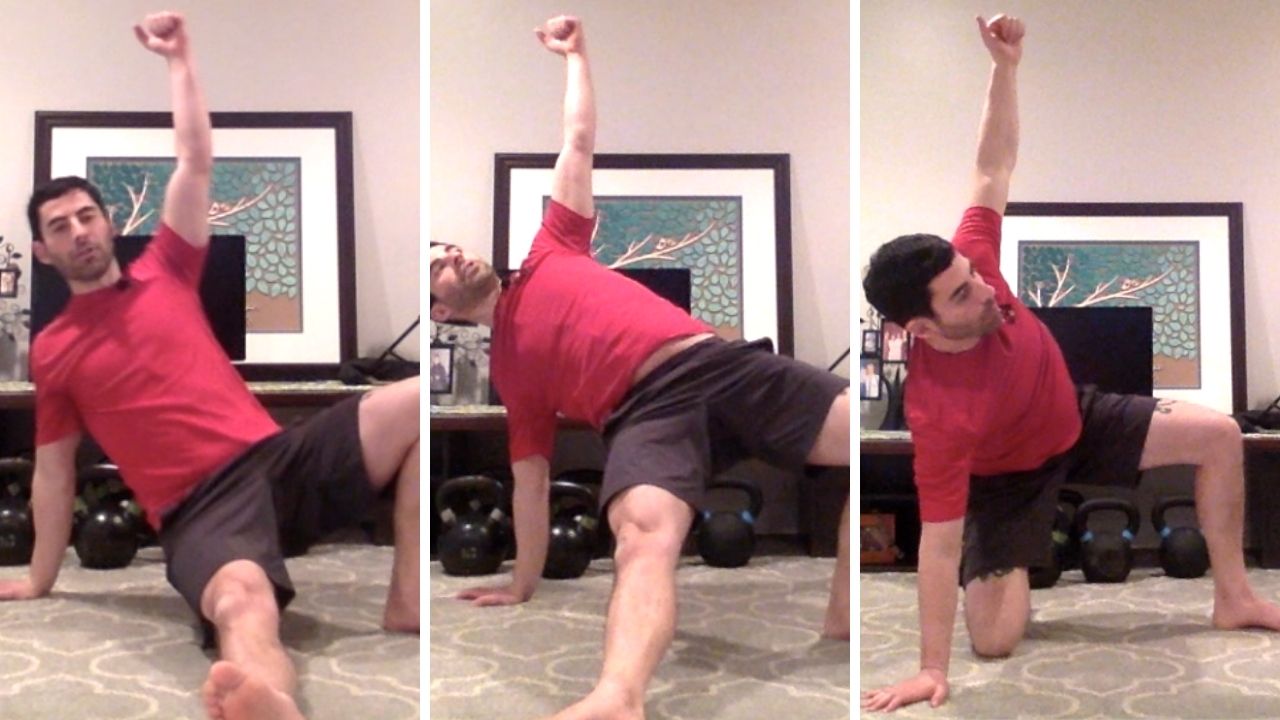
  6. Hinge back and bring the free hand to the floor. The hand, knee and foot should all be in a line. The knee should bisect that line. Press the bell.

(It should feel like a warmup for the Bent Press because it is a warmup for the Bent Press) Look, an asterisk: * (See Below)

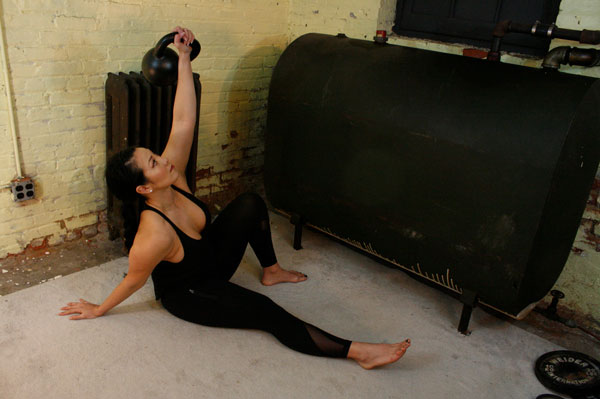
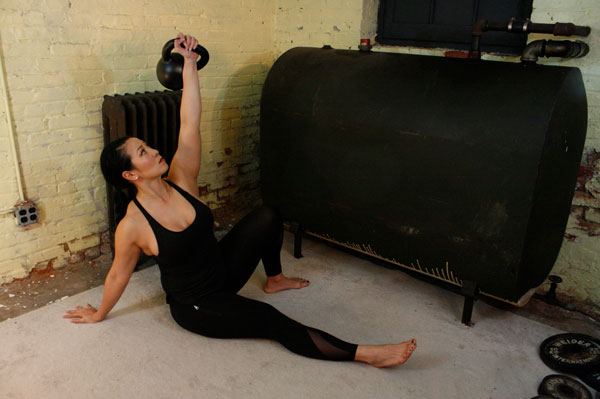
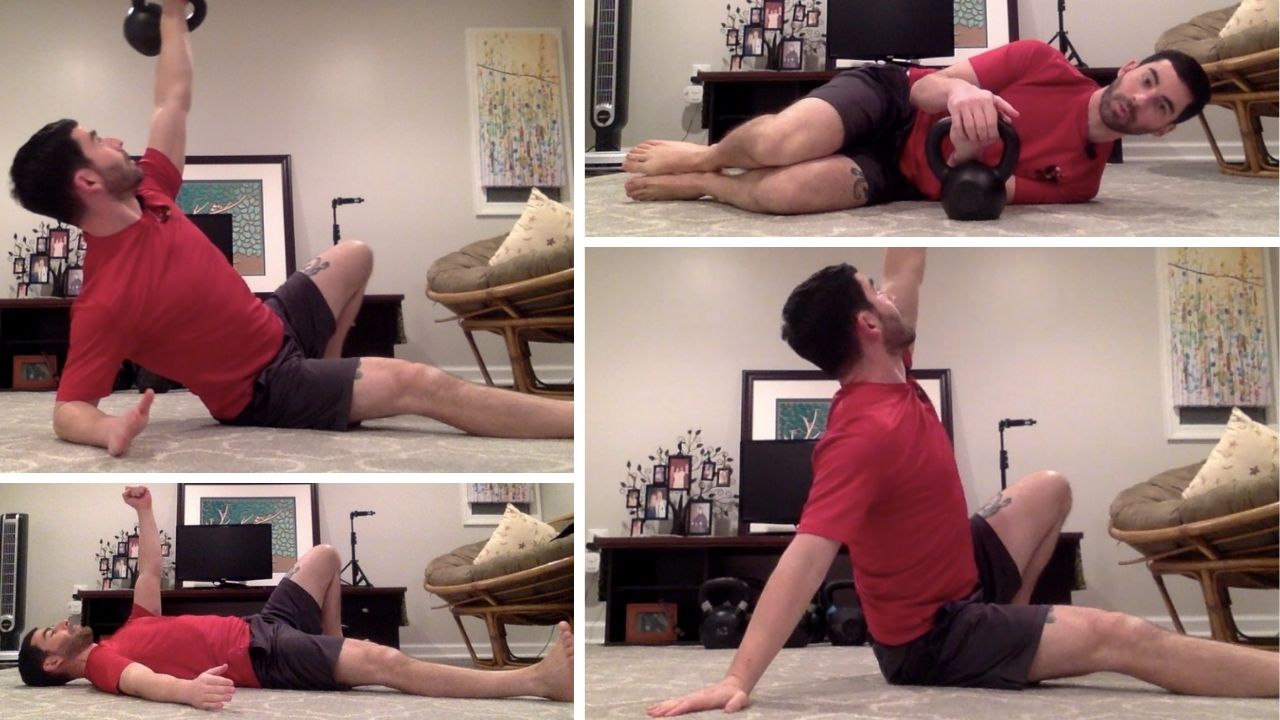
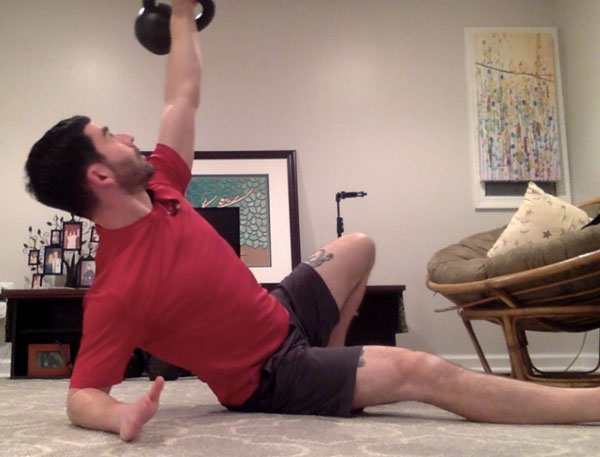
  1. Sweep the butt through to the Tall Sit Position. Press the bell.
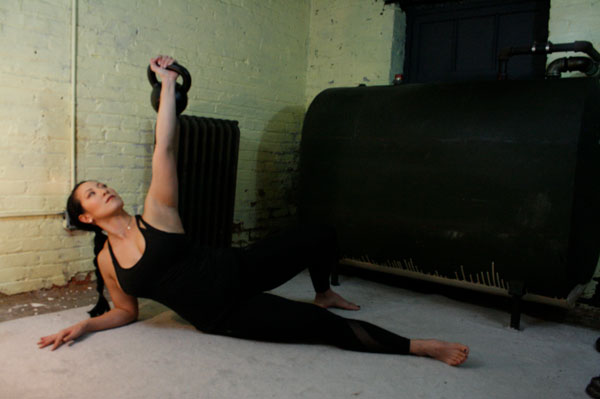
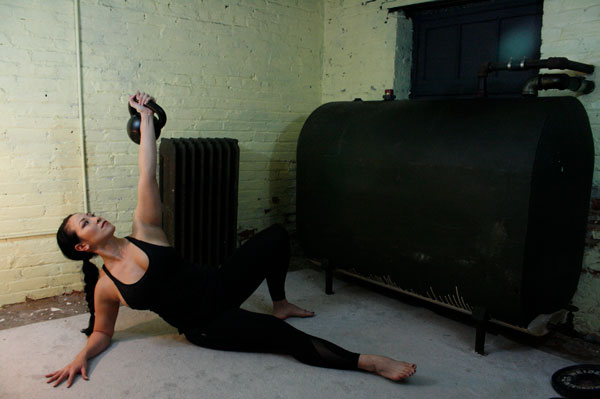
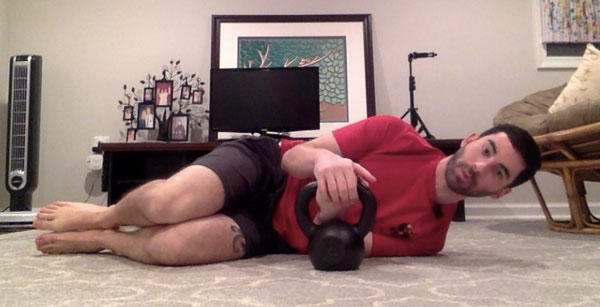
  2. Roll to the elbow. Press the bell.
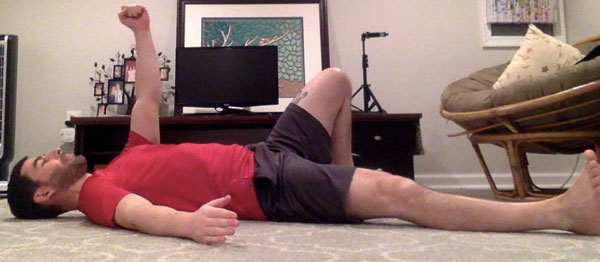
  3. Roll to the floor. Press the bell.
  4. With BOTH hands, bring the bell down, cuddle it, roll to the side and release the bell safely to the floor.

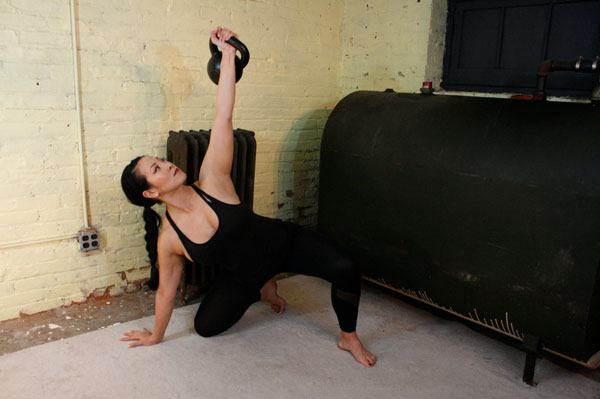
*Position Six is called the Kneeling Windmill and will be the focus of the next article in this series.

Let’s watch someone demonstrate it. The model seems to know what to do.

That’s eight presses. That’s a lot of presses. Moreover, as you will discover, the press grooves were different almost every press. I find that my shoulders feel better after this exercise. This movement can be done for mobility work and this is what I use the move for in my own training.

The TGDP can also be done for hypertrophy. If you did three rounds of both sides for eight total reps per round (24 total presses per hand), I’m just guessing something good would happen. Perhaps you would get those “shoulders that are the envy of your friends” that I used to read about in the muscle magazines. My friends envy my naturally curly hair (with a nod to Peanuts).

So, yes, this exercise is a great exercise. For my work with kettlebells, there are other values to this movement.

First, I’m not sure there is a better way to teach the Turkish Get UP. The Turkish Get DOWN with presses stops the participant at several key points and holds these positions in place. If you can’t get the press groove, there is a good chance the bell is in the wrong place. Most of the little troubling positions and points of the TGU are cleaned up with this simple drill.

Second, and it was only at the most recent RKC II that I realized this as clearly as I do now, this drill is gateway to the Windmill and Bent Press family.

Next time, we will dissect the Kneeling Windmill and show you how this single position can teach so much, so fast to so many.

The simple program I promised you.

One KB only mixed with Original Strength.

A1. Left Hand Press (Stand or Half-Kneeling)
A2. Prone Neck Nod

B1. Right Hand Press (Stand or Half-Kneeling)
B2. Prone Find Your Shoes

C1. Goblet Squat
C2. Six Point Rock

D1. March in Place with Load in Left Hand (Suitcase Carry)
D2. Six Point Rock with Left Leg in wide position (Kickstand)

E1. March in Place with Load in Right Hand (Suitcase Carry)
E2. Six Point Rock with Right Leg in wide position (Kickstand)

F1. Swings
F2. Egg Rolls

“Maybe” Day One:

Super set with Sets of Eight (Three Rounds)
A1. Left Hand Press (Stand or Half-Kneeling)
A2. Prone Neck Nod

B1. Right Hand Press (Stand or Half-Kneeling)
B2. Prone Find Your Shoes

Superset with Sets of Eight (Three Rounds)
C1. Goblet Squat
C2. Six Point Rock

Superset for maybe Thirty Seconds each
D1. March in Place with Load in Left Hand (Suitcase Carry)
D2. Six Point Rock with Left Leg in wide position (Kickstand)
E1. March in Place with Load in Right Hand (Suitcase Carry)
E2. Six Point Rock with Right Leg in wide position (Kickstand)

Five Rounds of 15 Swings and appropriate Egg Rolls
F1. Swings
F2. Egg Rolls

“Maybe” Day Two

Three Sets of Eight
A1. Left Hand Press (Stand or Half-Kneeling)
A2. Prone Neck Nod

Three Sets of Eight
B1. Right Hand Press (Stand or Half-Kneeling)
B2. Prone Find Your Shoes

Three Sets of Eight
C1. Goblet Squat
C2. Six Point Rock

Three Rounds of Thirty Seconds Each
D1. March in Place with Load in Left Hand (Suitcase Carry)
D2. Six Point Rock with Left Leg in wide position (Kickstand)
E1. March in Place with Load in Right Hand (Suitcase Carry)
E2. Six Point Rock with Right Leg in wide position (Kickstand)

“Up to 100 Swings”
F1. Swings
F2. Egg Rolls

“Maybe” Day Three

The entire circuit for three rounds of eights and thirty seconds as appropriate.

  1. Left Hand Press (Stand or Half-Kneeling)
  2. Prone Neck Nod
  3. Right Hand Press (Stand or Half-Kneeling)
  4. Prone Find Your Shoes
  5. Goblet Squat
  6. Six Point Rock
  7. March in Place with Load in Left Hand (Suitcase Carry)
  8. Six Point Rock with Left Leg in wide position (Kickstand)
  9. March in Place with Load in Right Hand (Suitcase Carry)
  10. Six Point Rock with Right Leg in wide position (Kickstand)
  11. Swings
  12. Egg Rolls

There you go…off the top of the head but pretty good.

***

Master RKC, Dan John is the author of numerous fitness titles including The Hardstyle Kettlebell Challenge: A Fundamental Guide To Training For Strength And Power, the best selling Never Let Go and Easy Strength. Dan has spent his life with one foot in the world of lifting and throwing, and the other foot in academia. An All-American discus thrower, Dan has also competed at the highest levels of Olympic lifting, Highland Games and the Weight Pentathlon, an event in which he holds the American record.

Dan spends his work life blending weekly workshops and lectures with full-time writing, and is also an online religious studies instructor for Columbia College of Missouri. As a Fulbright Scholar, he toured the Middle East exploring the foundations of religious education systems. For more information visit DanJohn.net

Filed Under: Kettlebell Training, Mobility and Flexibility, Tutorial, Workout of the Week Tagged With: bent press, Dan John, full body workout, get up, get-down, get-up presses, get-up programming, get-up tutorial, kettlebell tutorial, kettlebell windmill, kettlebell workout

The Kettlebell Get-up in Detail Part 2

May 6, 2021 By Ryan Jankowitz Leave a Comment


Ryan Jankowitz Demonstrating the move between the tall sit and the half windmill - kettlebell Get-Up Tutorial Part Two

Welcome back to my 3-part series on the kettlebell get-up! While my last post focused on the set-up, roll to elbow and the tall sit, today I’m going to focus on the leg sweep to windmill, lunge and stand up.

Once you’ve achieved the tall sit position, the next step is to sweep your leg back underneath you into the kneeling windmill position.

Some people may get confused at this part of the get-up because they are not sure how high they should bridge their hips before sweeping their leg back. This is mostly a matter of personal preference, however, I’ve found that with heavy get-ups doing a small bridge is the safest and most effective way to start the leg sweep. If you’re warming up with naked (no weight) get-ups or using a light kettlebell, then a high bridge can be okay. Just do what feels most safe and appropriate.

When you sweep your leg back, aim to line up your wrist, knee and ankle. A nice straight line here will allow you to load your hips and use your torso to straighten up to the kneeling position.  Also, make sure to tuck your toe under (dorsiflex) after you sweep your leg back and keep your toe tucked in order to help you with the lunge.

Be aware that if you don’t bring their knee back far enough, you will not be able to properly use your hips and torso to straighten up. When this happens, the arm on the ground and the lower back are overused—and at risk of injury.

Now that you’ve straightened up, you must put yourself into a lunge position. Here are the two different ways to do this:

  1. “Windshield wiper” your back leg
  2. Step across with your front leg

When teaching the get-up at the HKC and RKC, the “windshield wiper” method is taught first. This movement can sometimes be uncomfortable for people who have had a knee injury, knee surgery, or their knee just doesn’t like this type of movement. In this case, step your front leg across to move into a lunge position.

At this point, the arm holding the kettlebell should be vertical. The kettlebell should be behind your head so that if you were to look up you wouldn’t see the kettlebell in front of you. Now, you’re ready to stand up from the lunge. Push both feet powerfully into the floor to help you stand up. When you bring your legs together, hit your Hardstyle plank by contracting your glutes, quads and abs.

To see all of these steps in action, please watch this video:

Focus on improving these steps to gain the strength and confidence to perform the get-up with heavier kettlebells.

Stay tuned for my third and final blog post about the kettlebell get-up.

Stay Strong,
Ryan Jankowitz, RKC II

 ***

Ryan Jankowitz, RKC-II and owner of RJ Kettlebell, lives in Maryland with his wife and two dogs. They love to go hiking and spend time on the beach. When he’s not telling his dogs to stop chasing squirrels, Ryan enjoys spreading the RKC message and teaching others how to train with kettlebells. Try his 2-week advanced kettlebell plan: https://rj-kettlebell.ck.page/b59325e156

Filed Under: Kettlebell Training, Tutorial Tagged With: get-up tutorial, kettlebell get-up, kettlebell technique, kettlebell training, Ryan Jankowitz, turkish get up, tutorial

The Kettlebell Get-up in Detail Part 1

February 25, 2021 By Ryan Jankowitz 1 Comment

Ryan Jankowitz Get-Up Setup, Elbow, Tall Sit

If you’re doing Kettlebell Turkish Get-ups, then you’ve clearly invested time and energy in your health and strength.

The get-up is one of the best exercises you can do for total body strength and to prolong your life. Studies have shown that older adults who can “get up” off the floor easily will more likely avoid falls and live longer than adults who need help getting up from the ground.

There are many steps to learn with the get-up, but once you’ve learned the basic movements you can dive deeper and fine tune the exercise for greater strength and safety.

In order to communicate all of the information I want to share with you, I’ve decided to make this a 3-part series:

    1. Set-up, roll to elbow, tall sit (this post)
    2. Leg sweep to windmill and lunge, stand up
    3. Get back down through all transitions, parking the kettlebell, switching sides, and eye position

This post will be a dive deep into the set-up, rolling up to your elbow and the tall sit position. Improving movements will help take your get-ups to the next level.

The get-up actually starts from the fetal position with both hands wrapped around the kettlebell handle. Use the weight of your body to roll into position while bringing the kettlebell with you. Don’t try to “arm wrestle” the kettlebell.

Ryan Jankowitz kettlebell-Get-Up beginning at fetal position

Once you’ve pressed the kettlebell over your chest and locked out your arm, you must put your limbs opposite the kettlebell in the right spot on the floor. Place your unloaded arm (not holding the kettlebell) on the ground about 45 degrees from your body. This will ensure that when you come up to your elbow, your elbow will be right under your shoulder. From there, you will give you a strong base to work from.

Ryan Jankowitz Turkish Get-up unloaded limbs

Your legs should form the letter “V”. Bend the leg that is on the same side as the kettlebell and place your foot on the ground.

Now that you’re setup, you can focus on generating tension. Most of the tension you create will be on the side of the kettlebell. You will pack your shoulder supporting the kettlebell by pulling your shoulder down away from your ear and squeezing your armpit. This will also keep the tension out of your neck.

Next, you will start to crunch your obliques on the side that’s holding the kettlebell. The bent leg can then start contracting the glute and hamstring as you push your foot into the floor—this will help roll you up to your elbow.

Finally, push through your heel and flex your quad on the straight leg, which will help keep the leg down on the ground as you sit up to your elbow.

Okay, now that you’re set up, it’s time to roll up to your elbow. Think of this movement as a diagonal crunch where you’re trying to bring your shoulder closer to your opposite hip.

If you’ve set up correctly, then your shoulder should be stacked over your elbow when you roll up. This will give you a solid base to work from.

In this position, make sure to squeeze your shoulder blades together and push your chest up to the sky. This will help keep the tension out of your neck.

RyanJankowitz Get-Up to elbow

Once you’ve established a solid position on your elbow you can then sit up to your hand. This is known as the tall sit position.

I like to rotate my hand back slightly as I transition to my hand because it allows me to open up my chest and squeeze my shoulder blades together, which will prevent shrugging the shoulder up to the ear and putting tension in the neck.

Ryan Jankowitz Get-Up tall sit

Make sure to lock out your elbow. Imagine flexing your triceps and then pinching your triceps and lat together to create a solid base.

To see all these steps in action, please watch this video:

If you take the time to incorporate these tips into your kettlebell Turkish get-ups, then I know you’ll feel the changes taking place.

Stay tuned over the next few weeks for the next blog post in my get-up series.

Stay Strong,
Ryan Jankowitz, RKC II


 ***

Ryan Jankowitz, RKC-II and owner of RJ Kettlebell, lives in Maryland with his wife and two dogs. They love to go hiking and spend time on the beach. When he’s not telling his dogs to stop chasing squirrels, Ryan enjoys spreading the RKC message and teaching others how to train with kettlebells. Try his 2-week advanced kettlebell plan: https://rj-kettlebell.ck.page/b59325e156

Filed Under: Kettlebell Training, Tutorial Tagged With: get up, get-up setup, get-up tutorial, how do to a get-up, kettlebell grind, kettlebell training, Ryan Jankowitz, turkish get up

Rubik’s Get-Up

May 2, 2018 By Annie Vo Leave a Comment

Annie Vo Get-Up Rubiks Cube
When I first learned to perform a get-up, I was unsure of its purpose. It seemed almost like a series of random movements, ultimately resulting in getting off the floor. Of course, being able to get off the floor safely has its advantages, but even when progressing with resistance, it was still somewhat of a mystery to me.

Sometimes in order to understand new information, it is helpful to liken it to something old. The use of analogies in teaching has been shown to have a positive impact on the way we process new data. Analogies foster learning by highlighting the similarities between what we already know and that which we seek. The mind is complex.

Over the years I have come to think of the get-up like a Rubik’s Cube.

The Rubik’s Cube is a 3-D combination puzzle invented in 1974 by Hungarian sculptor and professor of architecture Erno Rubik. Originally called the Magic Cube, the goal is to align all of the color-coded squares on each side through a series of pivots. The shifts of the cube are smooth, tracking on an internal core track until the final destination is reached. The cube is considered incomplete if the sides are not aligned appropriately.

Although it is widely misreported that Dr. Rubik created “the cube” to be a teaching tool to help his students understand 3-D objects, his actual purpose was to solve the structural problems of moving parts independently—without the entire mechanism falling apart! In many ways, the get-up has the same goal.

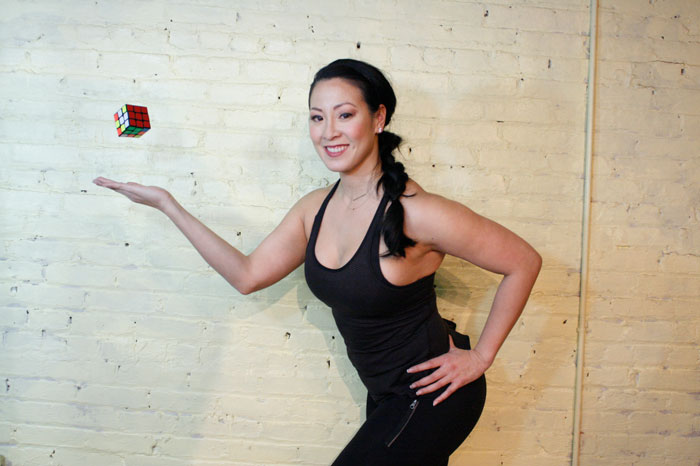
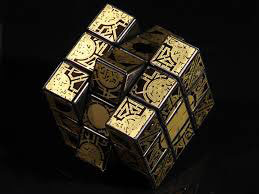
Each movement in the get-up is a pivot from the body’s core joints—the hips and shoulders. The pivoting should be smooth. Once the position is established, all “sides” of the get-up cube should also be aligned. The spine must be straight throughout the get-up. The body’s center of gravity must be balanced between the limbs. The angles of the hips and shoulders positioned to provide maximum support and stability. Each limb, joint and muscle must be arranged and coiled underneath the weight overhead to create a solid foundation.

As you develop your technique, you are likely to discover information about how you move, including strengths and weakness, balances and imbalances, and which areas should be developed. Your get-up is your sculpture. It is constantly evolving. The way you perform each pivot, swivel and shift can reveal or obscure what is truly beneath the surface. If you rush it, then you’ll miss the point.

As a Senior RKC Instructor, I’ve had the privilege of teaching the get-up to hundreds of coaches and kettlebell enthusiasts, spanning a multitude of backgrounds. Throughout my tenure, I’ve noticed that there are three common places in the get-up where symmetry and alignment tend to get neglected, even among experienced get-uppers. Here they are:

Initial Shift to the Elbow

The get-up begins in a lying position and is initiated by rolling up to your (unloaded) side. It is to be performed without any jerking or momentum. Imagine your trunk is one unbending steel rod that must be adjusted by wedging between the hip and shoulder. The result is a straight, stacked vertical line from the ground to overhead—a track as clear as the pathway of a Rubik’s Cube’s axis.

However, often the shoulder of the planted arm is forgotten in the pursuit of this vertical line, and sags forward. This is usually the result of not knowing how to find the alignment, and overcompensating. In short, it may feel like it’s lined up but it isn’t. If this is the case, there is unnecessary pressure on the front of the shoulder. To avoid this, make sure to preserve your vertical line by employing the support of the greatest shoulder stabilizer you have—the lat.

Problem shoulder position—Shoulder is rounded and relaxed.
Proper shoulder position—Shoulder is aligned and lat is packed.

Shift to the “Tall Sit”

When moving from the elbow to the straight arm seated position, the support shoulder has a tendency to rotate forward, therefore “exposing” itself and falling out of alignment. The support arm is arguably the most important part of the “tall sit” portion of the get-up because it determines whether you will be able to support your overhead weight (and bodyweight) while your legs swing under you. The support arm (and opposite leg) are responsible for supporting the body as it is lifted and rotated like a Rubik’s Cube.

To perform this transition with the greatest mechanical advantage, make sure your shoulder is in line with your planted hand and also rotated back and down, to ensure that the lat muscle is engaged.

Problem shoulder position—Shoulder is rounded forward.
Proper shoulder position—Shoulder is rounded back and in line with the hand.

Leg Sweep (both directions)

From the “tall sit” position, rotate your leg under your body, and place your knee on the ground. Sometimes people don’t bring the leg far enough under, on the way up. Remember, the angle of your hips should be roughly 90 degrees. Picture how difficult it would be to twist Dr. Rubik’s contraption if its sides were unaligned.

Conversely, a common mistake on the way down is to place the supporting hand (rather than the knee) out of alignment. It’s important to keep your grounded hand extended just beyond the knee.  A visible, vertical line should begin from the grounded hand, up through both shoulders, and overhead, ending in the kettlebell held firmly at the top.

Problem knee position—The knee is not drawn underneath far enough creating a less than 90 degree angle at the hip.
Problem hand position—The hand is placed out of alignment from the knee.
Proper hand, knee, shoulder alignment—Hips are at 90 degrees and a vertical line is created from grounded hand to KB.

These are time-tested tips to help improve your get-up. You’d be surprised how often revisiting these basics can help improve overall performance. Do not lose sight of the fact that your training is constantly evolving and never be afraid to revisit your foundation.

“Mind the edges of the cube or else Hell will literally break loose”

***

Annie Vo, Senior RKC, PCC Team Leader is a personal trainer, fitness writer and presenter in New York City. Contact her through her website annievo.com.

Filed Under: Kettlebell Training, Tutorial Tagged With: Annie Vo, fix get-up, get up, get-up tutorial, kettlebell technique, kettlebell training, tutorial

Primary Sidebar

Featured Products

previous arrow
BOOK-RKCBookofSnC
HardStyleKettlebellChallegeDanJohn700
BookCoverMasterTheKettlebell1
RKCiconKettlebell512
KettlebellGoddessdv040
next arrow

Recent Posts

  • RKC Big Six Workout
  • The Kettlebell Swing & Low Back Pain
  • Key Kettlebell Exercises To Help You Create Better Balance
  • How to Most Effectively Use Kettlebells to Meet Your New Year Goals
  • 1 Exercise That Checks All The Boxes
FOLLOW US ON TWITTER!

Archives

Copyright © 2025

Dragon Door Publications / The author(s) and publisher of this material are not responsible in any manner whatsoever for any injury that may occur through following the instructions or opinions contained in this material. The activities, physical and otherwise, described herein for informational purposes only, may be too strenuous or dangerous for some people, and the reader(s) should consult a physician before engaging in them.