• Skip to main content
  • Skip to primary sidebar
  • Home
  • Contributors
    • Matt Beecroft, Master RKC
    • Martijn Bos, Master RKC
    • Andrea Du Cane, Master RKC
    • Angelo Gala, Master RKC
    • Chris Holder, Master RKC
    • Steve Holiner, Master RKC
    • Dan John, Master RKC
    • Mike Krivka, Master RKC
    • Thomas Phillips, Master RKC
    • Robert Rimoczi, Master RKC
    • Phil Ross, Master RKC
    • Max Shank, Master RKC
  • Workshops
    • HKC Workshops
    • RKC Workshops
    • RKC-II Workshops
  • Find an RKC Instructor
  • Resources
    • Articles
    • Forums
    • Kettlebells
    • Products
  • Blogs
    • PCC Blog
    • Strong Medicine Blog
  • Archives

RKC School of Strength

Official blog of the RKC

Tutorial

Miyagi Pinball: Tilt Your Kettlebell Snatch!

September 16, 2015 By Steve "Coach Fury" Holiner 27 Comments

Steve "Coach Fury" Holiner Kettlebell Snatch

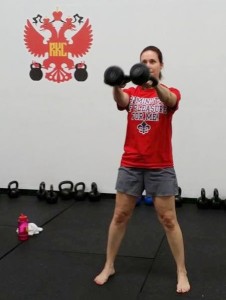
“You’re the best around. And nothing’s gonna ever keep you down”. That’s what they’ll be singing after you apply the following tips to your snatch technique. The following tips will improve your kettlebell snatch and help you destroy your snatch test if your RKC Workshop is coming up.

The kettlebell snatch is actually a fairly simple move, but people love to overcomplicate it. Over the years, I’ve broken down the technique into two simple words that pack a punch—or a crane kick—MIYAGI PINBALL! (Remember The Karate Kid?)

Two super common errors you’ll see with the Hardstyle kettlebell snatch are:

  1. Rotating or corkscrewing the kettlebell around the wrist as the kettlebell travels up and down.
  2. The arm staying straight during the entire snatch.

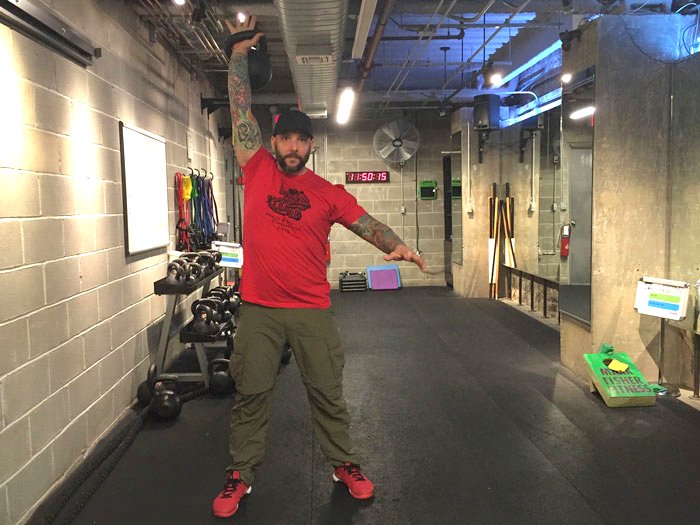
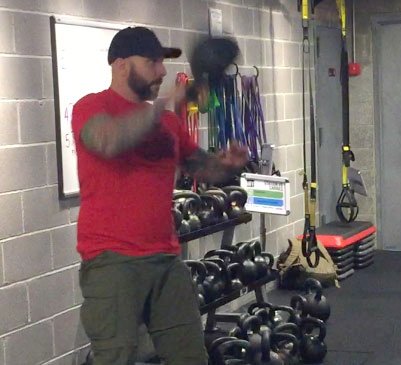
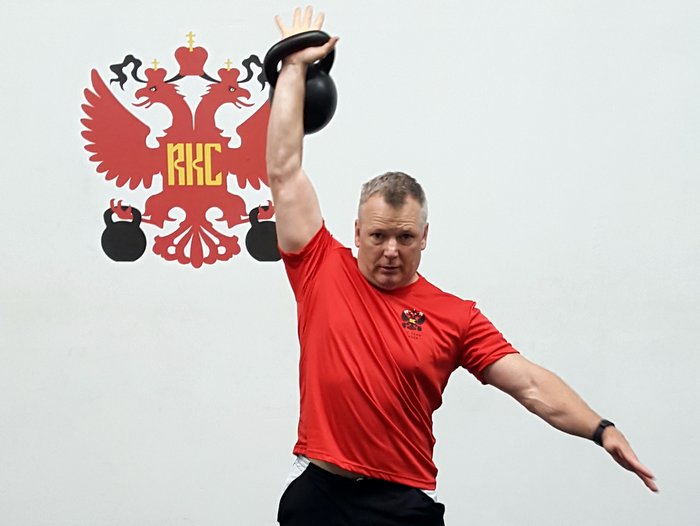
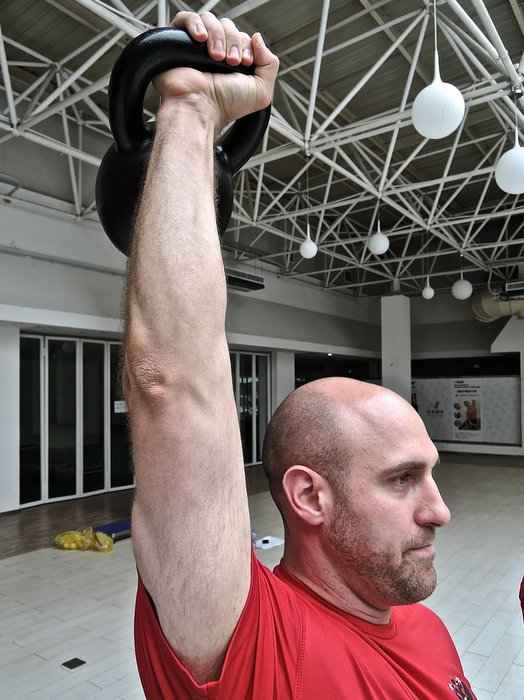
This is where “Miyagi” comes in. You have to paint the fence! Imagine you are Daniel-san standing in front of a fence. Your hand is an imaginary paintbrush. You’ll begin to paint upwards with the back of your fingers, then as you near the top of the fence, you’ll spike your fingers upward. The palm of your hand faces outward in this position. Now reverse the same motion on the way down. This will eliminate the first common error (corkscrew rotation) I previously mentioned. Painting the fence will also dramatically decrease the wear and tear on your hands when performing high rep kettlebell snatches.

Steve Holiner Kettlebell painting the fence
Steve “Coach Fury” Holiner in motion while demonstrating the kettlebell snatch “painting the fence” cue.

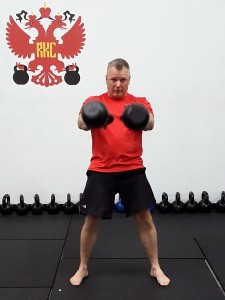
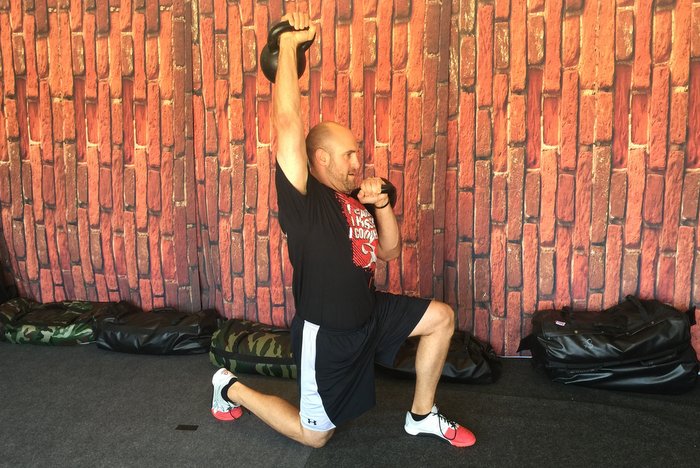
Do the following to fix the “straight arm” issue: Stand facing a wall, feet together, and with your right arm fully extended. Make a fist then move close enough to the wall that your arm is still straight and your knuckles are making contact with the wall. Now take a half step forward and allow your arm to bend. Paint the fence from this position. We’ve just shortened the arc of your kettlebell snatch, and that’s a very good thing.

Please note, that it is possible to try and shorten the arc too much. This will cause the kettlebell to travel almost straight down the body, forcing the elbow and shoulder to snap almost like a whip. We want to shorten the arc, not eliminate it, and you’ll still need some space to allow for a smooth transition into the backswing.

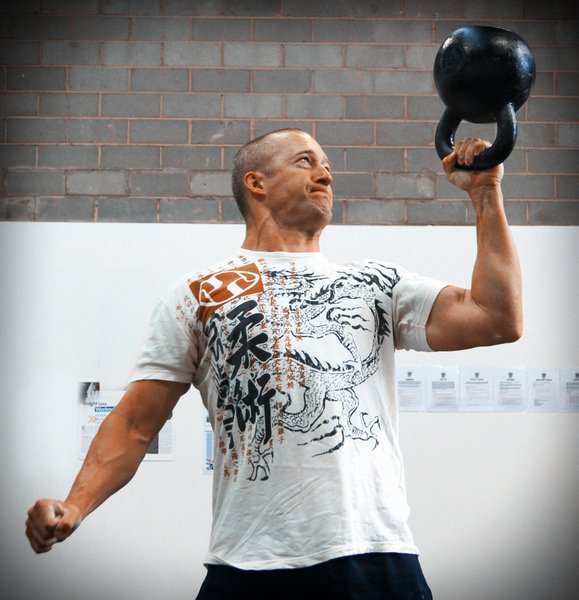
So, grab your kettlebell and go “Miyagi” on it! Hike the kettlebell back, snap your hips, let the elbow bend, and “paint the fence” until the kettlebell is locked out overhead. Reverse and repeat. If that feels different then you’ve earned that Karate Kid black belt from JC Penney.

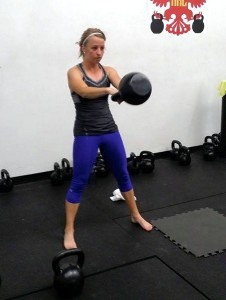
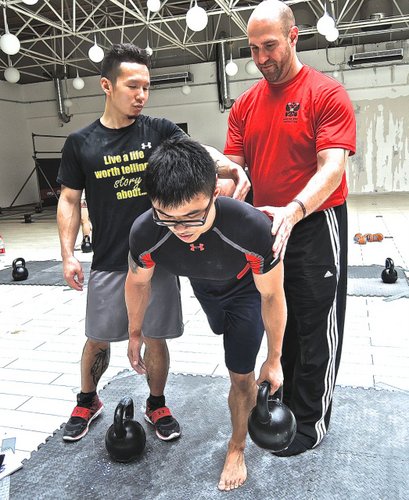
Now, here’s where “pinball” comes into play. Having completed, witnessed, and administered over one hundred snatch tests, I’ve noticed another common (and fatal) flaw. Many people will allow their hinge to get shallow as they snatch—and they lose the ability to generate a TON of power when this happens.

Steve Holiner Pinball Backswing

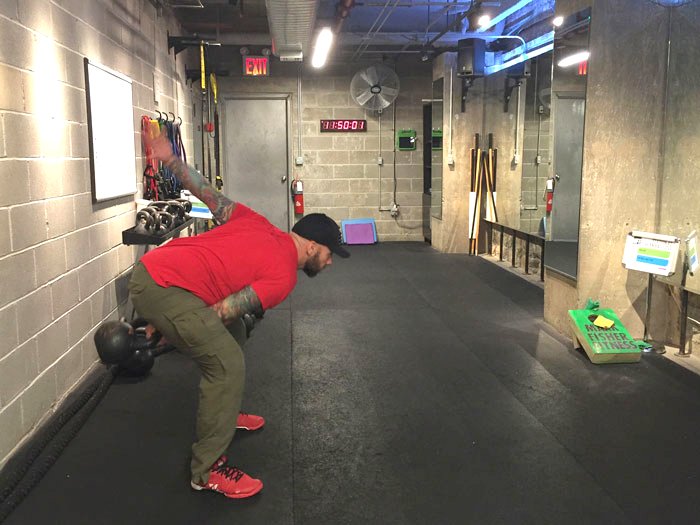
Your hips are a pinball hammer. The kettlebell is the pinball. Pull your hips deep into the hinge (always while keeping the shoulders above the hips, and hips above the knees). As you “paint the fence” into the downward eccentric phase of the snatch, “pull the hammer back” by deeply hinging, then squeeze your glutes hard and fast, drive your feet into the floor, stand tall and “paint that fence”! The kettlebell will soar overhead.

Here’s a combination to help practice the “Miyagi Pinball”:

  • Heavy dead swing x 5
  • Snatch x 5 per arm *Remember to “Paint the Fence”.
  • Heavy dead swing x 3
  • Snatch x 8 per arm
  • Heavy dead swing x 1
  • Snatch x 10 per arm

Here’s why it works:

The kettlebell snatch is about efficiency. Shortening your arc means that you will have to project the kettlebell over a lesser distance to get it overhead. Shortening the arc also allows you to cut the kettlebell’s momentum as it approaches the lockout. This drastically reduces the risk of wear and tear on your shoulders. Using your hips to project the kettlebell will also keep your shoulders and back healthy, while cutting back on undue fatigue during high rep snatches.

Do you think any above would help you crush an RKC Snatch Test?

I do.

https://youtu.be/VRybp4KhA3Q

A fellow coach at MFF, Laura Smith had this to say about “Miyagi Pinball”:

“After Steve told me to “paint the fence” (karate kid style of course) I never had hand issues again. After months of my hands tearing every time I did a snatch test, this was life changing.”

There it is gang.

Try it and let me know what you think.

-Fury

Steve “Coach Fury” Holiner’s superhero headquarters is Mark Fisher Fitness in NYC. Fury’s a Senior RKC, a DVRT Master Chief, and an Original Strength Instructor. He is available for classes, semi-privates, instructor training and programming at MFF. Check out coachfury.com, facebook.com/coachfury Instagram @iamcoachfury and Twitter @coachfury for more info.

Filed Under: Kettlebell Training, Tutorial Tagged With: Coach Fury, cues and drills, how to pass the snatch test, kettlebell snatches, kettlebell technique, Steve Holiner, tutorial

Stop Fearing the 5 Minute Snatch Test

September 2, 2015 By Paul Britt, DC 15 Comments

Paul Britt Kettlebell Snatches

Nothing seems to scare potential RKC Instructors more than the 5 Minute Snatch Test (read complete testing requirements here), the gatekeeper of the system. In the long run, it’s only 5 minutes out of 23 hours of training—just 0.36% of the weekend. Sometimes I think the fear comes from a lack of confidence in their preparation, even though I have found that many people over-train for the snatch test. They snatch almost daily for tons of reps for long periods of time. In my opinion, a less is more approach works better. My last snatch test was my easiest one to date, and I only trained an average of 5 minutes a day for the test.

If you break down the kettlebell snatch, it’s a swing that ends up at the top position of the press. My plan was to work the swing and the press to train for the snatch test. It works if you look at the small space you must travel between the two exercises. The swing comes to chest height, and the press begins just a little bit higher. There’s only a small space missing when performing the snatch.

In my opinion, if you cannot handle heavy weight overhead, it’s not smart to ballistically propel the weight into position at the top of the snatch movement. So, my students work on heavy presses—snatch weight or heavier. Since this is RKC prep, this approach knocks out two birds at once.

When it comes to swings, I mix it up a little. I believe in having a great hip extension to launch the kettlebell and use the “float” as rest—with swings and as much as you can during the snatch test. That explosive hip extension also makes snatching easier as there is no pulling or fighting the bell on the way up. You can generate the float and guide the bell into position. That power can be developed with heavy double swings to chest height. This is typically the longest training session because we like to get a little more rest between sets when working on power and explosiveness. We will typically perform 10 reps on the minute, every minute, for 10 minutes. This usually gives us about 45 seconds of rest each set. If I feel like I’m losing some of the pop or if form deteriorates, we will occasionally just perform a set of swings and wait one minute.

On some days, we will see how many swings we can do in a 5 minute set of one-arm swings. A starting goal is to hit 100 swings. After a student can do 100 in five minutes, they will work up to as many as possible in that time frame. We have had a couple of students perform 160 swings in 5 minutes. On other training days, the students will grab a medium weight kettlebell for two-hand swings—somewhere between their one hand and two-and swing weights—and perform 100 two-hand swings in a 5 minute set. This helps bridge the gap between endurance and power.

We do the snatch test about every two weeks. And it is the only training for that day, they don’t get to work anything else other than recovery and mobility.

Typically the first time they hit 100 snatches, they knock it out in less than 4 minutes. They are typically spent and take a while to recover, but once they know that they can do it, we work on strategy and timing. If you finish the test in 3:30 minutes or 4:59 minutes, you still pass. I like to take my time and have something left at the end. We typically train for 10 left and 10 right on the minute for the test, but find that some students like the 20, 15, 10 and 5 rep scheme to pass. Once you can pass the test, the rep strategy comes down to personal preference and finding what works best for you.

The following training template focuses on the swing and snatch, I did not include the rest of the skills, but they can fit into the training plan if they’re thought of as a skill to practice. Use appropriate weights and make sure that the technique is good. There is no need to really push it for an extended length of time. Remember that this is only a small part of your RKC Workshop weekend. Do not dread it so much that you miss the awesomeness of the entire experience.

Monday

  • 5 Minutes of 2 hand swings
  • 5 x 5 pressing

Tuesday

  • 10×10 heavy double kettlebell swings
  • 5 x 5 double kettlebell squats

Thursday

  • 5 minutes of snatch weight one-arm kettlebell swings
  • 3 x 5 presses each side

Friday

  • Light to medium one-arm swings for 10×10 (30 seconds on / 30 seconds off works well)
  • 5 Get-ups left and right

Saturday

  • Snatch test

***
RKC Team Leader Paul Britt has been an RKC kettlebell instructor since 2006. He trains clients at Britt’s Training Systems, his award-winning Hardstyle Kettlebell Training Facility in Rockwall, Texas. Paul has served as an assistant instructor at many RKC and HKC Courses, is a Certified Kettlebell Functional Movement Specialist (CK-FMS) and works with some of the top Chiroprators in North Texas. Please visit his website brittstrainingsystems.com for more information.

Filed Under: Kettlebell Training, Tutorial Tagged With: how to pass the RKC, kettlebell snatches, passing the RKC, Paul Britt, RKC Prep, RKC snatch test, Snatch Test, training template, tutorial

3 Ways to Get More from Your Kettlebells

July 15, 2015 By Josh Henkin 3 Comments

Master RKC Josh Henkin Overhead Press

Kettlebells were a big change for me—far beyond just adding swings, get-ups, and squats to my training. The whole concept of kettlebells made me re-evaluate the tools I used and made me reconsider how many tools I really needed to accomplish a specific fitness goal. In many ways, kettlebells got me thinking more about the big picture. Soon, I was solving fitness needs more effectively. I remember when Dragon Door kettlebells only came in three sizes—16kg, 24kg, and 32kg. Back then, most people didn’t consider switching to a lighter or heavier kettlebell to be the default way to make an exercise harder or easier. That’s what I loved about kettlebells in the first place—we were taught to think about them a bit differently, and I want to share that with YOU!

Many people think they will outgrow their kettlebells as they work through various movements and progressions, but I have yet to see that truly be the case. In fact, by not automatically jumping to a different size kettlebell, you will find yourself breaking plateaus and feeling stronger much faster. The following three kettlebell techniques will show you how!

Dead Stop Anything

Since cleans, snatches, and swings are essential in kettlebell training, it’s important to note how to progress these movements. Time after time I am shocked to see how dead stop progressions can change so much about someone’s movements—and how many strengths and weaknesses are revealed.

While the dead-stop technique is definitely beneficial for swings, I find it has the BIGGEST impact on cleans and snatches, because they don’t have any pre-swing to build from the powerful eccentric pre-load. Ironically, since many people love deadlifts for the same reason, I am surprised this technique is not more popular for kettlebell ballistic training. Personally, I have found VERY few people who can double clean two 32kg or bigger kettlebells from a dead stop for sets of five. But, every time I do meet someone who can, the strength transfer to other lifts is pretty amazing!

Stop!

Since many popular fitness approaches are based on completing a workout in a certain amount of time, we often overlook the value of adding specific pauses. The great thing about pauses is that they can add challenge to any kettlebell lift from snatches to get-ups to squats.

It is amazing what the addition of a few seconds pause can do to the weight of a kettlebell. Suddenly, a somewhat light kettlebell can feel MUCH heavier!

But there are more reasons we should use pauses. On a basic level, pauses give us an opportunity to look at our positions and alignment. When people try to fly through their workouts, it’s common to see a loss of proper posture and cheated ranges of motion. Pauses help prevent technique breakdown and also accomplish some of the benefits we discussed in dead stop training. And with pauses, we can hold in a wide variety of positions. There is great value in holding the catch of a clean or snatch, the bottom of a squat, or even specific phases of the get-up. All of these pause examples can help build untapped strength.

Finally, pauses are an opportunity to work on isometric strength, which is valuable but often difficult to add to most fitness programs. Since isometric training is typically only effective in about a 15 degree range of the action, it may not seem worthwhile. But that limitation is a GREAT reason to work on it at both the bottom and top ranges of motion of a given exercise. At the top, isometric strength can do wonders for building great core strength. And the bottom the range of motion is typically where we need the most strength in a lift.

Perform the Underdog Movement!

Recently I had the wonderful opportunity to teach an RKC Workshop in China. During the course we always demonstrate and teach “accessory” kettlebell drills. These drills aren’t tested in the RKC, but that doesn’t make them any less valuable. In truth, many of these additional kettlebell drills are just as important as the more popular and tested exercises.

For example, the kettlebell single leg deadlift has amazing transfer to swings, cleans, and snatches. Many people would benefit from performing the single leg deadlift because it builds greater stability and strength in the lower legs, hips, and trunk. It is so easy to catch and correct compensatory movements with drills like the kettlebell single leg deadlift.

Master RKC Josh Henkin Coaching One-Leg Deadlifts at the China RKC
Master RKC Josh Henkin Coaching Single Leg Deadlifts at the China RKC

Bent rows also make this list of “underdog movements”. I’ve heard some people say that bent rows are “too hard” on the back, but I think this row variation is a great foundational drill for all our ballistic kettlebell exercises. Think of the bent row as an alternative plank—if you can’t hold the position with the right posture, then you may not be really ready to produce power.

Rows also help the shoulder joint with all the overhead work involved with kettlebell training. Due to the typical modern lifestyle and training, the muscles on most people’s back sides are typically weaker. While some trainers will say that you just need to include pull-ups in your training to fix this imbalance, our lats are internal rotators of the shoulder and can actually increase the shoulders’ tendency to round forward. Think the shoulders of elite swimmers. Fortunately, bent rows can help many of the muscles which pull the shoulders back.

But there’s a crucial trick—while many people can lift a kettlebell when they row, they might not actually get their shoulder blades to move. We need to see and feel the shoulder blades coming together as you bring the weight upwards. When this happens, we will also sense if you have scapular movement. If you do not have this movement, it can impact your overhead strength and performance.

Since they are important, I don’t want you to just add some of these “other” kettlebell movements, but instead, PRIORITIZE them in your training. The benefits will include increased performance and resistance to injury.

Just Three?

Adding three things might sound easy, but they all take discipline to perform. You may honestly feel humbled by some of the lighter kettlebells you thought you’d bested. But if you truly have the desire to get better, you will never feel like you’ve grown out of your kettlebells after you experience the amazing benefits from these three simple strategies!

***

Josh Henkin, Master RKC, CSCS has been a RKC instructor since 2003 and has implemented kettlebell programs for major Division I programs, SWAT teams, and many different general fitness programs. Josh is also the creator of the DVRT Ultimate Sandbag Training system where he is a highly sought after presenter worldwide. He can be reached at info@ultimatesandbagtraining.com or http://DVRTFitness.com. Josh Henkin is also the author of DVRT, The Ultimate Sandbag Training System now available in paperback and ebook format.

Filed Under: Kettlebell Training, Tutorial Tagged With: Josh Henkin, kettlebell drills, kettlebell technique, kettlebells

The Single Rep Dead Stop Swing, Clean, Snatch Workout

July 1, 2015 By Andrea Du Cane 13 Comments

Master RKC Andrea Du Cane and Senior RKC Timothy Spencer Demonstrate the RKC Arm Bar

As I travel around teaching HKC and RKC workshops, I notice a common problem (theme – challenge), the sloppy start/stop of a kettlebell ballistic lift.

Imagine this scenario: someone is getting set up to swing; it doesn’t matter if it’s 2-handed, single arm or double. They stand over the kettlebell, lift it up, and rock it back a couple of times between their legs and THEN swing it back far enough to load their hips and explode up.

What’s wrong with this picture? The set-up was not correct. It was not focused or properly executed. There must be an intention and preparation before the start of the pull—before anything happens.

I like to say in regards to all kettlebell lifts, “You’re only as good as your set-up”.

Here is the correct way to start a swing (clean or snatch):

  • Place the kettlebell a foot or two in front of you.
  • Bend forward and grab the kettlebell handle.
  • Pull the kettlebell slightly toward you, while engaging your lats.
  • Set your weight way back on your heels, while keeping your feet planted & spine neutral.
  • “Hike” the kettlebell back behind you—fast.
  • Explode your hips forward and feet down into the ground. Let your arms be propelled forward by the force of the hips.

That’s it. Simple. No lifting the kettlebell up and rocking it a couple of times before hiking it back and exploding up. One crisp explosive hike pass and forward movement is all it takes!

This is the same for ALL the kettlebell dynamic lifts; including double kettlebell swings and cleans.

Scenario #2: someone has just finished a great set of swings, but on the last rep they fall forward while rounding their back and then dropping the bell down in front of them.  They nearly topple forward.

No further explanation is needed here, this is simply dangerous. The most common time for an injury to occur during any kettlebell exercise is on the last rep or while the kettlebell is being set down.

In both cases—the first rep or the last rep of a set—the lack of focus, intention and safety is to blame.

The answer to this problem is to training your single-rep or dead-stop swings. In essence that is what the single-rep is: the start and end of a swing, clean or snatch.

Programming single-rep sets is an easy way to reinforce good technique throughout a set of any ballistic lift.

The truth is, they are HARDER than continuous reps because you lose the assistance of gravity during the backswing. With single-rep workouts, each rep is initiated by the power of the lifter. The hips and lats have to work that much harder to generate the force to project the kettlebell up. Hence, an additional bonus is increased force production and explosive power. So this type of training is perfect for any athlete.

You can also modify single-rep workouts for any level kettlebell lifter.

Single-rep 2-handed swings are a progression to learning continuous swings, but for the advanced lifter, doing single rep heavy cleans or snatches or double swings and cleans, puts the burn in your butt!

Here are some workout examples (note: “SR” stands for Single Rep):

Beginner:

SR-Swings:   2-handed for 5 reps

Continuous:   2-handed for 10 reps

Repeat as long as you wish

OR use timed sets for 25-30 seconds of work to equal rest


Intermediate: (proficient with cleans and snatches)

SR-Swings 1-arm   5-10 reps left/right

Continuous 1-arm   10 reps left/right

SR- Cleans 1-arm   5-10 reps left/right

Continuous 1-arm   10 reps left/right

Repeat as long as desired or timed sets


2nd workout

SR-Swings 1-arm   5-10 left/right

SR- Cleans 1-arm   5-10 left/right

SR-Snatch 1-arm   5-10 left/right

Repeat as long as desired or timed sets


Advanced

SR-double swings   5-10 reps

SR-double cleans   5-10 reps

Repeat as desired or timed sets

***

Andrea Du Cane is a Master RKC Kettlebell Instructor, CK-FMS, CICS, and RIST, ZHealth certified, she has a BA in Psychology from the University of Minnesota and is also a Pilates instructor. She is the author of several books and dvds including The Ageless Body, The Kettlebell Boomer, and The Kettlebell Goddess Workout.  She has over twenty years of aerobics, weight training and fitness experience, with an additional background in… Read more here.

Filed Under: Kettlebell Training, Tutorial, Workout of the Week Tagged With: Andrea Du Cane, dead stop swing, dead swing, hkc, kettlebell swing, kettlebell technique, kettlebell training, kettlebell workout, kettlebell workouts, kettlebells, RKC, RKC kettlebell training, workout of the week

Kettlebells and Moving Planks

June 10, 2015 By Josh Henkin Leave a Comment

Josh Henkin Half Kneeling Kettlebell Press

If you want core strength, the “Fitness 101” answer is that you must do planks. While the plank is a great starting point and should be well established in any fitness program, it is not nearly the end of smart core conditioning. That’s is why there’s a plethora of plank variations—from the innovative to flat-out goofy!

The biggest problem with the plank is that when practicing it, you CANNOT MOVE! The whole point of the plank in the foundational phases of training is to teach the body how to resist movement by integrating the body’s entire chain. But, MOST of the things my clients and I do require movement.

Think of the plank as a reference point. Of course we want to establish strength in the plank, but we also want to use it as a reminder of concepts we want to use in other movement patterns. The beautiful thing about kettlebells is that they allow us to create many different functional variations of moving planks. We need to produce and resist forces at the same time. I will describe three easy ways to use kettlebells to create extremely functional plank variations.

Overhead Pressing

I love overhead pressing because it is basically an extended plank. If we start on the ground and assume a standard push-up position, we have the beginnings of overhead pressing. By simply walking the hands further and further forward, this straight arm plank variation becomes more difficult. And the problem with continuing on the ground is that we will eventually fall on our faces! Instead, by standing and pressing kettlebells overhead we can train that extended plank.

Of course the other beautiful thing about overhead pressing is that it points out any lack of mobility. Both the hips and upper body can cause us to have major compensations because places which lack mobility will usually cause us to recruit stability from an inefficient place. In other words, mobility issues cause compromised movement.

Assuming we have good mobility, there are so many awesome ways to use kettlebells with overhead pressing. I think of these progressions as similar to moving from a standard front plank before adding more side plank elements over time. You will see this progression in how we lift the kettlebells, and how we stand when we lift the kettlebell—or both! Here is a series you can use to progress from easiest to most challenging variation.

Overhead Pressing Variations Positional Emphasis Type of Plank
Standing Double KB Press KB movement Front Plank
Loaded KB Press KB movement Front/Side Plank
Alternating KB Press KB movement Front/Side Plank
One Arm Press KB movement Front/Side Plank
Military Double KB Press Body Position Front/Side Plank
Half Kneeling Alternating Press KB Movement/Body Position Front/Side Plank


Frequently Asked Questions:

  1. What about the Turkish get-up? It’s very different from a plank and emphasizes rolling patterns instead.
  2. Where is the bottoms-up press? It’s a personal preference, but I find that the progressions listed above are accessible for more people.
  3. Where are drills like push presses and jerks? These are all further progressions of plank training. When you add speed, you must have a more reactive core—which is definitely more advanced training.

One more note about pressing overhead. Some people may be wondering about the side lean that some trainees seem to use with kettlebell pressing. While I understand the idea of using leverage to help press the weight overhead, this approach does not build the core strength we can develop with the overhead press and may explain the lack of carryover these same trainees experience with other exercises or implements.

Hip Hinge

I have to credit kettlebell training for raising the awareness of the hip hinge pattern. While I had performed deadlifts and cleans in the past, the emphasis on quality of motion was something I really took home from my first RKC way back in 2003.

The hip hinge is actually a more complex plank variation than an overhead press. We can use it to create the pelvic “lock” used in overhead pressing in the beginning phase of the hip hinge. Because the torso changes angles during the hip hinge, the stress on the core constantly changes.

While most people might think kettlebell hip hinging is only for deadlifts, swings, cleans, and snatches, I am really happy to see the re-birth of bent rows with kettlebells! While it’s not nearly as sexy as many of the other kettlebell lifts, it’s probably one of the most important!

The bent row really challenges our core strength and endurance! Most people can’t maintain the proper hip hinge in the bent row without altering their posture. It’s pretty common for people to creep upwards and end their set more upright, or to speed through their bent rows because they don’t have the core integrity to perform them well.

The bent row should be a cornerstone drill for anyone progressing towards ballistic kettlebell exercises. Having the capacity to tolerate multiple sets of the bent row while maintaining the same hip hinge is a great indicator that the lifter really has excellent core strength and endurance.

Having said that, most people will fatigue in the bent row, so combining the bent row and kettlebell deadlift will allow us to introduce more time under tension without causing bad form from exhaustion.

Here is a series of big “bang for your buck” row and deadlift variations for the hips and plank. Again, move from least to most complex…

Bent Row & Deadlift Variations
Bilateral Deadlift and Row
Bilateral Deadlift with Alternating Row
Suitcase Deadlift with Row
Sprinter Stance Deadlift and Row
Sprinter Stance Deadlift with Inside Row
Sprinter Stance Deadlift with Outside Row
Rear Step Deadlift and Row
Rear Step Deadlift with Inside Row
Rear Step Deadlift with Outside Row


Manipulating the body position and which side the kettlebell is on allows us to challenge ourselves beyond just loading. These variations introduce anti-rotational forces, lower leg stability, and many more benefits as we progress. These kettlebell variations allow you to eventually progress and succeed with familiar but advanced drills like renegade rows.

Lunges

You may have expected me address squats next, but I find so much more value in the vital role lunges play in core strength. I know, you HATE lunges, but that’s all the more reason we need to use them. So many of us need MORE lunges in our training. Lunging is much closer to everyday movements like walking, running, etc. than almost anything else we do in the gym. The lunge is a very functional drill!

As soon as we go into the split position, we can almost instantly see where people lose their plank. Remember, the core is not just a fancy word for your abs, but an integration of your hips, and even your feet—one reason that barefoot training became popular.

The popularity of the half kneeling position for overhead pressing should tell us how important lunges are to real core stability and strength. For the sake of this blog post, we will keep things simple and focus on the reverse lunge which is the easiest to progress people. With lunges, we can vary load placement, and direction of the lunge to challenge the movement. For now, we will focus on using different kettlebell loading positions to build some incredibly strong moving planks!

Lunge Loading Progressions
Suitcase Double Lunge
Double KB Rack Lunges
Off-Set Loaded Suitcase Kettlebells
Suitcase Contralateral
Suitcase Ipsilateral
Off-Set Rack Kettlebells
Rack Contralateral
Rack Ipsilateral
Tactical Lunge
Double Overhead Lunge
Overhead Contralateral
Overhead Ipsilateral


This is the REALLY cool part—we are not just building MANY more kettlebell movement variations, but increasingly more meaningful progressions. Changing the intent of familiar, and often underestimated movements gives them new meaning and value.

You will never really outgrow the plank, it evolves over time just like kettlebell training. The purpose of the HKC and RKC are to give you a very strong foundation to kettlebell training. Most people underestimate the incredible value and versatility of kettlebells if they get stuck in the habit of just performing a few movements. But, if you understand that gaining proficiency in one drill opens the door to another, you will find infinite uses and benefits to every drill in your kettlebell toolkit.

***

Josh Henkin, Master RKC, CSCS has been a RKC instructor since 2003 and has implemented kettlebell programs for major Division I programs, SWAT teams, and many different general fitness programs. Josh is also the creator of the DVRT Ultimate Sandbag Training system where he is a highly sought after presenter worldwide. He can be reached at info@ultimatesandbagtraining.com or http://DVRTFitness.com. Josh Henkin is also the author of DVRT, The Ultimate Sandbag Training System now available in paperback and ebook format.

Filed Under: Kettlebell Training, Tutorial Tagged With: advanced training, Athletic Training, core strength, core training, fitness, functional movements, functional training, Josh Henkin, kettlebell drills, kettlebell training, progressions, tutorial, unusual progressions, variations

The Sweaty Beast Workout

May 13, 2015 By Beth Andrews 4 Comments

Beth Andrews Senior RKC

I live for a great workout. Do you? This is one of my favorite workouts and it’s a hit with my students as well. I thought I would share some of the kettlebell love and sweat with you. This workout is challenging, fun, will leave you in a pool of sweat and feeling like a beast when you’re done.

You can take this workout and grow with it by challenging yourself with heavier weight. I would first suggest you complete it with a kettlebell that’s your snatch test weight. When you can successfully do that, you can advance to the next size kettlebell.  🙂

Most people are familiar with the snatch and goblet squat, but are unfamiliar with the one arm chest press. Here are a few things to remember when performing the one arm chest press, a few options for the workout, a quick video tutorial and a demo sample of the workout.

1.There are many different ways to do the one arm chest press. My preference is to perform it with both legs down and both arms off of the floor, in the video below. This variation requires more body control/core stability. If you can’t keep your low back flat and your bum tight, bring one or both knees up. I prefer both knees up or both down.  Please option it out if needed. See pictures below.

Beth Andrews Chest Press Legs Up option
Yes! Legs up, bum tight, low back on floor.
BethAndrews Chest Press Legs Down Option
YES! Legs down, bum tight, low back on floor.
 belly button up to chin. This will help bring low back to the floor.
No! We want to prevent arching the low back.
Focusing on squeezing the glutes and pulling
belly button up to chin. This will help bring low back to the floor.

2. It can be challenging to chest press with your snatch test weight. No worries, just drop down to a lighter weight for that exercise.

3. You have 25 min to complete the workout. This workout is not about beating the clock, the timing is to keep you focused. It is all about good form, you gain nothing by racing through and taking shortcuts with form. Finish strong, my friends!

4. There are two ways I like to mix up the reps: a 10-1 countdown on all exercises, in a circuit fashion, or stay with 5 sets of 10 reps on everything for a beastlier challenge.

Check out the One-Arm Chest Press video tutorial:
(All kettlebells in the videos below are official Dragon Door kettlebells that have been painted)

Now you’re ready to give the The Sweaty Beast Workout a try! 🙂

***

Beth Andrews is a Senior RKC, PCC Team Leader, and CK-FMS. She leads HKC and RKC certifications, and assists at the PCC. She became the 5th Iron Maiden in 2013. Beth owns Maximum Body Training and a successful online training business. She has over 25 years of training experience. For online training or to host a certification, email Beth at: bethandrewsrkc@gmail.com. For more training tips and workouts subscribe to her YouTube channel, Beth Andrews RKC or visit her website at maximumbodytraining.com

Filed Under: Tutorial, Workout of the Week Tagged With: beth andrews, chest press, kettlebell technique, kettlebell training, kettlebells, one arm chest press, RKC, tutorial, video, workout, workout of the week

Fitness Freedom + Play = Increased Strength and Conditioning

May 6, 2015 By Lori Crock 1 Comment

Lori Crock Movestrong KB Pull Up

Fitness classes are social by nature and lend themselves to incorporating occasional play components to explore new, interesting and challenging movements and lifts with less structure, measurement or a set goal.

I call this Fitness Freedom.

The keys are:

1) Keep it exploratory

2) Give the student some control over how much they do and how they do it, and

3) Keep it safe.

Note: Play is not training riskier than usual; it is practicing relevant skills in creative ways when your students are ready for it.

Lori Crock Post Book Cover PlayYou can encourage creativity by using different fitness tools and combinations of movements that feel physically and mentally freeing, while still conditioning and challenging the body and the mind.

Stir the Imagination, Stimulate the Brain, and Reach into the Soul with Play

In Stuart Brown, M.D.’s book Play, he describes play “as important as diet and exercise to health.”

I agree.

So how do we incorporate play into our busy lives?


Our physical lives are the the perfect arena to explore play in a spirit of fitness freedom.

But we should already be thriving and enjoying our physical training–the everyday work should still feel fun.

Adding occasional play components can rev up our skill set in a new way and still be compatible with our current training methods.

For example, bottoms up kettlebell carries are challenging, but feel like play to me, and I like to find new ways to challenge myself with them. In the video below, I am balancing and moving mindfully with a kettlebell in the bottoms up position.

Often play starts out one way, and morphs into another way once our imagination kicks in.

Play is in the eye of the beholder and only limited by the imagination.

This opens the door to learning, creativity, improvisation and advanced skill development as individuals explore movements and lifts in a relaxed and exploratory environment.

I like to practice a climbing technique that I refer to as a jungle-up, and that often leads to practicing other hanging/pulling techniques on our suspended pullup bars. The jungle-ups condition the body for all types of bodyweight movements.

How Do Students Respond?

Some students enjoy the change … the freedom, the laughter, the ability to set their own limits and to try something new.

Others may tell you they prefer more structure with the reps, sets, and specific goals, but those are probably the students who will gain the most from fitness freedom.

How Often to Incorporate Play into Small Group Classes?

Play works well as an occasional warm-up component, a finisher, between sets, or as the main element of a lighter training day.

It can also be ideal for special occasion classes (holidays, open houses, family and friends events, special workshops, hump day, etc.)

You might decide to include a play component in Saturday classes when people are not rushing off to work and they have a more relaxed mindset. Or, you could add it as a recovery tool at the end of each round of a strength circuit

Play Examples for Small Group Kettlebell Classes

The Kettlebell Ameoba… often we are standing in one spot while we swing, clean, press, snatch, etc. Getting outside and moving as a group while we handle a kettlebell can feel playful while providing some great conditioning.

Sample Ameoba Programming with a Single Bell
(We use this is two teams, outdoors, and rest after each set of 10 paces.)

  • Walking 2-arm kettlebell swings – 10 paces down and back
  • 1-arm suitcase carry – 10 paces down and other arm back
  • 1-arm racked kettlebell lunge – 10 paces down and other arm back
  • Goblet hold and shuffle sideways – 10 paces down and back
  • Your choice carry – 10 paces down and back
  • Finish with single kettlebell figure-eight practice in the grass.

The Kettlebell Swing Wave… this idea came from Superb Health where we did it with a large group event. We used it when the Ohio State Buckeyes (our local team) were off to play for the national football championship. Our heavy 2-arm swing wave lasted as long as the Ohio State fight song and we started the swing as soon as the other person had the bell in the air–wave style.

Hand-Foot Crawling with Torso Stability Animals… the dog toys I keep in the gym for our occasional furry guests, come in handy when we are hand-foot crawling (great for warmup or as part of a circuit.) If the animal falls off a student’s back, add another animal and another to help them zero in on tightening their torso and moving the shoulders and hips.

Roxanne… playing the song Roxanne (or any song) and squatting (or any movement) every time you hear the word ‘Roxanne’. This is a great for warmup or a finisher–thanks to one of our gym members for this idea.

You-Go and I-Go Swings in Teams… two teams (one at a time) do 2-hand heavy swings in a 10-9-8 … 1 ladder (and maybe back up). We maintain active rest and cheer on the opposing team as they swing.

Kettlebell Figure-8s / Kettlebell Juggling… moving the bell in this way feels like play, but requires concentration, coordination and strength. Go light if you are new to this and make sure the flooring can handle an occasional dropped kettlebell — or better yet, head outdoors in the grass, to a volleyball sandpit or to the beach.

Push Exploration… set up an area with yoga blocks, Neuro-Grips, kettlebells for students to explore various push variations such as uneven push-ups, planks, kneeling fingertip push-ups, one-arm Neuro-Grip holds, ab wheel and so on. Not familiar with some of these? You might want to check out the PCC workshop. This is great fun. great conditioning and as a coach, you get visual feedback about your students’ strengths and weaknesses. We also use Pull Exploration with lots of hang and pull-up variations.

Lori Crock Group Fitness Push Exploration


***

Lori Crock is an RKC Team Leader, PCC, MovNat-II and FMS-II strength and movement coach based in Dublin, Ohio (Columbus area.) She owns MoveStrong Kettlebells where she practices fitness freedom with her students who continue to amaze, inspire and educate her in small group classes. Lori can be reached at lori@movestrongkbs.com, www.movestrongkbs.com or on Facebook.

Filed Under: Kettlebell Training, Tutorial Tagged With: advanced exercise variations, creative fitness, creative training, exercise variations, fitness freedom, group fitness, kettlebell training, kettlebells, Lori Crock

Fundamental Human Movements and Training in Opposite Planes of Motion

February 11, 2015 By Sebastian Müller 7 Comments

Sebastian Muller Push Up

There are many philosophies out there when it comes to improving performance and mastering training efficiency. The following post is about two things that changed my life completely.

Part 1: Fundamental Human Movements

When I stumbled upon kettlebells a few years ago on the Internet, one thing came to mind–kettlebell training is always training of the entire body. Back then, like many people, I used to train isolated muscles and had felt okay doing this for about ten years. When I heard ‘full body training’ I immediately thought about training schedules for beginners. In every forum it seemed like beginners started their training with full body exercises and then switched to split training later. The most popular splits were chest and biceps. On certain days, you only attack biceps and/or chest muscles nicely isolated with tons of exercises.

Through constant research about kettlebell training, one day I stumbled upon Dan John’s The Fundamental Human Movements. His philosophy was suddenly all about training movements instead of training muscles.

Train movements instead of muscles!

At first this didn’t make any sense to me at all. How exactly am I supposed to train movements? It took me a while to understand what he was writing about, and the advantages of this training philosophy. How could these movements be all you ever need to become more fit than the average Joe or Jane?

Here’s the “secret”:

The fundamental movements are push, pull, hinge, squat and loaded carries.

But isn’t this another split and you’ll train isolated muscles again? Not really. Take a look at the recommended exercises for each movement and you’ll see that your entire body is always incorporated and trained, only the focus changes. Here are these fundamental movements and some exercise examples:

Push: push up, military press, push press,

Pull: row, pull up

Hinge: hinge with added weight (sandbag, kettlebell, etc.), deadlift, one-legged deadlift, kettlebell swing, clean, snatch, jumps (vertical and horizontal)

Squat: goblet squat, front squat with kettlebells, squats with barbells

Loaded Carries: waiters walk, suitcase walk, rack walk, press walk, farmers walk, double rack walk, pulling or pushing sleds, cars, etc.

As you might imagine, “push” exercises are mostly favored by everybody. Bench pressing is likely to be a lot of people’s favorite exercise and unfortunately always has priority before squats, pull ups and hinges. Just take a look around in your local fitness studio and try to find out which machine is most frequented.

As for most of the people who hear about the fundamental movements for the first time, it’s now time to get back into balance. It was also like that for me in the beginning. Dan John recommends prioritizing the fundamental movements like this:

  1. Loaded carries
  2. Squat
  3. Hinge
  4. Pull
  5. Push

He argues that he can change your life with loaded carries in three weeks. Here is an example: in his book Intervention he describes a client who was already close to mastering all of the fundamental movements. Dan John could only teach him a little bit here and there about a few movements. But, when it came to loaded carries, it turned out that this athlete had never trained with them before. So they worked together on loaded carries and the results were extreme in a very short time. Near the end of my “traditional” training time in a fitness studio, I always brought my own kettlebell with me. I used to work in a studio as a trainer for rehabilitation and every time I finished working, I fetched two kettlebells and carried them across the studio. I trained in the evenings and the girls and guys on their ergometers were always giving me puzzled looks!

But back then, I recognized that I was getting the same performance improvements that Dan John describes in his book. This is one of the reasons I fell in love with kettlebell training and how this training philosophy changed my life.

But, you don’t have to just carry a kettlebell! Go out there and look for something that you can lift and carry and then do it! Do this for three weeks and see if your life changes.

Part II: Training in Opposite Planes of Motion

Sebastian Muller Pull Up

Hearing about the five fundamental human movements is a good start, but only pays half of your rent (German saying). If you ask yourself how you can use these movements together into an effective training schedule, carry on, because:

Training in opposite planes of motion is the most effective way to make your training more efficient!

Why? Because you will learn to do more and how to do it more efficiently in the same amount of time!

What are the planes of motion? Basically you have top and bottom, front and back, up and down and reverse.

Once you understand which direction, plane and axis corresponds with each fundamental movement, you are the big time winner. With this, you can easily combine the right exercises to train the whole body without ever missing any part of your body.

Here is a list of some exercises split into the fundamental movements. The phase where the most strength is required defines the direction.

Push

  • Focus on the front of the upper body
  • Directions: forward (push up), up (kettlebell press)

Pull

  • Focus on the back of the upper body
  • Directions: back (rows), down (pull ups)

Hinge

  • Focus on the back of the lower body
  • Directions: forward (deadlifts)

Squat

  • Focus on front of the lower body
  • Directions: up (front squat)

Loaded Carries and Groundwork

  • Focus on total muscle interaction from up to downwards and front to backwards

How can you use these movements and planes to make your training (more) efficient?

The answer is supersets, they are the best way to save time during training efficiently. Supersets are movements or exercises executed consecutively without a break between them. Here is an example of a superset, where lower and upper body alternate and frontside and backside are focused in turns.

Example: Deadlift (backside lower body) in a superset with press (frontside upper body)

So although you train your whole body with these two exercises, the focus alternates between these two, giving you ‘active rest’ from each fundamental movement in between.

Put a corrective movement into the breaks between the sets and you will attack the next set fresh and recovered.

Sebastian Muller Kettlebell Swing
Sebastian swings a Dragon Door kettlebell custom painted with his gym’s logo

Example of an entire training session with kettlebells and bodyweight using the fundamental movements:

1. Turkish Get Up 1/1 x5 (Groundwork)

2a. Double Front Squat 5×3 (Squat)

2b. Pull up 5×3 (Pull)

Break:  2 minutes – corrective movement: mobilizing t-spine

3a. Swings 10×5 (Hinge)

3b. Push up 5×5 (Push)

Break: 2 minutes – corrective movement: hip flexor stretching

4. Farmers Walk (Loaded Carries)

The plan above contains almost all fundamental movements except the horizontal pull and the vertical press.

According to how many training days your weekly plan involves, it’s always possible to do fewer exercises in one set on some and more on other days. A lot of people split the focus on lower and upper body for example. You could do Monday and Thursday movements with focus on lower body, Tuesday and Friday focus on upper body. This way it would still be effective because you would intensely train the different planes of motion while still having two recovery days.

How the distribution comes out in the end depends on your own personal training goals and your current fitness level. Nothing is carved into stone, but hands-on-heart:

Knowledge about the fundamental movement patterns combined with the different planes of motion is an immensely powerful tool to shorten your total training time while make training more intense.

Give it a try and let me know how it works out for you!

Filed Under: Kettlebell Training, Tutorial Tagged With: kettlebell workouts, movement, movement training, planes of motion, Sebastian Muller, workout design

Achieve Pain-Free Single Kettlebell Cleans From The Start

January 28, 2015 By Lori Crock 5 Comments

RKC Team Leader Lori Crock's Kettlebell Cleans Tutorial

I am a coach who hates to see people in pain from doing cleans.

And it doesn’t matter whether it’s a beginner, or a more advanced kettlebell athlete, the clean can be a challenge to do as effortlessly as its kindred ballistic—the swing or even the snatch.

I speak from experience—the clean was hard for me when I was preparing for the RKC-I. It wasn’t hard with the typical thump on the wrist and forearm in the catch. No. My issue was a shoulder-hike on one side as the kettlebell made its way up … which can be even worse with the trap pain and the potential for some serious asymmetry down-the-road.

To avoid this, read on!

When you are first learning the clean, it can seem mysterious as to what the hand, arm and kettlebell are doing on the way up to the racked position. It happens so fast!

Often we see the clean only as a transitory movement that prepares us for pressing, front-squatting or doing racked carries—instead of focusing on the quality of the clean—even though we know a more efficient clean results in stronger pressing and squatting. And the clean is a nice alternative to the swing or snatch for conditioning.

You might not realize the inefficiencies in your clean if you don’t train it on its own very often—until you notice bruises on your wrist or arm the next day.

So let’s review the phases of the clean to achieve pain-free cleans. Note that the coaching cues included here are phrases I use when teaching to help people remember key points. The phrases may not exactly match the words used in our RKC manual, but they are rooted in my RKC kettlebell training.

The Swing

Get your two-hand and one-hand swing down first to set your start position, hip hinge and especially a deep back swing. Use cheat cleans (two-hand cleans) while you are learning the swing to prevent grooving bad movement patterns with your single kettlebell clean.

The Setup

Clean setup is just like the swing, holding the center of the handle, except the handle is tipped vertically for internal shoulder rotation to prepare your elbow to lock into your side once your arm moves through to the front of the body.

Coaching Cue: Set up like a slingshot.

Lean back with hamstrings on, lats activated, the kettlebell is tipped toward you—the whole body is taunt and slightly leaning back—and ready to release the kettlebell into a deep back swing.

You are in this same slingshot position each time you clean, whether from the ground or in the air into another rep. This athletic, ready position also applies to the Swing and Snatch with the handle in a horizontal position … but when learning the clean, in my experience, students need a reminder about the importance of the setup because they are more focused on the finish.

Lori Crock Kettlebell Cleans Tutorial: The Setup
The Set Up

The Back Swing

Get into your best hip hinge and hike the bell back as deep as possible to load and explode out of your hips. Shortchanging the back swing means you’ll end up without the power to send the kettlebell upward; so your body may compensate by arm curling the kettlebell or hiking the shoulder to assist the kettlebell upward.

Coaching Cue: Crush the wall behind you with your tailbone and explode up.

Go back to the swing if you are having problems achieving a deep back swing and hip explosion.

Practice: Swing-Swing-Clean 3 times each side to refine the back swing for the clean.

Lori Crock Kettlebell Cleans Tutorial: The Back Swing
The Back Swing

The Breathing

Breathe in through your nose to fill the diaphragm on the back swing. Exhale as the hips snap and knees and glutes lock.

Hardstyle breathing is used for power production and safety at the concentric or positive part of the clean (and all ballistic kettlebell movements). Exhaling when the hips snap creates a powerful muscular contraction in the torso that assists the body with the movement.

Coaching Cue: Explode, exhale.

Time your exhale on the hip snap/lock—not on the catch of the kettlebell in the racked position.

The Rise

When the kettlebell enters the front of the body there is some quick work to lock the elbow against the side of the body and get the hand around the kettlebell handle with a loose grip. Do this right away after the back swing when the hand is at hip level rather than waiting until you are about to rack the kettlebell.

Coaching Cue Elbow and Arm: Hip and zip

Lock the elbow into you side above your hip, zip up your jacket; keep you hand and arm close to your chest as you guide the kettlebell upward.

Coaching Cue Hand: Houdini hands

Move your hand quickly around the kettlebell handle as soon as it enters the frontal plane; do this quick hand work at approximately hip/waist level.

Practice: Clean in front of a wall, door, or post to practice keeping the kettlebell close to the body if you tend to cast it out away from the body. Use your other hand to cover your face in case of actual impact to the wall.

The Catch

The triangle of your forearm / upper arm will receive the kettlebell and hold it with even pressure (50% pressure on forearm and 50% on your bicep), but think of the whole body as catching the kettlebell. We move into a vertical Hardstyle plank when receiving the kettlebell to help avoid high impact on the wrist and forearm.

In the racked position, the kettlebell will not be sitting on your chest; instead, the inside of your arm will connect with at the side of your torso with a vertical forearm and vertical wrist about at the level of your collarbone. Do not hold your racked arm out in space—keep it touching the body to prevent overloading the elbow joint and to engage the lats. The arm and the body are connected and working as one unit.

Coaching Cue Torso: Catch with your cylinder of strength (Thanks, Andrea Du Cane for this phrase!)

Feel the muscular sinking in of your whole body around the kettlebell (not a collapse, but a tightening) as your abdominals and glutes contract, lats engage, knee caps roll up into quads and the entire body links and locks to receive the kettlebell in the racked position.

Coaching Cue Wrist: Knuckle up!

Because we use a loose grip on the rise of the kettlebell, beginners sometimes end up catching with a ‘broken wrist’ (wrist slightly bent back) in the racked position. To avoid this, re-tighten the grip after the catch so that knuckles are flat and facing the ceiling.

Practice: 5 Cleans left and 1 Hardstyle plank for 15 seconds / repeat right.

The Drop

Tip the wrist to release the kettlebell into a downward descent with a relaxed arm, thumb down slightly and the shoulder will be slightly internally rotated. Use only enough tension to hold on to the kettlebell and guide it to the floor or into another rep. Your hips, as usual, are doing most of the work. Keep the kettlebell as close to your body as possible, with your arm still touching your body, and finish with the arm straight in the back swing position at the end of drop before setting the kettlebell gently on the ground.

Note that death-gripping the kettlebell on the drop can lead to elbow pain.

Coaching Cue: “Waterfall” the kettlebell downward.

Allow gravity to do most of the work on the descent of the kettlebell using only a light grip.

Putting it All Together

Now you are ready to put it all together and practice your (hopefully!) pain-free cleans.

The Practice

I use the clean for conditioning in complexes and chains. I also like kettlebell chains that include a clean to practice smooth transitions between movements. This complex meets both of those goals. I use one kettlebell for all movements with 1 minute of rest between 3-5 rounds.

10 Cleans left / 10 Cleans right

SA 2 Swings-2 Cleans-2 Press left

SA 2 Swing-2 Clean-2 Press right

***
By Lori Crock, RKC Team Leader, FMS II and MovNat MCT II. Lori owns MoveStrong Kettlebells in Dublin, Ohio where she teaches small group kettlebell classes to all ages and fitness levels and continues to be amazed, inspired and educated by her students. Her email address is lori@movestrongkbs.com

Filed Under: Kettlebell Training, Tutorial Tagged With: clean a kettlebell, kettlebell cleans, kettlebell how to, kettlebell instruction, kettlebell technique, kettlebell video, Lori Crock, RKC Team Leader, video

A One-Size-Fits-All Solution for Problematic Kettlebell Presses

December 10, 2014 By Andrew Read 4 Comments

Master RKC Andrew Read Performs a Kettlebell Bottoms Up Press

The learning and skill continuum that begins at HKC and progresses through RKC and RKC-II follows a fairly straight line. We begin with patterning exercises in HKC—two hand swings, the goblet squat, and the get-up—before progressing to one handed variations on these themes such as the clean and snatch, and the double kettlebell front squat at the RKC. The work done on the get-up lends itself to pressing and snatching which in turn leads to the double push press and jerk as well as the windmill and the bent press at RKC-II.

At RKC-II, people usually face one of two problems, either their thoracic mobility is poor and they struggle with the double overhead work (as well as the windmill and bent press) or they struggle to get their heavy press. As much as the old RKC saying, “To press a lot, you must press a lot” does ring true for many, it may also lead to bigger problems down the line.

About a year ago I wrote an article for Breaking Muscle (Single Kettlebell Ballistic Complexes: How to Save Your Shoulders and Still Work Overhead) which explained the three different types of AC joint set up that people have, as well as possible ways to train long term without damaging yourself. But that still doesn’t help us with the heavy press goal if we’re on our way to RKC-II, does it?

When I wrote Beast Tamer, I outlined many different press plans that could help you get through a sticking point in your press training. I’ve learnt a bit since then and want to outline a plan below that will help you get through your sticking points without risking injury.

What we need is a drill that gives us the same feel as the heavy press and the same effort—all without placing the same strain on the AC joint. This is where the bottoms-up press (BUP) comes into play. The BUP is an interesting drill. Interesting in that I have used it as a one-size-fits-all solution for a variety of problems with the press. Not gripping the kettlebell tightly? The BUP will fix that. Not staying tight in your press? The BUP will fix that too.

The BUP is ideal for our needs as it teaches great form while forcing you to use less load. That may sound problematic, but the body doesn’t register how much you lift, only how much tension you generate. If your form is even slightly off, the kettlebell will fall. This is what makes the BUP ideal as a learning tool. It is automatically apparent what needs to happen and where the point of failure is.

Imagine that the fulcrum (center of rotation) for this movement is not the delicate AC joint, but instead a point midway between the deltoid and the elbow—essentially the middle of the bicep. By focusing on having your elbow move around that point while doing a BUP you will teach your whole body to engage during the press. Likely you will find this feels significantly different to what you have been doing when overhead pressing.

One of the things to keep in mind in relation to the BUP, is that it has a great effect up to a point. I don’t believe that past 32kg they do much to boost your press as the skill becomes its own lift. Prior to that they can be a valuable tool to teach you tension and alignment. Do not make the mistake of turning the drill into an exercise. The goal is never to have the best BUP in the world, rather to use the BUP to build your press.

Low reps are a must with the BUP, as the CNS fatigue from the high grip demand is intense. 2-3 sets of 3-5 reps seem to work best prior to your limit presses for the day.

The other side of this equation is that healthy shoulders are not built from pressing alone. For every push, you must have at least one set of pulling to counteract it. While the pull up is usually the choice of functional trainers, I’ll caution against it as the lat also acts as an internal rotator of the arm, so if all you do are presses and pull ups you’re just as likely to end up with bad shoulders as if you only did presses.

At RPT, we use a variety of weighted mobility drills to achieve healthy shoulders. Here’s how a press workout might look:

Lying dislocates with weight – 3 sets of 10 reps. Paired with push-ups for 3 sets of 10-20 reps.

BUP – 2 x 5 at 50%

Y-T-Row – 2 x 5-5-10

BUP – 3 ladders of 1-2-3 reps combined with easy light two-hand swings in between to help shake the tension out.

Perform a rear support—think of it as a face up plank—for 60 seconds and then do a get-up on each side. Perform three super sets of this as a final shoulder health practice. Make sure to stretch after and “unglue” all the tension you’ve built up in these muscles during training. Pay particular attention to the triceps, lats, traps, and shoulders.

***

Andrew Read, Master RKC, Author of Beast Tamer, is head of Dragon Door Australia and Read Performance Training. Recognized as Australia’s leading functional strength trainer he is a regular contributor to Blitz, Inside MMA, International Kickboxer, Oxygen, Ultrafit and Breaking Muscle. His coaching background spans nearly twenty years having worked with many Olympic and world championship level athletes.

Filed Under: Kettlebell Training, Tutorial Tagged With: Andrew Read, Beast Tamer, bottom-up press, bottoms-up press, kettlebell drill, kettlebell press, kettlebell press drill, kettlebell press program, kettlebell technique, military press, overhead press

  • « Go to Previous Page
  • Page 1
  • Interim pages omitted …
  • Page 5
  • Page 6
  • Page 7
  • Page 8
  • Go to Next Page »

Primary Sidebar

Featured Products

previous arrow
BOOK-RKCBookofSnC
HardStyleKettlebellChallegeDanJohn700
BookCoverMasterTheKettlebell1
RKCiconKettlebell512
KettlebellGoddessdv040
next arrow

Recent Posts

  • RKC Big Six Workout
  • The Kettlebell Swing & Low Back Pain
  • Key Kettlebell Exercises To Help You Create Better Balance
  • How to Most Effectively Use Kettlebells to Meet Your New Year Goals
  • 1 Exercise That Checks All The Boxes
FOLLOW US ON TWITTER!

Archives

Copyright © 2025

Dragon Door Publications / The author(s) and publisher of this material are not responsible in any manner whatsoever for any injury that may occur through following the instructions or opinions contained in this material. The activities, physical and otherwise, described herein for informational purposes only, may be too strenuous or dangerous for some people, and the reader(s) should consult a physician before engaging in them.