• Skip to main content
  • Skip to primary sidebar
  • Home
  • Contributors
    • Matt Beecroft, Master RKC
    • Martijn Bos, Master RKC
    • Andrea Du Cane, Master RKC
    • Angelo Gala, Master RKC
    • Chris Holder, Master RKC
    • Steve Holiner, Master RKC
    • Dan John, Master RKC
    • Mike Krivka, Master RKC
    • Thomas Phillips, Master RKC
    • Robert Rimoczi, Master RKC
    • Phil Ross, Master RKC
    • Max Shank, Master RKC
  • Workshops
    • HKC Workshops
    • RKC Workshops
    • RKC-II Workshops
  • Find an RKC Instructor
  • Resources
    • Articles
    • Forums
    • Kettlebells
    • Products
  • Blogs
    • PCC Blog
    • Strong Medicine Blog
  • Archives

RKC School of Strength

Official blog of the RKC

Tutorial

How Are Your Ankles?

March 23, 2016 By Paul Britt, DC 16 Comments

Paul Britt Ankle Mobility

Have you played a lot of sports?

Do you wear high heels?

If so, how do you think your ankles are doing?

I have found that most of the people who I train tend to lack ankle mobility. This can be the first kink in the movement chain, and lead to further issues within the whole body. Ankle mobility issues can lead to knee, hip, and even shoulder mobility issues. These issues can also travel down that same path from shoulder to ankle. To find out what is ultimately causing the use, see your doctor and/or be screened by someone who is FMS certified. If you have pain, see your doctor first to be cleared.

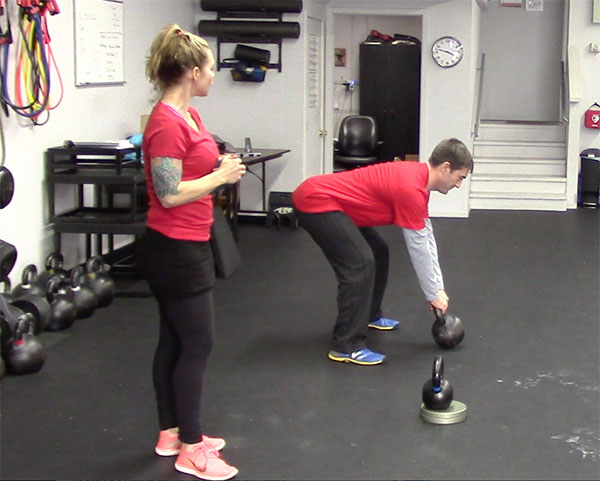
The following is a quick ankle mobility series that we use in our gym. Everyone who trains with me has been screened with the FMS/SFMA and if they have pain have been evaluated by their doctor.

I don’t show it in the video below, but everything starts with diaphragmatic breathing. We will typically breathe for a couple minutes to transition from work/life stress so we can train mindfully.

We start out by foam rolling the shin area. We work the anterior tibialis, the band of muscle on the outside of the shin. We are using small strokes to locate areas that are tender or tight. We then will make several passes over that area.

Next, we roll out our calves. While it is possible to do that with the foam roller, I like The Stick for this. It allows for adjustable tension on the calf, and requires less force to work on any trigger points/tender areas. I tell my students to only use about 7-10lb of force while rolling. If The Stick looks like a horseshoe, you are using too much force.

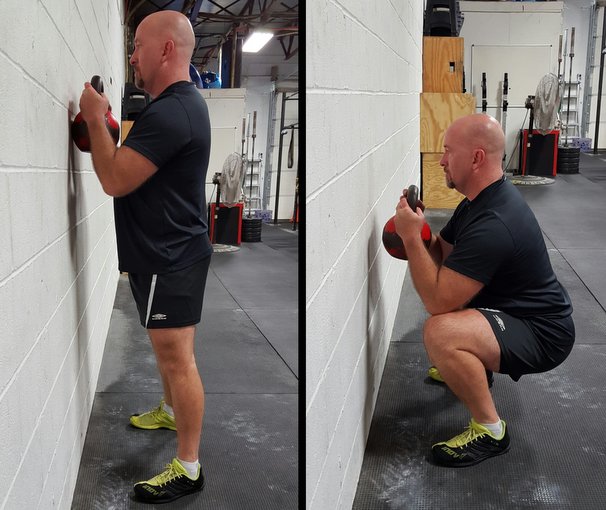
Then, we move onto direct ankle work. There are two different versions on the video. The first version—the field expedient manner—requires no equipment. It is performed in a half-kneeling stance. If the right knee is up, take your right hand and cup the right heel. The left hand will cover the toes. The goal is to keep your heel planted as you progress through the motion. Utilizing diaphragmatic breathing, apply some pressure on your right knee with the right elbow as you move back and forth through the movement. I find the normal rep range for the best results is about 10 reps per side. Perform this on both sides.

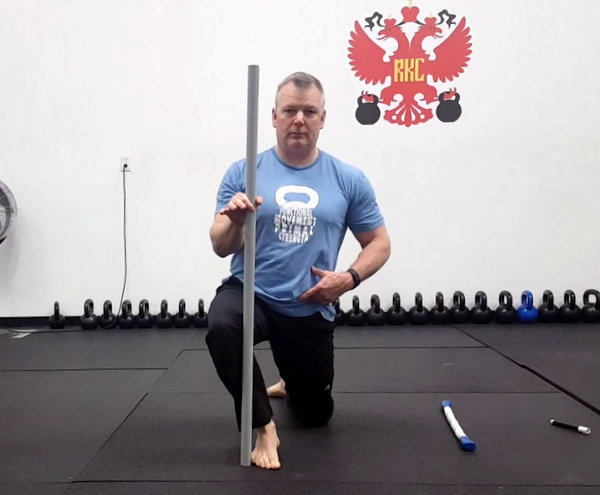
The second version is very similar except that you are using a stick and moving the knee to the outside of it. You only go as far as you can while still keeping your heel flat on the ground.

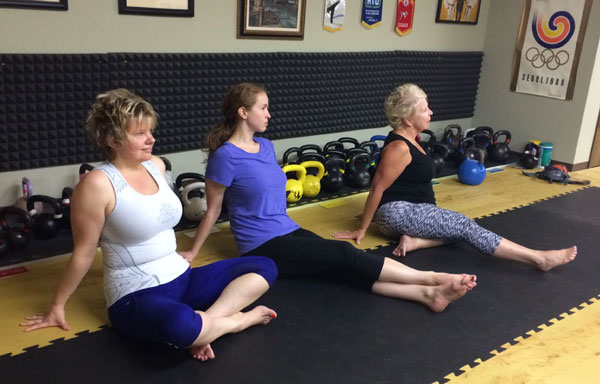
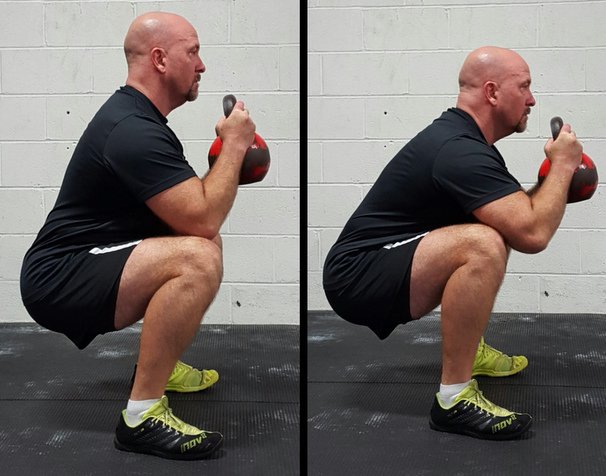
The last movement is the heel sit. Sit back on your heels with a little bit of a backwards lean. Tighten your thighs and think about driving your shins into the ground, then relax. You should feel your feet flatten out as you perform 3-5 reps of this sequence.

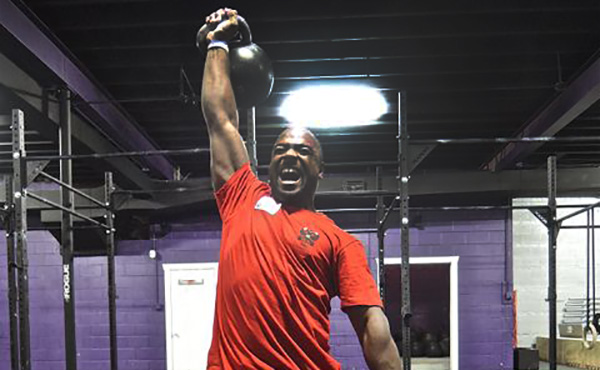
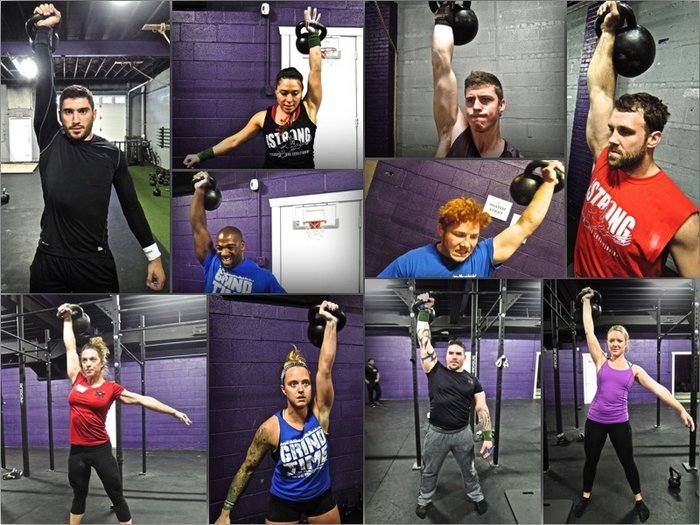
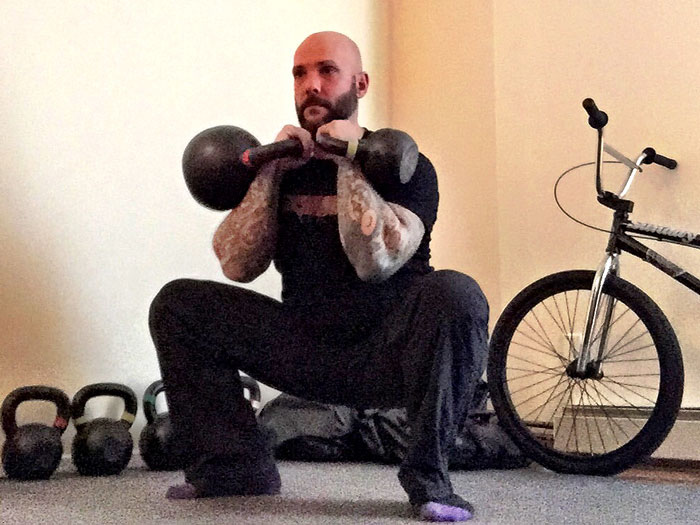
This quick and easy series is beneficial for restoring mobility to your ankles and improving your kettlebell training.

***
Senior RKC Paul Britt has been an RKC kettlebell instructor since 2006. He trains clients at Britt’s Training Systems, his award-winning Hardstyle Kettlebell Training Facility in Rockwall, Texas. Paul has served as an assistant instructor at many RKC and HKC Courses, is a Certified Kettlebell Functional Movement Specialist (CK-FMS) and works with some of the top Chiroprators in North Texas. Please visit his website brittstrainingsystems.com for more information.

Filed Under: Mobility and Flexibility, Tutorial Tagged With: ankle mobility, mobility sequence, mobility training, mobility video, Paul Britt

It Isn’t Sitting, It’s the Chair

March 9, 2016 By Jay Armstrong 10 Comments

Jay Armstrong Sitting Stretching

We have all heard about the bad things that happen to our bodies as a result of sitting in a chair—slumped shoulders, collapsed ribcages, tight hip flexors, weak abs, etc. Yet, if you want to improve your flexibility, I recommend you sit down. However, instead of sitting on your soft, comfy couch with a tv remote in one hand, your assignment is to sit on the floor.

The typical armchair encourages you to pour yourself into the seat, completely disengaging your glutes and abs. Then, a pair of armrests beg you to round your shoulders forward and flare your elbows outward—all while collapsing your ribcage. With your ribcage collapsed, your breathing will be compromised. In this position, your head will jut in front of your shoulders, and stress will begin to creep into your neck.

Nothing about the “armchair seated position” resembles quality postural alignment.

Prior to the invention of these cushy posture-destroying chairs, human beings were forced to sit differently. If, after miles of walking, you decided to rest on the side of the trail, you probably would have looked to rest your buns on a rock. In this position, you still need to maintain control to keep from falling off the rock. You’ll probably need to sit with a relatively erect posture, while keeping your head over your shoulders. After all, you are simply resting your legs and not your entire body. The only time you are supposed to be completely relaxed is while lying down.

Sitting Cross-Legged
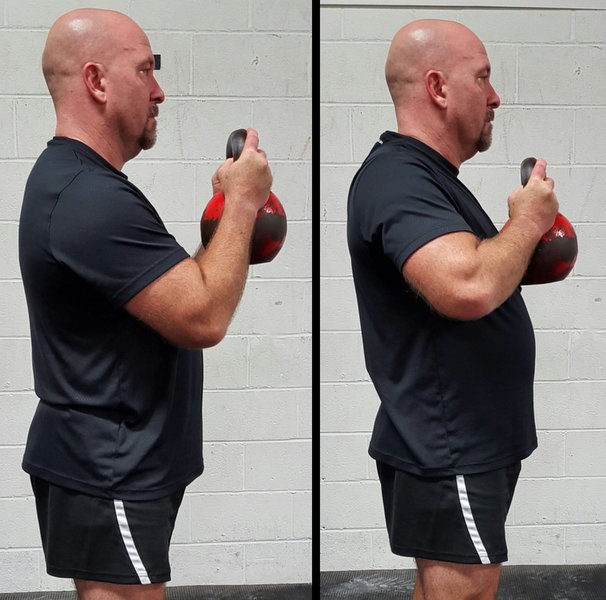
In our convenient Western lifestyle, we tend to stay further and further away from the ground. We don’t lie down or sit on the ground. However, sitting on the ground will potentially improve your flexibility for many other movements. I’ve outlined several ways to sit which can help improve posture, flexibility, and overall fitness.

Sitting Cross-Legged

When we sit in the cross-legged position, the femurs of upper legs are moved into external rotation. Sitting this way may also automatically encourage you to open your chest and properly align your spine.

Sitting On Heels
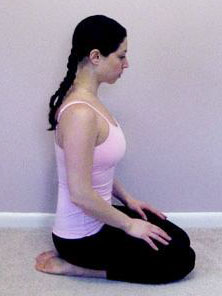
Sitting on Your Heels

When we sit on our heels, we’re obviously putting our knees into maximum flexion. Simultaneously, our feet will usually move into complete plantar flexion. Once again this position automatically encourages us to sit with an erect posture, activating the muscles which stabilize the spine.

Sitting with Internal Leg Rotation

Most people have a tough time moving their upper legs into significant internal rotation. However, if you can flex your knees, move your knees apart and sit between them, you will greatly improve your ability to internally rotate your hip joints. The little guy in the picture has a rather extreme range of motion and may actually prefer to sit in this position.

Sitting With Internal Rotation

Sitting with Your Arms Behind You

The soft, cushy armchair combined with computer work constantly places our shoulders in front of our chest or sternum—encouraging internal rotation of the shoulder joint. When we sit on the floor and place one or both arms behind us, we externally rotate the upper arm and open the chest. This is an excellent corrective position.

Sitting With Arms Behind

Sitting with One or Both Legs Straight

If you want to improve your hamstring flexibility, or desire to do the splits, sitting with one or both legs straight is the ticket. Any method of sitting with one or both legs straight (see photo at the beginning of this post) will provide at least a little stretching of the straight leg. So, “stretching” doesn’t need to be just an activity within your kettlebell workout. You can just sit on the floor while working or watching television. More time spent in these positions will make them feel more natural. If you watch television—and I encourage you to find something else to do with your valuable time—start by sitting on the floor from one commercial break to the next. While you’re seated on the floor, increase your awareness of the position of your ribcage, head, and spine. You may be surprised by the intensity of the stretching sensations you feel from just spending time close to the earth.

***

Jay Armstrong is a Senior RKC, 6 Degree Black Belt TKD, and Master Z-Health Trainer.  The past 30 years have been dedicated to helping others develop confidence through increased strength and pain-free, exceptional mobility.  His quest for knowledge continues.  He runs The Kettlebell Club in Houston, Texas.

Filed Under: Mobility and Flexibility, Tutorial Tagged With: flexibility, Jay Armstrong, lower body, mobility, sitting

How to Nail the RKC Kettlebell Snatch Test Once and For All

February 17, 2016 By Dan John 11 Comments

Nailing the RKC Kettlebell Snatch Test

The RKC Kettlebell Snatch Test seems to bother many people. It’s 100 reps, and quickly indicates the issue:

Is it your lungs?
Is it your buns?
Is it your guns?

During the snatch test, the skin comes off your hands, sweat drips in your eyes, and your organs seem to rise up in rebellion. If you have been practicing the snatch test by practicing under ten reps, resting for a set period, then repeating, you can usually have pretty lousy technique without ripping skin off of your hands.

Sadly, for the people I have prepped, I learned that the proper way to help someone improve their kettlebell snatch is to wait until around rep 70 to comment. The challenge of doing 100 reps in a set period of five minutes demands that the candidate bite the bullet and learn to keep snatching properly throughout the challenge.

After the first Belfast RKC, one attendee wrote, “With one sentence, you changed the way I snatched and I nailed the test.” I asked what the sentence was and the newly minted RKC answered, “It was when you said that you need the courage to drop the kettlebell into the swing with authority each and every time.”

Remember, first and foremost:

The swing is a swing.
The clean is a swing.
The snatch is a swing.

The bulk of the issues most people have with the clean or snatch can be cured by coaching the swing portion of the moves. As if by magic, learning a proper swing for the clean or snatch stops most wrist banging and lockout issues.

But, for a proper swing, we must set up for it with a good drop from the snatch. Teaching the kettlebell snatch “from the top down” has advantages that are only apparent when the reps are high. Again, a few sets of five then resting will be a lot different than going after 100 snatches in 5 minutes.

Three terms that seem to help 99% of the population when working with the snatch from the top down are: “Pour the Pitcher,” “Swim” and “Unzip the Jacket.” Before getting into the specifics, let’s look at a key principle explained at a recent workshop, the position of the body in the “Cylinder.”

In the Olympic lifts—especially the locked out front squat position just before the jerk (or in training movements)—the lats are flared out, and the chest is tall in what most people would recognize as the traditional “Muscle Beach” pose. Although this posture is ideal for some movements, we want a slightly different position. The opposite of this posture is the “hollow rock” from gymnastics. While it is perfect for holding an Iron Cross on the rings, this position is not what we want for our RKC movements. Instead, consider a position “in the middle.” Now, I love continuums, so think of the Olympic lifting posture on one end, and the hollow rock on the other—the RKC cylinder would be in the middle.

RKC Kettlebell Snatch Test Collage

This insight allowed me to finally connected the dots in regards to holding the hips in a neutral stance for training. If the pelvis is like a bowl filled with water, we want to stand (and stretch and move generally) without the water pouring out forward, backward or to either side. Utilizing this notion of a cylinder helps immensely with the hip position, too. It’s like the story of the Three Bears, one wants to stand “Just Right.”

While we are discussing posture, let’s add an additional insight about the packed shoulder. Sometimes, it is difficult to teach the packed arm to experienced athletes. Years of compensations can make some people convinced that their shoulders are packed, when in truth, their traps are on their ears! Fortunately there’s a very simple solution for this problem:

Years ago, Janis Donis, the famous Javelin thrower, told me that all throwing movements need to be done with an “open armpit” to protect the shoulder. This idea illuminated my discus throwing and kept me trouble-free with decades of pain-free shoulders. Literally, the entire armpit should be exposed for throwing movements. It shouldn’t twist or turn the shoulder down, a movement that often signals an “arm throw.”

As I worked with more and more guys who had played collision sports and trained like bodybuilders, teaching the packed shoulder became a more of a chore. Between the injuries and Frankenstein training, many athletes were not aware of where their shoulders were. Many were thinking, “Isn’t it right next to my head?”

Get ready for my million-dollar drill: Grab the tag on the back of your shirt collar. For most people, this will pack the shoulder “instantly”. Now, many people will need to slide down the spine a bit more to get the position, but this simple movement “instantly” packs the shoulder. Note how the bicep is on the ear? This is also probably the most-heard phrase during waiter walks, consider how “open” the arm pit has become with this simple move. Now, hold the shoulder in this position and simply straighten the arm. Now we have the packed shoulder and the open arm pit. Now that the body is in the cylinder, it is time to drop the kettlebell.

Let’s look at three terms or images that all lead to the same powerful swinging hip hinge. Let’s start with “Pour the Pitcher.” Now, if I drop the kettlebell straight down, my head is the first point of contact. Hitting the head multiple times with a heavy kettlebell is NOT optimal. Yes, please feel free to quote me on that. So, obviously, we need to push the bell forward. But, launching it straight out to the position of the top of the swing is not perfect either. With a heavy kettlebell, the athlete simply can’t counter this movement, and the athlete will either be pulled forward, or the kettlebell may even cause damage or injury—this is a lot of force in a bad position!

The first image I ever heard for the proper drop was “Pour the Pitcher.” With the thumb leading from the lockout position, simply turn the wrist and think of pouring milk on some cereal. (Just think of the cereal, don’t eat it. Cereal is for cows. Eat the cow instead.) Because of gravity, the kettlebell will start coming down in front. I encourage people to immediately get “the courage” to attack the hinge here.

“Swimming” is another cue that helps some people. Like the crawl stroke, imagine bringing the bell down the midline of the body as if you were doing laps in a pool. This image immediately made sense to me because the correct crawl stroke isn’t performed with a straight arm or a precisely prescribed angle, the elbow angle “depends” on many factors. The same is true for the kettlebell snatch. I also like this term because it illustrates that this is a dynamic movement, not just a simple free fall.

“Unzip the Jacket” is a phrase I heard at my RKC in San Jose. Simply, one should think of unzipping a jacket. Again, there is no National Zipping Policy, so there will be multiple ways to accomplish this task. As always, keep thinking about attacking the hinge.

Something I hear over and over from RKC candidates who FAIL the snatch test is the following kind of statement:

“Well, I did 30 reps the first time I tried the test, then built up to 54 with the 24kg kettlebell. I was hoping that the energy and enthusiasm of the group would get me those last 46 reps.”

I believe that you should come to the RKC already able to do 100 reps of the snatch. Now, that doesn’t mean every workout is done with the snatch-test weight kettlebell. Months before the RKC, I often recommend that the candidate use lighter kettlebells—as light as 12kg for men—and do several sets of 100 in training. I think it helps to “get used to” 100 reps.

Recently, I did a little challenge where I had to do 100 reps with the 24kg kettlebell. At 18 reps, I smiled. Later, I was asked, “Why did you smile?” Well, it’s because I use this system:

  • 20 reps with my left hand
  • 20 reps with my right.
  • 15 left
  • 15 right
  • 10 left
  • 10 right
  • 5 left
  • 5 right

This system gives a total of 100 reps with only seven hand switches. At 18 reps, I figure that I only have two more reps left with my weak hand and then I get to use my strong hand. In my mind, the first twenty reps get me over the hard part! The next eighty reps will be dessert.

But, if you don’t have the courage to actively drop the kettlebell for each and every rep, every rep will be hell.

****

Master RKC, Dan John is the author of numerous fitness titles including the best selling Never Let Go and Easy Strength.

Register for the Upcoming 2016 San Jose, California RKC taught by Master RKC Dan John with Senior RKC Chris Holder, and RKC Team Leader Chris White

Dan has spent his life with one foot in the world of lifting and throwing, and the other foot in academia. An All-American discus thrower, Dan has also competed at the highest levels of Olympic lifting, Highland Games and the Weight Pentathlon, an event in which he holds the American record.

Dan spends his work life blending weekly workshops and lectures with full-time writing, and is also an online religious studies instructor for Columbia College of Missouri. As a Fulbright Scholar, he toured the Middle East exploring the foundations of religious education systems. For more information visit: http://danjohn.net

Filed Under: Kettlebell Training, Tutorial Tagged With: Dan John, how to do the RKC snatch test, how to pass the snatch test, how to snatch a kettlebell, kettlebell snatches, Master RKC Dan John, RKC Prep, Snatch Test

Don’t Ignore These Two Common but Crucial Kettlebell Mistakes

February 3, 2016 By Keira Newton 9 Comments

Two Kettlebell Mistakes Keira Newton

As a Master RKC, I travel a lot. I love my job because I get to visit other gyms and teach people how to teach kettlebell technique according to the highest standards in the industry—RKC standards. In the past few years of teaching, I have noticed two commonly missed mistakes. These are simple fixes in my eyes, and easy to teach. So lets get started.

The Deadlift:

The deadlift is the basis of almost every kettlebell lift. It IS the foundation of what we do. However, I have seen people skip the deadlift altogether… (How will they learn the swing? How will that work?) Or they simply miss the most important part of the deadlift: the set up and how to work underneath the kettlebell.

In my experience, I’ve observed that people who are given a small kettlebell, are tall, tight in the hamstrings, or tight in the hips will round the low back to pick up the kettlebell. The cure for this? RAISE THE FLOOR. It’s such a simple fix, but it will help 99% of your students. I use it with almost all of my new students. The video below includes a short demo of this technique. Give it a try.

The Swing:

I think it is safe to assume we all know the kettlebell swing can be fantastic if performed correctly—and deadly if not. This is no joke. When training a client, or in your own training, you must know exactly what happens with this ballistic lift. The most common mistake I see from my clients and students (which is also the most missed among new trainers) is in the TIMING of the swing. While watching someone’s swing, if it looks like they are moving to the toes, swinging below the knees, or lifting the kettlebell with their arms, then their timing is off.

To fix the timing, tell your client to wait until the kettlebell has passed below the belly button, or their arms have touched their ribs after swinging the kettlebell forward before moving their hips back. It will seem almost as if the kettlebell will hit you where it hurts, and you get out of the way just in time. But, let’s make sure that happens okay? 🙂

Hope the video below helps you understand. Enjoy!


***

Kiera Newton, Master RKC, Level 3 Z-Health, MCT, PCC. Keira first picked up a kettlebell in 2005 when her husband challenged her to stop laughing and start swinging. She stuck with the challenge when she realized that she could get an all-in-one workout in a fraction of the time she spent at the gym. Keira was convinced… Read more here.

Filed Under: Kettlebell Training, Tutorial Tagged With: Keira Newton, kettlebell swing, kettlebell swings, kettlebell technique, kettlebell training, kettlebell troubleshooting, kettlebell tutorial, Master RKC Keira Newton, swings, tutorial

Fine-Tuning the Get-Up

January 27, 2016 By Andrea Du Cane 14 Comments

Master RKC Andrea Du Cane Get-Up Lead Photo

How and when to use the high bridge and when to use the “step-across” instead of the “windshield wiper”

At every HKC and RKC, I’m asked why we test the low sweep instead of the high-bridge. I also get a lot of questions regarding the “windshield wiper” vs. the “step-across” to transition in and out of the kneeling windmill to the lunge position. It’s time to explore each movement and gain a deeper understanding of some of the benefits of the get-up.

When I first became certified and started teaching the get-up, it was referred to as the “Turkish get-up”. Here’s the criteria that was given and tested at that time:

  1. Keep both shoulders packed.
  2. Keep the wrists neutral at all times.
  3. Keep the elbow locked at all times.
  4. Keep your eyes on the kettlebell.

Oh and well…. get-up! That was it, get up anyway you can.

Let’s just say the get-up has come a long way, baby. It’s transitioned from having very little explanation and direction to (for a time) elaborate direction, with a focus on corrective uses and advanced movement patterning.

You can say that now we have found a happy medium, erring on the side of explanation and points of movement. But, we have also found a good balance and an easier way to teach the get-up to newer kettlebell instructors and users.

The High Bridge or the Low Sweep

One area of confusion with the get-up is whether to use the high bridge or low sweep.

First, let me explain where the high bridge came from, and why it was initially introduced as a teaching and testing skill. The high bridge came from the FMS concept of using movement as a screen. When it was first introduced into the RKC curriculum, the high bridge was used as a screen for tight hip flexors. However, we began to notice that when people were doing the high bridge, their lumbar spine was actually in hyper-extension instead of full hip extension. I remember discussing this with Gray Cook, and he agreed with that it was one problem with using the high bridge as a screen, since it is easily cheated. It does not actually demonstrate whether the person is in full hip-extension or hyper-extension of the lumbar spine.

Secondly—and more importantly—you would not put a client, with a kettlebell in their hands, into a high bridge and then say, “Aha! You have tight hip-flexors”. Of course not. Long before they do that high bridge, you have deduced that they have tight hip-flexors from other screens. And from a safety perspective, you would not let someone perform a high bridge until they had opened up their hip flexors and could perform the movement correctly without a kettlebell.

Since one of the end goals of the get-up is to go heavy, for the purpose of safety and efficiency, you will want to pull your leg back and get your hips under the load as quickly as possible. The high bridge takes unnecessary risks with a heavy load during the transition.

That said, the high bridge is great with a moderate to light weight for a more advanced kettlebell user. Done correctly, it demonstrates shoulder stability, hip flexibility and control.

Master RKC Andrea Du Cane Get-Up Kneeling Windmill

Performance Tip: Think of the high bridge and sweep through as a tall side plank. When moving into a high bridge, post over towards the side, your shoulders should be stacked over each other. The hips will rotate slightly upwards, but the shoulders and t-spine are stacked vertically. Practice lots of side planks from the elbow and tall side planks, before moving onto the high bridge.

The “Step Across” Variation

Moving on to the next modification, using the “step across” instead of a windshield wiper. As stated earlier, the body needs to transition from the tall-sit position smoothly and with control all the way to lunge. That means the hips need to get under the kettlebell as quickly and safely as possible—this includes the sweep through and transitioning to the lunge.

From the kneeling windmill position, the torso is moving from a horizontal position to upright, as the hips are coming under the torso and kettlebell. The hips need to fully extend with the glutes tight as you move into the lunge position. That’s a LOT of movement happening at the same time. The more stable and connected to the ground the body is, the safer and smoother the transition.

That is why the windshield wiper is taught and tested. Both legs remain firmly on the ground and the hips easily and fully extend.

Performance Tip: think about finishing at the top of a swing. The glutes contract hard and fast and the hips fully extend, allowing your body to find stability in the lunge position as soon as you hit it.

A potential problem with this movement is the pressure and friction placed on the knee. Obviously, if the knee is feeling pain, this could jeopardize the movement. The ground you are training on becomes an issue, and individual knee sensitivities should be taken into account as well.

One way to solve the issue is to use the “step-across” modification. From the kneeling windmill, you simply lift your torso up and then step your loaded foot across into a lunge position. This will take the windshield wiper out of the movement and “save” the knee.

The downside to this modification is the inherent lack of stability as you lift your loaded leg up and step it across. You are also changing the orientation of your head and body, which can also cause us to lose stability and control.   Lastly, it is much harder to keep your glute and hip tight and contracted as you move the leg, leading to another possible loss of control.

As we say in the RKC, “safety trumps performance”, so if you have sensitive knees or are training on a hard or rough surface, the step-across is a modification you can use to protect your knee and stay in control.

My personal recommendation is to buy a $20 pair of knee pads or have your clients purchase them for training. I do a lot of kneeling training and take knee pads with me everywhere to use for all kneeling training and stretching. $20 knee pads are a cheap and easy way to protect your knees and increase the effectiveness of your kettlebell training.

****

Andrea Du Cane is a Master RKC Kettlebell Instructor, CK-FMS, CICS, and RIST, ZHealth certified, she has a BA in Psychology from the University of Minnesota and is also a Pilates instructor. She is the author of several books and dvds including The Ageless Body, The Kettlebell Boomer, and The Kettlebell Goddess Workout.  She has over twenty years of aerobics, weight training and fitness experience, with an additional background in… Read more here.

Filed Under: Coaching, Kettlebell Training, Tutorial Tagged With: Andrea Du Cane, get up, get ups, Getup, kettlebell technique, kettlebell training, RKC, RKC kettlebell training

Simple Hand Training Drills To Compliment Your Kettlebell Training

January 20, 2016 By Ryan Jankowitz 2 Comments

Ryan Jankowitz, RKC-II

Full disclosure—I love kettlebells. With that out of the way, I can share a few tips I’ve learned along my fitness journey. Some of these things I’ve learned through positive experiences, like reading a book, attending a certification, or studying martial arts. Other things I’ve learned through injury.

Let’s talk about the importance of training your hands to support and enhance your kettlebell training. If you are wondering how to train your hands and why, I will do my best to enlighten you. When I train my clients or myself, a lot of the movements we perform involve gripping the kettlebell, barbell, pull-up bar, etc. The amount of time we spend with our hands open pales in comparison to how much time we spend gripping objects. That alone is reason enough to keep performing push-ups and crawling movements. If we spend so much time gripping, then we may unknowingly create an imbalance. I learned this first hand after straining a muscle in my inner forearm—an injury which put me on the shelf for a couple weeks. (My massage therapist discovered the imbalance in my forearm.)

That injury occurred several years ago and I vowed to not let it happen again. So far I have been successful and would like to share the simple drills I use to train my hands and forearms so that you can also avoid this annoying injury.

Drill #1 – Wrist Circles

I first learned this drill while studying Kung Fu. It was part of our joint mobility warm-up. I was pleasantly surprised when we went through a similar mobility complex during my RKC Level 1 back in 2011. This is another example of the many parallels between martial arts and kettlebell training. If you look at your RKC or HKC manual, then you will see that this is the second drill in the mobility complex section. I do this drill every morning as part of a quick 8 to 10-minute Qigong Recharge. This drill gently works the wrists through their full range of motion, lubricates the joints, and brings healthy blood flow to the wrists.

I have also taught this drill to clients with carpal tunnel or who experience discomfort in their wrists. The results have been either positive or no change in discomfort—both of which are certainly better than a negative result.

To perform this drill, start by interlocking your fingers and bringing your palms together in front of your chest. Gently roll your wrists around, making sure to also reverse the direction.

Drill #2 – Wrist Flexion and Extension

This is another drill that I learned from studying Kung Fu. It was one of many hand-training drills we practiced. Now, I find this drill to be very beneficial for my clients and myself. The stretch is amazing and it hits parts of my forearm that I had usually neglected. In one instance, I actually cured a client’s wrist pain with just 5 reps of this drill!

To perform this drill, straighten your arms and bring them up and out in front at chest level. As you straighten your arms, push through the heel of your palms and try to pull your fingers back toward your face. Hold for just a few seconds, then start to pull your arms back into your body by bending your elbows. As your elbows bend, bring all of your fingers together to form a crane’s beak, then try to bring all of your fingers to the inner part of your forearm. That’s one rep. Perform 5-10 total reps.

https://youtu.be/H20gV0h9Ork

Drill #3 – Hand Whipping

This is yet another drill that I learned from Kung Fu. I also read about a similar drill called “shaking out” in an old Dragon Door book, Beyond Stretching: Russian Flexibility Breakthroughs, that employs the same technique for strengthening the tendons and ligaments in your legs. This drill is a bit more advanced than the previous two, but definitely worth trying.

Begin the drill with your arms relaxed by your sides. Slowly bring your hands up to your body and when your hands reach your chest, quickly whip them out in front of you. Although you are moving very fast, try to stay as relaxed as possible.

https://youtu.be/FbF1q2sBWKo

Thank you for reading my first RKC Blog post! Try these drills and let me know what you experience.

Stay Strong!

****

Ryan Jankowitz, RKC-II Instructor, CK-FMS, is a life-long athlete who can’t imagine sitting behind a desk. He enjoys sharing his passion for fitness and spreading the RKC knowledge. Ryan operates a remote fitness coaching service and is available for private kettlebell workshops as well. You can reach him at ryan@rjkettlebell.com or through his website rjkettlebell.com. He also works with clients and teaches kettlebell classes at Fitness on the Run in Alexandria, Virginia. If you’re in the area, visit fitnessontherun.net and come swing some bells with Ryan.

Filed Under: Kettlebell Training, Tutorial Tagged With: hand drills, hand training, injury prevention, injury recovery, kettlebell training, Ryan Jankowitz, wrist drills, wrist stretches

Be More Human

January 6, 2016 By Josh Henkin Leave a Comment

Kettlebell One Arm Swing

I’m in a great position nowadays. I get to counsel many younger coaches and hopefully teach them the lessons I wish I’d known when I was first starting in fitness. Even so, I keep hearing the same question:

“Which book or program do I use… so I don’t make mistakes?”

I always have to explain that making mistakes is part of the learning process. Mistakes are only a problem if they’re repeated. That philosophy really resonates with me because I grew up in a family of teachers. My mother, father, grandmother, and my aunt were all teachers and professors.

This is why I don’t ever consider mistakes to be a bad thing. In fact, the mistakes I’ve made have helped me become the coach I am today! Through that evolution and experience, my thoughts on “strength training” have changed quite drastically.

I went through several stages of what I THOUGHT strength training was all about:

  • Lifting as heavy as possible
  • Getting as tired as possible
  • Doing the “magical” lifts

If you can name it, then I have probably tried it at one point or another. But, nothing ever felt quite right until now. Now, what I see as strength is actually inspired by the old ideas from physical culture. Originally, exercise was never solely a physical venture, but included the whole person.

Then I realized that the real purpose of strength training was to help people become better humans.

At every RKC and DVRT program, I ask the class, “Do you believe in functional training?” Almost everyone does, but they look puzzled when I ask them to define functional training. Usually I get answers like, “Functional training makes people better in their lives.”

Who could argue with such an answer, even if it is really vague. But, approaching a training methodology in this philosophical way gives us no clear vision. We often forget what makes us human. Yes, people will tell us that we squat, hinge, push, and pull, but a list of such general movements is almost as vague as the term “functional training”!

I ask our classes to think about THE most common movement they all perform. I get answers like squats and deadlifts—but how much of that do you really do during the course of a day? The answer I am REALLY looking for is “walking”! Did you just hit yourself in the forehead? Walking contains elements of many different movement patterns that most people would consider to be part of a training program. I bring up walking because most of our REAL human activities are not singular motions found in the gym, but a combination of simultaneous movement patterns.

I know, we think of walking as simple, while a swing or snatch is complex. Everyone can walk, but not everyone can do a Turkish get-up. Well, lets put it this way—not everyone walks well! To put things in perspective, my wife, a physical therapist, spent a whole semester learning gait analysis (watching and examining how people walk). And most experts agree that there are between six and eight phases to the act of walking. Not so simple, right?

Lifting more for the sake of lifting more doesn’t really do us any good unless it increases our movement efficiency. Renowned physical therapist, Gray Cook, had a really good statement about this type of training:

“In other words, we want adaptable strength that can work in changing environments. Adaptable strength is developed though complex movement patterns, not over-rehearsed, over-coached lifts in a never-changing environment. The athlete, warrior, outdoor enthusiast or physical adventurer embraces change and challenge, while the gym rat needs comfort and consistency for a happy workout.”

How does this idea apply to your strength training? We tend to live in a value system where the heavier weight is the better option, while we forget the benefits of moving to more complex movements.

https://youtu.be/Tqed0CCRhPY

A few weekends ago, I taught a sold out New York RKC. We were discussing the one-arm kettlebell swing, and I asked the class what real life movement it most resembled. People looked at each other, and a few shouted out answers before I simply said, “Walking”. You would have thought I had had a mic drop moment when I gave the answer in that context.

Why walking? Because it includes reciprocal arm swing. This basically means that your arm swings with the opposite leg. This movement pattern happens for many reasons, but we all do it. Walking also requires us to push down into the ground and project our bodies forward. Guess what else walking needs? (Hint: the answer is also one of the biggest reasons that we swing only to chest height and not over our heads.)

I’m not saying that the one-arm swing is EXACTLY like walking, but it involves the same foundational skills required in this very common human motion we perform every day. With this in mind, you might appreciate that the BEST exercise might not be the one that is only heavier, but the one which places a more complex demand on the body and requires us to become better moving humans!

***

Sign up for the Las Vegas RKC with Master RKC Josh Henkin

Josh Henkin, Master RKC, CSCS has been a RKC instructor since 2003 and has implemented kettlebell programs for major Division I programs, SWAT teams, and many different general fitness programs. Josh is also the creator of the DVRT Ultimate Sandbag Training system where he is a highly sought after presenter worldwide.

Master RKC Josh Henkin can be reached at info@ultimatesandbagtraining.com or http://DVRTFitness.com. Josh Henkin is also the author of DVRT, The Ultimate Sandbag Training System now available in paperback and ebook format.

Filed Under: Coaching, Kettlebell Training, Tutorial Tagged With: Coaching, foundational skills, human movement patterns, Josh Henkin, kettlebell swing, kettlebell swing progressions, kettlebell swings, Master RKC Josh Henkin, movement patterns, strength, strength training, walking

Hacks for an Iron Clad Goblet Squat

December 2, 2015 By Mike Krivka 11 Comments

MikeKrivkaGobletSquatLeadPhoto

What is a hack? Hacks are shortcuts or enhancements and can be technical or lifestyle based. Think of hacks as inside tips to get the good stuff—the stuff that works fast and gets you to the tasty, rich and gooey center quicker! In this case, my goal is to provide you with hacks that will allow you how to get the most out of the kettlebell goblet squat.

What’s the Big Deal?

The goblet squat lies squarely within the realm of “simple but not easy”. But, don’t confuse the goblet squat with something that is so “simple” to master that it’s not worth your time. On the contrary—it is supremely important for all demographics, age groups and athletic abilities. Because it is so “simple”, it is easy to underestimate what needs to be in place for it to be maximally effective. Anyone looking at the goblet squat would immediately think “I can do that” …and they can. Once they get the feel for what the goblet squat really is, then they can then learn the specifics that take the goblet squat from simple to sublime.

By the way, if you don’t grasp the importance of the goblet squat yet, consider this: the goblet squat is part of both the HKC (Hardstyle Kettlebell Certification) and the RKC (Russian Kettlebell Certification). It is also one of the techniques Master RKC Dan John recommends to any and all of the athletes he trains—that should give you some indication of its value and application.

Hacking Away at the Goblet Squat

The following are a series of hacks that will allow you to get the most from the goblet squat. Take a look at the pictures so that you can effectively model the movement.

Elbows to Knees—It’s a Straight Line!

  • Don’t unload the torso by flaring the elbows outward or forward—you are supposed to feel the weight of the kettlebell on the front of your body, especially the stomach.
  • Where you start dictates where you end up—if you unload the torso by flaring the elbows, you will find it difficult, if not impossible to find the correct bottom position in the goblet squat.
  • Kiss your knees with your elbows—go down slow enough so that your elbows and knees barely touch; think of it as a caress! From some of the examples I’ve seen there would be a lot of bloody lips!
  • Tall and proud—with near vertical forearms, torso, and shins in the bottom position.
Mike Krivka Goblet Squat Elbow Position
Left: correct elbow alignment, Right: incorrect elbow alignment and posture faults

Find the Perfect Stance That Works For You

  • Heels in your armpits, or slightly wider is a good starting point. Going excessively wide is not going to help.
  • The toes may face straight forward or slightly turned out within 15-20 or so degrees, depending on each person’s individual hip structure.
  • Excessive external rotation should be limited. There may be mobility issues that need to be addressed if they flare excessively. This is a real problem especially if the feet rotate outward while squatting.

The Rack Is Where It’s At!

  • The kettlebell should not be resting on the chest—I know, I know, I know! It’s easier to hold it there but you are offloading the weight to the shoulders and neck.
  • Wedge it—the kettlebell should be held in a “wedge” created by the triceps locked into the lats and the elbows tight against the ribs.
  • Short of breath? The “wedge” should focus the load on the abs, lats, and pecs, not the shoulders and neck.
  • Heavy—the kettlebell is going to feel exceptionally heavy if held correctly in the wedge. Good! You’re doing it right!
  • Straight wrists—don’t break the wrists while holding the kettlebell. Broken wrists are going to adversely affect the movement down the line and you will be sneaking in compensations to correct them.
MikeKrivkaGoblet Squat Kettlebell Position
Left: correct elbow alignment, Right: incorrect elbow alignment and posture faults

It’s a GRIND, Damn It!

  • Lock down: “Lock down” your ribs before you start your decent. Some people call this bracing, but the end result is that you are clenching your abs, pulling your ribs down, and minimizing slack in the upper torso and thoracic spine.
  • Slow down: Slow way the heck down and pull yourself into the bottom position.
  • Hold it: Once you get to the bottom, maintain the tension. If you release it you’re going to be challenged to get it back and not comprise coming up out of the bottom position.

Bust a Move!

  • Don’t “pop and drop” into the goblet squat, this refers to the tendency for athletes to load forward through the hips and then throw them back to initiate the goblet squat.
  • Lock the ribs down first, this will keep you from even thinking about loading forward and backwards to initiate the movement.
  • Initiate with the hips—but not with a ballistic unlocking of the hips. The hips unlock and are pulled straight down.
  • Don’t drop—in no uncertain terms, do not drop into the bottom position of the goblet squat. Pull yourself slowly down into the bottom of the squat. Think G-R-I-N-D! I know it sucks, deal with it!

Start Strong to Finish Strong!

  • Where you start will either help you or hurt you. If you start in a bad position, chances are you are going to end up in an even worse one. With that in mind, your starting position for the goblet squat should be considered very carefully.
  • Down, not back: Pull yourself straight down leading/initiating with the hips. “Pry” the hips away from the elbows
  • Face the wall: The goblet squat can (and should be practiced) facing a wall. Start with the kettlebell touching the wall. Done correctly, you will still end up with plenty of space at the bottom.
  • Enough is enough: The goblet squat terminates when the point of the elbow touches just inside the knee; there’s no reason to go lower unless you are working on mobility.
  • Stack it up! From the bottom position, keep driving and maintaining alignment until all of the “parts” snap back into place. You should end up exactly where you are started!

Putting It All Together

The goblet squat is part of the “Trinity” in the HKC and “The Big Six” in the RKC for good reason. It looks so simple—and it is—but it will only be effective if you know how to efficiently load and unload it, as well as how to make the transitions smooth and flawless. Making the goblet squat look “simple” is not so much a factor that it is simple to do, but that the athlete has taken the time to properly cultivate the movement. Take some time to explore the points that were made above, get a feel for how the load is set and maintained throughout the movement, and I’m sure that you will come away with a new and profound appreciation for the goblet squat.

I look forward to seeing your thoughts and comments below. Until then, “Squat On Garth!”

***

About Michael A. Krivka, Sr. – Senior RKC: Michael A. Krivka, Sr. is a Washington, DC native who has been involved in Kettlebell training for over a decade and is currently a Senior RKC and member of the RKC Board of Advisors and the RKC Leadership Team under Dragon Door (where he has been listed as one of the top reviewed RKC’s in the world for the last five years). He is also the author of a bestselling eBook entitled “Code Name: Indestructible” and is in the process of finishing up several other eBooks on Kettlebells, body weight, and the integration of other tools into an effective strength and conditioning program. Mike has traveled extensively throughout the United States teaching Russian Kettlebells to military (USMC, USN, USA and USAF) and law enforcement personnel (FBI, DEA, USSS and CIA)… read more here.

Filed Under: Kettlebell Training, Tutorial Tagged With: goblet squat, goblet squat tutorial, how to do the goblet squat, kettlebell how to, mike krivka, tutorial

Regress to Progress—Why Patterning is the Key to Fixing Your Swing

October 28, 2015 By Matt Beecroft 5 Comments

Matt Beecroft Swing Setup
Matt Beecroft demonstrates the incorrect (left) and correct (right) position for starting a kettlebell swing

Movement quality underpins any good strength training system. The RKC has never been just about the kettlebell, it’s always been about learning to move better. And the key to moving better is often knowing the right time to progress an exercise—and when to regress. It can be challenging to know when to increase the movement challenge, complexity or difficulty of an exercise if you don’t have an RKC instructor to coach you. Fortunately, the RKC system also includes an awesome system for teaching the movements progressively and safely.

Sure, you could go out and learn 17 different techniques in other one or two day workshops… But not only will your personal proficiency in those lifts be suspect (unless you are an athletic freak, like our own Master RKC, Max Shank) but more importantly your ability to communicate and teach the information to others will also be questionable. This is especially true when attempting to coach someone who is new to training efficiently, safely, and effectively.

Also, the skill set of an athlete and a coach are very different. Many of your clients aren’t really interested in your amazing athleticism, they are much more interested in how amazing you can make them. We all know great athletes who are terrible coaches and vice versa.

The intelligent progression of exercises which teach how to get from “point A” to “point B” is what sets the RKC apart. If someone is having trouble mastering the swing, you probably know by now that trying to correct it is difficult. Because swings are ballistic, they’re fast, so trying to correct a client (or yourself) during an exercise like a swing can be almost impossible.

The first thing I want to emphasize that you must be patient with the steps leading up to the kettlebell swing. You will know if you have successfully completed the steps if you finally pick up the kettlebell and swing it with some grace and efficiency. But, if you have sped through the progressions too quickly, your swing will be ugly and dangerous. And then more problems will arise when you progress to the clean and the snatch—which should look exactly like a swing in many ways since your arms simply guide the kettlebell to these other positions while your hips do all the work. These more sophisticated exercises will amplify and illuminate all the flaws with your kettlebell swing technique.

Many people speed through the progressions in various exercises thinking that if they have to be patient and spend the time mastering the basics (note: basic doesn’t mean easy) or need to regress the exercise, then they have somehow failed or gone backwards. This couldn’t be further from the truth.

A few things happen when people try to outsmart the process, or jump ahead in the progressions:

  1. They find out that their swing is terrible and have many things to troubleshoot.
  2. They get injured.
  3. All of the above.

Either way, they will end up spending much more time ironing out their kettlebell swing issues. Hopefully they will go to an RKC Workshop to learn the “a-ha drills” we teach to troubleshoot and save time. Otherwise, they risk getting sidelined by injury instead of patiently mastering the progressions and enjoying the journey. Speeding ahead with load and intensity usually causes limited or dysfunctional movement patterns, if adequate mobility and motor control (stability) aren’t achieved beforehand.

So, how should you fix your kettlebell swing?

Embrace the suck and regress to progress. One reason the swing is taught through a progression—at least in my opinion—is because of the patterning. In many respects, it’s similar to some of the ideas in the Functional Movement Screen (FMS). By the time you pick up a kettlebell, after all the correct patterning you have practiced , it shouldn’t look like you are trying to hump the bell! Instead, your kettlebell swing will be a thing of power and beauty.

The general rule is to only use techniques that improve form, quality of movement, and quality practice while reducing compensations. Unfortunately, many trainers don’t have a system for teaching the swing, they just pick up the kettlebell any way they can and then try to get it to move!

The FMS and the RKC teach patterning in this order:

  1. No load, pattern assistance.
  2. No load, no pattern assistance.
  3. Load, with pattern assistance.
  4. Load, with no pattern assistance.

In the RKC, we begin by teaching the hinge unloaded. This is often assisted in a variety of ways – either the student uses the blades of their hands in their hips to help find the hip crease (sometimes coined “chopping and popping”), they might push their butt back towards a wall, or use a dowel touching three points along the spine (head, between the scapula, and the sacrum) to teach how to maintain a neutral spine.

Next we would aim to do this without load, but with no pattern assistance. Our goal is to remove the pattern assistance and do the movement unloaded with perfect form. If the form breaks down we can go back and return to the pattern assistance method (dowel, wall, etc.) until the right movement becomes what we do every time. Old strength coaches were renowned for not letting their athletes pick up a bar until they could first do the movements correctly with a dowel or a stick.

The third stage is load with pattern assistance. In the RKC curriculum, this is the kettlebell deadlift. Placing the kettlebell in line with the heels also places the shoulder blades over the kettlebell. This makes for a foolproof deadlift when we simply stand up with the bell. If you can’t do it slow then you probably can’t do it fast—this is what grinds like the deadlift are all about. Slow is smooth, smooth will become fast later. If the deadlift lacks stiffness or tension, we can use the static stomp deadlift or Hardstyle plank to link the body with tension and to keep midline stability and posture.

The next step is using the deadlift drag or pendulum swing to teach the backswing and the start of the swing—pattern assistance with load. At the final stage we will do dead swings or the proper two handed swing, which is the load with no pattern assistance. If we have adequately mastered the first three steps, the final stage, load with no pattern assistance, will be solid.

Every time I progress a client who isn’t ready, I find that I spend a lot of time trying to troubleshoot their swing. Regressing these clients back to one of the first three stages of patterning was the fastest way to actually help them master the swing.

So relax and enjoy the journey. Be patient in your progress and understand you don’t have to master everything immediately. Basic doesn’t mean “easy”. Spend more time on patterning and you will likely spend less time with the difficult task of troubleshooting swings at full speed. This approach also works with more advanced exercises, for example if your clean isn’t great, your one arm swing probably will need work. If your press isn’t great, your clean will need work. If your kettlebell snatch isn’t great, then your one arm swing, clean, and press probably all need work too.

If you find that your swing isn’t great, don’t think of regressing to an earlier step as failure, or that you’ve made a mistake. You are still traveling in the right direction. Regressing to progress is an amazing strategy that will still have you traveling in the right direction.

***

Matt Beecroft, RKC Team Leader, PCC Instructor is the director and head coach of Reality Self Defense & Conditioning in Adelaide, South Australia. He can be contacted through his website at realitysdc.com.au email: matt.beecroft@realitysdc.com.au or follow him on Facebook: facebook.com/MeetLifeHeadOn.

Filed Under: Coaching, Kettlebell Training, Tutorial Tagged With: clean a kettlebell, how to learn kettlebell swing, how to teach the kettlebell swing, how-to, kettlebell squat, kettlebell swing regressions, kettlebells, Matt Beecroft, movement patterning, movement patterns, movement quality, tutorial

The Best Things You Aren’t Doing With Your Kettlebells

October 14, 2015 By Josh Henkin 5 Comments

Steve Holiner Squat with Mismatched Kettlebells
Senior RKC Steve Holiner Squats with mis-matched double kettlebells

Recently, I had a blast teaching the first RKC in Sacramento, California. We had a fantastic group of people—coaches who wanted to learn. We are all coaches, even if that simply means we are coaching ourselves. When I teach RKC Workshops, my goal is not just to teach people great technique, but I also teach why we do what we do. The RKC method is a powerful functional fitness system because of the deeper understanding we have with our drills, along with our detailed techniques.

Is all this information really that important? Isn’t it just about having a great kettlebell swing? While the answers to those questions are ultimately up to the individual, the old saying, “knowledge is power” still holds true. The knowledge from an RKC Workshop gives so much more power and value than most people expect. Each time we teach the deeper explanations behind “just” another clean, swing, snatch or squat variation, it is exciting to see everyone’s eyes light up.

The best part is the realization that powerful results don’t require complicated applications. Using two different sized kettlebells for double kettlebell drills is a wonderful example. Of course using mismatched kettlebells can simply be a way to perform double kettlebell drills when only a few kettlebells are available, but there is also a better reason to train with them: setting up progressions for RESISTING rotation. Many coaches also refer to this as anti-rotational training.

Before we get into the details of anti-rotational training, we should acknowledge that you may already be using some forms of it. Snatches, one-arm swings, presses, and cleans all represent anti-rotational movements. Renegade rows, suitcase carries, and other similar drills are additional variations of anti-rotational movements. Overall, I think one of the BIGGEST benefits of kettlebell training is the number of anti-rotational exercises that can be performed.

According to renowned physical therapist Shirley Sahrmann, anti-rotational training is important because, “During most daily activities, the primary role of the abdominal muscles is to provide isometric support and limit the degree rotation of the trunk… A large percentage of low back problems occur because the abdominal muscles are not maintaining tight control over the rotation between the pelvis and the spine at the L5-S1 level.”

Learning to resist movement decreases the risk of back injury and allows us to move through the hips—the way the body was designed to move. The ability to resist excessive motion also gives us a foundation to progress and learn more complex movements over time. The first and foremost of these more complex motions is rotation. As many coaches have said, “We can’t produce what we can’t resist first.”

Rotational training is really important for punching, kicking, throwing, and almost anything which requires a great deal of power.

With so many different anti-rotational exercise options available with kettlebells, why choose mis-matched kettlebell training? First, it gives us many more progression possibilities. Secondly, it will allow us to introduce the concept of anti-rotation very gradually. Most people struggle when complex ideas are taught in an overly aggressive way. Lastly, mis-matched kettlebells will make some of our classic exercises that much smarter!

Implementation

Instead of just throwing some random weights together, we will start sensibly. This will allow us to meet an individual client’s needs, as well as easily see when they have hit their limit. In general, I find starting with a 4kg difference works well for most people. For example, a good starting place might be performing mixed kettlebell front squats using a 16kg and 12kg.

Next we’ll need a dowel rod, chalk line, or mat line for measurement on the ground. It will give us some important feedback. During a mis-matched kettlebell exercise, we will predominately watch the front and back of the movement to see if the trunk or hips are moving in rotation, or leaning. Many times, the trunk and pelvis will hold still, but the feet will move to compensate for the instability applied to the body. So, placing the a dowel rod along the toes, or lining the toes up to the edge of a chalk line or edge of a mat will provide quick and easy feedback. How much movement of the feet should we allow? My rule of thumb is “really technical”, if you actually need a tape measure to determine the amount of movement, then you are doing fine!

Remember, you will be switching sides, so keep that in mind when programming. The easiest solution is to use even numbered sets and just switch off on each set. However, if we use an odd number of sets, we will typically perform half of the set with the weights one way and switch halfway through.

Progression

You probably guessed that the most obvious way to progress is to add more weight… While that is true, I actually find that increasing the difference between the two kettlebells is even better. For example, if we are doing front squats and start with 16kg and 12kg kettlebells, we have a total load of 28kg. If it goes well and we want to increase the challenge, instead of just going heavier (which we still could do), we might try the same front squat with a 20kg and an 8kg kettlebell. Even though the total weight is the same, the larger weight difference between the kettlebells increases the challenging anti-rotational effect.

Another option is to change the position of the load. If we use this strategy with an exercise like a lunge, we can hold the load low by the hip and simply move the weight to the rack position, or finally overhead. That changing leverage will make anti-rotational challenge harder and harder. Keep in mind, during more unstable drills like single leg deadlifts, step-ups, and lunges, the anti-rotational forces are more difficult due to the instability of the movements.

The overall goal is to eventually move to true single arm exercises. If you have been around kettlebell training long enough, you will probably notice that as simple as one-arm exercises sound, getting people to do them really well is not so simple.

On the other hand, it is also a really cool way to making jump towards heavier loads. For example, double 32kg swings might just be out of reach. But, swings with a 32kg and a 24kg might be very possible. While the weight is quite a bit lighter, working on resisting the rotational forces will not only allow us to build upon heavier loads, but build a stronger and more stable foundation.

As we often say in DVRT, strength is not just what we lift, but what we resist. Try using some of these mixed match kettlebell ideas in your training and let us know how your kettlebell training takes another leap!

***

Josh Henkin, Master RKC, CSCS has been a RKC instructor since 2003 and has implemented kettlebell programs for major Division I programs, SWAT teams, and many different general fitness programs. Josh is also the creator of the DVRT Ultimate Sandbag Training system where he is a highly sought after presenter worldwide. He can be reached at info@ultimatesandbagtraining.com or http://DVRTFitness.com. Josh Henkin is also the author of DVRT, The Ultimate Sandbag Training System now available in paperback and ebook format.

Filed Under: Kettlebell Training, Tutorial Tagged With: anti-rotational training, Josh Henkin, kettlebell training, mismatched kettlebells, mixed matched kettlebells, unusual kettlebell drills

  • « Go to Previous Page
  • Page 1
  • Interim pages omitted …
  • Page 4
  • Page 5
  • Page 6
  • Page 7
  • Page 8
  • Go to Next Page »

Primary Sidebar

Featured Products

previous arrow
BOOK-RKCBookofSnC
HardStyleKettlebellChallegeDanJohn700
BookCoverMasterTheKettlebell1
RKCiconKettlebell512
KettlebellGoddessdv040
next arrow

Recent Posts

  • RKC Big Six Workout
  • The Kettlebell Swing & Low Back Pain
  • Key Kettlebell Exercises To Help You Create Better Balance
  • How to Most Effectively Use Kettlebells to Meet Your New Year Goals
  • 1 Exercise That Checks All The Boxes
FOLLOW US ON TWITTER!

Archives

Copyright © 2025

Dragon Door Publications / The author(s) and publisher of this material are not responsible in any manner whatsoever for any injury that may occur through following the instructions or opinions contained in this material. The activities, physical and otherwise, described herein for informational purposes only, may be too strenuous or dangerous for some people, and the reader(s) should consult a physician before engaging in them.