• Skip to main content
  • Skip to primary sidebar
  • Home
  • Contributors
    • Matt Beecroft, Master RKC
    • Martijn Bos, Master RKC
    • Andrea Du Cane, Master RKC
    • Angelo Gala, Master RKC
    • Chris Holder, Master RKC
    • Steve Holiner, Master RKC
    • Dan John, Master RKC
    • Mike Krivka, Master RKC
    • Thomas Phillips, Master RKC
    • Robert Rimoczi, Master RKC
    • Phil Ross, Master RKC
    • Max Shank, Master RKC
  • Workshops
    • HKC Workshops
    • RKC Workshops
    • RKC-II Workshops
  • Find an RKC Instructor
  • Resources
    • Articles
    • Forums
    • Kettlebells
    • Products
  • Blogs
    • PCC Blog
    • Strong Medicine Blog
  • Archives

RKC School of Strength

Official blog of the RKC

Kettlebell Training

How to Dominate the RKC Snatch Test

April 20, 2016 By Frank Delventhal 7 Comments

Frank Delventhal Snatch Test

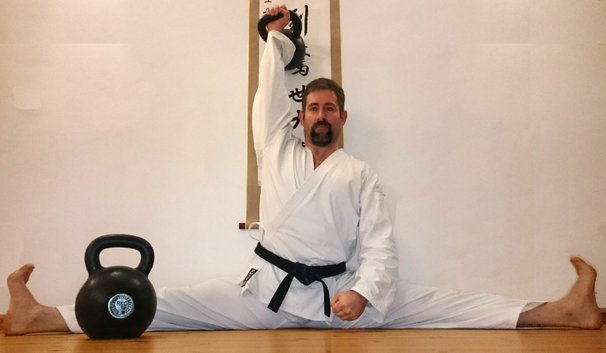
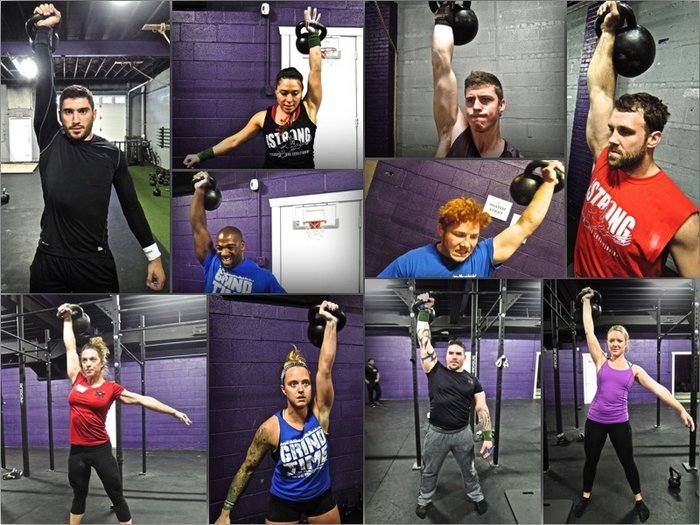
For many, the Snatch Test is a fearsome obstacle to RKC certification. But it does not have to be that way. When you start training frequently enough and have acquired good technique, you will be able to beat the challenge. It’s like learning vocabulary in school—you know what is expected of you, so it becomes more a question of diligence than talent.

What is the RKC Snatch Test?

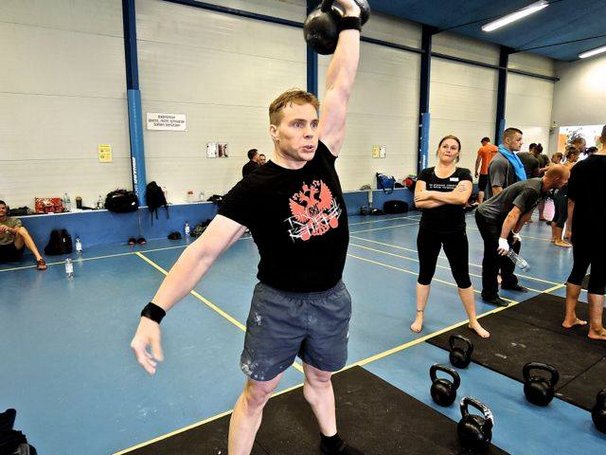
You must snatch your kettlebell 100 times in 5 minutes. The weight of the kettlebell depends on your bodyweight, age and gender. The average gentleman will use a 24kg and the average lady usually uses a 16kg kettlebell (be sure to check the rules link below to find your exact weight class)

You are allowed to switch hands as often as you like, and can even (carefully) rest the kettlebell on the floor. Click here for the exact rules and kettlebell weight requirements.

What are the Prerequisites for the Snatch Test?

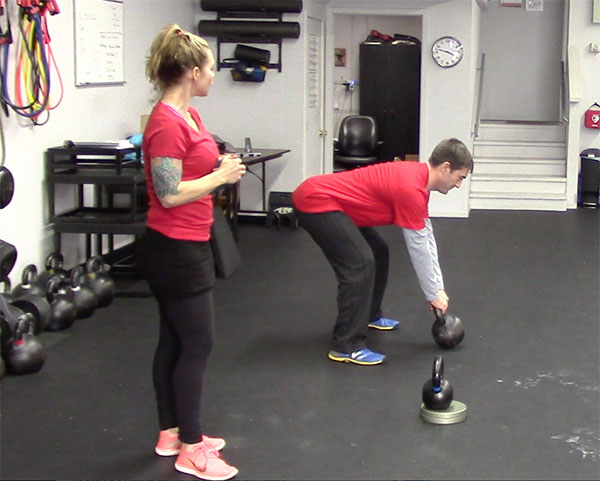
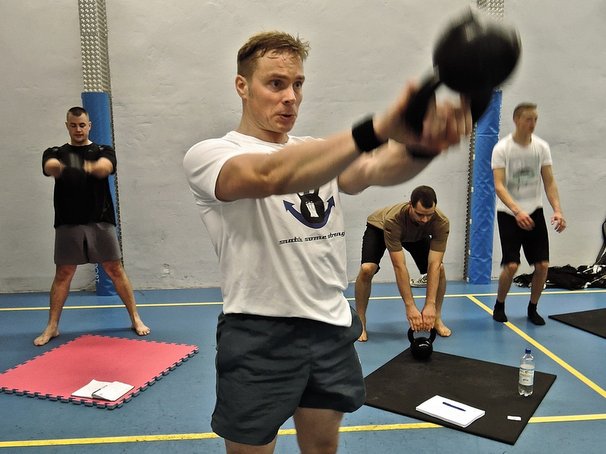
Before you attempt to snatch a kettlebell, you need a solid foundation in the two-hand Hardstyle swing, the one-arm swing, and the clean. These are the preliminary steps of the snatch. “OK” is not good enough—you must be good at these before you begin training for the Snatch Test.

As a general rule you should be able to do 100 one-arm swings within 5 minutes, with a kettlebell at or close to the weight of the kettlebell required for your test. For example, If you have to use a 24kg kettlebell for your test, you should be able to do 100 swings with a 20kg before you begin to specifically train for the snatch.

What Equipment Do I Need?

  • Assorted kettlebells ranging from very light up to your goal-sized kettlebell. (Hopefully your gym is well stocked and also has an RKC-Certified Instructor!)
  • Chalk
  • Optional hand protection: socks, tape, Dragon Skins™, minimalist gloves (cotton gardening gloves)
  • Optional sweat bands for the wrists
  • Your soundtrack
  • Hand care items for after training
  • You may not use belts, thick or padded-gloves, wrist wraps or any other equipment designed to support your body

Chalk

When doing 100 snatches, your hands will need to withstand a lot of friction. A little chalk can help, and will also dry your skin. If you have sweaty hands during the test, you can end up with “burger meat” for hands without chalk. But, too much chalk is also not good, so be sure to discover the right amount that just keeps your hands dry enough. I found that I do very well with just a couple of drops of liquid chalk or by rubbing a piece of chalk. Since chalk generally dries up your skin, it can cause excessive calluses—see the hand care section below.

Socks, Tape, Dragon Skins™, Minimalist Gloves

You are allowed to use sock strips, tape, DragonSkins™, or minimalist gloves (cotton gardening gloves) to protect your hands. If you really need them, that’s ok, but honestly I do better without them. I think you trade an important tactile connection for a little extra protection. But, I also have relatively tough hands that are conditioned to take a beating!

You may not even need these protective items if you train with the following method: begin with a very light weight and slowly progress to heavier weights (which also create more friction) so that your hands have plenty of time to adapt.

Thin Sweatbands or Long Sleeves

I sweat a lot during the test, so I need to wear sweatbands on my wrists—when I don’t have them sweat floods down my arms onto my hands, turning them to “burger meat” by the end of the test. Remember that wraps to protect or support the wrist are not allowed, so make sure that you only use thin sweatbands. Be sure to ask your instructor or judge at the RKC if your sweat bands are ok.

Alternately, you may want to wear a long sleeve compression shirt. The instructor must be able to see if your elbow is really locked out, so make sure that your compression shirt is extremely light and thin. It’s also common sense to use a dry shirt, not one already quenched in your own sweat!

Your Personal “Snatch Test Soundtrack”

The right music can give you extra power. My favorite track has plenty of power, but is not too fast. It’s 5:12 long, so I figured out exactly when to start during the song’s intro.

Listen to that song every time you practice the test. That has nothing to do with enjoying the music, it’s more about training your subconscious to feel the passing time. The song will also help you focus, giving you additional power. Each time you hear the song or imagine it in your head, you’ll KNOW that you will pass the snatch test. If you’re interested in learning more about the mental side of training, check out Logan Christopher’s Mental Muscle. Even though your snatch test at the RKC will be without music, all you need to do is hum the first notes of your song, and you are ready to rock and roll.

Hand Care After Training

The snatch test is also challenging for your hands. Be sure to start your training soon enough before the RKC workshop so that your hands have plenty of time to adapt.

After every workout, check to see if your calluses are hardening. These hardened areas must be removed carefully with a callus remover. Please make sure that you only remove the hard spots. The callus itself is important because it protects your hands from friction and pressure. If you used chalk (especially liquid chalk) you may also want to use a drop of lotion to soften up your hands.

Frank Delventhal Swings

Why should I train specifically for the Snatch Test? Isn’t it enough to prepare with plenty of swings?

This is a question of faith, and it is possible to gain enough power with swings to pass the test. In an objective comparison of the swing and snatch, you will discover that the swing is safer than the snatch. Using the swing to train is generally justified. Additionally, some argue that the Snatch Test is so strenuous that you should not do it very often. Under certain circumstances, I agree with that argument, especially when the student starts with his snatch size kettlebell and tries to work up to the volume of the test. But the title of this post is “How to DOMINATE the Snatch Test”! So, I have a “secret” training plan for you. 😉

Train Success

Start with a kettlebell that you can snatch 100 times in 5 minutes. It doesn’t matter if the kettlebell is very light—even as light as 6kg! The key is to practice the test two to three times a week after your normal workout, and you must succeed each and every time.

Before you do the 100 snatches, take 3 to 5 minutes to actively relax your muscles and visualize completing the test. The more detail you can imagine in your mind, the better. Mentally, you have already finished the test, before you even touch the kettlebell.

It is essential that you succeed each and every time! The goal is to become so accustomed to doing 100 snatches that it nearly becomes boring.

Frank Delventhal InstructingSnatch as precisely as Swiss Clockwork

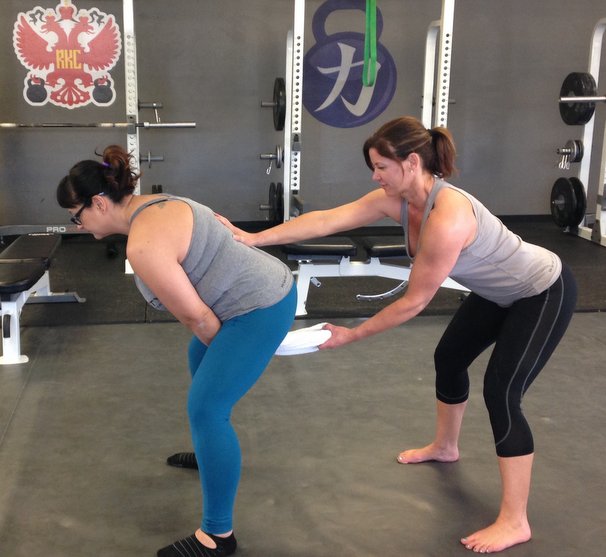
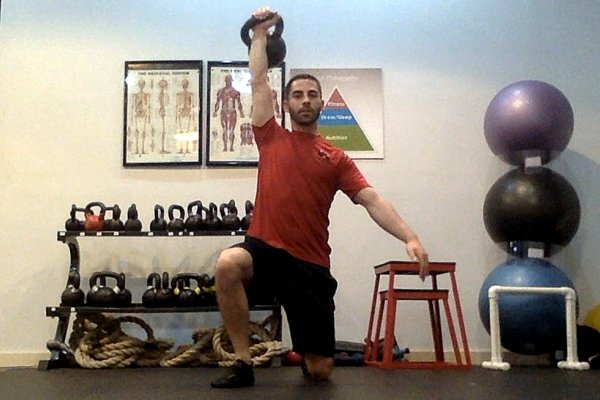
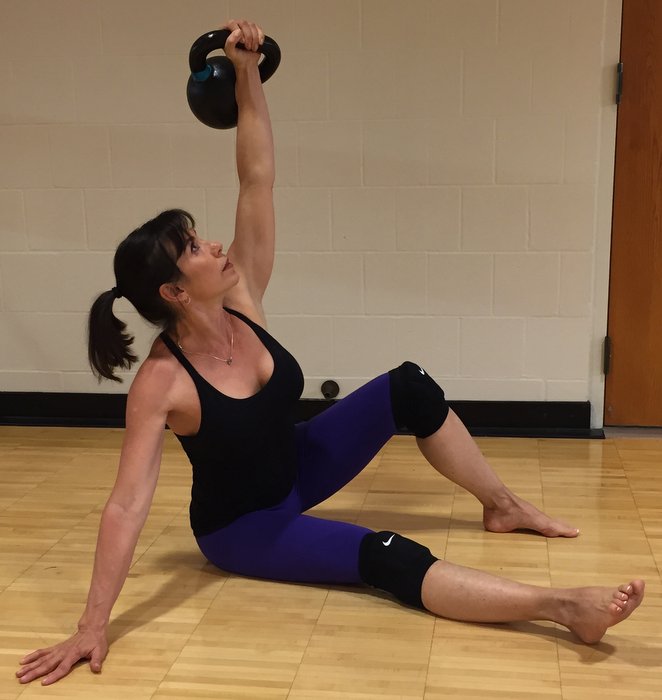
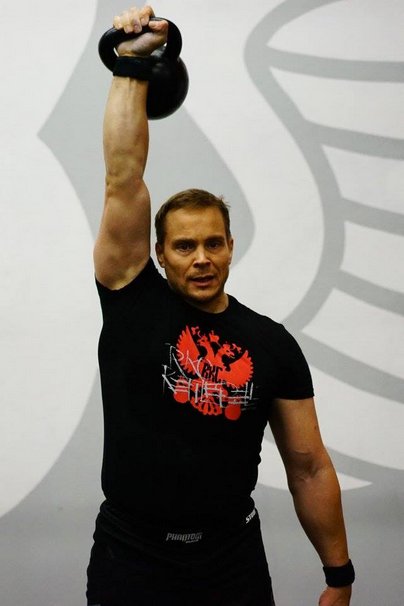
Watch your form. Every “no count” is discouraging, and many candidates have lost their focus during the test because of it. Take care that you practice strict form. Take a mini break at the top lockout position, when the kettlebell is held over your head. You will have a small rest, and the instructor watching will absolutely know that you are in control of the movement. Your arm should point straight at the ceiling. Your wrist must be straight, and your legs have to be locked out as well. You will look like a “hardcore version of the Statue of Liberty” holding a kettlebell instead of a torch. 😉

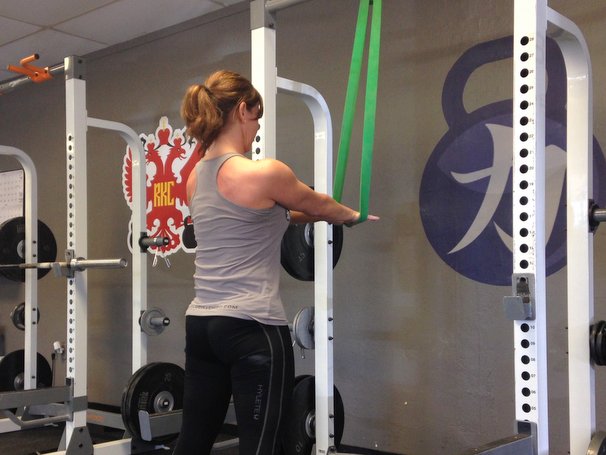
Pull your shoulder down to stabilize it. Normally I do not like mirrors while training, but they can be useful for checking your lockout position.

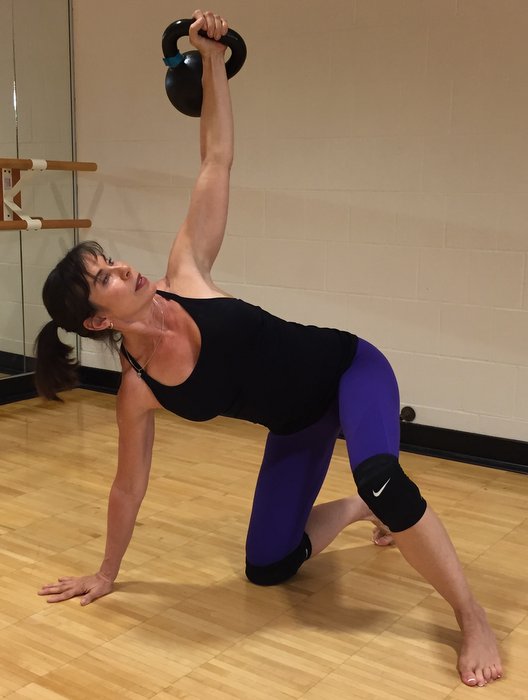
A Tip For the Overhead Lockout Position

If it is difficult to hold the correct overhead arm position, try the “downward dog” yoga pose. Let the tips of your thumbs touch each other, this will increase your mobility—and the ability hold your arms straight overhead. While a yogi will straighten their legs in “downward dog”, that isn’t necessary for our purposes. We want a straight line from the wrists on the floor towards the hips. It takes some practice to achieve that position (at least for most males, the ladies are generally better at this). If you can maintain that straight line, push your shoulders to the floor and over time, increase your range of motion. Improvement may take five minutes to several months, depending on your general mobility.

Changing Hands

Changing hands uses up precious time. It is an advantage if you can use fewer changes—but that also requires more conditioning. Fortunately with kettlebells, you can train cardio and power at the same time! Work up to more reps before switching hands slowly over time. It doesn’t make sense to do more than 20 snatches with one arm before you switch, as that would be unnecessarily fatiguing.

During the live test, your instructor will count for you. While you train, you should have enough concentration to count for yourself. When in doubt, just do ten extra reps.

Rep Schemes

Use your strong hand last as a “secret weapon”. This will make the end of the test will be much easier for you. For example, I am right handed, so I start with my left hand and finish the test with my right hand.

Scheme A: 9 Hand Changes

Let’s start simply. Do 10 snatches, then change hands until you reach 100 reps. If you can complete this scheme in under 4:30, then try Scheme B.

  • 10/10 (10 left / 10 right)
  • 10/10
  • 10/10
  • 10/10
  • 10/10

Scheme B: 7 Hand Changes

This scheme is slightly more challenging, but if you have completed Scheme A with enough spare time, the extra challenge will only be marginal.

  • 15/15
  • 15/15
  • 10/10
  • 10/10

Scheme C: 7 Hand Changes

This scheme allows you to complete 20 snatches with one arm safely. It is possible that you do not need this scheme, and can jump directly to Scheme D, but try it out at least once. As it gets progressively easier, many people like it.

  • 20/20
  • 15/15
  • 10/10
  • 5/5

Scheme D: 5 Hand Changes

The “master level”

  • 20/20
  • 20/20
  • 10/10

When you can easily complete the test with this scheme, and your time is always somewhere between 4:00-4:30 minutes, then you can progress to the next heavier kettlebell. You will probably be faster just because you need fewer hand changes. With the heavier kettlebell, start with the 10 x 10 (Scheme A). It will be more difficult, but you can do it. Progress the same way until you reach your goal weight kettlebell. Do not rush, just use a weight that allows you to succeed every time and the Snatch Test will become easy for you!

Create a Cardio Surplus

Even with your snatch size kettlebell, you should be able to complete scheme D. With extra gas in your tank, you can do the snatch test any time. If you have a bad day (or a cold), just drop to an easier scheme (such as C).

Does it make sense to use a kettlebell heaver than required by the test? No, and I would advise against using a much heavier kettlebell. “Enough is enough!” (Thank you Dan John.)

The RKC certification requirements include more than just the Snatch Test, so use your energy wisely. After you can do scheme D, only train the test once a week or every two weeks to maintain your skill and conditioning.

After your RKC certification workshop, you can work up to more if you want. Now you know how!

Good Luck!

You will greatly benefit from preparing for the test, whether you want to pass it as a personal goal or for your certification. Now that you know how to tackle it, it isn’t a “boss battle”.

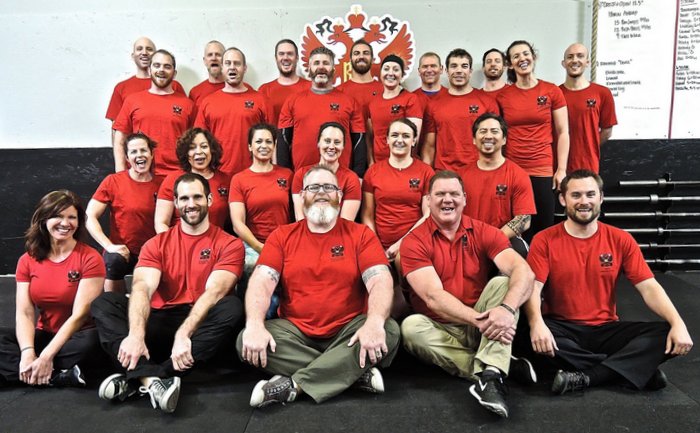
Understand that just watching a video about snatching on YouTube does not mean that you can do a snatch! Get an RKC instructor to teach you the right technique. This is safer and saves time. The snatch is the last exercise of the RKC Big Six (swing, get-up, clean, military press, squat, snatch) because the other five build the essential foundation. Enjoy your journey.

“First use your brain, then train!” 😉

Frank Delventhal, RKC-II

***

Frank Delventhal, RKC2, PCC, 1 Dan Aikido. Visit his website: https://hamburg-kettlebell-club.de/

Filed Under: Kettlebell Training, Tutorial Tagged With: Frank Delventhal, kettlbell snatch test, Kettlebell, passing the RKC, RKC snatch test, RKC workshop prep, Snatch Test

Dan John, Dr. Chris Holder and Chris White instruct at the San Jose RKC

April 15, 2016 By John Du Cane, CEO and founder, Dragon Door 5 Comments

SanJoseRKCGroup

I recently saw a terrific movie at one of our local Indie theaters, called Tangerine by Sean Baker (who has now become one of my favorite directors).

Tangerine is about transgender prostitutes in Los Angeles. Shot in a raw, neo-realistic, “street-doc” style, it’s funny, endearing, soulful, sad and enlightening. And beautifully shot. I loved it!

All very wonderful…but what has Tangerine got to do with kettlebells and the RKC?

Answer: it inspired me to start filming RKC and PCC events that I attended…

Why?

Because Tangerine was filmed entirely on an iPhone—and still looked fantastic on the big screen!

So I bought an iPhone 6 and shot with it at the recent San Jose RKC, taught by Dan John, Chris Holder and Chris White. I handed over all the footage to Adrienne Harvey and asked her to compose an initial short video—to give you a taste of the RKC culture in action.

Here it is:

You can see that Adrienne did a fantastic job editing from the mass of footage I dumped on her… 🙂

We hope to use more of the footage in future blogs and articles. But this is a start…

Filed Under: Kettlebell Training, Workshop Experiences Tagged With: Chris Holder, Chris White, Dan John, John Du Cane, RKC, RKC Workshop, Russian Kettlebell Certification, San Jose RKC, video, Video recap, workshop experience

The Standing Power Band Plank

April 13, 2016 By Robin Sinclear 2 Comments

Robin Sinclear Standing Band Plank

Solidifying the top and bottom positions of the kettlebell swing are key components to teaching someone to swing correctly. I have two go-to drills: one is part of the RKC manual and curriculum (the towel pull drill), and the other is something I had been using as a core activation drill. I found the standing power band plank had a lot of carryover for teaching the top position of the swing.

The Standing Power Band Plank:

With good cueing and proper positioning, this drill can teach rooting to the floor, solid core engagement, shoulder packing, and how to “breathe behind the shield”.

Here’s how to do it:

Loop a thick resistance band around a pull-up bar. Stand facing the resistance band with your feet hip distance apart. With your arms extended straight out in front, place your hands inside the band with your palms facing down—just like they are at the top of the swing. From this point, the cueing is nearly identical as for the Hardstyle plank.

  1. Your body should form a straight line from the top of your head down to your heels.
  2. Flatten your lower back. Imagine that you are bringing the tailbone and belly button together. Lift the pelvic floor.
  3. Squeeze your glutes tight.
  4. Pull up your kneecaps, and tighten your quads.
  5. Now, engage the lats and upper back by pressing down on the band, while packing and pressing the shoulders down and away from the ears.
  6. Breathe shallowly into a tight stomach.
  7. Hold this position for 10- 30 seconds.

Follow the standing power band plank with an isometric hold of the towel-pull drill from the RKC manual.

Quick review of the towel-pull drill:

Robin Sinclear Towel Pull Drill

Have the student hold each end of a towel and pass the center section of the towel between their legs, pretending they are on the backswing. The instructor grabs the center section of the towel. Using one hand to brace the student on the low back (so they don’t fall backward), the instructor pulls the towel until the student’s hips are fully loaded and most of their weight shifts toward their heels. Holding this isometric contraction for ten seconds or more can help the student feel where the bottom position of the swing should be. You would also choose the towel-pull drill as a corrective for someone who fails to load the hips and hamstrings.

Use the standing power band plank as a corrective drill for anyone who is…

  1. Not contracting their glutes maximally at the top of the swing
  2. Leaning back at the top of the swing
  3. Not packing the shoulders
  4. Using their arms to lift the kettlebell

After teaching the hip hinge and deadlift, performing a few isometric holds of these drills can help lock in the proper top and bottom positions of the kettlebell swing. Incorporate some one-arm isometric holds as well. Happy swinging!


***

Robin Sinclear, RKC-II, is the co-owner of Velocity Strength and Fitness in Chico, California. Her website is VelocityChico.com. She can be reached by email at velocitystrong@gmail.com or by phone at 530-520-2297. Follow Velocity Strength and Fitness on Facebook, Instagram, and Twitter.

Filed Under: Kettlebell Training, Tutorial Tagged With: core activation, corrective exercises, kettlebell cues, kettlebell technique, RKC technique, Robin Sinclear, standing plank, standing power band plank, teaching cues, towel-pull drill

HardStyle Breathing: On and Off

April 6, 2016 By Florian Kiendl 16 Comments

Florian Kiendl breathing

Breathing is an important key to performance. If you neglect it, you leave a big piece of the performance puzzle on the table.

If your mission (like mine) is to reach the apex of your physical potential—or get as close as possible—you should consciously use your breathing to reach your goals.

Why is breathing so important?

Our nervous system is divided in two parts: the autonomous nervous system and the cerebrospinal nervous system. These are complicated words for a fairly simple distinction. The autonomous nervous system (ANS) basically works on its own. Some of the tasks of the autonomous nervous system include your heartbeat, digestion, metabolism and the workings of your internal organs.

The other part of the nervous system, the cerebrospinal nervous system, is the part we are concerned with in our training. It enables us to consciously interact by:

  • Perceiving our surroundings with our senses
  • Reacting with the muscles in our bodies

If you ask a doctor, he probably will tell you that breathing is a function of autonomous nervous system that runs quite fine without conscious interaction on your part. While this is an objectively correct answer, it is not the whole picture. Unfortunately, many trainers leave it at this, and are ignoring the huge potential for performance enhancement.

The problem is, your autonomous nervous system does not know about your plans or your situation. The ANS reacts instinctively on perceived threats—if you encounter a dangerous situation, the ANS releases adrenaline to raise your heart rate, increase your breathing frequency, and to prime your muscles for the fight and flight response. This mechanism helped our ancestors survive to produce the next generation. However, the ANS reaction is not always the best option—especially not for athletic endeavors where energy management is often critical for success.

The RKC Snatch Test is one of those situations where breathing can easily fail you, if don’t take control. Anybody who has taken it knows that it is a staggering experience. Your energy consumption suddenly goes through the roof as a heavy iron kettlebell beats down on your body. If you are not accustomed to it, your nervous system will perceive the situation as an immediate threat, and trigger an adrenaline reaction. Initially, this will help you to use more of your strength. But if you do not take control, you will overexert yourself in the first three minutes, and probably fail in the end—or at least it will make it all much harder than necessary.

The benefits of taking control of your breathing:

  • It allows you to consciously manipulate certain functions of your autonomous nervous system (i.e. keep your heart rate down).
  • It ensures you do not prematurely overexert yourself.
  • It gives you extra power when you need it.
  • It helps you to relax.
  • It quickens your recovery.

How to do it correctly…

In the RKC, we have explicit instructions for breathing in each of our main exercises. The basic idea is to inhale during the negative phase of a movement, where the least power and stabilization is needed. The short and forceful exhalation should optimally be timed with the moment of highest demand in power and/or stability during the active phase. This principle creates a very distinct rhythm for each exercise. The two major categories to differentiate exercises are ballistics and grinds, but individual exercises also benefit if the breathing pattern matches the exact demands.

The Inhale:

There is a saying in the martial arts:
“When your opponent inhales through his mouth, victory is almost yours.”

I’ve made this observation in many sparring matches. Whenever I see my opponent’s mouth opening, I throw a few fast kicks and punches his way. Usually, the match will be over in seconds. My Taekwondo grandmaster, Son Jong Ho, even stated only the first and last breath should be through the mouth.

Practice nose breathing deeply into the abdomen to create pressure below your navel. When you use this technique in a kettlebell session, you will be able to keep your heart rate much lower, which will give you more endurance and power. When you begin to practice nose breathing, you will soon feel the urge to open your mouth, but try to resist it! The longer you practice, the better it will feel.

A little experiment: Lie on your stomach with your forehead resting on your hands. Inhale deeply through your mouth. You will feel your chest expanding during each breath. Now switch to breathing through the nose. You will immediately feel your belly pressing into the floor and your chest will stop heaving. The difference is that while breathing through the nose, your diaphragm will pull your lungs down into your abdomen, increasing the pressure in your lower abdomen. If your core muscles are engaged—as they should be whenever you touch a kettlebell, this will lead to much more core stability and therefore safety. On the other hand, an inhalation through the mouth mainly engages the chest and shoulders. If those muscles are tensed during a kettlebell swing, your breathing will be severely constricted. If you need more oxygen while breathing through the mouth, you will need to inhale more often, reducing the time oxygen will be processed in your lungs. Eventually, this will lead to hyperventilation and a breakdown of your performance.

Pressurized Exhalations

Breathing is a very versatile tool. When used correctly, it can benefit you in many different situations. For our purposes, we need it to enhance stability and power during our kettlebell workouts.

We use short, pressurized exhales like hisses or shouts to increase tension and avoid losing too much air. If you fully exhale, your abdomen is completely emptied and your core muscles have nothing to hold against. Imagine a car tire. When it is filled with the correct pressure, it is hard and sturdy, but the stability goes away when it starts losing air. Stability is completely lost when it is empty.

When exhaling during kettlebell drills, do it with your lips almost closed and the tongue pressed against the roof of your mouth behind your teeth. If this makes a hissing sound, you are doing it right.

Breathing Patterns for the RKC Kettlebell Exercises

As each exercise demands a different pattern of stability and power, the optimal breathing pattern for each exercise will also be different.

Breathing for Swings

The most basic ballistic kettlebell exercise is obviously the swing. This exercise gives the kettlebell its unmatched effectiveness and safety.

The passive phase of the swing, when the kettlebell drops freely from the apex of the swing, requires almost no effort until it is caught in a deep hip hinge. Therefore, this is the time for a deep inhale to the lower abdomen, the area where we need the most internal pressure. This also provides the necessary stability during the catch. For the optimal intra-abdominal pressure, you will need to inhale through the nose. When you start practicing this, you might get the impression that you are not getting enough oxygen, so take your time and adjust the intensity of your training. With practice, you will find that you can inhale much more deeply and get much more oxygen.

When catching the kettlebell from the drop, hold your breath for maximum intra-abdominal pressure. The exhalation should be as short and forceful as you can make it and timed exactly for the moment when your hips lock out at the top of the swing. In the kettlebell swing, the time between the hip snap and the moment when the kettlebell reaches its apex is almost identical. It will be more explosive if you focus on synchronizing the exhale with your hip snap.

Breathing for Cleans and Snatches

The basic movement pattern of the clean and snatch should be identical to the swing. The inhalation and exhalation also follows the exact same principle. Be aware that with the snatch (especially) there is significant time between the hip snap and the arrival of the kettlebell in the overhead lock out. The right timing will make an even bigger difference than in the swing.

But, there is also another difference between the swing, and the clean and snatch that we need to consider for the optimal breathing pattern. This difference is the built-in pause at the top position of both exercises. While the swing is a closed-chain exercise (meaning that every rep is immediately followed by the next without a discernible pause), the clean and snatch are not. After the initial rep, which starts on the floor, each clean or snatch starts and ends at the top. How you handle breathing with this pause will depend on the context of your workout and the exercise.

If you do short sets of snatches for instance, you can simply hold the air and wait for the drop. In a situation where you are doing many snatches in a short time (i.e. Snatch Test) you might need to use this pause to exhale more, thus enabling you to refill with more fresh oxygen. You could even decide to prolong the pause for additional breathing cycles to combat oxygen debt.

If you clean for reps, then you can use the same strategies as in the snatch. If you clean for squats or presses, you should hold your breath in the top position to conserve the tension from the clean.

Breathing for the Get-Up

The get-up is an exercise category in itself, and it needs it very own strategy for breathing. The first challenge is that the get-up (including get down) takes at least 30 seconds (though 60 seconds is recommended). Either way, you will obviously need to breathe several times during one single rep. The second challenge is not to lose tension within the entire rep. To accommodate both demands, you need to shallow breathe while keeping your abs tight at all times (breathing behind the shield). The hardest parts of the get-up are the transitions from one position to the next. To give you the necessary strength, time small but pressurized exhalations with each transition. Refill (inhale) through the nose when you are in a static holding position.

Florian Kiendl split press

Breathing for Presses

Military presses are high tension drills. The more tension you generate, the stronger your press. As already mentioned in the section on the clean, it is essential to conserve the tension generated from a good clean for your press. Make sure not to exhale while you catch the kettlebell in the rack position. Depending on the cardiovascular effort, you may wish to refill your lungs by inhaling again before you actually start the press.

For the press itself, the breathing pattern will depends on your objective:

  • If you press a light to medium kettlebell for high reps, exhale on the way up, and inhale on the way down.
  • If you are working with a heavy weight, exhale on the way up, inhale while the bell rests in the lock out, then exhale again while you are actively pulling the kettlebell down. Obviously, you will need to inhale again before you start the next rep.

The inhalation for the press should be through the nose to the lower abdomen as already explained for the other exercises.

The exhalation will last longer than in the ballistic exercises, but will require even more pressure. Make sure not to lose too much pressure!

Breathing for Squats

For a fairly simple exercise like the squat, it is funny that the breathing pattern is (in my opinion) the most complicated for all RKC drills!

First, let’s analyze the squat:

  • Usually you start with a clean. Do not lose air while catching the kettlebell.
  • Lower yourself into the squat.
  • Hold the lowest position until the downward momentum dissipates.
  • Press yourself back up to the standing position.

The moment you start to rise from the deep squat position (like in the deadlift) is when you need to get the dead weight moving again. It is also when you need to be strongest. To give you some extra tension, initiate the ascent with a forceful grunt followed by a short pressured exhale on the way up.

The purpose of the grunt becomes obvious when you squat heavy, but practice it even with light weights, so you build a habit for when it counts.

During the descent, you will need the least strength. But to best prepare yourself for the ascent, your abdomen should already be pressurized, and you need to get as tight possible. It is easier to fill your abdomen while it is not under strain, so inhale deeply while still standing then hold your breath during the descent.

Breathing During Rests

In the last section, I wrote about breathing while performing kettlebell exercises. If you did not control your breathing during your kettlebell work until now, using the above information will improve your performance considerably. However, there may still be a missing link to your overall performance: breathing patterns for rest periods or in between sets.

The better your breathing pattern fits the demands of your chosen exercise, the more power you can produce and the more continuous reps can you do.

When you set the kettlebell down and release the tension, your body will immediately try to reduce the oxygen debt. For reasons unknown to me, the preferred method to increase the oxygen intake is to suck in air through the mouth. The higher your oxygen debt is, the faster your breath will come. The problem with this method is that it leaves you winded until your oxygen has leveled out. For a martial artist, this would be a good way to lose an encounter. In kettlebell training, it leads to longer recovery periods and a reduced overall work capacity.

Whenever a candidate decides to set the kettlebell down during the RKC Snatch Test, breath control is the crucial factor for the outcome of the test. Almost all candidates who give in to the reflex of sucking air in through the mouth will fail their test because it will take them longer to start snatching again.

Between Sets

Immediately after you set the kettlebell down, the need to suck in air is the strongest. You may even have a sensation of choking! If you open your mouth and start sucking in air, the feeling subsides almost immediately, but it becomes very difficult to return to controlled breathing once you let that happen.

My suggestion is to leave your mouth shut and inhale deeply from the nose down into your groin. If you can stand it, also exhale through the nose. If not, let the air out from your mouth, but close it again before the next inhalation.

With this strategy you can start your next set much faster and keep your heart rate considerably lower.

After Your Training Session or Long Rest

If you opt for longer rest times or have finished today’s workout, the goal is not to start your next set sooner, but to get the most out of your recovery time and release the tension you accumulated. When your oxygen level is back to normal, keep breathing deeply, inhale into the groin and try to exhale slowly while letting loose all tension. You can even close your eyes and focus completely on the airflow through your nose. This will speed up your recovery.

HardStyle Breathing

The techniques I described in this article are by no means the ultimate solution or the only right way to breathe. As mentioned above, breathing is an incredibly versatile tool. There are many breathing techniques out there that do wonders if executed properly for the right purpose. The techniques I’ve described are explicitly aimed to make your kettlebell training safer and more effective.

Please share your experiences down in the comment section below.

Train safe, stay healthy – Florian.

***

RKC Team Leader Florian Kiendl is a second degree black belt in Tae Kwon Do and runs a Martial Arts Gym in a small town close to Munich (Germany). He made it his mission to help his students to improve their movement and overall health. In his search for ways to overcome the movement restrictions of his students (and his own) he found the RKC and now works together with Master RKC Robert Rimoczi and others to help as many people as possible to gain back their Strength and Agility. He writes a regular Blog at blog.kettlebellgermany.de and offers workshops all over Germany teaching the RKC kettlebell exercises: KettlebellGermany.de. If you have questions or comments on the article feel free to email him at florian@kettlebellgermany.de. 

Filed Under: Kettlebell Training Tagged With: breathing, Florian Kiendl, HardStyle Breathing, kettlebell breathing, kettlebell technique, kettlebells, RKC HardStyle

The Journey Doesn’t End with the Title

March 30, 2016 By Shari Wagner 11 Comments

Shari Wagner RKC Team Leader
My RKC workshop was in April 2009, and I didn’t pass at the workshop due to a failed snatch test. I submitted a video one week later to earn my RKC title. I recently stumbled across that fateful video and of course, I watched it.

I watched it with a little bit of shock and awe at the poor technique I displayed. I also watched it with a lot of pride. Pride for the hard work I have put in to improve my technique since then and pride for all I have accomplished over the years.

When I first learned the snatch, it was in the days of first learning the high pull. This caused me to have a very significant corkscrew. I worked and worked at fixing this corkscrew before attending the RKC to no avail, and it was one of the biggest worries I had going in to the workshop. It wasn’t the typical worry of not completing the reps, my worry was all about the technique.

I did improve my technique at my RKC workshop, but I still had some of that darn corkscrew. At the time, while not ideal, it was still considered passable technique. I kept plugging away at the technique, but that corkscrew still remained.

I eventually sought out some additional instruction, which helped quite a bit. I also started watching videos of other instructors doing the snatch. I watched the timing very intently, along with the arm position and the path the kettlebell took. I noticed that when they snatched, you could see the bottom of the kettlebell as it flipped over and it looked so smooth and effortless. When I snatched with the corkscrew, my arm was turning out the side, therefore the bottom of the kettlebell was turning out to the side. It also looked anything but smooth and effortless. It certainly felt like a lot more effort too.

I took all of these visual and verbal cues and turned them inward, so I could feel it and visualize what it should look like. I snatched in front of the mirror because at the time I didn’t have a way to video myself. The short story is that it worked! I was finally able to snatch without a corkscrew. However…

I still had work to do to improve my technique. I was now keeping my arm a bit too straight and casting the kettlebell out a bit too much. More training and more work ahead, but I took it all in and worked hard because I was determined to get better. Being a type-A perfectionist and a Capricorn served me well in this case. Not only would this extra work help me get better, but it would help me help my students.

I later assisted at an RKC for the first time and it was the first time with the new RKC. When I tested my requirements for Keira Newton, she gave me a few additional tips that added to the improvements I had already made.

Then I witnessed how we now teach the snatch from the top down. I was amazed at its simplicity, yet it was extremely effective. It seemed so much easier to learn and to teach others this way. I even told the participants how lucky I thought they were to now be taught this way.

Each of these improvements I learned and made over the years has helped make the snatch feel more fluid yet more powerful. My big a-ha with the cumulative effects of each of these improvements is in how much it has helped the efficiency in my movements. I was expending so much additional energy in the way I was snatching before. Watching that video from 2009 now, I can see that so clearly. It honestly looks painful to me.

My moral of this story is that our journey of learning and improving doesn’t stop once we earn our RKC. The RKC helps give us our foundation and our starting point for teaching. But there is so much more to learn and so much more to do after we become an RKC. What makes us really good instructors is our quest to always do more, always be better and always serve our students.

Keeping our certification current is not about paying money to re-certify and keep the letters behind our name. We must improve our own skills, which in turn helps make us better instructors. We can only help our students improve when we help ourselves improve. We can also better help our students when we have access to the most current teaching standards, combined with all the tools we learned before.

If I had never learned the current way of teaching the snatch and if I had never corrected my own technique, I certainly could have still taught people. But I believe that I wouldn’t be serving my students to the best of my ability. That is, after all, the reason why we seek out those 3 letters in the first place, right? Never give up, never stop trying to improve and don’t let the journey end with the letters.

****

Shari Wagner, RKC-II, CK-FMS owns Iron Clad Fitness in Denver, Colorado. She can be contacted through her website at IronCladFit.com, email: info@ironcladfit.com or by phone 720-900-4766. Follow her on Facebook: facebook.com/IronCladFitness and Twitter: twitter.com/IronCladFitness.

Filed Under: Kettlebell Training, Motivation Tagged With: Kettlebell, kettlebell certification, kettlebells, RKC, RKC Workshop, Shari Wagner, Snatch Test, workshop experience

The Clean Viking Salute, a New Spin on a Kettlebell Classic

March 16, 2016 By Ryan Jankowitz 5 Comments

Ryan Jankowitz Kettlebell Clean Viking Salute

As a kettlebell instructor, I love performing kettlebell complexes and chains. I also enjoy putting my clients through complexes and chains—though they may not love them as much as I do.

Complexes and chains allow you to string several movements together without putting the kettlebell down. Complexes and chains create a very time efficient, heart-pumping workout that hits many different movement patterns. Not only do we train several different movement patterns, but we are also able to explore the “time under tension” concept. The more time we spend holding tension, the stronger we become.

With that being said, I want to share one of my favorite chains. Gus Petersen’s “Viking Salute Workouts”, from the RKC Book of Strength and Conditioning, inspired this chain.

Gus Petersen’s Viking Salute Chain:

  • Snatch x 1
  • Overhead Lunge x 1
  • ½ Kneeling Press x 1
  • Overhead Lunge back to standing x 1
  • Repeat

If you have not read the RKC Book of Strength and Conditioning, I highly recommend you pick it up. It contains some really great programs and workouts that will spice up your training.

Gus Petersen’s “Viking Salute Workout” is great for intermediate to advanced kettlebell practitioners, but what about beginners?

My variation may work very well for those new to kettlebells, or instructors working with beginner clients. Instead of performing a snatch to start the chain, we begin with a clean.

Here’s the Clean Viking Salute chain:

  • Clean x 1
  • Rack Lunge x 1
  • ½ Kneeling Press x 1
  • Rack Lunge back to standing x 1
  • Repeat

I have used this chain successfully with individual clients and classes alike. With this chain, we explore a pull, hinge, lunge and vertical push all within one workout. I usually have my clients perform 5 reps on each side and anywhere from 3-5 sets in a training session.

Feel free to get creative with this chain and turn it into a complex or even add some rack carries. Give this workout a whirl and let me know what you think.

Stay Strong.

****

Ryan Jankowitz, RKC-II Instructor, CK-FMS, is a life-long athlete who can’t imagine sitting behind a desk. He enjoys sharing his passion for fitness and spreading the RKC knowledge. Ryan operates a remote fitness coaching service and is available for private kettlebell workshops as well. You can reach him at ryan@rjkettlebell.com or through his website rjkettlebell.com. He also works with clients and teaches kettlebell classes at Fitness on the Run in Alexandria, Virginia. If you’re in the area, visit fitnessontherun.net and come swing some bells with Ryan.

Filed Under: Kettlebell Training, Workout of the Week Tagged With: Gus Petersen, kettlebell chain, kettlebell complex, kettlebell video, kettlebell workout, kettlebell workout video, kettlebells, RKC, Ryan Jankowitz, video, viking salute

Five 5s: Five Simple, Effective, Nourishing Kettlebell Workouts

March 2, 2016 By Nick Lynch 11 Comments

Nick Lynch Group Workout Kettlebell Jerks

Sometimes, I just want to do a quick workout and either can’t or don’t want to spend an hour to do it. That’s why I put together this series of efficient kettlebell workouts which can be done in a short amount of time with minimal equipment (a kettlebell, the floor, rings and a pull-up bar of some type). These workouts are also simple to modify. If you DO have an hour in the gym, you can simply multiply your sets. As you’re reading, I invite you to take note of any questions you may have and ask them in the comments section below this blog post. I’m more than happy to do my best when answering them. I hope you enjoy these programs as much as we do in Milwaukee!

1: “The Zen of Zane”

Frank Zane used to train chest, triceps and shoulders in one day. Compared to how his competition was training, his approach was totally bizarre. His competition was training opposing muscle groups such as chest and biceps. Frank was known for his amazing symmetry and muscularity. With a daily dose of this workout, I think you might start to look and feel like Frank Zane!

Set a timer for five minutes and repeat the following sequence of exercises until five minutes has passed.

  • 5 push presses per side
  • 5 pull-ups
  • 5-10 push-ups
  • 30 seconds break
  • 1 push-up
  • 1 push press per side
  • 1 pull-up
  • 5 push presses per side
  • 5 pull-ups
  • 5-10 push-ups
  • 30 seconds break

Modification
Trade reps for seconds. For example, instead of 10 pull ups, perform a 10-seconds flex arm hang.

2: “My Favorite”

This workout is my personal favorite, let’s see what you think!

Set a timer for eight minutes, complete at least four full sets of the following:

  • 5 ring dips
  • 25 swings
  • 1:30 minutes rest

Modifications
Option one: try putting your feet a raised platform for extra stability. Option two: perform bench dips instead of ring dips. Option three: forming a triangle with your hands, and perform 5 push-ups, be sure to use the entire range of motion, bringing your sternum down to your hands.

3: “Lungs of Hell”

The name of this workout is a tribute to the classic Megadeth song which I think also sounds great played loud along with this workout…

Set a timer for five minutes, and perform the following sequence safely for time:

Perform a get-up to standing, do 5 overhead lunges, 5 push presses, 5 squats, then 5 snatches. Keeping the kettlebell overhead finish the get-up and return to the floor. Switch sides, resting as needed.

Modifications:
Option one, reduce your reps to three. Option two, reduce the size of the kettlebell you’re using. Option three, reduce your reps to one.

4: “Speak To Me/Breathe”

Pink Floyd begins their infamous albums, Dark Side of the Moon with “Speak To Me” which leads right into “Breathe.” I think this is funny because this could also describe the breathing techniques we teach and use in the RKC community. There’s the classic hiss during the swing and goblet squat “hoooop” grunt. You’ll need to focus on your vocalizing your breaths to keep up with these reps. The end result is amazing lung capacity, strong legs, bullet-proof abs, and grip strength that won’t quit!

Set a timer for 8 minutes with the goal of completing 4 rounds of the following:

  • 10 goblet squats
  • 25 swings
  • rest
  • 5 goblet squats
  • 25 swings
  • rest

Use a HEAVY kettlebell.

Modifications
Option one: use a lighter kettlebell. Option two: reduce overall reps. Option three: perform bodyweight squats and vertical jumps instead of goblet squats and swings.

5: “Look Alive”

Coordination and attention to detail make this last workout effective and nourishing. It’s challenging and fun at the same time because you must focus on every rep for the entire five minutes.

Set a timer for five minutes. Repeat the following sequence for a total of five sets. If you finish early, take a short active-rest break and, a swig of water and continue until the end of five minutes.

  • 5 push-ups
  • 5 partial jumps (please refer to video for the technique)
  • 5 swings

These five simple but scalable workouts produce results even when time is limited. I invite you to share your experience after trying one or all of the Five-5s. Feel free to have fun and modify them to fit your needs.

Enjoy and until next time, have a most excellent day!
Nick Lynch, RKC Team Leader

Nick Lynch Five Five

***

RKC Team Leader Nick Lynch is a Strength and Conditioning Coach at Milwaukee School of Engineering University (MSOE). He owns Superb Health Milwaukee, a kettlebell studio in Milwaukee, WI. He has 13 years of full-time training and coaching experience and a lifetime of wellness education. Nick lives in Milwaukee, WI with his wife Natalie and son Weston.

Filed Under: Kettlebell Training, Workout of the Week Tagged With: bodyweight and kettlebell workout, kettlebell workout, kettlebell workouts, Nick Lynch, short workouts, workout, Workout Wednesday

How to Nail the RKC Kettlebell Snatch Test Once and For All

February 17, 2016 By Dan John 11 Comments

Nailing the RKC Kettlebell Snatch Test

The RKC Kettlebell Snatch Test seems to bother many people. It’s 100 reps, and quickly indicates the issue:

Is it your lungs?
Is it your buns?
Is it your guns?

During the snatch test, the skin comes off your hands, sweat drips in your eyes, and your organs seem to rise up in rebellion. If you have been practicing the snatch test by practicing under ten reps, resting for a set period, then repeating, you can usually have pretty lousy technique without ripping skin off of your hands.

Sadly, for the people I have prepped, I learned that the proper way to help someone improve their kettlebell snatch is to wait until around rep 70 to comment. The challenge of doing 100 reps in a set period of five minutes demands that the candidate bite the bullet and learn to keep snatching properly throughout the challenge.

After the first Belfast RKC, one attendee wrote, “With one sentence, you changed the way I snatched and I nailed the test.” I asked what the sentence was and the newly minted RKC answered, “It was when you said that you need the courage to drop the kettlebell into the swing with authority each and every time.”

Remember, first and foremost:

The swing is a swing.
The clean is a swing.
The snatch is a swing.

The bulk of the issues most people have with the clean or snatch can be cured by coaching the swing portion of the moves. As if by magic, learning a proper swing for the clean or snatch stops most wrist banging and lockout issues.

But, for a proper swing, we must set up for it with a good drop from the snatch. Teaching the kettlebell snatch “from the top down” has advantages that are only apparent when the reps are high. Again, a few sets of five then resting will be a lot different than going after 100 snatches in 5 minutes.

Three terms that seem to help 99% of the population when working with the snatch from the top down are: “Pour the Pitcher,” “Swim” and “Unzip the Jacket.” Before getting into the specifics, let’s look at a key principle explained at a recent workshop, the position of the body in the “Cylinder.”

In the Olympic lifts—especially the locked out front squat position just before the jerk (or in training movements)—the lats are flared out, and the chest is tall in what most people would recognize as the traditional “Muscle Beach” pose. Although this posture is ideal for some movements, we want a slightly different position. The opposite of this posture is the “hollow rock” from gymnastics. While it is perfect for holding an Iron Cross on the rings, this position is not what we want for our RKC movements. Instead, consider a position “in the middle.” Now, I love continuums, so think of the Olympic lifting posture on one end, and the hollow rock on the other—the RKC cylinder would be in the middle.

RKC Kettlebell Snatch Test Collage

This insight allowed me to finally connected the dots in regards to holding the hips in a neutral stance for training. If the pelvis is like a bowl filled with water, we want to stand (and stretch and move generally) without the water pouring out forward, backward or to either side. Utilizing this notion of a cylinder helps immensely with the hip position, too. It’s like the story of the Three Bears, one wants to stand “Just Right.”

While we are discussing posture, let’s add an additional insight about the packed shoulder. Sometimes, it is difficult to teach the packed arm to experienced athletes. Years of compensations can make some people convinced that their shoulders are packed, when in truth, their traps are on their ears! Fortunately there’s a very simple solution for this problem:

Years ago, Janis Donis, the famous Javelin thrower, told me that all throwing movements need to be done with an “open armpit” to protect the shoulder. This idea illuminated my discus throwing and kept me trouble-free with decades of pain-free shoulders. Literally, the entire armpit should be exposed for throwing movements. It shouldn’t twist or turn the shoulder down, a movement that often signals an “arm throw.”

As I worked with more and more guys who had played collision sports and trained like bodybuilders, teaching the packed shoulder became a more of a chore. Between the injuries and Frankenstein training, many athletes were not aware of where their shoulders were. Many were thinking, “Isn’t it right next to my head?”

Get ready for my million-dollar drill: Grab the tag on the back of your shirt collar. For most people, this will pack the shoulder “instantly”. Now, many people will need to slide down the spine a bit more to get the position, but this simple movement “instantly” packs the shoulder. Note how the bicep is on the ear? This is also probably the most-heard phrase during waiter walks, consider how “open” the arm pit has become with this simple move. Now, hold the shoulder in this position and simply straighten the arm. Now we have the packed shoulder and the open arm pit. Now that the body is in the cylinder, it is time to drop the kettlebell.

Let’s look at three terms or images that all lead to the same powerful swinging hip hinge. Let’s start with “Pour the Pitcher.” Now, if I drop the kettlebell straight down, my head is the first point of contact. Hitting the head multiple times with a heavy kettlebell is NOT optimal. Yes, please feel free to quote me on that. So, obviously, we need to push the bell forward. But, launching it straight out to the position of the top of the swing is not perfect either. With a heavy kettlebell, the athlete simply can’t counter this movement, and the athlete will either be pulled forward, or the kettlebell may even cause damage or injury—this is a lot of force in a bad position!

The first image I ever heard for the proper drop was “Pour the Pitcher.” With the thumb leading from the lockout position, simply turn the wrist and think of pouring milk on some cereal. (Just think of the cereal, don’t eat it. Cereal is for cows. Eat the cow instead.) Because of gravity, the kettlebell will start coming down in front. I encourage people to immediately get “the courage” to attack the hinge here.

“Swimming” is another cue that helps some people. Like the crawl stroke, imagine bringing the bell down the midline of the body as if you were doing laps in a pool. This image immediately made sense to me because the correct crawl stroke isn’t performed with a straight arm or a precisely prescribed angle, the elbow angle “depends” on many factors. The same is true for the kettlebell snatch. I also like this term because it illustrates that this is a dynamic movement, not just a simple free fall.

“Unzip the Jacket” is a phrase I heard at my RKC in San Jose. Simply, one should think of unzipping a jacket. Again, there is no National Zipping Policy, so there will be multiple ways to accomplish this task. As always, keep thinking about attacking the hinge.

Something I hear over and over from RKC candidates who FAIL the snatch test is the following kind of statement:

“Well, I did 30 reps the first time I tried the test, then built up to 54 with the 24kg kettlebell. I was hoping that the energy and enthusiasm of the group would get me those last 46 reps.”

I believe that you should come to the RKC already able to do 100 reps of the snatch. Now, that doesn’t mean every workout is done with the snatch-test weight kettlebell. Months before the RKC, I often recommend that the candidate use lighter kettlebells—as light as 12kg for men—and do several sets of 100 in training. I think it helps to “get used to” 100 reps.

Recently, I did a little challenge where I had to do 100 reps with the 24kg kettlebell. At 18 reps, I smiled. Later, I was asked, “Why did you smile?” Well, it’s because I use this system:

  • 20 reps with my left hand
  • 20 reps with my right.
  • 15 left
  • 15 right
  • 10 left
  • 10 right
  • 5 left
  • 5 right

This system gives a total of 100 reps with only seven hand switches. At 18 reps, I figure that I only have two more reps left with my weak hand and then I get to use my strong hand. In my mind, the first twenty reps get me over the hard part! The next eighty reps will be dessert.

But, if you don’t have the courage to actively drop the kettlebell for each and every rep, every rep will be hell.

****

Master RKC, Dan John is the author of numerous fitness titles including the best selling Never Let Go and Easy Strength.

Register for the Upcoming 2016 San Jose, California RKC taught by Master RKC Dan John with Senior RKC Chris Holder, and RKC Team Leader Chris White

Dan has spent his life with one foot in the world of lifting and throwing, and the other foot in academia. An All-American discus thrower, Dan has also competed at the highest levels of Olympic lifting, Highland Games and the Weight Pentathlon, an event in which he holds the American record.

Dan spends his work life blending weekly workshops and lectures with full-time writing, and is also an online religious studies instructor for Columbia College of Missouri. As a Fulbright Scholar, he toured the Middle East exploring the foundations of religious education systems. For more information visit: http://danjohn.net

Filed Under: Kettlebell Training, Tutorial Tagged With: Dan John, how to do the RKC snatch test, how to pass the snatch test, how to snatch a kettlebell, kettlebell snatches, Master RKC Dan John, RKC Prep, Snatch Test

Don’t Ignore These Two Common but Crucial Kettlebell Mistakes

February 3, 2016 By Keira Newton 9 Comments

Two Kettlebell Mistakes Keira Newton

As a Master RKC, I travel a lot. I love my job because I get to visit other gyms and teach people how to teach kettlebell technique according to the highest standards in the industry—RKC standards. In the past few years of teaching, I have noticed two commonly missed mistakes. These are simple fixes in my eyes, and easy to teach. So lets get started.

The Deadlift:

The deadlift is the basis of almost every kettlebell lift. It IS the foundation of what we do. However, I have seen people skip the deadlift altogether… (How will they learn the swing? How will that work?) Or they simply miss the most important part of the deadlift: the set up and how to work underneath the kettlebell.

In my experience, I’ve observed that people who are given a small kettlebell, are tall, tight in the hamstrings, or tight in the hips will round the low back to pick up the kettlebell. The cure for this? RAISE THE FLOOR. It’s such a simple fix, but it will help 99% of your students. I use it with almost all of my new students. The video below includes a short demo of this technique. Give it a try.

The Swing:

I think it is safe to assume we all know the kettlebell swing can be fantastic if performed correctly—and deadly if not. This is no joke. When training a client, or in your own training, you must know exactly what happens with this ballistic lift. The most common mistake I see from my clients and students (which is also the most missed among new trainers) is in the TIMING of the swing. While watching someone’s swing, if it looks like they are moving to the toes, swinging below the knees, or lifting the kettlebell with their arms, then their timing is off.

To fix the timing, tell your client to wait until the kettlebell has passed below the belly button, or their arms have touched their ribs after swinging the kettlebell forward before moving their hips back. It will seem almost as if the kettlebell will hit you where it hurts, and you get out of the way just in time. But, let’s make sure that happens okay? 🙂

Hope the video below helps you understand. Enjoy!


***

Kiera Newton, Master RKC, Level 3 Z-Health, MCT, PCC. Keira first picked up a kettlebell in 2005 when her husband challenged her to stop laughing and start swinging. She stuck with the challenge when she realized that she could get an all-in-one workout in a fraction of the time she spent at the gym. Keira was convinced… Read more here.

Filed Under: Kettlebell Training, Tutorial Tagged With: Keira Newton, kettlebell swing, kettlebell swings, kettlebell technique, kettlebell training, kettlebell troubleshooting, kettlebell tutorial, Master RKC Keira Newton, swings, tutorial

Fine-Tuning the Get-Up

January 27, 2016 By Andrea Du Cane 14 Comments

Master RKC Andrea Du Cane Get-Up Lead Photo

How and when to use the high bridge and when to use the “step-across” instead of the “windshield wiper”

At every HKC and RKC, I’m asked why we test the low sweep instead of the high-bridge. I also get a lot of questions regarding the “windshield wiper” vs. the “step-across” to transition in and out of the kneeling windmill to the lunge position. It’s time to explore each movement and gain a deeper understanding of some of the benefits of the get-up.

When I first became certified and started teaching the get-up, it was referred to as the “Turkish get-up”. Here’s the criteria that was given and tested at that time:

  1. Keep both shoulders packed.
  2. Keep the wrists neutral at all times.
  3. Keep the elbow locked at all times.
  4. Keep your eyes on the kettlebell.

Oh and well…. get-up! That was it, get up anyway you can.

Let’s just say the get-up has come a long way, baby. It’s transitioned from having very little explanation and direction to (for a time) elaborate direction, with a focus on corrective uses and advanced movement patterning.

You can say that now we have found a happy medium, erring on the side of explanation and points of movement. But, we have also found a good balance and an easier way to teach the get-up to newer kettlebell instructors and users.

The High Bridge or the Low Sweep

One area of confusion with the get-up is whether to use the high bridge or low sweep.

First, let me explain where the high bridge came from, and why it was initially introduced as a teaching and testing skill. The high bridge came from the FMS concept of using movement as a screen. When it was first introduced into the RKC curriculum, the high bridge was used as a screen for tight hip flexors. However, we began to notice that when people were doing the high bridge, their lumbar spine was actually in hyper-extension instead of full hip extension. I remember discussing this with Gray Cook, and he agreed with that it was one problem with using the high bridge as a screen, since it is easily cheated. It does not actually demonstrate whether the person is in full hip-extension or hyper-extension of the lumbar spine.

Secondly—and more importantly—you would not put a client, with a kettlebell in their hands, into a high bridge and then say, “Aha! You have tight hip-flexors”. Of course not. Long before they do that high bridge, you have deduced that they have tight hip-flexors from other screens. And from a safety perspective, you would not let someone perform a high bridge until they had opened up their hip flexors and could perform the movement correctly without a kettlebell.

Since one of the end goals of the get-up is to go heavy, for the purpose of safety and efficiency, you will want to pull your leg back and get your hips under the load as quickly as possible. The high bridge takes unnecessary risks with a heavy load during the transition.

That said, the high bridge is great with a moderate to light weight for a more advanced kettlebell user. Done correctly, it demonstrates shoulder stability, hip flexibility and control.

Master RKC Andrea Du Cane Get-Up Kneeling Windmill

Performance Tip: Think of the high bridge and sweep through as a tall side plank. When moving into a high bridge, post over towards the side, your shoulders should be stacked over each other. The hips will rotate slightly upwards, but the shoulders and t-spine are stacked vertically. Practice lots of side planks from the elbow and tall side planks, before moving onto the high bridge.

The “Step Across” Variation

Moving on to the next modification, using the “step across” instead of a windshield wiper. As stated earlier, the body needs to transition from the tall-sit position smoothly and with control all the way to lunge. That means the hips need to get under the kettlebell as quickly and safely as possible—this includes the sweep through and transitioning to the lunge.

From the kneeling windmill position, the torso is moving from a horizontal position to upright, as the hips are coming under the torso and kettlebell. The hips need to fully extend with the glutes tight as you move into the lunge position. That’s a LOT of movement happening at the same time. The more stable and connected to the ground the body is, the safer and smoother the transition.

That is why the windshield wiper is taught and tested. Both legs remain firmly on the ground and the hips easily and fully extend.

Performance Tip: think about finishing at the top of a swing. The glutes contract hard and fast and the hips fully extend, allowing your body to find stability in the lunge position as soon as you hit it.

A potential problem with this movement is the pressure and friction placed on the knee. Obviously, if the knee is feeling pain, this could jeopardize the movement. The ground you are training on becomes an issue, and individual knee sensitivities should be taken into account as well.

One way to solve the issue is to use the “step-across” modification. From the kneeling windmill, you simply lift your torso up and then step your loaded foot across into a lunge position. This will take the windshield wiper out of the movement and “save” the knee.

The downside to this modification is the inherent lack of stability as you lift your loaded leg up and step it across. You are also changing the orientation of your head and body, which can also cause us to lose stability and control.   Lastly, it is much harder to keep your glute and hip tight and contracted as you move the leg, leading to another possible loss of control.

As we say in the RKC, “safety trumps performance”, so if you have sensitive knees or are training on a hard or rough surface, the step-across is a modification you can use to protect your knee and stay in control.

My personal recommendation is to buy a $20 pair of knee pads or have your clients purchase them for training. I do a lot of kneeling training and take knee pads with me everywhere to use for all kneeling training and stretching. $20 knee pads are a cheap and easy way to protect your knees and increase the effectiveness of your kettlebell training.

****

Andrea Du Cane is a Master RKC Kettlebell Instructor, CK-FMS, CICS, and RIST, ZHealth certified, she has a BA in Psychology from the University of Minnesota and is also a Pilates instructor. She is the author of several books and dvds including The Ageless Body, The Kettlebell Boomer, and The Kettlebell Goddess Workout.  She has over twenty years of aerobics, weight training and fitness experience, with an additional background in… Read more here.

Filed Under: Coaching, Kettlebell Training, Tutorial Tagged With: Andrea Du Cane, get up, get ups, Getup, kettlebell technique, kettlebell training, RKC, RKC kettlebell training

  • « Go to Previous Page
  • Page 1
  • Interim pages omitted …
  • Page 9
  • Page 10
  • Page 11
  • Page 12
  • Page 13
  • Interim pages omitted …
  • Page 16
  • Go to Next Page »

Primary Sidebar

Featured Products

previous arrow
BOOK-RKCBookofSnC
HardStyleKettlebellChallegeDanJohn700
BookCoverMasterTheKettlebell1
RKCiconKettlebell512
KettlebellGoddessdv040
next arrow

Recent Posts

  • RKC Big Six Workout
  • The Kettlebell Swing & Low Back Pain
  • Key Kettlebell Exercises To Help You Create Better Balance
  • How to Most Effectively Use Kettlebells to Meet Your New Year Goals
  • 1 Exercise That Checks All The Boxes
FOLLOW US ON TWITTER!

Archives

Copyright © 2025

Dragon Door Publications / The author(s) and publisher of this material are not responsible in any manner whatsoever for any injury that may occur through following the instructions or opinions contained in this material. The activities, physical and otherwise, described herein for informational purposes only, may be too strenuous or dangerous for some people, and the reader(s) should consult a physician before engaging in them.