• Skip to main content
  • Skip to primary sidebar
  • Home
  • Contributors
    • Matt Beecroft, Master RKC
    • Martijn Bos, Master RKC
    • Andrea Du Cane, Master RKC
    • Angelo Gala, Master RKC
    • Chris Holder, Master RKC
    • Steve Holiner, Master RKC
    • Dan John, Master RKC
    • Mike Krivka, Master RKC
    • Thomas Phillips, Master RKC
    • Robert Rimoczi, Master RKC
    • Phil Ross, Master RKC
    • Max Shank, Master RKC
  • Workshops
    • HKC Workshops
    • RKC Workshops
    • RKC-II Workshops
  • Find an RKC Instructor
  • Resources
    • Articles
    • Forums
    • Kettlebells
    • Products
  • Blogs
    • PCC Blog
    • Strong Medicine Blog
  • Archives

RKC School of Strength

Official blog of the RKC

Archives for November 2021

Here’s How I Built a 6 Figure Online Kettlebell Coaching Business

November 19, 2021 By Colleen Conlon 1 Comment

An online coaching call with Colleen Conlon, RKC-II Instructor

Before COVID I was a full-time fitness professional in NYC. I had a handful of private clients I saw in their apartment gyms—all older men who didn’t want to workout, but wanted to be seen with the cute female trainer. I taught 15 group fitness classes a week: cycling, yoga, HIIT—one of those classes was a Hardstyle kettlebell class.

When the pandemic hit, all the places I taught classes shut down. NONE of my private clients wanted to train virtually. I tried doing virtual classes: 3 HIIT, 1 yoga, 1 jump rope, 1 kettlebell. The virtual classes were good. I stuck with this load for close to 3 months, April 2020-June 2020 before pivoting. I realized I LOVED teaching from home. I no longer had a commute, I got to spend more time with my husband, and had time to start dreaming about what I wanted. This was my shot to get out of the rat race of living out of a backpack as I spent the past 7 years hustling in the fitness scene!

I hired a business coach. This was so scary! At the time I was averaging $50,000 a year, barely saving anything due to where I lived. The cost was $5,000 to be in a group coaching program. That felt like a LOT of money to drop, but here were my choices: Take time trying to figure it out on my own, sit and wait for things to get back to normal (a normal that I didn’t want to go back to), or invest in me, and try to build a new life. I remember calling my Dad, and I told him I dropped 5k on a business coach. He told me that was a stupid choice and I should get my money back! I cried. Then put my blinders up. I was going to get as much out of this course as I could. The course made me think about learning a new kettlebell skill. The devil’s in the details, and consistency is number one to make progress. I knew I was good at kettlebell details, and that gave me the confidence to believe I could build a virtual kettlebell business, so long as I followed my coach’s blueprint.

Week 1 had to do a lot of self-reflection. I had to figure out “who I was,” and “who I helped,” and “how I would do it.” I remember telling my coach that I wanted to help everyone! She said, “no!” I was baffled because at this point I had worked with all different types of people: senior citizens, high school athletes, moms, brides, middle-aged men. Yes, I can help anyone who wants my help, but my coach wanted me to figure out who I WANTED to help! This felt strange. In my head I thought, well it would be cool to help women who I can relate to, but I’ve never had that clientele. So that’s who I needed to attract and I had to do that by being on social media. Why did I need to do it via social media? Because there was no other place to get people to know about me and what I was offering!

Social isn’t about your number of followers. It’s about talking to your ideal client. It’s about getting people to know, like, and trust you. How do you do that? You share your story! You create proof that you know what you are talking about! You are authentically you!

My biz coach gave me this analogy that I want you to remember:

Colleen Conlon coaching via FacetimeIn NYC, there’s a coffee shop on every corner. They all get business! Some people want a bougie $9 cup of coffee, others want something cheap, some people want an experience where you sit down with a fireplace and soft music, then others want to go in and out. The virtual space gives us access to so many people who value different things! There are plenty of people to go around. You need to build your “coffee shop” so your ideal client can find their cup of coffee! All of my clients have come via Instagram because of how I’ve built out my page.

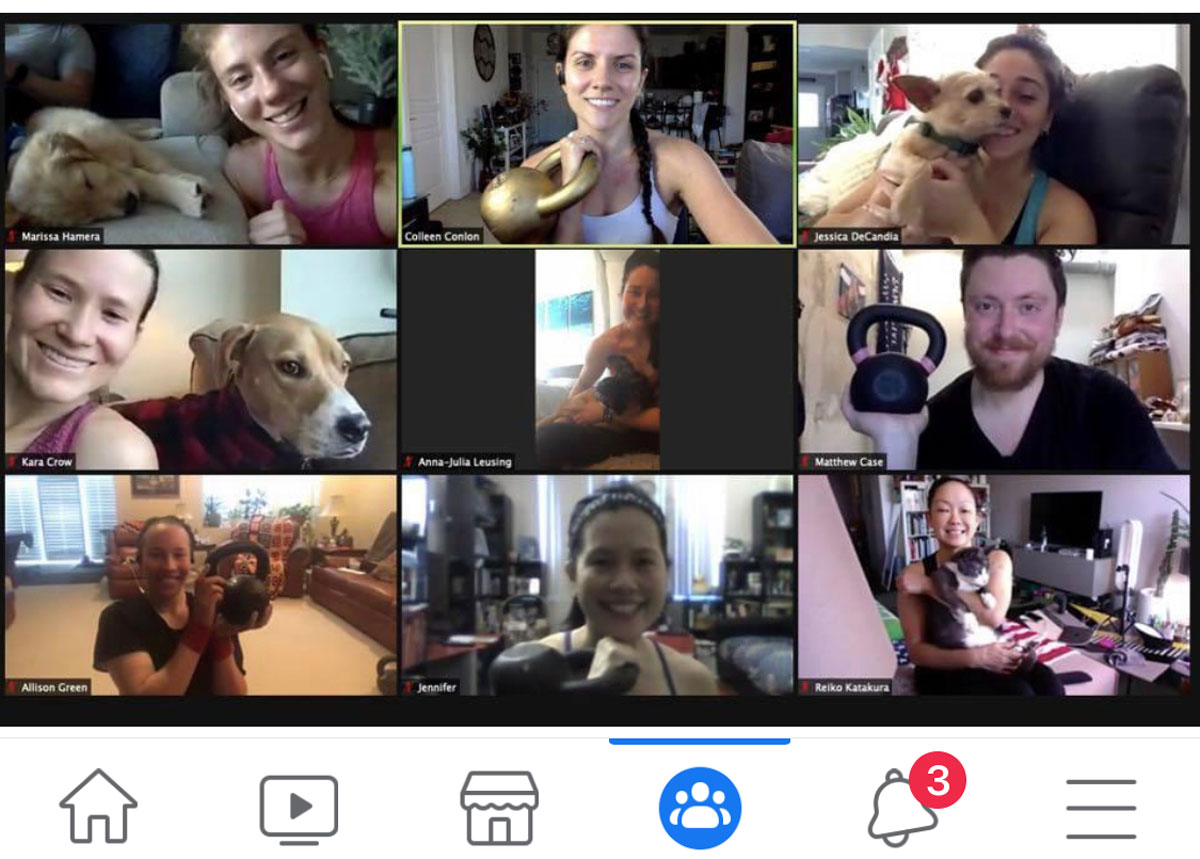
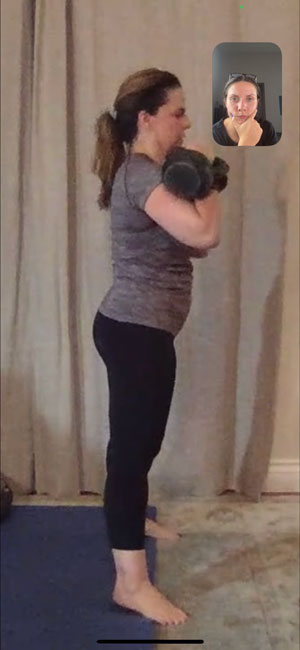
I started posting regularly about kettlebells, and I got my first virtual kettlebell client. She was EXACTLY who I wanted to attract! She thought she’d learn to use kettlebells in two sessions, but two sessions turned into nearly 250! She was a bit of an experiment, and her success has helped me prove to other women all over the world that kettlebells can change your life! All of her sessions were done via FaceTime or Zoom. 1x a week we met for an hour and then she took a 1-hour virtual kettlebell class. She started with two kettlebells: 12kg and 20kg. With her permission, she allowed me to share pieces of her journey on social, and that was when I began to get more traction from other women. Why? Because I had proof of concept!

My Online Kettlebell Course

The goal of the business course for me was to do two things. Get a few one on one clients. Then build a big course that I could run multiple times a year to teach people how to use kettlebells. The course would be intense! I wanted to get people who wanted to learn the big six, within 13 weeks, and be able to perform everything with at least their testing size bell. This course would be marketed to people who were down to train 4-5x per week on a progressive program. They’d see me 2-3x per week in a group setting. They’d get feedback on video submissions. They would be the ones who would want to invest in themselves! The first time I ran the course I charged $2,400. How did I get that number? I came up with it by figuring out how much I wanted to make for the hours I’d spend with them per week. I thought about the time it took to create the course. Then I factored in what I believed the transformation was worth. After the first person signed up, I knew this would be a game-changer! This wouldn’t be for everyone! It wasn’t intended to be for everyone. It was created for my ideal client.

Remember the 5k business coach investment my Dad told me was a bad choice? This 13 week intensive I created brought in $24,000 the first time I ran it! I had 10 people sign up at $2,400 per person. All to say, sometimes you just have to invest in yourself! If I figured it out on my own I doubt I’d be as far forward as I am. If I sat tight, I’d be back in the rat race. Instead, I’m now working with my ideal clients who are WANTING to learn how to use kettlebells because they BELIEVE that they will change their bodies, change their mental health, and elevate their confidence! Why do they believe this will happen? Because I’ve been showing them on Instagram what’s possible consistently for the past year and a half!

This 13-week intensive funnels me 1 on 1 clients, funnels into a weekly kettlebell class, programming, and weekend retreats!

Colleen Conlon Kettlebell Retreat Group

I use to think social media was a dumb time suck. I now realize it’s a powerful tool to build a virtual business. It’s not about how popular you are, it’s about connecting with that ideal client, getting them to know, like, and trust you, and helping to solve their problems.

Since building my business, I left NYC. I live with my Husband in Arizona. (His brick and mortar gym also turned into a full-time virtual fitness business). So long as we have WiFi, we can work and help our ideal clients ANYWHERE in the world!

If this is something you want, you can do it too! You just have to get started!

***

Follow Colleen Conlon, RKC-II on Instagram: https://www.instagram.com/iamcolleenconlon/

Filed Under: Fitness Business Tagged With: Colleen Conlon, fitness business, kettlebell coaching, online courses, online kettlebell coach, online kettlebell training, online trainer, online training, virtual fitness business, virtual kettlebell training

The Turkish Get Down Press and the Road to Windmills and Bent Presses

November 12, 2021 By Dan John 2 Comments

Dan John Performs a Kettlebell Get Down Press

Let me cut straight to the point, something I rarely do: the Turkish Get Down Press (TGDP) has allowed me to speed up the teaching process of three of the most difficult kettlebell exercises to teach and master:

  • The Turkish Get Up
  • The Windmill “Family”
  • The Bent Press

Actually, the TGDP has helped me speed up the teaching of the entire pressing family, too, but I like my world to fit neatly in threes. Certainly, you may know the exercise, but like The Rock’s world in Jungle Cruise, there seems a whole lot more to discover

I liked the movie. Just saying.

Committing to a few rounds of this lift might save you a lot of time and energy later trying to explain the hows and whys of doing the movement.

If you know how my brain works, you also know that this “all starts with a story.” We, my morning training corps (my Intentional Community), were having a typical gym discussion about what to do next in the workout. For the record, not EVERY thing we do in training is computer generated perfection.

Actually, the BEST things we do are usually cobbled together. Not every group can handle a Jazz Improv training program but it seems to work with us as we are a mix of ages, occupations and experience.

I had just returned from a workshop. At said workshop, someone asked about having a workout with just a single kettlebell and a basic knowledge of Tim Anderson’s Original Strength. (I include an example at the end) and we talked about how much I love, love I tell you, doing the Half-Kneeling Press for home trainees. Including me.

Done correctly, with the 90-degree angles at the knees and a tall position of the body, the Half-Kneeling Press stretches, mobilizes, and strengthens a host of bodyparts and “just feels good.”

And, of course, the question came up.

“Which hand with which knee?”

You see, with this press varietal, you have some options. You can press with one arm…or two. You can have your left knee down or your right knee. As you know, in lifting there are three knees:

  • The Left Knee
  • The Right Knee
  • The Hiney

I crack myself up. By the way, spellcheck does NOT like my spelling of “hiney.” For your illumination, I give you the dictionary explanation of my awful joke:

The first records of hiney come from the first half of the 1900s. It is derived from words based on the root word hind, meaning “the back,” as in behind (another euphemism for the buttocks) and hindquarters. The suffix -y or -ie is used to add an endearing or euphemistic quality to words—to make them cuter or more familiar, as in granny and doggie.

Dan John Demonstrates part of the Get-Down Press Sequence with a light kettlebell

We came to a decision as a group that the left knee should be down if pressing with the right hand and the right knee should be down if pressing with the left hand.

Why?

The Turkish Get Up!!!

Actually, one would learn this doing a correct Turkish Get Down. And, for total candor, it is the Turkish Get Down Press that got us thinking of this reason.

You don’t know the Turkish Get Down Press? Let me say this: for speeding up the teaching of the TGU, I have yet to find anything better than the TGD Press. It’s very simple:

At each step of the TG Down, add a press. I am telling you this now also: go lighter than you think.

Simply, here you go:

  1. I suggest snatching the bell up to the top. You can certainly clean and press but that adds an additional press to a lot of presses.
  2. Standing tall, press the bell.
  3. Step back with the foot opposite the bell into what I call the Cross Country Ski Position. For the record, the “key” to the TGD is a longish step back as it gives you space to move later. The knee will get close to touching the ground, but don’t let it touch. Press the kettlebell.
  4. Bring the knee down to the Half-Kneeling position. Press the bell.
  5. Windshield Wiper the front foot. I recommend pressing the bell here, too.
  6. Hinge back and bring the free hand to the floor. The hand, knee and foot should all be in a line. The knee should bisect that line. Press the bell.

(It should feel like a warmup for the Bent Press because it is a warmup for the Bent Press) Look, an asterisk: * (See Below)

  1. Sweep the butt through to the Tall Sit Position. Press the bell.
  2. Roll to the elbow. Press the bell.
  3. Roll to the floor. Press the bell.
  4. With BOTH hands, bring the bell down, cuddle it, roll to the side and release the bell safely to the floor.

*Position Six is called the Kneeling Windmill and will be the focus of the next article in this series.

Let’s watch someone demonstrate it. The model seems to know what to do.

That’s eight presses. That’s a lot of presses. Moreover, as you will discover, the press grooves were different almost every press. I find that my shoulders feel better after this exercise. This movement can be done for mobility work and this is what I use the move for in my own training.

The TGDP can also be done for hypertrophy. If you did three rounds of both sides for eight total reps per round (24 total presses per hand), I’m just guessing something good would happen. Perhaps you would get those “shoulders that are the envy of your friends” that I used to read about in the muscle magazines. My friends envy my naturally curly hair (with a nod to Peanuts).

So, yes, this exercise is a great exercise. For my work with kettlebells, there are other values to this movement.

First, I’m not sure there is a better way to teach the Turkish Get UP. The Turkish Get DOWN with presses stops the participant at several key points and holds these positions in place. If you can’t get the press groove, there is a good chance the bell is in the wrong place. Most of the little troubling positions and points of the TGU are cleaned up with this simple drill.

Second, and it was only at the most recent RKC II that I realized this as clearly as I do now, this drill is gateway to the Windmill and Bent Press family.

Next time, we will dissect the Kneeling Windmill and show you how this single position can teach so much, so fast to so many.

The simple program I promised you.

One KB only mixed with Original Strength.

A1. Left Hand Press (Stand or Half-Kneeling)
A2. Prone Neck Nod

B1. Right Hand Press (Stand or Half-Kneeling)
B2. Prone Find Your Shoes

C1. Goblet Squat
C2. Six Point Rock

D1. March in Place with Load in Left Hand (Suitcase Carry)
D2. Six Point Rock with Left Leg in wide position (Kickstand)

E1. March in Place with Load in Right Hand (Suitcase Carry)
E2. Six Point Rock with Right Leg in wide position (Kickstand)

F1. Swings
F2. Egg Rolls

“Maybe” Day One:

Super set with Sets of Eight (Three Rounds)
A1. Left Hand Press (Stand or Half-Kneeling)
A2. Prone Neck Nod

B1. Right Hand Press (Stand or Half-Kneeling)
B2. Prone Find Your Shoes

Superset with Sets of Eight (Three Rounds)
C1. Goblet Squat
C2. Six Point Rock

Superset for maybe Thirty Seconds each
D1. March in Place with Load in Left Hand (Suitcase Carry)
D2. Six Point Rock with Left Leg in wide position (Kickstand)
E1. March in Place with Load in Right Hand (Suitcase Carry)
E2. Six Point Rock with Right Leg in wide position (Kickstand)

Five Rounds of 15 Swings and appropriate Egg Rolls
F1. Swings
F2. Egg Rolls

“Maybe” Day Two

Three Sets of Eight
A1. Left Hand Press (Stand or Half-Kneeling)
A2. Prone Neck Nod

Three Sets of Eight
B1. Right Hand Press (Stand or Half-Kneeling)
B2. Prone Find Your Shoes

Three Sets of Eight
C1. Goblet Squat
C2. Six Point Rock

Three Rounds of Thirty Seconds Each
D1. March in Place with Load in Left Hand (Suitcase Carry)
D2. Six Point Rock with Left Leg in wide position (Kickstand)
E1. March in Place with Load in Right Hand (Suitcase Carry)
E2. Six Point Rock with Right Leg in wide position (Kickstand)

“Up to 100 Swings”
F1. Swings
F2. Egg Rolls

“Maybe” Day Three

The entire circuit for three rounds of eights and thirty seconds as appropriate.

  1. Left Hand Press (Stand or Half-Kneeling)
  2. Prone Neck Nod
  3. Right Hand Press (Stand or Half-Kneeling)
  4. Prone Find Your Shoes
  5. Goblet Squat
  6. Six Point Rock
  7. March in Place with Load in Left Hand (Suitcase Carry)
  8. Six Point Rock with Left Leg in wide position (Kickstand)
  9. March in Place with Load in Right Hand (Suitcase Carry)
  10. Six Point Rock with Right Leg in wide position (Kickstand)
  11. Swings
  12. Egg Rolls

There you go…off the top of the head but pretty good.

***

Master RKC, Dan John is the author of numerous fitness titles including The Hardstyle Kettlebell Challenge: A Fundamental Guide To Training For Strength And Power, the best selling Never Let Go and Easy Strength. Dan has spent his life with one foot in the world of lifting and throwing, and the other foot in academia. An All-American discus thrower, Dan has also competed at the highest levels of Olympic lifting, Highland Games and the Weight Pentathlon, an event in which he holds the American record.

Dan spends his work life blending weekly workshops and lectures with full-time writing, and is also an online religious studies instructor for Columbia College of Missouri. As a Fulbright Scholar, he toured the Middle East exploring the foundations of religious education systems. For more information visit DanJohn.net

Filed Under: Kettlebell Training, Mobility and Flexibility, Tutorial, Workout of the Week Tagged With: bent press, Dan John, full body workout, get up, get-down, get-up presses, get-up programming, get-up tutorial, kettlebell tutorial, kettlebell windmill, kettlebell workout

5 Reasons Manual Therapists Should Get Their HKC

November 1, 2021 By William Sturgeon Leave a Comment

William Sturgeon performs a half kneeling kettlebell halo

In August of 2020 I started school for massage therapy. My goal was to widen my scope of practice as a coach, so that I could better serve my clients. I will be graduating next month and will be entering the world of manual therapy. This has been something I have been wanting to do for many years. I truly believe that manual therapy and corrective exercise can benefit a lot of people and help them improve their quality of life.

In the world of manual therapy, we often see people who are dealing with neck, shoulder, and low back pain. We treat these symptoms with therapeutic protocols and then move our client into a wellness or as-needed-based plan. Our goal as therapists is to help find the solution to their problem and get them back to active daily living activities.

But, what if we were able to better help our clients gain results by helping them strengthen the areas they are struggling with? This is where kettlebell training can be best tool for the therapist to use to answer this question. Kettlebells have been around for a long time and have been proven to be an effective tool.

William Sturgeon Manual Therapist

As I enter this new industry, there is one thing that I strongly believe in, and that is, massage therapists can enhance their practice by getting their HKC. This post will outline the reasons.

Extra Income

Most massage therapists work an average 20-30 hours per week doing bodywork. In time this does become taxing on the body and will not always be sustainable for long-term. This is where getting your HKC can help you with making more income. You can do this by offering one on one training or by doing this in a group setting. You can make more money in a group setting and also save your energy. But, if you would rather work in a one on one setting, you are able to do so as well. Adding kettlebell training to your list of services takes time away from the table with the clients you already have by helping them in a new way.

William Sturgeon Massage Therapy

Create a Niche

Adding the HKC certification to your practice will help you widen your scope of practice as a therapist and also allow you to specialize in a specific area. If you live in an area where someone is not teaching kettlebell training this is an opportunity for you to bring in a new service and be the leading go to person. I found this to be a very profitable way to become a coach. I’m the only person certified to teach kettlebells in my local area, the next person is 90 minutes away. Since this is the case for me, I am known for being the kettlebell expert in my area. Creating a niche is a powerful tool to have to help separate yourself from your competition.

Help Your Clients Train Safely

Did I mention safety? The RKC is the School of Strength, meaning we place a HIGH priority in educating our students how to train safely with kettlebells. There are many regressions and progressions in the curriculum to help teach your clients the proper technique. When it comes to teaching your clients movement, you always want to place them in the best position to be successful, and the HKC does that well. The best example of how we teach safety is by looking at how much time we spend preparing and teaching students the proper way to perform a hip hinge. The hip hinge is the key to keeping your back safe when using kettlebells. Teaching the hip hinge properly can help clients with low back pain by showing them how to move better.

William Sturgeon Kettlebell Goblet Squat

Kettlebell Are Great For Corrective Exercise

Kettlebells are known for their ability to help correct movement dysfunction. The reason that the kettlebell does such a good job at this is because of the way it’s shaped. The offset weight and handle challenge the body more because of the amount of stability required to use a kettlebell. As we know as therapists, stability is the foundation for injury free movement.  A majority of our clients work office jobs that have them in seated positions for long periods at a time. This can lead to neck, shoulder, and hip dysfunction and tightness. Using some of the exercises taught in the HKC can help your clients with these problems. Take for example someone who is dealing with rotator cuff issues, the kettlebell arm-bar is a great exercise for this.

William Sturgeon performs a kettlebell arm-bar

Learn New Skills

There are many levels to uncover after the HKC, next step is your RKC Level One & then Level Two. Each certification will show you a whole new set of skills to teach yourself and your clients. This will allow for you to expand and widen your skill set as a kettlebell instructor. When we teach people how to use kettlebells we always inform them that strength is a skill. Teaching your clients how to be strong through the skills of the swing, get-up, and squat will be a great base level to a variety of new movements.

Investing in yourself as a kettlebell coach will open new doors for you as a manual therapist. Not only will you be able to help your clients get out of pain with manual work, but you can also help them get stronger and move better. If you are ready to expand your skills and knowledge as a manual therapist, then register for the next HKC!

***

William Sturgeon, RKC Team Leader, RKC II trains clients at his gym, Restored Strength. Contact him through his website at RestoredStrength.com or follow him on Facebook: facebook.com/restoredstrength

Filed Under: Coaching, Fitness Business, Kettlebell Training Tagged With: hkc, HKC Workshop, kettlebell training for manual therapists, kettlebell training for professionals, manual therapy, massage therapists, William Sturgeon

Primary Sidebar

Featured Products

previous arrow
BOOK-RKCBookofSnC
HardStyleKettlebellChallegeDanJohn700
BookCoverMasterTheKettlebell1
RKCiconKettlebell512
KettlebellGoddessdv040
next arrow

Recent Posts

  • RKC Big Six Workout
  • The Kettlebell Swing & Low Back Pain
  • Key Kettlebell Exercises To Help You Create Better Balance
  • How to Most Effectively Use Kettlebells to Meet Your New Year Goals
  • 1 Exercise That Checks All The Boxes
FOLLOW US ON TWITTER!

Archives

Copyright © 2025

Dragon Door Publications / The author(s) and publisher of this material are not responsible in any manner whatsoever for any injury that may occur through following the instructions or opinions contained in this material. The activities, physical and otherwise, described herein for informational purposes only, may be too strenuous or dangerous for some people, and the reader(s) should consult a physician before engaging in them.