• Skip to main content
  • Skip to primary sidebar
  • Home
  • Contributors
    • Matt Beecroft, Master RKC
    • Martijn Bos, Master RKC
    • Andrea Du Cane, Master RKC
    • Angelo Gala, Master RKC
    • Chris Holder, Master RKC
    • Steve Holiner, Master RKC
    • Dan John, Master RKC
    • Mike Krivka, Master RKC
    • Thomas Phillips, Master RKC
    • Robert Rimoczi, Master RKC
    • Phil Ross, Master RKC
    • Max Shank, Master RKC
  • Workshops
    • HKC Workshops
    • RKC Workshops
    • RKC-II Workshops
  • Find an RKC Instructor
  • Resources
    • Articles
    • Forums
    • Kettlebells
    • Products
  • Blogs
    • PCC Blog
    • Strong Medicine Blog
  • Archives

RKC School of Strength

Official blog of the RKC

mobility training

How Well Do You Move?

April 19, 2017 By Phil Ross 4 Comments

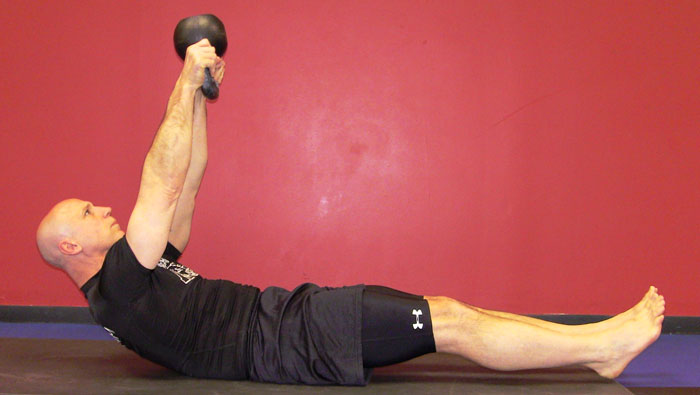
Master RKC Phil Ross, Kettlebell Pullover

How well do we—as humans—move? When we move are we trying to avoid or minimize pain? There seem to be three major areas of pain, have you wondered why these areas are so afflicted, even with people who are “in shape”?

The low back (lumbar region), the knees (distal femur, proximal tibia, fibula and patella) and the shoulders (glenohumeral and sterno-clavicular joints) are the pain points for many people. Why?

Two words need to be considered: stability and mobility. Certain joints of the body prefer stability and others favor mobility. Feet, knees, the low back and scapular regions favor stability. Ankles, hips, the thoracic spine (middle back) and glenohumeral joints (shoulders) flourish with mobility. The joints need to do what they are designed to do. If not, then asymmetries and injuries occur. And here’s the double whammy—not only will the misaligned joint be affected, the ones above and below it will too! For example, if a person has tight hips, their hip movement will be compromised. The movement will need to take place in other parts of the body, usually the knees and low back, both of which are stability-favoring joints above and below the hips. This creates instability in these joints, resulting in pain and anomalies.

Many people have low back pain. They might stretch their backs, get chiropractic adjustments, or take pain pills, but the issue will still not be addressed. The real issue be that the hips are tight and immobile, and/or the hamstrings are too tight. They may also have immobility issues if their thoracic spine (t-spine) is not strong enough or mobile enough to move safely. Are the erector spinea and the multifidi muscles (muscles that connect the vertebra) strong and engaged? Are the rhomboids, trapezius and other muscles of the scapula developed? Does the individual know how to keep them engaged? On many occasions, low back issues really lie in the areas above and below. Addressing the strength and flexibility of these major joints often significantly relieves back pain.

How do we address and avoid these issues? First, if you are not training, start. You’ll move better, feel better and live a longer (and often more productive) life. Next, consider that type of training, is it cardio, mobility or strength based? Are you getting the correct balance for optimal health? With your strength training or resistance training, are you using closed chain or open chain exercises? Closed chain movements involve more joints of the body and tend to be better for you. Open chain movements are more isolated and can have a shearing effect on the joint.

For example, let’s compare bodyweight squats and leg extensions. Bodyweight (or weighted for that matter) squats are a closed chain movement. The major joints and muscle groups addressed are the hips, knees and ankles, and the glutes, quadriceps, hamstrings and gastrocs (calves) are on the muscle side of the equation. Other muscles and stabilizers are involved at lesser degrees along with a good deal of core engagement for bracing. When performing squats, the feet are firmly planted and positive joint compression is employed. In contrast, leg extensions only address the quadriceps with concentric and eccentric contractions. The other leg muscles are virtually dormant and only the knee joint is involved. There is a shearing effect on the knee joint which may cause injury over time. In my estimation, this machine should be disassembled, melted down and repurposed as something useful, like a kettlebell! Just ask yourself, when you walk, run or jump, do you isolate a muscle or use your whole limbs and torso? In a rehabilitation situation or in bodybuilding, then muscle isolation may be appropriate, but otherwise multi-joint movements are superior.

There are many reasons why kettlebell training is my central mode of training. With kettlebells, all of the facets of fitness are addressed: strength, explosive power, flexibility, durability, muscular endurance, cardiovascular training, and mobility. Let’s consider mobility. Outsiders (I’m referring to those not acquainted with bonafide kettlebell training), only view kettlebell training as strength, explosive power and muscular endurance, but not necessarily promoting healthy mobility.

Along with the bo staff, freehand mobility and calisthenics I lead on a daily basis in my classes, there are three kettlebell based complexes we use to prepare for the rigors of the training session. We execute 10 repetitions of each movement on each side, or in each direction where applicable. The first complex is figure-8, then low, middle, and high halos. The second complex is bottoms-up crescent swings, kettlebell good mornings, and goblet squats. The third complex is the RKC armbar, lying side swings, and kettlebell pullovers.

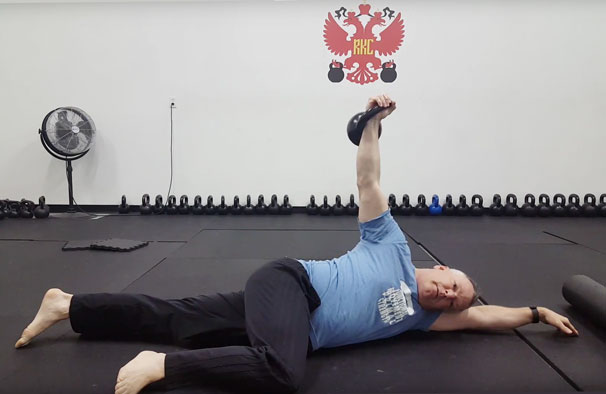
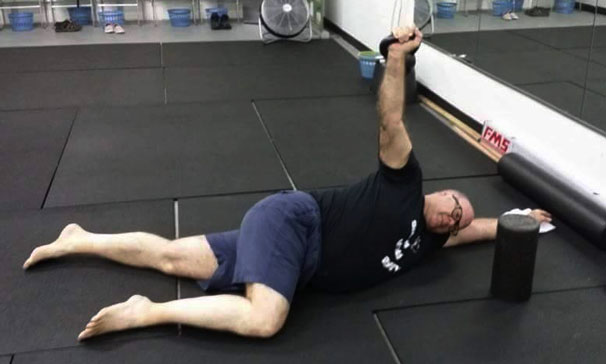
Let’s discuss the third complex: the RKC armbar, lying side press and the kettlebell pullover. Generally, we do 10 repetitions of the armbar, 10 reps of the lying side press on both sides, and then 10 reps of the kettlebell pullover. Two sets of each.

The Armbar packs the shoulder and prepares the participant for overhead work. Lie on your side in the fetal position as if you were starting a get-up. Grasp the kettlebell by the handle, bring it to your shoulder, then roll onto your back. With two hands, press the kettlebell upward. Make sure that your wrist is straight, your elbow is locked, and your shoulder is packed. If the kettlebell is in your right hand, take your right leg and bring it to the other side of your body so that your hip is facing the floor and most of your anterior is in the prone position. Do all of this while maintaining a relaxed neck and while rotating kettlebell in space. Attempt to bring your right hip as close to the floor as possible as you keep your arm and wrist locked. Once you’ve settled into the bottom of this movement, bring your right leg across the body until you are supine with the kettlebell above. This movement needs to be performed slowly, to maximize the opening of the hips and packing of the shoulders. Relish the time under the kettlebell as your thoracic region savors the mobility!

The Lying Side Press is to be done as soon as you have completed the armbar. As you are on your side, press the kettlebell upward. It is imperative to maintain a straight wrist and vertical forearm throughout this exercise. Pull the kettlebell down so that your elbow is slightly behind your hip. Keep the kettlebell steady and feel your rhomboids working. If you feel stress in your anterior deltoid, you are doing the movement incorrectly and most likely not keeping your forearm vertical.
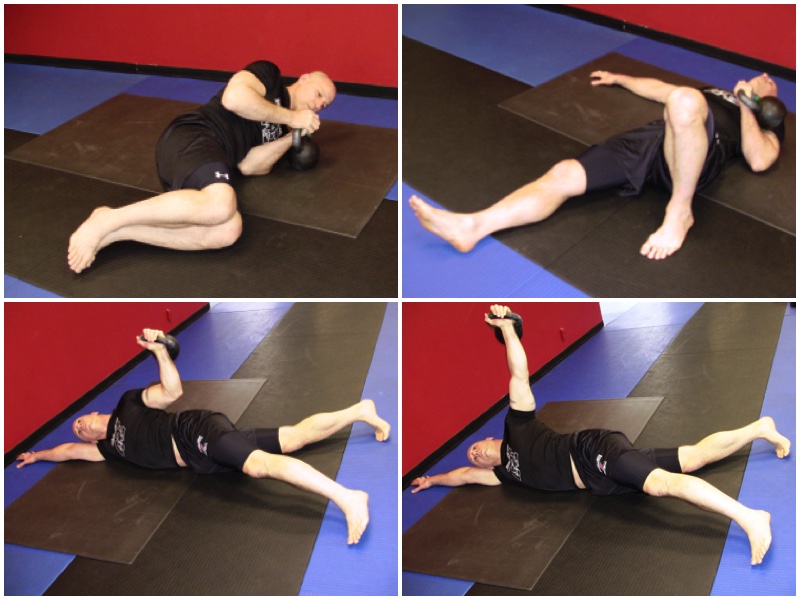
Phil Ross Lying Side Press Sequence

The Kettlebell Pullover is a movement that’s very easy to cheat! Don’t be “that guy” or “that girl”. The kettlebell is on the ground above your head as you lie in the supine position. Grasp the kettlebell in both hands at the horns and bring it overhead. Now, lock your arms. While you lower the kettlebell, remember the phrase “sometimes, always, never”. Sometimes your thoracic region comes off of the ground, Always have your head and cervical spine off of the ground and Never let your lumbar spine or hips come off of the ground. So, lower the bell with your head off of the mat and do not allow the kettlebell to touch the ground. As you keep the bottom of the kettlebell facing away from you, raise it so that it is perpendicular to the floor. Pause. Next, contract your abdominals as you bring the kettlebell straight upward while keeping your lumbar spine on the floor. Repeat this process for 10 repetitions.
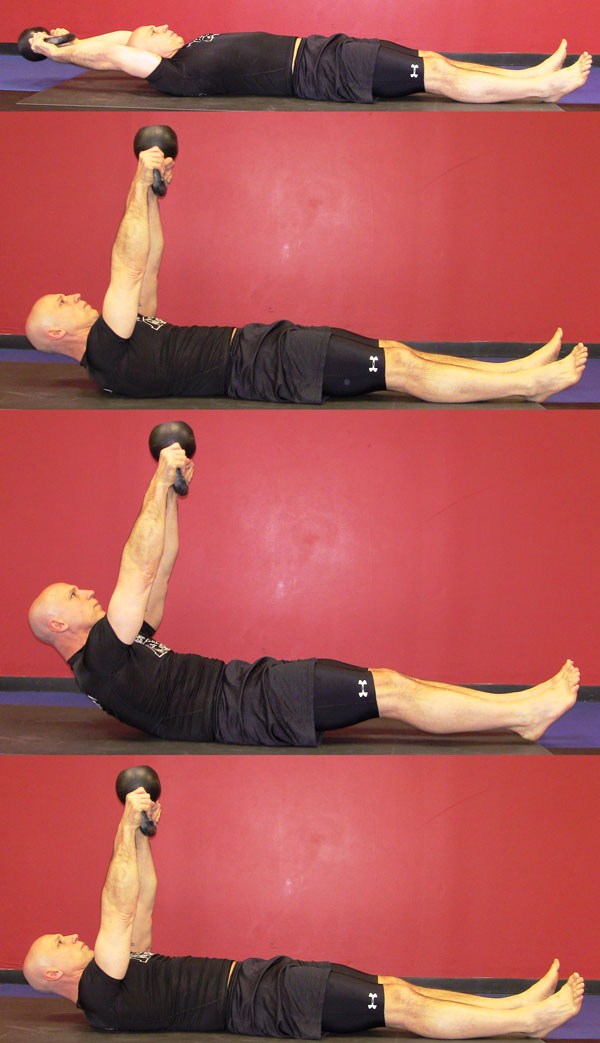
PhilRoss Kettlebell Pullover Sequence

If you have any questions regarding this RKC blog post or any other kettlebell or fitness related matter, please feel free to contact me.

Strength and Honor!

Coach Phil 


***

Phil Ross Master RKC, 8th Degree Black Belt, CK-FMS, PCC and ACE Certified. Author of Ferocious Fitness and Survival Strong, producer of The Kettlebell Workout Library. He is also the Chief Instructor at American Eagle MMA & Kettlebells
Filed Under: Kettlebell Training, Mobility and Flexibility Tagged With: kettlebell training, Master RKC Phil Ross, mobility, mobility training, mobility warmup, phil ross, warmups

A Superset Series for Shoulder Mobility

June 29, 2016 By Paul Britt, DC 3 Comments

Paul Britt Kettlebell RKC Arm Bar

I’ve screened many people with the Functional Movement Screen. In conducting all of those screens, I’ve observed typical patterns, one of which tends to be shoulder mobility issues. While this post is not a treatment plan or medical advice, it is the quick shoulder mobility series I use after the initial individual work and correctives. It’s a great way to open up thoracic and shoulder mobility after a long day of sitting or just living in today’s world.

I have my students perform the series as a superset. They move from one exercise to the next without a break. I typically have them perform the series three times. It’s a great mobility set and general warm-up for the session ahead.

We start with the RKC armbar. Use an appropriate weight for the movement. What is appropriate? I typically use a 14kg for the series as it is a warm-up / mobility drill and not strength focused. There are several versions of the RKC armbar, but I tend to have my knee bent at 90 degrees to keep my lumbar spine out of the exercise. This also focuses the exercise on the mid-thoracic area instead of rolling your hips into the ground. I like to take 3-5 breaths per side before moving on to the next drill.

Paul Britt's 67-year-old client practices the RKC armbar
Paul Britt’s 67-year-old client practices the RKC armbar

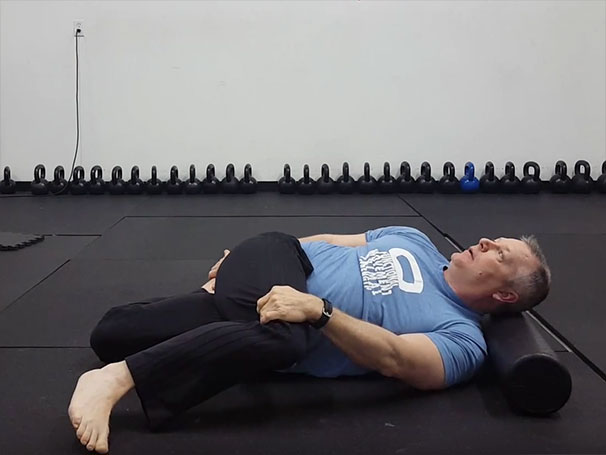
The next stop is the bretzel stretch. I rest my head on a roller or another padded surface to keep my neck free of tension so I can focus on the movement. I breathe to move through the stretch: I breath in, tighten up, then relax and exhale as I move deeper into the stretch. I typically practice for 3-5 breaths per side to move through the stretch.

Paul Britt Bretzel

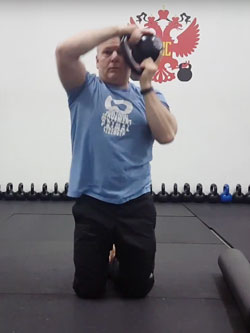
The last move in the set is the kettlebell halo. Since this is still a mobility exercise and not a strength move, I keep the weight at 14kg. I like the half kneeling position as it also helps to teach the body how to be stable. You can also do the halo standing if your knees prevent you from kneeling. While I did not demonstrate it in the video below, you can also use half kneeling to develop stability. I perform ten halos in one direction and ten in the other.

Paul Britt Kettlebell Halo

After a 30 second rest, I begin the series again.

If you have shoulder pain, do not perform any of these exercises without medical evaluation. I also highly recommend that you see an FMS practitioner for screening to address any and all movement issues.

***
Senior RKC Paul Britt has been an RKC kettlebell instructor since 2006. He trains clients at Britt’s Training Systems, his award-winning Hardstyle Kettlebell Training Facility in Rockwall, Texas. Paul has served as an assistant instructor at many RKC and HKC Courses, is a Certified Kettlebell Functional Movement Specialist (CK-FMS) and works with some of the top Chiropractors in North Texas. Please visit his website brittstrainingsystems.com for more information.

Filed Under: Kettlebell Training, Mobility and Flexibility, Tutorial Tagged With: bretzel, mobility training, Paul Britt, RKC, RKC arm bar, shoulder mobility, superset, video

How Are Your Ankles?

March 23, 2016 By Paul Britt, DC 16 Comments

Paul Britt Ankle Mobility

Have you played a lot of sports?

Do you wear high heels?

If so, how do you think your ankles are doing?

I have found that most of the people who I train tend to lack ankle mobility. This can be the first kink in the movement chain, and lead to further issues within the whole body. Ankle mobility issues can lead to knee, hip, and even shoulder mobility issues. These issues can also travel down that same path from shoulder to ankle. To find out what is ultimately causing the use, see your doctor and/or be screened by someone who is FMS certified. If you have pain, see your doctor first to be cleared.

The following is a quick ankle mobility series that we use in our gym. Everyone who trains with me has been screened with the FMS/SFMA and if they have pain have been evaluated by their doctor.

I don’t show it in the video below, but everything starts with diaphragmatic breathing. We will typically breathe for a couple minutes to transition from work/life stress so we can train mindfully.

We start out by foam rolling the shin area. We work the anterior tibialis, the band of muscle on the outside of the shin. We are using small strokes to locate areas that are tender or tight. We then will make several passes over that area.

Next, we roll out our calves. While it is possible to do that with the foam roller, I like The Stick for this. It allows for adjustable tension on the calf, and requires less force to work on any trigger points/tender areas. I tell my students to only use about 7-10lb of force while rolling. If The Stick looks like a horseshoe, you are using too much force.

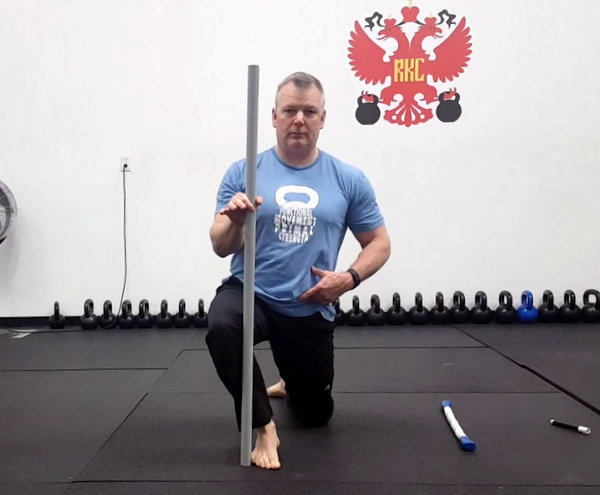
Then, we move onto direct ankle work. There are two different versions on the video. The first version—the field expedient manner—requires no equipment. It is performed in a half-kneeling stance. If the right knee is up, take your right hand and cup the right heel. The left hand will cover the toes. The goal is to keep your heel planted as you progress through the motion. Utilizing diaphragmatic breathing, apply some pressure on your right knee with the right elbow as you move back and forth through the movement. I find the normal rep range for the best results is about 10 reps per side. Perform this on both sides.

The second version is very similar except that you are using a stick and moving the knee to the outside of it. You only go as far as you can while still keeping your heel flat on the ground.

The last movement is the heel sit. Sit back on your heels with a little bit of a backwards lean. Tighten your thighs and think about driving your shins into the ground, then relax. You should feel your feet flatten out as you perform 3-5 reps of this sequence.

This quick and easy series is beneficial for restoring mobility to your ankles and improving your kettlebell training.

***
Senior RKC Paul Britt has been an RKC kettlebell instructor since 2006. He trains clients at Britt’s Training Systems, his award-winning Hardstyle Kettlebell Training Facility in Rockwall, Texas. Paul has served as an assistant instructor at many RKC and HKC Courses, is a Certified Kettlebell Functional Movement Specialist (CK-FMS) and works with some of the top Chiroprators in North Texas. Please visit his website brittstrainingsystems.com for more information.

Filed Under: Mobility and Flexibility, Tutorial Tagged With: ankle mobility, mobility sequence, mobility training, mobility video, Paul Britt

Friend Zone Exercises

December 30, 2015 By Max Shank 8 Comments

Max Shank Side Plank With Leg Lift

Ladies, you have that friend who is awesome in every way but just doesn’t excite you. He’s funny, smart, nice, and doesn’t look horrifying–but for some reason he just doesn’t strike passion in your heart.

Because of this, whether he knows it or not, he is stuck in the friend zone.

Let’s take a moment of silence for all the gentlemen before us who have fallen into the friend zone.

In today’s world, the same thing has happened with certain exercises. Because social media is now a window into people’s lives, you’d think that training was all back flips and heavy deadlifts. The problem is that anyone who doesn’t have a thorough understanding of exercise and building a well-balanced program, doesn’t see the important foundational stuff.

The following exercises get no love because they just aren’t that sexy.

  • Rows
  • Split Squats
  • Push Ups
  • Side Planks
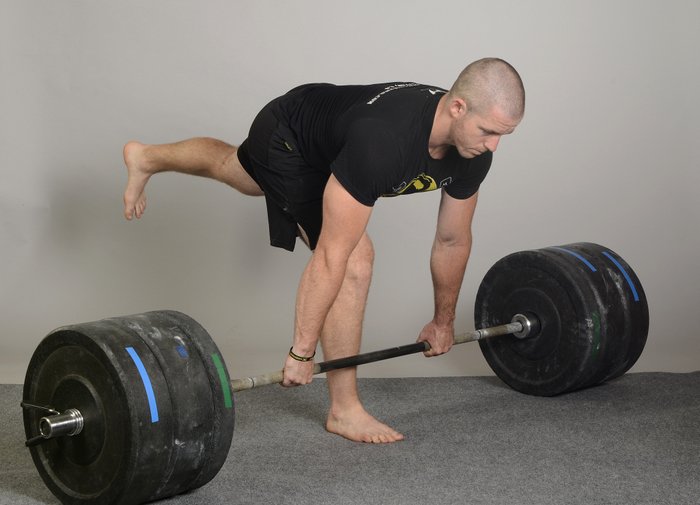
  • Single Leg Deadlift
  • Mobility training in general

Rows always get cast aside in favor of pull-ups or chin-ups. This is not to say that these exercises are bad, but rows are actually the better choice for most people. The postural benefits along with the promotion of shoulder health and biomechanics from rows far outweigh pulls or chins. Consider adding rows to your session either as a big strength movement or as a high rep accessory work movement toward the end of your session. Then, even if it’s not considered all that cool, post it on Instagram with the hashtag #IDoRows.

Split squats, walking lunges, rear foot elevated split squats, jumping lunges are all great exercises. The humble split squat is another exercise that gets little to no love. First, they are extremely user friendly. Second they do a terrific job of mobilizing the hip flexor/quadriceps and ankle/toes of the rear leg. The toe and ankle mobility is easy to avoid during normal lunges and other substitute exercises. Lastly they also are crucial for owning split-stance balance which will have a good carryover to other areas of life.

Push-ups… if you’re not clapping your hands or spinning around like a whirling dervish, then push-ups just don’t have that “shiny-thing” appeal. However, if done properly, the push-up will help you get stronger upper body pushing muscles. Also, push-ups train the abs to maintain stability–which has been proven to help prevent back problems. The push-up also allows for full scapular movement–important for maintaining shoulder health–unlike the bench press.

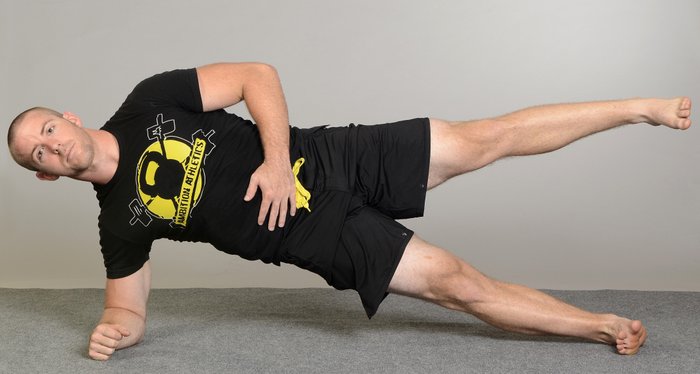
Side planks don’t look that cool, but they really turn on your lateral chain. The oblique and gluteus medius are important for stabilizing the pelvis (especially while you’re on one leg). This is sometimes a magic bullet for improving function in the upper and lower body.

Master RKC Max Shank Single Leg Deadlift with Barbell

The single leg deadlift is another exercise that is absolutely awesome for improving mobility, strength, balance, and coordination–all which have great carryover to athletics. The main criticism is that it’s just not heavy enough.

I beg to differ (barbell and kettlebell examples):

https://www.youtube.com/watch?v=SbsETxo8Vps

Wake up your glutes and get to work on some single leg deadlifts. They are especially challenging if you hold the weight in the hand opposite of the leg you are standing on.

Joint circles for mobility training aren’t all that cool looking, but they are a key component of a well rounded health and strength plan. In the RKC we take care to mobilize the joints before heavy lifting to prevent injury and enhance strength. Most people are too stiff, not too loose–you have to mobilize those joints every day if you want to be able to stay loose.

Side note: Mobility drills actually look kind of cool at 4x speed in my #5minuteflow video:

https://www.youtube.com/watch?v=k3ZD8s15ckc

Don’t forget the exercises that will stand by you through thick and thin, and reward you with sustainable progress through your whole life.

Better every day,
-Max

****

Master RKC Instructor Max Shank is the owner of Ambition Athletics in Encintas, California. He is very active in martial arts, competes in the Highland Games, and promotes a holistic approach to overall fitness. For more information about Max please visit www.ambitionathletics.com.
Max Shank is also the author of Master the Kettlebell, now available in ebook and paperback format.

Filed Under: Kettlebell Training Tagged With: forgotten exercises, foundational exercises, kettlebell rows, Master RKC Max Shank, max shank, mobility training, push-ups, RKC, rows, side plank, single leg deadlift, split squats

10 Reasons to Hire an RKC to Learn to Use Kettlebells

October 15, 2014 By Lori Crock 4 Comments

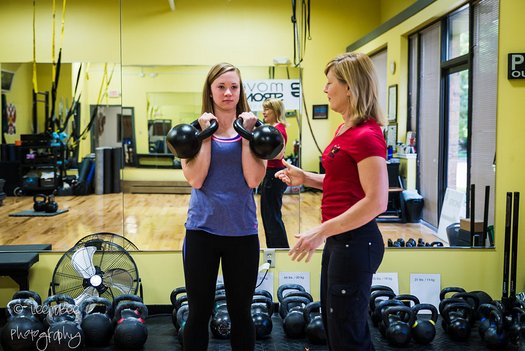
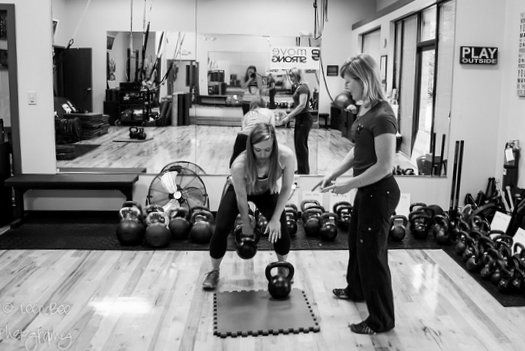
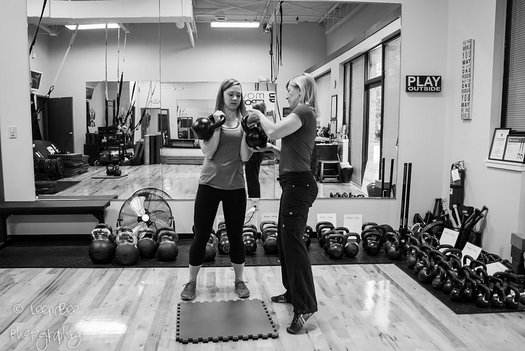
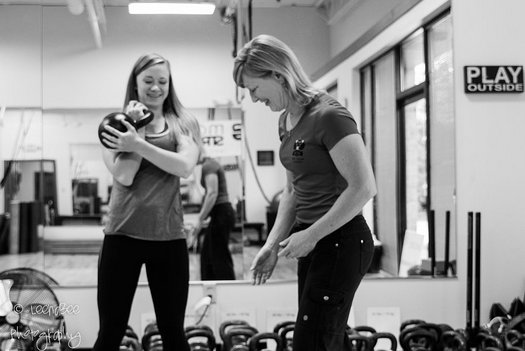
RKC Team Leader Lori Crock Coaching at Movestrong Kettlebells
Photo: Leenabee Photography

An online fitness magazine caught my attention recently when the headline read, “The Problem with Kettlebells is …”

The article explained that the problem is there are not enough certified kettlebell coaches to match the interest in kettlebells at the average gym. The result is poor technique and injuries resulting from no understanding of how to do the movements and lifts.

But there are plenty of Russian Kettlebell Certified (RKC) coaches out there who can not only keep people safe, but help them reach the next level of fitness.

Here are my 10 reasons why you should hire a certified kettlebell coach:

1. Train Safely – at all of the RKC certification events, safety is the number 1 priority. You will use kettlebells safely or you will not be using them at all. A certified coach is a representative of the RKC community and we are responsible for keeping our clients safe and safely progressing in their kettlebell skills and mobility work.

2. Get Strong – our certification prepares us to design programs to get our students stronger using smart, proven hardstyle technique that yields results. An RKC has learned and practiced numerous regressions and progressions to address movement challenges and adapt the skills to different fitness levels. For example, if a student is struggling with the swing, we have multiple methods to address issues such as a lack of hip mobilization, squatting or hip pop timing issues and so on.

RKC Team Leader Lori Crock Coaching Swings
Photo: Leenabee Photography

3. Move with Power and Precision – people sometimes ask me, “How long before I get really comfortable with the technique?” That will depend on many factors, but RKCs teach you to move with power and precision on Day 1. There is no short-cut for perfect technique and we keep working with our students, their anatomical structure, their former injuries, their goals and so much more to help them to achieve strength and movement efficiency.

4. Regain Foundational Movement – being able to move well is something we never stop learning, teaching and practicing with our own training and with our students. Movement always comes before strength. A certified coach will challenge their students to address whatever issues present with the FMS or other movement assessment tool. Some foundational movement improvements realized with RKC coaching include: squatting, lunging, reaching, hinging, lifting, carrying and single-leg balancing.

5. Acquire a New Skill – when people inquire about kettlebell training I compare this to learning a skill like golf or skiing. It takes time and practice to get really good at this. But even in the first month, under the direction of a certified coach, students can become skillful at the key lifts. They can take this skill with them into the rest of their lives … into any gym, home, on vacation or at the office. The kettlebell is a handheld gym, so this is a skill that they can use often in varied environments.

6. Understand Your Body to Prevent Injury – there is absolutely no way to train with kettlebells and not learn something new about your body in terms of posture, breathing and muscular-skeletal activation. A physical therapist friend said that he had no idea about the power of the latissimus dorsi until he started using kettlebells. Understanding how and when to engage and use the lats and other key muscles, such as the glutes and hamstrings, is something that many life-long exercisers have not paid much attention to. This understanding of how and when to engage muscles and use the biomechanical match breathing can take one’s physical training to a new level.

RKC Team Leader Lori Crock Coaching a client with double kettlebells
Photo: Leenabee Photography

7. Train with Goals in Mind – there is nothing random in our training methodology. This is training to get strong and to move better using a variety of ballistic movements and grinds, upper and lower body, push, pull, lift and carry and ongoing mobility work to reach goals. I highly recommend the book, Master the Kettlebell for more information about RKC methods and programming.

8. Integrate with other Fitness Practices – programming at my gym is 80-90% kettlebell-focused. This will vary among certified kettlebell trainers of course, but programming kettlebell training along with barbells, TRX, Crossfit, yoga and the martial arts works and yields great results in terms of building strength and resilience.

9. Address Weaknesses and Asymmetries – an RKC certified coach will teach you single-arm and two-arm movements and lifts. With the single-arm kettlebell training especially, weaknesses or asymmetries may become apparent. An RKC is trained to address/improve/eliminate imbalances to prevent injury and increase performance–and refer someone to a medical professional when someone has pain or seriously dysfunctional movement.

Lori Crock Coaching Kettlebell Cleans
Photo: Leenabee Photography

10. Learn from Someone Who is a Coach First – the RKC program focuses on making us good kettlebell coaches. RKCs enjoy training with kettlebells, but we know the power in this is teaching the art of safe, efficient kettlebell skills to our students. We love to share our passion and we take pride in being RKC. We work hard to uphold the high standards set before us. Our certifications are physically and mentally demanding and we ask instructor candidates to take their preparation very seriously months in advance. RKCs recertify every two years and we have a community of coaches that support each other.

Looking for an RKC instructor in your area? Search our world-wide listing. Ready to sign up for an HKC or RKC certification event? Register for your life-changing experience now.

***
By Lori Crock, RKC Team Leader, FMS II and MovNat MCT II. Lori owns MoveStrong Kettlebells in Dublin, Ohio where she teaches small group kettlebell classes to all ages and fitness levels and continues to be amazed, inspired and educated by her students. Her email address is lori@movestrongkbs.com

Filed Under: Coaching, Kettlebell Training Tagged With: kettlebell coaching, kettlebell safety, Lori Crock, mobility training, RKC, RKC Instructors, RKC Workshop, Russian Kettlebell Challenge, Russian Kettlebell Challenge Workshop, strength training, Why RKC?

Primary Sidebar

Featured Products

previous arrow
BOOK-RKCBookofSnC
HardStyleKettlebellChallegeDanJohn700
BookCoverMasterTheKettlebell1
RKCiconKettlebell512
KettlebellGoddessdv040
next arrow

Recent Posts

  • RKC Big Six Workout
  • The Kettlebell Swing & Low Back Pain
  • Key Kettlebell Exercises To Help You Create Better Balance
  • How to Most Effectively Use Kettlebells to Meet Your New Year Goals
  • 1 Exercise That Checks All The Boxes
FOLLOW US ON TWITTER!

Archives

Copyright © 2025

Dragon Door Publications / The author(s) and publisher of this material are not responsible in any manner whatsoever for any injury that may occur through following the instructions or opinions contained in this material. The activities, physical and otherwise, described herein for informational purposes only, may be too strenuous or dangerous for some people, and the reader(s) should consult a physician before engaging in them.