• Skip to main content
  • Skip to primary sidebar
  • Home
  • Contributors
    • Matt Beecroft, Master RKC
    • Martijn Bos, Master RKC
    • Andrea Du Cane, Master RKC
    • Angelo Gala, Master RKC
    • Chris Holder, Master RKC
    • Steve Holiner, Master RKC
    • Dan John, Master RKC
    • Mike Krivka, Master RKC
    • Thomas Phillips, Master RKC
    • Robert Rimoczi, Master RKC
    • Phil Ross, Master RKC
    • Max Shank, Master RKC
  • Workshops
    • HKC Workshops
    • RKC Workshops
    • RKC-II Workshops
  • Find an RKC Instructor
  • Resources
    • Articles
    • Forums
    • Kettlebells
    • Products
  • Blogs
    • PCC Blog
    • Strong Medicine Blog
  • Archives

RKC School of Strength

Official blog of the RKC

RKC: An Equal Opportunity, Self-Improvement Program for Fixing Flaws and Enhancing Function

July 20, 2016 By Nick Lynch and Adrienne Harvey 3 Comments

Milwaukee RKC 2016

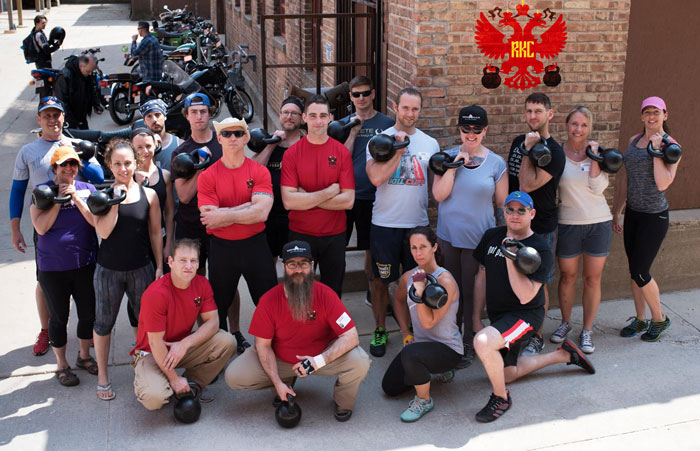
Adrienne: You recently hosted a second RKC at your gym in Milwaukee. What inspired you to host the RKC again?

Nick: We’ve had several HKC workshops at our gym as well. I think the RKC is the coolest, it’s the full package, and it’s good for everybody. At the recent workshop, the group included gym owners and professional athletes as well as “nine-to-fivers” who’ve never played a sport in their life! But, everyone can equally benefit.

The athletes signed up for the RKC to learn and enhance their performance in any future event—while often experiencing the hardest physical challenge of their lives! There’s a yin and yang to the RKC, you learn a ton while still experiencing a serious physical challenge in the process.

Adrienne: In your opinion, who should sign up for an RKC Workshop?

Nick: Anyone who is interested in improving themselves should sign up. At the recent RKC in Milwaukee we even had two people who signed up because they wanted to learn, even though they didn’t think they could pass the testing. A chiropractor who came to the RKC we hosted last year signed up again and fully retested, even though he didn’t need to recertify yet.

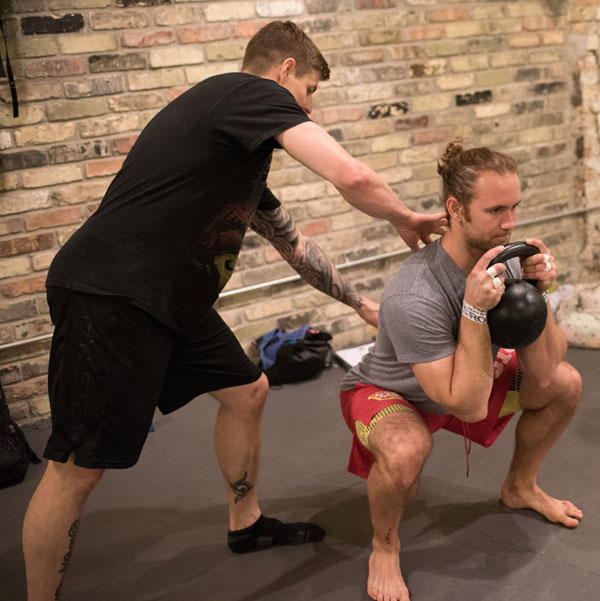
The RKC is great for anyone who wants to learn about kettlebell technique, functional strength training, and to see how hard they can safely push themselves. There’s a kind of safety net with the RKC—you’re pushing yourself to new limits while simultaneously correcting your movement patterns.

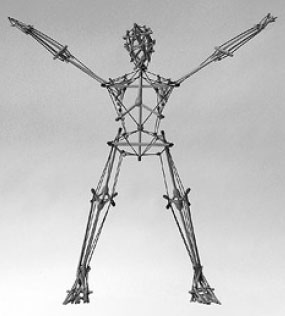
Essentially, you’ll spend three days finding everything dysfunctional about yourself and your students, then learn functional ways to fix and improve the issues. So anyone who is interested in learning how to replace dysfunction with function should go to an RKC Workshop.

Milwaukee RKC Jared Squat Coaching

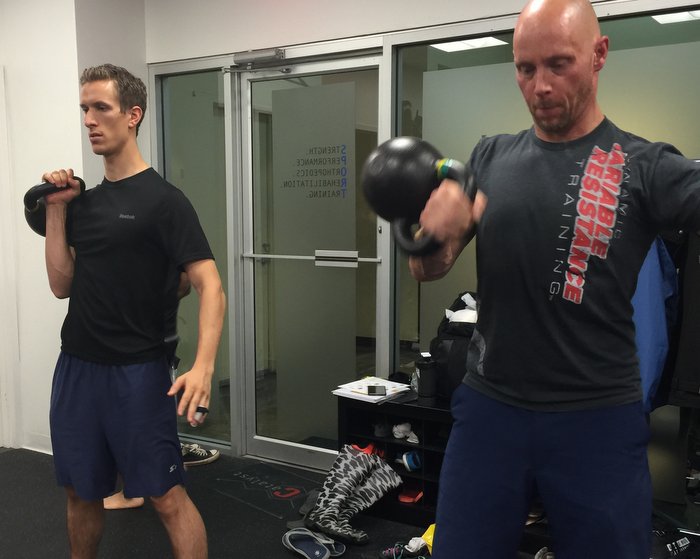
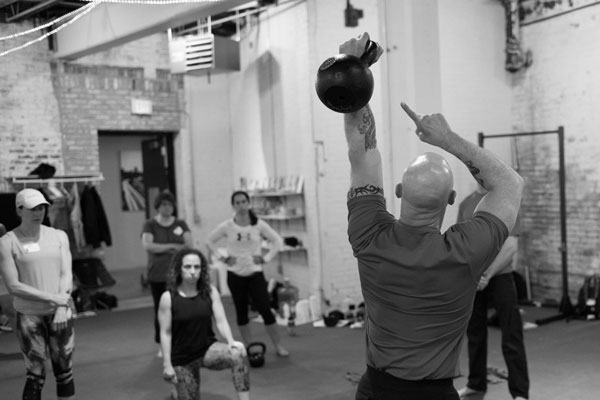
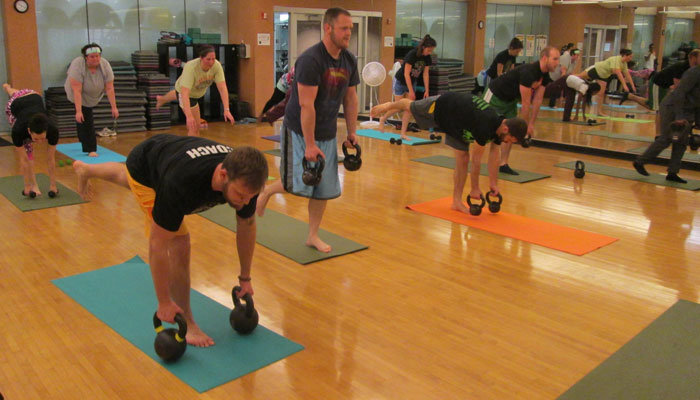
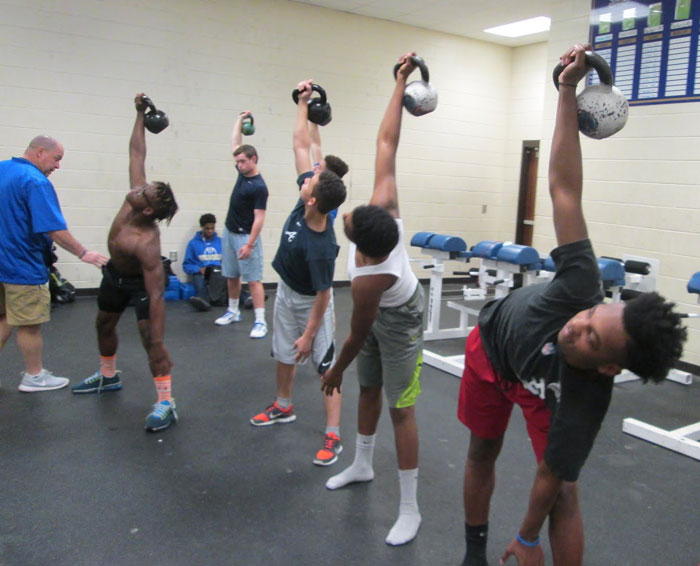
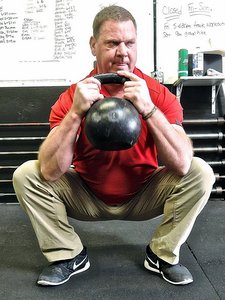
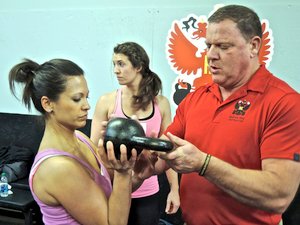
If I hand my beginner clients a kettlebell, the weight can anchor their joints so they can learn to wedge. A kettlebell can pull their hips back so that they can learn to hinge. Nearly everybody can get involved with kettlebells on a pretty equal playing field. I can easily teach a group of ten people kettlebell swings and watch as the professional athlete and beginner both improve.

Adrienne: That’s right—and with an appropriate weight for each, they can all practice the same basic movement patterns.

Nick: Yes and it’s kind of freaky how hard we can make kettlebell training—we’re not sure if it’s even possible to max out one’s potential. At the same time, kettlebell training can be regressed to beginner movements. We’ve even seen Prof. Stuart McGill, back surgeon Dr. Roth and Milwaukee RKC attendees Dr. Jon Duris and Dr. Christina Ronchetti trust the kettlebell with their patients. Kettlebells can work with a full spectrum of people and that’s why I think it’s important to host and be part of the RKC community.

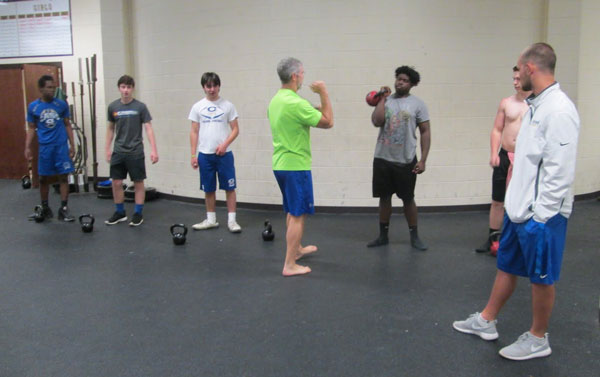
Adrienne: The recent RKC workshop you hosted was taught by Master RKC Phil Ross. I had the pleasure of recertifying for my RKC-II with him last year. He brings so many useful cues from his experience in martial arts and as a highly experienced teacher. Did you learn anything particularly unique from Phil this time?

Nick: Absolutely! I liked a lot of the old school stuff that he taught. He went over a lot of really applicable and functional drills with kettlebells—things that people can start using in their own training and with their clients immediately. I had forgotten about some of the ideas and also learned some cool new ways to use kettlebells.

Milwaukee RKC Phil Ross Instructing

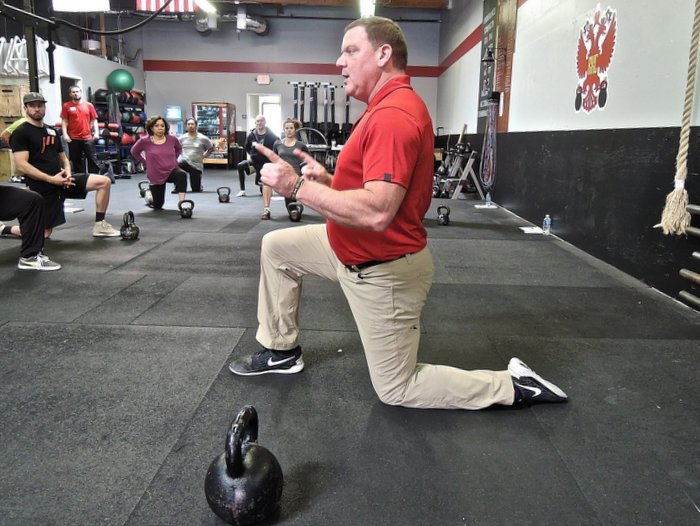
He brought so much to the table—I think it came from so many years of actively working in the fitness industry and his experience as a fighter. He’d also experienced debilitating injuries in the past, has healed and worked himself out of it. I think that experience has lead to a whole lot of learning.

Adrienne: Even though you’re an RKC-II and a Team Leader, did you learn anything completely new at the recent RKC Workshop you hosted?

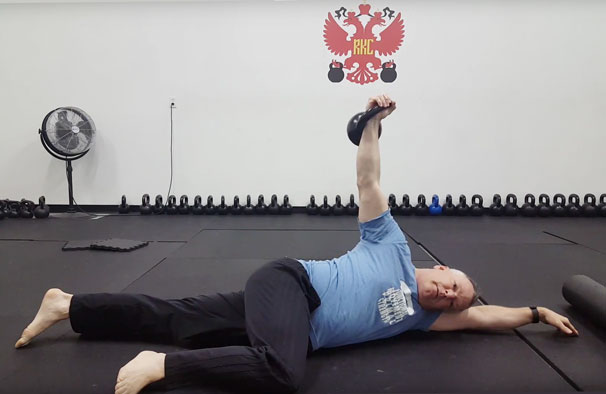
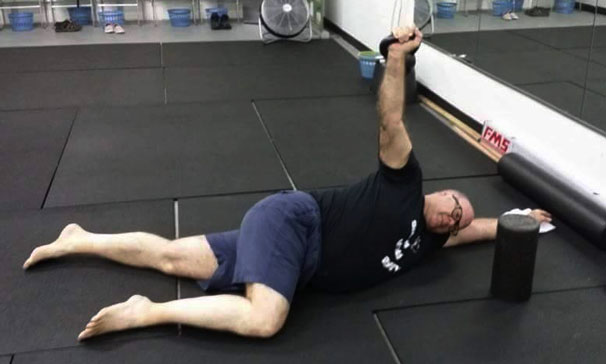
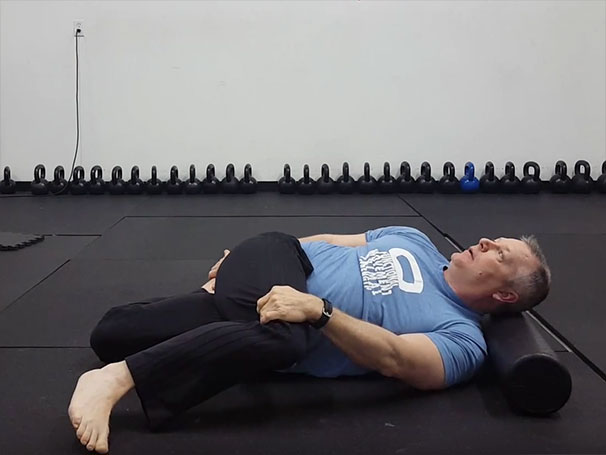
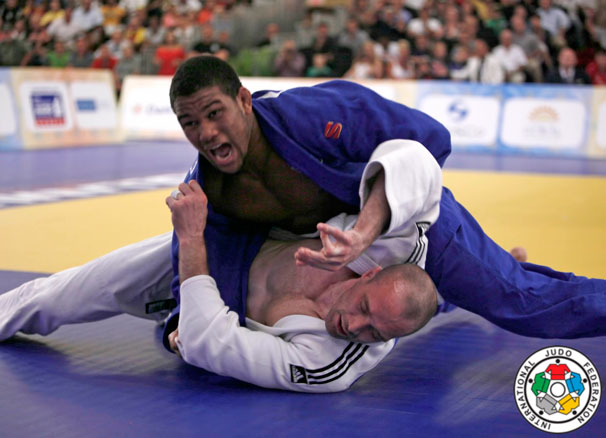
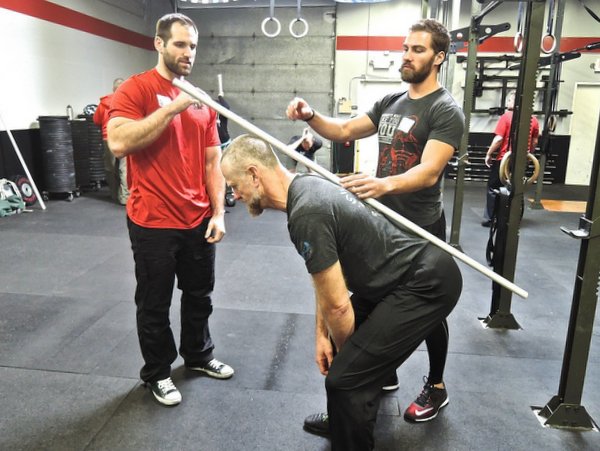
Nick: We went over some RKC armbar variations I hadn’t done before. Phil had everyone moving quickly in them, but with the number one safety rule: maintaining the wedge. We started on our backs with both legs still straight with heels flexed to get ready to move into the arm bar position. We were to keep the toe pointing towards our faces the whole time on the foot on the same side as the kettlebell. That leg then raises up and all the way across the body. Every time that leg moves though, your shoulders are packed, you’re pressing your lower back into the ground—and the same is true when you come out of it too.

Personally, as someone born with a congenital spinal defect (and I’ve avoided surgery) I’m cautious but open-minded about ways to safely strengthen my core. After that exercise, I felt like my whole body was put together really well. Normally twisting exercises with weight seem like we’re begging for injury, but because of the emphasis on the wedge and tension—even while moving quickly with it—everyone agreed they felt really good afterwards. I get something new every time!

****

Video and Photography by NickNikPhotography

RKC Team Leader Nick Lynch is a Strength and Conditioning Coach at Milwaukee School of Engineering University (MSOE). He owns Superb Health Milwaukee, a kettlebell studio in Milwaukee, WI. He has 13 years of full-time training and coaching experience and a lifetime of wellness education. Nick lives in Milwaukee, WI with his wife Natalie and son Weston.

Adrienne Harvey is a Senior PCC, RKC-II, DVRT, CK-FMS, and author of the upcoming Dragon Door title, Eat Strong, Lift Strong, Move Strong: Proven Secrets for Strength, Power and Robust Energy. She has been RKC Certified since 2010, RKC Level 2 certified since 2011, and a core member of the PCC team.  Adrienne loves sharing her knowledge with small groups and individuals.


Filed Under: Coaching, Kettlebell Training, Workshop Experiences Tagged With: Adrienne Harvey, Nick Lynch, RKC, RKC Milwaukee, RKC Milwaukee video, RKC video, RKC Workshop, Russian Kettlebell Certification, workshop experience

How to Keep Training When Life Gets in the Way

July 6, 2016 By Phil Ross 4 Comments


Phil Ross Master RKC One Hand Handstand

Other than the excuse of “I don’t have the money to train”, the other top excuse for not exercising is “I don’t have time”. The money issue is usually more a question of priorities. At my gym, it costs about five dollars a day to join my classes. That’s not much when it seems like many people spend $3 to $5 on their morning coffee, $10-15 on lunch and waste even more on other frivolous expenditures. If it still isn’t in the budget, people can always work out at home with books like Convict Conditioning, Survival Strong, or Master the Kettlebell for a small one-time investment. But, budgeting to join a class could be as easy as packing your lunch and making your own coffee. Where there’s a will, there’s a way. I’ve been almost penniless—twice—and never stopped training. Excuses are like armpits, everyone has them and they all stink! But, my focus for this post isn’t savings, it’s time allocation.

“No time, no time, no time…” That’s no excuse. Make time! It doesn’t take much. Pick an activity and do it for one hour, three times a week. Do something else for 20 to 30 minutes a day on your “off days”. If you still can’t manage one hour, three times a week, start by doing this little workout to get your juices flowing—all you need is 30 minutes, a floor and a $10 jump rope:

The goal is 1000 jump rope skips (200 per round for 5 sets), 100 push-ups (25 per round for 4 sets) and 120 abdominals (30 per round for 4 sets). Here’s the order: jump rope, push-ups, abs, jump rope, push-ups, abs, jump rope, push-ups, abs, jump rope, push-ups, abs, jump rope. End the workout with planks, bridges and stretching.

With kettlebells, you can do a 12 or 20 minute Tabata interval sequence. Pick 3 to 5 exercises, and set your interval timer for 20 seconds of work/10 seconds of rest and hit it! Your heart rate will rise and you’ll be sweating in no time! For example, you could pick three exercises like double kettlebell swings, double kettlebell front squats and double kettlebell presses. If you pick five exercises you might add double kettlebell rows and cleans. There are endless combinations. Pick a few that work well together. A bodyweight exercise only version could be burpees, push-ups and abs. End the workout with bridges and stretch out. There are endless possibilities.

Here’s a real life example of how I kept training in a very busy time…

It was crunch time. I had less than three weeks before the photo shoot for my upcoming book with Marty Gallagher, Ferocious Fitness. I needed to be in peak condition, so missing my training was out of the question. My training had been going according to schedule, but then life happened—as it often does—when you own a business, are a parent, a spouse, have older parents, and have dogs, too.

Right before noon, I got a call from my six year old daughter’s school. She was sick and needed to come home. Since my wife was at her job 40 miles away from home, I also needed to take my daughter to the doctor. I told my blue belts what to cover in our noon Brazilian Jiu Jitsu class, and I was out the door.

The first available doctor’s appointment was 2PM, and it was already 12:22 by the time I picked up my little one. After I situated her on the couch at home, I had 1 hour and 38 minutes to workout, eat, shower and get her to the doctor. Game on!

I went into the garage and hit it. I started with the 5 Geometric Bando forms (Point, Square, Cross, T and the Line), three times each. Then I did a nonstop circuit with Neuro-Grip push-ups and kettlebells. I did four sets of the Neuro-Grip push-ups and three sets of the other exercises:

  • 25 Neuro-Grip push-ups
  • 10 hand to hand kettlebell swings
  • Table top push-downs, 10 seconds, 6 reps
  • Single kettlebell front squats, 5 reps each side
  • WOD-QB roller: 5 seconds out and back, 5 reps to the center and each side
  • Single kettlebell high pulls, 8 each side
  • 4 way neck, 10 seconds dynamic tension in each direction
  • Single kettlebell rows, 8 each side

I ended the workout with 5 sets of uneven kettlebell shrugs (20 reps per set). 
Since I didn’t have time for a “real” lunch, I made a shake with a banana, a splash of OJ, water, a tablespoon of peanut butter, and egg white protein powder—then chugged it. I took the next 7 minutes to shower, get dressed and get in the car. (I’m glad I’m bald at times like this!) At 1:45PM we were off to the doctor’s office, and made it on time. It even worked out that we were able to pick up her prescription, and drop her off at home with the sitter by 3:15PM. I had plenty of time to teach my 4PM kettlebell class, and since my wife got home from work early, I was able to teach my classes through 9PM.

I could have easily bypassed the workout and no one would have thought less of me—except for me! My point is that these scenarios happen fairly often. A sick child, a parent who needs help, a dog eating the carpet, network problems at the studio… Life happens, but if you roll with the punches, you can still fit in your workout. You can do it!

Strength and Honor,

Coach Phil

****

Master RKC Phil Ross is the creator of many strength and conditioning programs, including The Kettlebell Workout Library DVD set. Visit www.philross.com to learn about his programs, classes, and workshops. Subscribe to his YouTube channel for more workout and exercise info.

Filed Under: Kettlebell Training, Motivation Tagged With: bodyweight workout, calisthenics, exercise, how to find time to workout, kettlebell workout, phil ross, time crunch workout, time-crunched, workout, workouts

A Superset Series for Shoulder Mobility

June 29, 2016 By Paul Britt, DC 3 Comments

Paul Britt Kettlebell RKC Arm Bar

I’ve screened many people with the Functional Movement Screen. In conducting all of those screens, I’ve observed typical patterns, one of which tends to be shoulder mobility issues. While this post is not a treatment plan or medical advice, it is the quick shoulder mobility series I use after the initial individual work and correctives. It’s a great way to open up thoracic and shoulder mobility after a long day of sitting or just living in today’s world.

I have my students perform the series as a superset. They move from one exercise to the next without a break. I typically have them perform the series three times. It’s a great mobility set and general warm-up for the session ahead.

We start with the RKC armbar. Use an appropriate weight for the movement. What is appropriate? I typically use a 14kg for the series as it is a warm-up / mobility drill and not strength focused. There are several versions of the RKC armbar, but I tend to have my knee bent at 90 degrees to keep my lumbar spine out of the exercise. This also focuses the exercise on the mid-thoracic area instead of rolling your hips into the ground. I like to take 3-5 breaths per side before moving on to the next drill.

Paul Britt's 67-year-old client practices the RKC armbar
Paul Britt’s 67-year-old client practices the RKC armbar

The next stop is the bretzel stretch. I rest my head on a roller or another padded surface to keep my neck free of tension so I can focus on the movement. I breathe to move through the stretch: I breath in, tighten up, then relax and exhale as I move deeper into the stretch. I typically practice for 3-5 breaths per side to move through the stretch.

Paul Britt Bretzel

The last move in the set is the kettlebell halo. Since this is still a mobility exercise and not a strength move, I keep the weight at 14kg. I like the half kneeling position as it also helps to teach the body how to be stable. You can also do the halo standing if your knees prevent you from kneeling. While I did not demonstrate it in the video below, you can also use half kneeling to develop stability. I perform ten halos in one direction and ten in the other.

Paul Britt Kettlebell Halo

After a 30 second rest, I begin the series again.

If you have shoulder pain, do not perform any of these exercises without medical evaluation. I also highly recommend that you see an FMS practitioner for screening to address any and all movement issues.

***
Senior RKC Paul Britt has been an RKC kettlebell instructor since 2006. He trains clients at Britt’s Training Systems, his award-winning Hardstyle Kettlebell Training Facility in Rockwall, Texas. Paul has served as an assistant instructor at many RKC and HKC Courses, is a Certified Kettlebell Functional Movement Specialist (CK-FMS) and works with some of the top Chiropractors in North Texas. Please visit his website brittstrainingsystems.com for more information.

Filed Under: Kettlebell Training, Mobility and Flexibility, Tutorial Tagged With: bretzel, mobility training, Paul Britt, RKC, RKC arm bar, shoulder mobility, superset, video

Why the Single-Leg Deadlift is a Go-To Leg Exercise

June 22, 2016 By Andrea Du Cane 2 Comments

Andrea Du Cane Single-Leg Deadlift

Why do I love single-leg deadlifts so much? For one thing, nothing works the butt and legs quite like it. Add the extra benefit to the back, core, lower legs and feet and you have a full body exercise. As Gray Cook likes to say, “Maintain your squat and TRAIN your deadlift.” I think this is especially true for the single-leg deadlift.

I have to share a personal story; I’ve had four patellar dislocations. Yes, FOUR! The first one happened after a two-hour ballet/pointe class. The second happened in the middle of a jazz dance class. The third happened when my tango partner hit my kneecap with his knee and the fourth happened when my shoe caught in an escalator and I fell. Yes, dance is a very dangerous sport!

The last two times, I popped it back in and rehabbed it myself. The single-leg deadlift was the most important exercise for strengthening and rehabbing my knee. So this is an exercise close to my heart!

Here’s why everyone should add this powerful exercise to their program:

The single-leg deadlift not only develops hip strength and power, but it also allows the muscles of the hips and legs to act as stabilizers. If you think about it, every time you stand on one leg, you’re using the same muscles for balance and stability that are generally used for force production.

Forcing the body to maintain stability on one leg allows the athlete and coach to see strength imbalances from left to right side. This is extremely important for athletes as well as special populations. And it can go a long way to help reduce injuries and improve performance.

Double Kettlebell Single-Leg Deadlifts:

Holding kettlebells in each hand is easier on your core because it balances out the load from side to side. This allows you to go heavy and train pure hip strength on one leg. You can then watch for and correct left/right strength asymmetries. The focus will be on initiating and driving forcefully with your glutes. This hip drive with stability is the same for both double kettlebells and single-arm kettlebell single-leg deadlifts.

Single-Arm Single-Leg Deadlifts:

Single-arm single-leg deadlifts have the advantage of requiring torso, pelvic, and hip stability as well as strength production. This exercise can be used as a corrective exercise because loading one size requires us to resist the rotational forces put on the body.

Holding the kettlebell on the opposite side of the working leg is the most common corrective use of the single-arm single-leg deadlift. However, holding a kettlebell on the same side as the working leg also has many benefits and challenges. Both versions of the single-arm single-leg deadlift challenge the body to restrict rotational forces from loading one side.

Interestingly, only half the people who try holding the kettlebell on the same side as the working leg will find it harder than holding it on the opposite side. And it may be different from left leg to right.

When using the single-leg deadlift as a corrective exercise, find your weakest link or most challenging combination and train the weak link 2-1.

Now let’s discuss how to perform single-leg deadlifts correctly. As I like to say, “Perfect Technique = Success”. Go to any gym and you’ll see lots of sloppy single-leg deadlifts. Are they getting the most from the exercise? Are they risking hurting themselves? The answer is “no” and “yes”, respectively.

These basics apply to both double and single arm single-leg deadlifts:

  1. The back MUST remain neutral throughout the lift. If your back rounds or flexes, you risk tweaking it. And if your back rounds or flexes, I guarantee you are not using your glutes.
  2. The hips HINGE and move back over your heels. This move is not about the torso bending forward, it’s about the hips moving backward.
  3. The front knee will bend, but it does not move forward excessively. Remember, we are deadlifting not squatting. Plus, this is not a straight-leg deadlift—straight-leg deadlifts shift the focus and load to the hamstrings and off the glutes. Think of the movement as an “elevator not a teeter-totter”.
  4. The shoulders and hips remain parallel to each other and the floor. Do not externally rotate your back leg, and don’t let your working hip sink or rise above parallel. The shoulders should also remain squared off and equal—for both the single or double arm variations.
  5. The arms move as a pendulum from the shoulders as the torso moves forward. The shoulders remain engaged at the lat, do not let your shoulders disconnect from your body as your torso moves forward. This helps the rotator cuff and shoulder stabilizers work during the movement. The elbows remain locked, no “pulling” with your biceps.
  6. The knee must track the toe; do not let the knee collapse inward or outward.
  7. The feet are active. The entire foot is loaded with a bit more weight towards the heel, with the big toe working and gripping the floor.
  8. The back foot is dorsiflexed and the toe is facing down to help keep the hips “closed”.
  9. The back leg is an extension of the spine, and the leg should not be higher or lower than the hips. The back leg should be in line with the hips, and active to help with balance.
  10. Squeeze your palms into the kettlebell handles, this increases shoulder and core stability and strength.
  11. Keep your eyes focused approximately 3-6 feet in front of you to help keep your head in alignment and to assist balance.
  12. Inhale as you stand back up. Power breathe as you drive your foot down into the ground and lift up.

All the elements listed above apply to both the two arm and single arm single-leg deadlift. For added focus, maintain level shoulders and torso at all times when performing single arm single-leg deadlift. You will need to fight the rotational pull with the weight.

A few other thoughts: If at all possible, perform your single-leg deadlifts barefoot. The proprioceptive, neurological information from your feet will assist your balance and make you stronger.

Modifications for Different Populations:

  • Use platforms to raise the kettlebell(s) so that they can be picked up safely AND with no spine flexion.
  • Start from the top instead of picking the kettlebells up from the ground. This way you are already loaded, instead of trying to find tension and stability at the bottom of the movement.
  • People with bad knees or balance issues can hold onto a wall or bar with one hand and hold the kettlebell in the other hand. They will not have to “fight” for balance and risking tweaking their knees or back.
  • Keep the back leg down as a “kick-stand”. This also helps with balance issues.
  • NEVER fight for balance! If you start to lose balance, simply place your back leg down on the ground and regroup.

When training, start with medium loads to get a feel for your weaknesses while developing single leg strength and balance. Try 6-8 reps 2-4 sets with this medium load. Then go heavy, especially with double arm single-leg deadlifts and drop the reps to 3-5.

This exercise should be performed slow and controlled—NOT fast and bouncy. If you’re bouncing up and down, you are either hiding weaknesses or you chose a kettlebell that is too light!

Here’s a short demo of a two-arm single-leg deadlift. As stated above, all points apply to using one kettlebell:

***

Andrea Du Cane is a Master RKC Kettlebell Instructor, CK-FMS, CICS, and RIST, ZHealth certified, she has a BA in Psychology from the University of Minnesota and is also a Pilates instructor. She is the author of several books and dvds including The Ageless Body, The Kettlebell Boomer, and The Kettlebell Goddess Workout.  She has over twenty years of aerobics, weight training and fitness experience, with an additional background in… Read more here.

Filed Under: Kettlebell Training, Tutorial Tagged With: Andrea Du Cane, how to do a single-leg deadlift, how-to, kettlebell exercise, kettlebell tutorial, kettlebells, One leg deadlift, single leg deadlift, tutorial

Training an Olympic Judoka with Kettlebell Swings and the Goblet Squat

June 15, 2016 By Ashoka McCormick 2 Comments

Colton Brown Goblet Squat

10,000 athletes compete in the Summer Olympics. Colton Brown, age 23, was ranked number 1 in the USA (and 27th in the world) in the Men’s 90 Kilogram Judo Black Belt Division on May 30, 2016. Now, Colton is heading to the 2016 Summer Olympics in Rio De Janeiro to represent the USA.

The road to Rio was not easy, but Colton’s USA Olympic Judo Team qualification was one of the proudest moments in my young career as a strength coach. After four years of hard work, Colton has manifested a dream he’s had since age 12.

Colton had just returned from competing in the World Judo Championships in Rio De Janeiro, Brazil when I first began working with him in August of 2013. I had just begun my coaching career by volunteering as the Spartan Judo Team strength coach at San Jose State University. As a dominant collegiate Judo athlete and 2-time All American, Colton had his sights set on becoming an Olympian. After the World Judo Championships, Colton wanted to gain muscle mass. We spent the Fall semester in the weight-room working on a basic hypertrophy program. With the 2016 Olympic qualification period nine months away, we planned to spend two-thirds of the year on strength and hypertrophy. By mid-November, Colton had made significant strength and size gains.

Colton then traveled to Texas and Japan, two of 2013’s last important tournaments. At the Tokyo Grand Slam Tournament, he reported standing toe to toe with the number four competitor in the world—and he only lost by a penalty. Colton won six matches and took the gold medal at the Dallas Open. He credits our weight training program for helping him become the best player in the country.

After the tournaments, Colton kept training on campus at San Jose State, he also trained with me privately two to three times each week at the facility. Even before he began working with me, Colton already had a great deadlift, crushed pull-ups, and push-ups with ease. But, Colton’s weakest lift was the squat. While we had addressed his movement patterns and mobility, the exercise which ultimately helped Colton improve his squat was the goblet squat.

Since late 2014, the goblet squat has been a staple of Colton’s training. At first, I used it as a tool to teach Colton to squat more efficiently, and to build a strong foundation. Next, we progressed to the barbell back squat, double kettlebell front squat, and many others. I believe goblet squats are a great exercise for athletic movement preparation, or as a stand-alone drill for mobility.

Most importantly, the goblet squat is a great in-season squat patterning exercise for all athletes. Judo athletes face a unique programming challenge—their entire year is “in-season”. There’s no true “off season”, especially at the international level. Judo athletes compete and train on a regular basis. Even during the “slower” parts of the year, they practice on the mat twice a day, for five to six days each week. During the qualification period, they frequently travel for qualifying tournaments and required training camps. Extra travel is another unique programming challenge.

Goblet squats have a high benefit to low-risk ratio. I am not comfortable placing a lot of load on my Judo athletes during certain times of the year with barbell back squats, or front squats. Regardless of the competition calendar, I can always turn to the goblet squat—it’s safe, effective, and works well in our training program.

Colton Brown Judo Throw

The Road to Rio

In April 2014, Colton won his third consecutive title at the National Collegiate Judo Championships and continued to establishing himself as the one of the best Judo players in the USA. Shortly after, the Olympic qualification period began in May 30, 2014 and lasted until May 30, 2016. Prior to qualification, we made sure to build a solid base of strength. With more travel, we adjusted the volume of Colton’s program while he competed all over the world.

The World Tour is tough on Judo athletes. It’s stressful, and while they get to see the world, it’s not a vacation. Standing are constantly changing, qualification points are on the line—along with the demands of competing and traveling in vastly different environments all over the world. It’s a grind.

During the two-year qualification period, I added kettlebell training to many of Colton’s workouts. The kettlebell can profoundly benefit elite level Judo athletes. Kettlebell training is one of the most important ingredients in our recipe for success. While I don’t use kettlebells exclusively in my programs, they have proven time and time again to benefit our athletes on the Judo mat. Kettlebell swings may be one of the best movements a Judoka can perform in the weight room. Since adding more swings to Colton’s training sessions in the Spring of 2014, they have remained a staple in his training as a go-to power exercise.

We needed to train Colton to be as strong and healthy as possible to endure the intense training camps and international Judo tournaments. While Colton had less time to train with me, our general programming template remained the same. For the three years we’ve been training, I’ve tried to use as many “big bang for your buck” movements in his training—no matter what tool we use.

Big Bang For Your Buck Movements

  • Push (horizontal and vertical)
  • Pull (horizontal and vertical)
  • Hinge (bilateral and unilateral)
  • Squat (bilateral and unilateral)
  • Crawling (side to side, forwards, backwards)
  • Core training
  • Movement in the sagittal, frontal, and transverse planes

Colton’s programs included balanced workouts with a wide variety of exercises with barbells, TRX, medicine balls, dumbbells, and kettlebells. For example, in one workout we would focus on a hinge movement and a pushing movement, then the next workout would feature a squatting movement and a pulling movement. I also included mobility, core training, and accessory movements in every session. Occasionally, we took the training to the beach or park. I think it’s important to include variety in your training and training environment. Another reason I love the kettlebell is you can work out with it almost anywhere.

Making the USA Olympic Judo Team

Colton continued to train relentlessly both on and off the Judo mat during the qualification period. During that time, he won a Gold Medal in the Pan American Open in San Salvador, Silver Medals at the European Open in Glasgow and African Open in Tunis, and placed at many other renowned tournaments throughout the world.

At the prestigious Pan American Championships in Havana, Cuba in May 2016, Colton earned three wins with one loss, capturing a Silver Medal after finishing in fifth-place for the previous two years. Now, Colton will be one of only three men representing the United States Judo Team in Rio De Janeiro this August.

Daily, Colton spends countless hours on the mats perfecting his judo technique, dialing in his nutrition, practicing mental visualization, planning his recovery, and studying his opponents. He also gives his best in every strength and conditioning session.

Kettlebell Swings and the Goblet Squat for Judo Performance

The Goblet Squat

The goblet squat is a staple in almost all of Colton’s strength and conditioning programs for the past two and a half years. Since there’s no true off-season in Judo, I have to be smart about loading him up. While we use other squat variations with the barbell, the goblet squat is our go-to.

Goblet Squat Prying

After a two to three week hiatus due to travel, goblet squat prying was an excellent choice to help open his hips. Flying has a direct physical impact. Sitting can cause the hip flexors and hamstrings to get tight and stiff. It can also take a toll on the spine, hips, and shoulders. Long flights leave your legs tight and your glutes inactive. One of the mobility drills I learned at the HKC is goblet squat prying, and it is incredibly effective for loosening up the hips.

I instruct the athlete to breathe deeply while maintaining their posture. As they begin to loosen up, I will instruct them to go deeper into the squat while wiggling the hips from side to side and in a small figure-8 as taught at the HKC. Alternately, I will instruct them to hold the bottom of the goblet squat position for a count of 10 breaths. We often superset the prying goblet squat with the RKC hip flexor stretch. These two exercises can do wonders for the hips, especially after a long flight. Adding a few sets of mini band activation exercises such as bent knee lateral walks, and mini band glute bridges ensure glute engagement. After opening up the hips, stretching the hip flexors, and turning on the glutes, the athlete is ready for a more productive training session.

The Goblet Squat as a “Mini Screen”

While I’m certified to use the FMS screen and administer it throughout the year, I also use the goblet squat in warm-ups and as a quick daily screen. Goblet squats how me how the athlete is moving during that particular training session. Basic movements like lunges, push ups, and squatting patterns can be used as movement preparation for the training session and as “mini screens”. I want to get a picture of where the athlete is on that given day, along with any flaws or leaks in the movement.

The Goblet Squat as a Teaching Aide

The goblet squat reinforces correct squatting mechanics. Colton’s squatting pattern, squat depth, and mobility immediately improved after adding the goblet squat to his program. The goblet squat is one of the best tools for helping my Judo athletes develop movement competency in the squatting pattern. I’m more confident when progressing them to advanced squatting variations such as barbell front squats, or racked kettlebell front squats.

San Jose Judo Kettlebells

The Kettlebell Swing

Powerful hip hinging movements teach athletes how to load their hips rather than their spine. They learn better ground force production while building a strong posterior chain (back, butt, abs, and hamstrings). For these reasons alone, the swing is always at the top of my exercise selection list for Judo athletes. I almost always some type of kettlebell swing in their programs. Russian wrestlers have used kettlebells for years and recognized the carryover onto the wrestling mats. I think the kettlebell swing is one of the best conditioning choices for grapplers and other combat sport athletes.

Hip Hinge

Moving comfortably and efficiently from the hip is important for the proper execution of throws and other movements in Judo. The main movements in the hip hinge are bending (flexion) and straightening (hip extension) when standing back up. A good Judo athlete must be able to properly hinge from the hips when setting up for or defending a takedown. I have seen a direct carryover from the explosive hip snap action of swinging kettlebells to the mat, especially for throwing.

Colton told me, “Judo is 90% hips, so when there’s a lot of kettlebell swings in my program my hips feel powerful—especially in my defense. When guys come in and try to throw me forward, I’m able to use my hips to block throws a lot more effectively.” Every time Colton sets up for kettlebell swings, he has to start from an athletic position before hiking the kettlebell back. Anytime your athletes can practice getting into the athletic position during training you’re on to something good. In grappling, the athletic position is critical for defending and blocking throws.

Grip

A kettlebell’s thick handle challenges the grip—another reason that kettlebells can greatly benefit the Judoka. If you’re doing a lot of swings, you’re also spending a lot of time building a vise-like grip. I experienced kettlebell-enhanced grip strength in my own Jiu-Jitsu practice when gripping my opponent’s gi. During the months of preparation leading up the HKC, I developed a better grip which was immediately apparent at my Jiu-Jitsu class.

Colton Brown Judo Pin

There are many ways to grip the gi in Judo and Jiu-Jitsu not only on the lapel and sleeves, but also on the pants and various parts of the jacket—sometimes even the belt. Once you achieve a good grip, you don’t want to lose it. “Without a good grip, Judo does not work” (Pedro, 2001 p48). Swings are just one of many kettlebell exercises (loaded carries, heavy get ups, presses, etc.) you can use to develop a strong grip. It is important to note that you can have the strongest grip in the world, but if you’re holding on to the wrong things, it does not help in Judo. Efficient gripping is addressed in the specific physical preparation of Judo practice, and should be complemented with supplemental grip strengthening exercises in a strength and conditioning program.

Tension and Relaxation

Some Judokas are too relaxed—and they are easily thrown. Others aren’t relaxed enough, and they ultimately burn more energy and fatigue more quickly than their opponent during the match. At the top of the kettlebell swing, all of your muscles must contract to allow the kettlebell to float briefly and then quickly relax so you can begin the backswing. The tension/relaxation principle taught in Hardstyle kettlebell training is incredibly valuable for the Judoka. Throughout a Judo match there is a constant—almost yin and yang like—balance between relaxation and tension. When working with Colton on his swings, I regularly reminded him to create tension at the top of each swing with the cues “tight abs” and “tight glutes”. At the same time I also checked for a full exhale, and during the backswing I would remind him to “relax”.

One principle from Hardstyle kettlebell training that I continually drive home with my Judo athletes is the transition between tension and relaxation. Kettlebell swings allow athletes to quickly create maximal amounts of tension followed by relaxation. This is a skill that can be transferred into almost any throw attempted on the mat.

Final Thoughts

Kettlebell training has played a big part in Colton Brown’s physical preparation for the Olympics, and I believe that kettlebell training is of particular benefit for anyone involved in martial arts such as Judo, Brazilian Jiu-Jitsu, and Muay Thai. This also holds true for any other type of combat sport like wrestling, boxing, or MMA.


Resources:

  1. Bakken, J. (2012, July 23). A journey of Olympic proportions begins with a determined step. Retrieved June 03, 2016, from https://www.uab.edu/news/latest/item/2599-a-journey-of-olympic-proportions-begins-with-a-determined-step
  1. Pedro, J., & Durbin, W. (2001). Judo techniques & tactics. Champaign, IL: Human Kinetics.

More about Judo Athlete Colton Brown:

  • NBC Biography of Colton Brown
  • USA Judo Team Announcement
  • Video about Colton’s Olympic Qualification

****

Ashoka McCormick, HKC, NASM-CPT, FMSC, CFSC works at Paradigm Sport Elite Athlete Training Center in Santa Cruz, CA, and he also serves as the Volunteer Strength & Conditioning Coach for SJSU Judo. He can be contacted at coachashoka@gmail.com. Please mention HKC in the subject. Connect with Ashoka McCormick on LinkedIn or follow him on Instagram: @ashoka_trains

Filed Under: Coaching, Kettlebell Training Tagged With: Ashoka McCormick, Colton Brown, hkc, Judo, Judo athletes, Judo players, kettlebell training, kettlebells, Olympian, Olympic Judo, Olympic Judoka, strength and conditioning, training an Olympic athlete

Improve Your Posture with the RKC Kettlebell Swing

June 8, 2016 By Beth Andrews and Jay Armstrong 7 Comments

Senior RKC Beth Andrews Kettlebell Swings

Postural correction is a hot topic. Spending too much time in a seated position while driving or working on a computer will adversely affect our ability to stand up straight.

Wouldn’t it be great if there was a time-efficient exercise that could counteract all the time you’ve spent in the seated position and help you develop good posture?

That exercise exists—it’s the kettlebell swing.

Swinging a kettlebell will help you develop strong muscles, bones, tendons and ligaments. It will also improve your endurance. But, one of the biggest benefits of the kettlebell swing is improvement in your posture. The kettlebell swing is a naturally corrective exercise which will help undo the maladaptive effects of too much sitting slumped over with a computer, tablet, or phone.

The following are some of the key postural issues that the RKC kettlebell swing can correct:

Problem #1: Your glutes are not working

Sitting down turns off your glutes. The RKC kettlebell swing includes a “hip drive” or “pop” that moves the tailbone under and drives the hips forward. The hips are a primary source of athletic power for many sports such as golf, tennis, baseball and boxing. This hip drive is fueled by a rapid and intense contraction of the glutes. Swinging a kettlebell can help you reactivate your glutes. Active glutes will also put the pelvis in a neutral position, increasing your athleticism and reducing your chances of developing chronic back pain.

Problem #2: Your back is rounded, and shoulders are hunched forward

When using a computer or driving a car, your arms are front of your body while you’re seated. This inevitably leads to the shoulders internally rotating and the chest collapsing. For most people, this also means they will look like a caveman when they finally stand up. The finish, or top position, of the RKC kettlebell swing features “packed” shoulders. This means that the shoulders are pulled back and down, the lats are activated, and the thoracic spine is in a neutral position.

The kettlebell swing also has the added advantage of teaching you to bend over and stand up into a correct postural position time after time, rep after rep. And each effort is performed under load. Using a weight means that the adaptive changes will take place faster. Even a short RKC kettlebell swing practice session will greatly improve your ability to go from a seated, computer desk position to an erect, well aligned standing position.

Problem #3 – Your core is weak and you cannot contract your abdominal muscles

Bad Computer Posture

Modern office furniture encourages us to relax everything while we type at the computer. This muscular relaxation includes the core and abs. But, when you stand up, your abs remain relaxed, your pelvis tips forward and all of your guts try to fall forward! Not very attractive. At the top position of the kettlebell swing, the spine is lengthened and aligned. In order to accomplish this alignment, the core must be stabilized with a balance of posterior and anterior tension. This simply means that the abs must be strongly contracted for a split second at the top of each swing. What could be a better way to relearn how to stabilize your core and contract your abs then to do this time after time with your RKC kettlebell swing.

One step we use while teaching the kettlebell swing is the RKC plank. Notice that opening your chest, contracting your abs, tightening your glutes and lengthening your spine into an ideal postural position are all part of the RKC plank exercise. The top position of a kettlebell swing should mimic the total body tension and spinal alignment of the RKC plank.

Beth Andrews RKC Plank

Focus on these points as you perform your RKC kettlebell swing. You will see fast and enormous postural improvements.

Stand tall my friend.

Beth Andrews and Jay Armstrong

****

Beth Andrews is a Senior RKC, PCC Team Leader, and CK-FMS. She leads HKC and RKC certifications, and assists at the PCC. She became the 5th Iron Maiden in 2013. Beth owns Maximum Body Training and a successful online training business. She has over 25 years of training experience. For online training or to host a certification, email Beth at: bethandrewsrkc@gmail.com. For more training tips and workouts subscribe to her YouTube channel, Beth Andrews RKC or visit her website at maximumbodytraining.com

Jay Armstrong is a Senior RKC, 6 Degree Black Belt TKD, and Master Z-Health Trainer.  The past 30 years have been dedicated to helping others develop confidence through increased strength and pain-free, exceptional mobility.  His quest for knowledge continues.  He runs The Kettlebell Club in Houston, Texas.

Filed Under: Kettlebell Training, Mobility and Flexibility, Tutorial Tagged With: beth andrews, Jay Armstrong, Kettlebell, kettlebell swing, kettlebell swings, kettlebells, plank, posture, posture correction, RKC, RKC plank

Rowing and Kettlebells

June 1, 2016 By Kathryn Taylor 2 Comments

Kathryn Taylor Kettlebells and Rowing

Indoor rowing is one of the fastest growing fitness trends in the US. Head to any major city and you’ll find rowing gyms. Even the local YMCAs are taking the rowing machines out of the corner and moving them to a prominent spot. But, with the rise of rowing, we also find many people rowing with poor technique. In addition to holding an RKC certification and regularly teaching kettlebells at FitWit Studio, I also started to teach rowing this past year and became a certified rowing instructor through UCanRow2. Many of my clients already have a background in kettlebells, and I’ve found that kettlebells can be a highly effective method to teach rowing.

First, a little bit about rowing… You may have seen athletes at the gym leaning all the way back at the end of a stroke and moving with lightning speed up and down the slide. For the most part, you’ve probably observed very poor form. Rowing, like kettlebell training, is highly technical. The power of the stroke comes from the push-back (legs) and the movement forward is all recovery. A goal is to set up for a strong push during the recovery. Basically, the movement pattern starting from the front of the erg is to push back with the legs, then the body goes back at a “one o’clock” position while the arms pull in. Return to the front of the erg by straightening the arms, hinging at the hips to the “eleven o’clock” position, before moving forward on the erg to the start or “catch” position. The order of the movement: legs, body, arms, arms, body, legs. Repeat this pattern one million times and you are rowing!

As I began to teach clients the rowing technique, I found myself moving them off the erg and over to the kettlebell so they could really learn how to properly row using the deadlift, goblet squat, and swing.

Kettlebell Deadlift: Hinge

When rowing, the body closely mimics the deadlift position. But, since it’s often difficult for clients to understand the concept of the hinge while on the machine, we practice our kettlebell deadlift set-up. We work on the hinge, and use the power of the legs to drive the kettlebell up. Then we get back on the erg and mimic the same position. The deadlift also helps clients really understand the correct shoulder position—rather than allowing the shoulders to round forward at the end of each stroke, they learn to keep their back in a strong position.

Kathryn Taylor Goblet Squat and Rowing

The Goblet Squat: Drive

Because most new rowers think that the power comes from the arms, it’s really important to teach them how to drive from their feet, and engage their glutes to push themselves back. I’ve used the goblet squat to reinforce this idea. My clients start with a fairly light kettlebell, and go deep into a goblet squat. They pause for 2-3 seconds at the bottom before standing up by driving hard thorough their feet. They do 5 reps, then do the next set with a heavier kettlebell. We repeat this process 2-3 times. The goal for this drill is to teach them that with heavier weight, they need to drive harder into the ground to stand up. After this drill, we get on the erg and practice the drive.

The Kettlebell Swing: Rhythm

Rowing has a certain rhythm to the stroke. You press back hard and fast, then recover slowly. Each individual has to find the right rhythm (stroke rate) for their most efficient row. If you go too quickly, your heart rate will spike too high. But if you go too slowly, you’ll burn out your legs. The kettlebell swing mimics the same rhythm that we are trying to find on the erg. A hard, fast drive gets the kettlebell up, before we allow the kettlebell to fall back down as we recover. All of the work happens on the way up. The swing has the additional benefit of reinforcing the hip hinge of the deadlift.

I’ve found that people who have practiced kettlebell training for a year or more tend to pick up rowing technique faster than those who haven’t. If you’re looking for a new cardio workout to add to your routine, I suggest trying rowing.

****

Kathryn Taylor, RKC, ACE-CPT, Oh Baby Fitness!, UcanRow2, TRX Level 1, is Studio Manager of FitWit Studio in Kirkwood/Decatur, Georgia.

Filed Under: Kettlebell Training, Tutorial Tagged With: Athletic Training, erg rowing, indoor rowing, Kathryn Taylor, kettlebell deadlift, kettlebell technique, kettlebell training, rowing

Moving Strong(er) Equals Training Strong(er)

May 25, 2016 By Russell Andrews 2 Comments

Russ Andrews Group Class

First, let’s consider the human movement system. What parts are involved? What is moving? What initiates the movement?

The human movement system is comprised of the nervous system, skeletal system, and the muscle system—including all the connective soft tissues: tendons, ligaments, and fascia. The nervous system is the master control center of the entire body. It coordinates every function, contraction, and every movement. The nervous system is a super highway of sensory and motor output controlling proper functions, compensating for deficiencies, and altering positions and patterns to maintain homeostasis. The human body is a global tensegrity unit.

Tensegrity

Nerve impulses contract muscles. Muscles and tendons tug on the bones. Ligaments connect bones to other bones, and fascia covers a great portion of the entire system. The skeleton can’t generate movement without muscle contractions. The soft tissue cannot contract to move the bones without the neural input firing impulses into the muscles. It takes all three systems to generate movement.

In perfect human movement, every muscle would be the perfect length, have perfect tension, and have perfect flexibility. The skeletal system would be perfectly uniform and aligned to move with precision and accuracy. The joints would have freedom of movement and quality mobility.

But we aren’t perfect.

Throughout life, we encounter interruptions and interference to our movement system. Here are just a few of them:

  • Congenital issues
  • Traumas and injuries
  • Altered growth patterns
  • Diseases
  • Poor nutrition
  • Lack of quality water
  • Lack of quality sleep
  • Sedentary lifestyles
  • Excess stress
  • Poor air quality and pollution
  • Lack of movement and exercise (of any type)

These interruptions force the human system to rearrange its alignment, compensate for imbalances, alter movement patterns, and adapt to dysfunctions—all to maintain homeostasis so we can perform in our daily lives. The body will maintain this re-arrangement until there’s a breakdown, an overload, or some type of system collapse. How can we maintain our systems and facilitate efficient function with minimal breakdowns? In other words, how can we move strong(er) in hopes of avoiding catastrophe?

I teach a wonderful class at Life University in the Chiropractic Science Department called Wellness, Movement Assessments, and Conditioning. In this class, we assess movement patterns then determine the soft tissue connections involved in dysfunctional patterns. After collecting all the data, we begin re-training the dysfunctional movement patterns by introducing corrective mobilization exercises and drills. We begin with simple ball rolling on the involved muscles.

Russ2SimpleBallRollingWhen using many of the kettlebell and bodyweight exercises in Dragon Door’s philosophy of addressing the total athlete, the improvements and results are phenomenal. When improving dysfunctional movement patterns, it is important to introduce corrective patterns through sensory input. This way, the brain can begin rewriting the movement patterns recorded in the cerebellum.

Some of the exercises we use are the get-up, windmill, one-leg deadlift, goblet squat, cossack stretch, renegade row, bear crawl, and arm bar. These movements are the “backbone” corrective exercises. We also mix in crawling patterns, diaphragmatic breathing, and bodyweight core-engagement exercises.

teaching...
Teaching the kettlebell exercises to Chiropractic students peaks their interest in the versatility and advantage of knowing how to incorporate the kettlebell in correcting movement patterns.

As my good friend Max Shank has repeatedly said, “To improve movement at a certain joint, say the gleno-humeral joint, work from the inside out.” That’s where the focal point of the corrections begin. Strengthen the core, next work on proper diaphragmatic breathing, address scapula stability and mobility, and then arrive at the gleno-humeral joint for strength and mobility. The same formula of working inside out also applies to the lumbo-pelvic-hip complex.

Along with teaching and instructing at Life University, I work with a local high school building quality athletes with kettlebells and movement exercises. These young players are experiencing the increase in strength and mobility that the kettlebell exercises deliver.

Moving Strong(er)             Training Strong(er)
Moving Strong(er) Training Strong(er)

Lastly, at Train Strong Gym, I work with local athletes. We use kettlebells to develop athletic strength and mobility. The benefits from kettlebell training is almost endless.

RussTrainingHighSchoolAthletes

In these three platforms, I have the privilege of introducing the value that the kettlebell exercises delivers to all these students and athletes. The knowledge and experience gained at all these levels is invaluable.

Russ Andrews Fingertip Pushup

****

Russell Andrews, Chiropractor (23 years), Assistant Professor at Life University, RKC, FMS, 30 years in Strength and Conditioning, certified in kinesiotaping. Previous speaker for the Glazier Football Coaches Clinics, lecturer, future author, co-instructor with Beth Andrews, Senior RKC at Trainstronggym.com

Filed Under: Uncategorized Tagged With: fascia, fms, human movement, kettlebell exercises, movement patterns, muscular system, RKC, Russell Andrews, soft tissue, tensegrity

Why Recertify?

May 18, 2016 By Dan John 5 Comments

Dan John Instructing at the 2016 San Jose RKC

As I review my half-century in the weightroom (I started lifting in 1965), I begin to see our world of strength through the lens of something Arthur Schopenhauer noted:

“When you look back on your life, it looks as though it were a plot, but when you are into it, it’s a mess: just one surprise after another. Then, later, you see it was perfect.”

With my massive collection of Strength and Health magazines and the short-lived American Athlete magazine, I can pick up an issue from just after World War II and see articles about how to repair the wounded warriors. The training presented for injured veterans was just like what most people now consider training: laying down on machines, isolation work and a few sets of about eight to ten reps. While that kind of training is perfect for someone with compromised health and fitness, it’s not optimal for elite sports performance!

I can read articles from the 1950s and see kettlebells used for leverage work, curls and grip training. I have found swing articles from the 1960s that emphasize dangerous overflexion at the hinge and overextension at the plank.

Yes, kettlebell work had basically devolved into a mess. Powerlifting had pushed Olympic lifting out of the way, and the bench press became the answer to every question. It wasn’t a good answer. Some excellent coaches and trainers were pushing the strength envelope, but others were bogging us down. Speaking of bogging us down in the mess, one famous strength coach advocated using mud as resistance and noted “progress will be made.” It works for pigs, so why not?

“Whadduya bench?” became the fitness standard. We saw the rise of the machines for leg training—as if leg presses indicated anything in the field of play or nature. The world of lifting was a mess.

Dan John's Goblet Squat
Dan John’s Goblet Squat

And then, the kettlebell returned and all credit—all credit—goes to Dragon Door if you wish to be historically sincere. As an Olympic lifter, I couldn’t fathom how these kettlebells could help me. I was surprised when I learned that the swing (done correctly and not how I first did it) made me a better Olympic lifter when I better understood the hinge. As much as I knew how to coach the squat, the horns on the kettlebell allowed me to teach pushing out the knees with the elbows. And, I invented the goblet squat.

One arm pressing trumped most of the overhead work I was doing with throwers as it demanded the hard work of the whole chain of anti-rotation muscles.

I became a better coach with kettlebells. But, I wouldn’t have been ready for them when I first saw them in Strength and Health.

As if kettlebells were a part of my coaching life’s plot, they arrived exactly when they needed to arrive…like what Gandalf says about wizards.

I learned enough to fill my head at my RKC certification in San Jose in 2008. Oddly, I learned even more a few months later as an assistant at an RKC at UCLA. And, I learned more again and again and again…

I started coaching in 1979, and thirty years later my head was being filled again!


I tell people all the time, you can’t think through a ballistic movement. To understand the swing, snatch and clean, you need to “hear” the standards, drills, corrections, and the insights several times before it “clicks.” Oddly, your technique might be seamless, but you might not be able to coach someone who has a simple error in their technique. Or, you might be able to “see” the problem, but your own technique is muddled.

When it comes to the goblet squat, get-up and press, are you really prying, packing or patterning the correct path? Or, are you just getting the reps in? Are you putting the kettlebell down like a professional every single time? How is your breathing? Your tension?

Hip Hinge Coaching San Jose RKC

You need other eyes. You need community.

You need to recertify!

I work with a handful of RKCs daily. It is a rare few weeks, when someone does NOT take me aside and point out that I’m making a basic error. On paper, I am a Master RKC—but in my own training, I am just another person swinging a kettlebell. I try not to get lazy. I try to stay packed and attack the hinge.

…but sometimes I don’t.

Over time, skills degrade. “Safety is part of performance,” except when we get tired, lazy or pressed for time. There are no excuses for lack of safety!

Dan John Coaching San Jose RKC
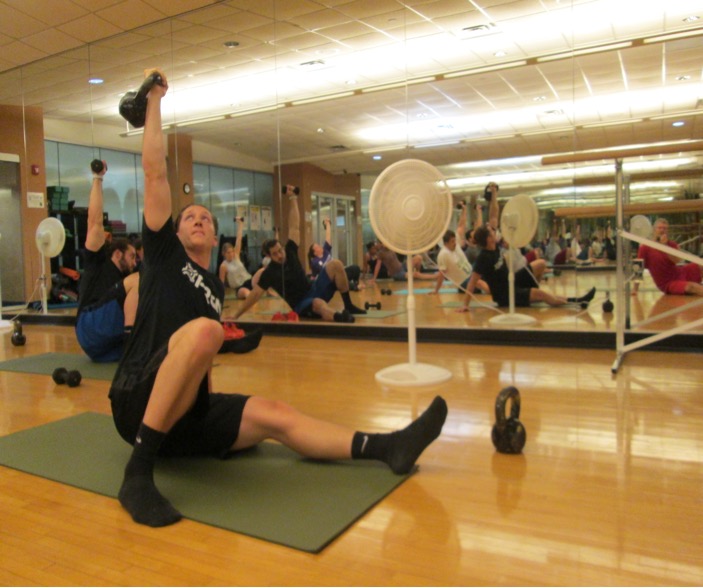
Recertifying will get eyes on you again. Recertifying for $500 means three days of expert teaching and evaluation from at least three people, if not many, many more. This is a bargain compared to hiring a personal trainer.

Whenever anyone returns from a retreat, a clinic, conference, or workshop, the enthusiasm and excitement drips off of them. They have clear eyes and a missionary zeal.

When I first embarked on my RKC journey, I came home and converted everyone I knew to the “Kettlebell Crusade”.

But, like all things, this wanes over time. It’s not bad or good, but without community, without an ongoing dialogue, the battery runs out of excitement.

Outside of an annual visit to “Kettlebell Kamp”, the best thing I can recommend is recertifying.

For as much as I learn during the day, I think I learn more at night. At dinner, we exchange emails, gym insights, training mistakes, and fixes. A wealth of information seems to fit perfectly on a napkin. My favorite RKC dinner moments are when John Du Cane gives me a “MUST” read book recommendations. I am forever grateful for his recommendations.

JDC does an interesting thing, when he asks for my book recommendations, he opens his phone and buys the books as I list them. If you believe in Shark Habits (“One bite!”) like I do, then this is a good example to follow.

It’s a rare day when I do NOT get a text, email, post, or message from someone I met at an RKC. It’s nice to recommit to the shared experience. But, people still move on, drop off and walk away. Recertify your way into a new group of people who can walk the walk with you.

For example, if you were certified before 2008, you missed the goblet squat. Since then, the get-up has been revamped several times. Finally, I think we’re teaching it with the appropriate steps, corrections, and drills. The sections on programming are tighter and clearer with more actual programs.

San Jose RKC Seth Munsey Group Getup

There are more swing drills and clearer correctives. In other words, the RKC is evolving. There was nothing wrong with the Sig Klein articles in Strength and Health, but kettlebells and kettlebell training has evolved. I rarely wear leopard skin and lace up boots when I train. (Note: I said when I train. My gym is judgment free, so you would be welcome to do what you need to do.)

I enjoy being part of this evolution. As much as I loved the original notion of the “kettlebell revolution”, the kettlebell won. If you are keeping score, I enjoy the kettlebell evolution ever more. Hundreds of people teaching thousands of clients with millions of swings will produce new insights, new ways of teaching and greater clarity with problems and issues.

I believe in investing in my continuing education. I sit in the front row at workshops and sign up for a weekend certification or conference at least once a year. It’s hard to find a better deal than the $500 for the three-day RKC recertification.

In 1993, with two little girls in the house, I flew out for a week-long discus camp at Dennison University. For that week, Tiffini worked full-time along with fulfilling full-time mommy and daddy work. It cost a lot—money we didn’t have—and it was a ton of work for me.

But, it changed my life. I have gone back every year since. It sharpened my coaching toolkit, opened my mind to new possibilities, and honed my own techniques.

We have earned back, in every way, this investment.

Look at recertification with the same lens: for $500, you are recertified for three years. More importantly, you’ll have a chance to fill your quiver of arrows, add new tools to your toolkit, experience a dynamic new community, learn new and evolving information, and get new sets of eyes on your technique.

The question shouldn’t be “why recertify?,” it should be “why not?”

It is the perfect way to plot your career.

****

Master RKC, Dan John is the author of numerous fitness titles including the best selling Never Let Go and Easy Strength.

Dan has spent his life with one foot in the world of lifting and throwing, and the other foot in academia. An All-American discus thrower, Dan has also competed at the highest levels of Olympic lifting, Highland Games and the Weight Pentathlon, an event in which he holds the American record.

Dan spends his work life blending weekly workshops and lectures with full-time writing, and is also an online religious studies instructor for Columbia College of Missouri. As a Fulbright Scholar, he toured the Middle East exploring the foundations of religious education systems. For more information visit: http://danjohn.net


From the RKC manual:
There are four compelling reasons to recertify and keep your RKC status.

The number one reason to recertify is to keep your skill level up to the current standards of the RKC. This signifies the importance you place on continuing your education and keeping your personal athletic skills sharp.

The second reason to recertify is the obvious benefit you receive from the Dragon Door marketing machine, by being listed as an RKC on the DragonDoor.com website. This can lead potential clients to you and give you a presence within and outside your on community.

The third reason to recertify is the ability to network with like-minded trainers. This is an extremely valuable tool to help keep you current, offer support and advice in all manners of kettlebell training and professional issues.

The fourth reason, is to continue to receive a discount on purchases of kettlebell and Dragon Door kettlebell products. Orders can be placed by logging you’re your instructor account online, where qualifying products are automatically discounted, or by calling DragonDoor.com customer service at 1-800-899-5111 or internationally 214-258-0134. Identifying yourself as a currently certified instructor is required, so the phone agents know to use your account to place your order.

Filed Under: Coaching, Kettlebell Training, Motivation Tagged With: Dan John, kettlebell training, Master RKC Dan John, recert, recert RKC, recertification, why recert

7 Steps to a Bang-Free Kettlebell Clean

May 11, 2016 By Steve "Coach Fury" Holiner 7 Comments

Steve Holiner Kettlebell Clean

Few movements in “kettlebell land” frustrate people like kettlebell cleans. Not everyone enjoys the bruising and soreness we often deal with while learning cleans. And, cleans can get stressful if we’re anticipating multiple slams to the arm.

In my years as an RKC Instructor, I’ve found kettlebell cleans to be one of the most challenging moves to truly own.

The common issues most people have with cleans fall well within the learning curve. Bruising, soreness, and forearm slamming stop as technique improves. Cleans should not hurt. However, you will need to invest some quality time to smooth out your clean. Patience and practice will go a long way!

Here are seven tips for achieving bang-free cleans:

1.    HINGE. People often begin to squat their cleans when they focus on getting the kettlebell up. From watching your backswing, I shouldn’t be able to tell if you’re going to do a swing, clean, or snatch. Keep the hinge consistent.

2.    GRIP. Loosen up folks! Your grip should be fairly relaxed. Think of your fingers as a hook and your thumb as a safety latch. The kettlebell handle must be able to move within your hand.

3.    ROTATE. As soon as your kettlebell is at the end of the backswing, begin to externally rotate your arm toward the rack position. Think “THUMB TO BUM” in the backswing—then, what my buddy Geoff Hemmingway calls “OLD TIMEY MAYOR” in the rack position. The kettlebell will actually make contact with the forearm during the float. This allows the kettlebell and arm to meet the torso at the same time. This tip will eliminate the big bang that can happen when the kettlebell lands last.

4.    VOLUME CONTROL. With practice you will learn to exert the right amount of force from the hamstrings, glutes, and hips to ease the kettlebell into the rack position. If the kettlebell is coming in too fast, and you can’t slow it down to prevent banging, then lower the volume. On the flip side, if you are using your biceps to curl the kettlebell into the rack, then you’ll need to turn the volume up. The kettlebell must float during the clean!

RKC Kettlebell Cleans

5.    LOW AND CLOSE. The path of the kettlebell should be low and close to you during the clean. If the kettlebell goes too high, it will arc down and slam into you. If the kettlebell goes too far away from you, it will whip into you. Keep your elbow close to your ribs. While some say to pin the elbow to your ribs, I’m not a huge fan of that cue, because when the focus shifts to the elbow, the arm will often get tense. Excess tension in the arm often leads to banging, curling, and eventual elbow discomfort.

6.    NEUTRAL WRIST. Keep your wrist neutral for a smooth bang-free clean. Own that rack position!

7.    REVERSE. Don’t over-think the eccentric part of the clean. Keep the kettlebell close, keep the grip relaxed, and rotate “thumb to bum” as the kettlebell goes into your hinge. Keep your shoulder in the socket as you spill the kettlebell into the backswing.

These seven tips will have a big impact toward removing the impacts on your arm! But, don’t try them all at once, or your brain will smoke. I suggest trying one drill at a time. You’ll have bang-free cleans in no time!

Let me know how these work for you.

Thanks for your time!

-Fury

***

Steve “Coach Fury” Holiner’s superhero headquarters is Mark Fisher Fitness in NYC. Fury’s a Master RKC, a DVRT Master Chief, and an Original Strength Instructor. He is available for classes, semi-privates, instructor training and programming at MFF. Check out coachfury.com, facebook.com/coachfury Instagram @iamcoachfury and Twitter @coachfury for more info.

Filed Under: Kettlebell Training, Tutorial Tagged With: Coach Fury, fixing kettlebell cleans, how to do a kettlebell clean, kettlebell clean, kettlebell cleans, kettlebell technique, Steve Holiner, video

  • « Go to Previous Page
  • Page 1
  • Interim pages omitted …
  • Page 9
  • Page 10
  • Page 11
  • Page 12
  • Page 13
  • Interim pages omitted …
  • Page 30
  • Go to Next Page »

Primary Sidebar

Featured Products

previous arrow
BOOK-RKCBookofSnC
HardStyleKettlebellChallegeDanJohn700
BookCoverMasterTheKettlebell1
RKCiconKettlebell512
KettlebellGoddessdv040
next arrow

Recent Posts

  • RKC Big Six Workout
  • The Kettlebell Swing & Low Back Pain
  • Key Kettlebell Exercises To Help You Create Better Balance
  • How to Most Effectively Use Kettlebells to Meet Your New Year Goals
  • 1 Exercise That Checks All The Boxes
FOLLOW US ON TWITTER!

Archives

Copyright © 2025

Dragon Door Publications / The author(s) and publisher of this material are not responsible in any manner whatsoever for any injury that may occur through following the instructions or opinions contained in this material. The activities, physical and otherwise, described herein for informational purposes only, may be too strenuous or dangerous for some people, and the reader(s) should consult a physician before engaging in them.