• Skip to main content
  • Skip to primary sidebar
  • Home
  • Contributors
    • Matt Beecroft, Master RKC
    • Martijn Bos, Master RKC
    • Andrea Du Cane, Master RKC
    • Angelo Gala, Master RKC
    • Chris Holder, Master RKC
    • Steve Holiner, Master RKC
    • Dan John, Master RKC
    • Mike Krivka, Master RKC
    • Thomas Phillips, Master RKC
    • Robert Rimoczi, Master RKC
    • Phil Ross, Master RKC
    • Max Shank, Master RKC
  • Workshops
    • HKC Workshops
    • RKC Workshops
    • RKC-II Workshops
  • Find an RKC Instructor
  • Resources
    • Articles
    • Forums
    • Kettlebells
    • Products
  • Blogs
    • PCC Blog
    • Strong Medicine Blog
  • Archives

RKC School of Strength

Official blog of the RKC

Kettlebell Training

3 Reasons To Train Barefoot with Kettlebells

January 6, 2021 By William Sturgeon Leave a Comment

Training Barefoot With Kettlebells - Deadlifts

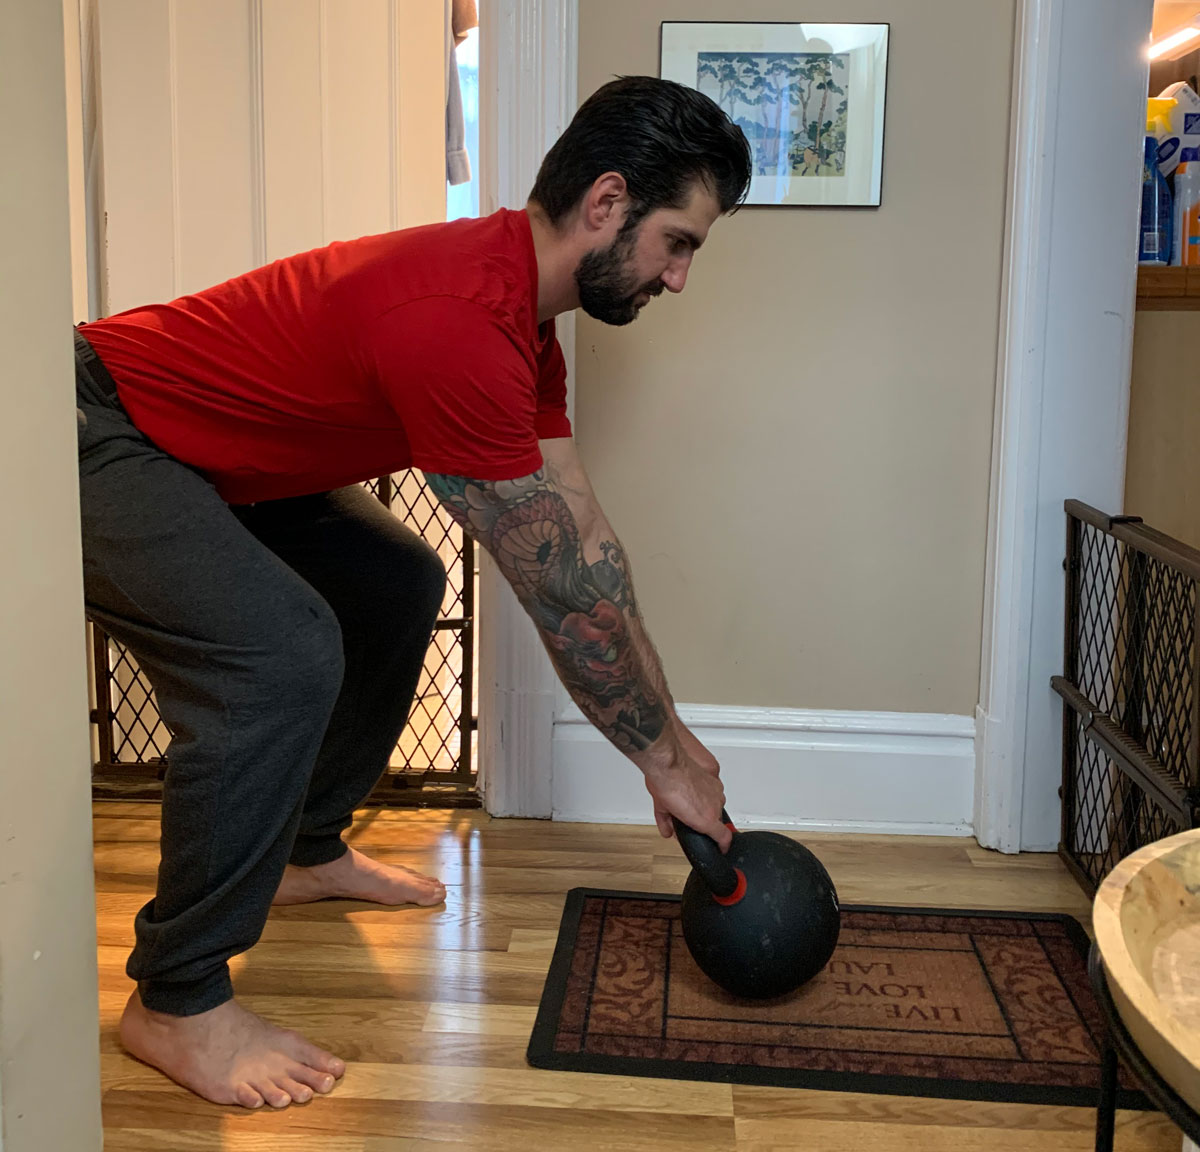
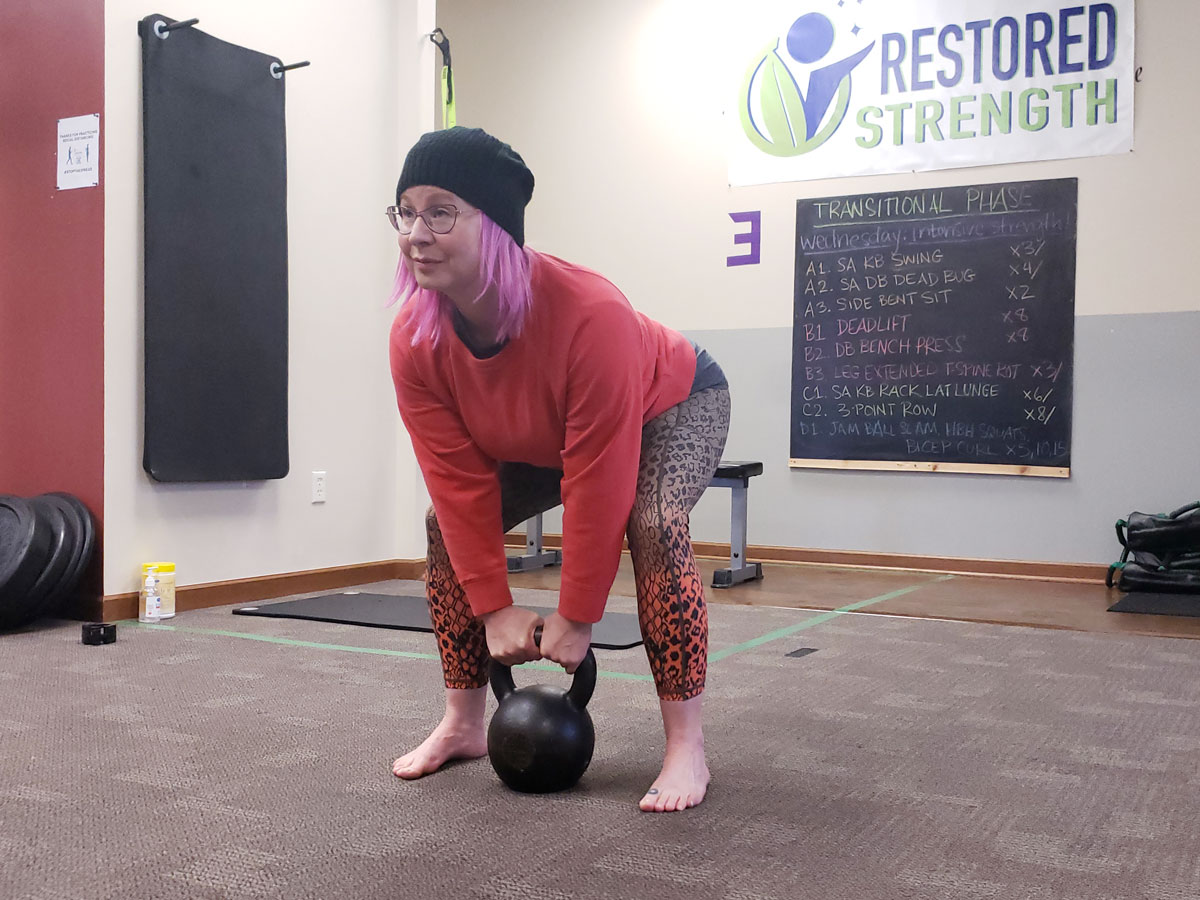
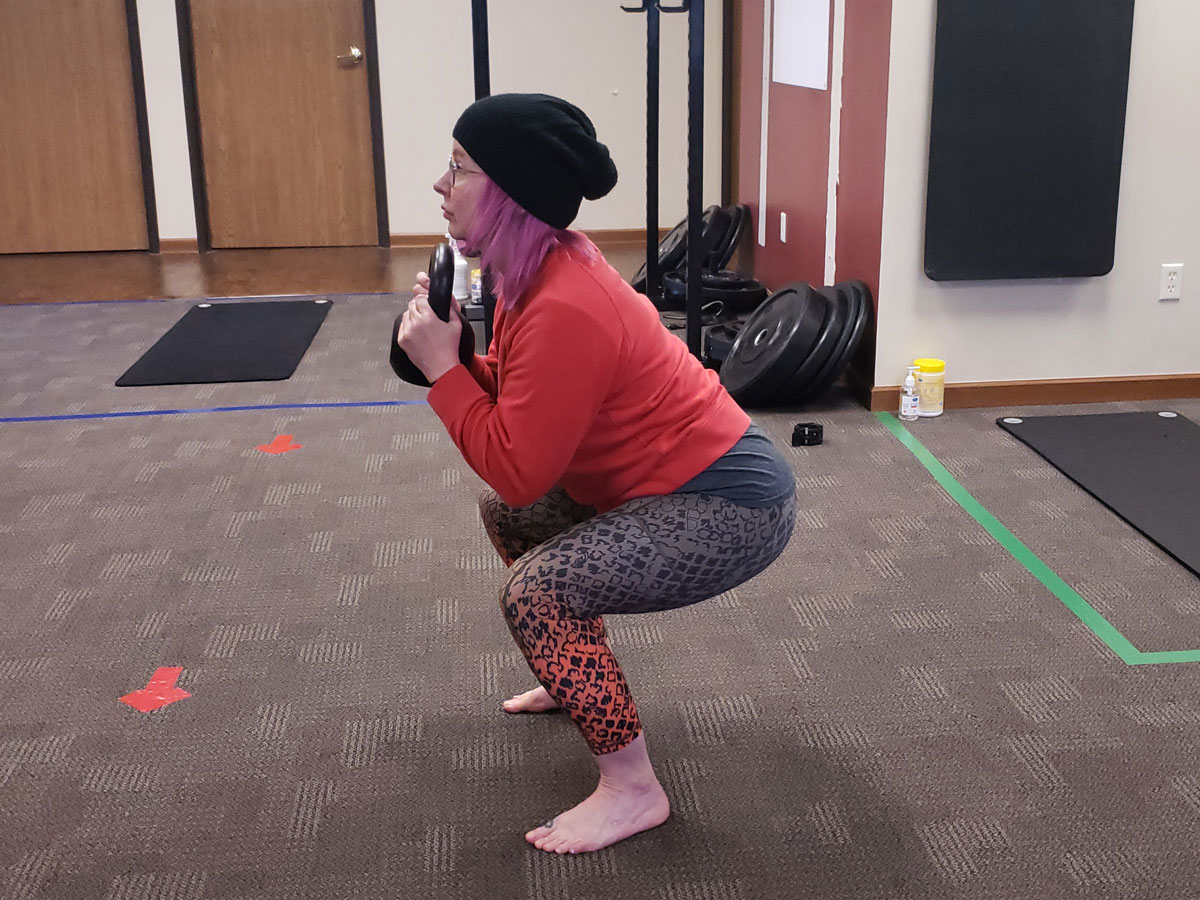
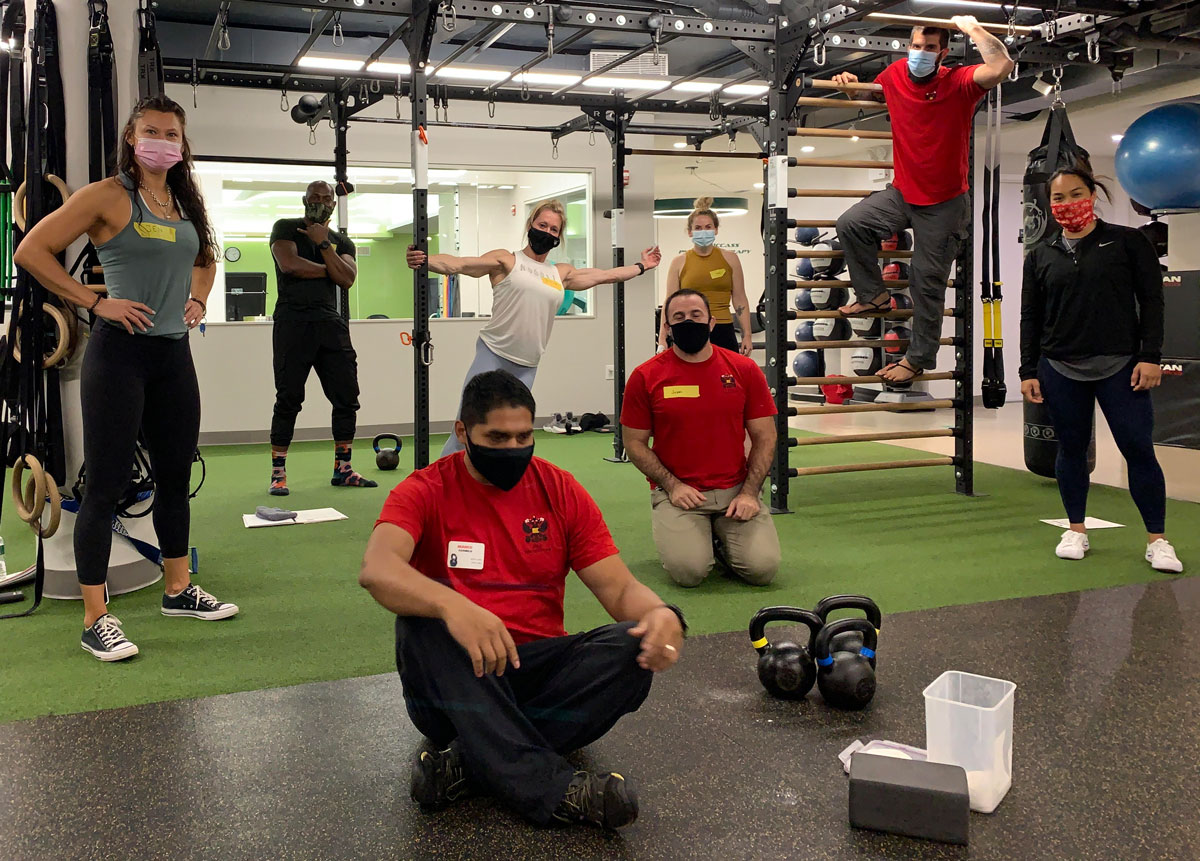
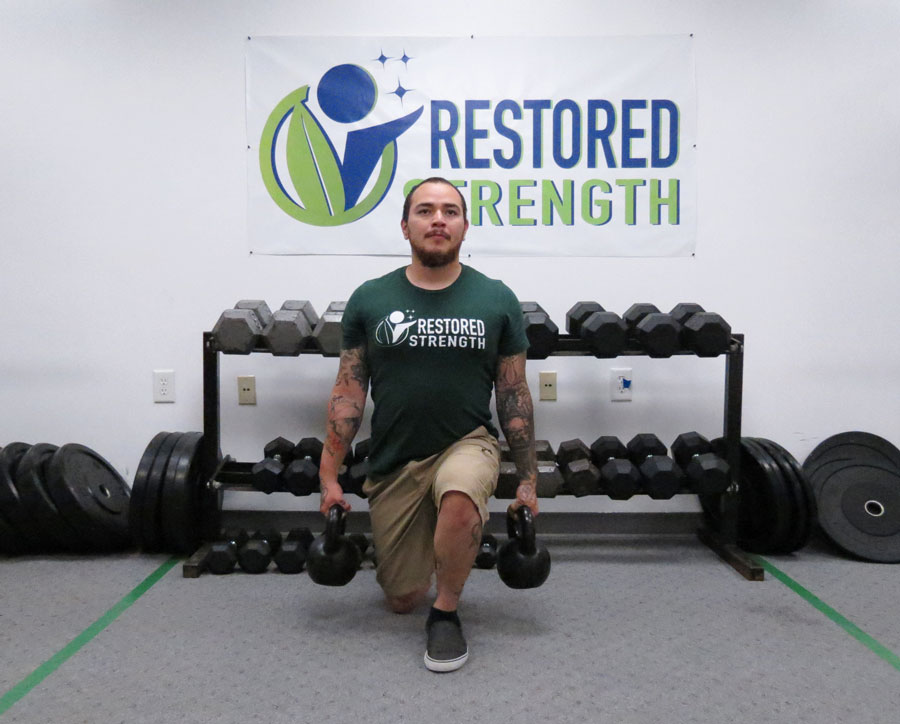
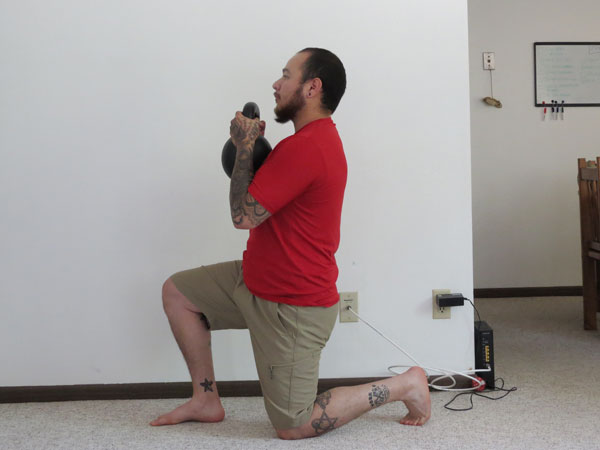
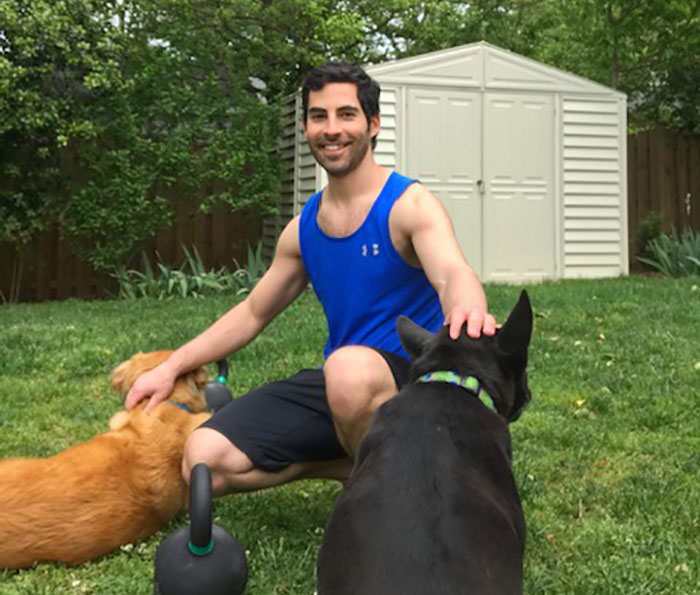
At my gym Restored Strength, it is common to see our members training barefoot during their kettlebell sessions. In today’s society it rare to see people spend time barefoot in their own home or at work. The feet are typically neglected when it comes to training, because most people don’t think that feet need to be trained. But there are a lot of benefits to training barefoot.

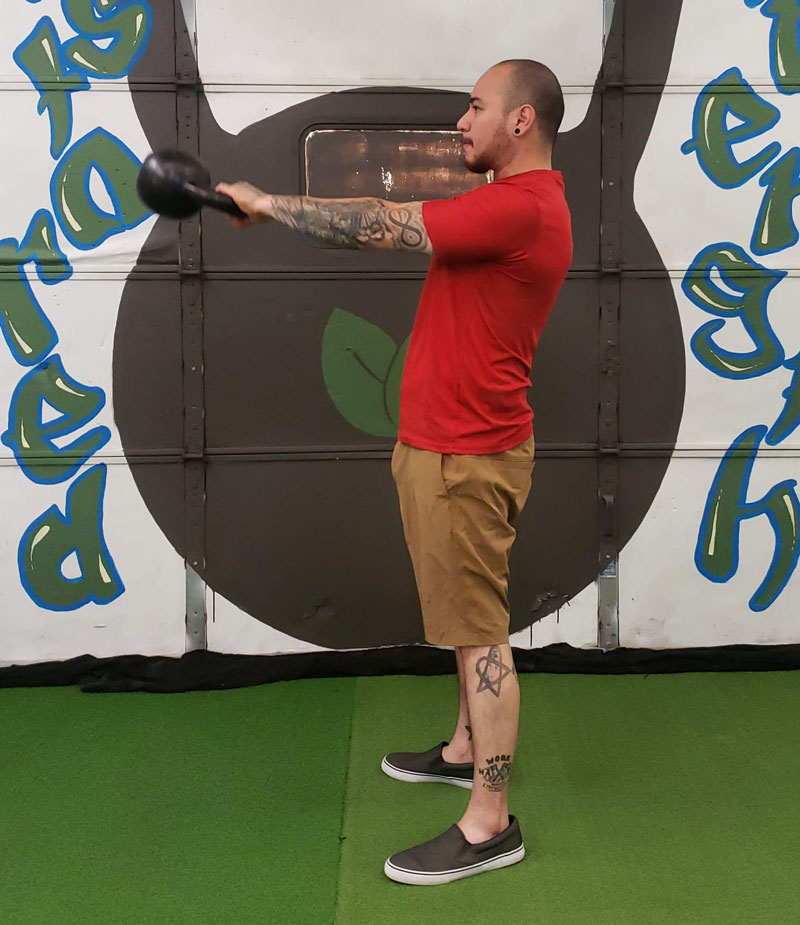
Wearing shoes can impact the way we train in many ways. Most shoes come with an elevated heel which naturally puts the feet in a more plantarflexed position. The reason that this becomes an issue when training with kettlebells is that you will have a faulty foundation. You will not be centered on your feet in order to truly push down into the floor to get your entire posterior chain to fire. Another issue with shoes is that they limit the range of motion (ROM) in the ankle.

Training Barefoot With Kettlebells - Goblet Squats

Here are my top three reasons that you should train barefoot:

Better Sense of Body Awareness

Proprioception is our awareness of our body in space and movement. We have many proprioceptors all throughout the body, with a big portion of them located in our feet. When we spend all day wearing shoes, we begin to neglect the proprioceptors in our feet. This is because they are not being stimulated by the ground, they are receiving feedback from the insides of our shoes. Exposing your feet to a hard surface will greatly increase the proprioception in your feet because they are not being protected by a large rubber sole.

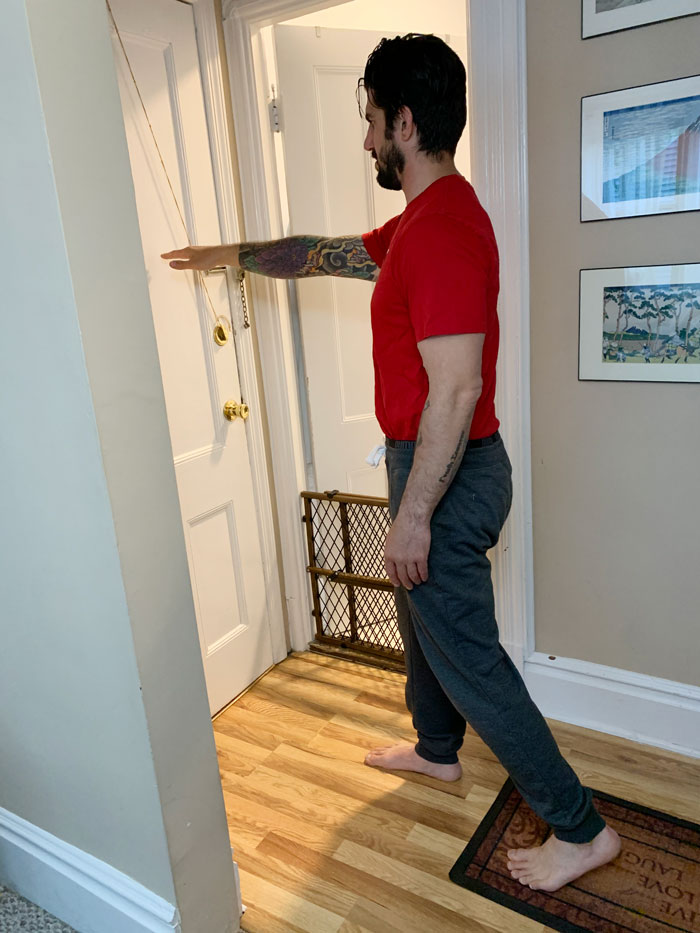
Greater Ankle Mobility

During my undergrad studies, I did a research project on the benefits of training barefoot. We found that the test subjects who trained without shoes had a greater ROM in their ankles compared to those who trained with shoes. Having tight restricting shoes can inhibit the ankles’ ability to freely move.

Training Barefoot With Kettlebells: Swings

Increased Foot Strength

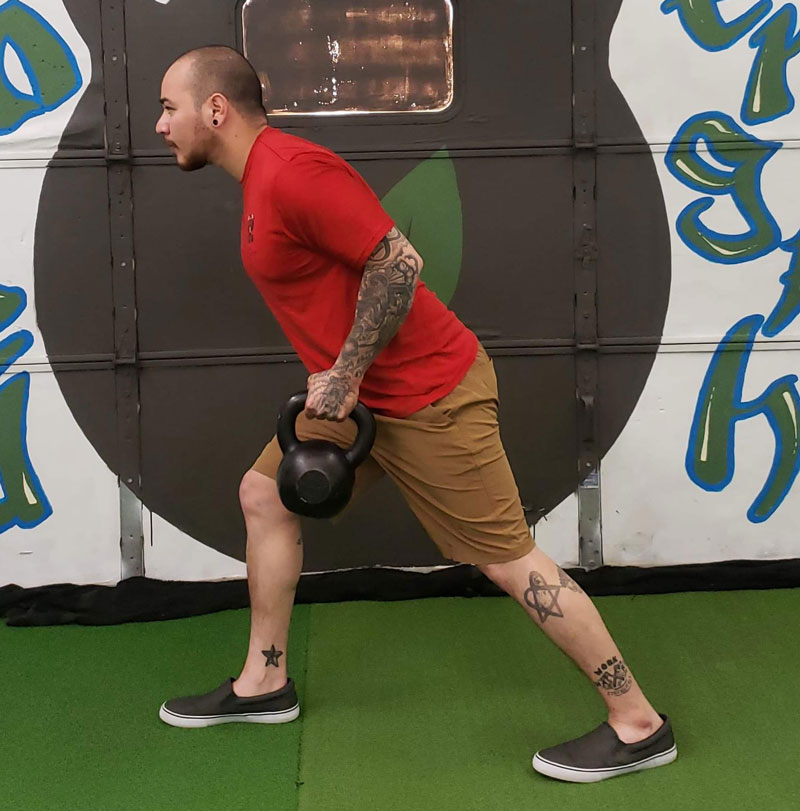
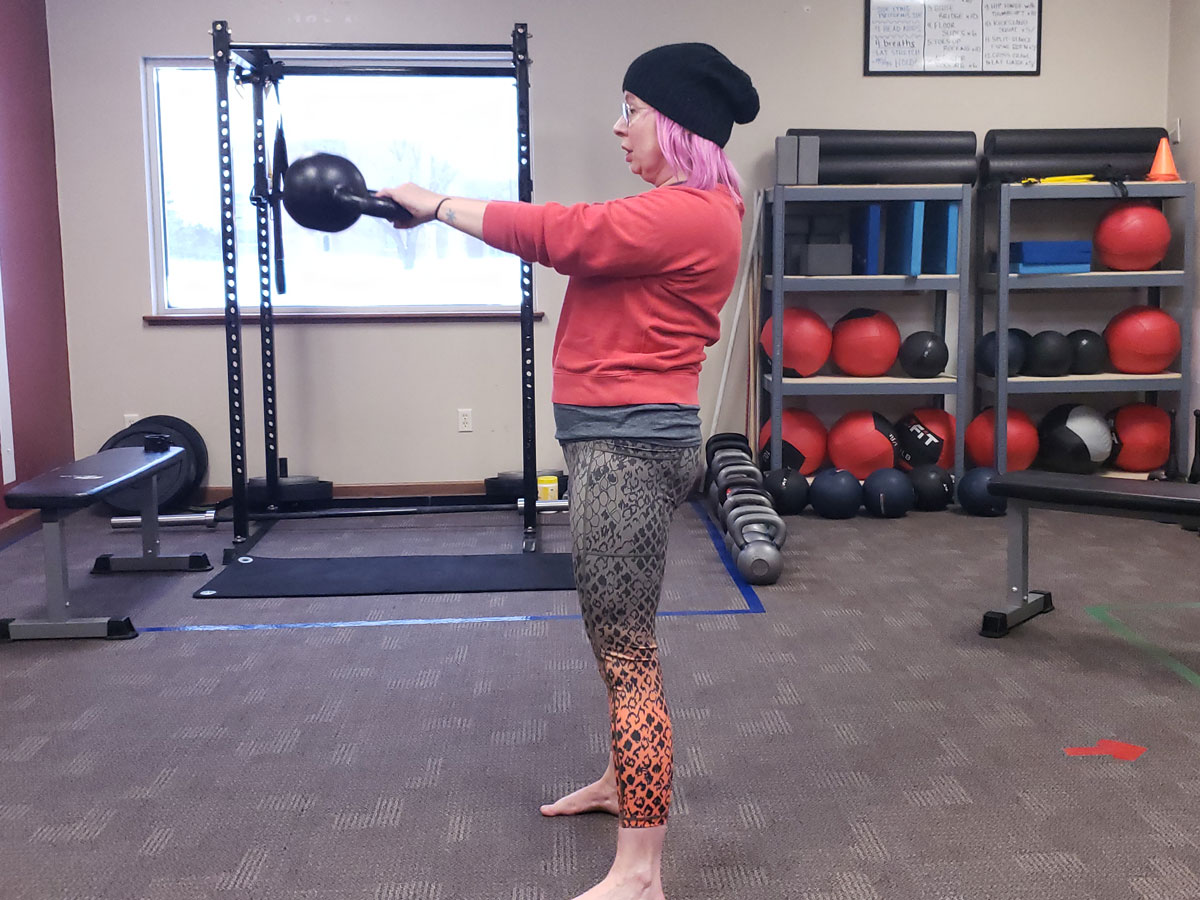
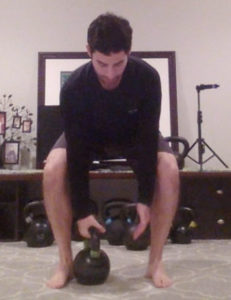
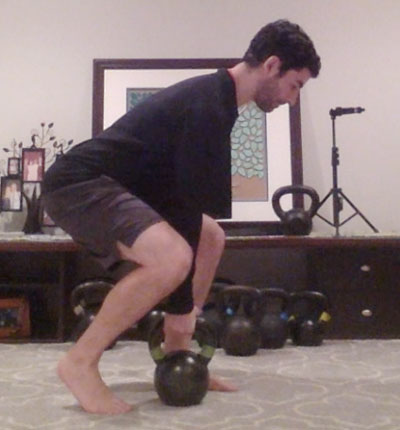
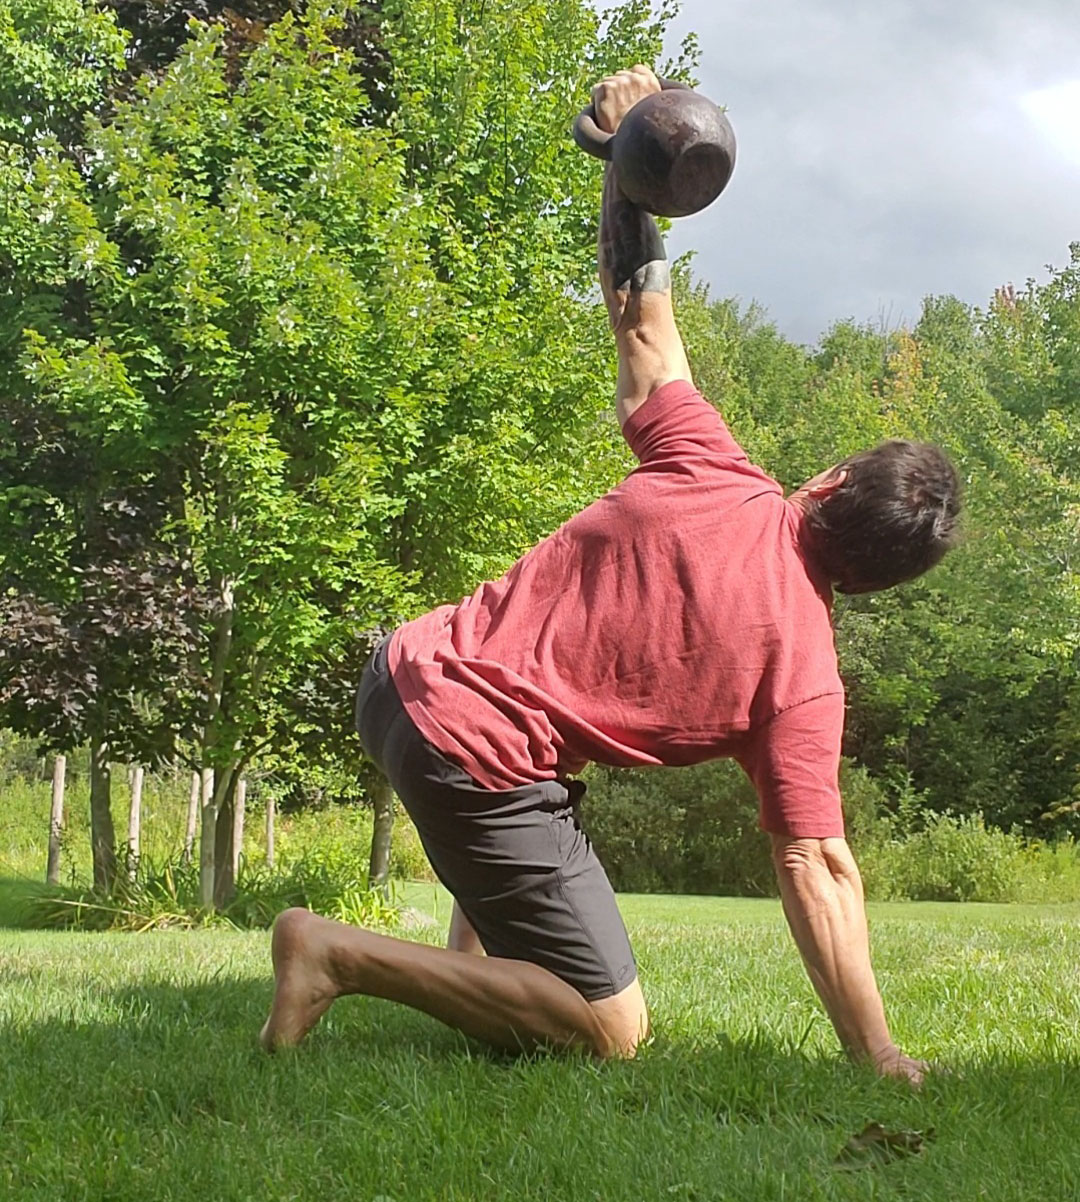
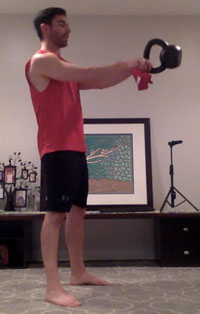
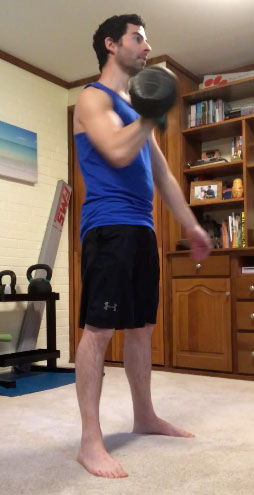
When training barefoot, you will focus more on how to firmly plant your heels in the ground as you swing a kettlebell. The foot has 29 muscles. Nineteen of them are intrinsic muscles—smaller, finer muscles. Being able to strengthen the intrinsic muscles will help you develop greater ankle stability and mobility.

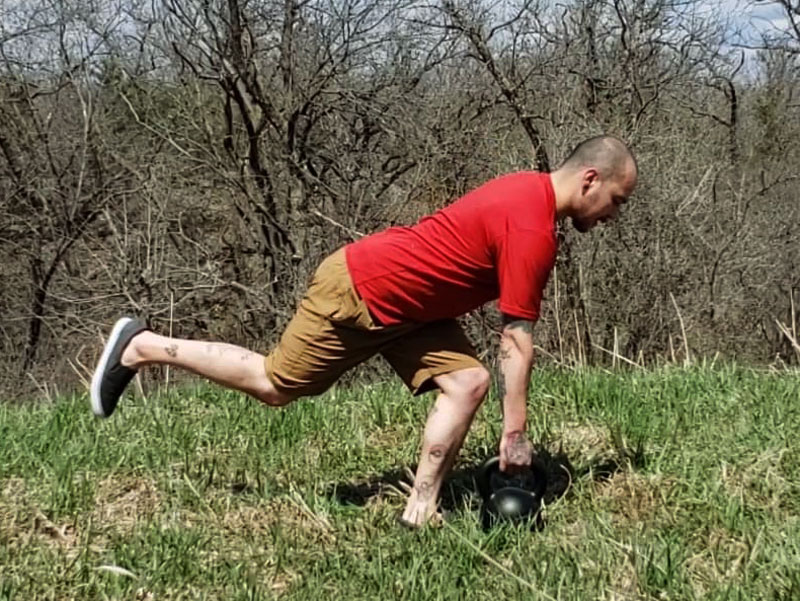
To safely train barefoot, you should ALWAYS be aware of your surroundings. Don’t let your grip or technique get sloppy because that is a first-class ticket to injury. Gradually introduce barefoot training to your kettlebell practice in order to get the most out of it.

***

William Sturgeon, RKC Team Leader, RKC II trains clients at his gym, Restored Strength. Contact him through his website at RestoredStrength.com or follow him on Facebook: facebook.com/restoredstrength

Filed Under: Kettlebell Training, Mobility and Flexibility Tagged With: ankle mobility, barefoot training, foot strength, kettlebell training, training barefoot, training barefoot with kettlebells, William Sturgeon

Deadlift Variations with One Kettlebell

November 18, 2020 By Ryan Jankowitz Leave a Comment

Ryan Jankowitz Single Leg Deadlift

Even though I’m writing this blog post during a global pandemic, I’m not trying to scare you into working out with kettlebells. However, kettlebell training will make you stronger and more resilient. My goal with this post is to give you a few new ideas for your kettlebell workouts because kettlebells and other fitness equipment have been hard to find recently. You may have just one kettlebell or several kettlebells and no matching pairs—but you can still do kettlebell deadlifts.

TRyan Jankowitz Kettlebell Deadlift
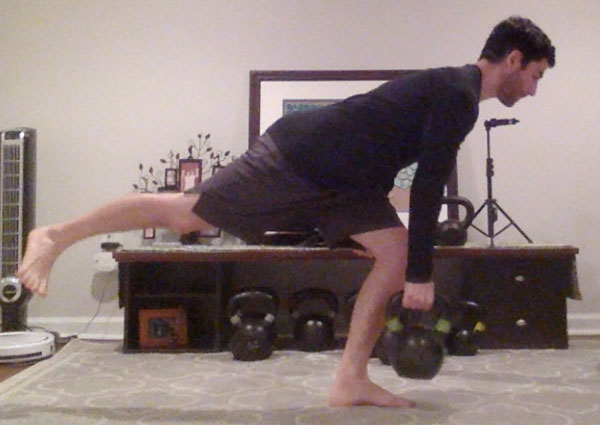
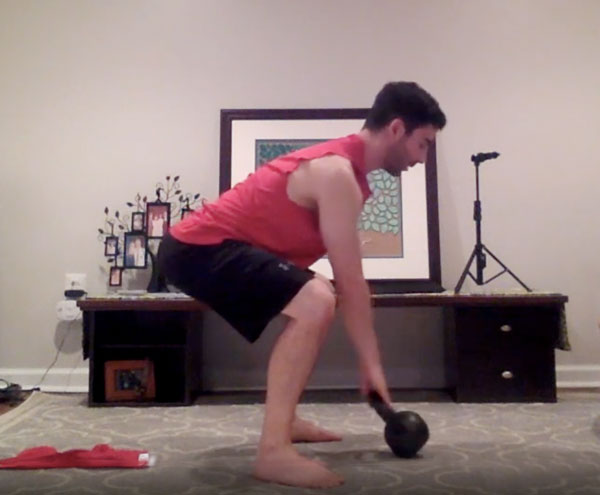
he deadlift is arguably the king of strength building exercises. Not only is it great for getting stronger, but it can improve your posture and strengthen your hips. When performed correctly, the deadlift can alleviate back pain.

Additionally, mastering the kettlebell deadlift will allow you to transition to the Hardstyle kettlebell swing. From there, a whole world of kettlebell exercises await.

First, you must master the standard kettlebell deadlift and understand the hip hinge.

The hip hinge means that you move from your hips, the strongest set of muscles in your body, while keeping your spine straight or neutral. Once you’ve mastered the standard kettlebell deadlift, you can begin training with a number of exciting variations. Here are a few to get you started:

Let’s Get Asymmetrical!

Ryan Jankowitz Suitcase Deadlift

Now we can unevenly load the body—for greater core engagement—by learning two different one-arm kettlebell deadlift techniques.

1. The kettlebell suitcase deadlift places the kettlebell outside one of your feet. This deadlift variation is great for grip strength because you’re only using one hand to grip the kettlebell handle. Make sure that you don’t lean or rotate toward the kettlebell as you move in and out of your hip hinge. Stay square all the way through the movement.

Ryan Jankowitz One Arm Deadlift

2. The kettlebell one-arm deadlift is fairly self-explanatory. The kettlebell will be between your feet but toward the hand that will be grabbing it.  Stay square all the way through the movement and don’t lean or rotate toward the kettlebell.  Again, grabbing the kettlebell with one hand will improve your grip strength and the offset load will really engage your core.

3. The kettlebell staggered stance deadlift is a unique variation because you use one hand—and also load one leg more than the other. You can practice this move with your opposite arm and leg, or by holding the kettlebell with the arm on the same side as the loaded leg.

Ryan Jankowitz Staggered Stance Deadlift
Staggered Stance Deadlift

4. The last variation I want to share is the kettlebell single leg deadlift. This deadlift is performed while balancing on one leg. The kettlebell single leg deadlift improves balance and is great for your feet and ankles.  This move is challenging, so take your time when performing it and move slowly with purpose.  You can hold the kettlebell in the opposing hand, or on the same side as the working (standing) leg.

Watch this video for demonstrations of each kettlebell deadlift variation mentioned in this post.

Stay Strong and Safe!

***

Ryan Jankowitz, RKC II lives in Maryland with his wife and two dogs. They love to go hiking and spend time on the beach.  When he’s not telling his dogs to stop chasing squirrels, Ryan enjoys spreading the RKC message and teaching others how to train with kettlebells.  He’s got a 90-day kettlebell transformation program that helps busy adults lose 10-15lbs., shed their spare tire and build lean muscle so that they look great naked and move like they did in their 20’s.  Click here to schedule a free call with Ryan.

Filed Under: Kettlebell Training, Tutorial Tagged With: balance training, core stability, deadlift variations, kettlebell deadlift, kettlebell deadlift variations, one arm deadlift, One leg deadlift, Ryan Jankowitz, staggered stance

Workshops in the time of the pandemic: What to expect at the RKC right now

October 18, 2020 By Jason Kapnick Leave a Comment

RKC NYC Masks Socially Distanced Group Photo

This year has been…a bit strange for the fitness industry. In the nearly seven months since we closed our gyms to “flatten the curve,” both society and the fitness industry has been turned upside down. Many of us have closed our businesses, had the heartbreaking experience of laying off staff, and seen years of hard work disappear overnight.

Of course, these hardships pale in comparison to those who have lost loved ones and fallen ill to the virus. Indeed, the devastation of covid has affected us in so many ways.

But today, I am here to offer you hope. Hope that we can return to our livelihoods, and hope that we as fitness professionals can go back to doing what we have devoted our lives to: helping our communities to be healthier, fitter, and live better lives. Our role as fit pros is more important than ever—this crisis is ultimately a crisis of health, and our constituency needs us now more than ever. It is time to get off the sidelines and show up as leaders for our people.

Why am I so hopeful? Well, we just wrapped up an amazing RKC this weekend. It was the first RKC I have taught since the onslaught of covid, and I was very unsure of what to expect. Would I be able to lecture and demonstrate kettlebell technique while wearing a mask? Would the candidates balk at the additional safety precautions? Would they even show up? How do we conduct a snatch test in masks?

These concerns were quickly put to rest within the first few hours of the course. We were appropriately cautious, we came together as a team to keep each other safe, and ultimately, we had one of the best RKC courses that I have ever been a part of. I want to thank each candidate that attended, as well as the assistant instructors and team leaders. Marco Guanilo of Momentum Fitness deserves a particularly hearty thank you—his facility was immaculately clean, and he made it so easy for us to stay safe; thank you Marco.

Here are the major lessons I learned throughout the weekend:

  • Regardless of your political beliefs, Covid is a real illness, and we all want to stay healthy: Covid has obviously become a major political hot button, and there is widespread disagreement on how society should respond to the virus. With so much conflicting information, it is hard to know “whose truth is the real truth.” However, we can all agree that Covid is a real illness, and nobody wants to get it. The candidates, even those who told me they could not care less about covid, were all diligent about taking precautions.
  • Safety is part of the RKC’s DNA, so it was easy to get everyone on board with necessary precautions. From the very beginning, we at the RKC have preached about the importance of safety when training. “Safety and performance are two sides of the same coin” is one of our core beliefs when it comes to fitness philosophy (meaning, that using good technique enhances both injury prevention as well as performance; we need not sacrifice our health in pursuit of our fitness), and since the RKC is an instructor certification, we’re frequently talking about safety in terms of appropriate exercise selection, awareness of surroundings, etc.So it was an easy extension of our philosophy to ask the candidates to take precautions to keep each other safe. This was not based on fear or forced compliance, but out of respect for each other as professionals. I do not know who is immuno-compromised, who cares for his or her elderly mother, or volunteers at the senior center, and I do not care. If I can take basic precautions to help you feel safer and more comfortable, I will.
Masks on, keeping each other safe
  • Masks are slightly annoying at first, but after the first hour, you won’t even notice (even on your snatch test!!). It really is that simple. Yes, it is more comfortable to be without a mask, but the inconvenience of wearing a mask did not impact our course in any way. The candidates went through workouts, drills, and even the snatch test with their masks on, and I did not hear a single complaint. After some of the more strenuous parts of the course, candidates were welcome to go outside to take a “fresh air break.” At no point during the weekend did I see anyone without a mask on.
  • We modified a few drills slightly, but the level of instruction did not suffer whatsoever. If anything, these are the modifications you will use with your own clients. There are a small handful of drills in the RKC that involve close physical contact. In some cases, we explained the drill but did not perform it. In other cases, we made modifications, using PVC dowels or a wall to substitute for the instructor’s body. For a few drills that involved hand-on-hand contact, we wore latex gloves.
  • Community, and the support of each other, is more important than ever. One of the most valuable parts of the RKC experience is being around other like-minded fitness professionals and kettlebell enthusiasts. Their passion, excitement, and bond of common experience is consistently a source for inspiration. If you attend an RKC, expect to leave the course energized and excited to apply what you have learned. As hard as things are right now, we can still find ways to thrive, and being around others with similar goals is a great step forward.
RKC Team Leader Joe Boffi teaches the finer points of the Get-Up

Candidates appreciated our diligence and had a great experience. We got some great feedback on how we handled covid at the course. Here are the candidates in their own words:

“Absolutely loved the experience” – Jen S. from Philadelphia, PA

“I truly learned a lot. I feel like I am walking away with a plan to better myself… I would also like to mention how fantastic the team handled all the covid constraints” – Biance W. from Pittsfield, MA

“Amazing facility! It was clean and safe (following all covid guidance).” Julia from Guilford, CT

If you are on the fence about attending the RKC due to covid, I encourage you to come to one of our upcoming RKC workshops. You can expect the unparalleled quality of instruction the RKC has always been known for, in an environment that values all our health and safety. We are being smart, taking precautions, and doing our absolute best in an imperfect world. I hope to work with you soon.

****

Jason Kapnick is the co-founder of Catalyst SPORT, one of New York City’s top kettlebell training facilities (Now offering Online classes and training). He has made multiple Elite powerlifting totals, with best lifts of 545/355/660 in the 198lb weight class, and achieved the Beast Tamer Challenge at his RKC in April 2013. He can be contacted through catalystsportnyc.com .

Filed Under: Coaching, Kettlebell Training, Workshop Experiences Tagged With: Covid RKC, fitness industry, kettlebell safety, NYC RKC, Pandemic RKC, pandemic safety, pandemic training, RKC, RKC Experience, socially distancing at workshops, what to expect at the RKC

The Hardstyle Kettlebell Basics for Hiking

September 14, 2020 By Shawn Burnah Leave a Comment

Shawn Burnah, RKC The HKC Kettlebell Exercises For Hiking

In 2005, I was deployed to Afghanistan as an Infantryman in the Hindu Kush mountains and found some odd shaped weights stamped with “DragonDoor.com”. I did a search and found the book, The Russian Kettlebell Challenge. After reading the advertisement for the program and how it would build strength and endurance for soldiers and fighters I was sold.

After following the manual and video religiously, I was done with the “globo gym” and long runs, as my abilities surpassed my peers’ on the mountainous patrols. I practiced kettlebells and select calisthenics for years and was always more than capable to meet the challenges of rucking and jiu-jitsu. In 2017 I retired and now spend the majority of my free time in the mountains hiking and snowshoeing.

The RKC Plank:

The plank strengthens the body so it can remain upright while hiking under load. Maintaining a strong posture with a pack allows you to enjoy the views—instead of falling into a “pack mule” mode, where your head drops, and you plod along with one foot in front of the other. An upright posture also allows you to keep your lungs open and your focus on footing and route selection.

Shawn Burnah Hiking Climbing Obstacles

The Kettlebell Swing:

The Hardstyle kettlebell swing builds lungs, legs, and back strength as well as a strong core—all which are especially important for hiking. Contrary to popular belief, hiking requires more hamstring than quadricep involvement. Having attended courses which focused on performing a lot of air squats while wearing body armor, many of my classmates were still not prepared for the challenges of the mountains in our training. Fortunately, I had also added a liberal dose of swings in my off time. I practiced Bud Jeffries’ protocol outlined in I Will Be Iron and thrived on the trail while others collapsed in exhaustion.

Like the RKC plank, the kettlebell swing—particularly the one-armed swing (OAS)—builds the strength to keep the torso upright while walking with a heavy pack. The OAS also builds the strength to maintain stability as your weight continuously shifts back and forth from foot to foot. The momentary lock out at the top of the swing is also extremely important. It’s training for the “lock step” hikers use when going uphill that allows the bones to support the load for a brief rest, extending a hiker’s endurance. When training for hiking, consider swinging an RKC Snatch Test sized kettlebell for your weight class for many reps with good form. I was training with several hundred swings! Try to reach your rep goal without setting the kettlebell down.

The Goblet Squat:

Shawn Burnah Kettlebell Goblet Squat
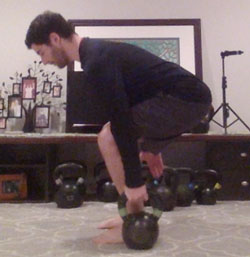
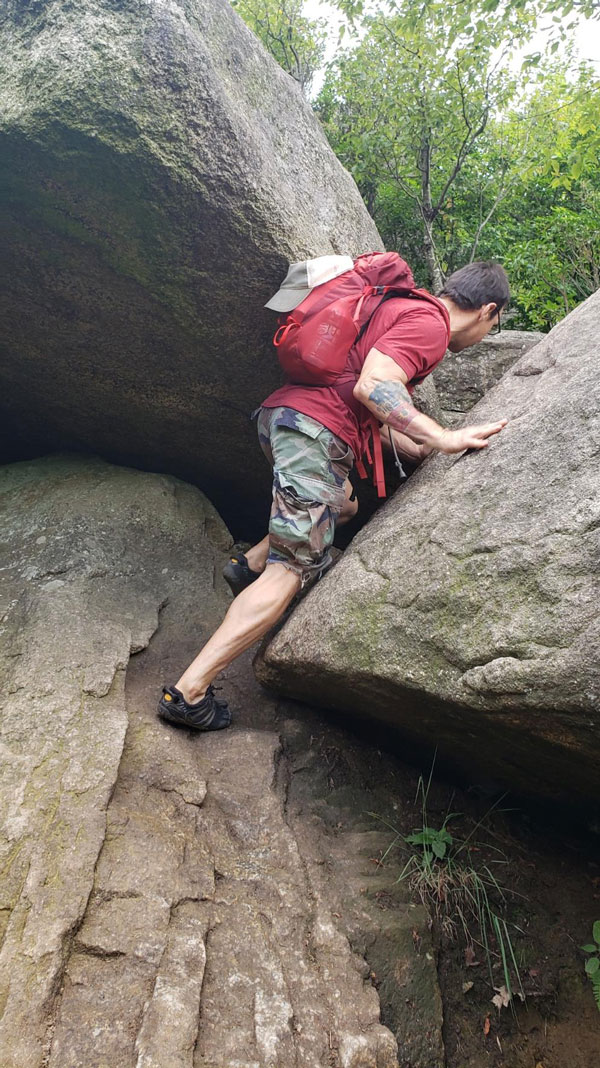
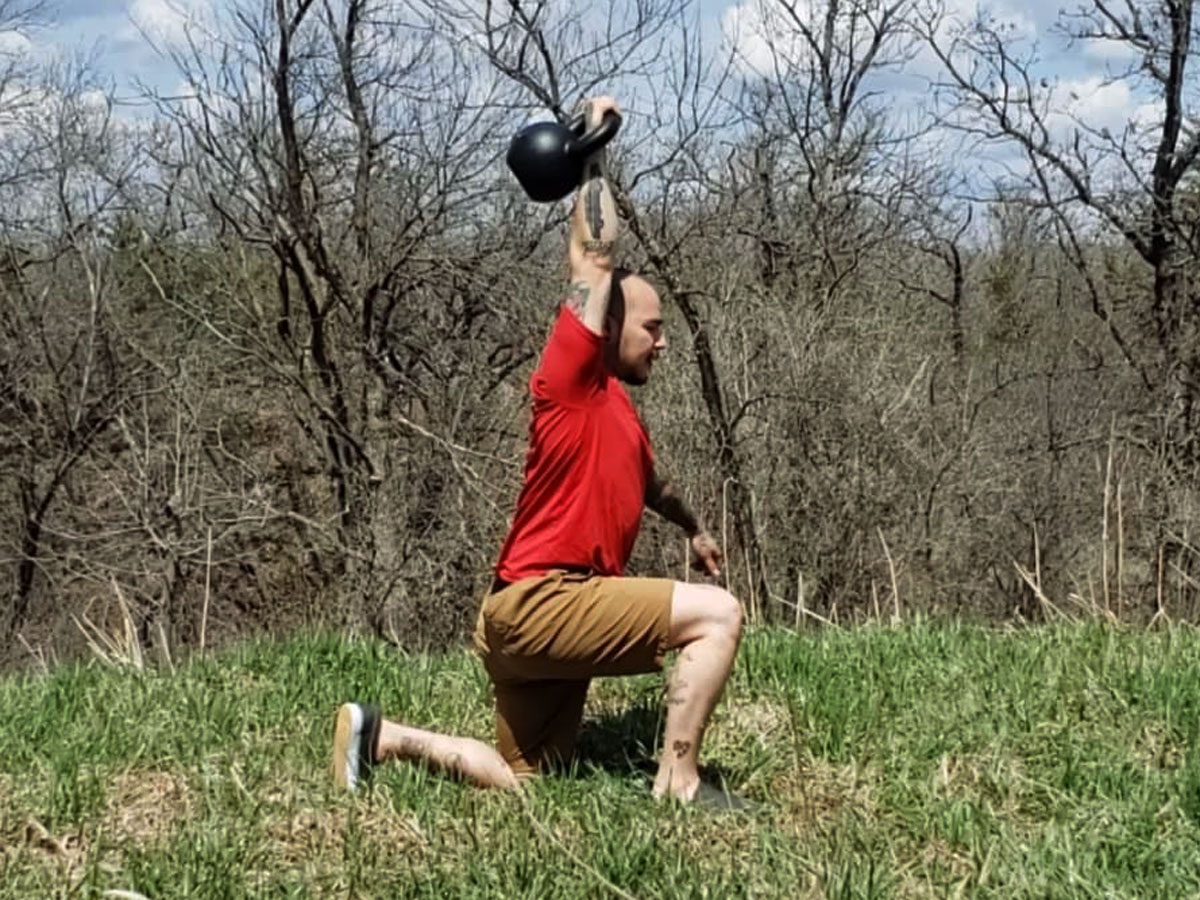
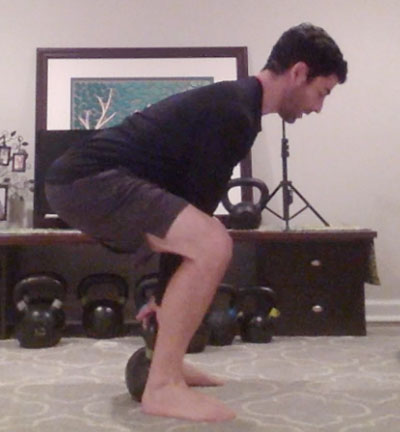
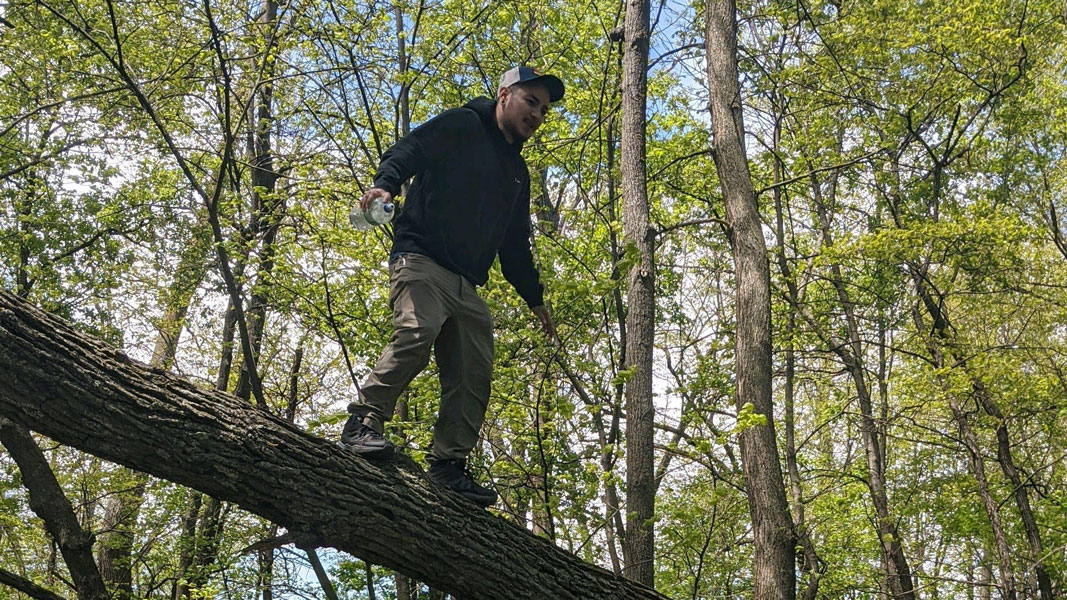
When we step up vertically while hiking, the quadriceps enter the scene. The quads act as shock absorbers, aid in speed control, and injury-proof your knees during all aspects of hiking, but especially when descending a mountain. The quadriceps are also prime movers for hopping around difficult terrain and help maintain stability when doing so. Practicing goblet squats is also similar to standing up with a heavy pack. Squats benefit hikers, but in a different way than most believe.

The author's son navigating obstacles on the trail
The author’s son navigating obstacles on the trail

The Get-Up:

The get-up mechanics are useful for hikers who are trying to rise from the ground with their pack on. When under a heavy pack like the military uses (60 – 100+ pounds), the ability to stand up smoothly prevents you from flailing like a beetle! By pressing and externally rotating the free arm downward and getting your leg underneath you, you allow yourself to rise evenly and under control. The get-up also increases strength and mobility of the spine and hips allowing you to step up, twist over, and move around obstacles.

The Hardstyle Push-up:

Triceps strength plays a role in scrambling uphill and lowering yourself down from a platform—instead of just dropping down and risking a lower body injury. Practicing Hardstyle push-ups also build the strength you will need to push up and over an obstacle.

The RKC Kettlebell Row:

Strong lats and rear delts assist in maintaining a good posture while wearing a pack. Rows build the strength required to climb up a sharp incline, or to pull a rope, tree, rock etc. The row also teaches you how to brace and pull to assist a fellow hiker up and over difficult obstacles like ledges.

While the exercises taught at the HKC (and through the online HardstyleFit program) may not cover every aspect of hiking, they are a solid foundation for you to start thriving in the mountains.

***

Shawn Burnah, RKC. Contact him through his Dragon Door Instructor page: Shawn Burnah, and Follow him on Instagram @shawn.burnah

Filed Under: Kettlebell Training, Mobility and Flexibility Tagged With: HardstyleFit, hikers, hiking, hkc, HKC exercises, kettlebell exercises for hiking, kettlebell swing, kettlebell training, kettlebells for hiking, RKC plank

How To Fix 4 Common Kettlebell Swing Mistakes

September 4, 2020 By Ryan Jankowitz 1 Comment

How To Fix 4 Common Kettlebell Mistakes

The kettlebell swing is a phenomenal exercise. I think it should be part of every training program. It addresses explosive power, the posterior chain, anaerobic conditioning and even grip strength. The kettlebell swing has many awesome qualities!

It’s also the foundation for more advanced kettlebell movements like one-arm swings, cleans and snatches. Before progressing to those more advanced movements, make sure that your two-hand swing is dialed in and that you can maintain proper technique with heavy kettlebells and high reps.

Let’s dial in our kettlebell swing technique by avoiding these four common mistakes.

Common Kettlebell Swing Mistake #1:
Poor Setup

There are several key concepts to remember for the kettlebell swing setup.

How far away are you from the kettlebell? If you’re too far from the bell, then you might shift too much weight forward and shrug your shoulders up to your ears while reaching for the bell.

Ideally, you want to sit back with your shoulders pulled down and the kettlebell tilted toward you.

Also, make sure that your hips are below your shoulders. If your hips are too high, then you may not be able to generate a lot of power with your first rep. And the swing is all about power.

Common Kettlebell Swing Mistake #2:
Arms Disconnected from the Body with Wrong Hip Hinge Timing

This mistake can cause discomfort or even injury to your lower back, so let’s dial this one in!

Each time the kettlebell is swung between your legs, even from the initial hike, your arms should connect to your torso. Upper arms connect to your ribcage and forearms connect to your inner thighs.

This will allow the hips to propel the kettlebell forward creating much more power.

Once you’ve reached the top of the swing, you want to stay standing tall for as long as possible while the kettlebell comes back down. Essentially, you’re playing chicken with the kettlebell.

Pushing your hips back too soon—while the kettlebell is still out in front of you—can cause unnecessary stress on the lower back.

The hips push the arms forward, the arms push the hips back.

Towel swing drill

Common Kettlebell Swing Mistake #3:
Using Your Arms and Shoulders to Raise the Kettlebell

The kettlebell swing is an explosive hip hinge, not a shoulder raise or shrug.

If the kettlebell is drooping at the top of the swing, or your shoulders and neck are feeling it, then you’re using your upper body way too much.

The arms are simply a tether holding onto the kettlebell. They shouldn’t do the heavy lifting. If you’re having issues with this, then check out the towel swing drill in the video below.

Common Kettlebell Swing Mistake #4:
Not Fully Locking Out Your hips or Knees at the Top of the Swing

In order to fully express your power, you must have full extension from the hips and knees. This doesn’t mean hyper-extending your knees, rather straightening your knees by flexing your quads.

You also don’t want to leave your hips back. You MUST contract your glutes hard at the top of the swing for maximum power and to protect your lower back.

Watch this video to see each mistake and correction.

I hope these tips help you master your kettlebell swing. When you get the swing dialed in, it’s one of the best exercises you can do for your fitness.

Keep Swingin’!
Ryan Jankowitz, RKC II

***

Ryan lives in Maryland with his wife and two dogs.  They love to go hiking and spend time on the beach.  When he’s not telling his dogs to stop chasing squirrels, Ryan enjoys spreading the RKC message and teaching others how to train with kettlebells.  He’s got a 90-day coaching program that helps busy adults get into shape, look and feel better by working out with kettlebells and eating healthier so they can elevate their self-esteem. Visit his website rjkettlebell.com or schedule a free call with Ryan: https://go.oncehub.com/RyanJankowitz

Filed Under: Kettlebell Training, Tutorial Tagged With: coaching kettlebell swing, common mistakes, fix kettlebell swing mistakes, fix the kettlebell swing, kettlebell swing, kettlebell swing technique, kettlebell technique, Ryan Jankowitz, troubleshooting kettlebell swing

Four Kettlebell Workouts to Maximize Fat Loss

August 21, 2020 By William Sturgeon Leave a Comment

William Sturgeon Kettlebell Fat Loss Workouts

As coaches, instructors or personal trainers, our clients often come to us for help with a fat loss goal. And while there are many ways that we can help our clients achieve their goals, the most important factor to consider for fat loss is nutrition.

There are no specific workouts that can help someone “out train” a bad diet. If someone is still consuming more calories than they are burning, then they will not receive the maximal training effect from a fat loss workout. But, once a client can change the way they eat, then they can really gain the most out of these workouts.

Once nutrition has been handled, strength training is the best way to help your clients lose weight and gain strength. Training in every plane of movement is important for sustaining optimal joint and muscle health. After the strength portion of the session, finish up with a conditioning workout such as the ones listed below. This approach will cater to your client’s specific weight-loss goal.

Here are four example workouts you can add at the end of your clients’ sessions to help with fat loss!

EMOM (Every Minute on the Minute)

Popularized in CrossFit training, EMOM stands for “Every Minute On the Minute”. This type of workout can even be done with one tool and one exercise. You can either work for a predetermined number of reps or for a time interval. If you choose a time interval, be sure to keep the work to rest ratio at 1:1 (30 sec on, 30 sec off) or 2:1 (40 seconds on, 20 seconds off).

Example:

10-15 minutes

  • Kettlebell Swings :20 seconds
  • Rest :40 seconds

Density Training

In fitness, density is the amount of work you do within a given time. With this training format, we are not as focused on the amount of weight lifted, or the speed we’re working. The focus is on completing the most amount of work during a set amount of time. This focus will help sustain a decent heart rate throughout the workout.

Example:

30 minutes

  • Kettlebell Snatch x5
  • Get-Up x1
  • Kettlebell Front Squat x6
  • Kettlebell Bent Over Row x8
  • Kettlebell See-saw Press x6
  • Thoracic Rotation x4

AMRAP (As Many Rounds as Possible)

Another workout popularized by CrossFit is AMRAP, which stands for “As Many Rounds as Possible”. An AMRAP workout can use any given number of exercises, but typically 2-5 exercises for a set amount of time. The goal is to move as quickly as possible while racing against the clock. Each week try to complete the same number of rounds or more as compared to the previous week. During the workout, the goal is to minimize rest and maximize the work.

Example:

10-15 minutes

  • Double Kettlebell Clean x5
  • Farmers Carry :30 seconds
  • Double Kettlebell Reverse Lunge x5

Circuits

Traditional circuit training is similar to HIIT, High Intensity Interval Training. A circuit can work a few different ways: station to station or exercise to exercise. The goal can be for reps or for time with each exercise. Often, exercises are grouped so that 2-4 exercises are completed per station, before switching to the next one.

Example:

10 min

  • Single Arm Swing x5
  • Single Arm Thruster x6

10 min

  • Goblet Squat x:20 sec
  • Single Arm Row x:15 sec

10 min

  • Two Hand Kettlebell Dead Bug x:20 sec
  • Single Arm Overhead Carry x:15 sec

When it comes to helping our clients achieve their weight-loss goals, we have to remember that it’s most important to address nutrition first. Then, we can choose from a variety of training approaches to reach their goals.

***

William Sturgeon, RKC Team Leader, RKC II trains clients at his gym, Restored Strength. Contact him through his website at RestoredStrength.com or follow him on Facebook: facebook.com/restoredstrength

Filed Under: Coaching, Kettlebell Training, Workout of the Week Tagged With: fat loss, fitness, general fitness, kettlebell workouts, William Sturgeon, workouts

Why Hikers Should Train With Kettlebells

July 20, 2020 By William Sturgeon Leave a Comment

William Sturgeon Kettlebells For Hiking

Hiking can be a very vigorous sport, and requires a great amount of strength and endurance. Trekking for hours on steep hills and uneven terrains is very demanding on the body. While out on the trail, you are faced with harsh climate conditions and potential risks for injuries. If you are wanting to improve your hiking and reduce fatigue and injury, you should consider training with kettlebells.

Kettlebell training can complement your hiking abilities in many ways. It is easy to just train for the sport itself, but sometimes that isn’t enough. Using kettlebells as a means of training will help enhance your time out on the trails.

Increase Strength with Kettlebells

One of the greatest benefits of kettlebell training is that it can increase your overall strength. Having greater strength makes it easier to carry more in your pack for longer periods of time.

Goblet front lunges are a great exercise to build stronger legs. Increasing your lower body strength makes hiking up hills much easier. When you’re stronger, your adventures are less taxing and more enjoyable!

William Sturgeon Goblet Lunge

Build Up Endurance

Hitting the trails for many hours can be pretty exhausting, so a great way to increase your work capacity is by increasing your endurance. Kettlebell swings are a staple exercise for building stronger lungs. Doing high intensity interval training is one of the best ways to improve your endurance. Working with kettlebell swings for longer intervals with minimal rest will focus on the glutes and hamstrings—and it’s very important to strengthen these muscle groups for hiking.

William Sturgeon Kettlebell Swing

Help Reduce Risk of Injury

Common hiking injuries involve the feet, ankles, knees, hips, and low back. In order to reduce the chances of injury, it is important to strengthen the muscles in these surrounding areas. Exercises such as single leg deadlifts and lateral lunges are great for creating better ankle and hip stability. Single leg exercises are important because hiking is a single leg sport.


Longer Treks and Bigger Adventures

After increasing your strength, endurance, balance—as well as improving other areas of weakness—you can go on longer hikes. You will have become more resilient and will be able to sustain longer more difficult hikes with greater ease.

I enjoy the simplicity and minimalism that hiking brings to my life. Using the kettlebell is the same for me and my training. It is a simple but very effective tool for progressing towards my fitness goals.

Start using kettlebells to improve your physical strength and endurance to get the most out of your hikes!

***

William Sturgeon, RKC Team Leader, RKC II trains clients at his gym, Restored Strength. Contact him through his website at RestoredStrength.com or follow him on Facebook: facebook.com/restoredstrength

Filed Under: Kettlebell Training Tagged With: endurance training, hiking, kettlebell exercises for hiking, kettlebell strength training, kettlebell training, William Sturgeon, work capacity

How To Work Out At Home With Your Kettlebell

July 13, 2020 By Ryan Jankowitz Leave a Comment

Ryan Jankowitz Outdoor Home Workout

We are living in uncertain times right now, and it’s more important than ever to focus on our health and fitness. For better or worse, working from home does have its advantages. I haven’t missed commuting. And working from home has allowed me to get higher quality workouts as I now have more time each day.

Even though I just have a few kettlebells, but I’m still crushing my workouts and feel as strong as ever.

So, I wanted to share my workout formula, so you can experience the joy of kettlebell training at home—even if you only have one kettlebell. I didn’t invent this formula, but it has worked time after time for me and my clients. We will be doing total body workouts to save time and to promote general athleticism.

The simplest way to design full body workouts is to choose a pulling and a pushing exercise.  This also creates balance and symmetry. We can get more creative by dividing the pushing and pulling into upper and lower body so that we’ll have upper body pulling, lower body pulling, upper body pushing and lower body pushing.

Ryan Jankowitz Kettlebell Home Workout
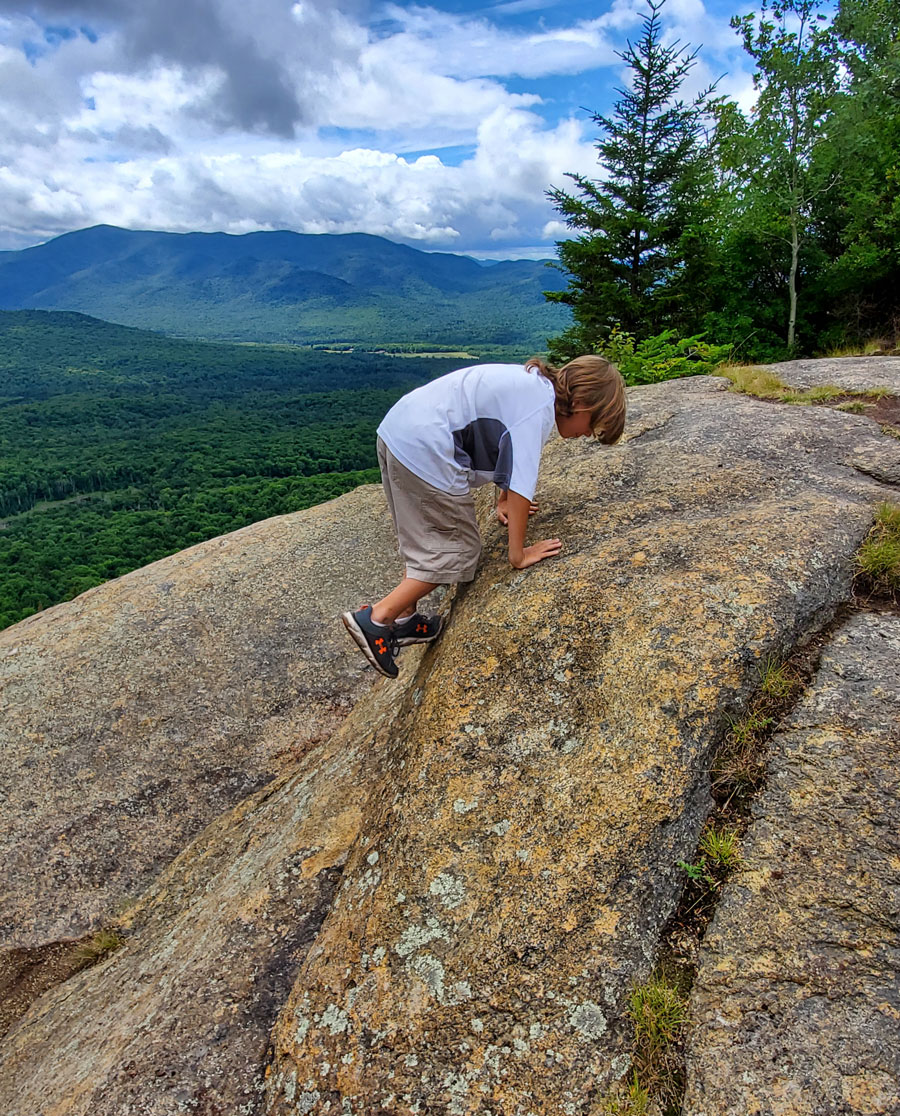
Pulling and Pushing Exercise Examples

Upper Body Pulling:

  • Kettlebell rows
  • Kettlebell cleans
  • Kettlebell snatches

Lower Body Pulling:

  • Kettlebell deadlifts
  • Single leg deadlifts
  • Suitcase deadlifts
  • Kettlebell swing variations

Upper Body Pushing:

  • Push-ups
  • Military press
  • Get-ups (can also be used as a lower body pushing exercise)

Lower Body Pushing:

  • Goblet squats
  • Kettlebell front squats
  • Kettlebell lunges

These basic exercises can build a foundation of strength and athleticism and can be used in many different combinations to keep training fun.

The basic formula I use for creating workouts:

Warm-up for 5-10 minutes (get your heart rate up and muscles warm)

Strength Block One:
(3-5x Sets)

  • Lower body pulling exercise
  • Upper body pushing exercise
  • Core exercise

Strength Block Two:
(3-5x Sets)

  • Lower body pushing exercise
  • Upper body pulling exercise
  • Core exercise

Conditioning:
(choose one exercise or create your own combination)

  • Swings
  • Sprints
  • Jump Rope
  • Burpees
  • Jumping Jacks

Cool down (light stretching, easy walk)

This formula has served me and my clients well for years. I would love to hear about the workout combinations you create with this formula in the comments section below.

Stay Strong and Safe,
Ryan Jankowitz, RKC II

***

Ryan lives in Maryland with his wife and two dogs.  They love to go hiking and spend time on the beach.  When he’s not telling his dogs to stop chasing squirrels, Ryan enjoys spreading the RKC message and teaching others how to train with kettlebells.  He’s got a 90-day coaching program that helps busy adults get into shape, look and feel better by working out with kettlebells and eating healthier so they can elevate their self-esteem.  Schedule a free call with Ryan: https://go.oncehub.com/RyanJankowitz


Filed Under: Kettlebell Training, Tutorial, Workout of the Week Tagged With: full body workout, home workout, home workouts, kettlebell workout, kettlebell workouts at home, push and pull, Ryan Jankowitz, work out at home, workout design, workout formula

5 Important Considerations For At-Home Kettlebells Workouts

May 20, 2020 By Joe Boffi Leave a Comment

Joe Boffi, RKC Team Leader Home Kettlebell Workouts

As a co-founder of Catalyst SPORT in NYC, I’ve been exposed to many different people—people just like you.

One of the most common questions I get from both fitness professionals and enthusiasts is, “What is the best piece of equipment I can buy for a home workout?” Being a long-time martial artist, athlete, and strength coach, I have used a plethora of exercise equipment (in the gym and at home). Without a doubt, my answer is always a KETTLEBELL.

With that choice, I wanted to add my top five things to consider for kettlebell workouts at home.

Space & Obstructions:

A significant concern for effective in-home workouts is the amount of physical space required. But, the beauty of using a kettlebell instead of something like a 7.2’ barbell is that you don’t need much space for most of the exercises in your repertoire. If you can lay on your floor with your arms stretched out over your head, you have enough space to do most kettlebell exercises. This much space will be enough for swings, cleans, squats, and most variations of those movements.

To set up for a swing based exercise, I like to consider whatever object (such as a wall or bookcase) which may be confining my space. I walk up to the wall with my arm and hand extended. When my fingertips touch the object, I take a big step back. I’ve now verified that I have the minimum required space in front of me for swinging a kettlebell.

Next, I need to make sure I have enough room behind me for the backswing. To do this, I turn around in place, then reach forward with my arm and fingers. If I cannot touch anything, I have enough space for backswings. Now, you can turn back around and safely swing, clean, and squat away!

Joe Boffi RKC Team Leader Indoor Kettlebell Swings Measurement

Practicing kettlebell snatches requires one more overhead measurement. If you’re a tall person and have low ceilings (or you just aren’t sure), I would always recommend to err on the side of caution and be precise by making an actual measurement. You’ll need a kettlebell, a helper, a tape measure, and a chair. Stand with your arm overhead and your hand open (fingertips facing upward). Have your helper stand on the chair behind you and measure the distance from your middle finger to the ceiling. Record that number. Now measure the height of your kettlebells. Place your kettlebell on its base and measure the height of the bell from the floor to the top of the handle. Comparing your first measure and the height of your kettlebells. Any kettlebell that measures at least an inch or two shorter than the first number you recorded will give you enough clearance to do snatches.

Normally, this should provide you with plenty of extra space overhead, but make sure there are no light fixtures or any obstructions hanging down from the ceiling in the path of your snatch. I always say, better safe than a hole in your ceiling.

Finally, what about the get-up? This one is pretty easy. Lay on the floor and open your legs more than 45 degrees on both sides, then reach your arms out straight from your sides. If you don’t touch or kick anything, then you’re good! Reaching your arms out entirely to the sides may not be necessary, but if you lose control of the kettlebell, you’ll be at less risk of putting a hole in your wall. Next, you need to measure the space above you by standing up with your arm overhead and your hand in a fist. If you don’t touch the ceiling, you have enough room.

Joe Boffi RKC Team Leader Getup Measurement

Floor Surface:

You may not have too many floor options in your home, but here are some ideas to keep in mind. Generally, any exercise you do standing, you can do on a hard surface like wood, stone, or tile. A hard surface to stand on will give your brain feedback from your feet and the floor. You will also have a stable platform for producing maximal tension and force.

Remember, you are in your home. Try not to aggressively drag or plop your bell down on these surfaces because you may damage them. I suggest standing on the hard surface and placing an area rug, yoga mat, or towel on the floor in front of you; this can serve as a runway for you to start and park your bell.

If you have a room that has a hard rug, this will work as well. My living room (where I do my home workouts) is a hard-packed rug.

It’s a good idea to avoid very thick and squishy rugs. These surfaces make finding the stability you need for a safe workout a difficult, and the feedback from the ground to your feet and brain gets a little lost.

Sweat:

Be aware while working out on hardwood, linoleum, or any shiny floor, your perspiration will make the floor slippery. Have a hand towel ready to help clean up between sets. Conversely, working out on a rug won’t become slippery, but it is more difficult to clean up, so wiping yourself often and doing get-ups on a couple of mats is a good option.

Shake, Rattle & Oops:

When we are doing ballistic movements like swings, cleans, and snatches, we are producing a lot of force right into the floor. In a structure like a house or an apartment, force travels through the floor and will cause items in your room or even rooms next to you to shake. I recommend doing a couple of reps and listening closely for anything that rattles. If you hear something rattle, move or secure that item. On two separate occasions, in two different apartments, I have rattled picture frames off the wall, and one of my wife’s little trinkets off a shelf.

Weight & Exercise Selection:

While working out in your home, choosing the right weight for you, the exercise, and your environment is extra important. I recommend using a weight that you really OWN—or possibly only slightly heavier—during an exercise, so that you don’t lose control or have to bail out of a movement.

The get-up provides an excellent example of why careful weight selection is essential for safe home workouts. Performing a get-up with a bell that is going to be a personal record (PR) or something that you’ve had extreme difficulty completing may not be the best idea at home. For one, you most likely won’t have a spotter, and second, if you do safely bail out, you will probably damage the floor and anything else in the surrounding area that the kettlebell hits. Ouch.

Similar rules apply for your exercise selections. Doing a V02 max style kettlebell snatch workout in your hallway is not a good idea. Remember that unsafe slippery sweat I mentioned before? You probably will not have enough time to catch your breath, let alone responsibly clean up sweat on the floor or yourself. If you lose the kettlebell because of your max output, then where will it go?

Now don’t get me wrong, I want you to work hard and do swings, snatches, and get-ups. I am just telling you to be smart about your weight and exercise selection. If you can workout outside in your yard, then go HAM! But if you are in your hallway or living room, just dial it back a little.

Working out at home is an excellent alternative to the gym. It may seem like you don’t have enough space or equipment, but all you need is a little guidance (which hopefully this article provided) and a kettlebell.

Be safe, aware of your surroundings, and work hard.

***

Joe Boffi, RKC Team Leader can be contacted at Joe@catalystsport.com. For more in-depth guidance from Joe for your workouts, sign-up for Catalyst’s Online Programming.

Filed Under: Kettlebell Training, Tutorial Tagged With: home kettlebell workouts, home workout, Joe Boffi, kettlebell safety, kettlebell workouts, working out at home, workout safety, workouts at home

8 Essential Kettlebell Exercises for Hikers

May 1, 2020 By William Sturgeon Leave a Comment

Kettlebell Get-up William Sturgeon, RKC Team Leader

With summer right around the corner and hikers getting ready to hit the trails, it’s important that we maintain our strength to enhance our time trekking. Hiking can be an exhausting hobby that demands a great amount of strength and conditioning. Using these eight kettlebell exercises will help you set yourself up for a great hiking season.

Kettlebell Swing

The kettlebell swing is a great exercise to help with conditioning the body for those long treks. Using the kettlebell swing as a conditioning tool will help build up the lung capacity needed for the trails.

William Sturgeon Kettlebell Swings

Goblet Split Squat

Hiking is a unilateral sport, meaning we are working one leg at a time. The goblet split squat is going to help strengthen your quads to face those tall hikes.

Kettlebell Press

Trekking poles can be a great tool to use when hiking, but they may also require a little more upper body strength. Practicing the kettlebell press will help you strengthen your shoulders.

Single Arm Row

Carrying a backpack around for long periods of time can take a toll on the upper back. Using the kettlebell row will help your posture and strengthen your back.

William Sturgeon, RKC Team Leader - Kettlebell Rows

Single Deadlift

The single leg deadlift will help strengthen your ankle and glutes. This greater stability can help reduce injuries on the trail.

William Sturgeon RKC Team Leader, one leg kettlebell deadlift

Kettlebell Get-Up

Being on the trail all day long while carrying a bag can be very taxing, use the Get-Up to help build a stronger core from all angles.

Halo

The halo is a simple kettlebell exercise for creating greater shoulder mobility. This will help you when climbing and/or carrying your bag.

Kettlebell Half Kneeling Stretch

Ankle and calves can get really tight from long treks. Be sure to use this exercise to help mobilize the joint and stretch the muscle.


***

William Sturgeon, RKC Team Leader, RKC II trains clients at his gym, Restored Strength. Contact him through his website at RestoredStrength.com or follow him on Facebook: facebook.com/restoredstrength

Filed Under: Kettlebell Training, Tutorial Tagged With: hikers, hiking, kettlebell exercises, kettlebells for hiking, William Sturgeon

  • « Go to Previous Page
  • Page 1
  • Page 2
  • Page 3
  • Page 4
  • Page 5
  • Interim pages omitted …
  • Page 16
  • Go to Next Page »

Primary Sidebar

Featured Products

previous arrow
BOOK-RKCBookofSnC
HardStyleKettlebellChallegeDanJohn700
BookCoverMasterTheKettlebell1
RKCiconKettlebell512
KettlebellGoddessdv040
next arrow

Recent Posts

  • RKC Big Six Workout
  • The Kettlebell Swing & Low Back Pain
  • Key Kettlebell Exercises To Help You Create Better Balance
  • How to Most Effectively Use Kettlebells to Meet Your New Year Goals
  • 1 Exercise That Checks All The Boxes
FOLLOW US ON TWITTER!

Archives

Copyright © 2025

Dragon Door Publications / The author(s) and publisher of this material are not responsible in any manner whatsoever for any injury that may occur through following the instructions or opinions contained in this material. The activities, physical and otherwise, described herein for informational purposes only, may be too strenuous or dangerous for some people, and the reader(s) should consult a physician before engaging in them.