• Skip to main content
  • Skip to primary sidebar
  • Home
  • Contributors
    • Matt Beecroft, Master RKC
    • Martijn Bos, Master RKC
    • Andrea Du Cane, Master RKC
    • Angelo Gala, Master RKC
    • Chris Holder, Master RKC
    • Steve Holiner, Master RKC
    • Dan John, Master RKC
    • Mike Krivka, Master RKC
    • Thomas Phillips, Master RKC
    • Robert Rimoczi, Master RKC
    • Phil Ross, Master RKC
    • Max Shank, Master RKC
  • Workshops
    • HKC Workshops
    • RKC Workshops
    • RKC-II Workshops
  • Find an RKC Instructor
  • Resources
    • Articles
    • Forums
    • Kettlebells
    • Products
  • Blogs
    • PCC Blog
    • Strong Medicine Blog
  • Archives

RKC School of Strength

Official blog of the RKC

Archives for August 2018

How Long Should It Take To Do One Kettlebell Get-Up?

August 29, 2018 By Ryan Jankowitz Leave a Comment

Ryan Jankowitz, RKC-II Coaching Getup Practice

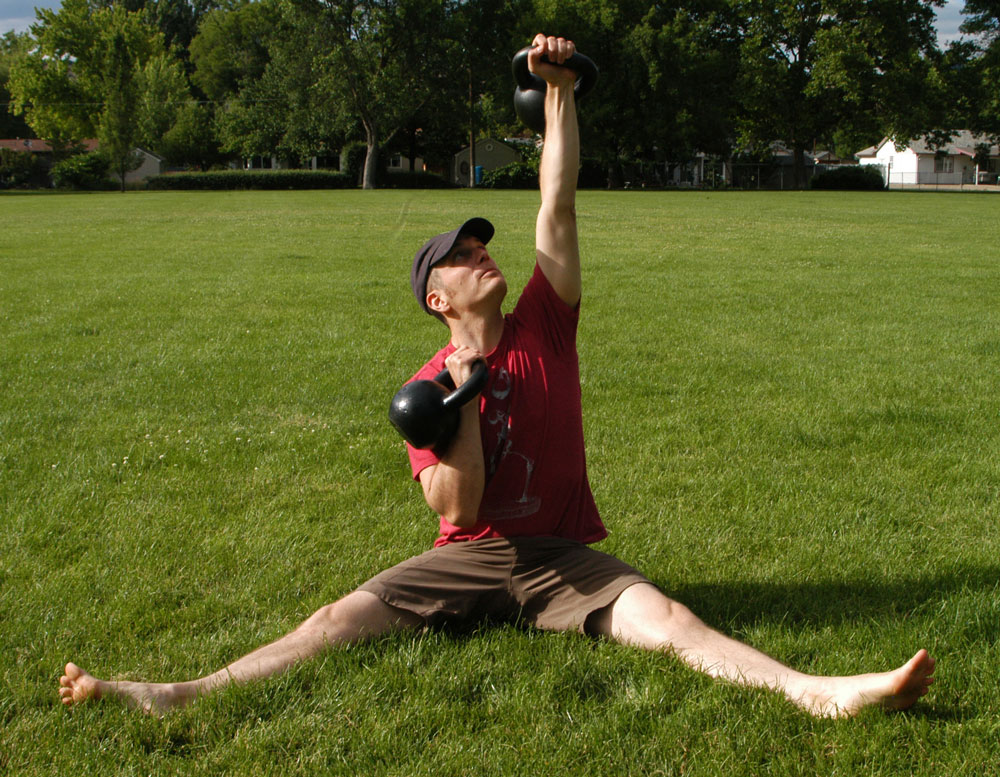
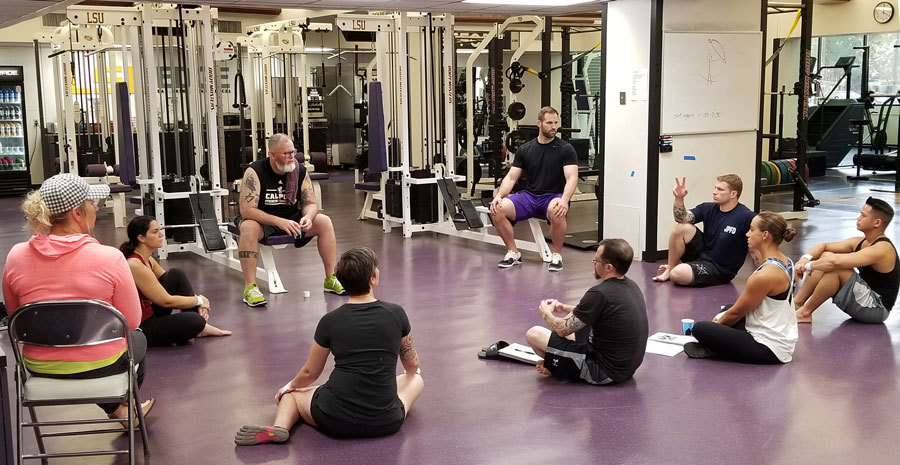
Occasionally, trainees ask me how long a get-up should take when they’re first learning how to do one. I think it’s a really great question and I’m glad when they ask it—because it means that they are probably starting to really dig kettlebell training. But, my answer always seems to surprise them just a bit. When I tell them that a solid get-up takes at least 30 seconds per side, they start to realize that this exercise requires patience.

My best get-ups tend to take around 36 seconds (clearly, I love to time things). It seems to take about 36 seconds for me to feel like I am owning each stage of the get-up while taking my time.

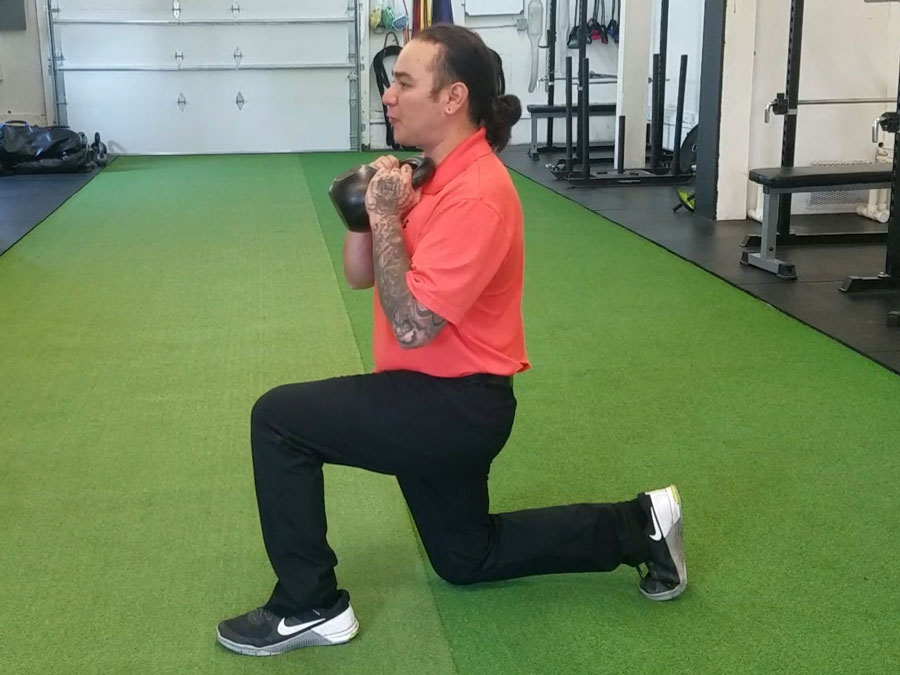
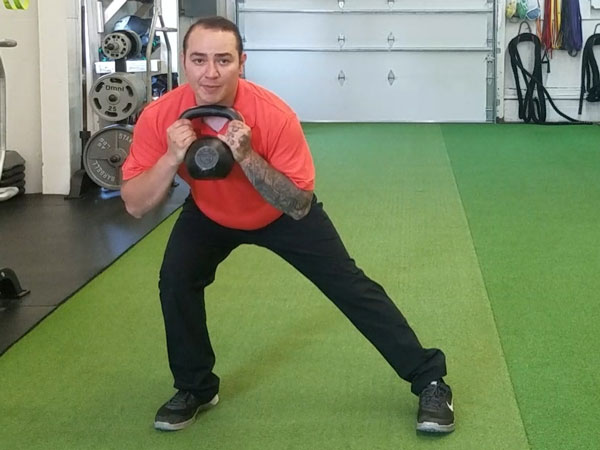
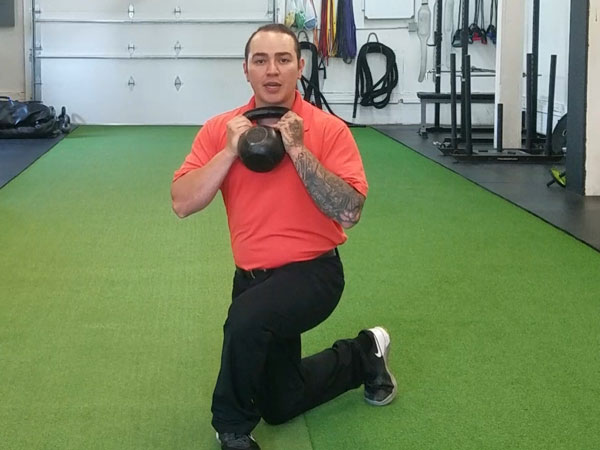
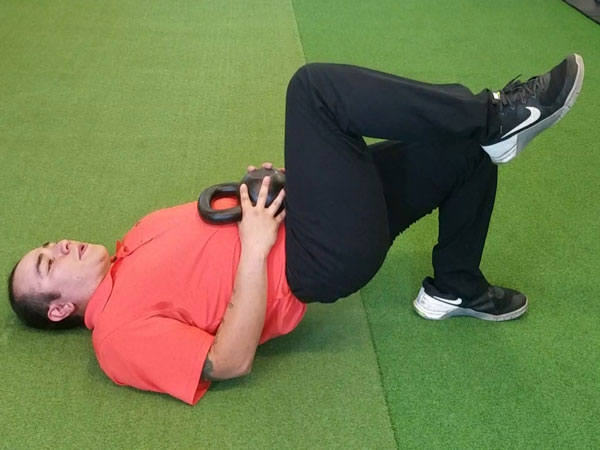
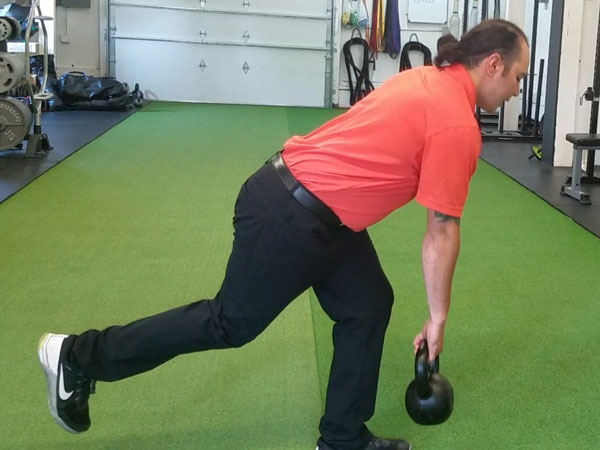
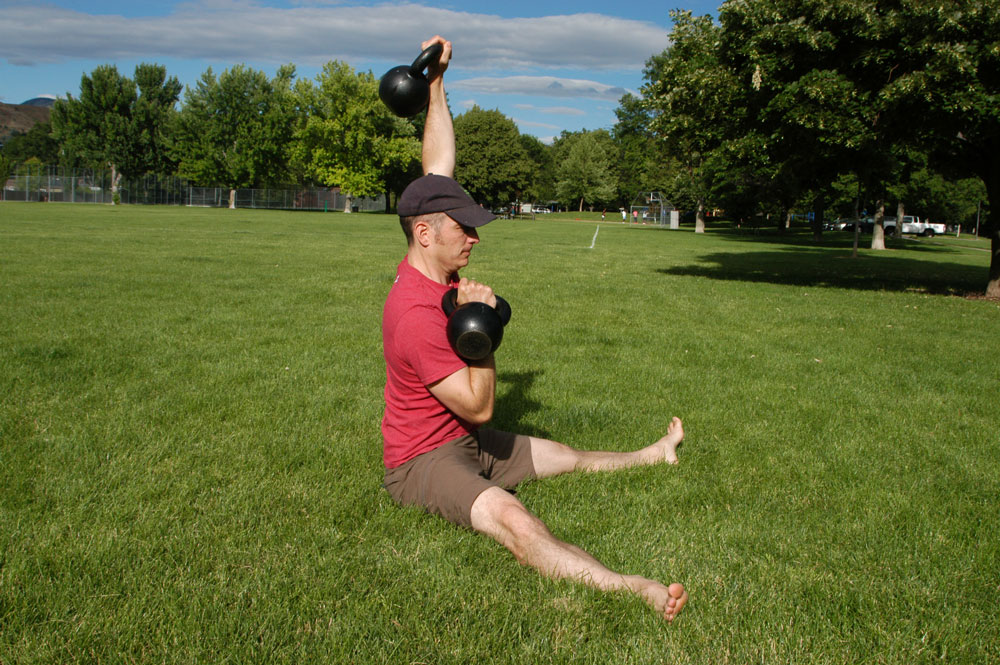
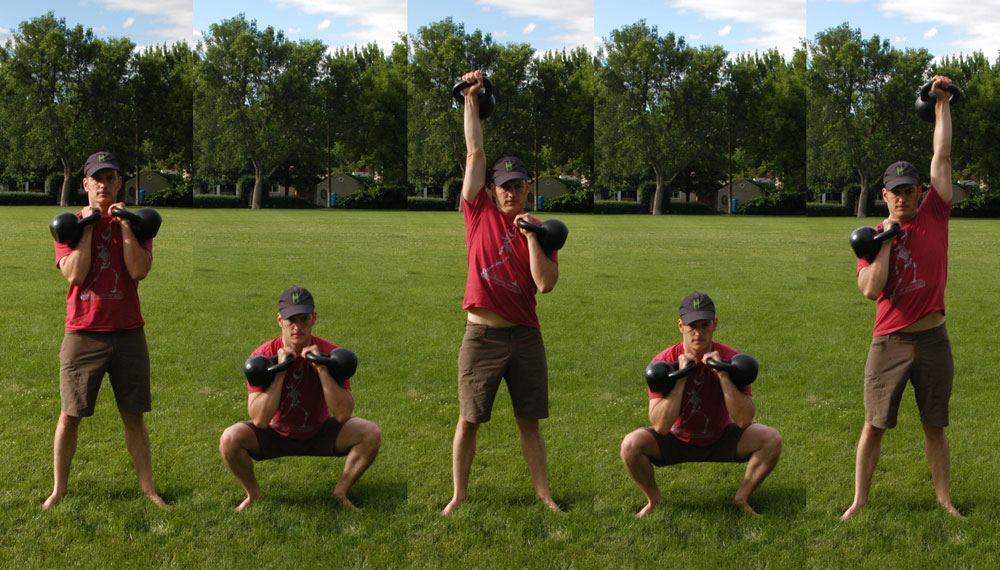
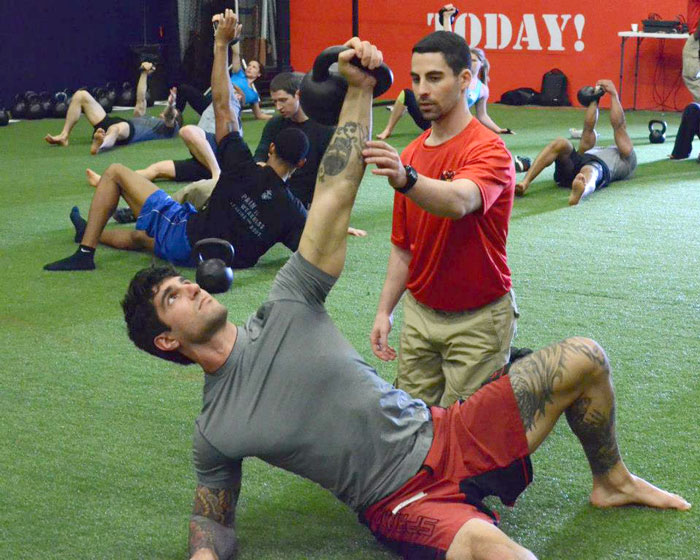
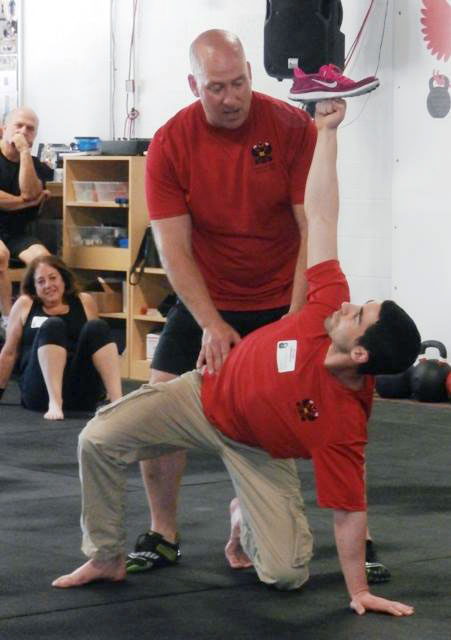
Each stage of the get-up is equally important and demands equal attention. If one stage is rushed or not performed well, that weak link may negatively impact the rest of the movement. There’s nothing worse than trying to adjust your position while holding a heavy hunk of iron over your head.

I’ve found that going back to naked (no weight) get-ups or using a very light kettlebell with a 3-5 second pause at each stage for several reps is a great drill for reinforcing patience. These drills also allow you or your client to get very familiar with how each stage of the get-up should feel.

Ryan Jankowitz, RKC-II and Master RKC Michael Krivka demonstrate the get-up at a recent HKC workshop in Gathersburg, MD.
Ryan Jankowitz, RKC-II and Master RKC Michael Krivka demonstrate the get-up at a recent HKC workshop in Gaithersburg, MD.

My intent in writing this blog post was to create a discussion and learn what other kettlebell instructors and enthusiasts think about the timing of a get-up. Have you found an optimal time for the get-up? How long do you think a kettlebell get-up should take? Please leave your answers in the comments section at the end of this post.

I feel that being patient with kettlebell training pays off big time in the long term. In a time when people want to do more exercises faster and faster, sometimes slowing down is actually the best approach.

Performing one repetition of the get-up masterfully is far superior to performing ten sloppy reps. Really, this can be said for any exercise—quality over quantity. If you take your time and master the basics, the rest will fall into place.

All of my best kettlebell lifts and personal goals have come years after I first picked up a kettlebell. I’m in this for the long haul and sometimes I have to remind myself to slow down.

Please leave a comment and let me know your thoughts!

Stay Strong.

***

Ryan Jankowitz, RKC-II Instructor, CK-FMS, is a life-long athlete who can’t imagine sitting behind a desk. He enjoys sharing his passion for fitness and spreading the RKC knowledge. Ryan provides online kettlebell training and in-person training in the DC Metro area. You can reach him at ryan@rjkettlebell.com or through his website rjkettlebell.com.

Filed Under: Kettlebell Training Tagged With: Coaching, get up, how to do a get-up, kettlebell training, Ryan Jankowitz, Ryan Jankowitz RKC-II

The Importance of Single Leg Training

August 15, 2018 By William Sturgeon Leave a Comment

William Sturgeon, RKC-II Split Squat

We spend a lot of time training our clients with bilateral movements, such as squatting and hinging. These dynamic and explosive movements are done in a stationary position. When we choose exercises for our clients—or for our own training—the exercises should always be purposeful movements applicable to their lifestyle and goals. Whether you coach athletes or the general population, everyone moves unilaterally.

Whenever moving in any plane of motion, we move by stepping with one foot first. We move unilaterally throughout our whole day. Unless we’re stationary for a while, we do not spend much time in a bilateral stance. Knowing that all movement is initiated with one foot, why do we place such an emphasis on bilateral movements when training our clients?

There are many reasons to include unilateral exercises in our training programs. But, one of the main reasons I include single leg training is to allow me to train my clients’ weaknesses. While it is easy to temporarily correct a client out of a knee valgus during a squat with the cue “spread the knees apart,” it doesn’t really fix the problem. By including single leg exercises you can help strengthen your client’s asymmetrical weaknesses—which will also strengthen their bilateral movements.

Another reason I favor unilateral movements, is because they can help rehab and prevent injuries. If you train athletes or the general population, your job is to help them reach their goals—and keep them safe during their training. Another great benefit unilateral exercises offer over bilateral exercises is that they promote even more ankle stability and strength. Strengthening the ankles can reduce the chance of ankle injuries—which often lead to knee and hip pain.

The following are a few of my favorite single leg exercises:

Split Squat (see photo at beginning of post)

  • Start at the bottom of a split squat position.
  • Hold a kettlebell as if you were about to do a goblet squat (place the kettlebell near the collar bone).
  • Push evenly with the foot—through the ball of the foot and the heel to stand.
  • Lock the knee at the top of the movement while squeezing the glutes.
  • Lower yourself down slowly, and do not let the knee bang against the ground.

Lateral Lunge

William Sturgeon RKC-II Lateral Lunge

  • Start by holding the kettlebell in the rack position, or at the chest (the goblet squat position).
  • Take a large step to the side.
  • Bend your knees and push your hips back.
  • Return to the starting position by pushing through the inside of the foot you used to step to the side.

Curtsy Lunge

William Sturgeon RKC-II, Curtsy Lunge

  • Start by holding the kettlebell at the chest (the goblet squat position).
  • Step back and behind your other leg.
  • Slowly lower your hips until the knee lightly touches the ground.
  • Push through the front leg, and return to the starting position.

Weighted Single Leg Glute Bridge

Weighted Single Leg Glute Bridge

  • Begin on your back, and hold a kettlebell at your belt line.
  • Raise one leg off the ground by lifting the knee.
  • Tuck your chin and rib cage down as you press the heel of the other foot into the ground
  • Raise the hips up and squeeze the glutes.
  • Lower yourself down slowly and return to the starting position.

Single Leg Rear Deadlift (RDL)

  • Place both hands on the kettlebell handle.
  • Keep a slight bend in the knee and push your hips back.
  • Keep a straight spine and lower the kettlebell below the knee by bending with the hips.
  • Return to the starting position by pulling your chest and hips up as you stand tall.

Single Leg Deadlift

William Sturgeon, Single Leg Deadlift

  • Begin with the kettlebell on the ground in line with your toes.
  • Bend at one knee and begin to hinge down while pushing your hips towards the wall.
  • Keep your chest up while lowering yourself through the hips.
  • Return to the starting position by standing tall.

Single leg exercises are essential moves to consider in your kettlebell training.

****

William Sturgeon, RKC II trains clients at his gym, Restored Strength. Contact him through his website at RestoredStrength.com or follow him on Facebook: facebook.com/restoredstrength

Filed Under: Kettlebell Training, Mobility and Flexibility Tagged With: kettlebells, leg exercises, single leg exercises, unilateral training, William Sturgeon

Beyond the See-Saw Press: Two New Variations

August 8, 2018 By Nick Collias Leave a Comment

Z-Saw Kettlebell Press Nick Collias
Some lifts just never feel quite right, no matter how hard we try to force them to do so. Others are a willing dance partner from the first rep. And from the first time I tried it, the see-saw press just felt right.

Unlike the single-arm press, which took months (er, years) to share the ideal groove, the see-saw offered it up instantly. And because it’s a rhythmic push with a bit of a pull (or an eccentric push that feels like a pull), it demands that all manner of anterior, posterior, lateral, and deep core muscles get in the game of tug-o-war. Any experienced RKC can tell you that this extra activation usually allows you to get 2-3 extra reps, maybe more, with any given weight than what you’d manage with either single-arm or double-arm presses.

That translates to extra strength, extra volume, extra activation, and extra-efficient training. Extra awesome.

Those are all reasons to try the see-saw press. But they’re also reasons to explore different variations of the movement. Here are two variations that have quickly become my two favorite presses, period.

To be clear, I make no claim to inventing either of them. Somebody else probably did long ago. I just happened across them in my training, picked them up, and am now passing them along.

Z-Saw Press

This is nothing more than a seated see-saw press in a straddle position, or what is known as a Z-press. But that alteration changes the lift dramatically.

What I dig about it:

  • Sure, it brings the wicked shoulder pump, but it also ties in more total upper body musculature than any press I’ve tried—even more than the standing see-saw press. All the postural muscles of the upper back light up, but so does the core. When those groups are both working hard, I know I’m doing something right.
  • Lumbar hyperextension is pretty much impossible with this lift. Not so with the standing see-saw. This makes it a great way to work around an achy lower back, or just one, like mine, that just doesn’t like to work hard early in the morning when I tend to train.
  • No clean is needed. That’s not an advantage or disadvantage; it’s just a feature of the lift. This means it lends itself more cleanly to an upper/lower split, if you prefer that approach.
  • Perhaps because the upper back and core are so integrated, I find it also lends itself better than other press variations to grinding out a few hard reps at the end of a set, while still being safe on the shoulder joint.

This is one reason why I like it with a DeLorme Protocol-style approach:

10 reps light, or around half of 10RM
10 reps medium, or about .75 of 10RM
10 reps with more or less a 10RM

Z Saw Kettlebell Press Side view Nick Collias
Look forward or look up; either way, your postural muscles and pressing muscles will both work overtime.

Keeping a set at a 10RM or lighter also keeps you from having to figure out how to get two seriously heavy bells into position. Just curl it up and go.

One more technique note: In a recent email, Master RKC Andrea Du Cane mentioned that she recommends most people—men in particular—sit on a yoga block or something similar during Z-press variations, because otherwise they often struggle achieve a neutral pelvis and spine position on the ground. Me, I like something about half to two-thirds yoga block-height, like one of those hardcover college textbooks you haven’t done anything with in a long time. The Modern Library edition of Plutarch’s Lives of the Noble Greeks and Romans is just about perfect.

Swollias Press

This movement took on my nickname at work (I do work at Bodybuilding.com, after all), simply because I’d never seen it before, and the nomenclature alternatives are all pretty complicated. “Alternating see-saw kettlebell thruster,” anyone? No thanks. Let’s go with Swollias.

As with the Z-saw, this isn’t a new lift so much as it is a combination of existing ones. Here’s how to do it:

  1. Clean a pair of kettlebells, either from a dead stop or with a swing. You can do it with two matching weights, or two uneven ones. It works great with both.
  2. Perform a single front squat, and on the way up, press one of the kettlebells up while keeping the other in the rack.
  3. Lower the top bell into the rack. A second clean is optional here.
  4. Squat again, and on the way up, press the other bell. You can then set the kettlebells down and shake it off before going again, or you could keep piston-pumping reps as long as you want.

What’s the advantage? Well, having a bell in the rack means you’re forced to keep an upright torso and tight core. I like the single-kettlebell thruster, but find it can get a little sloppy and forward-leaning under fatigue. This variation holds a little firmer, in my experience.

"Swollias" Kettlebell Combo Sequence Nick Collias
Lots of cleans, lots of squats, lots of time in the rack. What more do you want?

On the flipside, it doesn’t require the same level of thoracic mobility as a double-kettlebell press or thruster, and once again, lumbar hyperextension is hard to slip into with this variation. Definitely not so with the double kettlebells.

With heaver weight, I like to treat these as a little mini-complex, kind of like Dan John’s “Armor-building” complex of two cleans, one press, and three squats. One round of clean, squat, press, clean (optional), squat, press every 30 seconds, or on the minute, is a great routine. Do it for 10-20 minutes, and it adds up to lots of cleans, lots of squats, lots of time in the rack.

Alternately, you could use a lighter weight, up the reps, and just see what cries “Uncle” first.

How To Use These Lifts

There’s a time to train like you’re chasing something—say, a half-bodyweight press for an RKC-II certification—and there’s a time to train like you’re not. And when I’m not chasing, I like to mix my presses up. A lot.

For the last few months, my favorite way to do this is to use Dan John’s press and suspension strap circuit from this article on Bodybuilding.com as a template, and swap out press variations based on whatever feels good that day. Both of these press variations have been regulars in the batting order.

Don’t confuse this with “program hopping,” that oft-maligned symptom of exercise ADD. The parameters and the basic movement patterns don’t change much; just the specifics do. If I want to change every workout, fine. If I want to do the same thing for three weeks, fine.

This approach keeps me excited to train, allows me to sneak into moderate rep PRs regularly, but also allows—or maybe forces—me to learn and explore new lifts, either those that I see out in the world, or that I cook up on my own in a moment of living room inspiration. These are two of the latter. Enjoy!


***

Nick Collias, RKC-II, PCC, is the executive editor at Bodybuilding.com, and the host of the Bodybuilding.com Podcast. You can read and hear more of his work at Bodybuilding.com.

Filed Under: Kettlebell Training, Mobility and Flexibility, Tutorial Tagged With: kettlebell training, kettlebell tutorial, Nick Collias, press challenge, RKC, see-saw press, straddle press

Coaching the Kettlebell Coach

August 1, 2018 By Chris Holder Leave a Comment

Master RKC Chris Holder Coaching RKC Coaches

After attending and passing an HKC or RKC Workshop, we’ve done countless swings, feel confident about the material, and want to present the ideas we’ve learned to our clients. If you are like me, you’ve invested a ton of time and effort into other training systems. And you know that it’s difficult to integrate all the moving parts into a single sensible flow of program design.

During a certification weekend, I make a point to lecture on how to coach. “How to coach” is a drastically different subject than “what to coach”. The RKC manual and the instruction protocols we follow to teach the exercises are very thorough. If you’re a smart coach and refer back to the manual, most cases are very simple. But, how to coach it all—that’s an entirely different conversation.

Is this article about coaching style? Yes and no. Is it about coaching procedures? Sort of… I define coaching as the entire approach when teaching the material, the techniques, and the expected intensities for a given set. For great coaches, this is effortless. But, new coaches will need to make a conscious effort to develop the coaching muscle memory before it can become automatic. After twenty years in the college strength and conditioning world, I can confidently tell you that I’m there—but it took time. In this post, I will outline much of what I teach about coaching.

What Modality Are You Teaching?

Kettlebells, Olympic lifts, TRX, and CrossFit all have certain inherent personalities—and your temperament should fit the training setting. For example, when coaching the Olympic lifts, there is a massive psychological component with an athlete who is attempting a personal best. In that moment, you might go from being a coach to a psychotherapist. You might help them manage fear and hesitancy instead of yelling and trying to fire them up.

It’s extremely important to clearly understand the nature of what you are coaching. A yoga instructor yelling for their students to perform various poses will probably not be a yoga instructor for very long. It’s a ridiculous but clear example.

The RKC is a high tension program, which also means it’s high effort. So, an instructor using a very calming yin tone will likely not help their trainee get the most out of a nasty kettlebell swing ladder.

Embody the spirit of what you are coaching.

Who Are You Coaching?

One of my favorite things about the CrossFit community is that the members know today will not be easy. The programming always includes a big push at some point. If I were a box owner, I would assume that most of my clients have some edge, and that I can take them to some of the outer realms of fatigue, burn and through certain pain thresholds.

Conversely, I will never forget my first paying personal training client. At the time I had been coaching college kids for about seven years when I got an email from a woman who had some back pain and wanted to hire me for kettlebell training. We exchanged emails, agreed on a price and planned our first meeting the coming Saturday.

Remember, I had been coaching bulletproof 18-22-year-olds for years—and a severely deconditioned, 70 year old woman who was about 50 pounds overweight walked in! She was carrying two 2lb kettlebells with plastic handles attached to nylon straps which formed what can only be described as oversized hacky sacks. She insisted on using them. While I wanted to ask her where the hell she found that nonsense, I knew that my tough-guy approach was not going to work. I suddenly had to learn how to work with a brand new demographic. Thankfully, I knew that an elderly woman would not respond to me screaming at her to pick up the weight!

Know Your Stuff

Know the information cold, in your sleep, without thinking. Make sure you refer to your RKC or HKC manual many times after your certification weekend. I’ve had the profound luxury of training between 300-500 athletes every day, Monday through Friday. At minimum I’ll led 1,500 individuals in their training (in groups of course) each week. Regardless of the season, my athletes do 100 swings a day. So, that’s 150,000 swings that I could potentially dissect and critique each week. Most personal trainers won’t see that many swings in a year.

My coaching uptake is fast simply because I’m truly immersed in it daily. I see a slew of funky swings, tons of just-right swings, and more horrible swings than any one person should ever have to see. Every day I quickly analyze and pump out corrections at a blistering pace. I’m not a genius, I simply have critiqued—and continue to critique—countless reps.

Watch everything, be an observer at all times. Watch other people’s clients so you can bank reps. Record your own reps with your phone and critique yourself. Be a student every waking moment of the day and deconstruct what you are seeing—pass everything through your RKC filter. Mentally pick apart what you see to sharpen your blade.

I can coach anyone, and it’s not because I’m special. It’s because I’ve been able to constantly analyze and coach for years without pause. It’s nothing you can learn from a book or at a certification weekend. You have to do the time, put in the reps, and see as many repetition attempts as possible.

What To Watch

A good coach has a very specific eye for watching reps. Each exercise has lists of technical requirements. But, all of our movements begin with the feet on the floor—even the get-up. As you watch your clients or athletes train, your eyes should first go to their feet. Many technical errors in the top half of the body can be remedied by correcting the feet—not the chest, shoulder, or even the back. Our feet connect the movement to leverage, support posture, and give the athlete a foundation. The feet are the gateway to all things good. So, your eyes should start at the feet and return there throughout the set.

Breathing is also a frequent cause of technical flaws. When do they inhale? When do they exhale? Are they exhaling completely, or are they sipping and leaking? Know the answers, have a game plan for their breathing, and then coach it. Breathing is more listening than watching.

We have very clear standards for all of our movements. You know them because you were responsible for learning and demonstrating them at your RKC or HKC workshop. We don’t just enforce the standards to complicate the RKC weekend, we enforce them because they almost guarantee safety and without question ensure top performance. You need to coach those standards and elements. While we all eventually develop some degree of stylistic variations of our own, before you teach them to your clients, they should already have a firm handle on the basics. Look for the basics as you watch, and correct accordingly.

Lastly, I want you to pay particular attention to the head and neck. The RKC and HKC curriculum is filled with huge, dynamic movements. We need to understand the potential range of motion of the individual spinal joints. Joints are meant to move—until they are not. Whenever the body is loaded, the spine should stay motionless, unless the exercise is specifically designed for the spine to twist, rotate, flex or extend. The spine doesn’t stop at the shoulders, and most trainers forget that the neck is still part of the spine. I have multiple stories that will give you the chills involving athletes simply turned their heads while under load and breaking their backs. So, without getting into too much gore, the head and neck need to stay relatively motionless any time while the athlete is under load. Correct this immediately.

Chris Holder optimal Coaching Position

Positioning Is Everything

While it is important to watch reps, your orientation to the athlete while observing the reps is just as important.

Unless you are a seasoned pro, you should never watch a rep while standing directly in front of the athlete. Conversely, watching someone from behind is not only a very poor position for catching technical errors, it’s also incredibly creepy. Don’t be a creep.

The best location to watch reps and get the largest amount of information is in front and at a 45 degree angle. This is the most optimal spot for nearly all training methods, not just kettlebell training. It gives you the opportunity to see the most movement through several planes of motion. If you can’t stand at 45 degrees for some reason, then standing directly to the side is the next best option.

Intensity

The word HardStyle should say it all. But, after all my years of coaching one fact is very clear: most coaches and trainers don’t fully understand how much intensity they want from their athletes or clients. They don’t know how hard they should go!

With the grinds, we usually work in sets of 5, 3, and 1, and most of the intensity is handled within the programming. But, if you program your clients’ intensity along with sets and reps, they will make even greater progress in less time. For example, let’s consider pressing 3 sets of 5 reps for each arm. You could tell your client to use a 1:5 tempo (1 or burst up followed by a 5 or slow return). You can use any tempo (1:5, 1:2, 3:2, 5:1…) and any combination of ups and downs to really dial in the intensity.

During RKC Certifications, we teach an “effort dial” drill. While you do kettlebell swings for a set of 10, we yell percentages: 80%, 70%, 60%, 100%, etc. This drill quickly teaches how to dial effort up and down in the real world. But, if I am being totally honest, if you aren’t swinging 100% on all the reps, you are wasting time.

Most people don’t know what hard is, so show them. Most of your clients have never ventured into the pain cave. They might think they have, but most have no idea what it means to push. Show them, but be smart and safe. Let them have a real “that was the absolute maximum I could give and couldn’t muster one more” experience. They will thank you.

Be A Tremendous Communicator

Tremendous… read everything. Expand your vocabulary in general and within the realm of training. I’m notorious for saying that we need to have 14 different ways for saying the same thing. Be comfortable communicating because it is the life blood of your business. If you can’t communicate what you know, who cares what you know!

I studied Neuro Linguistic Programming (NLP) for two years so I could refine my ability to communicate. Do you need to do that? No, but you should… or you should study something like it. There are multiple ways to communicate with your clients—it’s not all just verbal. When you are trying to get an athlete to push, your words alone might not do it. The tone, volume, and pace of your speech as well as your body language all effect what your client hears and understands. Own all aspects of your communication so the people under your watchful eye clearly understand on what you want.

10 Questions

I drive my assistants and athletes crazy with “10 Questions,” but it’s incredibly effective. Regardless of what I’m teaching to a group—even if it’s review—I end every section with 10 Questions. My students know that we will sit for the rest of the afternoon until they ask me ten questions related to the information we just covered.

This fall, about 100 new athletes will come into my facility to begin their journey as a Cal Poly Mustang. One of the first things I will teach them is how to do kettlebell swings. For most of them, this is their first experience with kettlebells. Since I coach at such a frenetic pace, I have to know that they are absorbing the information. So, we teach for 30-45 minutes, and then regardless of the size of the group, we gather and they are required to ask me 10 questions. This forces us to communicate. Again, I have been talking a mile a minute at them in the session. I need to know if what I’ve tried to convey has reached them. They raise their hands, or I pick on the ones who are trying to hide. Either way, we break the ice and this helps the athletes become more willing to speak to me next time.

It also puts me on the spot. 10 Questions happens several times a day, especially during heavy instruction times. You wouldn’t believe some of the off the wall ideas going through the minds of these athletes. At times they ask questions I’ve never heard before, and it forces me to think. I have had countless “ah-ha” moments mid-sentence while working through an explanation. And if they truly stump me, I have no problem telling them that I don’t know, but will get them an answer as soon as possible.

For those of you who have taken an RKC or HKC where I was the lead instructor, you all know too well about 10 Questions. I do this at every certification I lead, several times a day. 10 questions is beneficial for a deeper understanding, and it quickly creates rapport between the class and myself, but also within the group of attendees. By the end of day one, they have all asked several questions and they naturally become more willing to speak up as the course progresses.

Lastly…

The moment you think you “have it” is the moment you have lost your way. Many of you would faint if you saw my resume, list of experiences, degrees, mentorships and certifications. I’m very lucky. I’ve learned from the absolute best in the world in a myriad of disciplines. My list of mentors is a who’s who of strength and fitness legends. And after all of this, I know that I’m just scratching the surface. The more I learn, the more I realize how much more I need to learn.

Be a student at all times. Listen to everyone—even the folks you think are full of crap. Every time you close your mouth and listen, you will learn something. Approach each day as an opportunity to forge your coaching craft. Read anything you can, attend workshops and certifications on modalities that you might not think are useful. Listen to podcasts and interviews about the movers and shakers in the industry. Refine your coaching to the point where there’s nothing left to correct, then pick it apart and correct it anyway.

***

Master RKC Chris Holder is a collegiate strength and conditioning coach professionally for over 15 years having worked at Eastern Kentucky University, Appalachian State University and San Jose State University. He is in his second stint and eighth year at Cal Poly in beautiful San Luis Obispo, CA.

The 2000 graduate of Eastern Kentucky University majored in physical education and earned a master’s degree in kinesiology from Cal Poly in 2005. In February 2012, Holder completed his doctorate in Chinese Medical Qigong Therapy. Under the tutelage of world famous Qigong Grand Master Dr. Jerry Alan Johnson, Dr. Holder conducted groundbreaking research on the effects of Medical Qigong Therapy with athletes in competition. This research has spawned other works and additional studies on the effects of this ancient medical practice and its impact on athletes and athletic performance.

Holder received his American doctorate from the International Institute of Medical Qigong in Monterey, CA, and is also licensed in China to practice medicine from The Western District Qigong Science and Traditional Chinese Medicine Research Institute in Beijing, China.

Filed Under: Coaching, Kettlebell Training Tagged With: Chris Holder, Coaching, coaching strategies, leadership, leading, master rkc, RKC, Teaching, Training Athletes

Primary Sidebar

Featured Products

previous arrow
BOOK-RKCBookofSnC
HardStyleKettlebellChallegeDanJohn700
BookCoverMasterTheKettlebell1
RKCiconKettlebell512
KettlebellGoddessdv040
next arrow

Recent Posts

  • RKC Big Six Workout
  • The Kettlebell Swing & Low Back Pain
  • Key Kettlebell Exercises To Help You Create Better Balance
  • How to Most Effectively Use Kettlebells to Meet Your New Year Goals
  • 1 Exercise That Checks All The Boxes
FOLLOW US ON TWITTER!

Archives

Copyright © 2025

Dragon Door Publications / The author(s) and publisher of this material are not responsible in any manner whatsoever for any injury that may occur through following the instructions or opinions contained in this material. The activities, physical and otherwise, described herein for informational purposes only, may be too strenuous or dangerous for some people, and the reader(s) should consult a physician before engaging in them.