• Skip to main content
  • Skip to primary sidebar
  • Home
  • Contributors
    • Matt Beecroft, Master RKC
    • Martijn Bos, Master RKC
    • Andrea Du Cane, Master RKC
    • Angelo Gala, Master RKC
    • Chris Holder, Master RKC
    • Steve Holiner, Master RKC
    • Dan John, Master RKC
    • Mike Krivka, Master RKC
    • Thomas Phillips, Master RKC
    • Robert Rimoczi, Master RKC
    • Phil Ross, Master RKC
    • Max Shank, Master RKC
  • Workshops
    • HKC Workshops
    • RKC Workshops
    • RKC-II Workshops
  • Find an RKC Instructor
  • Resources
    • Articles
    • Forums
    • Kettlebells
    • Products
  • Blogs
    • PCC Blog
    • Strong Medicine Blog
  • Archives

RKC School of Strength

Official blog of the RKC

Archives for March 2016

The Journey Doesn’t End with the Title

March 30, 2016 By Shari Wagner 11 Comments

Shari Wagner RKC Team Leader
My RKC workshop was in April 2009, and I didn’t pass at the workshop due to a failed snatch test. I submitted a video one week later to earn my RKC title. I recently stumbled across that fateful video and of course, I watched it.

I watched it with a little bit of shock and awe at the poor technique I displayed. I also watched it with a lot of pride. Pride for the hard work I have put in to improve my technique since then and pride for all I have accomplished over the years.

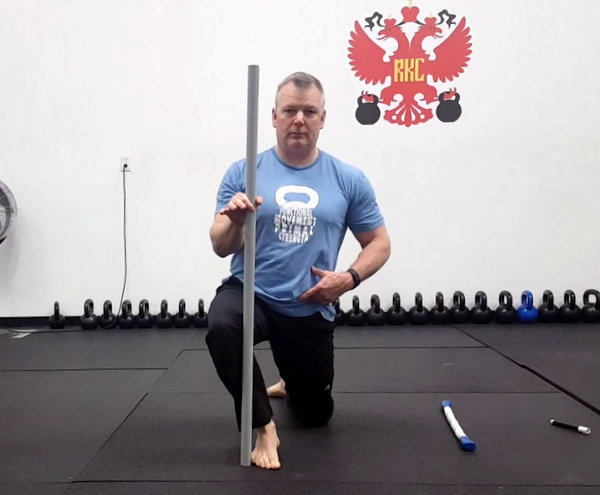
When I first learned the snatch, it was in the days of first learning the high pull. This caused me to have a very significant corkscrew. I worked and worked at fixing this corkscrew before attending the RKC to no avail, and it was one of the biggest worries I had going in to the workshop. It wasn’t the typical worry of not completing the reps, my worry was all about the technique.

I did improve my technique at my RKC workshop, but I still had some of that darn corkscrew. At the time, while not ideal, it was still considered passable technique. I kept plugging away at the technique, but that corkscrew still remained.

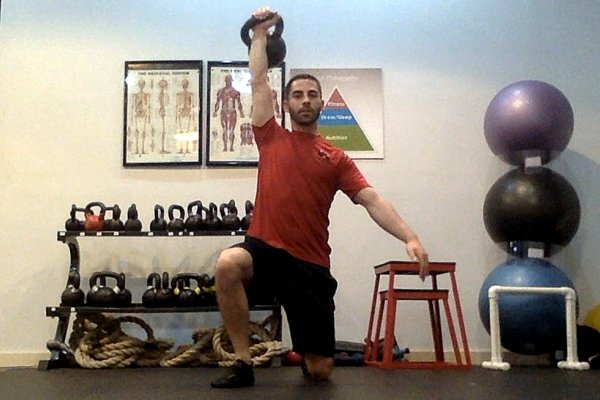
I eventually sought out some additional instruction, which helped quite a bit. I also started watching videos of other instructors doing the snatch. I watched the timing very intently, along with the arm position and the path the kettlebell took. I noticed that when they snatched, you could see the bottom of the kettlebell as it flipped over and it looked so smooth and effortless. When I snatched with the corkscrew, my arm was turning out the side, therefore the bottom of the kettlebell was turning out to the side. It also looked anything but smooth and effortless. It certainly felt like a lot more effort too.

I took all of these visual and verbal cues and turned them inward, so I could feel it and visualize what it should look like. I snatched in front of the mirror because at the time I didn’t have a way to video myself. The short story is that it worked! I was finally able to snatch without a corkscrew. However…

I still had work to do to improve my technique. I was now keeping my arm a bit too straight and casting the kettlebell out a bit too much. More training and more work ahead, but I took it all in and worked hard because I was determined to get better. Being a type-A perfectionist and a Capricorn served me well in this case. Not only would this extra work help me get better, but it would help me help my students.

I later assisted at an RKC for the first time and it was the first time with the new RKC. When I tested my requirements for Keira Newton, she gave me a few additional tips that added to the improvements I had already made.

Then I witnessed how we now teach the snatch from the top down. I was amazed at its simplicity, yet it was extremely effective. It seemed so much easier to learn and to teach others this way. I even told the participants how lucky I thought they were to now be taught this way.

Each of these improvements I learned and made over the years has helped make the snatch feel more fluid yet more powerful. My big a-ha with the cumulative effects of each of these improvements is in how much it has helped the efficiency in my movements. I was expending so much additional energy in the way I was snatching before. Watching that video from 2009 now, I can see that so clearly. It honestly looks painful to me.

My moral of this story is that our journey of learning and improving doesn’t stop once we earn our RKC. The RKC helps give us our foundation and our starting point for teaching. But there is so much more to learn and so much more to do after we become an RKC. What makes us really good instructors is our quest to always do more, always be better and always serve our students.

Keeping our certification current is not about paying money to re-certify and keep the letters behind our name. We must improve our own skills, which in turn helps make us better instructors. We can only help our students improve when we help ourselves improve. We can also better help our students when we have access to the most current teaching standards, combined with all the tools we learned before.

If I had never learned the current way of teaching the snatch and if I had never corrected my own technique, I certainly could have still taught people. But I believe that I wouldn’t be serving my students to the best of my ability. That is, after all, the reason why we seek out those 3 letters in the first place, right? Never give up, never stop trying to improve and don’t let the journey end with the letters.

****

Shari Wagner, RKC-II, CK-FMS owns Iron Clad Fitness in Denver, Colorado. She can be contacted through her website at IronCladFit.com, email: info@ironcladfit.com or by phone 720-900-4766. Follow her on Facebook: facebook.com/IronCladFitness and Twitter: twitter.com/IronCladFitness.

Filed Under: Kettlebell Training, Motivation Tagged With: Kettlebell, kettlebell certification, kettlebells, RKC, RKC Workshop, Shari Wagner, Snatch Test, workshop experience

How Are Your Ankles?

March 23, 2016 By Paul Britt, DC 16 Comments

Paul Britt Ankle Mobility

Have you played a lot of sports?

Do you wear high heels?

If so, how do you think your ankles are doing?

I have found that most of the people who I train tend to lack ankle mobility. This can be the first kink in the movement chain, and lead to further issues within the whole body. Ankle mobility issues can lead to knee, hip, and even shoulder mobility issues. These issues can also travel down that same path from shoulder to ankle. To find out what is ultimately causing the use, see your doctor and/or be screened by someone who is FMS certified. If you have pain, see your doctor first to be cleared.

The following is a quick ankle mobility series that we use in our gym. Everyone who trains with me has been screened with the FMS/SFMA and if they have pain have been evaluated by their doctor.

I don’t show it in the video below, but everything starts with diaphragmatic breathing. We will typically breathe for a couple minutes to transition from work/life stress so we can train mindfully.

We start out by foam rolling the shin area. We work the anterior tibialis, the band of muscle on the outside of the shin. We are using small strokes to locate areas that are tender or tight. We then will make several passes over that area.

Next, we roll out our calves. While it is possible to do that with the foam roller, I like The Stick for this. It allows for adjustable tension on the calf, and requires less force to work on any trigger points/tender areas. I tell my students to only use about 7-10lb of force while rolling. If The Stick looks like a horseshoe, you are using too much force.

Then, we move onto direct ankle work. There are two different versions on the video. The first version—the field expedient manner—requires no equipment. It is performed in a half-kneeling stance. If the right knee is up, take your right hand and cup the right heel. The left hand will cover the toes. The goal is to keep your heel planted as you progress through the motion. Utilizing diaphragmatic breathing, apply some pressure on your right knee with the right elbow as you move back and forth through the movement. I find the normal rep range for the best results is about 10 reps per side. Perform this on both sides.

The second version is very similar except that you are using a stick and moving the knee to the outside of it. You only go as far as you can while still keeping your heel flat on the ground.

The last movement is the heel sit. Sit back on your heels with a little bit of a backwards lean. Tighten your thighs and think about driving your shins into the ground, then relax. You should feel your feet flatten out as you perform 3-5 reps of this sequence.

This quick and easy series is beneficial for restoring mobility to your ankles and improving your kettlebell training.

***
Senior RKC Paul Britt has been an RKC kettlebell instructor since 2006. He trains clients at Britt’s Training Systems, his award-winning Hardstyle Kettlebell Training Facility in Rockwall, Texas. Paul has served as an assistant instructor at many RKC and HKC Courses, is a Certified Kettlebell Functional Movement Specialist (CK-FMS) and works with some of the top Chiroprators in North Texas. Please visit his website brittstrainingsystems.com for more information.

Filed Under: Mobility and Flexibility, Tutorial Tagged With: ankle mobility, mobility sequence, mobility training, mobility video, Paul Britt

The Clean Viking Salute, a New Spin on a Kettlebell Classic

March 16, 2016 By Ryan Jankowitz 5 Comments

Ryan Jankowitz Kettlebell Clean Viking Salute

As a kettlebell instructor, I love performing kettlebell complexes and chains. I also enjoy putting my clients through complexes and chains—though they may not love them as much as I do.

Complexes and chains allow you to string several movements together without putting the kettlebell down. Complexes and chains create a very time efficient, heart-pumping workout that hits many different movement patterns. Not only do we train several different movement patterns, but we are also able to explore the “time under tension” concept. The more time we spend holding tension, the stronger we become.

With that being said, I want to share one of my favorite chains. Gus Petersen’s “Viking Salute Workouts”, from the RKC Book of Strength and Conditioning, inspired this chain.

Gus Petersen’s Viking Salute Chain:

  • Snatch x 1
  • Overhead Lunge x 1
  • ½ Kneeling Press x 1
  • Overhead Lunge back to standing x 1
  • Repeat

If you have not read the RKC Book of Strength and Conditioning, I highly recommend you pick it up. It contains some really great programs and workouts that will spice up your training.

Gus Petersen’s “Viking Salute Workout” is great for intermediate to advanced kettlebell practitioners, but what about beginners?

My variation may work very well for those new to kettlebells, or instructors working with beginner clients. Instead of performing a snatch to start the chain, we begin with a clean.

Here’s the Clean Viking Salute chain:

  • Clean x 1
  • Rack Lunge x 1
  • ½ Kneeling Press x 1
  • Rack Lunge back to standing x 1
  • Repeat

I have used this chain successfully with individual clients and classes alike. With this chain, we explore a pull, hinge, lunge and vertical push all within one workout. I usually have my clients perform 5 reps on each side and anywhere from 3-5 sets in a training session.

Feel free to get creative with this chain and turn it into a complex or even add some rack carries. Give this workout a whirl and let me know what you think.

Stay Strong.

****

Ryan Jankowitz, RKC-II Instructor, CK-FMS, is a life-long athlete who can’t imagine sitting behind a desk. He enjoys sharing his passion for fitness and spreading the RKC knowledge. Ryan operates a remote fitness coaching service and is available for private kettlebell workshops as well. You can reach him at ryan@rjkettlebell.com or through his website rjkettlebell.com. He also works with clients and teaches kettlebell classes at Fitness on the Run in Alexandria, Virginia. If you’re in the area, visit fitnessontherun.net and come swing some bells with Ryan.

Filed Under: Kettlebell Training, Workout of the Week Tagged With: Gus Petersen, kettlebell chain, kettlebell complex, kettlebell video, kettlebell workout, kettlebell workout video, kettlebells, RKC, Ryan Jankowitz, video, viking salute

It Isn’t Sitting, It’s the Chair

March 9, 2016 By Jay Armstrong 10 Comments

Jay Armstrong Sitting Stretching

We have all heard about the bad things that happen to our bodies as a result of sitting in a chair—slumped shoulders, collapsed ribcages, tight hip flexors, weak abs, etc. Yet, if you want to improve your flexibility, I recommend you sit down. However, instead of sitting on your soft, comfy couch with a tv remote in one hand, your assignment is to sit on the floor.

The typical armchair encourages you to pour yourself into the seat, completely disengaging your glutes and abs. Then, a pair of armrests beg you to round your shoulders forward and flare your elbows outward—all while collapsing your ribcage. With your ribcage collapsed, your breathing will be compromised. In this position, your head will jut in front of your shoulders, and stress will begin to creep into your neck.

Nothing about the “armchair seated position” resembles quality postural alignment.

Prior to the invention of these cushy posture-destroying chairs, human beings were forced to sit differently. If, after miles of walking, you decided to rest on the side of the trail, you probably would have looked to rest your buns on a rock. In this position, you still need to maintain control to keep from falling off the rock. You’ll probably need to sit with a relatively erect posture, while keeping your head over your shoulders. After all, you are simply resting your legs and not your entire body. The only time you are supposed to be completely relaxed is while lying down.

Sitting Cross-Legged
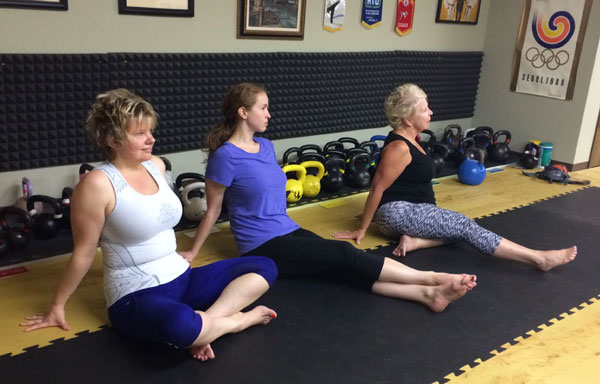
In our convenient Western lifestyle, we tend to stay further and further away from the ground. We don’t lie down or sit on the ground. However, sitting on the ground will potentially improve your flexibility for many other movements. I’ve outlined several ways to sit which can help improve posture, flexibility, and overall fitness.

Sitting Cross-Legged

When we sit in the cross-legged position, the femurs of upper legs are moved into external rotation. Sitting this way may also automatically encourage you to open your chest and properly align your spine.

Sitting On Heels
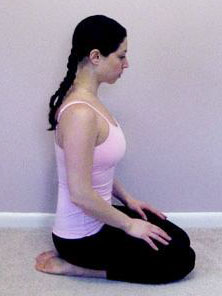
Sitting on Your Heels

When we sit on our heels, we’re obviously putting our knees into maximum flexion. Simultaneously, our feet will usually move into complete plantar flexion. Once again this position automatically encourages us to sit with an erect posture, activating the muscles which stabilize the spine.

Sitting with Internal Leg Rotation

Most people have a tough time moving their upper legs into significant internal rotation. However, if you can flex your knees, move your knees apart and sit between them, you will greatly improve your ability to internally rotate your hip joints. The little guy in the picture has a rather extreme range of motion and may actually prefer to sit in this position.

Sitting With Internal Rotation

Sitting with Your Arms Behind You

The soft, cushy armchair combined with computer work constantly places our shoulders in front of our chest or sternum—encouraging internal rotation of the shoulder joint. When we sit on the floor and place one or both arms behind us, we externally rotate the upper arm and open the chest. This is an excellent corrective position.

Sitting With Arms Behind

Sitting with One or Both Legs Straight

If you want to improve your hamstring flexibility, or desire to do the splits, sitting with one or both legs straight is the ticket. Any method of sitting with one or both legs straight (see photo at the beginning of this post) will provide at least a little stretching of the straight leg. So, “stretching” doesn’t need to be just an activity within your kettlebell workout. You can just sit on the floor while working or watching television. More time spent in these positions will make them feel more natural. If you watch television—and I encourage you to find something else to do with your valuable time—start by sitting on the floor from one commercial break to the next. While you’re seated on the floor, increase your awareness of the position of your ribcage, head, and spine. You may be surprised by the intensity of the stretching sensations you feel from just spending time close to the earth.

***

Jay Armstrong is a Senior RKC, 6 Degree Black Belt TKD, and Master Z-Health Trainer.  The past 30 years have been dedicated to helping others develop confidence through increased strength and pain-free, exceptional mobility.  His quest for knowledge continues.  He runs The Kettlebell Club in Houston, Texas.

Filed Under: Mobility and Flexibility, Tutorial Tagged With: flexibility, Jay Armstrong, lower body, mobility, sitting

Five 5s: Five Simple, Effective, Nourishing Kettlebell Workouts

March 2, 2016 By Nick Lynch 11 Comments

Nick Lynch Group Workout Kettlebell Jerks

Sometimes, I just want to do a quick workout and either can’t or don’t want to spend an hour to do it. That’s why I put together this series of efficient kettlebell workouts which can be done in a short amount of time with minimal equipment (a kettlebell, the floor, rings and a pull-up bar of some type). These workouts are also simple to modify. If you DO have an hour in the gym, you can simply multiply your sets. As you’re reading, I invite you to take note of any questions you may have and ask them in the comments section below this blog post. I’m more than happy to do my best when answering them. I hope you enjoy these programs as much as we do in Milwaukee!

1: “The Zen of Zane”

Frank Zane used to train chest, triceps and shoulders in one day. Compared to how his competition was training, his approach was totally bizarre. His competition was training opposing muscle groups such as chest and biceps. Frank was known for his amazing symmetry and muscularity. With a daily dose of this workout, I think you might start to look and feel like Frank Zane!

Set a timer for five minutes and repeat the following sequence of exercises until five minutes has passed.

  • 5 push presses per side
  • 5 pull-ups
  • 5-10 push-ups
  • 30 seconds break
  • 1 push-up
  • 1 push press per side
  • 1 pull-up
  • 5 push presses per side
  • 5 pull-ups
  • 5-10 push-ups
  • 30 seconds break

Modification
Trade reps for seconds. For example, instead of 10 pull ups, perform a 10-seconds flex arm hang.

2: “My Favorite”

This workout is my personal favorite, let’s see what you think!

Set a timer for eight minutes, complete at least four full sets of the following:

  • 5 ring dips
  • 25 swings
  • 1:30 minutes rest

Modifications
Option one: try putting your feet a raised platform for extra stability. Option two: perform bench dips instead of ring dips. Option three: forming a triangle with your hands, and perform 5 push-ups, be sure to use the entire range of motion, bringing your sternum down to your hands.

3: “Lungs of Hell”

The name of this workout is a tribute to the classic Megadeth song which I think also sounds great played loud along with this workout…

Set a timer for five minutes, and perform the following sequence safely for time:

Perform a get-up to standing, do 5 overhead lunges, 5 push presses, 5 squats, then 5 snatches. Keeping the kettlebell overhead finish the get-up and return to the floor. Switch sides, resting as needed.

Modifications:
Option one, reduce your reps to three. Option two, reduce the size of the kettlebell you’re using. Option three, reduce your reps to one.

4: “Speak To Me/Breathe”

Pink Floyd begins their infamous albums, Dark Side of the Moon with “Speak To Me” which leads right into “Breathe.” I think this is funny because this could also describe the breathing techniques we teach and use in the RKC community. There’s the classic hiss during the swing and goblet squat “hoooop” grunt. You’ll need to focus on your vocalizing your breaths to keep up with these reps. The end result is amazing lung capacity, strong legs, bullet-proof abs, and grip strength that won’t quit!

Set a timer for 8 minutes with the goal of completing 4 rounds of the following:

  • 10 goblet squats
  • 25 swings
  • rest
  • 5 goblet squats
  • 25 swings
  • rest

Use a HEAVY kettlebell.

Modifications
Option one: use a lighter kettlebell. Option two: reduce overall reps. Option three: perform bodyweight squats and vertical jumps instead of goblet squats and swings.

5: “Look Alive”

Coordination and attention to detail make this last workout effective and nourishing. It’s challenging and fun at the same time because you must focus on every rep for the entire five minutes.

Set a timer for five minutes. Repeat the following sequence for a total of five sets. If you finish early, take a short active-rest break and, a swig of water and continue until the end of five minutes.

  • 5 push-ups
  • 5 partial jumps (please refer to video for the technique)
  • 5 swings

These five simple but scalable workouts produce results even when time is limited. I invite you to share your experience after trying one or all of the Five-5s. Feel free to have fun and modify them to fit your needs.

Enjoy and until next time, have a most excellent day!
Nick Lynch, RKC Team Leader

Nick Lynch Five Five

***

RKC Team Leader Nick Lynch is a Strength and Conditioning Coach at Milwaukee School of Engineering University (MSOE). He owns Superb Health Milwaukee, a kettlebell studio in Milwaukee, WI. He has 13 years of full-time training and coaching experience and a lifetime of wellness education. Nick lives in Milwaukee, WI with his wife Natalie and son Weston.

Filed Under: Kettlebell Training, Workout of the Week Tagged With: bodyweight and kettlebell workout, kettlebell workout, kettlebell workouts, Nick Lynch, short workouts, workout, Workout Wednesday

Primary Sidebar

Featured Products

previous arrow
BOOK-RKCBookofSnC
HardStyleKettlebellChallegeDanJohn700
BookCoverMasterTheKettlebell1
RKCiconKettlebell512
KettlebellGoddessdv040
next arrow

Recent Posts

  • RKC Big Six Workout
  • The Kettlebell Swing & Low Back Pain
  • Key Kettlebell Exercises To Help You Create Better Balance
  • How to Most Effectively Use Kettlebells to Meet Your New Year Goals
  • 1 Exercise That Checks All The Boxes
FOLLOW US ON TWITTER!

Archives

Copyright © 2025

Dragon Door Publications / The author(s) and publisher of this material are not responsible in any manner whatsoever for any injury that may occur through following the instructions or opinions contained in this material. The activities, physical and otherwise, described herein for informational purposes only, may be too strenuous or dangerous for some people, and the reader(s) should consult a physician before engaging in them.