• Skip to main content
  • Skip to primary sidebar
  • Home
  • Contributors
    • Matt Beecroft, Master RKC
    • Martijn Bos, Master RKC
    • Andrea Du Cane, Master RKC
    • Angelo Gala, Master RKC
    • Chris Holder, Master RKC
    • Steve Holiner, Master RKC
    • Dan John, Master RKC
    • Mike Krivka, Master RKC
    • Thomas Phillips, Master RKC
    • Robert Rimoczi, Master RKC
    • Phil Ross, Master RKC
    • Max Shank, Master RKC
  • Workshops
    • HKC Workshops
    • RKC Workshops
    • RKC-II Workshops
  • Find an RKC Instructor
  • Resources
    • Articles
    • Forums
    • Kettlebells
    • Products
  • Blogs
    • PCC Blog
    • Strong Medicine Blog
  • Archives

RKC School of Strength

Official blog of the RKC

kettlebell deadlift

Key Kettlebell Exercises To Help You Create Better Balance

February 20, 2023 By William Sturgeon 1 Comment

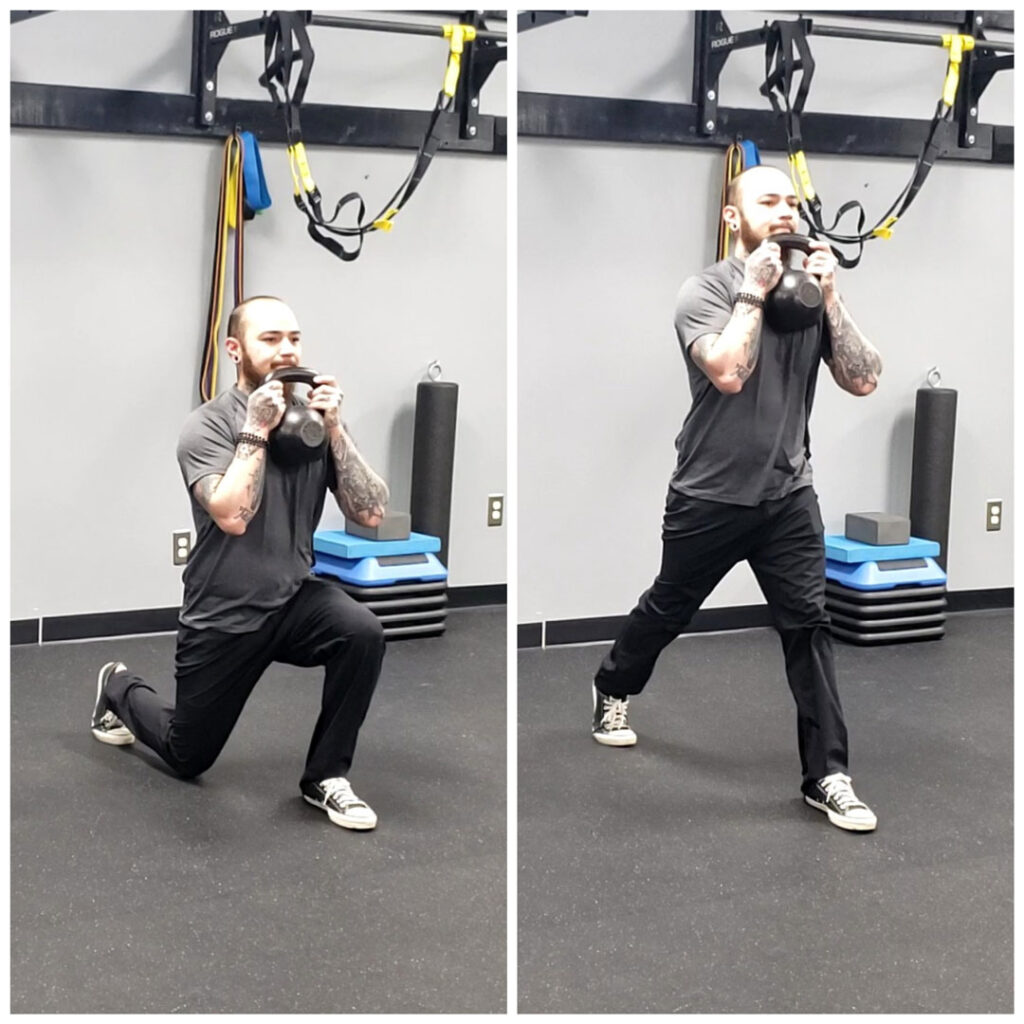
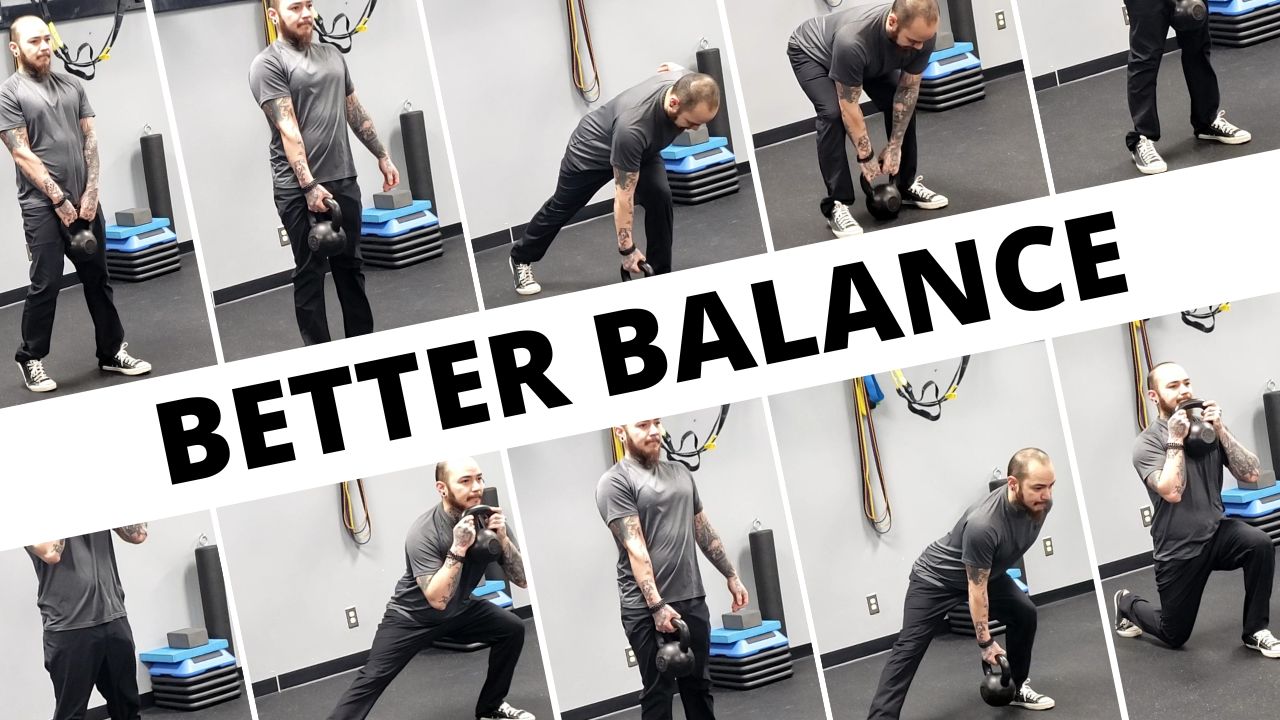
Better Balance with Kettlebell Exercise - article lead image with multiple cropped examples of the exercises described in the article.

What effective balance training is NOT

Many people believe that balance training has to involve a bosu ball or a balance pad where you think that you’re challenging and improving your balance. This is an outdated idea of how balance should be trained.

When you work with the general population, you discover that a high number of them have a difficult time simply standing on one leg. If your client is already challenged by standing on one leg and you put them on a balance pad or bosu ball, you’re only building on dysfunction and a faulty base of support.

Instead of going right into challenging their surface area of support, challenge their base of support first. This allows you to help build a stronger base of support and go from stable to least stable using their own biomechanics.

The more effective way to train balance

To properly train balance you need to see where you’re at with your client. This can be done by assessing their movement.  The FMS does a good job at helping screen for movement capabilities. The assessments that help to determine a client’s balance are the split squat and hurdle step. I prefer to use a single leg stand test which is similar to the hurdle step and ask my client if they can perform a lunge — and if not I test their ankle range of motion by using a simple ankle dorsiflexion test to see where their range of motion is.

When you train proper balance you begin with the most stable base of support which is going to be a bilateral position where both feet are flat on the floor. From there you can change the body position into a kickstand position, then further it into a step back position, then move into a full single leg motion. Balance training is about how well you can maintain stability of the fixed joint. When you do proper balance training there is no need for balance pads or bosu balls.

Here are some of my favorite kettlebell exercises to help build and progress in proper balance training.

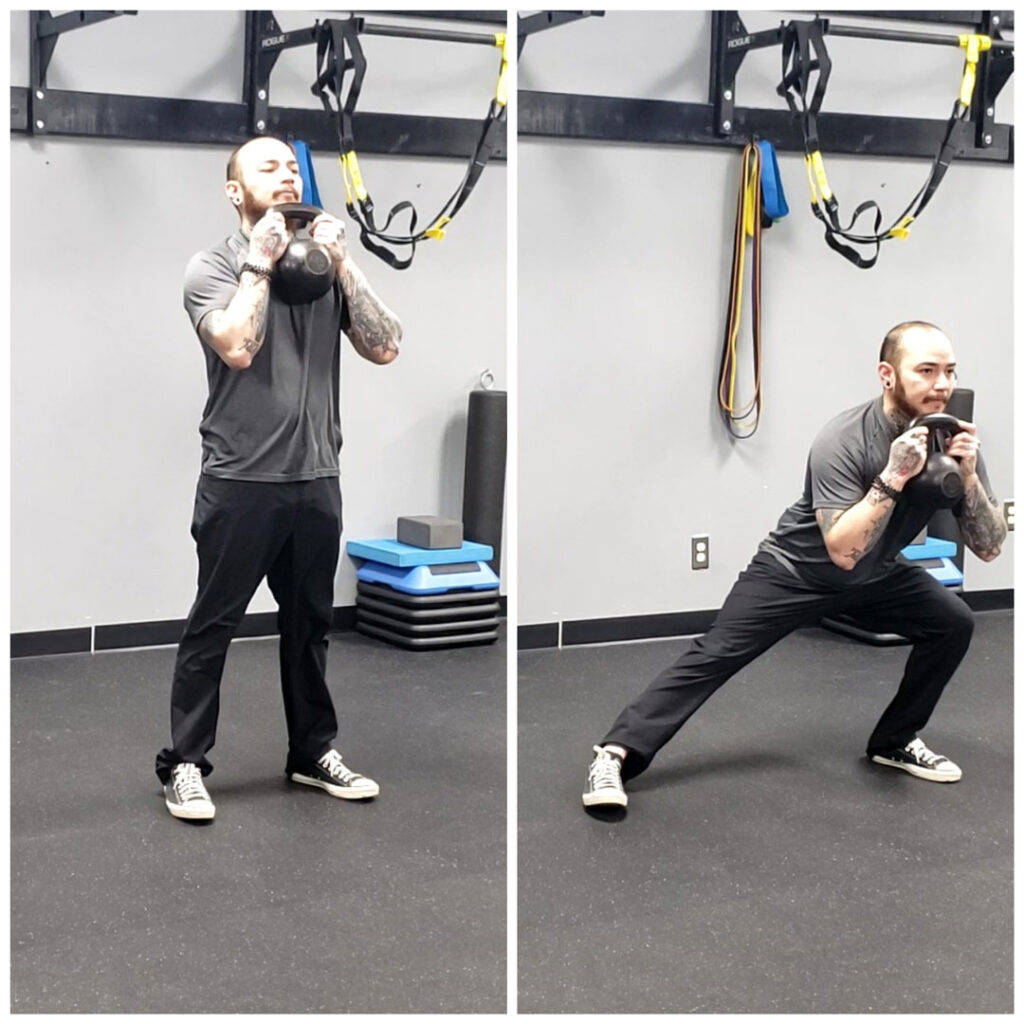
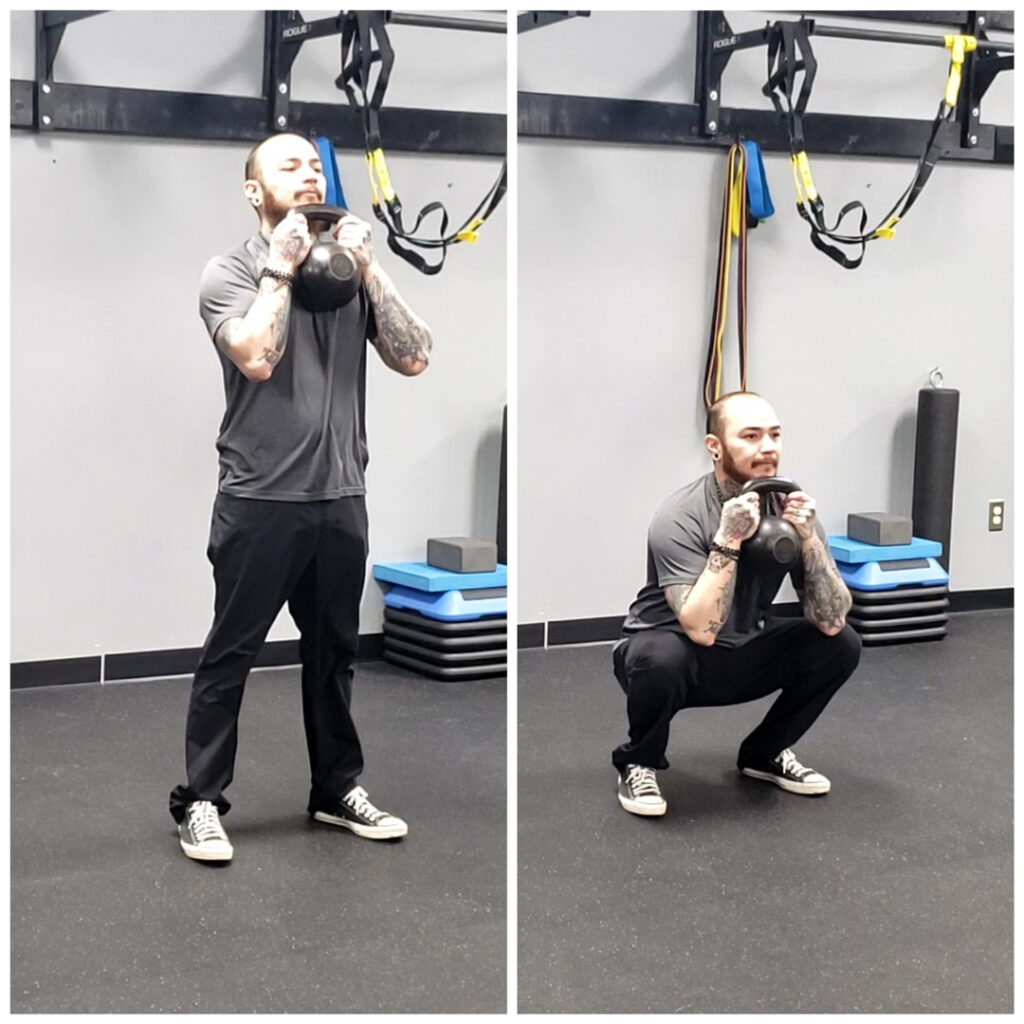
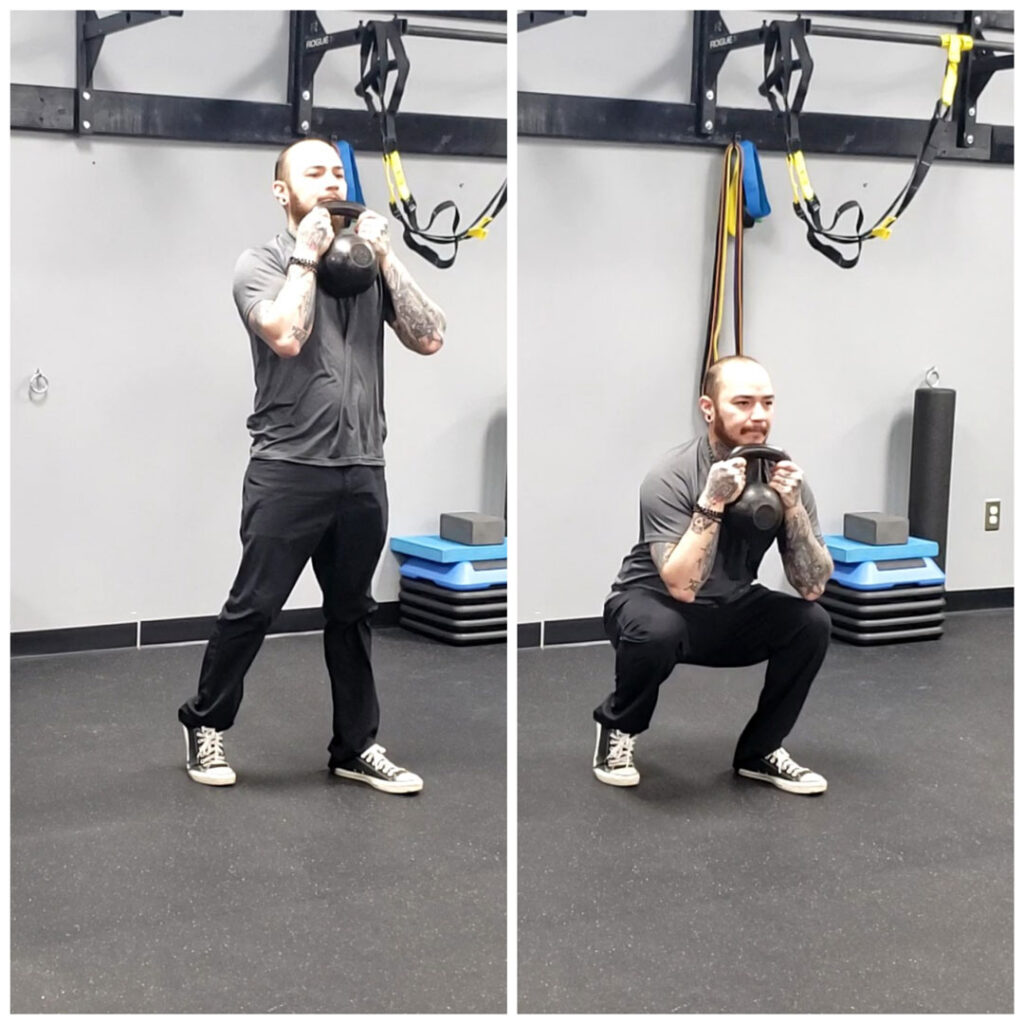
Split Squat

kettlebell Goblet squat
Kettlebell Goblet Squat
Kettlebell split squat
Kettlebell Split Squat

The split squat is a great exercise because you get to train balance of the forward leg while maintaining stability through the rear foot.

You can begin with a traditional squat and once the technique has been properly mastered you can then move into a kickstand position where you begin to challenge the base of support, because you are raising the heel off the ground and pulled in-line with the fixed heel. From there you can begin to further challenge the position by going into a step back position, then going into a rear foot elevated position where you are creating a greater intensity to your balance and stability.

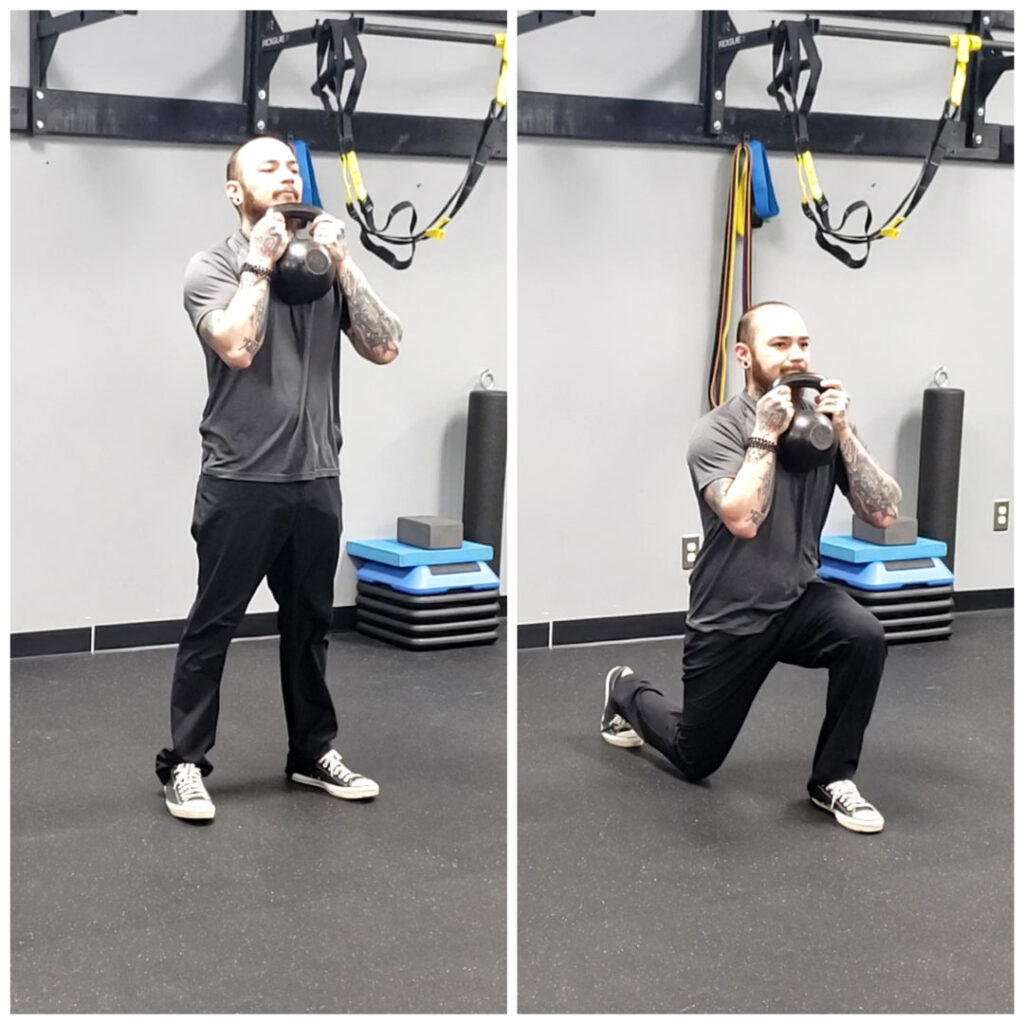
Reverse Lunge

Kettlebell Lunge
Kettlebell Reverse Lunge

The reverse lunge is another exercise I like to help train balance for clients. If the client is unable to perform a lunge then I will have them substitute it for a step up. The sequence is slightly the same, which would be starting with the greatest base of support where they’re continuing to learn how to squat from there they can move into an active kickstand position, then moving into a reverse lunge. You can progress this movement by elevating the front foot or by stepping forward.

Lateral Lunge
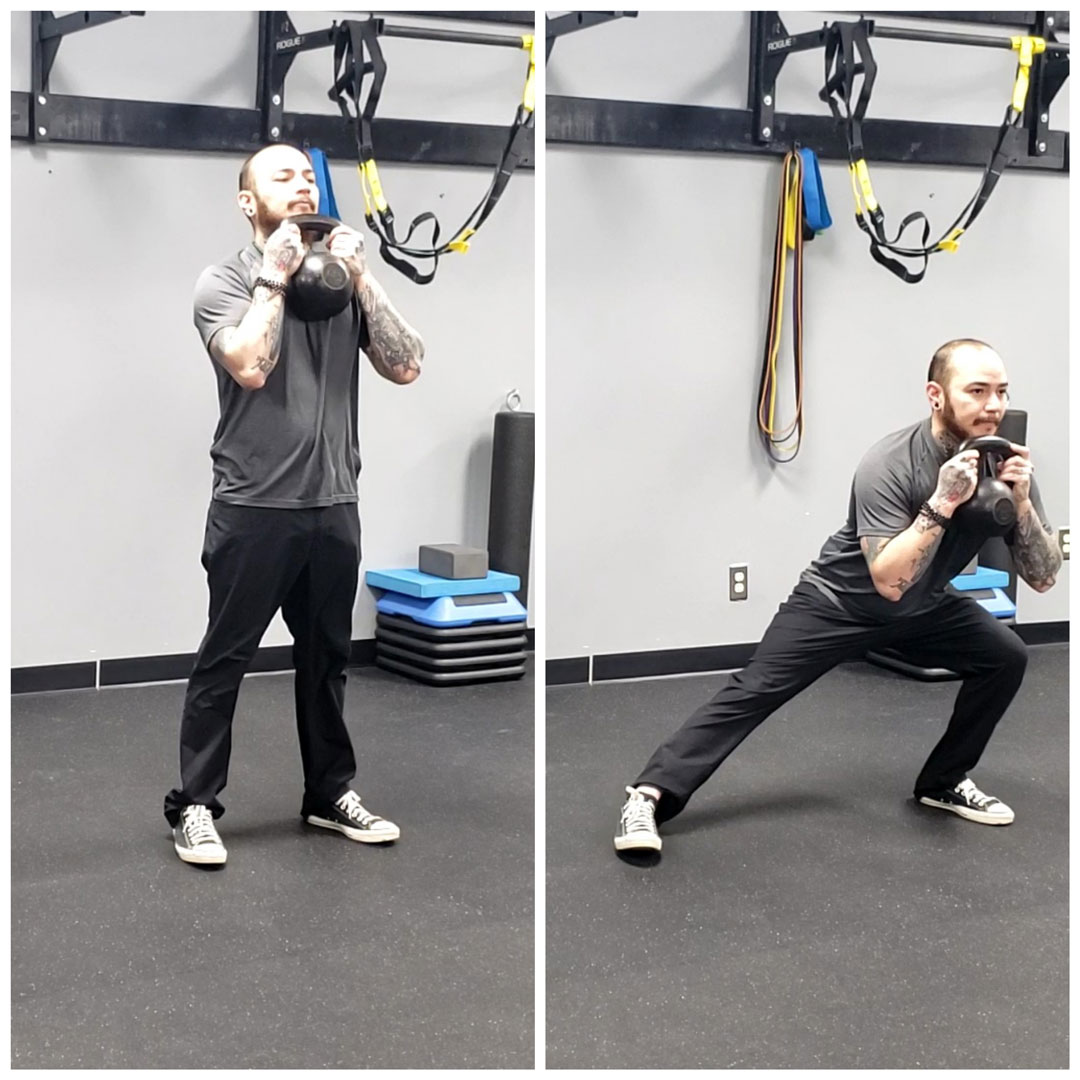
Kettlebell lateral lunge The lateral lunge takes you from the sagittal plane of motion into the frontal plane of motion where things can be even more challenging for creating better balance. You can begin by starting in a wide stance and squatting down in a stationary position. From there you can move into a more active lateral lunge where you are more active and fluid with the movement. You can progress this movement by adding in a cross over step to further challenge the base of support with additional resistance.

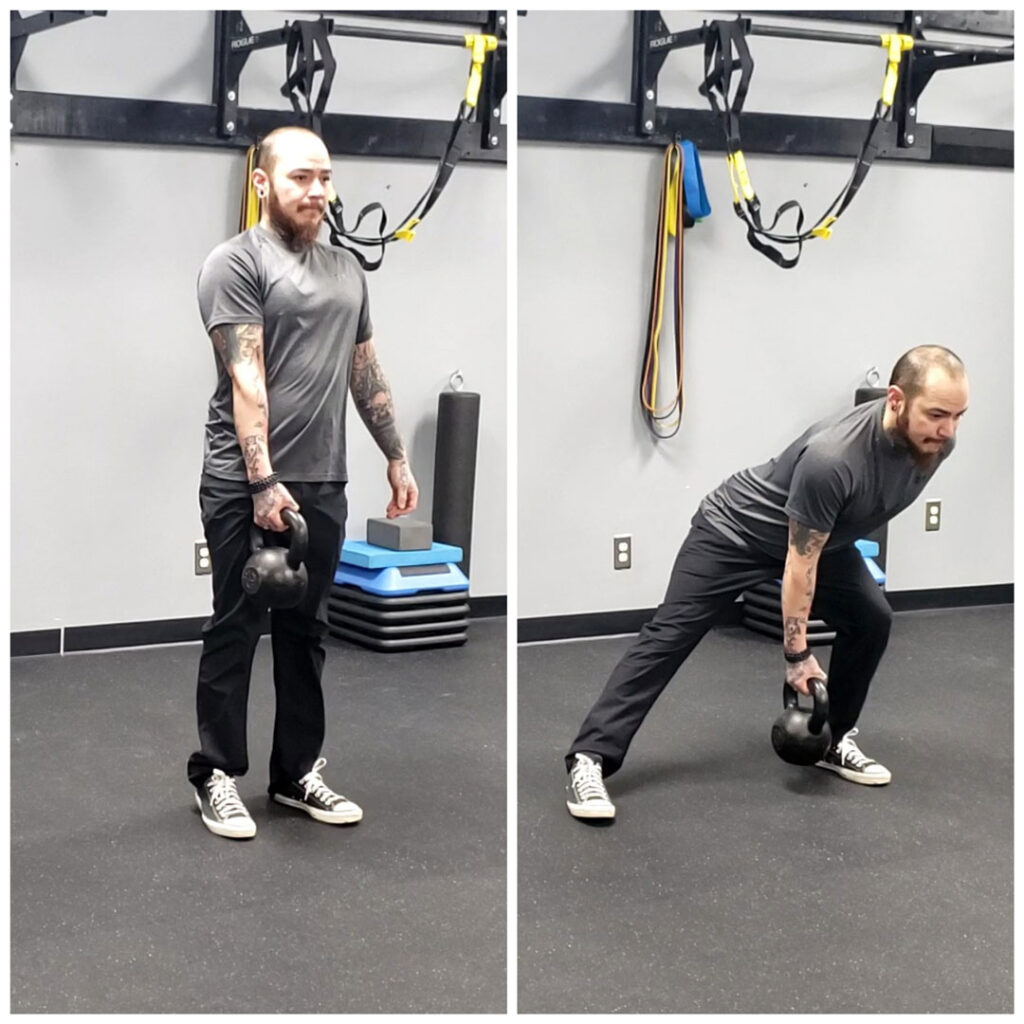
Single Leg Deadlift

Kettlebell Deadlift
Kettlebell Kickstand Deadlift
Kettlebell One Leg Deadlift

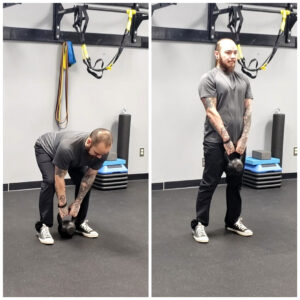
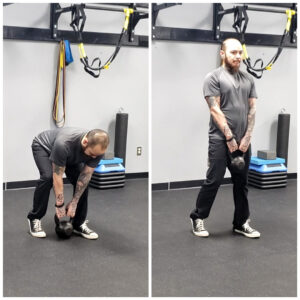
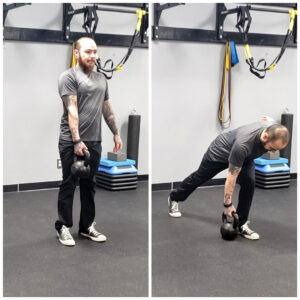
The single leg deadlift is one of my favorite exercises to build better balance. This is a similar progression model where we begin with building a solid foundational base of support with both feet flat on the ground. From there clients can progress with a kickstand position then move into an active step back position, then lastly going into a full single leg deadlift. This allows you to build the lever arm of the traveling leg from short to long and from most stable to least stable.

Lateral Deadlift

Kettlebell lateral lunge
Kettlebell Lateral Lunge
Kettlebell Lateral Deadlift

The lateral kettlebell deadlift will be a similar build up from the lateral lunge. You can be in in a wide stationary position, then build into a more active movement, and progress it by adding in the crossover step. You can go from a single bell to double bells to help add load and complexity to the exercise.

Balance training should be a big component to your fitness program, but it needs to be done in a sequential manner where there is a gradual build up to the end goal. Adding strength onto dysfunction will only lead to further dysfunction, especially when your client is already lacking a bare minimum entrance point to their balance.

***

William Sturgeon, RKC Team Leader, RKC II trains clients at his gym, Restored Strength. Contact him through his website at RestoredStrength.com or follow him on Facebook: facebook.com/restoredstrength
Filed Under: Kettlebell Training, Tutorial Tagged With: balance training, functional training, kettlebell deadlift, kettlebell exercises, lateral deadlift, stability training, William Sturgeon

Deadlift Variations with One Kettlebell

November 18, 2020 By Ryan Jankowitz Leave a Comment

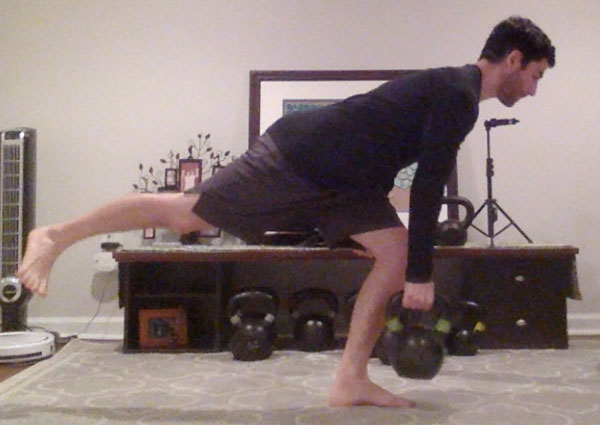
Ryan Jankowitz Single Leg Deadlift

Even though I’m writing this blog post during a global pandemic, I’m not trying to scare you into working out with kettlebells. However, kettlebell training will make you stronger and more resilient. My goal with this post is to give you a few new ideas for your kettlebell workouts because kettlebells and other fitness equipment have been hard to find recently. You may have just one kettlebell or several kettlebells and no matching pairs—but you can still do kettlebell deadlifts.

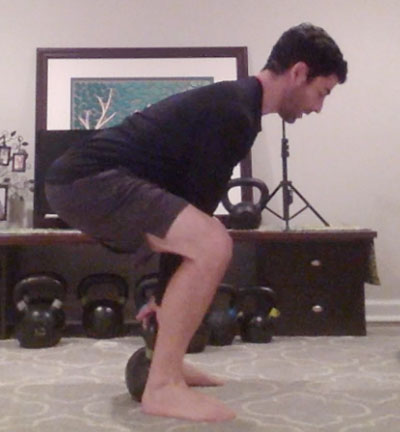
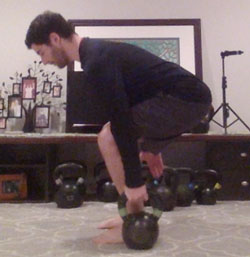
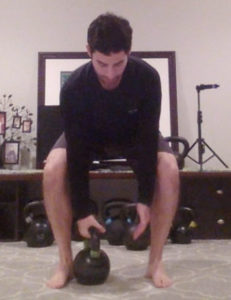
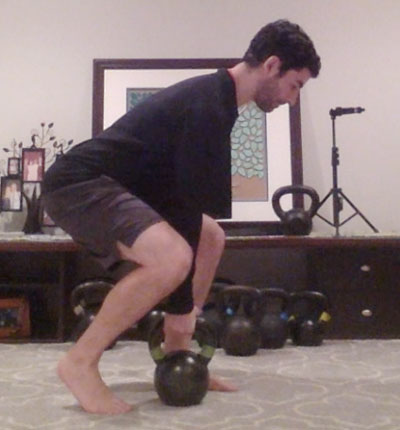
TRyan Jankowitz Kettlebell Deadlifthe deadlift is arguably the king of strength building exercises. Not only is it great for getting stronger, but it can improve your posture and strengthen your hips. When performed correctly, the deadlift can alleviate back pain.

Additionally, mastering the kettlebell deadlift will allow you to transition to the Hardstyle kettlebell swing. From there, a whole world of kettlebell exercises await.

First, you must master the standard kettlebell deadlift and understand the hip hinge.

The hip hinge means that you move from your hips, the strongest set of muscles in your body, while keeping your spine straight or neutral. Once you’ve mastered the standard kettlebell deadlift, you can begin training with a number of exciting variations. Here are a few to get you started:

Let’s Get Asymmetrical!

Ryan Jankowitz Suitcase Deadlift

Now we can unevenly load the body—for greater core engagement—by learning two different one-arm kettlebell deadlift techniques.

1. The kettlebell suitcase deadlift places the kettlebell outside one of your feet. This deadlift variation is great for grip strength because you’re only using one hand to grip the kettlebell handle. Make sure that you don’t lean or rotate toward the kettlebell as you move in and out of your hip hinge. Stay square all the way through the movement.

Ryan Jankowitz One Arm Deadlift

2. The kettlebell one-arm deadlift is fairly self-explanatory. The kettlebell will be between your feet but toward the hand that will be grabbing it.  Stay square all the way through the movement and don’t lean or rotate toward the kettlebell.  Again, grabbing the kettlebell with one hand will improve your grip strength and the offset load will really engage your core.

3. The kettlebell staggered stance deadlift is a unique variation because you use one hand—and also load one leg more than the other. You can practice this move with your opposite arm and leg, or by holding the kettlebell with the arm on the same side as the loaded leg.

Ryan Jankowitz Staggered Stance Deadlift
Staggered Stance Deadlift

4. The last variation I want to share is the kettlebell single leg deadlift. This deadlift is performed while balancing on one leg. The kettlebell single leg deadlift improves balance and is great for your feet and ankles.  This move is challenging, so take your time when performing it and move slowly with purpose.  You can hold the kettlebell in the opposing hand, or on the same side as the working (standing) leg.

Watch this video for demonstrations of each kettlebell deadlift variation mentioned in this post.

Stay Strong and Safe!

***

Ryan Jankowitz, RKC II lives in Maryland with his wife and two dogs. They love to go hiking and spend time on the beach.  When he’s not telling his dogs to stop chasing squirrels, Ryan enjoys spreading the RKC message and teaching others how to train with kettlebells.  He’s got a 90-day kettlebell transformation program that helps busy adults lose 10-15lbs., shed their spare tire and build lean muscle so that they look great naked and move like they did in their 20’s.  Click here to schedule a free call with Ryan.

Filed Under: Kettlebell Training, Tutorial Tagged With: balance training, core stability, deadlift variations, kettlebell deadlift, kettlebell deadlift variations, one arm deadlift, One leg deadlift, Ryan Jankowitz, staggered stance

Use These 3 Cues to Teach The Deadlift

August 21, 2019 By William Sturgeon Leave a Comment

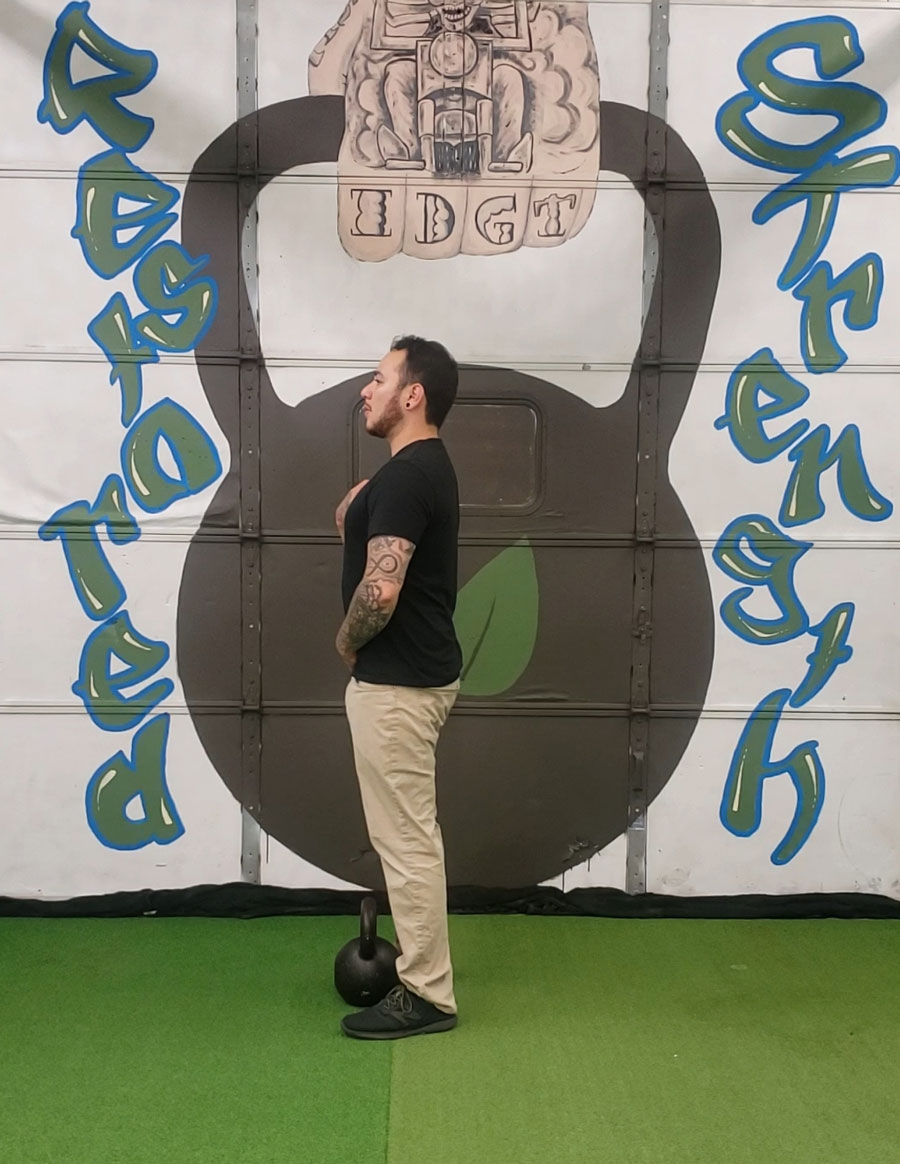
William Sturgeon Deadlift Coaching Cues

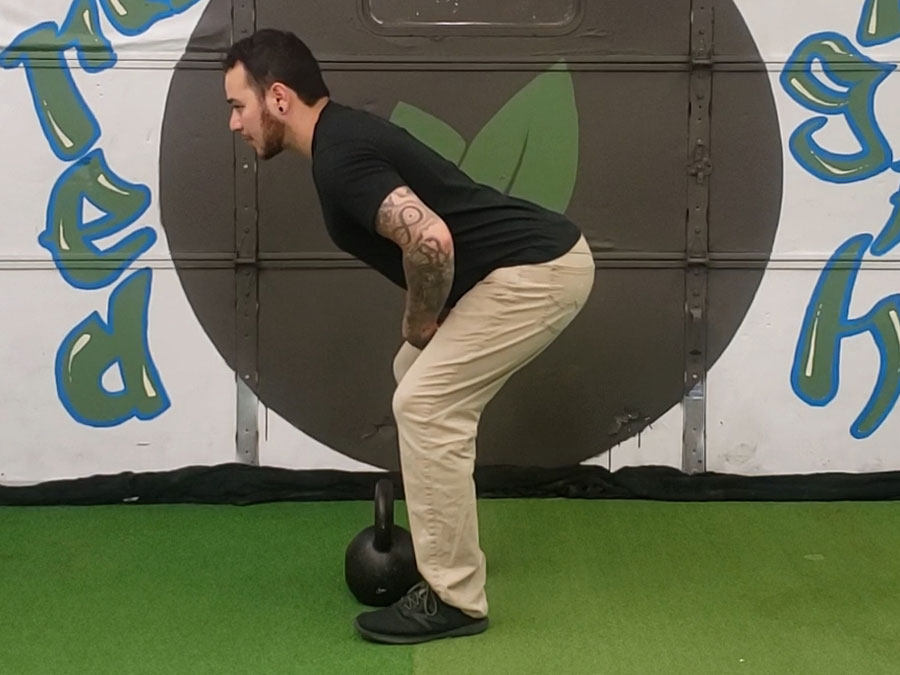
When teaching a client how to deadlift, we must first help them master the hip hinge. Often when we begin to teach someone how to hinge we use the following cues: “keep a slight bend in the knees, push your hips back, keep your back straight, pack the shoulders, push your hips forward and stand tall…”

These cues are effective, but when someone has never done a hip hinge before, all these words may be too overwhelming.

When we’re working with a client, we always want to make sure that they are not confused. We want to make our instructions as clear as possible so that they are set up for success.

Start by teaching your client a tall & tight position.

Tall & Tight

  • This position begins standing with feet shoulder width apart. Then, instruct your client to pull their hips slightly forward. Tell them to imagine pulling their belt buckle to their chin.
  • Next teach the tight position. This begins by tucking the ribs down and pinching the shoulders back.
  • The tall & tight position teaches how to maintain a neutral spine while maintaining tension in the core.

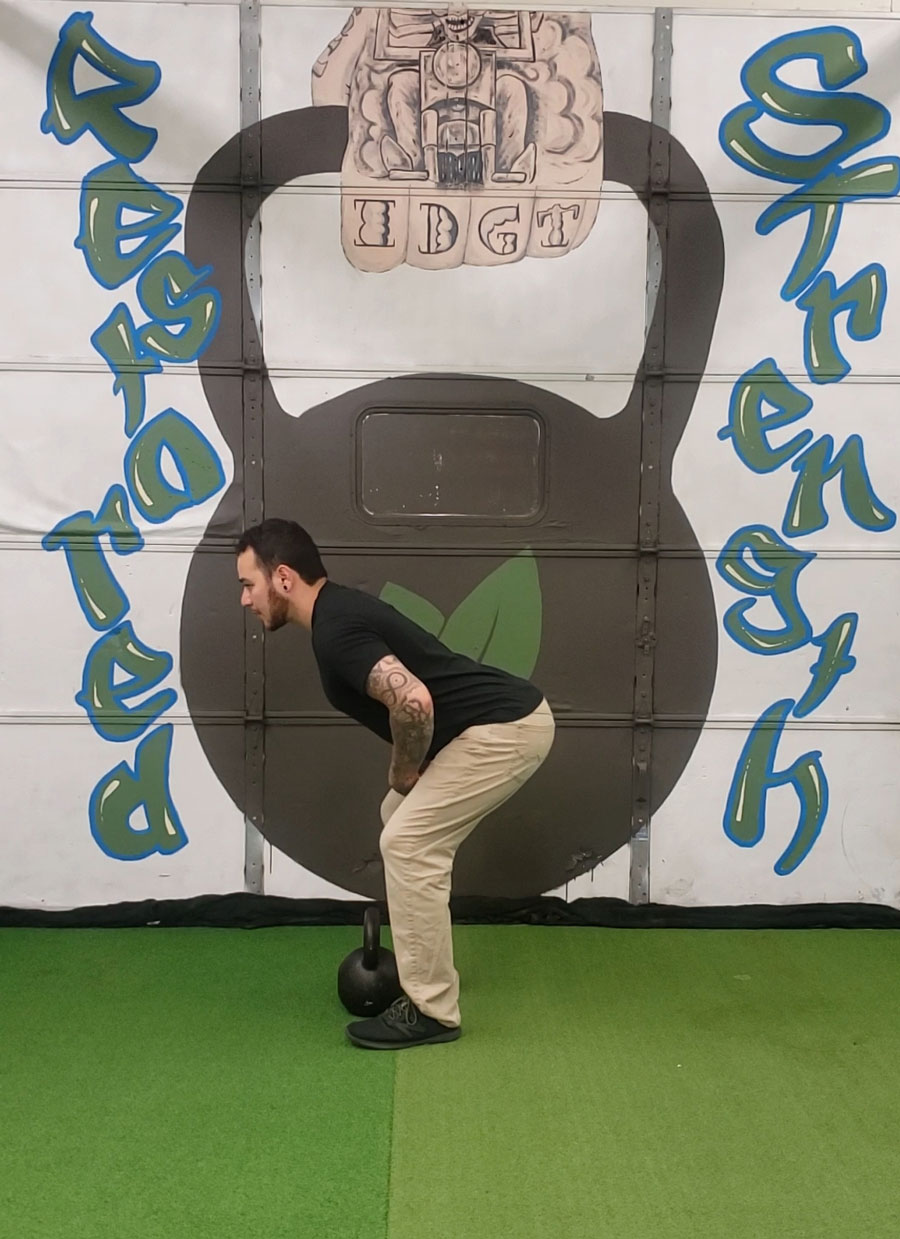
Reach Your Hips Back

Next we are going to teach our client how to reach their hips back. “Begin with a slight bend in the knees. Reach your hips back by trying to touch your butt towards the wall behind you, while keeping the tall and tight position.” These instructions can get complicated quickly, so I use the following cues instead:

  • I begin by helping people understand this movement by instructing them to place their fists on their hips.
  • Then I tell them to imagine their body is a can crusher—the upper body being the top half and the lower body being the bottom half of the machine.
  • Next, I ask them to reach their hips back and “crush their cans.”

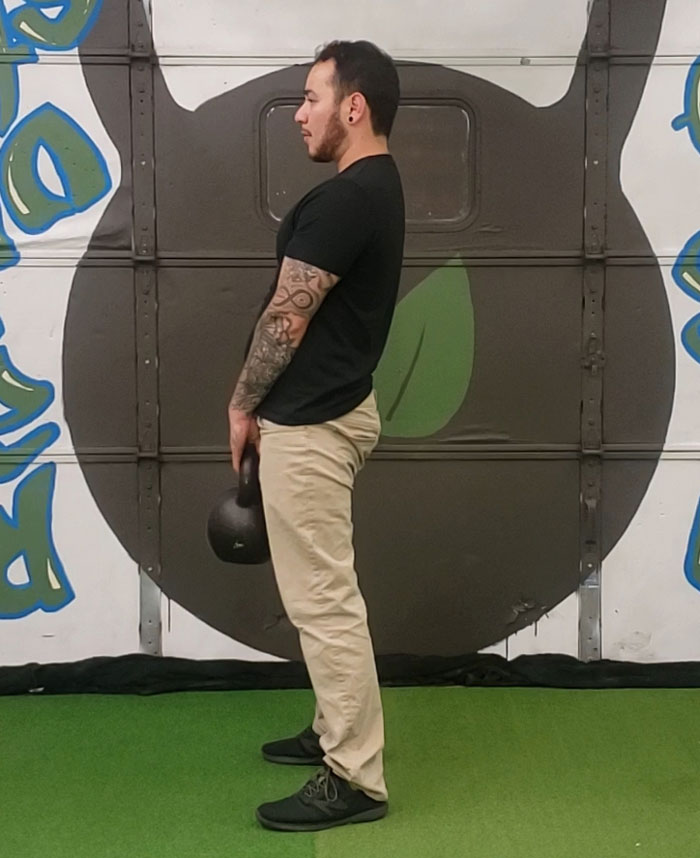
Drive Through Your Hips

Lastly we will review “driving through the hips” to finish the exercise.

  • While maintaining a tall and tight position, push through the hips to the starting position.
  • Next, think about punching your feet into the ground, while thrusting your hips forward.

Once you’ve mastered this fundamental skill you can now progress to loading your client for a deadlift.

Just remember: tall & tight, reach your hips back, and drive through the hips.

****

William Sturgeon, RKC II trains clients at his gym, Restored Strength. Contact him through his website at RestoredStrength.com or follow him on Facebook: facebook.com/restoredstrength
Filed Under: Coaching, Kettlebell Training, Mobility and Flexibility Tagged With: coaching cues, coaching deadlift, deadlift, how to do a kettlebell deadlift, kettlebell deadlift, William Sturgeon

Rowing and Kettlebells

June 1, 2016 By Kathryn Taylor 2 Comments

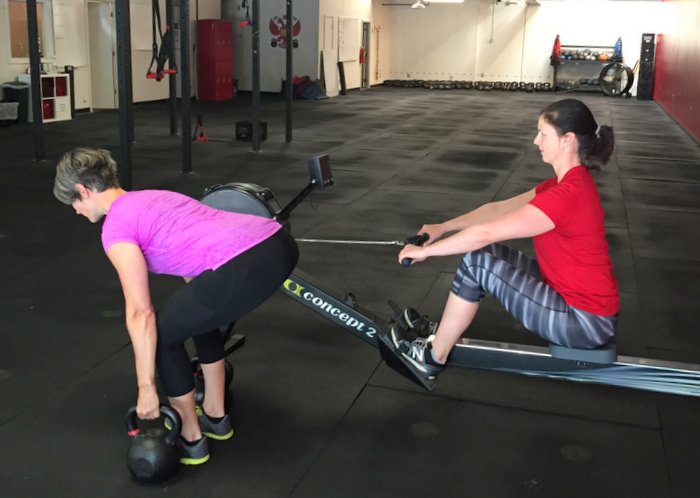
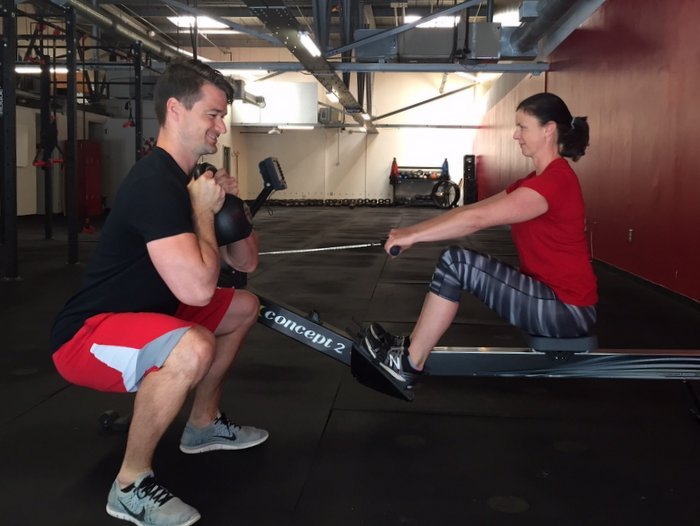
Kathryn Taylor Kettlebells and Rowing

Indoor rowing is one of the fastest growing fitness trends in the US. Head to any major city and you’ll find rowing gyms. Even the local YMCAs are taking the rowing machines out of the corner and moving them to a prominent spot. But, with the rise of rowing, we also find many people rowing with poor technique. In addition to holding an RKC certification and regularly teaching kettlebells at FitWit Studio, I also started to teach rowing this past year and became a certified rowing instructor through UCanRow2. Many of my clients already have a background in kettlebells, and I’ve found that kettlebells can be a highly effective method to teach rowing.

First, a little bit about rowing… You may have seen athletes at the gym leaning all the way back at the end of a stroke and moving with lightning speed up and down the slide. For the most part, you’ve probably observed very poor form. Rowing, like kettlebell training, is highly technical. The power of the stroke comes from the push-back (legs) and the movement forward is all recovery. A goal is to set up for a strong push during the recovery. Basically, the movement pattern starting from the front of the erg is to push back with the legs, then the body goes back at a “one o’clock” position while the arms pull in. Return to the front of the erg by straightening the arms, hinging at the hips to the “eleven o’clock” position, before moving forward on the erg to the start or “catch” position. The order of the movement: legs, body, arms, arms, body, legs. Repeat this pattern one million times and you are rowing!

As I began to teach clients the rowing technique, I found myself moving them off the erg and over to the kettlebell so they could really learn how to properly row using the deadlift, goblet squat, and swing.

Kettlebell Deadlift: Hinge

When rowing, the body closely mimics the deadlift position. But, since it’s often difficult for clients to understand the concept of the hinge while on the machine, we practice our kettlebell deadlift set-up. We work on the hinge, and use the power of the legs to drive the kettlebell up. Then we get back on the erg and mimic the same position. The deadlift also helps clients really understand the correct shoulder position—rather than allowing the shoulders to round forward at the end of each stroke, they learn to keep their back in a strong position.

Kathryn Taylor Goblet Squat and Rowing

The Goblet Squat: Drive

Because most new rowers think that the power comes from the arms, it’s really important to teach them how to drive from their feet, and engage their glutes to push themselves back. I’ve used the goblet squat to reinforce this idea. My clients start with a fairly light kettlebell, and go deep into a goblet squat. They pause for 2-3 seconds at the bottom before standing up by driving hard thorough their feet. They do 5 reps, then do the next set with a heavier kettlebell. We repeat this process 2-3 times. The goal for this drill is to teach them that with heavier weight, they need to drive harder into the ground to stand up. After this drill, we get on the erg and practice the drive.

The Kettlebell Swing: Rhythm

Rowing has a certain rhythm to the stroke. You press back hard and fast, then recover slowly. Each individual has to find the right rhythm (stroke rate) for their most efficient row. If you go too quickly, your heart rate will spike too high. But if you go too slowly, you’ll burn out your legs. The kettlebell swing mimics the same rhythm that we are trying to find on the erg. A hard, fast drive gets the kettlebell up, before we allow the kettlebell to fall back down as we recover. All of the work happens on the way up. The swing has the additional benefit of reinforcing the hip hinge of the deadlift.

I’ve found that people who have practiced kettlebell training for a year or more tend to pick up rowing technique faster than those who haven’t. If you’re looking for a new cardio workout to add to your routine, I suggest trying rowing.

****

Kathryn Taylor, RKC, ACE-CPT, Oh Baby Fitness!, UcanRow2, TRX Level 1, is Studio Manager of FitWit Studio in Kirkwood/Decatur, Georgia.

Filed Under: Kettlebell Training, Tutorial Tagged With: Athletic Training, erg rowing, indoor rowing, Kathryn Taylor, kettlebell deadlift, kettlebell technique, kettlebell training, rowing

Primary Sidebar

Featured Products

previous arrow
BOOK-RKCBookofSnC
HardStyleKettlebellChallegeDanJohn700
BookCoverMasterTheKettlebell1
RKCiconKettlebell512
KettlebellGoddessdv040
next arrow

Recent Posts

  • RKC Big Six Workout
  • The Kettlebell Swing & Low Back Pain
  • Key Kettlebell Exercises To Help You Create Better Balance
  • How to Most Effectively Use Kettlebells to Meet Your New Year Goals
  • 1 Exercise That Checks All The Boxes
FOLLOW US ON TWITTER!

Archives

Copyright © 2025

Dragon Door Publications / The author(s) and publisher of this material are not responsible in any manner whatsoever for any injury that may occur through following the instructions or opinions contained in this material. The activities, physical and otherwise, described herein for informational purposes only, may be too strenuous or dangerous for some people, and the reader(s) should consult a physician before engaging in them.