• Skip to main content
  • Skip to primary sidebar
  • Home
  • Contributors
    • Matt Beecroft, Master RKC
    • Martijn Bos, Master RKC
    • Andrea Du Cane, Master RKC
    • Angelo Gala, Master RKC
    • Chris Holder, Master RKC
    • Steve Holiner, Master RKC
    • Dan John, Master RKC
    • Mike Krivka, Master RKC
    • Thomas Phillips, Master RKC
    • Robert Rimoczi, Master RKC
    • Phil Ross, Master RKC
    • Max Shank, Master RKC
  • Workshops
    • HKC Workshops
    • RKC Workshops
    • RKC-II Workshops
  • Find an RKC Instructor
  • Resources
    • Articles
    • Forums
    • Kettlebells
    • Products
  • Blogs
    • PCC Blog
    • Strong Medicine Blog
  • Archives

RKC School of Strength

Official blog of the RKC

how-to

Try This Solo Version of a Classic Kettlebell Corrective Partner Drill

December 28, 2016 By Shari Wagner 5 Comments

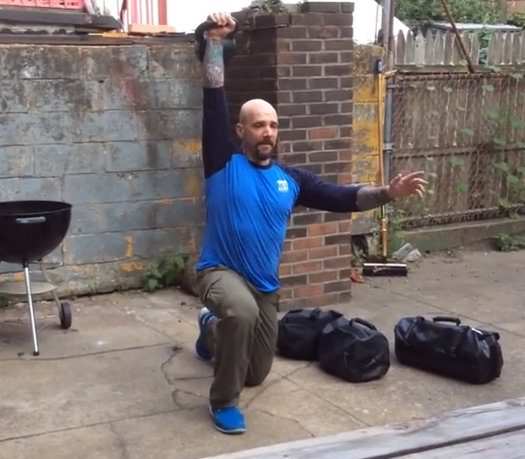
Shari Wagner RKC Team Leader Swing Setup

I was working with a personal training client who was having trouble packing his shoulder in the one-arm kettlebell swing, particularly in the hike pass position. He had no problems with this in his two-hand swing, it only happened when he switched to the one-arm swing. So, I used the RKC towel pull drill with him and voila! It taught him the feeling of properly loading in the hike position and it improved his shoulder packing when he went back to swings.

This client trains with me once a week to learn proper kettlebell technique, and the rest of the time he trains on his own at home. How could he duplicate this drill on his own when he didn’t have a training partner or qualified instructor to train with him at home? We needed a solution so that he could practice the drill prior to each set of one-arm swings, at least until he was able to groove the pattern in his swings.

The deadlift drag is a wonderful exercise and I use it quite often. In this drill, you set up as if to swing, but instead, you drag the kettlebell on the floor very slowly, keeping yourself in the hike position and loaded up through the posterior chain the whole time. However, I sometimes find that the deadlift drag doesn’t have the same carry-over into the swing itself. Not every drill will work for every person to correct the pattern they need to correct. In this case I wanted my client to be able to really load up in the same way we do with the towel pull drill since it really worked to help his one-arm swing. I wanted him to have his arm connected to his body as if the kettlebell were behind him like it is in the hike position of the swing.

I came up with a similar drill using a resistance band. I used a band that was about 1/2” wide, that provides about 15-30 lbs of resistance. Keep in mind that you’re using a double thickness of the band when you set it up as I have in the video below. The loading in this drill happens from the front as you are pulling the band behind you, rather than loading from the back in the towel pull drill. But, the drill still worked really well for my client. He got his shoulder packed in the hike position and felt the loading and support that comes from the shoulder position in the in the swing.

We did one set like you’ll see in the video below and it had the same positive effect on his one-arm swing technique as when we did the towel pull drill together at the gym. The best part is that he can now do the resistance band drill when he trains by himself at home. I prescribed for him to do about five pulls of the band, followed by one 10-second static hold before every set of one-arm swings.

https://youtu.be/9Ac8T1bpdpo

I did experiment with this same idea, and we turned around to try and load up from the back, in order to really try and emulate the towel pull. I personally didn’t like this as much as pulling from the front, because I felt like the resistance of the band wanted to pull me backwards and without a partner to brace against in the pull, I didn’t feel like I was in control of the movement as much. I also didn’t feel like I could engage the lats and the hips in the same way or to the same extent.

I invite you to try this drill both ways and let me know what you think in the comments section below!

Here’s a quick workout you can do using this resistance band drill, the deadlift drag, and the all-important single rep swing. Hopefully the combination will really help your one-arm swings.

  • 5 1-arm deadlift drags, left side
  • 5 single rep swings, left side
  • 5 band pulls, left side with :10 hold on last rep
  • 10 1-arm swings, left side
  • Repeat on the right

Repeat for 5-10 sets, resting as needed between sets

****

RKC Team Leader Shari Wagner, RKC-II, PCC, CK-FMS owns Iron Clad Fitness in Denver, Colorado. She can be contacted through her website at IronCladFit.com, email: info@ironcladfit.com or by phone 720-900-4766. Follow her on Facebook: facebook.com/IronCladFitness and Twitter: twitter.com/IronCladFitness.
Filed Under: Coaching, Kettlebell Training, Tutorial Tagged With: how-to, kettlebell drills, kettlebell training, kettlebell tutorial, RKC, Shari Wagner, video

Why the Single-Leg Deadlift is a Go-To Leg Exercise

June 22, 2016 By Andrea Du Cane 2 Comments

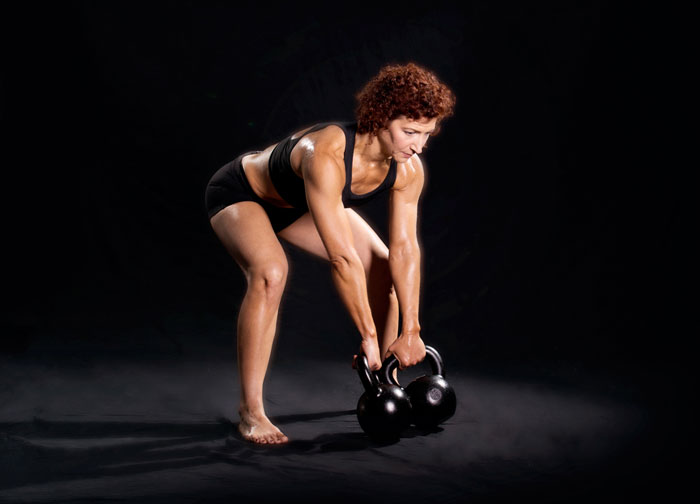
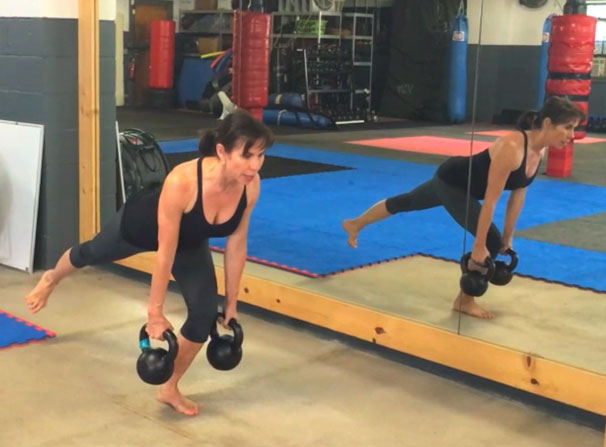
Andrea Du Cane Single-Leg Deadlift

Why do I love single-leg deadlifts so much? For one thing, nothing works the butt and legs quite like it. Add the extra benefit to the back, core, lower legs and feet and you have a full body exercise. As Gray Cook likes to say, “Maintain your squat and TRAIN your deadlift.” I think this is especially true for the single-leg deadlift.

I have to share a personal story; I’ve had four patellar dislocations. Yes, FOUR! The first one happened after a two-hour ballet/pointe class. The second happened in the middle of a jazz dance class. The third happened when my tango partner hit my kneecap with his knee and the fourth happened when my shoe caught in an escalator and I fell. Yes, dance is a very dangerous sport!

The last two times, I popped it back in and rehabbed it myself. The single-leg deadlift was the most important exercise for strengthening and rehabbing my knee. So this is an exercise close to my heart!

Here’s why everyone should add this powerful exercise to their program:

The single-leg deadlift not only develops hip strength and power, but it also allows the muscles of the hips and legs to act as stabilizers. If you think about it, every time you stand on one leg, you’re using the same muscles for balance and stability that are generally used for force production.

Forcing the body to maintain stability on one leg allows the athlete and coach to see strength imbalances from left to right side. This is extremely important for athletes as well as special populations. And it can go a long way to help reduce injuries and improve performance.

Double Kettlebell Single-Leg Deadlifts:

Holding kettlebells in each hand is easier on your core because it balances out the load from side to side. This allows you to go heavy and train pure hip strength on one leg. You can then watch for and correct left/right strength asymmetries. The focus will be on initiating and driving forcefully with your glutes. This hip drive with stability is the same for both double kettlebells and single-arm kettlebell single-leg deadlifts.

Single-Arm Single-Leg Deadlifts:

Single-arm single-leg deadlifts have the advantage of requiring torso, pelvic, and hip stability as well as strength production. This exercise can be used as a corrective exercise because loading one size requires us to resist the rotational forces put on the body.

Holding the kettlebell on the opposite side of the working leg is the most common corrective use of the single-arm single-leg deadlift. However, holding a kettlebell on the same side as the working leg also has many benefits and challenges. Both versions of the single-arm single-leg deadlift challenge the body to restrict rotational forces from loading one side.

Interestingly, only half the people who try holding the kettlebell on the same side as the working leg will find it harder than holding it on the opposite side. And it may be different from left leg to right.

When using the single-leg deadlift as a corrective exercise, find your weakest link or most challenging combination and train the weak link 2-1.

Now let’s discuss how to perform single-leg deadlifts correctly. As I like to say, “Perfect Technique = Success”. Go to any gym and you’ll see lots of sloppy single-leg deadlifts. Are they getting the most from the exercise? Are they risking hurting themselves? The answer is “no” and “yes”, respectively.

These basics apply to both double and single arm single-leg deadlifts:

  1. The back MUST remain neutral throughout the lift. If your back rounds or flexes, you risk tweaking it. And if your back rounds or flexes, I guarantee you are not using your glutes.
  2. The hips HINGE and move back over your heels. This move is not about the torso bending forward, it’s about the hips moving backward.
  3. The front knee will bend, but it does not move forward excessively. Remember, we are deadlifting not squatting. Plus, this is not a straight-leg deadlift—straight-leg deadlifts shift the focus and load to the hamstrings and off the glutes. Think of the movement as an “elevator not a teeter-totter”.
  4. The shoulders and hips remain parallel to each other and the floor. Do not externally rotate your back leg, and don’t let your working hip sink or rise above parallel. The shoulders should also remain squared off and equal—for both the single or double arm variations.
  5. The arms move as a pendulum from the shoulders as the torso moves forward. The shoulders remain engaged at the lat, do not let your shoulders disconnect from your body as your torso moves forward. This helps the rotator cuff and shoulder stabilizers work during the movement. The elbows remain locked, no “pulling” with your biceps.
  6. The knee must track the toe; do not let the knee collapse inward or outward.
  7. The feet are active. The entire foot is loaded with a bit more weight towards the heel, with the big toe working and gripping the floor.
  8. The back foot is dorsiflexed and the toe is facing down to help keep the hips “closed”.
  9. The back leg is an extension of the spine, and the leg should not be higher or lower than the hips. The back leg should be in line with the hips, and active to help with balance.
  10. Squeeze your palms into the kettlebell handles, this increases shoulder and core stability and strength.
  11. Keep your eyes focused approximately 3-6 feet in front of you to help keep your head in alignment and to assist balance.
  12. Inhale as you stand back up. Power breathe as you drive your foot down into the ground and lift up.

All the elements listed above apply to both the two arm and single arm single-leg deadlift. For added focus, maintain level shoulders and torso at all times when performing single arm single-leg deadlift. You will need to fight the rotational pull with the weight.

A few other thoughts: If at all possible, perform your single-leg deadlifts barefoot. The proprioceptive, neurological information from your feet will assist your balance and make you stronger.

Modifications for Different Populations:

  • Use platforms to raise the kettlebell(s) so that they can be picked up safely AND with no spine flexion.
  • Start from the top instead of picking the kettlebells up from the ground. This way you are already loaded, instead of trying to find tension and stability at the bottom of the movement.
  • People with bad knees or balance issues can hold onto a wall or bar with one hand and hold the kettlebell in the other hand. They will not have to “fight” for balance and risking tweaking their knees or back.
  • Keep the back leg down as a “kick-stand”. This also helps with balance issues.
  • NEVER fight for balance! If you start to lose balance, simply place your back leg down on the ground and regroup.

When training, start with medium loads to get a feel for your weaknesses while developing single leg strength and balance. Try 6-8 reps 2-4 sets with this medium load. Then go heavy, especially with double arm single-leg deadlifts and drop the reps to 3-5.

This exercise should be performed slow and controlled—NOT fast and bouncy. If you’re bouncing up and down, you are either hiding weaknesses or you chose a kettlebell that is too light!

Here’s a short demo of a two-arm single-leg deadlift. As stated above, all points apply to using one kettlebell:

***

Andrea Du Cane is a Master RKC Kettlebell Instructor, CK-FMS, CICS, and RIST, ZHealth certified, she has a BA in Psychology from the University of Minnesota and is also a Pilates instructor. She is the author of several books and dvds including The Ageless Body, The Kettlebell Boomer, and The Kettlebell Goddess Workout.  She has over twenty years of aerobics, weight training and fitness experience, with an additional background in… Read more here.

Filed Under: Kettlebell Training, Tutorial Tagged With: Andrea Du Cane, how to do a single-leg deadlift, how-to, kettlebell exercise, kettlebell tutorial, kettlebells, One leg deadlift, single leg deadlift, tutorial

Regress to Progress—Why Patterning is the Key to Fixing Your Swing

October 28, 2015 By Matt Beecroft 5 Comments

Matt Beecroft Swing Setup
Matt Beecroft demonstrates the incorrect (left) and correct (right) position for starting a kettlebell swing

Movement quality underpins any good strength training system. The RKC has never been just about the kettlebell, it’s always been about learning to move better. And the key to moving better is often knowing the right time to progress an exercise—and when to regress. It can be challenging to know when to increase the movement challenge, complexity or difficulty of an exercise if you don’t have an RKC instructor to coach you. Fortunately, the RKC system also includes an awesome system for teaching the movements progressively and safely.

Sure, you could go out and learn 17 different techniques in other one or two day workshops… But not only will your personal proficiency in those lifts be suspect (unless you are an athletic freak, like our own Master RKC, Max Shank) but more importantly your ability to communicate and teach the information to others will also be questionable. This is especially true when attempting to coach someone who is new to training efficiently, safely, and effectively.

Also, the skill set of an athlete and a coach are very different. Many of your clients aren’t really interested in your amazing athleticism, they are much more interested in how amazing you can make them. We all know great athletes who are terrible coaches and vice versa.

The intelligent progression of exercises which teach how to get from “point A” to “point B” is what sets the RKC apart. If someone is having trouble mastering the swing, you probably know by now that trying to correct it is difficult. Because swings are ballistic, they’re fast, so trying to correct a client (or yourself) during an exercise like a swing can be almost impossible.

The first thing I want to emphasize that you must be patient with the steps leading up to the kettlebell swing. You will know if you have successfully completed the steps if you finally pick up the kettlebell and swing it with some grace and efficiency. But, if you have sped through the progressions too quickly, your swing will be ugly and dangerous. And then more problems will arise when you progress to the clean and the snatch—which should look exactly like a swing in many ways since your arms simply guide the kettlebell to these other positions while your hips do all the work. These more sophisticated exercises will amplify and illuminate all the flaws with your kettlebell swing technique.

Many people speed through the progressions in various exercises thinking that if they have to be patient and spend the time mastering the basics (note: basic doesn’t mean easy) or need to regress the exercise, then they have somehow failed or gone backwards. This couldn’t be further from the truth.

A few things happen when people try to outsmart the process, or jump ahead in the progressions:

  1. They find out that their swing is terrible and have many things to troubleshoot.
  2. They get injured.
  3. All of the above.

Either way, they will end up spending much more time ironing out their kettlebell swing issues. Hopefully they will go to an RKC Workshop to learn the “a-ha drills” we teach to troubleshoot and save time. Otherwise, they risk getting sidelined by injury instead of patiently mastering the progressions and enjoying the journey. Speeding ahead with load and intensity usually causes limited or dysfunctional movement patterns, if adequate mobility and motor control (stability) aren’t achieved beforehand.

So, how should you fix your kettlebell swing?

Embrace the suck and regress to progress. One reason the swing is taught through a progression—at least in my opinion—is because of the patterning. In many respects, it’s similar to some of the ideas in the Functional Movement Screen (FMS). By the time you pick up a kettlebell, after all the correct patterning you have practiced , it shouldn’t look like you are trying to hump the bell! Instead, your kettlebell swing will be a thing of power and beauty.

The general rule is to only use techniques that improve form, quality of movement, and quality practice while reducing compensations. Unfortunately, many trainers don’t have a system for teaching the swing, they just pick up the kettlebell any way they can and then try to get it to move!

The FMS and the RKC teach patterning in this order:

  1. No load, pattern assistance.
  2. No load, no pattern assistance.
  3. Load, with pattern assistance.
  4. Load, with no pattern assistance.

In the RKC, we begin by teaching the hinge unloaded. This is often assisted in a variety of ways – either the student uses the blades of their hands in their hips to help find the hip crease (sometimes coined “chopping and popping”), they might push their butt back towards a wall, or use a dowel touching three points along the spine (head, between the scapula, and the sacrum) to teach how to maintain a neutral spine.

Next we would aim to do this without load, but with no pattern assistance. Our goal is to remove the pattern assistance and do the movement unloaded with perfect form. If the form breaks down we can go back and return to the pattern assistance method (dowel, wall, etc.) until the right movement becomes what we do every time. Old strength coaches were renowned for not letting their athletes pick up a bar until they could first do the movements correctly with a dowel or a stick.

The third stage is load with pattern assistance. In the RKC curriculum, this is the kettlebell deadlift. Placing the kettlebell in line with the heels also places the shoulder blades over the kettlebell. This makes for a foolproof deadlift when we simply stand up with the bell. If you can’t do it slow then you probably can’t do it fast—this is what grinds like the deadlift are all about. Slow is smooth, smooth will become fast later. If the deadlift lacks stiffness or tension, we can use the static stomp deadlift or Hardstyle plank to link the body with tension and to keep midline stability and posture.

The next step is using the deadlift drag or pendulum swing to teach the backswing and the start of the swing—pattern assistance with load. At the final stage we will do dead swings or the proper two handed swing, which is the load with no pattern assistance. If we have adequately mastered the first three steps, the final stage, load with no pattern assistance, will be solid.

Every time I progress a client who isn’t ready, I find that I spend a lot of time trying to troubleshoot their swing. Regressing these clients back to one of the first three stages of patterning was the fastest way to actually help them master the swing.

So relax and enjoy the journey. Be patient in your progress and understand you don’t have to master everything immediately. Basic doesn’t mean “easy”. Spend more time on patterning and you will likely spend less time with the difficult task of troubleshooting swings at full speed. This approach also works with more advanced exercises, for example if your clean isn’t great, your one arm swing probably will need work. If your press isn’t great, your clean will need work. If your kettlebell snatch isn’t great, then your one arm swing, clean, and press probably all need work too.

If you find that your swing isn’t great, don’t think of regressing to an earlier step as failure, or that you’ve made a mistake. You are still traveling in the right direction. Regressing to progress is an amazing strategy that will still have you traveling in the right direction.

***

Matt Beecroft, RKC Team Leader, PCC Instructor is the director and head coach of Reality Self Defense & Conditioning in Adelaide, South Australia. He can be contacted through his website at realitysdc.com.au email: matt.beecroft@realitysdc.com.au or follow him on Facebook: facebook.com/MeetLifeHeadOn.

Filed Under: Coaching, Kettlebell Training, Tutorial Tagged With: clean a kettlebell, how to learn kettlebell swing, how to teach the kettlebell swing, how-to, kettlebell squat, kettlebell swing regressions, kettlebells, Matt Beecroft, movement patterning, movement patterns, movement quality, tutorial

Using DVRT Training to Improve Your Turkish Get-Ups

August 13, 2014 By Steve "Coach Fury" Holiner 2 Comments

Coach Fury Kettlebell Get-Up

It’s time for another fitness tip from your man Fury. The Turkish get-up is one of my all time favorite lifts. The relative simplicity and overall impact of the TGU make it an absolute desert island movement in my book. Few things get me more excited than a beautifully executed TGU (especially when heavy). Sometimes we fall short of beautiful and need to think “out of the box” on how to hit that high standard we strive for. This is where Dynamic Variable Resistance Training (DVRT) and the Ultimate Sandbag (USB) comes into play.

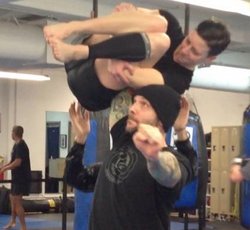
Coach Fury TGU with Human WeightPersonally, I find the three hardest parts of a get-up (regardless of weight) to be the initial roll to elbow, the half kneeling to stand and the final roll from elbow to your back. Whether it’s a kettlebell, barbell or the occasional human being (not recommended), I usually know I’ll make it (or come close) if I get to the elbow. The half kneel to stand will usually by my next sticking point. The roll back down from the elbow is often more nerve racking from a self preservation standpoint.

I think most will agree with me on these three positions within the TGU sequence. Here are three DVRT Ultimate Sandbag Training exercises that will help the cause.

1. Ultimate Sandbag TGU. In the DVRT TGU, the USB is loaded over the shoulder and it will drape over part of the back and chest as you move. Some key points here. Being shoulder loaded removes the leverage generally provided by the locked out arm of the kettlebell TGU. The USB is literally pushing you directly into the floor while sand in the front and back of the USB is pulling downward too. The USB is doing it’s best to keep you on your back. What’s awesome about this, is that you truly have to develop the rolling pattern to get to the elbow. You are forced to get that proper diagonal roll from the shoulder to opposite elbow. Given proper thoracic mobility and the ability to lockout the arm, a kettlebell TGU to elbow will feel easier after nailing this down. This delivers the same payday on the descending elbow to back roll. The USB TGU also removes all fear of dropping a bell on your head while training the roll to and from elbow. Strength+Safety=Glory.

2. USB Lateral Lunges. Damn you sagittal plane! That half kneeling lunge to stand is a stability monster when you’re doing a TGU. Sometimes, instead of stepping back from a problem it is best to step sideways. There are a bunch of killer USB Lateral Lunge exercises and any of them will help with your half kneel to stand. Training your lunges within the frontal plane (side to side) will help you build some untapped stability. Spend some time with USB Lateral Lunges and watch how your half kneel to stand becomes a thing to be feared.

3. Rotational Lunge. This move delivers similar benefits to the lateral lunges but now we’re moving in even more plains of motions. Transverse much yo! This will bullet proof your TGU. Ever feel those legs and hips wobble under a heavy getup? Get good at rotational lunges with a USB and see how they feel know. The RT adds another killer bonus: by snapping the hips similar to a swing, but within a lunge pattern, you will very likely find it easier to simply stand up a helluva lot quicker in your TGU.

Now those are three ways to use DVRT/Ultimate Sandbag Training to help your Turkish get-up. I’d bet these lifts would help your deadliest, squat and press too. Doubt me? Try it. These aren’t meant to be quick fixes or voodoo tricks. Step away from your TGU for 1-3 weeks and focus on one or more of these DVRT exercises. Then check out their impact on your TGU and smile big in the post PR selfie you just took.

Please keep me posted on your progress.

I suggest digging deeper into the DVRT Training system by attending a workshop or one of our certifications. Click here to find dates and locations. Yours truly will be leading a DVRT Level I Cert and an HKC Kettlebell Cert at Kathy Dooley, Joe Boffi and Jason Kapnick’s place Catalyst S.P.O.R.T. in NYC on November 1 and 2nd. You can register for one or both (big discount on both) through the link.

I hope to see you there.

-Fury out

Steve “Coach Fury” Holiner, DVRT Master Instructor, Senior RKC, Original Strength Instructor, is a proud member of the Ninja Army training staff at Mark Fisher Fitness in NYC. Fury is available for classes, semi-privates, instructor training and programming at MFF. He also has availability for private training at Five Points Academy and Catalyst S.P.O.R.T. Check out www.coachfury.com, facebook.com/coachfury and Twitter @coachfury for more info.

Filed Under: Tutorial Tagged With: Coach Fury, corrective exercise, dvrt, get up, how-to, Kettlebell, Steve Holiner, turkish get up, tutorial, video tutorial

Primary Sidebar

Featured Products

previous arrow
BOOK-RKCBookofSnC
HardStyleKettlebellChallegeDanJohn700
BookCoverMasterTheKettlebell1
RKCiconKettlebell512
KettlebellGoddessdv040
next arrow

Recent Posts

  • RKC Big Six Workout
  • The Kettlebell Swing & Low Back Pain
  • Key Kettlebell Exercises To Help You Create Better Balance
  • How to Most Effectively Use Kettlebells to Meet Your New Year Goals
  • 1 Exercise That Checks All The Boxes
FOLLOW US ON TWITTER!

Archives

Copyright © 2025

Dragon Door Publications / The author(s) and publisher of this material are not responsible in any manner whatsoever for any injury that may occur through following the instructions or opinions contained in this material. The activities, physical and otherwise, described herein for informational purposes only, may be too strenuous or dangerous for some people, and the reader(s) should consult a physician before engaging in them.