• Skip to main content
  • Skip to primary sidebar
  • Home
  • Contributors
    • Matt Beecroft, Master RKC
    • Martijn Bos, Master RKC
    • Andrea Du Cane, Master RKC
    • Angelo Gala, Master RKC
    • Chris Holder, Master RKC
    • Steve Holiner, Master RKC
    • Dan John, Master RKC
    • Mike Krivka, Master RKC
    • Thomas Phillips, Master RKC
    • Robert Rimoczi, Master RKC
    • Phil Ross, Master RKC
    • Max Shank, Master RKC
  • Workshops
    • HKC Workshops
    • RKC Workshops
    • RKC-II Workshops
  • Find an RKC Instructor
  • Resources
    • Articles
    • Forums
    • Kettlebells
    • Products
  • Blogs
    • PCC Blog
    • Strong Medicine Blog
  • Archives

RKC School of Strength

Official blog of the RKC

Uncategorized

Fitness, Health, and Performance

February 26, 2014 By Max Shank 4 Comments

Max_Shank_IMG_1520

What is the primary goal of exercise? What is the primary objective to training at all?

The answer is that it depends entirely on the individual. However, most of us will fall into the health category. This would include anyone who is not a professional athlete getting paid for their level of performance. Fitness and Health typically go hand in hand, but Health is the primary goal. It is possible to be fit (physically) but to be unhealthy (pain, disease, malnutrition). Therefore we must look at Health first. Then we can address fitness and performance.

There are a few cases where you may have to sacrifice health to excel at a sport (i.e. cutting weight for wrestling, or taping up an ankle instead of resting because you are the star quarterback playing in the Superbowl.)

As you can see those instances are few and far between. So focus on Health before performance. The really cool part is that being healthy will actually unlock your potential by eliminating negative effects of distress/sickness.
When you are in pain or unhealthy, a couple things will happen:

1) Cortisol (stress hormone) is elevated constantly from pain which decreases growth hormone, testosterone, muscle growth, recovery, strength, etc.

2) Pain is depressing and will be psychologically damaging over time. Do not develop an association between pain and exercise!

3) When you feel pain, your brain will compensate by making you weak, tight, or both so you don’t do any more damage. This obviously makes you weaker or stiffer–the last thing you want.

4) Basic nutrient deficiency can also play a factor in your decreased health and performance

-Fatigue

-Apathy

-Simple Vitamin D deficiency, for example, can cause muscle fatigue, weakness, and even depression

So realize, moving forward, that health is not only a precursor to fitness and performance, but health enhances performance, as well as quality of life.

Common Sense

My best friend’s dad told us when we were young that, “Common sense isn’t very common.”

I have found the last couple decades to have confirmed that statement.

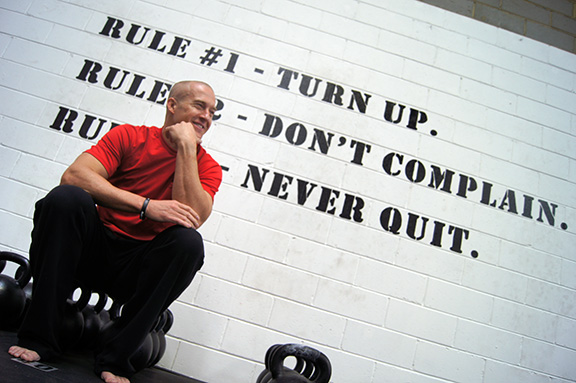
So, with that said, here is an abbreviated list of the most important common sense to be applied to your training.

1) If it hurts, don’t do it.

2) Don’t try to put square pegs into round holes.

3) Heavier does not mean “better.”

4) More does not mean “better.”

5) Your personal goals are yours and yours alone, and they are meaningful

6) You don’t have to do anything

Keep these simple things in mind when you approach your training or coaching.

Fitness Folks

The overwhelming majority of exercisers want the following things in this order:

1) Look better

2) Lose Fat and Build Muscle (see #1)

3) Feel better

4) Get stronger

This is an important reality to understand whether you are a coach or athlete.

Even if you think you are neither of the above, you are an athlete; you just play a different sport.

Maybe your sport is losing ten pounds or walking up the stairs without getting tired after the first 5 steps. We all have goals and should approach them with the same dedication that professional athletes pursue their own goals.

Educate yourself, and attack your goals, whatever they are.

The first thing you have to do is to simply be healthy.

Then move well.

Max_Shank_2 hands anyhow profile***

About Max Shank, Master RKC: Max Shank is not only an extremely gifted teacher, but one of the most well-rounded and capable athletes in the world. From excelling in Muay Thai and Jiu Jitsu to performing impressive feats of strength in weightlifting and gymnastics, Max has… Read more here.

Filed Under: Uncategorized Tagged With: athletic performance, fitness, health, max shank, RKC, Russian Kettlebell Challenge

What is the most versatile RKC movement?

February 19, 2014 By Shannon Scullin 2 Comments

Good and bad getupShannon demonstrates a good and a bad Get Up stance

The Turkish Get Up is the most versatile movement in the RKC system. It incorporates all seven of the FMS movement patterns  – squat, hurdle step, in line lunge, shoulder mobility, active straight leg raise, trunk and rotary stability – allowing us to utilise it as not only a strength building exercise but as a screening and rehab tool, making it the most valuable exercise to have in your arsenal of training drills.

I’ve been known to be a little bit of a perfectionist when it comes to teaching people how to do a get up.  I firmly believe that one repetition completed with good form is far more beneficial to you than completing ten reps with a half arsed attempt at the movement. But I am pedantic about technique for a very good reason…

I train and have taught a large number of people how to use kettlebells during my time as a trainer. From personal trainers to the self-taught and those who have never touched a weight before in their life. All of these people have one thing in common… As their get up improves, their mobility and stability improves. As their mobility and stability improves their coordination improves. As their coordination improves their strength improves and as their strength improves so does the rest of their training.

The get up is not a “simple” movement to teach or to learn. In fact as well as being the most versatile it’s actually one of the most complex of all the kettlebell exercises.

There are a few books on the market that delve deep into the get up, its technique and corrective drills to help you improve your form, the most famous being “Kalos Sthenos – Kettlebells From the Ground Up”. However, most people’s get up can be greatly improved by simply doing the following:

1)    Thoracic mobility and hamstring flexibility drills.

Two of the most common issues we see in the get up are caused by poor thoracic mobility (hunching forward or shoulder unpacking during the seated position) and hamstring flexibility (inability to keep the down leg straight or allowing the foot to rotate outward).

Often I see people grinding their way through the movement with bad posture in an attempt to improve. But why continue beating your head against a brick wall when there is an easier way.…

There are a number of drills that you can perform to help improve your mobility and flexibility in these areas, thus improving your get up and posture in general.

My favourite drills, and the ones I have found achieve the best results are all incorporated in to one simple mobility workout called the “Daily Dozen”.  This simple eight minutes of mobility, done consistently in conjunction with the get up, will not only vastly improve your movement and posture but they are the perfect way to prepare your body for the workout ahead.

I recommend starting your warm up by “testing” a get up on each side. Once you have completed your get up perform one round of the “Daily Dozen” and then perform another get up on each side. Repeat this process three times.

Pay attention to how your get up feels after performing the first round of mobility drills. If you are particularly tight in the thoracic region you may choose to focus solely on the armbar, bent armbar and kettlebell brettzel for the next round of mobility. Likewise, if you are feeling particularly tight from the hips down, you may choose to focus on the Cossack, can opener and lower limb drills.

For those of you who are beginners or may be a little daunted at the thought of doing a bent armbar or the kettlebell brettzel you can replace both of these movements with the “Brettzel” which will achieve the same results.

2)    Shift your weight.

From the moment you are born you commence a journey of movement. You learn how to shift your weight in order to roll over on to your belly, rock back and forth, crawl, stand and walk. Without this shift in weight movement becomes very difficult.

The get up is a similar journey of movement. Each stage you move to has a different centre of gravity. In order to perform the get up efficiently and gain maximum results you need to learn how and where to shift your weight in order to take the kettlebell from lying to standing position and back down again.

The easiest way to remember where the weight should be felt is to follow this zig zag pattern – elbow, hip, hand, knee.

As you roll to your elbow you should feel all the weight of your body and the bell going through your elbow in to the floor. As you straighten your arm out and progress to the seated position this weight should shift and be felt through your glute, where your femur meets your hip. As you progress to the bridge/low sweep, your arms should form a straight line from the kettlebell, through your shoulders and the weight should be felt through the hand that is connected to the ground. And finally, as you transition from the knee to hand through to the lunge position the weight should be felt through the knee that is connected to the ground. On the descent the weight shift works in the opposite order – knee, hand, hip, elbow.

3)    Do more reps.

This is important. In order to get better at something you need to practice it over and over again.

In an average workout you may complete anywhere between 25 to 100 repetitions of exercises such as swings, snatches, presses, deadlifts and squats however, the get up seems to get neglected when it comes to getting our repetitions in.

Instead of lumping the get up in with your warm up every time you train, why not try changing it up a little? Try spending an entire session focusing solely on the get up every now and then.

Mid last year I started using the get up as my recovery workout. Twice a week I would take a light kettlebell (nothing heavier than 14kg), set the Gymboss on sixty second intervals and then proceed to perform get ups for the next 100 minutes. One get up on the minute, every minute. The get up was to be slow and controlled, focusing on good form throughout the movement.  By the time I had completed twenty get ups all tightness had washed away from my body and any aches and pains that were rearing their ugly little heads prior to the session had retreated with tails between their legs. My movement felt strong, natural and effortless and the more repetitions I did the better everything felt.

Coincidentally, after incorporating the 100 get up recovery workout in to my routine, not only did I hit a new get up PR but I saw gains in all other areas of my training too.

Work on your mobility, shifting your weight and getting more reps in and I guarantee that your get up will not only get better but you will get stronger too!

***

Shannon Scullin is an RKC Team Leader and PCC Instructor based out of Dragon Door Australia.  As Australia’s first, and highest ranked female RKC Shannon brings a keen eye for technique to training and is renowned for being very focused on form ensuring that clients with previous injuries are able to train safely. As the head of Personal Training at Read Performance Training she uses the CK FMS to test and evaluate all clients before training, ensuring that not only will they look better from training, but they will also move better too. With a background in triathlon, adventure racing, rock climbing, cycling, hockey and running Shannon fell in love with kettlebells and the FMS system when she saw the immediate result that improving mobility, stability and strength has on sporting performance. She can be reached through: www.readpt.com

Filed Under: Uncategorized Tagged With: athletes, coordination, get up, ketllebells, kettlebells, mobility, RKC, stability, strength, turkish get up, women

The Four Pillars of Strength

February 12, 2014 By Mike Krivka Leave a Comment

Mak_110lbs_KB_pngINTRODUCTION

People are constantly looking for new ways to increase their strength.  They get wrapped up in changing up reps, loads, intensity, and new exercises in the blind pursuit of strength. This pursuit usually entails looking for a new training program, tool, or gimmick that they desperately hope will give them an edge and increase their athletic abilities.  Unfortunately what usually happens is that they fall back on their old training habits and apply them to their new program with dismal results.  Let me borrow a definition from someone who is (obviously) smarter than I am: “Insanity: doing the same thing over and over again and expecting different results” – Albert Einstein.

So if I told you that there are four basics tenets of strength that you can apply to the training program that you are doing right now, that would almost instantly increase your strength – would you try it?  Really?  Then I’ll let you in on a trade secret in the strength and conditioning world!  The keys to strength lie in the “Four Pillars of Strength” (and they all start with the letter “G”): Grip, Gut, Glutes and Gaze.  Let’s take a look at each one and see how focusing on one or all of them will ensure that you actually do get what you are looking for!

GRIP

I know this seems obvious but increasing your grip strength, or even focusing on what your grip is doing, will give you a huge jump in the strength game.  Think about when you missed that heavy Deadlift – what failed?  Your grip failed.  How about when you tried to do that strict pull-up and you couldn’t ramp up the tension to complete it – what kept you from making it happen?  Your grip failed. How about the last time you did your RKC Snatch Test (05 minutes to do 100 reps with a 24 kg Kettlebell) – what happened around minute four that made the last thirty or so reps hard?  Your grip failed.

So is it really a question of increasing your grip strength or learning how to manage your grip?  Well it couldn’t hurt to increase your grip strength, and I strongly suggest that you do, but the better you become at managing your grip the better results you are going to get. What do I mean by “managing your grip”?  What I mean is that you need to learn when you should be applying maximum tension and when you should be using just enough tension to keep control of the situation.  Taking the time to master this one technique will make your Kettlebell technique improve, help you manage your fatigue, and allow you to train harder and (more importantly) harder.

Does strengthening your grip only apply to your hands?  Heck no!  Your feet are almost as important as your hands when it comes to grip strength.  The recent appearance of “minimalist” shoes is nothing new to traditional strength athletes who know that without a firm, direct connection to the ground their strength will be fragile and tenuous.  For athletes, especially contact or combat athletes, strengthening your feet and how well they grip the ground during dynamic and ballistic loading will go a long way in protecting your ankles, knees, hips and back.

When it comes to your feet do you know what they are doing when you are swinging or snatching?  How about when you are doing pull-ups or push-ups? Well you should!  When you are performing any movement skill you not only need to maintain control of the load, be it your body weight or a Kettlebell, but you also need to get feedback.  If you are compromising the surface area of your foot, and therefore compromising the quality and quantity of feedback you are getting from your feet, then you are never going to be able to get as strong as your potential.

Test it out:

Pistol or Body Weight Squat – Pick either the Pistol of the Body Weight Squat (Squat) and take some time to explore what your feet are doing when you do this movement. Chances are that your feet are tapping like you are playing the piano with your feet or you are rolling onto the edge of your foot.  Both of these are very common and are easily remedied!  As you are pulling yourself down into the Squat or Pistol “grab the ground” with your whole foot, especially your toes, and feel how much more stable and strong you feel.  Don’t lose this tension at the bottom; instead let it by the driving force behind driving the ground down and away from you as you come up.  BTW – does your hand grip affect your Pistol and Squat?  Heck yes!  Having trouble maintaining tension throughout the whole movement?  Make a fist and crush your grip to help create stabilizing tension throughout your upper body that will irradiate into your legs. You can also squeeze a towel or a hand gripper to get the same effect.

Kettlebell Swing or Snatch – the same concept holds true here as it did with the Pistol or Squat. You’ve got to pay attention to what your feet and hands are doing if you are going to ever become stronger doing the Swing or Snatch.  There are two key moments in the execution of both the Swing and the Snatch that you want to pay close attention to what your hands and feet are doing: during the backswing of the Swing and the Snatch and in the overhead lockout of the Snatch.  In both of these positions it’s easy to concentrate on your grip, as you should, but are you over-concentrating on your grip?  Maximum tension should only be applied to the Kettlebell grip at the bottom of the backswing and at lockout overhead; all the rest of the time you need to use just enough grip to keep the Kettlebell under control.  How about looking at what your feet are doing as well?  Your feet should be gripping the ground maximally on the backswing, really grabbing the ground and giving you a solid base to drive off of. During the Snatch you should think about doing the same thing when you hit the overhead lockout; grip the Kettlebell tightly to buffer the impact and create a stable strong base to receive the load on.

GUT

Your Abs are the bracing system for everything you do and learning how to use them properly will allow you to generate more force as well as accept more of a load.  Being able to regulate your abdominal tension is critical when it comes to creating power from the ground up – and it’s invaluable when it comes to protecting your back.  The concepts behind Intra Abdominal Pressure (IAP) will teach you how to create a “virtual belt” around your midsection that not only reinforces the spine but allows you to transfer energy more efficiently.

Just bracing your gut and hoping for the best isn’t enough; learning how and when to tighten is the real key.  Coordinating breathing and the amount of breath you inhale and exhale are important as well as learning how to “bleed off” tension (through hissing and/or the martial arts kiai).  You’ll see people panting, huffing and puffing while training; never once thinking about how that unregulated breathing is affecting their performance.  Having a strong gut is not a matter of doing sit-ups and crunches – both those exercises have faults that only lead to more problems down the road.  While I’m a big fan of the Ab Wheel, or as I call it “The Wheel of Pain”, you really need to shown how to use it correctly or you’ll overstress your shoulders and lower back.  So how do you get a strong gut?  Learn when and how to breath.

Sucking in a big gut full of air and letting it out is going to get you nowhere.  You need to regulate the amount of air you bring in, how much tension is used to maintain it, and how to effectively release it.  Taking in too much air at one time is counterproductive as well as taking in too little; not to mention trying to maintain it by using your throat. Yikes!  I teach a really simple technique to get enough air in, braced, and ready for use that seems to work well for most people.  First off you can’t take a big “gulp” of air through your mouth. It’s going to create pressure in the wrong area and lead to problems.  All you need to do is take a “predatory sniff” of air through your nose and hold it. NOTE: the “predatory sniff” is a technique you can observe right before someone take a swing or tackles a defender.  It’s a cue that an attack is imminent but it is also a great way to prepare for an explosive energy requirement.  Hold that breath in your gut, deep in your gut and not up in your chest, then let it out under control through your teeth like you are hissing.  This sequence will take a while to develop but once you get it down you will be able to reference the skill on demand.  Time this breathing sequence with your efforts and you will find that you aren’t getting breathless or winded… but did I mention that this takes practice to achieve?

Test it out:

Pull-ups – applying this directed breathing during a grand makes it easier to stay “tight”.  Try doing a pull-up with a big gut full of air and see how it feels.  Now try it with the method described above.  It should be a lot easier and feel tighter and “crisper”. One of the things you will need to work on is regulating how much air you release. Too much too soon and you’ll be left only half way up… this is a regulated release of air, with the accompanying abdominal pressure, that lasts the whole movement.

Swings – Kettlebell Swings can make even the most well conditioned athlete breathless; but it doesn’t have to happen early in the session. Take a quick sniff of air on the backswing of the Swing and then explosively let it out in conjunction with your hip snap.  You’ll find that the Kettlebell moves faster, and higher, than usual and that you are able to regulate your breathing for longer as well. This breathing pattern is quick and crisp and doesn’t require as much air to make it effective as the grinding version.

GLUTES

Much aligned and often ignored, especially by guys, the glutes are the biggest, and as far as I’m concerned, the most important muscles in the body.  So developing the ability to integrate them fully and activate them at the appropriate time will make you strong – fast!  While everyone knows (not really, but let’s assume they do) how important the Glutes are then why do we still see people with soft knees and soft Glutes at the top of their Kettlebell Swing and Snatch? That’s because they aren’t tying in the Glutes to the end of the hip snap and missing out on tying in the biggest muscles in the body into their technique.

When I talk about working the Glutes most guys ignore my advice and head for the nearest set of dumbbells to work on their curls or grab a bar to work on their bench press.  Women are more receptive to my advice because they understand the “power” of strong Glutes… but for a different reason than the one that I’m interested in addressing!  So why are the Glutes so important?  Because the Glutes are not only the biggest group of muscles in the body they are also the brace for the abs and the foundation for the back.  Weak Glutes and you’re going to be overtaxing your abs and lower back to do the work that the Glutes are designed for.  Especially bothersome are people who have spent an inordinate amount of time developing their abs (think mucho sit-ups or crunches) and have compromised their posture and have effectively short-circuited their ability to fully engage their Glutes.  Don’t believe me?  Take the following two tests and see what happens when you are able to clench your Glutes for all they are worth!

Test it out:

Tip-over Test – Have someone stand tall and strong, locking their knees and clenching their Glutes as hard as they can. Place your hand on their chest and slowly start pushing.  See how hard it is to rock them back onto their heels. Do this again a second time but have them keep their Glutes relaxed; slowly start pushing against their chest and see how easy it is to rock them back onto their heels. Now here comes the clincher: same setup as the previous two but this time have them relax their Glutes and only clench them when they feel like they are going to tip over and fall. Be sure to put your other hand behind them just in case they can’t “catch” themselves. If they can’t catch themselves then they need some serious “Glute therapy” to get them turned back on! If they are able to catch themselves then they will have a shocked look on their face when they realize that their Glutes are the reason why they didn’t fall.

Stance Test – how wide you have your feet apart can directly impact how tightly you can clench your Glutes.  Is really that important? Only if you want to move faster, hit harder, and translate more energy from your body into a Kettlebell or bar. Try this series of tests to see how your stance (distance between your feet) impacts your Glute tension. Start with your feet in stance that is wider than your shoulders. Squeeze your Glutes as hard as you can and make a mental note of how tight they are.  Move your feet in a little this time, just inside shoulder width, with your heels right under your arm pits. Squeeze your Glutes as hard as you can and make a mental note of how tight they are. Now place your feet together with your big toes almost touching. Squeeze your Glutes as hard as you can and make a mental note of how tight they are. Last one: with your feet together once again, put your heels together and let your feet point off at an angle, let’s see 15-20 degrees. Squeeze your Glutes as hard as you can and make a mental note of how tight they are.  What did you find?  Did you find that the wider the stance the less Glute contraction you get and the more narrow the stance (especially with your heels together!) the more Glute contraction you get? What does that tell you about how you can get more power out of your hip snap if you learn to maximize your Glute contraction by minimizing your stance?  Yeah, I thought so…

GAZE

What the heck are you looking at? No really. What the heck are you looking at while you are training?  How much do your eyes, and how they are being used during movement, impact your performance? Quite a bit actually!  If you watch people doing Kettlebell Swings or Snatch you’ll see that most of them have their eyes going up, down, left, right, pretty much everywhere and it gets even worse when they change hands. Training yourself to focus internally is hard enough but you also need to create some discipline in what you are doing with your eyes and your head as you are training. Remember that your head is going to follow your eyes and you can end up doing some weird stuff to your neck and back if you’re not careful.

So what should you be doing with your eyes? First think about keeping your head neutral on your neck.  Neutral means that your chin is neither pointing up or down – you are looking straight ahead. You will see a lot of people putting their head into weird alignments because they are trying to look at one spot while they are performing a lift or movement.  This is something you can do and it does have its benefits – except for the fact that it’s going to put your neck and thoracic spine into some weird loading configurations that you are going to regret in the long run. So if your head is neutral and you start to do a squat what should your eyes be doing?  As you pull yourself back into your Squat your head should track with your torso and your gaze should end up stopping about 08-10 feet in front of you. As you drive up out of the Squat your head should remain neutral and finish where it began at the beginning.

I know what you’re thinking!  You’ve seen pictures of athletes going for a world record Deadlift or Squat with their head up and back and their chin jutting forward. Yep – you can do that! If you’re chasing a world record and you are familiar with the risks that you are taking when you do that, and then by all means proceed.  But if you are training on a regular basis and don’t want to take risks with your neck and thoracic spine then stick with the neutral position. You’ll thank me one day…

Test it out:

Posterior Chain Activation Test – Take a stance with your feet just inside shoulder width and with your head in a neutral position, squeeze all the muscles in your body from head to toe. Get a feeling for how much tension you’re able to create with your head in a neutral position.  Now try looking straight down at your toes and then squeeze all the muscles in your body from head to toe.  Once again get a feeling for how much tension you’re able to create, especially in the posterior and anterior chain (front and back of your body). For the final attempt try looking straight up at the ceiling and then squeeze all of the muscles in your body from head to toe. Get a feeling for how much tension you were able to create and if there was any difference in the amount of tension you could produce front and back.

What did you find?  I’m guessing that if you created enough tension in all three positions were surprised to find that you were able to balance out the tension with your head in a neutral position but you lost tension either in the posterior or anterior chain when you looked up or down.  Kind of strange that most coaches recommend that you look up when you Squat or Deadlift but in reality you lose tension in the muscles you are trying to activate. Something to think about… Look up too much, shifting the tension from the posterior to the anterior chain, and you can say hello to Mr. Hernia because you’re going to shift the tension too far and put stress on the abdominal wall.

NOTE: a slight downward tilt of the head works best to fire up the posterior chain, especially if you are a martial artist, soldier or law enforcement officer. This part physiological and part psychological phenomenon but it really works.  Keep looking straight ahead, but tilt your chin down and in a little bit, and you can take advantage of the physical and psychological boost this head position gives you.  

Swing Test – This is an easy test to do and experience.  Grab your favorite Kettlebell and do a handful of Swings.  First try doing them with your head staying neutral throughout the movement; that means that your gaze will shift from ahead of you to in front of you as you swing.  Then try to do the Swings with your head up the whole time.  Keep looking up throughout the technique and get a feel for how your hip snap feels and the weight of the Kettlebell. Finally attempt to do some Swings while looking down throughout the technique.  Get gauges for how your hip snaps feels, how heavy or light the Kettlebell feels, and how your breathing is. What did you find?  Did you notice that with your head in the neutral position throughout the movement that you were stronger, faster, and more relaxed?  If you didn’t go back and try it again; I think you’ll be shocked at the difference.

CONCLUSION

I hope that you take the time to look at how these four pillars can be added into your existing strength training program, regardless of if it is with kettlebells, body weight, or barbells.  I am confident that if you mindfully apply the principles that I outlined above that you will be amazed at how quickly you will get gains!  BTW – don’t try to implement all of these new skills at the same time.  I would strongly suggest that you take one and apply it across a spectrum of techniques and see how it works for you. Then, once you’ve given yourself a chance to explore it fully, add another element to the mix.  Being able to apply all the variables surrounding Grip, Gut, Glutes and Gaze will take practice and few people will be able to get them all working at the same time.  But if you can get two out of three you are well on the way to making some great gains!

***

About Michael A. Krivka, Sr. – RKC Team Leader: Michael A. Krivka, Sr. is a Washington, DC native who has been involved in Kettlebell training for over a decade and is currently an RKC Team Leader and member of the RKC Board of Advisors and the RKC Leadership Team under Dragon Door (where he has been listed as one of the top reviewed RKC’s in the world for the last five years). He is also the author of a bestselling eBook entitled “Code Name: Indestructible” and is in the process of finishing up several other eBooks on Kettlebells, body weight, and the integration of other tools into an effective strength and conditioning program. Mike has traveled extensively throughout the United States teaching Russian Kettlebells to military (USMC, USN, USA and USAF) and law enforcement personnel (FBI, DEA, USSS and CIA)… read more here.

Filed Under: Uncategorized Tagged With: four pillars, gaze, glutes, grip, guts, leadership, MAK, mike krivka, RKC Team Leader

Martial Artists and the Kettlebell Swing

February 5, 2014 By Jay Armstrong 3 Comments

Reverse PunchWhen I encountered the kettlebell, it was love at first swing.

I knew immediately that this was a tool that would complement (rather than interfere with) martial arts training.  Traditional efforts in the gym trying to develop big muscles made me strong, sore, and SLOW.

Swinging a kettlebell is clearly not traditional weight training.  It will help your martial arts practice if you have the proper technique and a clear understanding of what you are trying to master.  Two specific areas of martial arts skills that the kettlebell swing can help improve are:

  • Tense/Relax Cycling, and
  • Breath Control

If you feel you have been missing out on strength training or you want to add a different form of cardiovascular endurance training to your routine the kettlebell swing may be exactly what you need.  But, the kettlebell swing has even more to offer if you are a martial artist.

Tense/Relax Cycling

Exceptional athletes have the ability to rapidly contract their muscles, or create tension, and then just as quickly release that expression of energy.  In fact, one of the things that separates great athletes from good athletes is the ability to create a greater amount tension in a shorter period of time than their competitors and then to more quickly return to a relaxed state.  This makes them more efficient.  I call this skill the tense/relax cycling skill.  This is the ability to rapidly command the desired muscles, and only those muscles, to tense and then to release this tension.

Visualize your favorite professional athlete.  Would you characterize their best performances as tense or relaxed?  Do you think their impressive performances require no effort?  Of course not.  They just make it look easy because there is no unnecessary tension.

The kettlebell swing is an athletic skill.  It is one that requires tension, muscular control, balance, coordination and significant energy expenditure.  This is complex movement pattern that incorporates many practical elemental skills.

As the kettlebell descends down and behind the kettlebell athlete, the maximum amount of force is experienced.  The maximum amount of force is presented to the grip and the shoulders and then downward through the posterior chain and into the ground.  This moment of maximum exertion (or tension) requires that the kettlebell athlete strongly contract the muscles of the abdomen (or core).  The kettlebell doesn’t stay at the bottom position for long.  So, this contraction of the core is brief.

The big muscles of the hamstring group and the glutes drive the hips forward and upward to project energy into the kettlebell.  As the hips move forward, they must encounter an opposing force otherwise they will move far enough forward to put the lower back into excessive extension.  Repetitively doing this will probably make your back hurt.

As the kettlebell moves forward, the kettlebell athlete returns to the standing position.  This postural position is referred to as the “plank” position.  It is a neutral alignment of the neck, thoracic spine, and lumbar spine.  In order to achieve this position, there must be a significant, simultaneous contraction of many muscles.  There are few muscles excluded from this contraction.  The lats should be strongly contracted to connect the arms to the torso.  The abs and core muscles should be strongly contracted to transfer the power from the legs to the arms and to prevent hyperextension of the lower back.  The muscles of the legs should be strongly contracted to provide a strong base of support and rooting of the body to the ground.  The kettlebell is only floating at the top of the swing for a brief period of time, so this display of high tension is momentary.

Chair PlankHow do we improve on a particular skill?  Skills improve through focused and intelligent practice.  The rate of progress is also related to 1) the frequency of practice; 2) the number of repetitions; and 3) the load or intensity of the practice.

The kettlebell swing provides the martial artist with an excellent platform for improving the tense/relax cycling skill.  This is a drill that can be practiced with a large number of repetitions and with great frequency.  In addition, the drill is obviously practiced with a load that may sometimes be significant.  This all adds up to imply that swinging a kettlebell is an excellent way to improve the martial artist’s ability to rapidly and strongly tense muscles and then just as rapidly release this tension.

Focus on this aspect of the kettlebell swing and you will find you delivery more power in your kicks and strikes.  And, your newfound ability to quickly relax will greatly reduce your fatigue.

Breath Control

We have looked at the principle of tense/relax cycling and how a martial artist can use the kettlebell swing to improve this skill.  Now, we will look at how the kettlebell swing can be employed to give the martial artist better breath control.

The topic of breathing and breath control could take up several volumes.  We need oxygen to provide energy to our muscles and to our brain.  Carbon dioxide is a waste by-product of energy expenditure. Breathing is the mechanism by which oxygen is added to the blood during the inhalation phase and CO2 is expelled during the exhalation phase.  Both of these are important!  Inefficient breathing techniques will cause premature fatigue and adversely affect cognition.

Breath control is an essential skill for everyone but especially for martial artists.  Two of the breath control abilities that are required by a martial artist are: 1) a sharp, strong exhalation (or yell) to accompany a maximum contraction, breaking technique, or punch; and 2) the ability to effectively inhale while the core and abdominal muscles are contracted (as they are during a fight).

A forced exhalation through a restriction causes many of the abdominal muscles to contract strongly.  Imagine you are blowing up a very stubborn balloon.  This is what I mean by exhalation with restriction.  This effort develops a tension that spreads throughout the entire body.  Yelling simulates this effect and has been used for centuries in martial arts communities.  This practice has become commonplace in the world of tennis (among other sports) where many players yell each time they hit the tennis ball.  The technique of rapidly and forcefully expelling air through a restricted orifice will help you generate much more tension and power.

It is difficult to inhale when your abdominal muscles are contracted.  It is virtually impossible to do so with an inefficient, chest-breathing technique.  To breath when your stomach muscles are tight, you must pull the diaphragm downward.  Whenever you step into the ring to fight, your abdominal muscles automatically contract to help protect the vital organs behind them.  So, you should learn to breathe with these muscles contracted.  Even if you are not a martial artist, these muscles contract in the same way whenever you are under stress (at work, at home, or during sports) or whenever you are afraid.  Learning to breathe while your abdominal muscles are strongly contracted will improve your endurance whenever your are excited or under the stress of competition.

Both of these breathing techniques are skills. You can improve your breath control abilities through intelligent and focused practice.  The kettlebell swing provides an excellent training opportunity to improve these abilities.

The total tension position at the top of the kettlebell swing (or the plank position) is a great time to use the sharp exhalation to generate a bit more tension.  And, the quick sniff of air through the nose at the bottom of the kettlebell swing is an opportunity to practice inhalation with braced abdominal muscles.

Your skill will improve quickly if you practice with focus, if there are lots of reps, and if there is significant intensity.  The kettlebell swing provides the ideal scenario for all of these requirements.

Workout with Purpose

Often, we are given exercises with the sole purpose of working and strengthening a specific muscle group.  Or, perhaps the drills are designed to increase the size of a muscle.  While these activities are not necessarily bad, wouldn’t it be better if the purpose of an exercise was to help us improve our ability to perform in a real-world situation or in a sports activity?

The kettlebell swing can be utilized for just such a reason.  If you focus on the correct aspects of the technique, the kettlebell swing can improve your tense/relax cycling skill and improve your ability to use your breath to facilitate the development of tension.  These skills are essential to all martial artists.  I am sure you will see rapid progress if you focus on these goals during your kettlebell swings.

***

Jay Armstrong is a Senior RKC, 6 Degree Black Belt TKD, and Master Z-Health Trainer.  The past 30 years have been dedicated to helping others develop confidence through increased strength and pain-free, exceptional mobility.  His quest for knowledge continues.  He runs The Kettlebell Club in Houston, Texas and can be reached here.

Filed Under: Uncategorized Tagged With: artist, Jay Armstrong, Kettlebell, martial, power, senior rkc, strength, swing

Dirty Dozen Move # 8: The Handstand

January 29, 2014 By Phil Ross 4 Comments

Phil_Ross_handstand_smallThe Handstand, I LOVE IT! It’s such a fun exercise to do. I will tell you though, that it was very challenging for me to accomplish. I’m not a gymnast, I’m a 189 lb, 51 year old man who hadn’t done much inverted training since walking on my hands in college back in the ’80’s (and banging out 20 reps of Handstand Push-ups after wrestling practice). Throw in a few injuries, especially the most recent one in 2011 and the thought of me being upside-down and unsupported was an unlikely proposition. I then took the first ever PCC in June of 2013 and I was determined to be able to perform a Free Standing Handstand. During the PCC, I accomplished a few personal bests, but I was unable to hit the Free Standing Handstand for more than a few unbalanced seconds. I didn’t “own” the movement. So, I laid out a plan and executed it. I referenced the PCC manual, took the advice the Kavadlo Brothers had given me at the certification and some other tips from Max Shank, and I was off and “standing.”

After about 2 months of dedicated training with the “Grease the Grove” method, I was able to hit a Handstand with relative ease and hold it. My best Handstand was a 29 second hold. I was even able to hit a few push-ups–3 was my best. Albeit, they are not full, touch my head to the ground push-ups, but I did break the 90 degree plane. I was even able to pull off a Handstand on top of two 24KG bells!

You may be asking yourself what is so great about the Handstand? For one, doing Handstands improves your pressing ability by reaffirming the proper alignment of your shoulders, neck arms, torso and legs. If you are not balanced, you will fall. If you have the proper alignment required for the Handstand, you’ll be conditioning your body to adopt the most efficient position for proper execution of the Kettlebell Press. Think about the alignment of your shoulder, arm, neck, torso, etc..for the Press and then look at the Handstand – IDENTICAL! Additionally, Free Standing Handstand and Wall Push-ups require and increase your strength dramatically without the use of weights! Imagine you are a 225 pound guy performing Handstand Push-ups, that’s a lot of beef being pushed around! Simply getting into the position and holding has incredible strength developing benefits.

Handstands are now part of my training regimen and I encourage all of my students to practice them as well. Even if a particular individual does not ever hit a perfect, Free Standing Handstand, SO WHAT? They are getting stronger and better conditioned throughout the process. Additionally, their pressing will get better, they will get stronger and their shoulders will be healthier. Plus, you never know; keep plugging away long enough and almost ANYTHING is possible. Please read on….

One of my female clients was a little reluctant to attempt the Handstand. She has four children and her shoulders needed strengthening. She was having issues with her core and her presses as well. She couldn’t even hold a Crow Stand for more than 3 seconds before taking a nose dive. Not a likely Handstand Candidate, right? WRONG! I first started her with the Crow Stand with several karate striking pads piled up to support her head while she developed the necessary tension to be able to hold herself up. Once she achieved 30 seconds, I’d remove a pad. By the end of the month, she was performing the Crow Stands–sans the pads!

We then moved to the wall. She had a fear of being inverted, so we needed to build her confidence with “Face the Wall” Handstands. After she got closer and closer and was able to hold the position for 30 seconds, I had her kick-up into the outward facing “Wall Handstand.” Using the 30 second time as an indicator to move to the next level, we began the “Free Standing Handstand” with me spotting her. This is where we are at four months later.

I really can’t tell you how long it will take another individual to progress, but she trains 3 to 4 days a week (sometimes 5) and she’s very motivated by health and strength. She is determined, dedicated and disciplined. Training is a priority. If you possess her attributes – There’s Nothing You Can’t Accomplish!

Strength & Honor,

Coach Phil Ross


***

About Master RKC Phil Ross: Master RKC, 8th Degree Black Belt, Specialist in Bodyweight Strength, PCC and CK-FMS Certified. His name is synonymous with Martial Arts and Fitness. He is known as the area’s Kettlebell King and has successfully competed on the National Level in…  Read more here.

Filed Under: Uncategorized Tagged With: athletic application, ballistic to static, clean, dirty dozen, handstand, Kettlebell, kettlebell king, phil ross

The Only Three Ways to Build the Body

January 22, 2014 By Andrew Read 2 Comments

a_read_cartwheelThere are only three ways to build the body – intensity, volume, and density. So why is it that we often look to only change one variable when seeking to improve?

In textbook periodization the early phases of training are characterized by a steady increase in volume first. This continues until beginning the competition preparation phases and a subsequent rise in intensity. However in modern fitness planning it is far more common to see people try to increase either intensity via lifting more weight or density by trying to do more reps in a given time frame.

Back when I started lifting weights it was common for beginners to start in the gym with a simple plan that was full body, with each exercise being done for three sets of ten reps. It was common for there to be an exercise for major muscle groups, and this plan was repeated for three days each week. As the trainee improved it was normal to add an extra day of training, thereby increasing the total volume of work they did for the week.

This process of adding volume was repeated by adding another set or two into the workout, up until it got to the point where it was unrealistic in terms of time management to complete the session. At this point trainees were often put onto a plan called a split routine where they did different body parts on different days, or still did the whole body each time but performed different lifts. The trend of adding volume continued as people added more exercises to each body part, until they arrived at something like three to five exercises per body part, done for three to five sets of eight to fifteen reps each. It’s not uncommon for bodybuilders to hit as many as twenty-five sets of work for a big body part like the legs. As the total volume of the workout increased they kept dividing the workout into smaller and smaller groups of body parts starting with full body, then half body, and then into days where one major part per day was being worked such as legs, arms, or chest.

And the reason for all this is simple – because adding volume works.

But then we get to strength training and one of the things that everyone seems to always think is that plans need to be kept low volume. I don’t believe that to be the case for most people, and the reason is simple – because most haven’t broken through to the point where volume can no longer added. It’s only when you can no longer recover from your previous training that volume can no longer be added. This ultimately is because of only one thing – your training intensity is too high.

Two very noteworthy experts, from two different types of weight lifting, agree on one thing. That average intensity should be around 70%. Sheiko believes this to be the case for power lifters, and Medveydev claims this for nearly all lifters too (except those at International Master of Sports levels, i.e. those attending the Olympics. Obviously because these are rare genetic specimens, and the use of performance enhancing drugs must be considered, the rules that apply to them are slightly different). When two guys at the top of their fields are both saying the same thing we should all listen up.

Often people look at all the numbers in a lifting plan and see a mass of percentages but never take the time to consider how they add up.

Method #1

The simplest way to moderate intensity is to do as many sets above 70% as you do below. For example, doing a set at 60%, then at 70% and finally at 80% keeps the average intensity at 70%, as long as you do the same number of reps in each set.

For example: 60%/3, 70%/3, 80%/3.

If you want to do more sets at the top weight you need extra sets at the lower weights too. The lower weight sets are useful for building technical proficiency.

For example: 55%/3, 65%/3, 70%/3, 80%/3 x 2 will still give you an average intensity of 70%, while giving you exposure to higher loads too.

Method #2

When it comes to fixed weight objects, like kettlebells or sandbags, it becomes much harder to moderate the weight and a better method becomes moderating intensity through manipulating volume. Let’s say that you can press a 24kg bell five times just to make the math easier. If you do ladders of 2, 3, and 5 reps, then your average for each ladder comes out to 67%. That’s pretty good considering that kettlebells tend to come in large jumps in sizes and you can’t micro-load like you can with barbells.

The other way to do this is to play around with how many total ladders you do in a session. Let’s suppose that the maximum number of 2-3-5 ladders you can cope with at a given weight is five. If you have a week where you perform four ladders, then two ladders, and three ladders over successive workouts your average intensity is 60%. However, if you then perform five ladders, three ladders, and four ladders the following week you have an average of 80%. And when you look at the long-term effect of that you wind up back at our magic 70% intensity.

The magic thing about training at this seventy percent average is that you can train a lot. I mean A LOT. Dan John’s Forty Day Plan in Easy Strength is a classic example that allows you to train daily with an average intensity of 70%.

A further example that I’ve used personally was during helping Beth Andrews and Val Hedlund get ready for the Iron Maiden challenge. They both did workouts that featured twenty sets of five presses with a 16kg bell. With a projected max of 24kg, that 16kg works out to 67%. (That’s as close as you’ll likely get when using kettlebells because of the big jumps from one bell to the next).

The lesson here is simple – keep average intensity to seventy percent and try adding volume before you add intensity. This has the added benefit of not taxing the joints so much, nor needing to psyche oneself up for training efforts. There is no need for screaming at this stage of training – save that for game day. But get the volume in.

People like to talk about how strength is a skill. Well, skills need to be practiced a lot before they are polished and become second nature. Keeping the intensity moderate allows many, many practice sessions that would otherwise be missed due to muscle soreness or fatigue. All those extra reps will add up when you call on your strength to be there for you.

At this point you’re asking how do you know if you need more volume? Just ask yourself one question – are you getting the result you want? If not try doing more. I think you’ll be surprised at exactly how much you can do, and how quickly you improve, once you add more volume.

 ***

About Andrew Read, Master RKC, Dragon Door Australia: Andrew Read, Master RKC, is head of Dragon Door Australia and Read Performance Training. Recognized as Australia’s leading functional strength trainer he is a regular contributor to Blitz, Inside MMA, International Kickboxer, Oxygen, Ultrafit and Breaking Muscle. His coaching background spans nearly twenty years having worked with many Olympic and world championship level athletes.

Filed Under: Uncategorized Tagged With: australia, density, intensity, Kettlebell, load, master rkc, pressure, quitters, RKC drills, strength, trainers, volume

Are You Really Missing Out?

January 15, 2014 By Josh Henkin 5 Comments

Josh_HenkinEvery New Years my wife feels like we should do something big! To be honest, I am not all that into going out when so many people are liquored up. I ask her, “why do you want to go out so badly?” She often replies, “cause I don’t want to miss out on anything great!”

The same fear that my wife has about missing something great during New Years is the very same emotion that I think many people in fitness experience. How so? People end up doing everything, every training method, they want to have ever training tool, they have to go to every program under the sun. Why? When I ask people why they do such things, it is often, “I don’t want to be left out”.

I find that staggering, but not shocking. I went through that process in my early career as well. Pretty much any new piece of fitness equipment I got it. Any new program, I had to try it! Then something happened. I changed.

I went from having a extremely packed facility full of equipment to rather bare bones. It wasn’t in an effort to be hip or cool, I just started to realize what I REALLY needed and what really helped the people that I trained. Pretty soon I wasn’t worried that I didn’t perform all the “cool” exercises, I had figured out what worked for what person. I learned the dirty little secret that no single exercise is vital, you have to find the right exercise. Since then, I can’t tell you how much better my own training and that of my clients has been.

That is why I find it interesting when people make strong statements like, “you can’t train only with kettlebells!” Hmmm, you don’t HAVE to train with just kettlebells, but can you?

I hear lots of reasons, “kettlebells don’t go heavy enough”, which leads to “you can’t get really strong”, and of course, “you can’t perform THIS so very important essential exercise.”

Instead of thinking of how training with kettlebells exclusively would make you feel limited. I actually believe it would make your training much smarter! Let me explain by dispelling some of these very common myths.

Kettlebells Don’t Go Heavy Enough

Years ago I heard a well respected strength coach make the argument that kettlebells aren’t that powerful because they only go up to 70 pounds (at the time they did) so they aren’t that great for strength. Ironically, a rather strong person is someone who can manhandle a pair of 70’s (32kgs). How do we have both?

The problem is that most people try to compare the weight of a kettlebell to that of a dumbbell or more problematically a barbell. Sorry, trying to compare the weight of a kettlebell to a barbell is almost apples to oranges. Whether is has to do with the independent movement of the kettlebells, to the different weight distribution, or the fact the holding position of the kettlebell is very different from a barbell. In the end we know one thing and that is weight is not all equal.

I might believe that kettlebells aren’t heavy enough if I routinely saw people throw around double 106 (48kg) bells with ease. However, I find that to be a very rare find.

You Can’t Get Really Strong

To be perfectly honest, this is the one that gets me more wound up. Unfortunately, most people totally screw up the governing principle of strength, the overload principle. The idea of the overload principle leads people to becoming consumed with the idea of load. However, that isn’t what the overload principle actually means. The concept is that we have to provide a stress to the body to cause changes greater than the body experienced before.

The reason that most programs fail is they fall into that trap of just load and forget about the many other variables that actually can play a very important role in improving strength. By not having the small jumps in weight available in kettlebells we can focus on these other concepts.

Other Overload Variables:

-Speed

-Load Position

-Body Position

-Range of Motion

-Volume (amount of work)

-Density (amount of work in a given amount of time)

-Direction of Force

-Type of Muscle Contraction

Each one of these concepts could be an article within themselves. My point though is to show how many other variables most programs fail to actually consider. If we look at each and think about how they play a vital role in strength training and program development, we can see that kettlebells can work incredibly well in all these variables and how the weights of kettlebells could be greatly altered in conjunction with manipulating these different ideas.

We often hear the legend of old time strongmen performing incredible feats of strength. Ironically, most didn’t sit there focusing on adding 2 1/2 pounds to a lift. They intuitively used these other methods to manipulate load. The deadlift didn’t really become a staple lift till 1910-1920 when South African Strongman, Hermann Goerner, made it a focused lift. Bob Hoffman of York Barbell Company really popularized the more familiar barbell that we know in the early 1930’s. My point is that these things we consider soooo important to get strong are really rather new ideas. We have seen people become incredibly strong without the luxury of small weight increases or a wide array of weights for centuries.

The Fitness Cynic

I don’t blame people for being more than a bit skeptical about the idea of getting stronger by JUST using kettlebells. However, since Dragon Door helped bring back kettlebells to the modern fitness world, there have been hundreds of real world stories of people getting darn strong!

Some may feel a bit cynical because there was marketing of kettlebells that helped the movement and therefore, their popularity. Few realize that the barbell become popular because Bob Hoffman and York Barbell were advertising and promoting the benefits of barbell training. Why? They wanted to sell barbells, but also because this is what they truly believed, the barbell was a great and powerful tool that could change people’s lives.

A third reason that I think many people have issues with the idea of kettlebell training only goes back to an interesting piece I saw on CNN about social media. The story told of how less and less young people are using Facebook as their primary social media outlet. Why? Much has to do with the fact it went mainstream. When the grandparents started becoming active on social media, it started to become deemed “less cool” by the younger generation.

Now that you can find infomercials on kettlebells, fitness ads using kettlebells, and just about any fitness media that wants to appear cool. I think some people have fallen victim to the idea that kettlebells aren’t cool because anyone can use them. Funny enough, I think that is what makes them a beautiful tool.

***

About Josh: Josh Henkin, Senior RKC, CSCS has been a RKC instructor since 2003 and has implemented kettlebell programs for major Division I programs, SWAT teams, and many different general fitness programs. Josh is also the creator of the DVRT Ultimate Sandbag Training system where he is a highly sought after presenter worldwide. He can be reached at info@ultimatesandbagtraining.com or http://DVRTFitness.com.

Filed Under: Uncategorized Tagged With: barbells, coach, complex, exercise, fitness, heavy, Josh Henkin, kettlebells, missing out, sandbags, senior rkc

Combining RKC and FMS

January 8, 2014 By Andrew Read Leave a Comment

Andrew Read's 3 rulesThe FMS is a fantastic tool kit for any trainer, and when used in conjunction with RKC methods can provide a quick way to resolve almost any issue a client may have. But it can also be incredibly daunting once you start to peel back the layers of the systems and see everything that there is.

One of the best ways to use both systems together is to start to look at the framework that both provide and distil them down to their barest elements. In the case of the RKC drills our purpose is to lead a client in only a single direction, to an “a-ha” moment. A smart drill leaves them with only one direction to go in – the correct one, allowing them to instantly get the feeling or movement they were previously unable to connect with.

While there are many corrective exercises also within the FMS, and this is perhaps what it is best known for, people often forget that the purpose of the FMS is to not only screen for and correct asymmetries, but also to give us a path to follow once we go back to strength work. A simple framework that can be followed is that each movement has four steps –

No load, pattern assistance.
No load, no pattern assistance.
Load, with pattern assistance.
Load, with no pattern assistance.

Looking at how we teach the swing at the RKC you can see that this format is followed closely. We begin by teaching the hinge. This is often assisted in a variety of ways – either using the blades of the hands in the hips to help find the hip crease, pushing the butt back towards a wall, or using a dowel to teach how to keep neutral spine.

And here is where the “a-ha” drills fit in – we can go back and forth between the first and second steps as needed to reinforce the pattern. Our intent is to remove the pattern assistance and have the person do it unloaded but perfectly on their own. If form breaks down we can get them to return to the pattern assistance method (dowel, wall, etc.) until it becomes ingrained.

From there we can move to kettlebell deadlifts with the partner “reminding” the student how to keep the body tight via some tough love. Many people struggle to activate the right muscles to begin with and providing a cue that allows them to feel what muscles need to be switched is valuable. The final step in this process is to finish with deadlifting without any form of pattern assistance.

You can follow the same step for the swing itself. Begin with the hip hinge reinforced with a dowel. Move to hinging without any form of pattern assistance. Then onto the swing where we can assist in any number of ways from using a towel to teach timing, hip drive and straight arms, to putting the toes on a slight raise to teach people to avoid scooping, to having a target behind the student to have them hike the bell more, to spiked swings to reinforce the loading phase of the swing. Finally, once we have cleared all problems with our “a-ha” drills we can swing without pattern assistance.

The FMS also have a logical system of progression for loading and uses four postures that follow a developmental sequence. They start with lying, progress to quadruped, then onto kneeling and finally standing. If you look closely you’ll see that this sequence is the get up. That kind of symmetry between the two systems isn’t a mistake as both are about movement and strength.

But how can we apply our FMC framework to a skill like kettlebell pressing, using the postures too?

One of the issues people often have with pressing is an inability to stay tight through their midsection during the press putting their lower back at risk. If we begin lying supine (face up) we can do the backpressure crunch drill. To perform this have your partner place a rolled up towel under your lower back and lie down on it. Bring your knees to your chest and push your lower back into the ground while your partner tries to take the towel away as you extend your legs. This will teach how to stay tight through the midsection while keeping neutral spine. Retest with your press and see if it has improved.

The next step is to be in quadruped. For this drill we’re going to do bird dogs using a Cook band. Our single kettlebell press is fired on a diagonal and this drill will teach you to stay tight while your arm is moving. (To regress this drill slightly stay in the same position, but use a foam roller on the lower back to teach how to keep the natural curve of the spine). Retest again with your press and see if it has improved.

From here we can choose to press from kneeling and use either the tall kneeling or half kneeling postures. I would pick which one to use based on whether my client had asymmetries in their Inline Lunge or Hurdle Step tests (half kneeling in this case). If they were symmetrical then we could progress to tall kneeling. For pattern assistance we could do a core activation drill and press the kettlebell bottoms up. Again, perform the drill then retest your press to see what has improved. (Kneeling and bottoms up presses are taught and discussed at RKCII so if in doubt please see an RKCII for further information).

The final step is a standing single bell press without any assistance. At any point if the movement degrades there is the choice of regressing the posture used, or going back into the matrix and deciding if we need pattern assistance. Both answers can be right, depending on the person’s unique history.

Keep these simple rules in mind when training and you’ll find a lot of the confusion melts away. The takeaways are that the RKC uses “a-ha” drills to give a client only a single solution to their problem. If the drill you’ve picked doesn’t lead to the right answer then you picked the wrong drill. The FMS uses a simple four by four matrix to figure where training needs to be at any time. Follow the process and you’ll see that the system is very logical, and make sure to use the system.

Tying the two together leads to quick gains for your students and can often shine a light on the right path to take when someone just seems stalled in training.

 ***

About Andrew Read, Master RKC, Dragon Door Australia: Andrew Read, Master RKC, is head of Dragon Door Australia and Read Performance Training. Recognized as Australia’s leading functional strength trainer he is a regular contributor to Blitz, Inside MMA, International Kickboxer, Oxygen, Ultrafit and Breaking Muscle. His coaching background spans nearly twenty years having worked with many Olympic and world championship level athletes.

Filed Under: Uncategorized Tagged With: australia, back pressure, clients, fms, hinging, Kettlebell, load, master rkc, pattern assistance, quitters, RKC drills, strength

It’s in the Hips, Part 4

December 18, 2013 By Mark Bixby 8 Comments

mark_bixby_croppedIn this fourth and final installment dedicated to better utilization of the hips, I show some crawling progressions to emphasize that we can sometimes skip mobility drills and just move instead.  But before we jump into part four, let’s briefly review the previous three pieces.  First, we looked at some basic stretches done in a variety of positions to loosen up tight areas around the hips.  In part two, we covered a very basic dynamic hip and hamstring mobility sequence to prepare field/court athletes or fighters for their active flexibility needs in competition.  In the third piece, I differentiated “linkage” from “leakage” using the Hanging Leg Raise Sequence, and I went on to show how plyometric-style HLR’s can help with patterning powerful hip flexion/extension for the sprints.

I reviewed the previous segments to set this piece up as continuing in the line of “linkage” discussed in part three.  In the HLR sequence, we used linkage to generate explosive power and dynamic control.  Today’s segment departs from the power focus and instead incorporates “linkage” to produce controlled efficiency of movement.  My aim today is to demonstrate quiet rather than explosive movement.

While your average guy on the street isn’t yet acquainted with the notion of mobility, it’s been a trendy word in the fitness industry for several years.  The few people who actually do mobility drills tend to stand in one place and make a series of circular motions through the joints from the neck down to the ankles.  While this is an excellent thing to get fluid moving into the joints and surrounding tissues, it’s debatable whether these isolated drills actually produce better mobility.  Today’s video, then, attempts to show how putting mobility in motion yields better results than isolating each joint while also being more fun.

There are six movements on the video.  All of them both require and improve mobility in the hips.  The first two are low crawls, one on the belly and one on the back.  The next two moves are creeping squats, the first done from a traditional squat and the other from a Cossack squat position.  The final two moves combine elements of the first four and add rolls.  The goal on each of the six movements is to move quietly.  If you can do them without producing thuds during the transitions, you aren’t leaking; instead, you’re moving efficiently.

In an attempt to elaborate on my notion of how linkage can create quiet as well as explosive movement, I’ll provide an exercise x-ray of the fifth move in the video: the creeping squat/roll combination.  I set up the move in a Cossack squat position.  From there, the flat foot shifts towards the ball of foot as the ankle extends to drop the knee to the floor.  The knee drop carries my momentum forward.  If I don’t rotate through my thoracic spine while flexing and rotating my neck, I’ll do a face plant.  So, I opt for rotation.  The previous movement clears the neck and spine so I can roll over the shoulder.  An internal rotation of the rolling shoulder (imagine the Egyptian shoulder mobility drill that screws the shoulders into internal and external rotation) allows me to take the impact of the floor on the backside of the shoulder (thus avoiding jamming into the A/C joint).  I roll across (not straight down) the spine to the opposite hip and back into the Cossack position.  I do a creeping squat Cossack switch to get the other knee up and repeat the sequence to roll over the opposite shoulder.  Basically, I have linked mobility drills sequentially from the feet up through the neck to produce movement.

In the RKC School of Strength, we emphasize the Turkish Get Up because it demands multi-planar movement through multiple joints while navigating the stability challenge of maintaining weight overhead.  It is one of those few, coveted “desert island” exercises because of its strength, mobility and stability demands.  If we hope to achieve the same great benefits from bodyweight exercises, we need to remember the mantra of “multiple planes, multiple directions and multiple joints.”  While focusing on the hips is a great place to start in this endeavor, we must remember that dynamic movement is produced by systemic integration.  Hopefully, the video that accompanies this piece can give you some ideas in making your movement more effective, integrated and enjoyable.

***

Mark Bixby is a Dragon Door RKC Team Leader, PCC Instructor and MovNat Instructor.  He discovered kettlebells in 2002 and found that they are the quickest, most effective way to train.  A combination of past injuries and persistent low physical self-image had caused Mark to have severe posture issues and chronic back pain. Kettlebells taught Mark how to use his hips so that he didn’t tuck his pelvis and slump with his posture. He grew taller, stronger and more confident. More than six years later, Mark has accomplished huge gains in strength, flexibility and stability and he finds that kettlebells still present significant physical and technical challenges. Because the skill set can always be refined, kettlebells continue to push Mark towards higher levels of body awareness and fitness. Mark can be reached through: http://www.dkbfitness.com/.

Filed Under: Uncategorized Tagged With: dragon door, exercises, GAIN, hips, joints, Mark Bixby, part 3, posture, stiff, stretches

A Set-Up for Success from a Senior RKC

December 11, 2013 By Cortez Hull 2 Comments

Cortez xmas

WARNING:  This is not going to be your usual RKC blog post.  If you are already getting the results you want, then this article is not for you.  My words are for someone who is tired of piss-poor outcomes and honestly wants progress.

Throughout my life, I’ve jumped blindly from one type of workout to another in pursuit of such progress.  I was kind of like that old cartoon character, Mr. Magoo.

As you might expect, constantly changing my routines without clear plans did not prove effective.

All progress requires change, but not all change is progress.  Why did I experience change without progress?

I’ve come to realize that I failed to follow certain essential ideas that separate the GREATS from the mediocre masses.  These ideas may be simple and easy to do, but what is easy to do is also easy not to do.

If you are tired of seeing subpar results – or none at all – then read on.

If you are ready for change that is truly progress, then read on.

Idea #1:  Decide what it is that you want.  Decide your goal!

Zig Ziglar tells a story about a champion archer named Howard Hill, who has NEVER been beaten in open competition.  Of the 267 competitions he has entered, he has won 267 times.  However, Zig always asserts that Hill can be defeated:

“I’ll bet you that, in a few hours, I could having you hitting a target more consistently than him . . . IF I blindfolded him, spun him around a few times, and moved him before he shot!”

The moral of the story?  Even a champion can’t hit a target if he or she doesn’t know where it is.

How can you achieve something if you aren’t clear about precisely what you want?

If you asked the average person to share their fitness goals, you might hear the following comments:

“I want to be healthy.”
“I want to tone my body.”
“I want to get in shape.”
“I want to get stronger.”
“I want to get cut.”

These goals are admirable, but they’re also too vague.  How will these people know when they’re healthy, toned, in shape, or cut?  They need to define exactly what they want to accomplish.  We all do.

My father-in-law once told me a joke about two people who failed to do this:  Sven and Ole.  (I live in Minnesota, home to many tales about these Scandinavian farmer friends.)

One snowy winter day, Sven and Ole went hunting and managed to get a deer.  The two friends struggled as they attempted to drag it back to the truck.  Seeing their exhaustion, another hunter approached to offer a suggestion: “Hey, instead of pullin’ dat deer by the tail, try takin’ it by the horns.  Dat’ll be easier.”  Sven and Ole followed his advice, grabbed the horns, and continued on their way.

After a few minutes, Ole said to Sven, “Ya know, dat hunter was right!  Dis is much easier.”  Sven responded, “Ya, sure is.  But we’re gettin’ farder and farder away from de truck.”

Sven and Ole were doing something that worked, but they were doing it with no consideration as to what they REALLY wanted.

As you take on your own challenge, avoid Sven and Ole-style slip-ups.

Ask yourself: WHAT IS MY CLEARLY DEFINED GOAL?

Idea #2:  Once you have your goal, identify why you want it!

Why is this important to you?  I don’t mean the superficial why.  I mean the deep, EMOTIONAL reason you have for wanting your goal.

Years ago, a buddy’s girlfriend broke up with him.  My friend was obviously heartbroken, but with his depression came motivation:  he decided to transform his body.

By a few months after the break-up, my friend had gotten a new hairstyle, bought new clothes, changed his eating habits, and dropped a significant amount of body fat.  He had even developed new moves on the basketball court.  WHY?  He knew he was going to see his ex-girlfriend, and he wanted her to regret breaking up with him.

I’m not sure whether she regretted it, but my point is that my friend was able to transform himself because he had a compelling cause for doing so.  He didn’t succeed because of a simple desire to see his abs.  He succeeded because he had a deep, EMOTIONALLY-CHARGED WHY!

If your why isn’t big enough, your focus and consistency won’t last long.

Ask yourself:  WHAT IS MY WHY?

IDEA #3:  Once you have your goal and know why you want to reach it, become aware of where you are now.

When we look for particular stores in shopping malls (my local behemoth is the Mall of America), we’re often at a loss until we locate a map with those ever-helpful words: “You are here.”

When we use a GPS or smartphone app to seek directions, we need to know our current location to find out where to go.

Why would beginning a fitness plan be any different?

The act of becoming aware of where you are starting out can be your single greatest tool for further improvement.

Unfortunately, many people neglect to take this step.  What a pity!  They have no idea of how long it will take to achieve their goals, or if those goals are even realistic.

One such person is a student at the school where I work.  Let’s call him Jay.  The other day, he came up to me in the hall – the fifth  time he’s done so in the last two years.  Jay told me that he wanted to get in shape, as he has during every previous conversation we’ve had.

“But this time’s different,” he promised.  “I’m serious now, and I need your help.”

I asked Jay what he meant by “get in shape,” and challenged him to specify his fitness goals by writing down some actual numbers.  He did so.  Once I knew his precise aims, we talked about his reasons for wanting to reach them.  The first two of my key ideas in action!

Applying my third idea, I asked Jay, “Where are you now?”  He responded with that oft-heard phrase of teenage nonchalance:  “I don’t know.”  I suggested that he come into the gym so that we could assess his starting point.

Although Jay promised to follow up, two weeks have passed without a word from him.  Two wasted weeks in which he is not making any progress towards where he wants to be.

Please, do me a favor:  Don’t be like Jay.  Don’t let denial or laziness impede you at the very outset of your course.  Empower yourself by informing yourself.

If your goal is strength, how strong are you now?
If you want to burn fat, then what is your body fat percentage now?
If you want to perform more work in a specific amount of time, how much work can you do now?

Ask yourself: WHERE AM I NOW?

You’re probably thinking:  “It all seems too simple.  I already know all of this.”

That may be the case, but there’s a difference between knowing and doing.  You may be familiar with these ideas, but are you living them?

Remember:

Formulate your goal.  Determine the reasons why you MUST accomplish it.  Become aware of what you are doing now.

These concepts are game-changers, with the potential to turn any program from lackadaisical and lackluster into something profoundly powerful.  Add them to your program and watch your results improve.  Though they may seem basic, their impact will be anything but.

***

Cortez Hull is a Senior RKC, FMS specialist, PCC instructor, and Police Training instructor.  He is known as the consummate learner, and is available for program design, HKC workshops, and preparation for the RKC.  Email him HERE.

Filed Under: Uncategorized Tagged With: Christmas Kettlebells, cortez hull, decide, goals, identify, mental training, plan, progress, senior rkc

  • « Go to Previous Page
  • Page 1
  • Page 2
  • Page 3
  • Page 4
  • Page 5
  • Interim pages omitted …
  • Page 10
  • Go to Next Page »

Primary Sidebar

Featured Products

previous arrow
BOOK-RKCBookofSnC
HardStyleKettlebellChallegeDanJohn700
BookCoverMasterTheKettlebell1
RKCiconKettlebell512
KettlebellGoddessdv040
next arrow

Recent Posts

  • RKC Big Six Workout
  • The Kettlebell Swing & Low Back Pain
  • Key Kettlebell Exercises To Help You Create Better Balance
  • How to Most Effectively Use Kettlebells to Meet Your New Year Goals
  • 1 Exercise That Checks All The Boxes
FOLLOW US ON TWITTER!

Archives

Copyright © 2025

Dragon Door Publications / The author(s) and publisher of this material are not responsible in any manner whatsoever for any injury that may occur through following the instructions or opinions contained in this material. The activities, physical and otherwise, described herein for informational purposes only, may be too strenuous or dangerous for some people, and the reader(s) should consult a physician before engaging in them.