• Skip to main content
  • Skip to primary sidebar
  • Home
  • Contributors
    • Matt Beecroft, Master RKC
    • Martijn Bos, Master RKC
    • Andrea Du Cane, Master RKC
    • Angelo Gala, Master RKC
    • Chris Holder, Master RKC
    • Steve Holiner, Master RKC
    • Dan John, Master RKC
    • Mike Krivka, Master RKC
    • Thomas Phillips, Master RKC
    • Robert Rimoczi, Master RKC
    • Phil Ross, Master RKC
    • Max Shank, Master RKC
  • Workshops
    • HKC Workshops
    • RKC Workshops
    • RKC-II Workshops
  • Find an RKC Instructor
  • Resources
    • Articles
    • Forums
    • Kettlebells
    • Products
  • Blogs
    • PCC Blog
    • Strong Medicine Blog
  • Archives

RKC School of Strength

Official blog of the RKC

load

The Only Three Ways to Build the Body

January 22, 2014 By Andrew Read 2 Comments

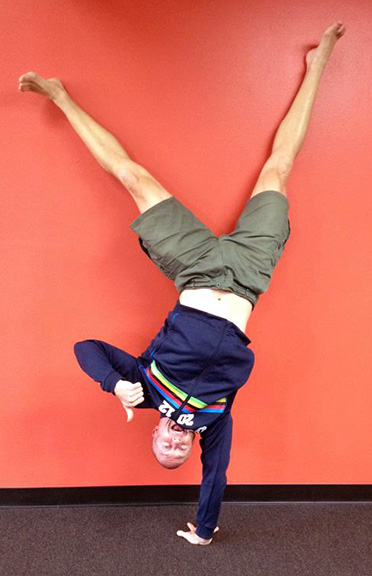
a_read_cartwheelThere are only three ways to build the body – intensity, volume, and density. So why is it that we often look to only change one variable when seeking to improve?

In textbook periodization the early phases of training are characterized by a steady increase in volume first. This continues until beginning the competition preparation phases and a subsequent rise in intensity. However in modern fitness planning it is far more common to see people try to increase either intensity via lifting more weight or density by trying to do more reps in a given time frame.

Back when I started lifting weights it was common for beginners to start in the gym with a simple plan that was full body, with each exercise being done for three sets of ten reps. It was common for there to be an exercise for major muscle groups, and this plan was repeated for three days each week. As the trainee improved it was normal to add an extra day of training, thereby increasing the total volume of work they did for the week.

This process of adding volume was repeated by adding another set or two into the workout, up until it got to the point where it was unrealistic in terms of time management to complete the session. At this point trainees were often put onto a plan called a split routine where they did different body parts on different days, or still did the whole body each time but performed different lifts. The trend of adding volume continued as people added more exercises to each body part, until they arrived at something like three to five exercises per body part, done for three to five sets of eight to fifteen reps each. It’s not uncommon for bodybuilders to hit as many as twenty-five sets of work for a big body part like the legs. As the total volume of the workout increased they kept dividing the workout into smaller and smaller groups of body parts starting with full body, then half body, and then into days where one major part per day was being worked such as legs, arms, or chest.

And the reason for all this is simple – because adding volume works.

But then we get to strength training and one of the things that everyone seems to always think is that plans need to be kept low volume. I don’t believe that to be the case for most people, and the reason is simple – because most haven’t broken through to the point where volume can no longer added. It’s only when you can no longer recover from your previous training that volume can no longer be added. This ultimately is because of only one thing – your training intensity is too high.

Two very noteworthy experts, from two different types of weight lifting, agree on one thing. That average intensity should be around 70%. Sheiko believes this to be the case for power lifters, and Medveydev claims this for nearly all lifters too (except those at International Master of Sports levels, i.e. those attending the Olympics. Obviously because these are rare genetic specimens, and the use of performance enhancing drugs must be considered, the rules that apply to them are slightly different). When two guys at the top of their fields are both saying the same thing we should all listen up.

Often people look at all the numbers in a lifting plan and see a mass of percentages but never take the time to consider how they add up.

Method #1

The simplest way to moderate intensity is to do as many sets above 70% as you do below. For example, doing a set at 60%, then at 70% and finally at 80% keeps the average intensity at 70%, as long as you do the same number of reps in each set.

For example: 60%/3, 70%/3, 80%/3.

If you want to do more sets at the top weight you need extra sets at the lower weights too. The lower weight sets are useful for building technical proficiency.

For example: 55%/3, 65%/3, 70%/3, 80%/3 x 2 will still give you an average intensity of 70%, while giving you exposure to higher loads too.

Method #2

When it comes to fixed weight objects, like kettlebells or sandbags, it becomes much harder to moderate the weight and a better method becomes moderating intensity through manipulating volume. Let’s say that you can press a 24kg bell five times just to make the math easier. If you do ladders of 2, 3, and 5 reps, then your average for each ladder comes out to 67%. That’s pretty good considering that kettlebells tend to come in large jumps in sizes and you can’t micro-load like you can with barbells.

The other way to do this is to play around with how many total ladders you do in a session. Let’s suppose that the maximum number of 2-3-5 ladders you can cope with at a given weight is five. If you have a week where you perform four ladders, then two ladders, and three ladders over successive workouts your average intensity is 60%. However, if you then perform five ladders, three ladders, and four ladders the following week you have an average of 80%. And when you look at the long-term effect of that you wind up back at our magic 70% intensity.

The magic thing about training at this seventy percent average is that you can train a lot. I mean A LOT. Dan John’s Forty Day Plan in Easy Strength is a classic example that allows you to train daily with an average intensity of 70%.

A further example that I’ve used personally was during helping Beth Andrews and Val Hedlund get ready for the Iron Maiden challenge. They both did workouts that featured twenty sets of five presses with a 16kg bell. With a projected max of 24kg, that 16kg works out to 67%. (That’s as close as you’ll likely get when using kettlebells because of the big jumps from one bell to the next).

The lesson here is simple – keep average intensity to seventy percent and try adding volume before you add intensity. This has the added benefit of not taxing the joints so much, nor needing to psyche oneself up for training efforts. There is no need for screaming at this stage of training – save that for game day. But get the volume in.

People like to talk about how strength is a skill. Well, skills need to be practiced a lot before they are polished and become second nature. Keeping the intensity moderate allows many, many practice sessions that would otherwise be missed due to muscle soreness or fatigue. All those extra reps will add up when you call on your strength to be there for you.

At this point you’re asking how do you know if you need more volume? Just ask yourself one question – are you getting the result you want? If not try doing more. I think you’ll be surprised at exactly how much you can do, and how quickly you improve, once you add more volume.

 ***

About Andrew Read, Master RKC, Dragon Door Australia: Andrew Read, Master RKC, is head of Dragon Door Australia and Read Performance Training. Recognized as Australia’s leading functional strength trainer he is a regular contributor to Blitz, Inside MMA, International Kickboxer, Oxygen, Ultrafit and Breaking Muscle. His coaching background spans nearly twenty years having worked with many Olympic and world championship level athletes.
Filed Under: Uncategorized Tagged With: australia, density, intensity, Kettlebell, load, master rkc, pressure, quitters, RKC drills, strength, trainers, volume

Combining RKC and FMS

January 8, 2014 By Andrew Read Leave a Comment

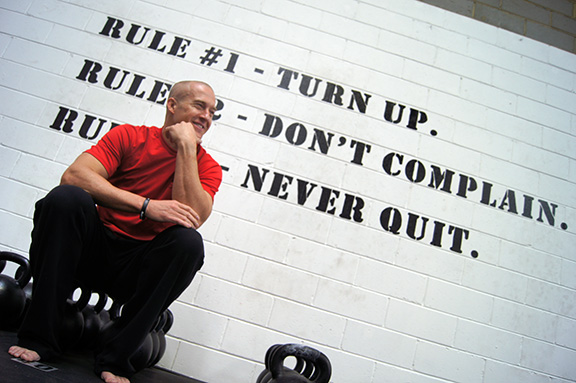
Andrew Read's 3 rulesThe FMS is a fantastic tool kit for any trainer, and when used in conjunction with RKC methods can provide a quick way to resolve almost any issue a client may have. But it can also be incredibly daunting once you start to peel back the layers of the systems and see everything that there is.

One of the best ways to use both systems together is to start to look at the framework that both provide and distil them down to their barest elements. In the case of the RKC drills our purpose is to lead a client in only a single direction, to an “a-ha” moment. A smart drill leaves them with only one direction to go in – the correct one, allowing them to instantly get the feeling or movement they were previously unable to connect with.

While there are many corrective exercises also within the FMS, and this is perhaps what it is best known for, people often forget that the purpose of the FMS is to not only screen for and correct asymmetries, but also to give us a path to follow once we go back to strength work. A simple framework that can be followed is that each movement has four steps –

No load, pattern assistance.
No load, no pattern assistance.
Load, with pattern assistance.
Load, with no pattern assistance.

Looking at how we teach the swing at the RKC you can see that this format is followed closely. We begin by teaching the hinge. This is often assisted in a variety of ways – either using the blades of the hands in the hips to help find the hip crease, pushing the butt back towards a wall, or using a dowel to teach how to keep neutral spine.

And here is where the “a-ha” drills fit in – we can go back and forth between the first and second steps as needed to reinforce the pattern. Our intent is to remove the pattern assistance and have the person do it unloaded but perfectly on their own. If form breaks down we can get them to return to the pattern assistance method (dowel, wall, etc.) until it becomes ingrained.

From there we can move to kettlebell deadlifts with the partner “reminding” the student how to keep the body tight via some tough love. Many people struggle to activate the right muscles to begin with and providing a cue that allows them to feel what muscles need to be switched is valuable. The final step in this process is to finish with deadlifting without any form of pattern assistance.

You can follow the same step for the swing itself. Begin with the hip hinge reinforced with a dowel. Move to hinging without any form of pattern assistance. Then onto the swing where we can assist in any number of ways from using a towel to teach timing, hip drive and straight arms, to putting the toes on a slight raise to teach people to avoid scooping, to having a target behind the student to have them hike the bell more, to spiked swings to reinforce the loading phase of the swing. Finally, once we have cleared all problems with our “a-ha” drills we can swing without pattern assistance.

The FMS also have a logical system of progression for loading and uses four postures that follow a developmental sequence. They start with lying, progress to quadruped, then onto kneeling and finally standing. If you look closely you’ll see that this sequence is the get up. That kind of symmetry between the two systems isn’t a mistake as both are about movement and strength.

But how can we apply our FMC framework to a skill like kettlebell pressing, using the postures too?

One of the issues people often have with pressing is an inability to stay tight through their midsection during the press putting their lower back at risk. If we begin lying supine (face up) we can do the backpressure crunch drill. To perform this have your partner place a rolled up towel under your lower back and lie down on it. Bring your knees to your chest and push your lower back into the ground while your partner tries to take the towel away as you extend your legs. This will teach how to stay tight through the midsection while keeping neutral spine. Retest with your press and see if it has improved.

The next step is to be in quadruped. For this drill we’re going to do bird dogs using a Cook band. Our single kettlebell press is fired on a diagonal and this drill will teach you to stay tight while your arm is moving. (To regress this drill slightly stay in the same position, but use a foam roller on the lower back to teach how to keep the natural curve of the spine). Retest again with your press and see if it has improved.

From here we can choose to press from kneeling and use either the tall kneeling or half kneeling postures. I would pick which one to use based on whether my client had asymmetries in their Inline Lunge or Hurdle Step tests (half kneeling in this case). If they were symmetrical then we could progress to tall kneeling. For pattern assistance we could do a core activation drill and press the kettlebell bottoms up. Again, perform the drill then retest your press to see what has improved. (Kneeling and bottoms up presses are taught and discussed at RKCII so if in doubt please see an RKCII for further information).

The final step is a standing single bell press without any assistance. At any point if the movement degrades there is the choice of regressing the posture used, or going back into the matrix and deciding if we need pattern assistance. Both answers can be right, depending on the person’s unique history.

Keep these simple rules in mind when training and you’ll find a lot of the confusion melts away. The takeaways are that the RKC uses “a-ha” drills to give a client only a single solution to their problem. If the drill you’ve picked doesn’t lead to the right answer then you picked the wrong drill. The FMS uses a simple four by four matrix to figure where training needs to be at any time. Follow the process and you’ll see that the system is very logical, and make sure to use the system.

Tying the two together leads to quick gains for your students and can often shine a light on the right path to take when someone just seems stalled in training.

 ***

About Andrew Read, Master RKC, Dragon Door Australia: Andrew Read, Master RKC, is head of Dragon Door Australia and Read Performance Training. Recognized as Australia’s leading functional strength trainer he is a regular contributor to Blitz, Inside MMA, International Kickboxer, Oxygen, Ultrafit and Breaking Muscle. His coaching background spans nearly twenty years having worked with many Olympic and world championship level athletes.

Filed Under: Uncategorized Tagged With: australia, back pressure, clients, fms, hinging, Kettlebell, load, master rkc, pattern assistance, quitters, RKC drills, strength

Primary Sidebar

Featured Products

previous arrow
BOOK-RKCBookofSnC
HardStyleKettlebellChallegeDanJohn700
BookCoverMasterTheKettlebell1
RKCiconKettlebell512
KettlebellGoddessdv040
next arrow

Recent Posts

  • Key Kettlebell Exercises To Help You Create Better Balance
  • How to Most Effectively Use Kettlebells to Meet Your New Year Goals
  • 1 Exercise That Checks All The Boxes
  • Kettlebells in the Clinic
  • How Breathing Can Improve Your Kettlebell Training
FOLLOW US ON TWITTER!

Archives

Copyright © 2023

Dragon Door Publications / The author(s) and publisher of this material are not responsible in any manner whatsoever for any injury that may occur through following the instructions or opinions contained in this material. The activities, physical and otherwise, described herein for informational purposes only, may be too strenuous or dangerous for some people, and the reader(s) should consult a physician before engaging in them.