• Skip to main content
  • Skip to primary sidebar
  • Home
  • Contributors
    • Matt Beecroft, Master RKC
    • Martijn Bos, Master RKC
    • Andrea Du Cane, Master RKC
    • Angelo Gala, Master RKC
    • Chris Holder, Master RKC
    • Steve Holiner, Master RKC
    • Dan John, Master RKC
    • Mike Krivka, Master RKC
    • Thomas Phillips, Master RKC
    • Robert Rimoczi, Master RKC
    • Phil Ross, Master RKC
    • Max Shank, Master RKC
  • Workshops
    • HKC Workshops
    • RKC Workshops
    • RKC-II Workshops
  • Find an RKC Instructor
  • Resources
    • Articles
    • Forums
    • Kettlebells
    • Products
  • Blogs
    • PCC Blog
    • Strong Medicine Blog
  • Archives

RKC School of Strength

Official blog of the RKC

Uncategorized

Moving Strong(er) Equals Training Strong(er)

May 25, 2016 By Russell Andrews 2 Comments

Russ Andrews Group Class

First, let’s consider the human movement system. What parts are involved? What is moving? What initiates the movement?

The human movement system is comprised of the nervous system, skeletal system, and the muscle system—including all the connective soft tissues: tendons, ligaments, and fascia. The nervous system is the master control center of the entire body. It coordinates every function, contraction, and every movement. The nervous system is a super highway of sensory and motor output controlling proper functions, compensating for deficiencies, and altering positions and patterns to maintain homeostasis. The human body is a global tensegrity unit.

Tensegrity

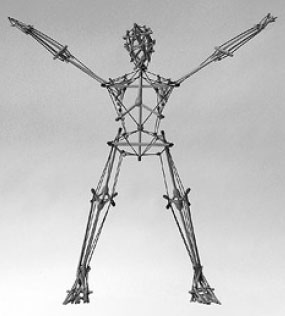
Nerve impulses contract muscles. Muscles and tendons tug on the bones. Ligaments connect bones to other bones, and fascia covers a great portion of the entire system. The skeleton can’t generate movement without muscle contractions. The soft tissue cannot contract to move the bones without the neural input firing impulses into the muscles. It takes all three systems to generate movement.

In perfect human movement, every muscle would be the perfect length, have perfect tension, and have perfect flexibility. The skeletal system would be perfectly uniform and aligned to move with precision and accuracy. The joints would have freedom of movement and quality mobility.

But we aren’t perfect.

Throughout life, we encounter interruptions and interference to our movement system. Here are just a few of them:

  • Congenital issues
  • Traumas and injuries
  • Altered growth patterns
  • Diseases
  • Poor nutrition
  • Lack of quality water
  • Lack of quality sleep
  • Sedentary lifestyles
  • Excess stress
  • Poor air quality and pollution
  • Lack of movement and exercise (of any type)

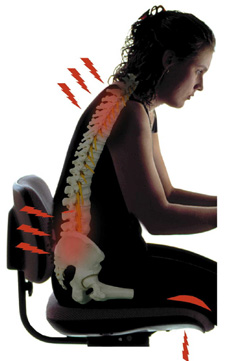
These interruptions force the human system to rearrange its alignment, compensate for imbalances, alter movement patterns, and adapt to dysfunctions—all to maintain homeostasis so we can perform in our daily lives. The body will maintain this re-arrangement until there’s a breakdown, an overload, or some type of system collapse. How can we maintain our systems and facilitate efficient function with minimal breakdowns? In other words, how can we move strong(er) in hopes of avoiding catastrophe?

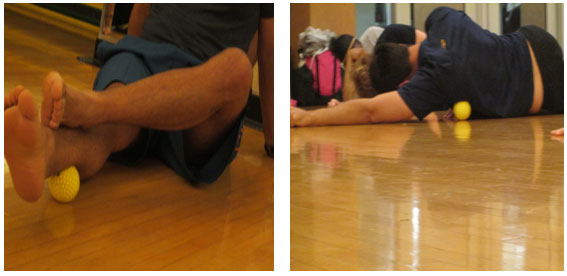
I teach a wonderful class at Life University in the Chiropractic Science Department called Wellness, Movement Assessments, and Conditioning. In this class, we assess movement patterns then determine the soft tissue connections involved in dysfunctional patterns. After collecting all the data, we begin re-training the dysfunctional movement patterns by introducing corrective mobilization exercises and drills. We begin with simple ball rolling on the involved muscles.

Russ2SimpleBallRolling
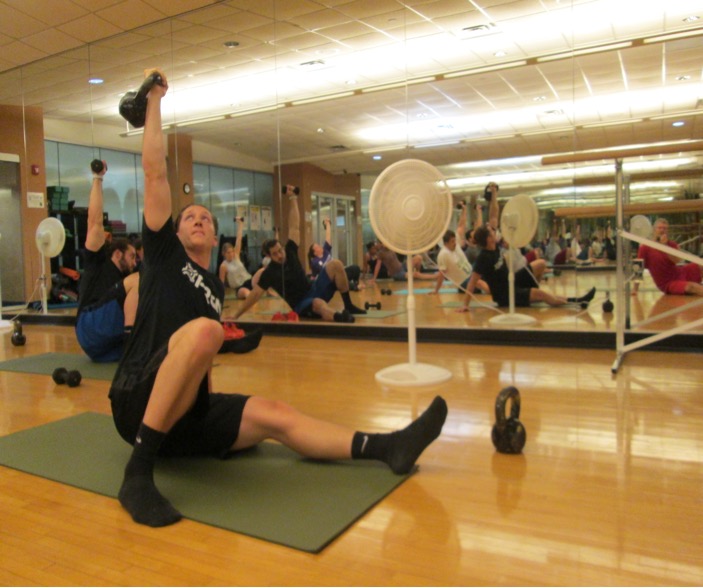
When using many of the kettlebell and bodyweight exercises in Dragon Door’s philosophy of addressing the total athlete, the improvements and results are phenomenal. When improving dysfunctional movement patterns, it is important to introduce corrective patterns through sensory input. This way, the brain can begin rewriting the movement patterns recorded in the cerebellum.

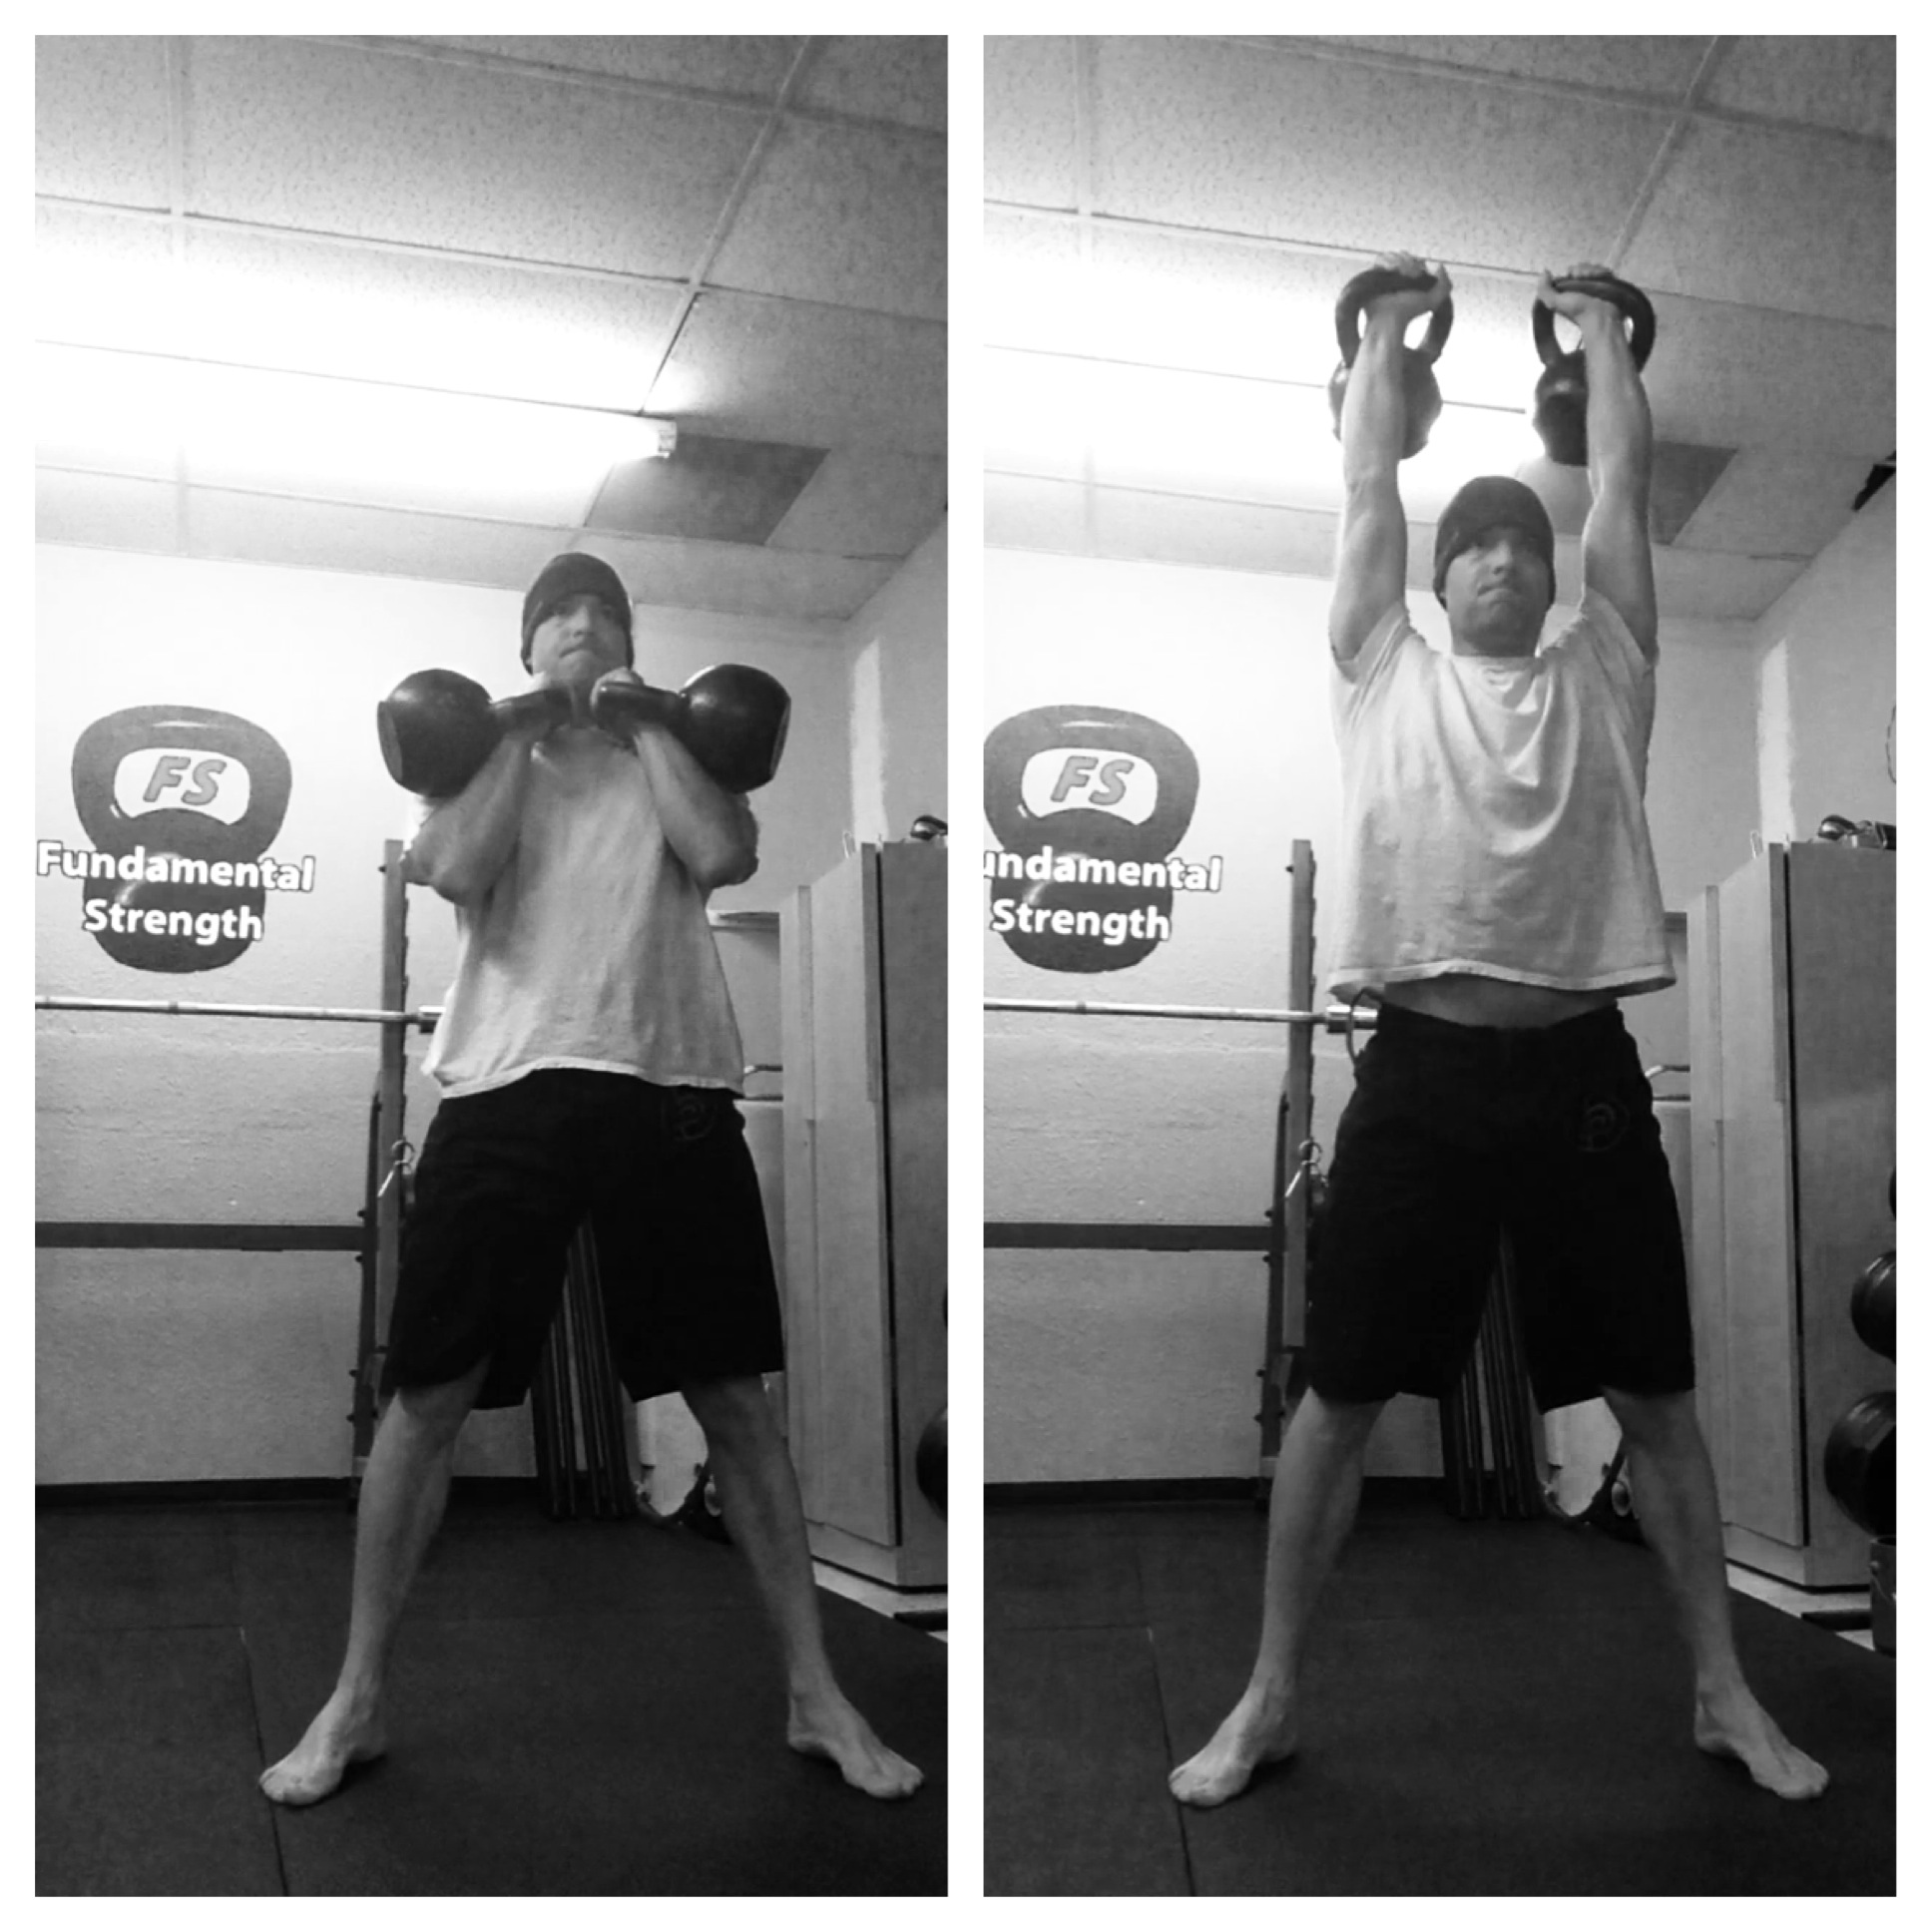
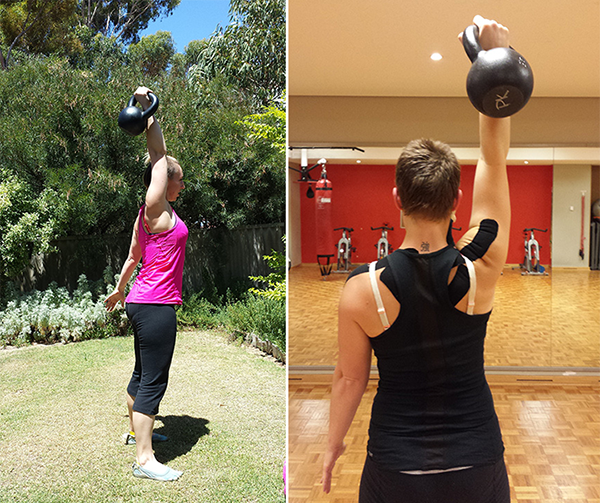
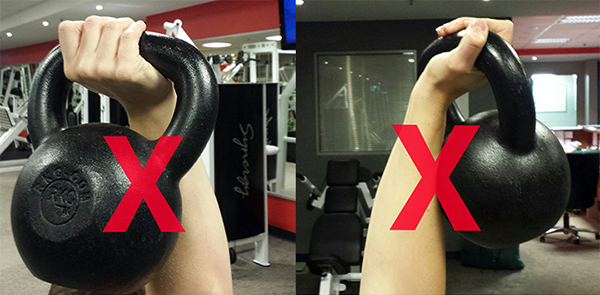
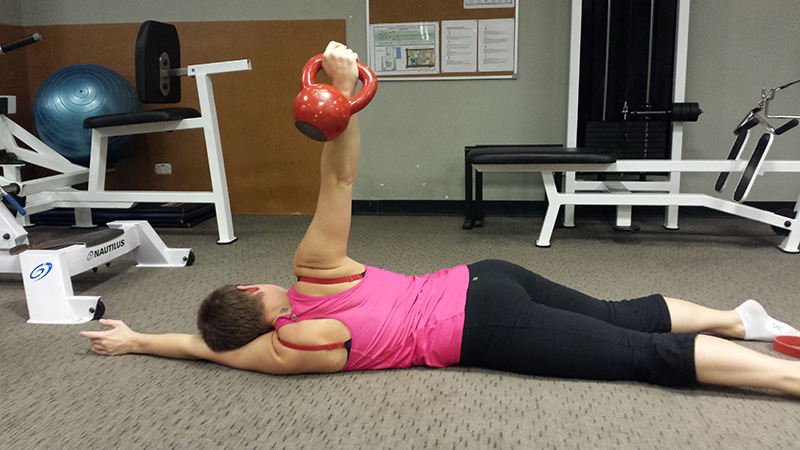
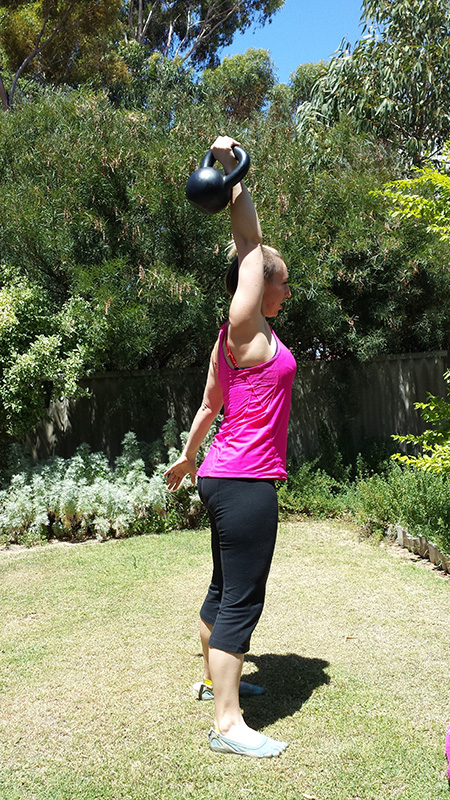
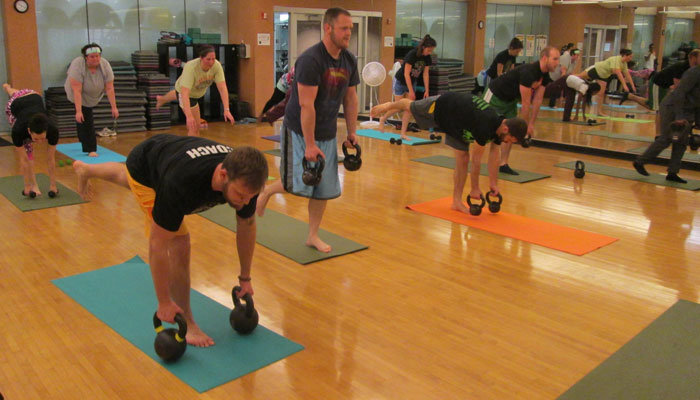
Some of the exercises we use are the get-up, windmill, one-leg deadlift, goblet squat, cossack stretch, renegade row, bear crawl, and arm bar. These movements are the “backbone” corrective exercises. We also mix in crawling patterns, diaphragmatic breathing, and bodyweight core-engagement exercises.

teaching...
Teaching the kettlebell exercises to Chiropractic students peaks their interest in the versatility and advantage of knowing how to incorporate the kettlebell in correcting movement patterns.

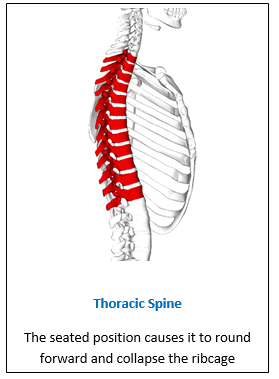
As my good friend Max Shank has repeatedly said, “To improve movement at a certain joint, say the gleno-humeral joint, work from the inside out.” That’s where the focal point of the corrections begin. Strengthen the core, next work on proper diaphragmatic breathing, address scapula stability and mobility, and then arrive at the gleno-humeral joint for strength and mobility. The same formula of working inside out also applies to the lumbo-pelvic-hip complex.

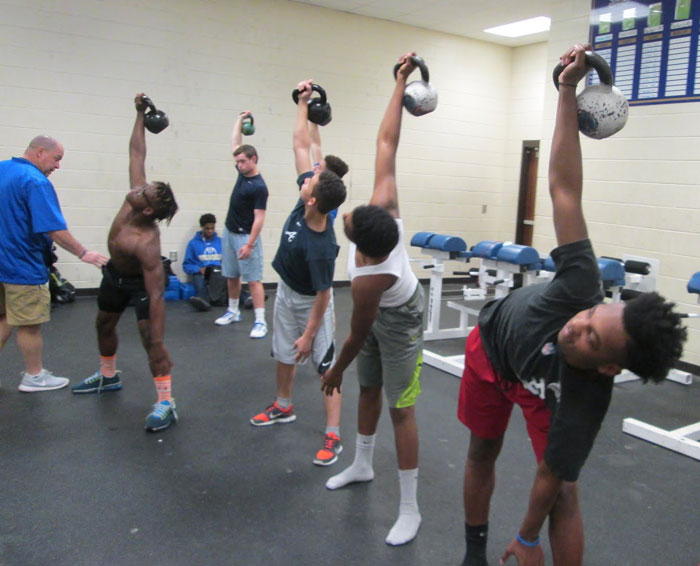
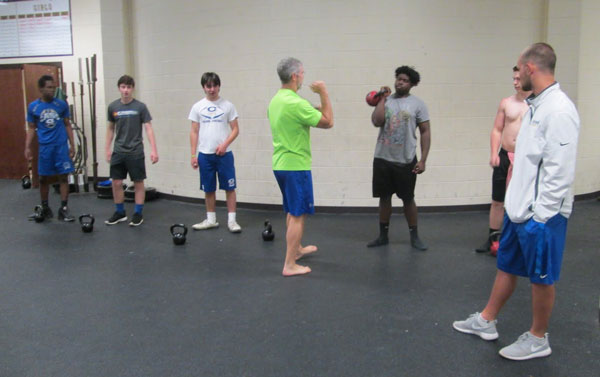
Along with teaching and instructing at Life University, I work with a local high school building quality athletes with kettlebells and movement exercises. These young players are experiencing the increase in strength and mobility that the kettlebell exercises deliver.

Moving Strong(er)             Training Strong(er)
Moving Strong(er) Training Strong(er)

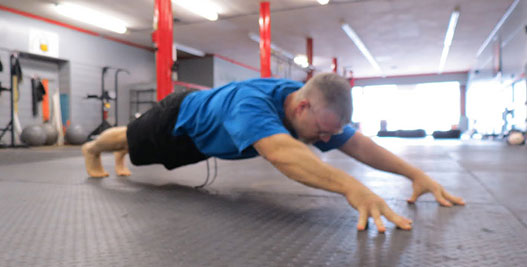
Lastly, at Train Strong Gym, I work with local athletes. We use kettlebells to develop athletic strength and mobility. The benefits from kettlebell training is almost endless.

RussTrainingHighSchoolAthletes

In these three platforms, I have the privilege of introducing the value that the kettlebell exercises delivers to all these students and athletes. The knowledge and experience gained at all these levels is invaluable.

Russ Andrews Fingertip Pushup

****

Russell Andrews, Chiropractor (23 years), Assistant Professor at Life University, RKC, FMS, 30 years in Strength and Conditioning, certified in kinesiotaping. Previous speaker for the Glazier Football Coaches Clinics, lecturer, future author, co-instructor with Beth Andrews, Senior RKC at Trainstronggym.com

Filed Under: Uncategorized Tagged With: fascia, fms, human movement, kettlebell exercises, movement patterns, muscular system, RKC, Russell Andrews, soft tissue, tensegrity

Elite Abs: “Hollow Body Lat Pull” (Part 5 of 5)

July 30, 2014 By Keira Newton 1 Comment

Master RKC Keira Newton explains how to apply the hollow position on the pull up bar

The final installment of Master RKC, Keira Newton’s Elite Abs video series–how and why to apply the hollow position on a pull up bar.

***

Master RKC, Level 3 Z-Health, MCT. Keira first picked up a kettlebell in 2005 when her husband challenged her to stop laughing and start swinging. She stuck with the challenge when she realized that she could get an all-in-one workout in a fraction of the time she spent at the gym. Keira was convinced… Read more here.

Filed Under: Uncategorized Tagged With: abdominal exercises, abs, elite abs, hollow position, Keira Newton, tutorial, video tutorial

7 Fun and Whimsical Kettlebell Workouts to Burn Fat and Build Muscle

July 23, 2014 By Pat Flynn 1 Comment

Pat_Flynn_Dust

Yesterday, in the sultry middle of the afternoon, I went outside to do some sprints. There is a hill in the far corner of my neighborhood of the perfect gradation for this kind of work, and at the top, standing all alone, is a tree. After my rounds, I inspected the tree and made the wonderful discovery that this loveliness was a producer of blackberries, fresh, dark and delicious. I picked some, and ate. The verdict was that they were of top quality, and not costly; so I thought I’d gather two or three bunches, carry them home, and making an honest pie out of my efforts, but at the last minute decided against it. Pie is no good.  Too much sugar, too much work, and I don’t know the first or last thing about baking.

I unquestionably detest the fuss of baked goods, all the measuring that goes along with it. It is too much of a meticulous science for me—I need something that will give me the room to wiggle when I need it, or the ability to make things up as I go along without the promise of dismal results.

Today, and everywhere, all the people are training, following a strictly periodized program, and adhering to their charts and tables of statistics. Everything is baked goods—all the ingredients, now, are measured meticulously; the sets, the reps, and the time between exertions—and nobody has done a whimsical workout in years. Because nobody, so far as I know, has been given the permission to simply throw a bunch of exercises into a skillet and see how it turns out. Even CrossFit, the proposed inventor of stir-fried exercise (proposed…), well now all of them are following some sort of granular programming, too (I would say something further about that here, usually, and then regret it later).

I thought the purpose of exercise, like cooking, was meant to be fun. It’s the whimsy we are missing, now, and it’s the whimsy that can breathe freshness into an otherwise very stale exercise routine. Having said this, I am not against structure of any kind. I measure out ingredients for myself, certainly I do it for my clients, and I bake things—but every so often, like yesterday, I take out the skillet and see what I can come up with on the spot.  My creation wasn’t bad either. Sprints and hindu push-ups, ten rounds, resting as little as I needed between efforts. Could have used a little more heat, I think, but overall I was pleased with the dish.

What I say is pretty true. Whimsy has its proper place in training, and can be used usefully. The best place for it, by the way, is for your fat burning stuff. Strength work should be kept largely repetitious, and maybe even a little bit boring—but your conditioning! Ah, yes, your conditioning indeed! Well spruce that right up why don’t you? Throw in some red pepper flakes, a little splash bourbon even, and from time to time, feel free to go out on a limb and invent something new entirely. Mostly when I’m doing it—improvising, that is—I take the same, few basic ingredients (the fundamental human movements: push, pull, hinge, squat, core), and tinker with their ordering and dose. Rarely do I cook with any thing exotic as I’m somewhat cowardly, but maybe you will?

What follows are seven of my more whimsically put together kettlebell complexes. They’ve gained honorable mention here for being well-mannered, even-tempered, thoughtfully assembled, and worth doing.

–          Pat

PS – If you enjoy these workouts and kettlebell complexes, I have 101 more of them which you can get HERE, free of charge.

Double Kettlebell See-Saw Thrusters

Grab two bells: males use 2x24kg, females use 2×16. Then, clean the bells into the rack and perform the following:

1 squat to overhead press (right)

1 squat to overhead press (left)
1 squat to overhead press (right + left)
1 squat to overhead press (right)

1 squat to overhead press (left)
1 squat to overhead press (right + left)

Set 15 minutes on the clock, and gather as many quality rounds as you can.

The “Cardio” Workout that Builds Muscle

This I scrapped together on the spot when the strong and lovely Jen Sinkler came down to hang out, swing bells, and eat oysters with me.

Full Body “Girls Gone Strong” Workout

I can claim no credit for this as Molly either zipped it together on the spot or pulled it from out storage, I never asked which.

She explains the need to know in the video.

How to Crawl Your Way to Better Fitness

It was chilly weather when the Aleks “The Hebrew Hammer” came to town, but we were excited to see what the mixture of our demented brains could come up with.

The Beastmother

Fred, the groundhog who lives outside of the Dragon Gym, who is twenty pounds overweight and looks like an objectionable dog, waits in high anticipation each year for the budding of the peach tree. I was going to say Fred inspired this workout, but he really had nothing to do with it.

A Workout of Just Swings and Goblet Squat


A Complex of Uneven Proportions

This workout requires two bells of opposing sizes—for males I suggest a 24kg and a 16kg, for females a 16kg and an 8kg.

1 double swing
1 double clean
1 double press
1 front squat
2 double swing
2 double clean
2 double press
2 front squat
3 double swing
3 double clean
3 double press
3 front squat

Again, like all the other workouts (unless otherwise noted) set 15 minutes on the clock and accumulate as many quality rounds as you can.

***

About Pat Flynn:  Pat Flynn is a certified Russian Kettlebell Challenge instructor, fitness philosopher, and 7th degree blackbelt in hanging out. Pat is the founder of ChroniclesOfStrength.com and chief contributor to the Chronicles of Strength Inner Circle where he shares his best ideas on how to chop fat and multiply muscle through kettlebell complex training. Pat also offers online coaching. It’s expensive, and certainly not for those who are fragile by nature. Email Pat at PatFlynn@ChroniclesOfStrength.com with the subject line of “online coaching” to learn more.

Pat_Flynn_usual

Filed Under: Uncategorized Tagged With: exercise programming, Kettlebell, kettlebell complexes, kettlebell workouts, Pat Flynn, short workouts, workout variety, workouts

Put your pistols down!

July 16, 2014 By Max Shank Leave a Comment

The pistol has long be heralded as the king of bodyweight leg exercises. In some regards, rightfully so, it requires an incredible amount of mobility and stability in the ankle, knee, hip, and core. It is an impressive demonstration of these qualities–but is it the best way to train your legs?

Max2 (1)

The answer is that it depends.

One thing that I always try to do is identify what the goals, and the natural trends of the average exerciser. We can assume that the goal of the exercise is to improve strength and flexibility in the lower body on one leg without the use of heavy external load. I would hope that the goal is always to move better and become more athletic as well–this is something we put a lot of emphasis on at the RKC, being a complete, well-rounded athlete.

The natural trends that exercisers and athletes alike fall into are that of a body that spends too much time in a seated position.

Bad_posture

If the goal of exercise is improvement, then the effects of excessive sitting must be counteracted.

The main effects are as follows:

  • Loss of hip extension
  • Loss of ability to disassociate hips from each other, and trunk
  • Loss of thoracic extension
  • Stiffness in cervicothoracic junction (where neck meets back)

Even in a well executed pistol, the posture of the thoracic spine is nearly always caved forward (forcing the neck to make a sharp turn in relation to the spine), and both hips are in flexion–not off to a fantastic start. These issues aside, the pistol is still a terrific measure of relative flexibility, which is why it is included along with appropriate flexibility drills and progressions in RKC Level 2. Being able to do a pistol should be the goal, not necessarily making them a cornerstone of your training.

A better solution exists, and that is the airborne lunge. It’s the single leg exercise that everyone forgets about, and it has secret benefits that the pistol does not have.


As you can see in the video above, in the bottom position, one hip is in flexion while the other is in extension (just like sprinting, walking, etc). The posture is significantly improved and there is no spinal sharp turns. You will also get a little more overall hip mobility and glute activation when doing airborne lunges. Lastly, the airborne lunge is also much easier to load up to a heavy weight. My two favorites are with double kettlebells in the rack and a barbell held in the zercher position if you want to go exceptionally heavy.

Get stronger, run faster, all while increasing flexibility and movement quality–the airborne lunge is a win-win.

***

About Max Shank, Master RKC: Max Shank is not only an extremely gifted teacher, but one of the most well-rounded and capable athletes in the world. From excelling in Muay Thai and Jiu Jitsu to performing impressive feats of strength in weightlifting and gymnastics, Max has… Read more here.


Filed Under: Uncategorized

Dirty Dozen Move # 10: The Pull Up

July 9, 2014 By Phil Ross Leave a Comment

IMG_1939There is no other single barometer for upper body, bodyweight strength more accurate than the Pull Up. Many other tests are rendered useless after the Pull Up is employed. Think about it, have you ever met someone who can do 20 Pull Ups, yet has a weak core? How many people that can execute 20 Pull Ups can’t do 50 Push Ups? It boils down to this simple axiom, if you can move your own bodyweight a full arm’s length, a substantial amount of times (10 to 20 repetitions), you are strong.

Who can do Pull Ups? Where do I start? How do we get to this point? How far to we take it? What are our limitations?


Virtually anyone can do Pull Ups. You are probably saying to yourself that “I’ve lost my mind.” Well, maybe so – but that has nothing do with most people’s ability to perform some type of Pull Up and significantly increase their Upper Body Strength. I train a number of fighters and other highly competitive athletes, but we are not going to focus on them. Instead, we are going to consider my student that suffers from spina bifida as well as students enjoying their later years in life. When she first came to train with me, she was using a walker to get around after suffering through an accident which resulted in her requiring surgery. After 4 months of rehabilitation at a PT center, she was at a stand still as was very frustrated.
 
On the recommendation of her physician, her father brought her in and I honestly didn’t know if I would be able to help. She told me what was being done for her in therapy and for some reason her core strength was not being addressed. The Physical Therapists were treating her body as if it were a set of disconnected parts. I decided to work her from her core out. This included what I call Plank (PCC Terminology – Down Under) Pull Ups as part of the routine. We trained three times a week and within 6 weeks, she was walking without a walker, driving her car and could even carry a pizza from her car into her apartment!
 
I also have a few students over the age of 60. They came in with very little upper body strength. I started them in a doorway hanging onto the door jam while standing almost upright. Shortly thereafter they were on the Smith Machine performing Plank Pull Ups at various heights. Will they ever be able to do a full, neck to bar Tactical Pull Up? Probably not, but who cares? They have and will continue to grow stronger and live better with their new found strength. Both of these students feel better and are more empowered.
 
So, yes – virtually anyone can do Pull Ups! 
 
If you are not an extreme case, I would recommend that you start by using the Plank (or Down Under) Pull Ups. Once you are able to perform 20 repetitions at hip level, while touching your chest to the bar, you are ready to move overhead. The Pull Up Protocol in the Convict Conditioning book is excellent. For a quick read, feel free to read my Greasing the Groove blog regarding my use of Pull Ups to rehabilitate myself after having neck surgery on four vertebra. I chronicled my progress and wrote the blog shortly after I had completed my self administered rehabilitation.
 
There are a great variety of Pull Ups that one may perform. I would consider The Standard to be an Overhand, Tactical Pull Up. Thumbs over the bar, body straight, clear the bar with your chin well over the bar (men to their Adams Apple) so that your neck can touch the bar. There should be no “kipping” whatsoever, that does not produce strength. The Chin Up version would have the same components except no thumb-less grip is required and your palms face you. Due to the increased involvement of your biceps, this version is a bit easier than the palms facing away Pull Up.
 
It’s up to you how far you’d like to take your Pull Up training. There are Uneven Pull Ups, Archer,  One Arm Pull Up (Ultimate Display of Strength), Offset, Weighted, Levers to name a few. It’s best to mix them up and be certain to “de-load” your forearms. Practice plenty of Push Ups and Handstand variations as well as exercises to stretch the extensors and flexors of the forearm. Be cautious with loading up too quickly, you want to avoid damage to the connective tissue of your elbows. I would also strongly recommend that you cycle the variations and the volume of your Pull Up practice throughout the year.
 
There are additional methods to produce strength for your Pull Up. Bent Over Rows with a Kettlebell, Barbell or Dumbbell. The Flexed Arm Hang, with either the Down Under or Standard Pull Up. I will usually incorporate these at the end of my last set. Once I’m at 80-85% of my maximum, I hold the top position of the movement for varying amounts time.
 
Enjoy your Pull Ups! Have fun incorporating them into your routine.
 
Strength & Honor
Coach Phil
 
IMG_1940

***

About Master RKC Phil Ross: Master RKC, 8th Degree Black Belt, Specialist in Bodyweight Strength, PCC and CK-FMS Certified. His name is synonymous with Martial Arts and Fitness. He is known as the area’s Kettlebell King and has successfully competed on the National Level in…  Read more here.


Filed Under: Uncategorized

RKC Kettlebell Hinge Analysis

July 2, 2014 By Mike Krivka 5 Comments

Krivka_teachingOVERVIEW
There are six basic movement patterns : Push, Pull, Squat, Hinge, Carry and Groundwork (i.e. Turkish Get Up, Rolling, etc.).  A thorough understanding and utilization of these movement patterns will make you an exceptional athlete, a better rounded coach or trainer, and will allow you to move and grow old gracefully – which are no easy tasks.  Tens of thousands of words have been written in regard to Pushing, Pulling, and Squatting; of late the Hinge, Carry and Groundwork have started to get some well deserved attention as well.  Among all of the writing there are some real gems of information and guidance as to how to effectively implement the movements and safely execute them.  One area that is referenced a lot, but not clearly defined and explained, is the Hinge.  The Hinge is the basis for most of the Kettlebell techniques as well as the foundation for the barbell Deadlift. While it is being taught and practiced by athletes and clients every day there are still some issues with executing it safely and efficiently.  The following several paragraphs are my attempt to clarify some “gray areas” regarding the Hinge.

A HINGE IS A HINGE… OR IS IT?
There is a lot of confusion as to what a Hinge is and what isn’t.  If you spend any time on YouTube (and I do) you will see a wide variety of examples what people are doing that looks like a Hinge but in reality is something completely different.  Let’s define the Hinge first and see if we can identify where people go wrong.  First – a Hinge is not a Squat (but the Squat has a Hinge component; we’ll get back to this later on). The Squat requires maximum flexion of the Ankle, Knee and Hip and puts the butt parallel or below parallel. Second – the Hinge is not bending over or what some people call “The Sippy Bird”. Bending over requires that the Hip flexes and the head travels forward over the toes.  This type of Hinge presents itself with people who are trying to “pull” the Kettlebell or Bar.  Third – the Hinge is not done with a straight back – meaning upright, but a flat or neutral spine.  When you do the Hinge, the backin its entirety, needs to stay neutral or flat in order to not only protect it but to “stack” is so that you can transfer power through it.

So we have three things that the Hinge isn’t – so what is it?  The Hinge is a loading position that allows you to maximally translate energy from the ground via a ballistic extension of the ankles, knees and hips. This ballistic extension can then be translated into movement of the body or a secondary object like a Kettlebell.  There are a laundry list of variables that will affect the volatility of your Hinge (and yes it should be a “violent” extension” but I’m going to save that for another RKC Blog posting).  What I want you to imagine that the Hinge should be the position you feel that you can get the most drive or explosion out of.  Think “jumping over a building in a single bound” and you’ll get what I’m talking about.

LEADING WITH YOUR HEAD
Here’s the nitty gritty about the Hinge: it’s all about initiating, generating power, and transferring power.  And guess where the biggest errors occur? You’d think it’s with generating and transferring – but it’s actually on the initiation.  You see when most people do the Kettlebell Swing (or Clean or Snatch for that matter) they explode out of the Hinge position leading with their torso and head (back to that Sippy Bird” thing).  Don’t believe me?  Then try the simple test outlined in the video below.  The first demonstration shows the athlete trying to pull their way out of the Hinge position.  This position is so weak that light pressure on the head stalls the whole body.  The second demonstration shows the athlete driving up from the ground using their legs and finishing with a powerful Hinge movement. The presence of my hand on the top of the athletes head doesn’t deter them at all.

What you are going to find is that many of your athletes and clients are paying lip service the Hinge but are actually generating power through their lower back and acceleration of their head.  It’s going to startle many people when you are able to stop them dead in their track with gentle pressure on their head; careful when you try to demonstrate this because you can easily tweak someone’s neck or back if they try to “fight” their way through the obstruction.  Here’s the thing – you can train the Hinge in this manner and get reasonably strong and stay injury-free for a long time.  But… and it’s a big one… you are not going to be able to generate as much power as you could if you don’t learn to initiate and follow through with the Hinge  from the ground up.

Think about the Hinge this way: the best way to generate power is from a fixed object outward or upward (like the ground).  If you are initiating your Hinge by driving off the ground with an explosive push from your feet, the force will be transferred though the ankles to the knees, the knees into the hips, and ultimately into the Kettlebell.  This is generating power in one direction.  If you are inadvertently generating force by using your lower back and head (once again think “Sippy Bird”) then you have force being generated both upward towards the head and downward towards the ground and only a percentage of that will be able to be transferred into the Kettlebell.   Once again – watch the simple hands-on test and cueing that I demonstrate in the video and you’ll see that the most efficient and powerful way to create force in the Hinge is through initiating through the ground up.

WISDOM FROM A MASTER
Marty Gallagher is a master in the realm of strength.  He has made a career out producing world record holding athletes, writing about the iron game (have you read his opus “The Purposeful Primitive”?), and working with Tier One Special Operators.  To say he knows what it takes to be strong and get strong would be an understatement.  I’ve had the pleasure of sitting down and talking about strength training with Marty on a couple occasions and I always come away with insights that are light years away from where I currently am.  For instance, we were talking about Barbell Deadlifting (DL) and how many of the current crop of DL’ers you see start way too high and are facing down when they initiate the movement.  Sure, you can get the bar moving there but you’re never going to reach your potential using that technique; not to mention you are putting unnecessary stress and strain on your back. According to Marty the best “pulling position” for the  Barbell DL is the shins and the torso at almost the same angle – this allows you at to drive off the ground with the legs (squatting) and then transferring the load into the Hinge to complete it.  Once again – the Hinge completes the movement; it’s not the whole movement.

So how does this apply to the Hinge in regards to the Kettlebell? Directly! Do not pass Go, do not collect five hundred dollars! While pulling a heavy barbell Deadlift and performing a heavy Kettlebell Swing may look radically different they have a lot of similarities (and several differences). If you look at the Hinge from this perspective it will radically change how much more force you can generate (using the biggest muscles and drivers in your body) and will lessen your reliance on using your arms to move the Kettlebell. Several things that make a difference between the two are the position of the load during execution.  The barbell has no choice but to stay in front of the shins during the movement; this will change not only the loading but also affect the angles of all of the major joints.  With the Kettlebell you have much more latitude for positioning the load (those pesky shins don’t get in the way) and you can put it between and behind your feet to allow a more direct and powerful loading of the hips, glutes and hamstrings.

Don’t let my explanation of the positioning on the barbell Deadlift and Kettlebell Swing confuse you!  The point I am trying to make is that when you are practicing a technique that utilizes the Hinge the key factor is how you are initiating the movement.  Are you driving through the Hinge from the ground up or are pulling through the Hinge with your arms and head?  There is a HUGE difference and the results are profound…

CONCLUSION
What I’ve outlined above may be common knowledge to some and, even after a video and over a thousand words, will still be a mystery to others.  That’s okay!  Watch the video, re-read the above post and see if you can work out the specifics on your own or via experimenting with your athletes or clients.  The purpose behind the test I demonstrated is not to frustrate or confuse you – it’s to show you a simple and effective way to ensure that your athletes or clients are using the safest and most effective way to generate power for Kettlebell ballistic techniques.

Thanks for your time and attention and I look forward to your feedback and questions!

***

About Michael A. Krivka, Sr. – Senior RKC: Michael A. Krivka, Sr. is a Washington, DC native who has been involved in Kettlebell training for over a decade and is currently an RKC Team Leader and member of the RKC Board of Advisors and the RKC Leadership Team under Dragon Door (where he has been listed as one of the top reviewed RKC’s in the world for the last five years). He is also the author of a bestselling eBook entitled “Code Name: Indestructible” and is in the process of finishing up several other eBooks on Kettlebells, body weight, and the integration of other tools into an effective strength and conditioning program. Mike has traveled extensively throughout the United States teaching Russian Kettlebells to military (USMC, USN, USA and USAF) and law enforcement personnel (FBI, DEA, USSS and CIA)… read more here.

Filed Under: Uncategorized Tagged With: entry level, fitness instructor, get up, goblet squat, Hardstyle, hkc, instructor training, Kettlebell, squat, swing, turkish get up, workshop

Why are you working out?

June 25, 2014 By Jay Armstrong 1 Comment

Seesaw Press 2 - Red Shirt
Could exercise be fun and help you undo the dysfunction of your daily non-activities?

Most people treat exercise like it is a bad tasting prescription from the doctor.  They HAVE TO do it because someone told them to do it.  And what exactly are they supposed to do?  Well, of course they need to get into shape, because if they get into shape they will reduce their risk of heart disease, cancer and premature death.  At all costs we must avoid death.  Bad news happy campers and kiddie troupers.  It ain’t gonna happen.  For most of us … death is unavoidable.

Here is an alternative plan.  Exercise, work out, train, or play with the purpose of feeling better and being able to live life more fully.  Make yourself strong and mobile and develop some endurance.  As a result of your continued exercise program you should be able to engage in whatever physical activities give you joy.

If you are an American, you probably spend a lot of time at a computer, much of your day sitting at a desk texting, typing, or on the phone, and hour upon hour riding in a car.  As a result of these many cumulative hours spent sitting on your all-too-wide and weak butt, you may be ill equipped to engage in many intense exercises for 1 hour, three times per week.  This amount of exercise will probably not significantly change your weight.  (That is mostly about diet and hormones.) These exercise programs may in fact cause you more harm than good.  Furthermore, the thing you most need is to UNDO the damage done by the hours of maladaptation that is caused by sitting.

jay_thoracic_spineWhat kind of bad stuff is happening to your body and to your natural athleticism as a result of all this seated work?

  1. While you are seated your glutes are generally turned off (as are your abs).  So when you stand your hip flexors will seem overly tight and your pelvis will tip forward.  This puts stress (and excessive curvature) on your lower back.
  2. While working on the computer, your chest is collapsed (adversely affecting your breathing) and your shoulders are rounded forward.  This causes your upper back (or thoracic spine) to become stuck and excessively curved in the opposite direction of your lower back.
  3. Your eyes are fixed on a computer screen in an intermediate distance.  Your inner ear (responsible for balance and coordinated movement) is not being challenged because your body is not changing position.

So, consider this…  Choose some fun and engaging exercises that will help offset or counteract the ill effects of the daily desk job demise.

The kettlebell could be the training tool you have been looking for that will help you begin your rehabilitation.  Unlike most exercises on machines in a gym, kettlebell training requires you to stop sitting and stand up.  This might be the very first step to improved posture and a better you!

The kettlebell swing, the most fundamental move of the RKC system, includes a strong contraction of the glutes at the top of the swing.  This “hip-snap” helps open up the hip flexors and helps teach the athlete to once again contract the glutes during loaded movement.  The kettlebell swing and the lunge position of the Turkish getup both work to open up or release your tight hip flexors.

Putting a kettlebell overhead will help mobilize your upper back (or thoracic spine).  The kettlebell press, the kettlebell snatch, and the Turkish getup all involve movement with a weight overhead.  You must develop a strong, braced posture and a lengthened, erect spinal position to master these techniques.  Once your thoracic spine is mobile and you can neutrally align your pelvis, you are well on your way to improved posture and reaching your next level of athletic performance.

Your vision and vestibular system (the inner ear) will be stimulated whenever you move the torso.  This occurs when you turn around, bend over, lie down, stand up, etc.  The kettlebell swing and the kettlebell snatch both involve a hip hinge and a tipping forward of the torso.  This action will provide a significant amount of sensory input to the brain from the vision and vestibular systems.  An even greater challenge is provided to your balance and sense of 3D orientation while performing the Turkish getup.

The best exercise program for most people is one that UNDOES the damage caused by lack of daily mobility and the hours of our seated work.  Exercise programs must make you feel better, move better, and be able to handle the daily demands of life.  If you workout program isn’t fun, you probably will not be able to sustain the practice for a very long time.

Kettlebell training is fun and challenging and is an engaging skill practice.  Regular practice of the basic kettlebell drills will help you undo some of the damages of the standard American working environment.

***

Jay Armstrong is a Senior RKC, 6 Degree Black Belt TKD, and Master Z-Health Trainer.  The past 30 years have been dedicated to helping others develop confidence through increased strength and pain-free, exceptional mobility.  His quest for knowledge continues.  He runs The Kettlebell Club in Houston, Texas and can be reached here.

Filed Under: Uncategorized Tagged With: exercise, Jay Armstrong, Kettlebell, kettlebells, senior rkc, thoracic spine

Elite Abs: “Hollow Plank Positions” (Part 4 of 5)

June 18, 2014 By Keira Newton Leave a Comment

Master RKC Keira Newton performs a plank

Master RKC, Keira Newton continues her series on how to use your new “hollowed out” position with more advanced plank variations.

***

Master RKC, Level 3 Z-Health, MCT. Keira first picked up a kettlebell in 2005 when her husband challenged her to stop laughing and start swinging. She stuck with the challenge when she realized that she could get an all-in-one workout in a fraction of the time she spent at the gym. Keira was convinced… Read more here.

Keira_thumbnail


Filed Under: Uncategorized Tagged With: abs, elite, hollow plank, Keira Newton, master rkc, plank

Why The Double Kettlebell Push Press

June 12, 2014 By Aaron Pierson Leave a Comment

aaron_pierson_dbl_kb_pushpress
Aaron Pierson performs a double kettlebell push press.

The double kettlebell push press may easily be one of the most under-used skills when it comes to training clients. In many circles it’s become known as the “cheater” press or the equivalent to a kipping pull up. For some individuals the push press may not always translate over to a stronger strict press and because of that, many people feel it’s a skill not worth working on.

Most people would agree that the best way to improve a strict press is to work the strict press on a regular basis. What about those who are not concerned with max strength or those who have a history of shoulder injuries? How about the athlete who needs to focus on strength endurance or power rather than raw strength? For those people, the push press may be the perfect answer.

The push press and the strict press have similarities. Both require an appropriate degree of shoulder mobility as well as core and shoulder stability. However the push press offers many qualities the strict press does not offer.

  1. The push press allows a heavier working weight and/or higher repetitions. Consider a person working the strict press with a basic ladder of 3 x (1-2-3-4-5) for a total of 45 reps with double 24kg kettlebell. That same person can nearly triple the amount of work completed with the same weight using the push press ladders of 3 x (2-4-6-8-10).
  2. Another benefit often forgotten about with the push press is the utilization of the legs. Instead of initiating the movement from the upper body, the push press utilizes the legs as it’s driving force. Add a clean between each push press and you have a very powerful full-body workout.
  3. The third piece the push press can offer is shoulder protection for those with a history of shoulder problems. Obviously this is dependent on shoulder mobility and injury history but let’s face it, not everybody is built to overhead press. In this case the push press may be the better alternative considering it bypasses the most risky part of the overhead press.

When building a program for yourself or clients, keep the big picture goal in mind. If the goal is to improve GPP, lose weight, increase muscle mass or increase power, the double kettlebell push press should be considered a top candidate for exercise selection.

***
About Aaron Pierson RKC Team Leader: Aaron has been apart of the RKC since 2010. He currently works full time as an EMT and owns Fundamental Strength in Fort Collins, Colorado. He can be reached at [email]aaron@fundamentalstrengthllc.com[/email] or by visiting www.fundamentalstrengthllc.com

Filed Under: Uncategorized Tagged With: Aaron Pierson, double kettlebell, dragon door, Kettlebell, kettlebells, push press, strength

Importance of the Overhead Lockout

June 4, 2014 By Tabitha Dearle Leave a Comment

tabitha1and2
So many kettlebell exercises go overhead.

Some move quickly like the Snatch (top left picture) and Jerk. Some move slowly like the Press (top right picture) and Bent Press. And some are simply just held overhead like the Turkish Get Up and Windmill but every single one of them should look identical in the lockout position.

When the kettlebell is overhead your body should have tension running through it from top to bottom, reaching the top of your movement is not a moment to relax. Keeping your lats activated, your belly and glutes tight, the arm sucked into the shoulder, wrist straight ensures safety and strength.

Breaking down the Overhead Lockout:

The Wrist:  When the wrist is in the correct position the muscle in your forearm remains active. Maintaining a straight wrist with knuckles facing the sky can be a challenge for some, especially when using a lighter kettlebell that sits higher on the wrist and presses on bone. If the pressure on the wrist is too much when you are starting out grab some sweatbands and cover the wrist for protection (not for continual use to cushion a kettlebell banging onto your wrist, that is a different issue altogether).

Keeping the wrist straight is essential in reducing injury, the “Broken Wrist” position will eventually lead to exactly that…

I asked fellow RKC and Physiotherapist Craig Soley for a breakdown of the dangers of incorrect wrist position, the following is his response –

“One of the most common mistakes in KB pressing activities is wrist position. So we can be clear, wrist (neutral) extension is described such that if I drew a line from your knuckles along the back of your hand and down your wrist is would be a perfectly straight line. If the wrist is flexed (a less common mistake) the knuckles would be in front of the wrist and forearm. If the wrist is extended then the knuckles would be located behind the bones of the wrist and forearm. Holding the KB in wrist neutral, the load is carried through the joint and held by muscular effort – this is good. In wrist extension, the load is carried on the joint, less muscle effort and the weight is resting upon the bony structures – over time this is bad and it is bad practice.

Why? Think collapsed arches and flat feet, hyperextended knees and hyperlorditic lumbar spines as other examples of resting on your joints. If you continually rest on your joints they will eventually wear out. Also, if you are training, train! Use your muscles to do the work and take the load off your joints! Keeping your wrist neutral trains for function and longevity.”

tabitha3and4
The Elbow: The elbow, as with the wrist, should maintain a straight alignment. The extended arm should run parallel to your head with your bicep inline with your ear. If you are hypermobile through the joint you will need to be more mindful of your movements as they are more likely to sustain injury due to the unstable nature of the joint.

Shoulder/Ear Poisoning: Over and over throughout all of my kettlebell learning I’ve heard the phrase “Your ears are poison to your shoulders”, simply meaning that if you’re overhead and the shoulder is close your ear then you’ve lost all stability and strength from the shoulder girdle being in a shrugged up position. Keep the arm securely in the socket and activate your lats for upper torso strength.

Core/Glutes: If you are planning to conquer The Iron Maiden Challenge (or for the fellas The Beast Tamer Challenge) you know that a good heavy Press comes from strong glutes and having your core locked tight. It is the solid base that stops you from leaking power and maintains control. Finish your lift strong by keeping them all engaged – meaning no disengaging in the middle.

Get moving before going overhead: Always warm up before any workout with your aim to target the muscles that are going to be used. PFE warm-up, Halos with Kettlebell, rotating all joints through their full range of movement.

Can’t Maintain Lockout? Thoracic Spine Extension Mobility plays a big part in maintaining posture in the overhead lockout. If you are lacking in thoracic mobility work on it with some of the following stretches/exercises –

  • Foam Roller on the thoracic spine
  • Armbar or Crooked Armbar
  • Thoracic Bridging

tabitha5

Always seek out professional help if you are suffering pain in any overhead position.

***

Tabitha Dearle, RKCII based in Perth, Australia, and is Co-owner of Perth Kettlebell School of Strength. She spent the first decade of her working life managing fast food restaurants before making a life-changing decision to become a Personal  Trainer. Since then she’s been helping many, from athletes to seniors to children, change their lifestyles to become fitter, healthier and more mobile mostly through using Kettlebells. You can follow her blog at http://tabidrkc.wordpress.com/

tabitha1

Filed Under: Uncategorized Tagged With: australia, best, body, dragon door, fitness, Kettlebell, kettlebells, lockout, overhead, RKC, strength, swing, trainer, trainers, women

  • Page 1
  • Page 2
  • Page 3
  • Interim pages omitted …
  • Page 10
  • Go to Next Page »

Primary Sidebar

Featured Products

previous arrow
BOOK-RKCBookofSnC
HardStyleKettlebellChallegeDanJohn700
BookCoverMasterTheKettlebell1
RKCiconKettlebell512
KettlebellGoddessdv040
next arrow

Recent Posts

  • RKC Big Six Workout
  • The Kettlebell Swing & Low Back Pain
  • Key Kettlebell Exercises To Help You Create Better Balance
  • How to Most Effectively Use Kettlebells to Meet Your New Year Goals
  • 1 Exercise That Checks All The Boxes
FOLLOW US ON TWITTER!

Archives

Copyright © 2025

Dragon Door Publications / The author(s) and publisher of this material are not responsible in any manner whatsoever for any injury that may occur through following the instructions or opinions contained in this material. The activities, physical and otherwise, described herein for informational purposes only, may be too strenuous or dangerous for some people, and the reader(s) should consult a physician before engaging in them.