• Skip to main content
  • Skip to primary sidebar
  • Home
  • Contributors
    • Matt Beecroft, Master RKC
    • Martijn Bos, Master RKC
    • Andrea Du Cane, Master RKC
    • Angelo Gala, Master RKC
    • Chris Holder, Master RKC
    • Steve Holiner, Master RKC
    • Dan John, Master RKC
    • Mike Krivka, Master RKC
    • Thomas Phillips, Master RKC
    • Robert Rimoczi, Master RKC
    • Phil Ross, Master RKC
    • Max Shank, Master RKC
  • Workshops
    • HKC Workshops
    • RKC Workshops
    • RKC-II Workshops
  • Find an RKC Instructor
  • Resources
    • Articles
    • Forums
    • Kettlebells
    • Products
  • Blogs
    • PCC Blog
    • Strong Medicine Blog
  • Archives

RKC School of Strength

Official blog of the RKC

Mike Krivka

Thoughts on the RKC Kettlebell Snatch Test

April 5, 2022 By Mike Krivka 1 Comment

Master RKC Michael Krivka Demonstrating Kettlebell Snatches

The following are my thoughts and observations regarding the RKC Snatch Test. This post is based on over twenty years of experience training with and teaching kettlebells to the public, military, and law enforcement personnel. Some of what you are about to read is contrary to what you find being recommended by other trainers and coaches. That’s fine and should be expected. What you need to do is find the program that works best for you and your clients.

Test ≠ Race

The test is not a race. You have five minutes to complete the Snatch Test and I strongly recommend that you use all of it. Someone who completes the test in 3:50, and someone who completes it in 4:59, will both pass. But I will guarantee you that the person who used as much time as possible had an easier time and exhibited much, much better technique.

You Must Exhibit Positional and Transitional Management

You don’t pass the Snatch Test by just doing 100 kettlebell snatches in 5 minutes. You must demonstrate positional and transitional management coming out of the backswing, overhead, from the drop, and back into the backswing. Loss of control in any of those positions not only makes the Snatch Test more difficult but can also cause or lead to injuries.

Train Grind Strength Before Ballistic Strength

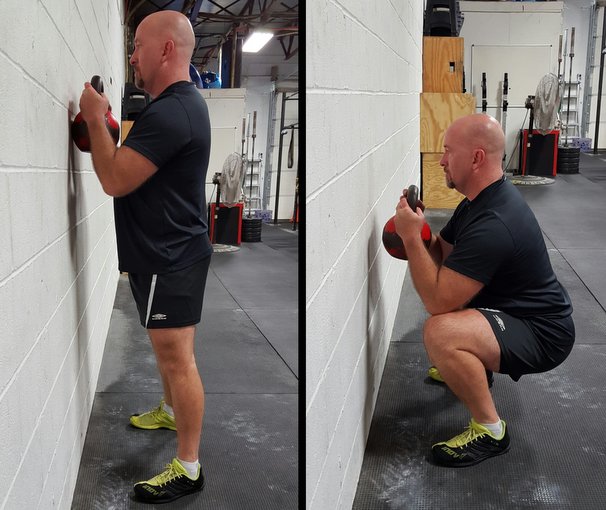
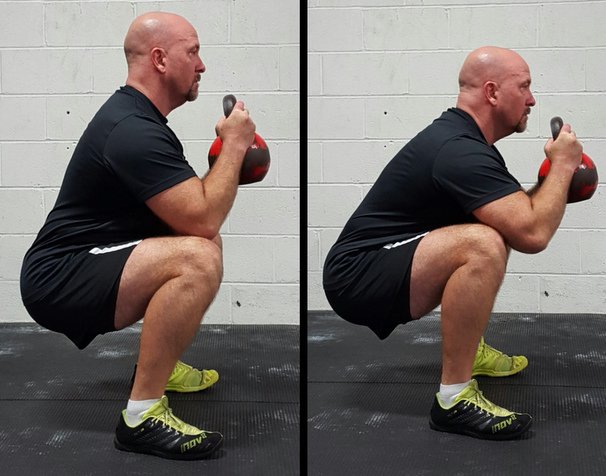
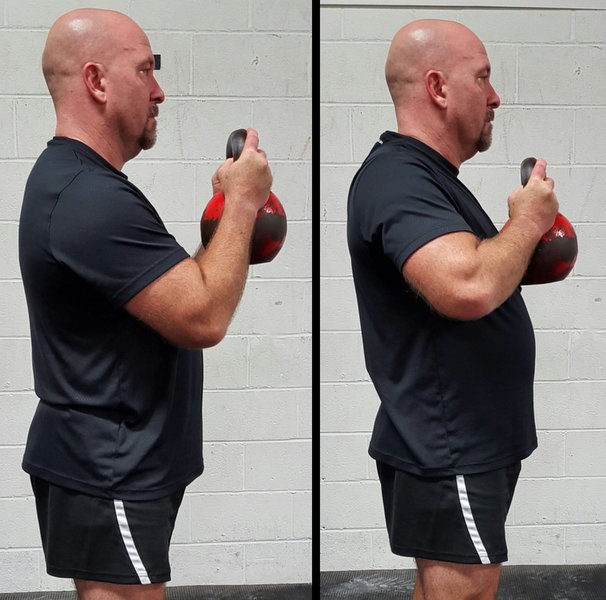
To execute the Snatch Test safely, you will need to develop several skills and attributes. First, you will need strength and stability in the overhead lockout position. This can be done easily by spending a good portion of your time working on the kettlebell press, push press, and/or kettlebell jerk. Strength in this position protects the shoulder itself from the rigors of ballistic snatches, as well helping to maintain mobility in the shoulder and upper quadrant of the torso.

Master RKC Michael Krivka Demonstrates the overhead lockout position of the kettlebell snatch

Second, you will need to develop an efficient and powerful backswing. The backswing is sometimes overlooked or minimized. But the more you work on it, the easier the swing, clean, and snatch will be. You will develop a highly efficient system for transferring energy from the ground, through the hips, and into the overhead position. Ignore this aspect of training to your own detriment.

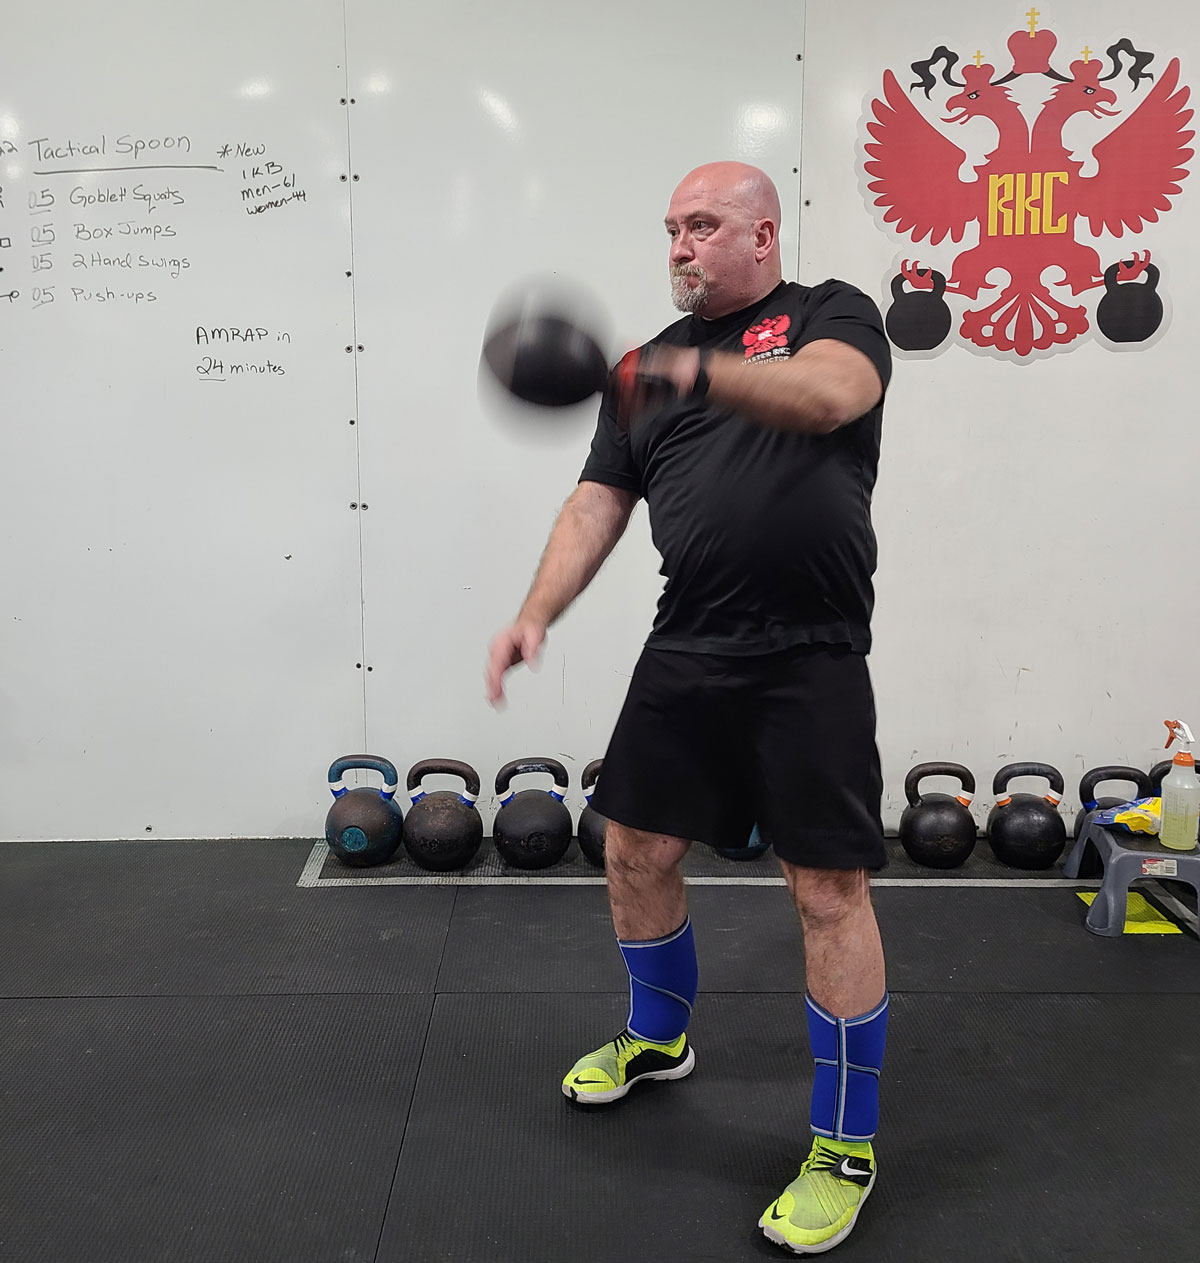
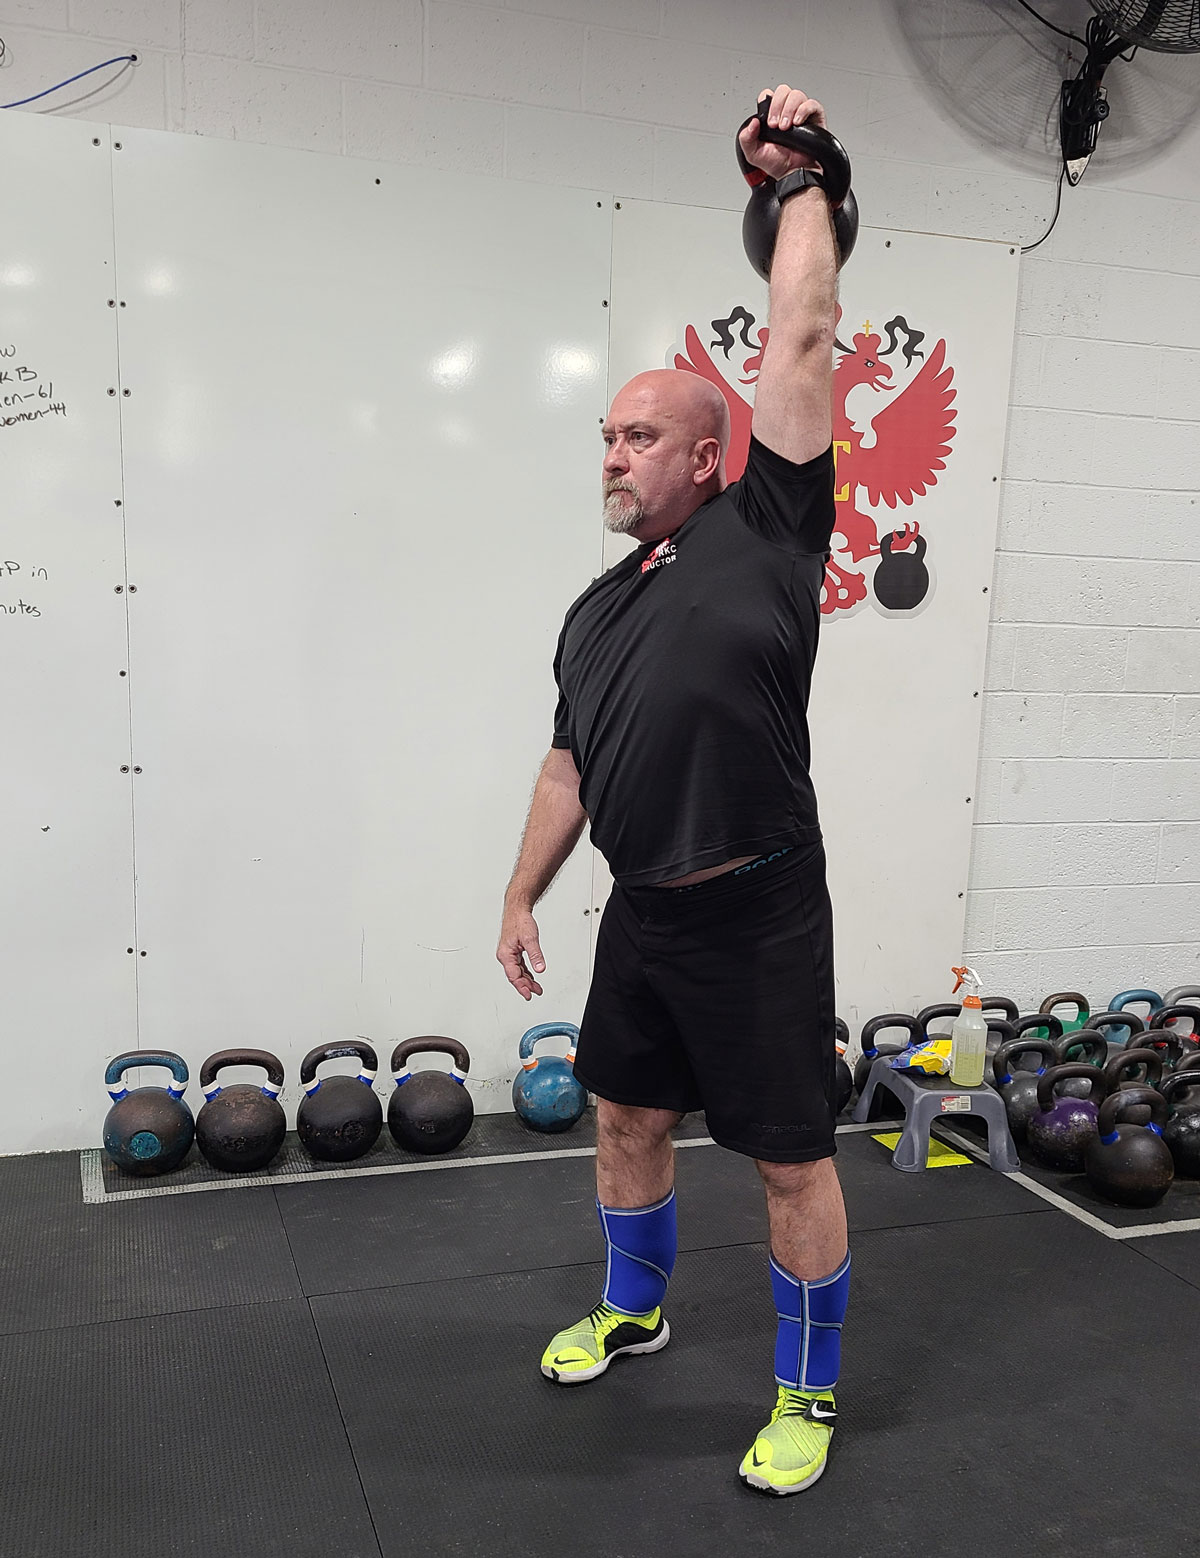
Finally, train to develop a smooth and soft overhead lockout. When you watch most people snatch the kettlebell, it looks like a big swing with the kettlebell going over the top of their hand on the way up before slamming onto the forearm. This is very inefficient and does not demonstrate a viable understanding of how to translate and transition energy from the body into the kettlebell. The kettlebell should explode from the backswing and then float to the overhead position, where the hand is gently punched through the handle while all the joints, bottom to top, lock softly.

Before Attempting the Snatch Test

As you start preparing for the Snatch Test, here’s a key piece of information that will make the test easier–as well as save wear and tear on your shoulders. Before you start doing high rep snatch practice sessions, you should be able to press your Snatch Test weight kettlebell ten times right and left. Work on grinding out of the rack and into a solid lockout overhead, then a slow and strict transition back to the rack. Once this becomes easy (and it will after a while) you are reasonably safe to start practicing high rep snatches.

Let me put it this way: until you have the strength to strictly press 20% of what you are going to snatch during the test, you have no business practicing for 100% of the ballistics you will be doing.

Build grinding strength before ballistic intensity and numbers.

Training for the Snatch Test

Training for the Snatch Test should consist of two very different types of training sessions: Grinds and Ballistics.

Your grind sessions should be oriented so that you can get to the 10×10 strict press on both sides with your Snatch Test weight kettlebell. These sessions can be done at lower weights to practice getting the reps. They can also be done heavier to build extra strength and stability for transitioning from the rack to lockout and from lockout back into the rack.

Your Ballistics sessions should be comprised of:

  • 40% Swings; with both snatch weight and heavier
  • 40% Cleans; with both snatch weight and heavier
  • 20% Snatches; with lighter than snatch weight, snatch weight, and heavier

Training sessions should be relatively brief and slowly progress in load and volume to Snatch Test numbers. Properly planned and executed, you can go from 10×10 snatches right and left to 50×50 snatches right and left in 8-10 weeks of moderate training.

When to Take the Snatch Test

The only time you should take the Snatch Test is when you are both physically, mentally, and technically dialed in. The RKC experience will make major changes to the technique you have been using to prepare for the Snatch Test. If you feel that you need more time to prepare for the Snatch Test, you have 90 days after your RKC Workshop to submit a video. I would strongly recommend this option for most people attending the RKC. Once you have your technique dialed in at the RKC, you can go home and work in a more efficient and safe manner. If you just jumping into the Snatch Test after learning how to execute the snatch safely and effectively, you will likely just revert to old habits and accommodations while under the stress of the test. It takes time to develop a new foundation for your snatch technique and you can easily do that within the 90-day window.

If you are interested in seeing what I think the “perfect” Snatch Test looks like, watch the video below:


I hope this helps you prepare for the RKC Snatch Test. Please reach out to me if you have any additional questions or concerns.

***

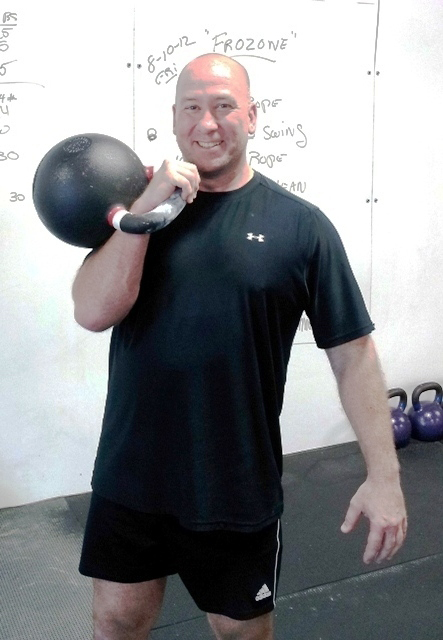
Master RKC Michael A. Krivka, Sr. is a Washington, DC native who has been involved in Kettlebell training for over a decade and is currently a Master RKC and member of the RKC Board of Advisors under Dragon Door (where he has been listed as one of the top reviewed RKC’s in the world for the last five years). Mike has traveled extensively throughout the United States teaching Kettlebells to military (USMC, USN, USA and USAF) and law enforcement personnel (FBI, DEA, USSS and CIA) as well hard-living civilians from Soccer Moms to CEOs. In addition to teaching workshops and clinics he logs several hundred hours a year teaching and training with Kettlebells at his own gym and martial arts studio. He is also a Level I CrossFit Trainer, and Olympic Lifting Coach.

Filed Under: Coaching, Kettlebell Training Tagged With: how to train for the snatch test, kettlebell snatches, RKC snatch test, Snatch Test

Hacks for an Iron Clad Goblet Squat

December 2, 2015 By Mike Krivka 11 Comments

MikeKrivkaGobletSquatLeadPhoto

What is a hack? Hacks are shortcuts or enhancements and can be technical or lifestyle based. Think of hacks as inside tips to get the good stuff—the stuff that works fast and gets you to the tasty, rich and gooey center quicker! In this case, my goal is to provide you with hacks that will allow you how to get the most out of the kettlebell goblet squat.

What’s the Big Deal?

The goblet squat lies squarely within the realm of “simple but not easy”. But, don’t confuse the goblet squat with something that is so “simple” to master that it’s not worth your time. On the contrary—it is supremely important for all demographics, age groups and athletic abilities. Because it is so “simple”, it is easy to underestimate what needs to be in place for it to be maximally effective. Anyone looking at the goblet squat would immediately think “I can do that” …and they can. Once they get the feel for what the goblet squat really is, then they can then learn the specifics that take the goblet squat from simple to sublime.

By the way, if you don’t grasp the importance of the goblet squat yet, consider this: the goblet squat is part of both the HKC (Hardstyle Kettlebell Certification) and the RKC (Russian Kettlebell Certification). It is also one of the techniques Master RKC Dan John recommends to any and all of the athletes he trains—that should give you some indication of its value and application.

Hacking Away at the Goblet Squat

The following are a series of hacks that will allow you to get the most from the goblet squat. Take a look at the pictures so that you can effectively model the movement.

Elbows to Knees—It’s a Straight Line!

  • Don’t unload the torso by flaring the elbows outward or forward—you are supposed to feel the weight of the kettlebell on the front of your body, especially the stomach.
  • Where you start dictates where you end up—if you unload the torso by flaring the elbows, you will find it difficult, if not impossible to find the correct bottom position in the goblet squat.
  • Kiss your knees with your elbows—go down slow enough so that your elbows and knees barely touch; think of it as a caress! From some of the examples I’ve seen there would be a lot of bloody lips!
  • Tall and proud—with near vertical forearms, torso, and shins in the bottom position.
Mike Krivka Goblet Squat Elbow Position
Left: correct elbow alignment, Right: incorrect elbow alignment and posture faults

Find the Perfect Stance That Works For You

  • Heels in your armpits, or slightly wider is a good starting point. Going excessively wide is not going to help.
  • The toes may face straight forward or slightly turned out within 15-20 or so degrees, depending on each person’s individual hip structure.
  • Excessive external rotation should be limited. There may be mobility issues that need to be addressed if they flare excessively. This is a real problem especially if the feet rotate outward while squatting.

The Rack Is Where It’s At!

  • The kettlebell should not be resting on the chest—I know, I know, I know! It’s easier to hold it there but you are offloading the weight to the shoulders and neck.
  • Wedge it—the kettlebell should be held in a “wedge” created by the triceps locked into the lats and the elbows tight against the ribs.
  • Short of breath? The “wedge” should focus the load on the abs, lats, and pecs, not the shoulders and neck.
  • Heavy—the kettlebell is going to feel exceptionally heavy if held correctly in the wedge. Good! You’re doing it right!
  • Straight wrists—don’t break the wrists while holding the kettlebell. Broken wrists are going to adversely affect the movement down the line and you will be sneaking in compensations to correct them.
MikeKrivkaGoblet Squat Kettlebell Position
Left: correct elbow alignment, Right: incorrect elbow alignment and posture faults

It’s a GRIND, Damn It!

  • Lock down: “Lock down” your ribs before you start your decent. Some people call this bracing, but the end result is that you are clenching your abs, pulling your ribs down, and minimizing slack in the upper torso and thoracic spine.
  • Slow down: Slow way the heck down and pull yourself into the bottom position.
  • Hold it: Once you get to the bottom, maintain the tension. If you release it you’re going to be challenged to get it back and not comprise coming up out of the bottom position.

Bust a Move!

  • Don’t “pop and drop” into the goblet squat, this refers to the tendency for athletes to load forward through the hips and then throw them back to initiate the goblet squat.
  • Lock the ribs down first, this will keep you from even thinking about loading forward and backwards to initiate the movement.
  • Initiate with the hips—but not with a ballistic unlocking of the hips. The hips unlock and are pulled straight down.
  • Don’t drop—in no uncertain terms, do not drop into the bottom position of the goblet squat. Pull yourself slowly down into the bottom of the squat. Think G-R-I-N-D! I know it sucks, deal with it!

Start Strong to Finish Strong!

  • Where you start will either help you or hurt you. If you start in a bad position, chances are you are going to end up in an even worse one. With that in mind, your starting position for the goblet squat should be considered very carefully.
  • Down, not back: Pull yourself straight down leading/initiating with the hips. “Pry” the hips away from the elbows
  • Face the wall: The goblet squat can (and should be practiced) facing a wall. Start with the kettlebell touching the wall. Done correctly, you will still end up with plenty of space at the bottom.
  • Enough is enough: The goblet squat terminates when the point of the elbow touches just inside the knee; there’s no reason to go lower unless you are working on mobility.
  • Stack it up! From the bottom position, keep driving and maintaining alignment until all of the “parts” snap back into place. You should end up exactly where you are started!

Putting It All Together

The goblet squat is part of the “Trinity” in the HKC and “The Big Six” in the RKC for good reason. It looks so simple—and it is—but it will only be effective if you know how to efficiently load and unload it, as well as how to make the transitions smooth and flawless. Making the goblet squat look “simple” is not so much a factor that it is simple to do, but that the athlete has taken the time to properly cultivate the movement. Take some time to explore the points that were made above, get a feel for how the load is set and maintained throughout the movement, and I’m sure that you will come away with a new and profound appreciation for the goblet squat.

I look forward to seeing your thoughts and comments below. Until then, “Squat On Garth!”

***

About Michael A. Krivka, Sr. – Senior RKC: Michael A. Krivka, Sr. is a Washington, DC native who has been involved in Kettlebell training for over a decade and is currently a Senior RKC and member of the RKC Board of Advisors and the RKC Leadership Team under Dragon Door (where he has been listed as one of the top reviewed RKC’s in the world for the last five years). He is also the author of a bestselling eBook entitled “Code Name: Indestructible” and is in the process of finishing up several other eBooks on Kettlebells, body weight, and the integration of other tools into an effective strength and conditioning program. Mike has traveled extensively throughout the United States teaching Russian Kettlebells to military (USMC, USN, USA and USAF) and law enforcement personnel (FBI, DEA, USSS and CIA)… read more here.

Filed Under: Kettlebell Training, Tutorial Tagged With: goblet squat, goblet squat tutorial, how to do the goblet squat, kettlebell how to, mike krivka, tutorial

The RKC–the Perfect Training System?

August 27, 2014 By Mike Krivka 5 Comments

RKC Big Six Kettlebell Exercises
Graphic: Senior RKC, Robert Rimoczi


INTRODUCTION

Everyone is looking for the perfect “thing”–the perfect diet, the perfect car, the perfect vacation, the perfect look, the perfect mate (sorry, not going to happen and this isn’t the venue for that conversation), or the perfect workout. Looking to find the “perfect” anything is a fool’s quest but the pursuit of perfection makes champions. This article will explore what I consider to be the almost perfect strength and conditioning program: the Russian Kettlebell Certified (RKC) Kettlebell training system.

PREFIX

To determine if something is “perfect”, you have to either compare it against other similar items or at least have a list of criteria that you can judge it against. Fair enough. In this instance we are looking for the perfect strength and conditioning program and while I’m not going to point fingers or name names, I will define the characteristics that I think make the RKC superior. In my humble opinion for a strength and conditioning program to be anywhere “near perfect” it needs to have (at a minimum) the following components:

  1. It must address the six basic movement patterns:
    • Push
    • Pull
    • Squat
    • Hinge
    • Carry
    • Groundwork (ex. Turkish Get Up)
  2. It must have both Ballistics and Grinds as part of the training program:
    • a. Ballistics for strength endurance and impact generation
    • b. Grinds for deep strength and tenacity under pressure

Those are the basic criteria for analysis and they are pretty easily defined. The goal of the perfect system should be to enhance the athlete’s or client’s overall strength, mobility, work output and athleticism. Read on to find out why I think the RKC meets these criteria and much more.

SWING (Ballistic)

To say that the kettlebell swing is the foundation that all ballistic movements with the kettlebell are based on would be an understatement. The swing establishes a deep and powerful explosive groove that allows the athlete to generate power from the ground up. It reinforces transitional and positional strength skills as well as developing a fine tuned ability to go from absolute relaxation to absolute tension in a heartbeat (one that is beating very fast as well).

Training the kettlebell swing develops the hugely important hinge movement in a dynamic manner. Most athletes will train the hinge, or something that looks like it, while doing barbell deadlifts. But the kettlebell swing gives the athlete a platform to practice exploding out of the hinge, dynamically loading the hinge, and teaches how to transition quickly and efficiently from loading to unloading while seamlessly applying force when and where it is needed. This is a tremendously valuable skill for anyone involved in contact sports or who has to move fast and recover quickly–like Moms and Dads chasing kids around!

GOBLET SQUAT (Grind)

The squat has been the staple of most strength and conditioning programs since before the invention of the barbell–as well it should be. The squat develops tremendous strength in the legs, hamstrings and glutes. It also requires the athlete to establish and maintain bracing throughout the torso. Understanding how to squat well is one of the foundational movement patterns and one that is overlooked by many athletes; you know the ones – big guns and chicken legs. In the RKC System, the goblet squat is the primary squatting movement for a good reason: most people (even those who have been squatting for years) lack the strength, mobility, and awareness to squat safely and effectively.

The goblet squat establishes a solid structure for loading the posterior chain, reinforcing the anterior chain, and creating alignment in the joints that ensures safe loading and transitions. For some, the goblet squat takes on a more rehabilitative form since it trains the client or athlete to open their hips and use their knees safely and effectively while teaching how to avoid undue stress on the lower back. The only drawback of the goblet squat is that it cannot be loaded to the same extent as a barbell squat. The inclusion of the kettlebell squat with one or two kettlebells makes this point almost moot. Once again, you can’t go to extreme loads but the efficiency but efficacy of the squat with the kettlebell almost makes up for it.

TURKISH GET-UP (Grind)

The Turkish get-up (TGU) or just plain old “get-up” is new to this generation of athletes and has found many ardent followers. The TGU is relatively hard to categorize.  Some people consider it to be a pure strength technique while others categorize it as a mobility or pre-hab/rehab tool. Regardless, the TGU is an essential tool in the quest to make athletes move better and develop integrated strength. With modest loads, the TGU can be used as a strength endurance tool; the stresses placed on the athlete getting up and down are phenomenal for conditioning and rival the dreaded burpee for the language they generate. With heavier loads, the TGU can be used to develop transitional and positional strength like no other technique that I am aware of. Mastery of a number of planes of movement, the ability to maintain tension and establish intermediate loading and unloading positions, are all challenges that must be overcome if you are going to be successful at doing the TGU. From a pure movement perspective the TGU is golden and adequately fills in the “groundwork” section of the basic movement pattern requirements.

CLEAN (Ballistic)

The kettlebell clean is often overlooked and under-appreciated when it comes to developing strength. But I will tell you this from the outset–show me someone with a weak clean and I will show you someone who has an even weaker snatch and military press. The clean is the foundation for all of the overhead ballistics and grinds with the kettlebell and it also establishes an efficient and powerful groove that will be reflected in the kettlebell snatch. The clean, just like the swing, is a foundational move that relies on a powerful backswing to get the kettlebell moving. But unlike the swing, the clean requires that the kettlebell be directed upward as opposed to outward. A “swingy” clean is ugly and painful as well as being inefficient. Once the kettlebell has been “cleaned” it is considered to be in the “rack”–and that is where the magic happens. The “racked” kettlebell is now being supported by a complex symphony of tension from the anterior and posterior chains and is ready to be cleaned again or (military) pressed or jerked. The stability of the kettlebell in the clean (racked position) has to be absolute if it is going to be used to grind the kettlebell overhead via the military press or as a ballistic via the kettlebell jerk.

MILITARY PRESS (Grind)

The military press (MP) is the first overhead technique in the RKC System. The MP trains full body tension, bracing or “wedging” of the body under the load, efficient grooving (the path the kettlebell takes), the overhead lockout, and much more. More than just a mindless pressing movement with the kettlebell, the MP trains the client or athlete to drive from the ground up to press the kettlebell overhead, hold the lockout, and then to pull the kettlebell back into the racked position of the clean. The last five decades or so has seen the MP being supplanted in most strength and conditioning programs by a heavy emphasis on the bench press. While the bench press has many and varied benefits the MP is (in my opinion) superior to developing integration with the torso and power from the upper torso that translates over to many sporting and daily functions. The MP can be very frustrating for both sexes as well. Men who have a “big bench” find that they have puny MP’s. Women who have strong legs and good kettlebell swings are stymied by trying to get even a light load safely overhead. With a little practice and some determination, both groups will find their strength improve and will reap the benefits of being stronger overhead (especially when it comes time to snatch the kettlebell).

SNATCH (Ballistic)

The kettlebell snatch is a riddle wrapped in an enigma. It looks so easy and effortless when you watched it done by a well trained practitioner and it can also look like a tragedy in the making when done by someone without the proper coaching. As a ballistic technique it is comprised of many facets that appear to be one smooth and seamless movement (if done correctly). I have heard the snatch described as a “swing that ends up overhead” but I don’t think that is an accurate assessment of the movement. The swing is more like a clean that ends up overhead. I’ve always said that a “clean is a short snatch and a snatch is a long clean”. Why? Because the trajectory of the clean and the snatch are almost exactly the same; one ends up on your shoulder and the ends up overhead. But why is the snatch such an important part of the RKC? Because it trains the client or athlete to develop and master a number of skills and make them appear as one.

To master the snatch you have to be able to generate, manage, and absorb force; you need to be able to manage tension and relaxation; you need to be able to create and demonstrate positional and transitional strength; and so much more. Hopefully you can see why the snatch is held in such high regard and considered by some as the “King of the Ballistics”.

CONCLUSION

Six techniques – that’s it. With those six you have met all of the requirements of the six basic movement patterns with the exception of one: the carry. That’s pretty easy to fix with some farmers’ carries or walking with the kettlebell in the clean (racked position) or held overhead. Okay, okay – the pull is somewhat sketchy as well, although you are getting some great pulling work out of all the kettlebell ballistics. The addition of renegade rows or pull ups will fill that gap nicely as well.

Here’s the thing – there is no “perfect” system but the RKC comes darn close to hitting the basic requirements that any client or athlete needs to improve their movement, their athleticism, and their longevity. A nice balance of ballistics and grinds as well as a series of movements that hit every major muscle (and most of the minor ones as well) makes the RKC system “near perfect” as far as a strength and conditioning program goes – and that’s about all you can ask for in this lifetime.

***

About Michael A. Krivka, Sr. – Senior RKC: Michael A. Krivka, Sr. is a Washington, DC native who has been involved in Kettlebell training for over a decade and is currently an RKC Team Leader and member of the RKC Board of Advisors and the RKC Leadership Team under Dragon Door (where he has been listed as one of the top reviewed RKC’s in the world for the last five years). He is also the author of a bestselling eBook entitled “Code Name: Indestructible” and is in the process of finishing up several other eBooks on Kettlebells, body weight, and the integration of other tools into an effective strength and conditioning program. Mike has traveled extensively throughout the United States teaching Russian Kettlebells to military (USMC, USN, USA and USAF) and law enforcement personnel (FBI, DEA, USSS and CIA)… read more here.

Filed Under: Kettlebell Training Tagged With: clean, get up, goblet squat, kettlebell squat, Master the Kettlebell, mike krivka, military press, RKC, RKC system, Russian Kettlebell Challenge, snatch, strength and conditioning, swing, turkish get up

RKC Kettlebell Hinge Analysis

July 2, 2014 By Mike Krivka 5 Comments

Krivka_teachingOVERVIEW
There are six basic movement patterns : Push, Pull, Squat, Hinge, Carry and Groundwork (i.e. Turkish Get Up, Rolling, etc.).  A thorough understanding and utilization of these movement patterns will make you an exceptional athlete, a better rounded coach or trainer, and will allow you to move and grow old gracefully – which are no easy tasks.  Tens of thousands of words have been written in regard to Pushing, Pulling, and Squatting; of late the Hinge, Carry and Groundwork have started to get some well deserved attention as well.  Among all of the writing there are some real gems of information and guidance as to how to effectively implement the movements and safely execute them.  One area that is referenced a lot, but not clearly defined and explained, is the Hinge.  The Hinge is the basis for most of the Kettlebell techniques as well as the foundation for the barbell Deadlift. While it is being taught and practiced by athletes and clients every day there are still some issues with executing it safely and efficiently.  The following several paragraphs are my attempt to clarify some “gray areas” regarding the Hinge.

A HINGE IS A HINGE… OR IS IT?
There is a lot of confusion as to what a Hinge is and what isn’t.  If you spend any time on YouTube (and I do) you will see a wide variety of examples what people are doing that looks like a Hinge but in reality is something completely different.  Let’s define the Hinge first and see if we can identify where people go wrong.  First – a Hinge is not a Squat (but the Squat has a Hinge component; we’ll get back to this later on). The Squat requires maximum flexion of the Ankle, Knee and Hip and puts the butt parallel or below parallel. Second – the Hinge is not bending over or what some people call “The Sippy Bird”. Bending over requires that the Hip flexes and the head travels forward over the toes.  This type of Hinge presents itself with people who are trying to “pull” the Kettlebell or Bar.  Third – the Hinge is not done with a straight back – meaning upright, but a flat or neutral spine.  When you do the Hinge, the backin its entirety, needs to stay neutral or flat in order to not only protect it but to “stack” is so that you can transfer power through it.

So we have three things that the Hinge isn’t – so what is it?  The Hinge is a loading position that allows you to maximally translate energy from the ground via a ballistic extension of the ankles, knees and hips. This ballistic extension can then be translated into movement of the body or a secondary object like a Kettlebell.  There are a laundry list of variables that will affect the volatility of your Hinge (and yes it should be a “violent” extension” but I’m going to save that for another RKC Blog posting).  What I want you to imagine that the Hinge should be the position you feel that you can get the most drive or explosion out of.  Think “jumping over a building in a single bound” and you’ll get what I’m talking about.

LEADING WITH YOUR HEAD
Here’s the nitty gritty about the Hinge: it’s all about initiating, generating power, and transferring power.  And guess where the biggest errors occur? You’d think it’s with generating and transferring – but it’s actually on the initiation.  You see when most people do the Kettlebell Swing (or Clean or Snatch for that matter) they explode out of the Hinge position leading with their torso and head (back to that Sippy Bird” thing).  Don’t believe me?  Then try the simple test outlined in the video below.  The first demonstration shows the athlete trying to pull their way out of the Hinge position.  This position is so weak that light pressure on the head stalls the whole body.  The second demonstration shows the athlete driving up from the ground using their legs and finishing with a powerful Hinge movement. The presence of my hand on the top of the athletes head doesn’t deter them at all.

What you are going to find is that many of your athletes and clients are paying lip service the Hinge but are actually generating power through their lower back and acceleration of their head.  It’s going to startle many people when you are able to stop them dead in their track with gentle pressure on their head; careful when you try to demonstrate this because you can easily tweak someone’s neck or back if they try to “fight” their way through the obstruction.  Here’s the thing – you can train the Hinge in this manner and get reasonably strong and stay injury-free for a long time.  But… and it’s a big one… you are not going to be able to generate as much power as you could if you don’t learn to initiate and follow through with the Hinge  from the ground up.

Think about the Hinge this way: the best way to generate power is from a fixed object outward or upward (like the ground).  If you are initiating your Hinge by driving off the ground with an explosive push from your feet, the force will be transferred though the ankles to the knees, the knees into the hips, and ultimately into the Kettlebell.  This is generating power in one direction.  If you are inadvertently generating force by using your lower back and head (once again think “Sippy Bird”) then you have force being generated both upward towards the head and downward towards the ground and only a percentage of that will be able to be transferred into the Kettlebell.   Once again – watch the simple hands-on test and cueing that I demonstrate in the video and you’ll see that the most efficient and powerful way to create force in the Hinge is through initiating through the ground up.

WISDOM FROM A MASTER
Marty Gallagher is a master in the realm of strength.  He has made a career out producing world record holding athletes, writing about the iron game (have you read his opus “The Purposeful Primitive”?), and working with Tier One Special Operators.  To say he knows what it takes to be strong and get strong would be an understatement.  I’ve had the pleasure of sitting down and talking about strength training with Marty on a couple occasions and I always come away with insights that are light years away from where I currently am.  For instance, we were talking about Barbell Deadlifting (DL) and how many of the current crop of DL’ers you see start way too high and are facing down when they initiate the movement.  Sure, you can get the bar moving there but you’re never going to reach your potential using that technique; not to mention you are putting unnecessary stress and strain on your back. According to Marty the best “pulling position” for the  Barbell DL is the shins and the torso at almost the same angle – this allows you at to drive off the ground with the legs (squatting) and then transferring the load into the Hinge to complete it.  Once again – the Hinge completes the movement; it’s not the whole movement.

So how does this apply to the Hinge in regards to the Kettlebell? Directly! Do not pass Go, do not collect five hundred dollars! While pulling a heavy barbell Deadlift and performing a heavy Kettlebell Swing may look radically different they have a lot of similarities (and several differences). If you look at the Hinge from this perspective it will radically change how much more force you can generate (using the biggest muscles and drivers in your body) and will lessen your reliance on using your arms to move the Kettlebell. Several things that make a difference between the two are the position of the load during execution.  The barbell has no choice but to stay in front of the shins during the movement; this will change not only the loading but also affect the angles of all of the major joints.  With the Kettlebell you have much more latitude for positioning the load (those pesky shins don’t get in the way) and you can put it between and behind your feet to allow a more direct and powerful loading of the hips, glutes and hamstrings.

Don’t let my explanation of the positioning on the barbell Deadlift and Kettlebell Swing confuse you!  The point I am trying to make is that when you are practicing a technique that utilizes the Hinge the key factor is how you are initiating the movement.  Are you driving through the Hinge from the ground up or are pulling through the Hinge with your arms and head?  There is a HUGE difference and the results are profound…

CONCLUSION
What I’ve outlined above may be common knowledge to some and, even after a video and over a thousand words, will still be a mystery to others.  That’s okay!  Watch the video, re-read the above post and see if you can work out the specifics on your own or via experimenting with your athletes or clients.  The purpose behind the test I demonstrated is not to frustrate or confuse you – it’s to show you a simple and effective way to ensure that your athletes or clients are using the safest and most effective way to generate power for Kettlebell ballistic techniques.

Thanks for your time and attention and I look forward to your feedback and questions!

***

About Michael A. Krivka, Sr. – Senior RKC: Michael A. Krivka, Sr. is a Washington, DC native who has been involved in Kettlebell training for over a decade and is currently an RKC Team Leader and member of the RKC Board of Advisors and the RKC Leadership Team under Dragon Door (where he has been listed as one of the top reviewed RKC’s in the world for the last five years). He is also the author of a bestselling eBook entitled “Code Name: Indestructible” and is in the process of finishing up several other eBooks on Kettlebells, body weight, and the integration of other tools into an effective strength and conditioning program. Mike has traveled extensively throughout the United States teaching Russian Kettlebells to military (USMC, USN, USA and USAF) and law enforcement personnel (FBI, DEA, USSS and CIA)… read more here.

Filed Under: Uncategorized Tagged With: entry level, fitness instructor, get up, goblet squat, Hardstyle, hkc, instructor training, Kettlebell, squat, swing, turkish get up, workshop

…It’s Only the HKC!?!?

March 18, 2014 By Mike Krivka 5 Comments

HKC Group Photo from a Recent HKC in New York City

I’ve had the honor and pleasure to attend pretty much every certification that Dragon Door has offered for over a decade and I’ve always been impressed with the extremely high quality, professionalism, and thoroughness of each and every one of these events. The quality of the instruction and the enthusiasm of the attendees are unparalleled.  So when I heard a recent attendee at an HKC certification make the comment “Why are you being so picky?  It’s only the HKC?” I had to respond; but only after I was able to excuse myself, get a drink of water and splash some cold water on my face, and come back and address the question with a level head and something approaching my normal blood pressure…

Introduction

The HKC is comprised of a full day of instruction on three tremendously powerful, important and effective techniques:

  • Kettlebell Goblet Squat
  • Kettlebell Swing
  • Turkish Get Up

A whole day to cover just three techniques?!?! Yes–and even with a whole day to cover them, and a handful of variations, you are still only scratching the surface on how to use, apply, and perfect them.  These three techniques will make a huge difference in you and your client’s strength, mobility, athletic ability and longevity.  While at first glance they seem to be simple to execute and master you will quickly realize that to truly understand them will take thousands of repetitions and hours and hours of work.  At the end of the day you will not only be able to safely and effectively know how to execute these three key techniques, but more importantly you will be able to spot good and bad technique, sequencing errors, and weak links in these core movements.

The Heart of the RKC

HKC Logo Hardstyle KettlebellThe HKC is the heart of the RKC. It is the strength, conditioning, and mobility foundation that it creates that will allow you to move onto more technical and challenging techniques.  Without the understanding of the Swing, Goblet Squat and the Turkish Get UP being successful at the RKC would be impossible.  The bedrock that the Snatch, Clean, and Military Press are built upon is the HKC–and they are also the foundation that the RKC II is established upon as well.

I have heard the HKC referred to as “RKC-light” or the “mini-RKC” and this is far from the truth. The HKC introduces three essential movements that set the foundation for more advanced ballistics and grinds as well as preparing the athlete to understand how to generate, absorb, and redirect force; key and game changing principles that are essential to high-level performance.  The HKC is anything but a “light” version of the RKC–it establishes the awareness of a high quality movement baseline that will follow the athlete from the gym to the field, court, or streets.

Dan John, one of the most sought after and influential strength and conditioning coaches of our era, changed the paradigm for the composition of a complete training program from the time honored “push, pull, and squat” to something much, much more.  According to Mr. John an athlete needs to train in the following six areas:

  • Push
  • Pull
  • Squat
  • Hinge
  • Carry
  • Groundwork

When assessing where athletes come short in their training programs, in other words, trying to figure out where they have gaps in their training, you need to look at what they are doing and what they are avoiding.  Consistently you will find that most athletes are able to rattle off their Bench Press and Squat numbers but start to mumble when you ask about the rest of their training program. They are invariably short in their Pull, Hinge, Carry, Groundwork, and (quality) Squat movements.

So what does this have to do with the HKC?  Everything!  If you were to augment the athletes (or your clients) training program to include more quality work in Squatting (Goblet Squat and variations), Hinging (Kettlebell Swings and variations), and Groundwork (Turkish Get Up and variations) you would make a huge and lifelong difference in how they move, perform, and recover.  Filling in those gaps would make that much of a difference in the short term as well as having a huge impact on how the move and feel in the coming years.  NOTE: I didn’t address the weakness in the Pull movement but that can be easily filled by Pull Ups (think Convict Conditioning) and by Farmer Walks (do a search on YouTube; there are lots of good examples).

Who Should Attend the HKC?

If you are truly interested in improving how you move, feel and perform as an athlete you need to attend the HKC.  Even if you have no intention in ever teaching someone else how to use a kettlebell, but odds are you will share this newfound knowledge, you should attend.  If you are interested in making a huge dent in your weaknesses, be they strength, mobility, or conditioning, then you need to make the investment in yourself and attend.

If you are a coach or trainer that is looking for a way to “round out” your athletes or clients then the HKC is the answer!  Most athletes will hide between the movements that they are comfortable with and have no interest in learning new movement and loading patterns unless you can demonstrate and explain the benefits behind doing Goblet Squats, Kettlebell Swings, and Turkish Get Ups.  Attend the HKC and you will be armed with this knowledge and much, much more.

If you are in the Military, Law Enforcement, or Fire/EMS service then you are desperately in need of a fast, efficient, and powerful training program that meet the physical demands of your profession. The foundation created by Goblet Squats, Kettlebell Swings, and Turkish Get Ups will go a long way in keeping your body in peak physical condition to be able to perform your job at a high level and return home, safe and sound, at the end of your tour, shift, or rotation.  Because of the time commitment that all of these professions require you need to have a training program that will allow you to train efficiently as well as have carryover into your day-to-day tasks–you would be hard pressed to do better than the information that is presented in the HKC.

If you are a “Coach Potato” or “Weekend Warrior” then you can benefit more than you can imagine.  This minimalist approach to training can augment, compliment, or out and out replace your exiting training program; and if you’re not doing any strength and conditioning training on a regular basis then this is a great place to start.  With these three powerful techniques you can lose fat, gain muscle, move better, feel better and add quality years to your life – and have fun doing it!

Conclusion

If you are interested in improving how you move, feel, and perform then I strongly suggest that you look at the HKC as the answer to your strength and conditioning questions.  The training that you will receive at the HKC is an investment in your health that will pay dividends for the rest of your life. It will be an experience that will change your concept of what effective training is and set a foundation for additional skills that will make you stronger, more mobile, and more effective in your sport of choice; even of your sport of choice is “life”.

Still not sure if the HKC is for you?  Then I challenge you to get on the Dragon Door website and reach out to an HKC in your area, or anywhere, and get their feedback on the training they received and how it has impacted their lives. I think you will be surprised on how excited they are about the experience and how much that one day has influenced their training and their lives.

NOTE: If we ever get the chance to meet face to face, and I hope we do, please don’t ask me who said “It’s only the HKC!?!?”  I have been sworn to secrecy and I can’t tell you who it was.  That doesn’t mean I can’t send you a link to a website through an anonymous email account though… just kidding!  My lips are sealed!

***

About Michael A. Krivka, Sr. – Senior RKC: Michael A. Krivka, Sr. is a Washington, DC native who has been involved in Kettlebell training for over a decade and is currently an RKC Team Leader and member of the RKC Board of Advisors and the RKC Leadership Team under Dragon Door (where he has been listed as one of the top reviewed RKC’s in the world for the last five years). He is also the author of a bestselling eBook entitled “Code Name: Indestructible” and is in the process of finishing up several other eBooks on Kettlebells, body weight, and the integration of other tools into an effective strength and conditioning program. Mike has traveled extensively throughout the United States teaching Russian Kettlebells to military (USMC, USN, USA and USAF) and law enforcement personnel (FBI, DEA, USSS and CIA)… read more here.

Filed Under: Uncategorized Tagged With: entry level, fitness instructor, get up, goblet squat, Hardstyle, hkc, instructor training, Kettlebell, squat, swing, turkish get up, workshop

The Four Pillars of Strength

February 12, 2014 By Mike Krivka Leave a Comment

Mak_110lbs_KB_pngINTRODUCTION

People are constantly looking for new ways to increase their strength.  They get wrapped up in changing up reps, loads, intensity, and new exercises in the blind pursuit of strength. This pursuit usually entails looking for a new training program, tool, or gimmick that they desperately hope will give them an edge and increase their athletic abilities.  Unfortunately what usually happens is that they fall back on their old training habits and apply them to their new program with dismal results.  Let me borrow a definition from someone who is (obviously) smarter than I am: “Insanity: doing the same thing over and over again and expecting different results” – Albert Einstein.

So if I told you that there are four basics tenets of strength that you can apply to the training program that you are doing right now, that would almost instantly increase your strength – would you try it?  Really?  Then I’ll let you in on a trade secret in the strength and conditioning world!  The keys to strength lie in the “Four Pillars of Strength” (and they all start with the letter “G”): Grip, Gut, Glutes and Gaze.  Let’s take a look at each one and see how focusing on one or all of them will ensure that you actually do get what you are looking for!

GRIP

I know this seems obvious but increasing your grip strength, or even focusing on what your grip is doing, will give you a huge jump in the strength game.  Think about when you missed that heavy Deadlift – what failed?  Your grip failed.  How about when you tried to do that strict pull-up and you couldn’t ramp up the tension to complete it – what kept you from making it happen?  Your grip failed. How about the last time you did your RKC Snatch Test (05 minutes to do 100 reps with a 24 kg Kettlebell) – what happened around minute four that made the last thirty or so reps hard?  Your grip failed.

So is it really a question of increasing your grip strength or learning how to manage your grip?  Well it couldn’t hurt to increase your grip strength, and I strongly suggest that you do, but the better you become at managing your grip the better results you are going to get. What do I mean by “managing your grip”?  What I mean is that you need to learn when you should be applying maximum tension and when you should be using just enough tension to keep control of the situation.  Taking the time to master this one technique will make your Kettlebell technique improve, help you manage your fatigue, and allow you to train harder and (more importantly) harder.

Does strengthening your grip only apply to your hands?  Heck no!  Your feet are almost as important as your hands when it comes to grip strength.  The recent appearance of “minimalist” shoes is nothing new to traditional strength athletes who know that without a firm, direct connection to the ground their strength will be fragile and tenuous.  For athletes, especially contact or combat athletes, strengthening your feet and how well they grip the ground during dynamic and ballistic loading will go a long way in protecting your ankles, knees, hips and back.

When it comes to your feet do you know what they are doing when you are swinging or snatching?  How about when you are doing pull-ups or push-ups? Well you should!  When you are performing any movement skill you not only need to maintain control of the load, be it your body weight or a Kettlebell, but you also need to get feedback.  If you are compromising the surface area of your foot, and therefore compromising the quality and quantity of feedback you are getting from your feet, then you are never going to be able to get as strong as your potential.

Test it out:

Pistol or Body Weight Squat – Pick either the Pistol of the Body Weight Squat (Squat) and take some time to explore what your feet are doing when you do this movement. Chances are that your feet are tapping like you are playing the piano with your feet or you are rolling onto the edge of your foot.  Both of these are very common and are easily remedied!  As you are pulling yourself down into the Squat or Pistol “grab the ground” with your whole foot, especially your toes, and feel how much more stable and strong you feel.  Don’t lose this tension at the bottom; instead let it by the driving force behind driving the ground down and away from you as you come up.  BTW – does your hand grip affect your Pistol and Squat?  Heck yes!  Having trouble maintaining tension throughout the whole movement?  Make a fist and crush your grip to help create stabilizing tension throughout your upper body that will irradiate into your legs. You can also squeeze a towel or a hand gripper to get the same effect.

Kettlebell Swing or Snatch – the same concept holds true here as it did with the Pistol or Squat. You’ve got to pay attention to what your feet and hands are doing if you are going to ever become stronger doing the Swing or Snatch.  There are two key moments in the execution of both the Swing and the Snatch that you want to pay close attention to what your hands and feet are doing: during the backswing of the Swing and the Snatch and in the overhead lockout of the Snatch.  In both of these positions it’s easy to concentrate on your grip, as you should, but are you over-concentrating on your grip?  Maximum tension should only be applied to the Kettlebell grip at the bottom of the backswing and at lockout overhead; all the rest of the time you need to use just enough grip to keep the Kettlebell under control.  How about looking at what your feet are doing as well?  Your feet should be gripping the ground maximally on the backswing, really grabbing the ground and giving you a solid base to drive off of. During the Snatch you should think about doing the same thing when you hit the overhead lockout; grip the Kettlebell tightly to buffer the impact and create a stable strong base to receive the load on.

GUT

Your Abs are the bracing system for everything you do and learning how to use them properly will allow you to generate more force as well as accept more of a load.  Being able to regulate your abdominal tension is critical when it comes to creating power from the ground up – and it’s invaluable when it comes to protecting your back.  The concepts behind Intra Abdominal Pressure (IAP) will teach you how to create a “virtual belt” around your midsection that not only reinforces the spine but allows you to transfer energy more efficiently.

Just bracing your gut and hoping for the best isn’t enough; learning how and when to tighten is the real key.  Coordinating breathing and the amount of breath you inhale and exhale are important as well as learning how to “bleed off” tension (through hissing and/or the martial arts kiai).  You’ll see people panting, huffing and puffing while training; never once thinking about how that unregulated breathing is affecting their performance.  Having a strong gut is not a matter of doing sit-ups and crunches – both those exercises have faults that only lead to more problems down the road.  While I’m a big fan of the Ab Wheel, or as I call it “The Wheel of Pain”, you really need to shown how to use it correctly or you’ll overstress your shoulders and lower back.  So how do you get a strong gut?  Learn when and how to breath.

Sucking in a big gut full of air and letting it out is going to get you nowhere.  You need to regulate the amount of air you bring in, how much tension is used to maintain it, and how to effectively release it.  Taking in too much air at one time is counterproductive as well as taking in too little; not to mention trying to maintain it by using your throat. Yikes!  I teach a really simple technique to get enough air in, braced, and ready for use that seems to work well for most people.  First off you can’t take a big “gulp” of air through your mouth. It’s going to create pressure in the wrong area and lead to problems.  All you need to do is take a “predatory sniff” of air through your nose and hold it. NOTE: the “predatory sniff” is a technique you can observe right before someone take a swing or tackles a defender.  It’s a cue that an attack is imminent but it is also a great way to prepare for an explosive energy requirement.  Hold that breath in your gut, deep in your gut and not up in your chest, then let it out under control through your teeth like you are hissing.  This sequence will take a while to develop but once you get it down you will be able to reference the skill on demand.  Time this breathing sequence with your efforts and you will find that you aren’t getting breathless or winded… but did I mention that this takes practice to achieve?

Test it out:

Pull-ups – applying this directed breathing during a grand makes it easier to stay “tight”.  Try doing a pull-up with a big gut full of air and see how it feels.  Now try it with the method described above.  It should be a lot easier and feel tighter and “crisper”. One of the things you will need to work on is regulating how much air you release. Too much too soon and you’ll be left only half way up… this is a regulated release of air, with the accompanying abdominal pressure, that lasts the whole movement.

Swings – Kettlebell Swings can make even the most well conditioned athlete breathless; but it doesn’t have to happen early in the session. Take a quick sniff of air on the backswing of the Swing and then explosively let it out in conjunction with your hip snap.  You’ll find that the Kettlebell moves faster, and higher, than usual and that you are able to regulate your breathing for longer as well. This breathing pattern is quick and crisp and doesn’t require as much air to make it effective as the grinding version.

GLUTES

Much aligned and often ignored, especially by guys, the glutes are the biggest, and as far as I’m concerned, the most important muscles in the body.  So developing the ability to integrate them fully and activate them at the appropriate time will make you strong – fast!  While everyone knows (not really, but let’s assume they do) how important the Glutes are then why do we still see people with soft knees and soft Glutes at the top of their Kettlebell Swing and Snatch? That’s because they aren’t tying in the Glutes to the end of the hip snap and missing out on tying in the biggest muscles in the body into their technique.

When I talk about working the Glutes most guys ignore my advice and head for the nearest set of dumbbells to work on their curls or grab a bar to work on their bench press.  Women are more receptive to my advice because they understand the “power” of strong Glutes… but for a different reason than the one that I’m interested in addressing!  So why are the Glutes so important?  Because the Glutes are not only the biggest group of muscles in the body they are also the brace for the abs and the foundation for the back.  Weak Glutes and you’re going to be overtaxing your abs and lower back to do the work that the Glutes are designed for.  Especially bothersome are people who have spent an inordinate amount of time developing their abs (think mucho sit-ups or crunches) and have compromised their posture and have effectively short-circuited their ability to fully engage their Glutes.  Don’t believe me?  Take the following two tests and see what happens when you are able to clench your Glutes for all they are worth!

Test it out:

Tip-over Test – Have someone stand tall and strong, locking their knees and clenching their Glutes as hard as they can. Place your hand on their chest and slowly start pushing.  See how hard it is to rock them back onto their heels. Do this again a second time but have them keep their Glutes relaxed; slowly start pushing against their chest and see how easy it is to rock them back onto their heels. Now here comes the clincher: same setup as the previous two but this time have them relax their Glutes and only clench them when they feel like they are going to tip over and fall. Be sure to put your other hand behind them just in case they can’t “catch” themselves. If they can’t catch themselves then they need some serious “Glute therapy” to get them turned back on! If they are able to catch themselves then they will have a shocked look on their face when they realize that their Glutes are the reason why they didn’t fall.

Stance Test – how wide you have your feet apart can directly impact how tightly you can clench your Glutes.  Is really that important? Only if you want to move faster, hit harder, and translate more energy from your body into a Kettlebell or bar. Try this series of tests to see how your stance (distance between your feet) impacts your Glute tension. Start with your feet in stance that is wider than your shoulders. Squeeze your Glutes as hard as you can and make a mental note of how tight they are.  Move your feet in a little this time, just inside shoulder width, with your heels right under your arm pits. Squeeze your Glutes as hard as you can and make a mental note of how tight they are. Now place your feet together with your big toes almost touching. Squeeze your Glutes as hard as you can and make a mental note of how tight they are. Last one: with your feet together once again, put your heels together and let your feet point off at an angle, let’s see 15-20 degrees. Squeeze your Glutes as hard as you can and make a mental note of how tight they are.  What did you find?  Did you find that the wider the stance the less Glute contraction you get and the more narrow the stance (especially with your heels together!) the more Glute contraction you get? What does that tell you about how you can get more power out of your hip snap if you learn to maximize your Glute contraction by minimizing your stance?  Yeah, I thought so…

GAZE

What the heck are you looking at? No really. What the heck are you looking at while you are training?  How much do your eyes, and how they are being used during movement, impact your performance? Quite a bit actually!  If you watch people doing Kettlebell Swings or Snatch you’ll see that most of them have their eyes going up, down, left, right, pretty much everywhere and it gets even worse when they change hands. Training yourself to focus internally is hard enough but you also need to create some discipline in what you are doing with your eyes and your head as you are training. Remember that your head is going to follow your eyes and you can end up doing some weird stuff to your neck and back if you’re not careful.

So what should you be doing with your eyes? First think about keeping your head neutral on your neck.  Neutral means that your chin is neither pointing up or down – you are looking straight ahead. You will see a lot of people putting their head into weird alignments because they are trying to look at one spot while they are performing a lift or movement.  This is something you can do and it does have its benefits – except for the fact that it’s going to put your neck and thoracic spine into some weird loading configurations that you are going to regret in the long run. So if your head is neutral and you start to do a squat what should your eyes be doing?  As you pull yourself back into your Squat your head should track with your torso and your gaze should end up stopping about 08-10 feet in front of you. As you drive up out of the Squat your head should remain neutral and finish where it began at the beginning.

I know what you’re thinking!  You’ve seen pictures of athletes going for a world record Deadlift or Squat with their head up and back and their chin jutting forward. Yep – you can do that! If you’re chasing a world record and you are familiar with the risks that you are taking when you do that, and then by all means proceed.  But if you are training on a regular basis and don’t want to take risks with your neck and thoracic spine then stick with the neutral position. You’ll thank me one day…

Test it out:

Posterior Chain Activation Test – Take a stance with your feet just inside shoulder width and with your head in a neutral position, squeeze all the muscles in your body from head to toe. Get a feeling for how much tension you’re able to create with your head in a neutral position.  Now try looking straight down at your toes and then squeeze all the muscles in your body from head to toe.  Once again get a feeling for how much tension you’re able to create, especially in the posterior and anterior chain (front and back of your body). For the final attempt try looking straight up at the ceiling and then squeeze all of the muscles in your body from head to toe. Get a feeling for how much tension you were able to create and if there was any difference in the amount of tension you could produce front and back.

What did you find?  I’m guessing that if you created enough tension in all three positions were surprised to find that you were able to balance out the tension with your head in a neutral position but you lost tension either in the posterior or anterior chain when you looked up or down.  Kind of strange that most coaches recommend that you look up when you Squat or Deadlift but in reality you lose tension in the muscles you are trying to activate. Something to think about… Look up too much, shifting the tension from the posterior to the anterior chain, and you can say hello to Mr. Hernia because you’re going to shift the tension too far and put stress on the abdominal wall.

NOTE: a slight downward tilt of the head works best to fire up the posterior chain, especially if you are a martial artist, soldier or law enforcement officer. This part physiological and part psychological phenomenon but it really works.  Keep looking straight ahead, but tilt your chin down and in a little bit, and you can take advantage of the physical and psychological boost this head position gives you.  

Swing Test – This is an easy test to do and experience.  Grab your favorite Kettlebell and do a handful of Swings.  First try doing them with your head staying neutral throughout the movement; that means that your gaze will shift from ahead of you to in front of you as you swing.  Then try to do the Swings with your head up the whole time.  Keep looking up throughout the technique and get a feel for how your hip snap feels and the weight of the Kettlebell. Finally attempt to do some Swings while looking down throughout the technique.  Get gauges for how your hip snaps feels, how heavy or light the Kettlebell feels, and how your breathing is. What did you find?  Did you notice that with your head in the neutral position throughout the movement that you were stronger, faster, and more relaxed?  If you didn’t go back and try it again; I think you’ll be shocked at the difference.

CONCLUSION

I hope that you take the time to look at how these four pillars can be added into your existing strength training program, regardless of if it is with kettlebells, body weight, or barbells.  I am confident that if you mindfully apply the principles that I outlined above that you will be amazed at how quickly you will get gains!  BTW – don’t try to implement all of these new skills at the same time.  I would strongly suggest that you take one and apply it across a spectrum of techniques and see how it works for you. Then, once you’ve given yourself a chance to explore it fully, add another element to the mix.  Being able to apply all the variables surrounding Grip, Gut, Glutes and Gaze will take practice and few people will be able to get them all working at the same time.  But if you can get two out of three you are well on the way to making some great gains!

***

About Michael A. Krivka, Sr. – RKC Team Leader: Michael A. Krivka, Sr. is a Washington, DC native who has been involved in Kettlebell training for over a decade and is currently an RKC Team Leader and member of the RKC Board of Advisors and the RKC Leadership Team under Dragon Door (where he has been listed as one of the top reviewed RKC’s in the world for the last five years). He is also the author of a bestselling eBook entitled “Code Name: Indestructible” and is in the process of finishing up several other eBooks on Kettlebells, body weight, and the integration of other tools into an effective strength and conditioning program. Mike has traveled extensively throughout the United States teaching Russian Kettlebells to military (USMC, USN, USA and USAF) and law enforcement personnel (FBI, DEA, USSS and CIA)… read more here.

Filed Under: Uncategorized Tagged With: four pillars, gaze, glutes, grip, guts, leadership, MAK, mike krivka, RKC Team Leader

The Kettlebell Jerk

July 10, 2013 By Mike Krivka Leave a Comment

329

Overview
The strength of the RKC is its reliance on the development of the six fundamental techniques that are taught as part of the baseline RKC curriculum: the Swing, Clean, Front Squat, Press, Snatch, and Turkish Get-Up.  These foundational techniques give the trainer and the athlete a solid foundation to start with and enough variety in movement and skills mastery to keep them busy for years to come.  But is there a missing link? Is a critical technique excluded that would round out the six and make it a lucky seven?  I think the missing link would be the Kettlebell Jerk and in the following paragraph’s I’ll try to explain to you my reasoning.

BTW – the Kettlebell Jerk is part of the RKC II curriculum so fear not—it’s part of the program!

What is the Kettlebell Jerk?
The Jerk, by extension, is within the same family as all of the other overhead techniques that can be performed with the Kettlebell.  Meaning that it is related to the Press and Snatch – at least it’s a distant cousin of both.  In reality it is part of the loading progression to getting heavy weights overhead; starting with the Press, moving on to the Push Press, and then ending with the Jerk.  The Jerk isn’t as “ballistic” as the Snatch, but its close; and it’s not as “grinding” as the press, because it shouldn’t be.  This means that the carryover skills that you will develop when practicing the Jerk will benefit both sides of the movement coin.

The Jerk is comprised of the “Dip and Drive” of the Push Press followed by a soft lockout in a high Overhead Squat or high Hip Hinge.  The key behind having success with the Jerk is in how well you can translate the energy behind the Dip and Drive into the Kettlebell and get it moving overhead.  If your Dip and Drive isn’t strong enough to get the Kettlebell to “float” then you won’t be able to get under the it and “catch” it with a locked out arm.  Now if your Dip and Drive really is strong enough to “float” the kettlebell, but your initial racked position is weak or loose, then there’s no way you’ll get it overhead or you’ll struggle to press it out.  Your racked position has to keep the Kettlebell in the perfect alignment with the torso and legs to accept the power from the Dip and Drive, and the elbows have to be tight against the body and ready to transition from holding to driving upward once the legs have done their job. So you might say that your Jerk depends on fast knees and tight elbows.

So far we’ve talked about transferring energy from the lower body to the upper body—now we need to talk about what the lower body is doing to set up the energy transfer.  First thing you need to think about is your stance width or how far apart your feet are.  Many people take a wide stance assuming that if their feet are far apart they will get more power.  Well in this case it just doesn’t work that way.  Remember, we are trying to create a ballistic transfer of energy from your legs to the Kettlebell.  To do that you want to have a shoulder-width stance (be realistic about how wide your shoulders are) that will allow you to drive hard off the ground and get a maximum contraction of the glutes.  If your starting stance for the Jerk is too wide then you won’t get maximum glute contraction and you’ll have to make up the difference somewhere else.  So, after you’ve got the perfect stance you need to make sure that you Dip doesn’t go too deep.  The Dip should be a quick and forceful bending of the knees (not the hips) that lets you get underneath the Kettlebell and start driving it upwards.  The Drive starts immediately after the Dip; don’t hesitate – explode! Once you starting driving off of the ground through the knees you need to make sure that you follow all of the way through to engage the glutes and transfer the energy into the torso.

Now that your Dip and Drive are in place and working the way you want them to, you still don’t have a Jerk yet.  What you’ve got is the underpinnings for a decent Push Press.  Now you have to master the most difficult part of the Jerk: the Drop.  This seems to be the most common area of confusion and difficulty for most athletes when in actuality it should be the easiest.

Then why is it so hard for most people?  All you have to do is look back at their Dip and Drive.  If they aren’t fully transferring the energy generated by the Drive into the torso, thereby allowing the Kettlebell to float, then they are going to be stuck under the Kettlebell and won’t be able to drop underneath to catch it.  Remember: you can’t effectively drop out from under the Kettlebell if you are still loaded with it.  You’ve got to off-load the kettlebell and then quickly drop or hinge out underneath it.

If all of the elements described above line up, then the Kettlebell will be caught in the overhead position with a locked elbow but a “soft arm.”  What do I mean by a “soft arm?”  It means that you shouldn’t be punching through the lockout with any more force than what’s needed to brace the arm for receiving the load from the Kettlebell.

Better than the Kettlebell Snatch?
Is the Jerk (or the Clean and Jerk to be specific) better than the Snatch?  It could be—it just depends on the person and what they are training for.  The Snatch, when executed properly, trains a laundry list of qualities that will benefit the athlete. It trains maximizing the Backswing, taming the arc, transitioning from pulling to punching, the overhead lockout position and the commensurate mobility required to attain it, maximizing the trajectory of the Kettlebell throughout the movement, and other important qualities.  The Jerk, also when executed properly, trains a similar list of qualities. Foremost are translating energy/motion from the legs to the torso, translating energy/motion from the torso to the arm via the elbow, perception of movement and split-second timing while under load, transitioning from driving to catching, and anticipating load and velocity while in motion.  Sounds pretty complex and it is; but the work is worth it once you get the proper timing and sequencing down.

So, it looks like they are both pretty beneficial—so which one comes out on top?  Well if you are looking for a great way to build up your grip and develop explosive power from ground to sky then the Snatch will fit the bill.  It’s also a great way to build up some serious anaerobic endurance.  Don’t believe me? Ask someone who trains for the RKC Snatch Test what it feels like around minute four. Oh I’m sorry, they can’t talk right now, they’re gasping for air!

In regards to the Jerk, I think it comes out on top for someone who is trying to move a near one-arm maximum load in a ballistic manner and learn how to deal with it in the overhead lockout.  For the combat athlete it is a great technique to develop a more intimate appreciation for how to apply maximum force to any upper body striking technique and how to conserve energy until the very last millisecond.  Remember that time under tension is how you get strong and the Jerk will allow you to put a greater load overhead and train you to manage the position as well.

Conclusions
Training the Jerk will benefit anyone who has mastered the “Big Six” Kettlebell techniques already and are ready for a challenge that will allow them to develop the strength to manage a heavier load overhead.  While it is a simple technique, it is not easy to master—and success with it will be dependent on not only have a strong Press and Push Press but also a relatively high degree of physical awareness and how to manage quick height transitions.  If you are truly interested in learning how to perform the Jerk, I strongly suggest you find an RKC that can help you fine-tune all of the precursors to this dynamic, fun and positively challenging technique.

About Michael A. Krivka, Sr. – RKC Team Leader: Michael A. Krivka, Sr. is a Washington, DC native who has been involved in Kettlebell training for over a decade and is currently an RKC Team Leader and member of the RKC Board of Advisors and the RKC Leadership Team under Dragon Door (where he has been listed as one of the top reviewed RKC’s in the world for the last five years). He is also the author of a bestselling eBook entitled “Code Name: Indestructible” and is in the process of finishing up several other eBooks on Kettlebells, body weight, and the integration of other tools into an effective strength and conditioning program. Mike has traveled extensively throughout the United States teaching Russian Kettlebells to military (USMC, USN, USA and USAF) and law enforcement personnel (FBI, DEA, USSS and CIA)… read more here.

Filed Under: Uncategorized Tagged With: advanced, jerk, Kettlebell, Krivka, mike, skills, techniques, training

Using the SAT to Fix Your Kettlebell Snatch

May 15, 2013 By Mike Krivka 2 Comments


Overview

The SAT, or Snatch Assessment Tool, is a tool that I created to help trainers and kettlebell practitioners alike to visually assess and correct their Kettlebell Snatch technique. Working with athletes on a daily basis makes it a requirement to have simple and effective tools in your “trainer’s toolbox” to quickly fix or remediate movement skills. Always on the lookout for new tools that I can use, I was thrilled when I learned about Dan John’s Hinge Assessment Tool and how simple and effective it was. Dan’s HAT or Hinge Assessment Tool inspired me to look at the Kettlebell Snatch in a very different light; interpreting the markers for a great Snatch technique as opposed to a poor Snatch technique. So once again I find myself thanking Dan John… Thanks!

The Snatch Assessment Tool (SAT)

The SAT is comprised of four tests that will allow the user to visually assess the subjects Kettlebell Snatch technique and hopefully lead them to several corrections or technique modifications. All that is required for the SAT is a stick or PVC pipe about six feet long, a bit of open space, and a Kettlebell. Once you have all those things in place you’re ready to go.

The four tests are: Taming the Arc, Trajectory, Transition, and Top Lockout. Looking at each one of these separately and in combination will improve your Snatch technique, make them more consistent and safer, and allow you to move more weight faster and more efficiently.

Taming the Arc

Taming the Arc means that you are using just enough forward swing to mobilize the Kettlebell and get it into the overhead position as safely and as efficiently as possible. What this means is that the forward arc that most people associate with the Kettlebell Swing needs to be dialed back and that energy needs to be translated into upward movement.

To check if the arc of the Kettlebell has been properly tamed you will need to have the subject stand with their arm bent at ninety degrees and the elbow tucked against their body. The fingertips should be extended and the stick should be placed at the end of the fingertips. This will be the testing distance for the Snatch and the subject should not realign their feet once they have found the correct distance. The trainer should stand in front of the subject, holding the stick in place, so that they can observe the arc of the Kettlebell. Have the subject do several Kettlebell Snatch on both the right and left side to see if they can effectively mobilize the Kettlebell within this testing zone.

Trajectory

Trajectory means the path that the Kettlebell takes from the backswing all the way to the overhead position and on the way back down. The trajectory of the kettlebell is important in that it tells a lot about the subject’s backswing, shoulder alignment, pull/punch transition, and hand position on the Kettlebell. Optimally the trajectory of the Kettlebell should be a straight line when viewed from the front. Deviations from this optimal trajectory indicate that there are compensations occurring during the movement that will need to be addressed.

To check if the trajectory of the Kettlebell both safe and efficient have the subject stand with their arm bent at ninety degrees and the elbow tucked against their body. The fingertips should be extended and the stick should be placed at the end of the fingertips. This will be the testing distance for the Snatch and the subject should not realign their feet once they have found the correct distance. In this instance the trainer should pay particular attention as to where the place the stick in relation to the subject. While maintaining the testing distance the stick should be placed so that it bisects the subject’s body; clearly defining their centerline. The trainer should stand in front of the subject, holding the stick in place, so that they can observe the trajectory of the Kettlebell. Have the subject do several Kettlebell Snatch on both the right and left side to see if they can effectively mobilize the Kettlebell within this testing zone. Observe the path that the Kettlebell takes and confirm that it is moving parallel with the stick from the backswing to the overhead lockout position. The easiest way to confirm this is to focus on the thumb of the hand holding the Kettlebell. Do not focus on the Kettlebell itself; watch the hand that is mobilizing the Kettlebell instead. This will give you a truer evaluation of the trajectory than focusing on the Kettlebell itself.

Transition

Transition means the timing between pulling through the backswing and the ballistic punch of the Kettlebell into the overhead lockout in addition well as managing the “float”. This is an oftentimes underappreciated aspect of the Kettlebell Snatch but by studying this part of the technique you can gain insight into how well the person is transferring energy to and from the Kettlebell.

To check and see if the transition of the Kettlebell is both safe and efficient once again have the subject stand in testing position described above. Make sure that you can easily see the subject from hips to shoulders and that once again the centerline is bisected by the stick. Have the subject do several Kettlebell Snatch on both the right and left side and note where the transition from “pulling” to “punching” occurs. In the instance where the energy derived from the backswing and the hip snap are effectively being transferred to the Kettlebell you will notice that the transition occurs above the waist and approaching the shoulders. This transitional zone should be consistent from the right side to the left side in the absence of any other factors. If the transition is observed as being well above the shoulders and almost at the lockout position then the Snatch technique should be evaluated again for leaks in the hip snap or a shortened backswing among other factors.

Top Lockout

Top Lockout means the position of the Kettlebell overhead once it has stopped moving. This is a loaded overhead position and it’s alignment with the shoulder, midline and hand tells a lot about the rest of the technique. Having a good top lockout means that the load from the Kettlebell is being transmitted through the whole body in a safe, efficient and strong manner and that the shoulders, neck and back are not unduly taxed in the process.

In this instance the trainer should stand beside the subject and line the stick up with the subject’s ear. There is no need to “crowd” the subject during this part of the assessment and it is important that the trainer has enough room to make a good visual assessment of the termination of the Snatch. Have the subject do several Kettlebell Snatch on both the right and left side, pausing in the overhead position until the trainer releases them for the next repetition. The trainer should observe the location of both the subject’s hand and the kettlebell at the termination of the Snatch. The optimal position of the subject’s hand should be inline or slightly behind their ear and the stick should make any deviations from this position quite obvious. If the subject is observed stopping the Kettlebell prior to a full overhead lockout position (i.e. the hand in front of the subject’s ear) then the Snatch technique will need to be reevaluated from the bottom to top to see where the truncation of the movement originates.

Summation

The Kettlebell Snatch is a visually simple but technically challenging technique with a host of subtleties involved. Mastering it will take the average athlete thousands and thousands of repetitions to be competent at it while true mastery of the movement will take tens of thousands of repetitions. While this might be daunting to some I hope it is a challenge to others in that is will inspire you to study the technique and find out how to make it more efficient, safe and powerful.

I hope this blog posting will benefit you and I look forward to your feedback and comments.

***

mike_krivka_Teaching


Michael A. Krivka, Sr., RKC Team Leader is a Washington, DC native who has been involved in Kettlebell training for over a decade and is currently an RKC Team Leader and member of the RKC Board of Advisors under Dragon Door (where he has been listed as one of the top reviewed RKC’s in the world for the last five years… read more here.

Filed Under: Uncategorized Tagged With: assessment, Dan John, HAT, hinge, Kettlebell, Krivka, mike, SAT, snatch, tool

Understanding Kettlebell Ballistics and Grinds

April 19, 2013 By Mike Krivka 1 Comment

Mak_110lbs_KB

Kettlebell exercises can be segmented into two general categories: Ballistics and Grinds. The simplest distinction between the two is that Ballistic exercises are for the most part executed very fast, while grinds are slow. A more insightful and accurate distinction would be that ballistics train the practitioner to generate and absorb power in a dynamic fashion, while grinds train the practitioner to generate full-body power (and tension) in a contracted or sustained fashion.

Whichever way that you look at it there is a big distinction between the two types of techniques and the more you understand about the differences the more successful you will be when learning and perfecting them.

“Ballistics” refers to dynamic, explosive, multi-joint exercises such as the Clean, Snatch, Swing, Jerk, etc. These exercises are normally performed within a wide range of motion (or movement pattern) and incorporate a large number of muscles and muscular chains. Ballistic exercises tax not only the muscles but also the heart and lungs – think wind sprints as opposed to a slow comfortable jog. Ballistics challenge your ability to regulate your breathing, monitor your form, and master the “tight-loose-tight” method of body tension. A note about tension: it is not that Ballistics don’t as much tension as Grinds it is that they take a higher level of mastery of the manipulation and application of tension.

“Grinds” refer to slow, controlled pressing, pulling or squatting exercises such as the Military or Overhead Press, Squat, Deadlift, Side and Screw Press, etc. These exercises are distinguished by the need for constant tension on the muscles or muscular chain throughout the execution of the exercise. Grinds require particular attention to whole-body tension and the regulation of sustained power breathing.

grinder_sandwich
Not this kind of grind!

Grinds will challenge your ability to maintain tension, smoothly transition from muscle group to muscle group, and point out inconsistencies and inadequacies in your structure and alignment. In particular Grinds will show any lacking in positional and transitional strength that you might have and help you learn how to manage the feedback from the movement.

A third possible category for Kettlebell techniques could be referred to as “Hybrids” or “Combinations”. They feel a bit like a Ballistic and a bit like a Grind – think Kettlebell Thrusters, Split or Squat Snatch, Split or Squat Jerk, and the Overhead Squat. These exercises accentuate the best and the worst of both the Ballistics and the Grinds.

They are performed within a wide range of motion (or movement pattern), require you to move between maximum tension and maximum relaxation, tax both aerobic and anaerobic thresholds, require smooth transitions from muscle group to muscle group, and develop the ability to transition from sustained strength to dynamic strength in the same exercise. Hybrids are a lot of fun to perform, but you need to be particularly careful that you don’t keep going after fatigue (and oxygen deprivation) has made mince-meat of your form.

The RKC Level I curriculum gives you a solid foundation in both Ballistics and Grinds with the Swing, Clean and Snatch comprising the Ballistics and the Squat, Deadlift, Military or Overhead Press and the Turkish Get-up rounding out the Grinds. With this knowledge in hand an experienced trainer can devise workouts that can take advantage of all three types of exercises. The only caveat is you need to be cautious when sequencing the exercises, paying particular attention to the number of sets or duration of each type that are performed.

A good rule of thumb is to Grind while you’re fresh and do Ballistics while you still have the breath to do them properly. Trying to perform effective grinds after a lung-searing session of ballistics or hybrids may be detrimental to your health. You might toss your lunch, or drop a kettlebell on your head!

***

Michael A. Krivka, Sr., RKC Team Leader is a Washington, DC native who has been involved in Kettlebell training for over a decade and is currently an RKC Team Leader and member of the RKC Board of Advisors under Dragon Door (where he has been listed as one of the top reviewed RKC’s in the world for the last five years… read more here.

Filed Under: Uncategorized Tagged With: ballistics, basics, funny, grinds, Kettlebell, kettlebells, strength

Ten Reasons to Train with Kettlebells

March 27, 2013 By Mike Krivka 14 Comments

Jak_Dad_EarthTreks_01

RKC Team Leader Mike Krivka lifts one of his favorite weights – his son Jak!

I’m well into my second decade of training with Kettlebells and I can honestly say that I learn something new every single time I pick one (or two) up – and that’s usually several times a day! I’ve had the great honor to train with a wide variety of people and introduce them to what I consider to be the best strength and conditioning tool around. In each and every instance people are fascinated and appalled at how this seemingly simple tool can be so hard to use well and so amazingly effective at the same time. It doesn’t matter if I’m training with a “Soccer Mom”, a Marine Corps officer, or an aspiring athlete – they all learn very quickly that the lessons that the Kettlebell can teach them will serve them well.

Following are a quick list of ten reasons why I think you should be training with kettlebells. There are many more, but I’m hoping this list will help you come to be a better understanding on how to approach utilizing this amazing tool.

1. Efficiency – Kettlebells (in conjunction with a handful of high-tension body weight skills) can provide an intense full-body workout in an incredibly short period of time. With a workout of less than 30 minutes in length you drenched with sweat and gasping for air. Think about the last time you did the RKC Snatch Test (five minutes) or the USSS Snatch Test (ten minutes) – both are great mono-structured workouts that do the job without wasting time. Most “trainers” recommend that you perform lengthy cardio and resistance sessions for up to 6 to 8 hours a week. A week’s worth of kettlebell workouts equal only a fraction of that and you will get much better results.

2. Tension Management – Kettlebells require that you develop a high level of sensitivity in regards to grip strength and tension distribution and redistribution that readily carries over into all forms of athletics. The kettlebell’s displaced center of gravity create grip and forearm strength requirements that cannot be matched by regular free weights or machines. The ability to create and distribute tension is of paramount importance to any athlete. Not only is it a factor in strength, but also in speed, flexibility, and endurance as well. Muscles become stronger by learning how to contract them more effectively, explosively, and efficiently. The body as a unit becomes stronger by learning how to instigate a coordinated firing of muscles in a more effective, explosive, and efficient manner.

3. Mindfulness – Kettlebell training requires you to “be in the moment,” allowing you to develop a high-level of concentration, focus, intensity and body awareness. Lapses in concentration or body awareness are swiftly punished. A lack of intensity will not allow you to build the requisite strength and mental toughness needed to distinguish yourself in action. How many people have you seen staring off into space while they were working out? Don’t even think about doing that with kettlebells unless of course you enjoy sitting in the Emergency Room!

4. Sensitivity – Kettlebells require you to constantly challenge your spatial awareness, hand-eye coordination, tension, balance and timing. Once again, these are all very martial skills that will cross over into your training and especially into combat athletics. Doing a 7.5 foot ROM snatch requires a much higher degree of skill and muscle mastery than a 1.5 foot ROM biceps curl does. Think about it.

5. Raw Strength – Kettlebells develop thick, dense muscles that deliver when you need them – as opposed to the puffy, tribal-tattooed ‘look good in a Speedo’ muscles. By forcing the muscle to support the KB you end up activating the deeper, harder-to-work, stabilizing and supporting muscles. Most people who start using kettlebells see a rapid loss of excess body fat and weight loss. Once the ‘honeymoon’ is over there oftentimes occurs an increase in weight that accompanies a rapid rise in strength. This is when the muscles start becoming denser and the deficient areas of the musculature start suddenly filling in.

Mak_110lbs_KB

Mike lifting the ‘Beast’ Kettlebell

6. Unilateral Strength – Kettlebells require that you develop unilateral skills, coordination and strength. There is no hiding behind your “strong-hand” in kettlebell training. Weak links in power development are filled in as you get stronger and become accustomed to the bracing requirements of kettlebell training. Being able to move a load on a bar doesn’t mean that you’ll be able to move the same load using one or two kettlebells. I’ve embarrassed way too many “gym rats” by matching their bar loads and then leaving them in the dust with a pair of kettlebells. Try getting the meathead at the gym with the 350 pound bench press to military press your two 53 lbs kettlebells – try not to laugh when he can’t get them off of his shoulders.

7. Holistic – Kettlebells combine strength, flexibility, mobility and anaerobic training into one workout. No other tool will challenge you when it comes to developing attributes that you will be able to apply on the hardwood, the court or the battlefield. Kettlebell training specifically trains all of the physical traits required by the elite athlete and succeeds where other methods fail. In particular, KB training addresses all of the elements that are going to be required of an athlete in competition or in a life-or-death struggle.

8. Mental Hardening – Kettlebell training develops a high level of mental toughness and an understanding of controlled aggression. You can’t approach a kettlebell workout without either – the kettlebell is the enemy and it has to be submitted, controlled or destroyed; or the kettlebell will destroy you. Someone who is looking for a “light” or “toning” workout can find just that by using kettlebell techniques that will enhance their overall mobility and awareness, but for someone who is looking to get an edge on their opponents, the kettlebell is the key that opens the lock. If you have ever done any high-repetition kettlebell training you know exactly what I’m talking about. That little voice in your head that tells you it’s time to quit has to be wrestled to the ground and choked out so that you can build the strength that you want.

9. Movement – Kettlebells require you to learn how to move your body efficiently, strongly and with grace and power. Sitting in a machine or lying on a bench is not going to give you the athletic ability to do a single leg takedown or knock-out an opponent. Learning how to transition for movement to movement without external stabilization, (i.e., a bench or machine) will require you to develop a higher level of strength and mobility that no machine can ever provide. Developing the ability to internally stabilize an external load will give you the sensitivity and control you will need to play or fight at a higher level. Kettlebells will rub your face in your weaknesses until they become strengths – and then humble you over and over again.

10. Complete System – Training with Kettlebells may be the perfect system for developing strength. Kettlebells allow you to perform all of the basic movement patterns (Push, Pull, Squat, Hinge, Carry and the Turkish Get-up; kudos to Dan John for this list) safely, efficiently and effectively. No other tool out there can make this claim and many will try – but very few will even come close. Through a unique combination of design, utilization and loading the Kettlebell is “efficiently inefficient” in building strength – something that will serve anyone from a “Soccer Mom” to a US Navy SEAL.

I’m sure that you can think of a lot more reasons why someone should train with kettlebells and I’d love to hear from you! Please feel free to respond to this blog post to share your thoughts and ideas.

***

Michael A. Krivka, Sr., RKC Team Leader is a Washington, DC native who has been involved in Kettlebell training for over a decade and is currently an RKC Team Leader and member of the RKC Board of Advisors under Dragon Door (where he has been listed as one of the top reviewed RKC’s in the world for the last five years… read more here.


Filed Under: Uncategorized Tagged With: 10, awesome, decades, experience, kettlebells, Krivka, mike, reasons, Ten, train, trainers

  • Page 1
  • Page 2
  • Go to Next Page »

Primary Sidebar

Featured Products

previous arrow
BOOK-RKCBookofSnC
HardStyleKettlebellChallegeDanJohn700
BookCoverMasterTheKettlebell1
RKCiconKettlebell512
KettlebellGoddessdv040
next arrow

Recent Posts

  • RKC Big Six Workout
  • The Kettlebell Swing & Low Back Pain
  • Key Kettlebell Exercises To Help You Create Better Balance
  • How to Most Effectively Use Kettlebells to Meet Your New Year Goals
  • 1 Exercise That Checks All The Boxes
FOLLOW US ON TWITTER!

Archives

Copyright © 2025

Dragon Door Publications / The author(s) and publisher of this material are not responsible in any manner whatsoever for any injury that may occur through following the instructions or opinions contained in this material. The activities, physical and otherwise, described herein for informational purposes only, may be too strenuous or dangerous for some people, and the reader(s) should consult a physician before engaging in them.