• Skip to main content
  • Skip to primary sidebar
  • Home
  • Contributors
    • Matt Beecroft, Master RKC
    • Martijn Bos, Master RKC
    • Andrea Du Cane, Master RKC
    • Angelo Gala, Master RKC
    • Chris Holder, Master RKC
    • Steve Holiner, Master RKC
    • Dan John, Master RKC
    • Mike Krivka, Master RKC
    • Thomas Phillips, Master RKC
    • Robert Rimoczi, Master RKC
    • Phil Ross, Master RKC
    • Max Shank, Master RKC
  • Workshops
    • HKC Workshops
    • RKC Workshops
    • RKC-II Workshops
  • Find an RKC Instructor
  • Resources
    • Articles
    • Forums
    • Kettlebells
    • Products
  • Blogs
    • PCC Blog
    • Strong Medicine Blog
  • Archives

RKC School of Strength

Official blog of the RKC

Snatch Test

Thoughts on the RKC Kettlebell Snatch Test

April 5, 2022 By Mike Krivka 1 Comment

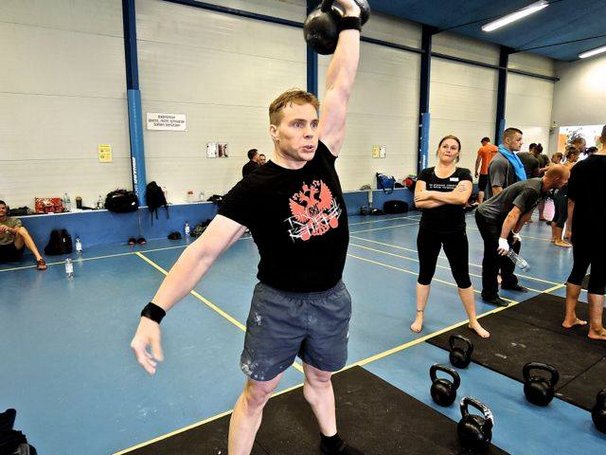
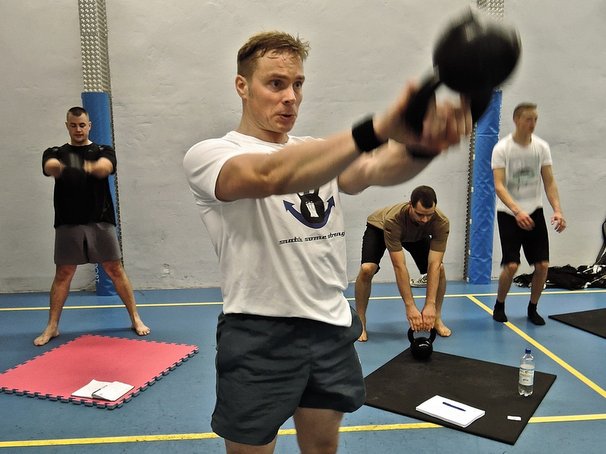
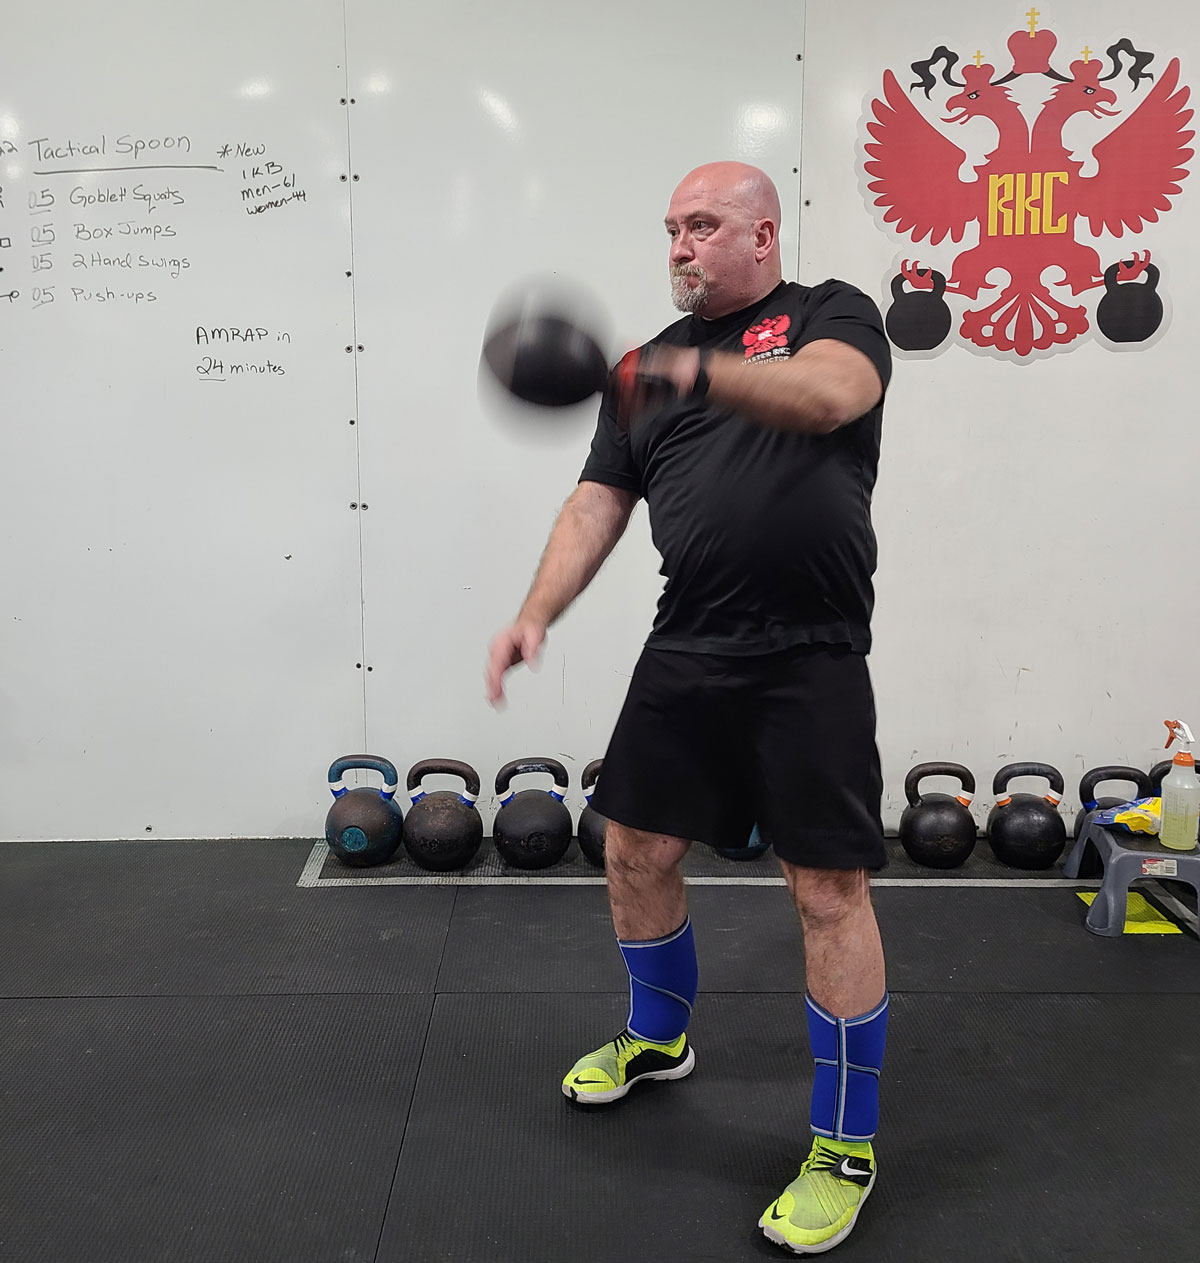
Master RKC Michael Krivka Demonstrating Kettlebell Snatches

The following are my thoughts and observations regarding the RKC Snatch Test. This post is based on over twenty years of experience training with and teaching kettlebells to the public, military, and law enforcement personnel. Some of what you are about to read is contrary to what you find being recommended by other trainers and coaches. That’s fine and should be expected. What you need to do is find the program that works best for you and your clients.

Test ≠ Race

The test is not a race. You have five minutes to complete the Snatch Test and I strongly recommend that you use all of it. Someone who completes the test in 3:50, and someone who completes it in 4:59, will both pass. But I will guarantee you that the person who used as much time as possible had an easier time and exhibited much, much better technique.

You Must Exhibit Positional and Transitional Management

You don’t pass the Snatch Test by just doing 100 kettlebell snatches in 5 minutes. You must demonstrate positional and transitional management coming out of the backswing, overhead, from the drop, and back into the backswing. Loss of control in any of those positions not only makes the Snatch Test more difficult but can also cause or lead to injuries.

Train Grind Strength Before Ballistic Strength

To execute the Snatch Test safely, you will need to develop several skills and attributes. First, you will need strength and stability in the overhead lockout position. This can be done easily by spending a good portion of your time working on the kettlebell press, push press, and/or kettlebell jerk. Strength in this position protects the shoulder itself from the rigors of ballistic snatches, as well helping to maintain mobility in the shoulder and upper quadrant of the torso.
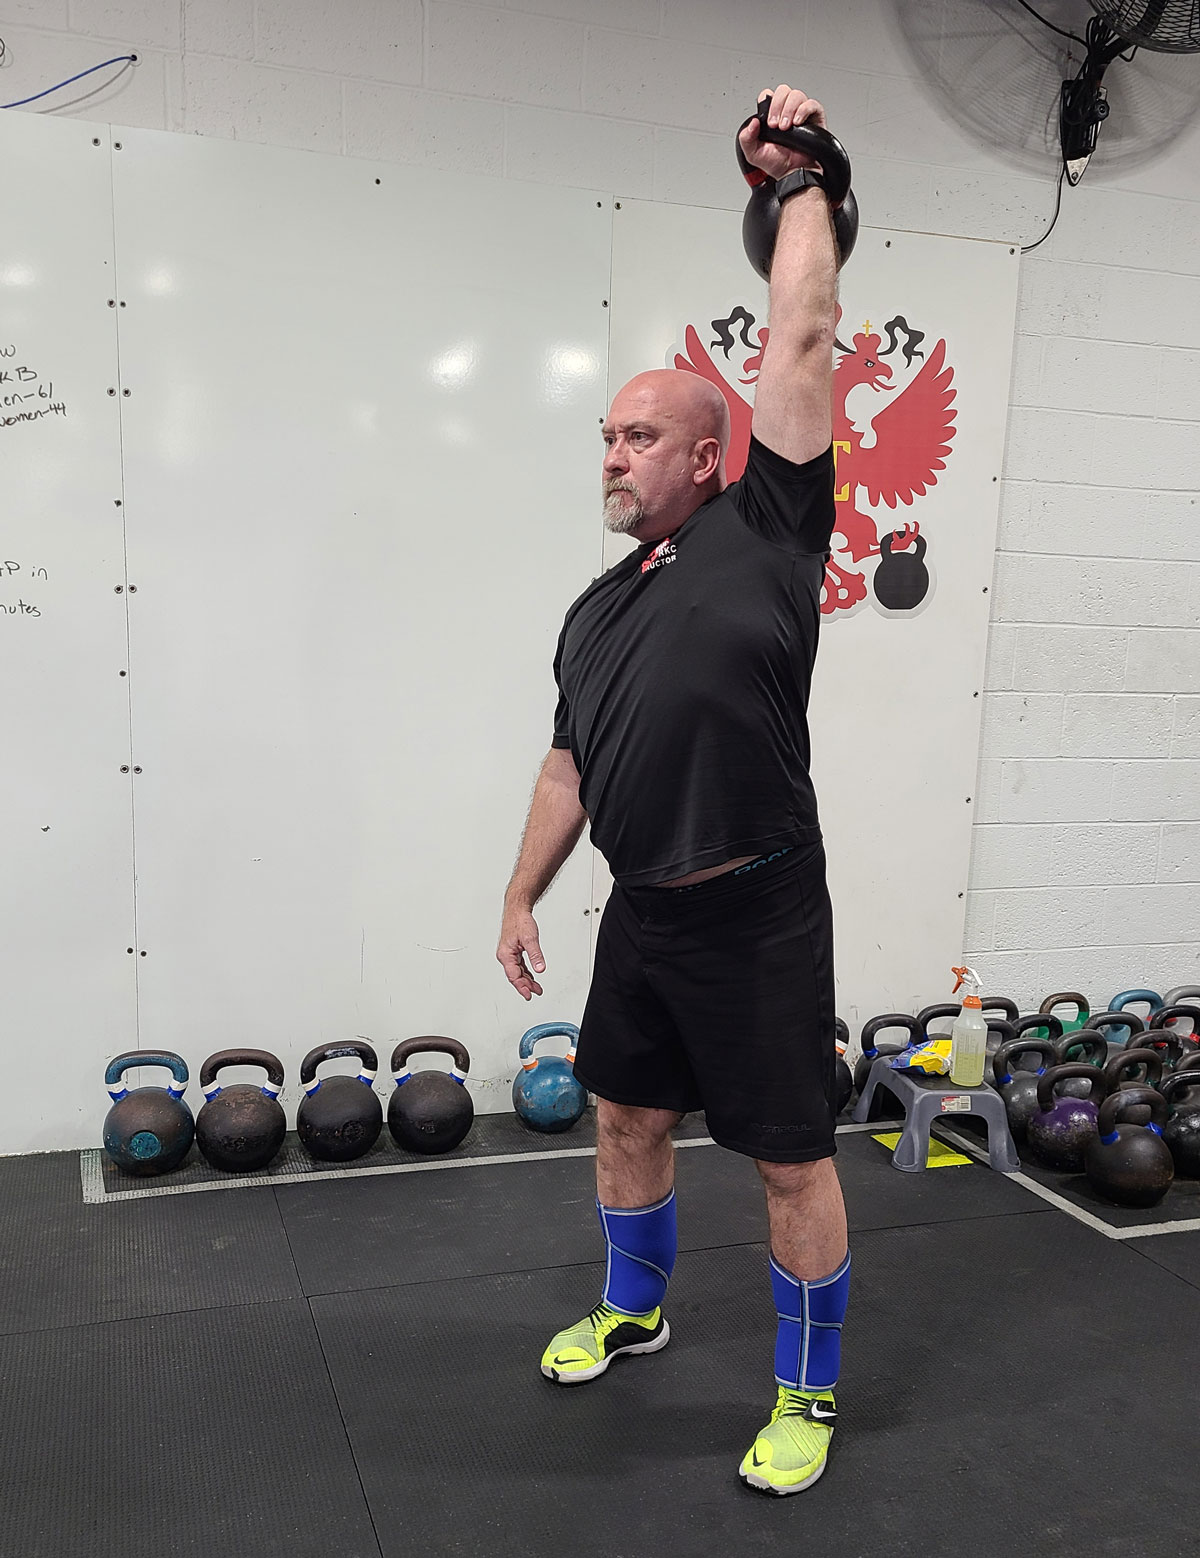
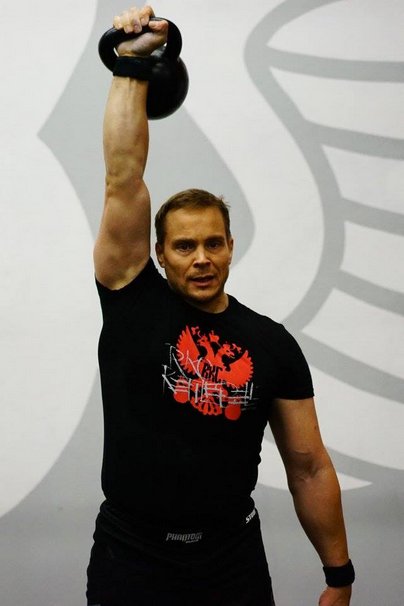
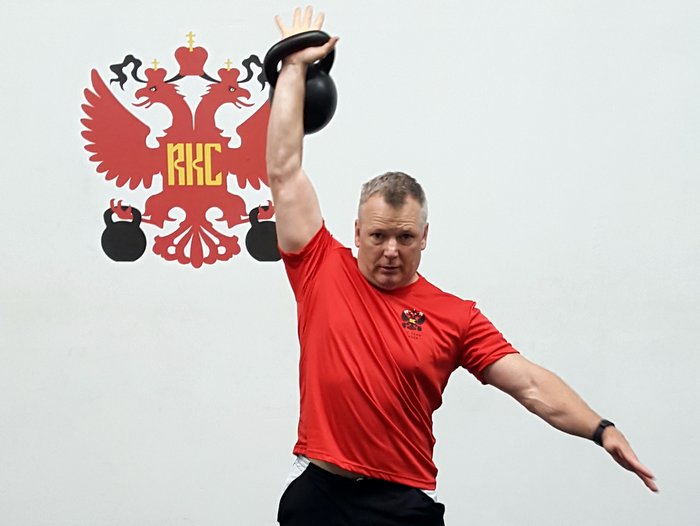
Master RKC Michael Krivka Demonstrates the overhead lockout position of the kettlebell snatch

Second, you will need to develop an efficient and powerful backswing. The backswing is sometimes overlooked or minimized. But the more you work on it, the easier the swing, clean, and snatch will be. You will develop a highly efficient system for transferring energy from the ground, through the hips, and into the overhead position. Ignore this aspect of training to your own detriment.

Finally, train to develop a smooth and soft overhead lockout. When you watch most people snatch the kettlebell, it looks like a big swing with the kettlebell going over the top of their hand on the way up before slamming onto the forearm. This is very inefficient and does not demonstrate a viable understanding of how to translate and transition energy from the body into the kettlebell. The kettlebell should explode from the backswing and then float to the overhead position, where the hand is gently punched through the handle while all the joints, bottom to top, lock softly.

Before Attempting the Snatch Test

As you start preparing for the Snatch Test, here’s a key piece of information that will make the test easier–as well as save wear and tear on your shoulders. Before you start doing high rep snatch practice sessions, you should be able to press your Snatch Test weight kettlebell ten times right and left. Work on grinding out of the rack and into a solid lockout overhead, then a slow and strict transition back to the rack. Once this becomes easy (and it will after a while) you are reasonably safe to start practicing high rep snatches.

Let me put it this way: until you have the strength to strictly press 20% of what you are going to snatch during the test, you have no business practicing for 100% of the ballistics you will be doing.

Build grinding strength before ballistic intensity and numbers.

Training for the Snatch Test

Training for the Snatch Test should consist of two very different types of training sessions: Grinds and Ballistics.

Your grind sessions should be oriented so that you can get to the 10×10 strict press on both sides with your Snatch Test weight kettlebell. These sessions can be done at lower weights to practice getting the reps. They can also be done heavier to build extra strength and stability for transitioning from the rack to lockout and from lockout back into the rack.

Your Ballistics sessions should be comprised of:

  • 40% Swings; with both snatch weight and heavier
  • 40% Cleans; with both snatch weight and heavier
  • 20% Snatches; with lighter than snatch weight, snatch weight, and heavier

Training sessions should be relatively brief and slowly progress in load and volume to Snatch Test numbers. Properly planned and executed, you can go from 10×10 snatches right and left to 50×50 snatches right and left in 8-10 weeks of moderate training.

When to Take the Snatch Test

The only time you should take the Snatch Test is when you are both physically, mentally, and technically dialed in. The RKC experience will make major changes to the technique you have been using to prepare for the Snatch Test. If you feel that you need more time to prepare for the Snatch Test, you have 90 days after your RKC Workshop to submit a video. I would strongly recommend this option for most people attending the RKC. Once you have your technique dialed in at the RKC, you can go home and work in a more efficient and safe manner. If you just jumping into the Snatch Test after learning how to execute the snatch safely and effectively, you will likely just revert to old habits and accommodations while under the stress of the test. It takes time to develop a new foundation for your snatch technique and you can easily do that within the 90-day window.

If you are interested in seeing what I think the “perfect” Snatch Test looks like, watch the video below:


I hope this helps you prepare for the RKC Snatch Test. Please reach out to me if you have any additional questions or concerns.

***

Master RKC Michael A. Krivka, Sr. is a Washington, DC native who has been involved in Kettlebell training for over a decade and is currently a Master RKC and member of the RKC Board of Advisors under Dragon Door (where he has been listed as one of the top reviewed RKC’s in the world for the last five years). Mike has traveled extensively throughout the United States teaching Kettlebells to military (USMC, USN, USA and USAF) and law enforcement personnel (FBI, DEA, USSS and CIA) as well hard-living civilians from Soccer Moms to CEOs. In addition to teaching workshops and clinics he logs several hundred hours a year teaching and training with Kettlebells at his own gym and martial arts studio. He is also a Level I CrossFit Trainer, and Olympic Lifting Coach.
Filed Under: Coaching, Kettlebell Training Tagged With: how to train for the snatch test, kettlebell snatches, RKC snatch test, Snatch Test

A Sensible Approach To RKC Prep

July 27, 2016 By Andrea Du Cane 3 Comments

Andrea Du Cane Kettlebell Snatch Test

What’s the first thing you think of when preparing for the RKC? Most people instantly think of the dreaded SNATCH Test! It’s understandable—after all, the RKC Snatch Test is a test of a candidate’s conditioning, and how well they’ve trained to complete 100 snatches within 5 minutes with the appropriate kettlebell for their weight class. It is meant to be a challenge. Everyone will agree, you have to earn your RKC—it’s not just given away to anyone who attends an RKC workshop.

So, it’s no surprise that most of the questions and information out there about preparing for an RKC workshop are focused on how to successfully sail through the Snatch Test. As a Master instructor who has seen thousands of Snatch Tests and who has tested the skills of more RKCs than I can count, I can tell you most people are focusing on the wrong thing in their RKC prep!

I always remind candidates that the Snatch Test is not the same as the Snatch Technique Test. The Snatch Test examines the mental and physical conditioning of the candidate. The Snatch Technique Test is all about technique—so each rep should be as perfect as possible. We let a fair amount of sloppy form pass with the Snatch Test because it is nearly impossible to perform 100 PERFECT reps within 5 minutes. But, we DO expect 5 perfect reps on each side during the technique test.

So, if someone has focused all of their preparation on pounding out 100 reps without any attention to the technique of the movement, then they could be in for a surprise if they fail the Snatch, Swing, or Clean Technique Tests. Which brings me to the point of this article; your preparation should be all about the basics—like the swing!

Before their RKC workshop, many candidates think their swing is pretty good. But, nearly everyone soon learns that they had “leaks” in their swing technique! And when the extra pull of the arm to the overhead lockout for the snatch is added, many candidates lose their hips, or their breath since with bad technique, the snatch can become a back and shoulder pull, instead of a hip-driven exercise.

My Advice:

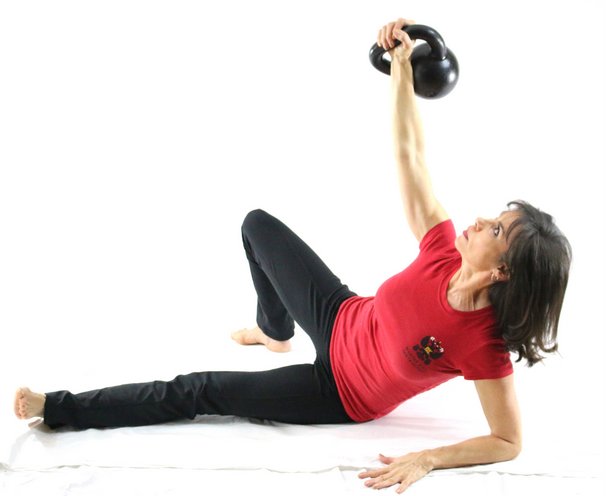
Practice all the skills, work on your volume and conditioning using heavy swings and practice your snatch and cleans with a focus on perfect form. Develop your pressing and squatting strength. Spend a lot of time working on the Get-Up—starting with lighter kettlebells and then increasing the load to your snatch test size kettlebell. Last but not least, work on your mobility and flexibility! You will not pass the RKC if you have neglected your movement skills!

The best way to ensure you are training and performing the exercises correctly is to attend an HKC Workshop as part of your prep—and/or work with a local RKC Instructor to keep you on track.

Attempting to use YouTube as your “teacher” will give limited to negative results. Anyone who has ever attempted to teach someone how to hinge and swing knows, this is a very difficult movement for many people and it is very easy to cheat—without even knowing it!

Below, I will outline a very simple program template. It is a general guideline that you will need to adjust for your individual needs. If you are working with an RKC, they will no doubt design a specific program with you in mind.

How much time should I give myself to prepare for an RKC?

Generally, if you have not been certified as an HKC, we recommend spending six months to a year preparing for the RKC. If you are HKC certified, allow for three to six months.

This may seem like a lot of time, but remember, in order to train safely and build up your overall conditioning you will need plenty of time to push hard and rest. At every RKC workshop, there are always people who have needed to postpone their attendance due to injury during their preparation training.

Spend 3-4 days each week on swing and technique practice. Alternate days of heavy two-hand swings with single arm work with a snatch size or one size lighter kettlebell. At first, keep the volume of your cleans and snatches low. As your technique and conditioning improve, increase your reps. The get-up can be used as a warm up, active rest, and as an exercise to practice with load.

Andrea Du Cane Kettlebell Get-up

Only attempt the full five minute Snatch Test after a full month of consistent training. After that first month, perform the full Snatch Test once a week at most.

At about 4-6 weeks out from your RKC Workshop, start peaking your intensity. Then at or within 2-3 weeks out, taper down to focus on general conditioning with lots of rest. You should also continue attempting your Snatch Test weekly and continue to practice your skills. For the final week before your RKC, you should focus on basic swings. It is important to rest and eat well during the last five days before your RKC Workshop. You will need all your energy and focus to make it through the weekend.

Hand care should be addressed from the VERY beginning of your training. Keep your calluses trimmed, filed and moisturized. Use as little chalk as possible, too much chalk can cause your calluses to tear. If necessary, use some thin hand protection—but only during your snatch and clean practice.

Each workout should begin with mobility and movement practice and should end with flexibility and stretching. The biggest weak link we see with RKC candidates is a lack of good hip and shoulder mobility. In fact those mobility weaknesses are the biggest reasons for failing the snatch, get up, press and squat!

Your rest days should be active. Continue to work on your mobility and flexibility as well as any other corrective drill or foam-rolling you need on your rest days.

Example Preparation Plan:

Day One:

  • 30 seconds work/rest intervals: heavy two-hand swings. Build up to 15 minutes total.
  • Get-up practice: 5–10 minutes of alternating get-ups.
  • 3 sets of 8-10 goblet squats or single kettlebell rack squats with your Snatch Test size kettlebell.
  • Kettlebell carries: 30 seconds for two sets each arm (single kettlebell), then double kettlebell carries for 2 sets of 30 seconds.

Day Two:

  • Press ladders (start with a kettlebell you can press at least 5 times). If the 1-2-3-4 ladder pattern is easy, then you chose a kettlebell that was too light. Stop if you can’t make each rung with good technique. If you can add a fifth rung to the press ladder, go ahead.
  • 3 sets of 5 double kettlebell front squats. Pick a pair of kettlebells which are challenging, but still allow you to complete the sets with proper form.
  • 10 L/R for 10 sets single-arm swings with a kettlebell snatch size or one lighter. Rest as needed between sets.

Day Three:

  • 5 sets of 15-20 double kettlebell swings with heavy kettlebells (rest as needed between sets).
  • Practice snatches for 5 reps L/R for 5 or more sets. Use a lighter kettlebell or fewer reps or sets if your technique slips or if you are banging your forearms.
  • Practice cleans for 5 reps L/R for 5 sets. Focus on good technique. Use a lighter kettlebell, or fewer reps or sets if your technique slips or if you are banging your forearms.
  • Hardstyle push-ups 5-10 reps for 2-3 sets (monitor your technique, drop reps or sets or drop down to your knees if your technique slips)

Day Four: Snatch test practice

Option 1: If you are already comfortable using your snatch size kettlebell, try performing as many reps within 5 minutes as possible. Keep count, and try to get closer to reaching 100 reps each week.

If you are not yet comfortable using your snatch size kettlebell, choose one that is one or two sizes lighter and try the Snatch Test with it. Once you’ve reach 100 reps within 5 minutes, move up to the next size kettlebell.

Option 2: Snatch for 50-60 reps in 10 minutes (rest as needed) with a heavier than snatch size kettlebell.

Option 3: Try 2, 3 or 4 minute snatch tests with 40, 60, 80 reps with your snatch size kettlebell if the 100 snatches in 5 minutes is too hard. Slowly work up to the full 100 reps in 5 minutes.

Practice get-ups with a light kettlebell, breaking the movement into sections, and repeating the transitions. Spend extra time in the kneeling windmill position and during the transitions up and down.

Finish with bent-over rows, 6-8 reps for 3 sets with a light kettlebell focusing on keeping the shoulder away from the ear and the lat engaged during the movement. Or practice the variety exercises in the next sentence.

Practice the following variety exercises either on a separate day or at the end of days 1, 2, 4: single-leg deadlift, HardStyle push-ups, kettlebell carries, lunges, bent-over rows etc.


***

Andrea Du Cane is a Master RKC Kettlebell Instructor, CK-FMS, CICS, and RIST, ZHealth certified, she has a BA in Psychology from the University of Minnesota and is also a Pilates instructor. She is the author of several books and dvds including The Ageless Body, The Kettlebell Boomer, and The Kettlebell Goddess Workout.  She has over twenty years of aerobics, weight training and fitness experience, with an additional background in… Read more here.

Filed Under: Kettlebell Training, Workout of the Week Tagged With: Andrea Du Cane, rkc test, RKC Testing, RKC Workshop Prep. RKC Workshop Preparation, Snatch Test

How to Dominate the RKC Snatch Test

April 20, 2016 By Frank Delventhal 7 Comments

Frank Delventhal Snatch Test

For many, the Snatch Test is a fearsome obstacle to RKC certification. But it does not have to be that way. When you start training frequently enough and have acquired good technique, you will be able to beat the challenge. It’s like learning vocabulary in school—you know what is expected of you, so it becomes more a question of diligence than talent.

What is the RKC Snatch Test?

You must snatch your kettlebell 100 times in 5 minutes. The weight of the kettlebell depends on your bodyweight, age and gender. The average gentleman will use a 24kg and the average lady usually uses a 16kg kettlebell (be sure to check the rules link below to find your exact weight class)

You are allowed to switch hands as often as you like, and can even (carefully) rest the kettlebell on the floor. Click here for the exact rules and kettlebell weight requirements.

What are the Prerequisites for the Snatch Test?

Before you attempt to snatch a kettlebell, you need a solid foundation in the two-hand Hardstyle swing, the one-arm swing, and the clean. These are the preliminary steps of the snatch. “OK” is not good enough—you must be good at these before you begin training for the Snatch Test.

As a general rule you should be able to do 100 one-arm swings within 5 minutes, with a kettlebell at or close to the weight of the kettlebell required for your test. For example, If you have to use a 24kg kettlebell for your test, you should be able to do 100 swings with a 20kg before you begin to specifically train for the snatch.

What Equipment Do I Need?

  • Assorted kettlebells ranging from very light up to your goal-sized kettlebell. (Hopefully your gym is well stocked and also has an RKC-Certified Instructor!)
  • Chalk
  • Optional hand protection: socks, tape, Dragon Skins™, minimalist gloves (cotton gardening gloves)
  • Optional sweat bands for the wrists
  • Your soundtrack
  • Hand care items for after training
  • You may not use belts, thick or padded-gloves, wrist wraps or any other equipment designed to support your body

Chalk

When doing 100 snatches, your hands will need to withstand a lot of friction. A little chalk can help, and will also dry your skin. If you have sweaty hands during the test, you can end up with “burger meat” for hands without chalk. But, too much chalk is also not good, so be sure to discover the right amount that just keeps your hands dry enough. I found that I do very well with just a couple of drops of liquid chalk or by rubbing a piece of chalk. Since chalk generally dries up your skin, it can cause excessive calluses—see the hand care section below.

Socks, Tape, Dragon Skins™, Minimalist Gloves

You are allowed to use sock strips, tape, DragonSkins™, or minimalist gloves (cotton gardening gloves) to protect your hands. If you really need them, that’s ok, but honestly I do better without them. I think you trade an important tactile connection for a little extra protection. But, I also have relatively tough hands that are conditioned to take a beating!

You may not even need these protective items if you train with the following method: begin with a very light weight and slowly progress to heavier weights (which also create more friction) so that your hands have plenty of time to adapt.

Thin Sweatbands or Long Sleeves

I sweat a lot during the test, so I need to wear sweatbands on my wrists—when I don’t have them sweat floods down my arms onto my hands, turning them to “burger meat” by the end of the test. Remember that wraps to protect or support the wrist are not allowed, so make sure that you only use thin sweatbands. Be sure to ask your instructor or judge at the RKC if your sweat bands are ok.

Alternately, you may want to wear a long sleeve compression shirt. The instructor must be able to see if your elbow is really locked out, so make sure that your compression shirt is extremely light and thin. It’s also common sense to use a dry shirt, not one already quenched in your own sweat!

Your Personal “Snatch Test Soundtrack”

The right music can give you extra power. My favorite track has plenty of power, but is not too fast. It’s 5:12 long, so I figured out exactly when to start during the song’s intro.

Listen to that song every time you practice the test. That has nothing to do with enjoying the music, it’s more about training your subconscious to feel the passing time. The song will also help you focus, giving you additional power. Each time you hear the song or imagine it in your head, you’ll KNOW that you will pass the snatch test. If you’re interested in learning more about the mental side of training, check out Logan Christopher’s Mental Muscle. Even though your snatch test at the RKC will be without music, all you need to do is hum the first notes of your song, and you are ready to rock and roll.

Hand Care After Training

The snatch test is also challenging for your hands. Be sure to start your training soon enough before the RKC workshop so that your hands have plenty of time to adapt.

After every workout, check to see if your calluses are hardening. These hardened areas must be removed carefully with a callus remover. Please make sure that you only remove the hard spots. The callus itself is important because it protects your hands from friction and pressure. If you used chalk (especially liquid chalk) you may also want to use a drop of lotion to soften up your hands.

Frank Delventhal Swings

Why should I train specifically for the Snatch Test? Isn’t it enough to prepare with plenty of swings?

This is a question of faith, and it is possible to gain enough power with swings to pass the test. In an objective comparison of the swing and snatch, you will discover that the swing is safer than the snatch. Using the swing to train is generally justified. Additionally, some argue that the Snatch Test is so strenuous that you should not do it very often. Under certain circumstances, I agree with that argument, especially when the student starts with his snatch size kettlebell and tries to work up to the volume of the test. But the title of this post is “How to DOMINATE the Snatch Test”! So, I have a “secret” training plan for you. 😉

Train Success

Start with a kettlebell that you can snatch 100 times in 5 minutes. It doesn’t matter if the kettlebell is very light—even as light as 6kg! The key is to practice the test two to three times a week after your normal workout, and you must succeed each and every time.

Before you do the 100 snatches, take 3 to 5 minutes to actively relax your muscles and visualize completing the test. The more detail you can imagine in your mind, the better. Mentally, you have already finished the test, before you even touch the kettlebell.

It is essential that you succeed each and every time! The goal is to become so accustomed to doing 100 snatches that it nearly becomes boring.

Frank Delventhal InstructingSnatch as precisely as Swiss Clockwork
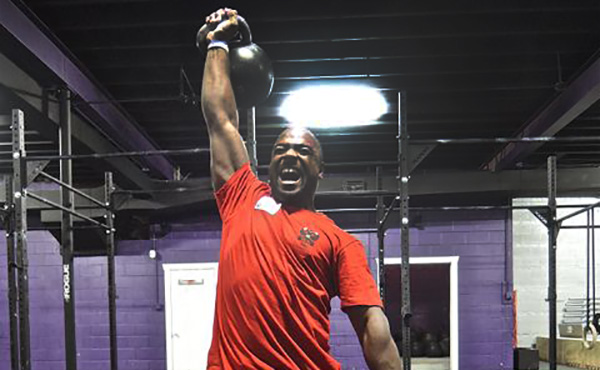
Watch your form. Every “no count” is discouraging, and many candidates have lost their focus during the test because of it. Take care that you practice strict form. Take a mini break at the top lockout position, when the kettlebell is held over your head. You will have a small rest, and the instructor watching will absolutely know that you are in control of the movement. Your arm should point straight at the ceiling. Your wrist must be straight, and your legs have to be locked out as well. You will look like a “hardcore version of the Statue of Liberty” holding a kettlebell instead of a torch. 😉

Pull your shoulder down to stabilize it. Normally I do not like mirrors while training, but they can be useful for checking your lockout position.

A Tip For the Overhead Lockout Position

If it is difficult to hold the correct overhead arm position, try the “downward dog” yoga pose. Let the tips of your thumbs touch each other, this will increase your mobility—and the ability hold your arms straight overhead. While a yogi will straighten their legs in “downward dog”, that isn’t necessary for our purposes. We want a straight line from the wrists on the floor towards the hips. It takes some practice to achieve that position (at least for most males, the ladies are generally better at this). If you can maintain that straight line, push your shoulders to the floor and over time, increase your range of motion. Improvement may take five minutes to several months, depending on your general mobility.

Changing Hands

Changing hands uses up precious time. It is an advantage if you can use fewer changes—but that also requires more conditioning. Fortunately with kettlebells, you can train cardio and power at the same time! Work up to more reps before switching hands slowly over time. It doesn’t make sense to do more than 20 snatches with one arm before you switch, as that would be unnecessarily fatiguing.

During the live test, your instructor will count for you. While you train, you should have enough concentration to count for yourself. When in doubt, just do ten extra reps.

Rep Schemes

Use your strong hand last as a “secret weapon”. This will make the end of the test will be much easier for you. For example, I am right handed, so I start with my left hand and finish the test with my right hand.

Scheme A: 9 Hand Changes

Let’s start simply. Do 10 snatches, then change hands until you reach 100 reps. If you can complete this scheme in under 4:30, then try Scheme B.

  • 10/10 (10 left / 10 right)
  • 10/10
  • 10/10
  • 10/10
  • 10/10

Scheme B: 7 Hand Changes

This scheme is slightly more challenging, but if you have completed Scheme A with enough spare time, the extra challenge will only be marginal.

  • 15/15
  • 15/15
  • 10/10
  • 10/10

Scheme C: 7 Hand Changes

This scheme allows you to complete 20 snatches with one arm safely. It is possible that you do not need this scheme, and can jump directly to Scheme D, but try it out at least once. As it gets progressively easier, many people like it.

  • 20/20
  • 15/15
  • 10/10
  • 5/5

Scheme D: 5 Hand Changes

The “master level”

  • 20/20
  • 20/20
  • 10/10

When you can easily complete the test with this scheme, and your time is always somewhere between 4:00-4:30 minutes, then you can progress to the next heavier kettlebell. You will probably be faster just because you need fewer hand changes. With the heavier kettlebell, start with the 10 x 10 (Scheme A). It will be more difficult, but you can do it. Progress the same way until you reach your goal weight kettlebell. Do not rush, just use a weight that allows you to succeed every time and the Snatch Test will become easy for you!

Create a Cardio Surplus

Even with your snatch size kettlebell, you should be able to complete scheme D. With extra gas in your tank, you can do the snatch test any time. If you have a bad day (or a cold), just drop to an easier scheme (such as C).

Does it make sense to use a kettlebell heaver than required by the test? No, and I would advise against using a much heavier kettlebell. “Enough is enough!” (Thank you Dan John.)

The RKC certification requirements include more than just the Snatch Test, so use your energy wisely. After you can do scheme D, only train the test once a week or every two weeks to maintain your skill and conditioning.

After your RKC certification workshop, you can work up to more if you want. Now you know how!

Good Luck!

You will greatly benefit from preparing for the test, whether you want to pass it as a personal goal or for your certification. Now that you know how to tackle it, it isn’t a “boss battle”.

Understand that just watching a video about snatching on YouTube does not mean that you can do a snatch! Get an RKC instructor to teach you the right technique. This is safer and saves time. The snatch is the last exercise of the RKC Big Six (swing, get-up, clean, military press, squat, snatch) because the other five build the essential foundation. Enjoy your journey.

“First use your brain, then train!” 😉

Frank Delventhal, RKC-II

***

Frank Delventhal, RKC2, PCC, 1 Dan Aikido. Visit his website: https://hamburg-kettlebell-club.de/

Filed Under: Kettlebell Training, Tutorial Tagged With: Frank Delventhal, kettlbell snatch test, Kettlebell, passing the RKC, RKC snatch test, RKC workshop prep, Snatch Test

The Journey Doesn’t End with the Title

March 30, 2016 By Shari Wagner 11 Comments

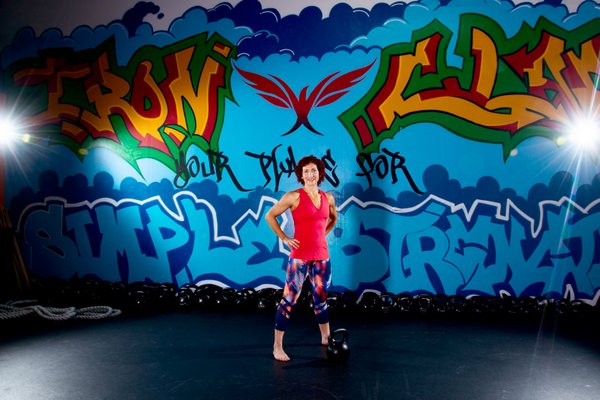
Shari Wagner RKC Team Leader
My RKC workshop was in April 2009, and I didn’t pass at the workshop due to a failed snatch test. I submitted a video one week later to earn my RKC title. I recently stumbled across that fateful video and of course, I watched it.

I watched it with a little bit of shock and awe at the poor technique I displayed. I also watched it with a lot of pride. Pride for the hard work I have put in to improve my technique since then and pride for all I have accomplished over the years.

When I first learned the snatch, it was in the days of first learning the high pull. This caused me to have a very significant corkscrew. I worked and worked at fixing this corkscrew before attending the RKC to no avail, and it was one of the biggest worries I had going in to the workshop. It wasn’t the typical worry of not completing the reps, my worry was all about the technique.

I did improve my technique at my RKC workshop, but I still had some of that darn corkscrew. At the time, while not ideal, it was still considered passable technique. I kept plugging away at the technique, but that corkscrew still remained.

I eventually sought out some additional instruction, which helped quite a bit. I also started watching videos of other instructors doing the snatch. I watched the timing very intently, along with the arm position and the path the kettlebell took. I noticed that when they snatched, you could see the bottom of the kettlebell as it flipped over and it looked so smooth and effortless. When I snatched with the corkscrew, my arm was turning out the side, therefore the bottom of the kettlebell was turning out to the side. It also looked anything but smooth and effortless. It certainly felt like a lot more effort too.

I took all of these visual and verbal cues and turned them inward, so I could feel it and visualize what it should look like. I snatched in front of the mirror because at the time I didn’t have a way to video myself. The short story is that it worked! I was finally able to snatch without a corkscrew. However…

I still had work to do to improve my technique. I was now keeping my arm a bit too straight and casting the kettlebell out a bit too much. More training and more work ahead, but I took it all in and worked hard because I was determined to get better. Being a type-A perfectionist and a Capricorn served me well in this case. Not only would this extra work help me get better, but it would help me help my students.

I later assisted at an RKC for the first time and it was the first time with the new RKC. When I tested my requirements for Keira Newton, she gave me a few additional tips that added to the improvements I had already made.

Then I witnessed how we now teach the snatch from the top down. I was amazed at its simplicity, yet it was extremely effective. It seemed so much easier to learn and to teach others this way. I even told the participants how lucky I thought they were to now be taught this way.

Each of these improvements I learned and made over the years has helped make the snatch feel more fluid yet more powerful. My big a-ha with the cumulative effects of each of these improvements is in how much it has helped the efficiency in my movements. I was expending so much additional energy in the way I was snatching before. Watching that video from 2009 now, I can see that so clearly. It honestly looks painful to me.

My moral of this story is that our journey of learning and improving doesn’t stop once we earn our RKC. The RKC helps give us our foundation and our starting point for teaching. But there is so much more to learn and so much more to do after we become an RKC. What makes us really good instructors is our quest to always do more, always be better and always serve our students.

Keeping our certification current is not about paying money to re-certify and keep the letters behind our name. We must improve our own skills, which in turn helps make us better instructors. We can only help our students improve when we help ourselves improve. We can also better help our students when we have access to the most current teaching standards, combined with all the tools we learned before.

If I had never learned the current way of teaching the snatch and if I had never corrected my own technique, I certainly could have still taught people. But I believe that I wouldn’t be serving my students to the best of my ability. That is, after all, the reason why we seek out those 3 letters in the first place, right? Never give up, never stop trying to improve and don’t let the journey end with the letters.

****

Shari Wagner, RKC-II, CK-FMS owns Iron Clad Fitness in Denver, Colorado. She can be contacted through her website at IronCladFit.com, email: info@ironcladfit.com or by phone 720-900-4766. Follow her on Facebook: facebook.com/IronCladFitness and Twitter: twitter.com/IronCladFitness.

Filed Under: Kettlebell Training, Motivation Tagged With: Kettlebell, kettlebell certification, kettlebells, RKC, RKC Workshop, Shari Wagner, Snatch Test, workshop experience

How to Nail the RKC Kettlebell Snatch Test Once and For All

February 17, 2016 By Dan John 11 Comments

Nailing the RKC Kettlebell Snatch Test

The RKC Kettlebell Snatch Test seems to bother many people. It’s 100 reps, and quickly indicates the issue:

Is it your lungs?
Is it your buns?
Is it your guns?

During the snatch test, the skin comes off your hands, sweat drips in your eyes, and your organs seem to rise up in rebellion. If you have been practicing the snatch test by practicing under ten reps, resting for a set period, then repeating, you can usually have pretty lousy technique without ripping skin off of your hands.

Sadly, for the people I have prepped, I learned that the proper way to help someone improve their kettlebell snatch is to wait until around rep 70 to comment. The challenge of doing 100 reps in a set period of five minutes demands that the candidate bite the bullet and learn to keep snatching properly throughout the challenge.

After the first Belfast RKC, one attendee wrote, “With one sentence, you changed the way I snatched and I nailed the test.” I asked what the sentence was and the newly minted RKC answered, “It was when you said that you need the courage to drop the kettlebell into the swing with authority each and every time.”

Remember, first and foremost:

The swing is a swing.
The clean is a swing.
The snatch is a swing.

The bulk of the issues most people have with the clean or snatch can be cured by coaching the swing portion of the moves. As if by magic, learning a proper swing for the clean or snatch stops most wrist banging and lockout issues.

But, for a proper swing, we must set up for it with a good drop from the snatch. Teaching the kettlebell snatch “from the top down” has advantages that are only apparent when the reps are high. Again, a few sets of five then resting will be a lot different than going after 100 snatches in 5 minutes.

Three terms that seem to help 99% of the population when working with the snatch from the top down are: “Pour the Pitcher,” “Swim” and “Unzip the Jacket.” Before getting into the specifics, let’s look at a key principle explained at a recent workshop, the position of the body in the “Cylinder.”

In the Olympic lifts—especially the locked out front squat position just before the jerk (or in training movements)—the lats are flared out, and the chest is tall in what most people would recognize as the traditional “Muscle Beach” pose. Although this posture is ideal for some movements, we want a slightly different position. The opposite of this posture is the “hollow rock” from gymnastics. While it is perfect for holding an Iron Cross on the rings, this position is not what we want for our RKC movements. Instead, consider a position “in the middle.” Now, I love continuums, so think of the Olympic lifting posture on one end, and the hollow rock on the other—the RKC cylinder would be in the middle.

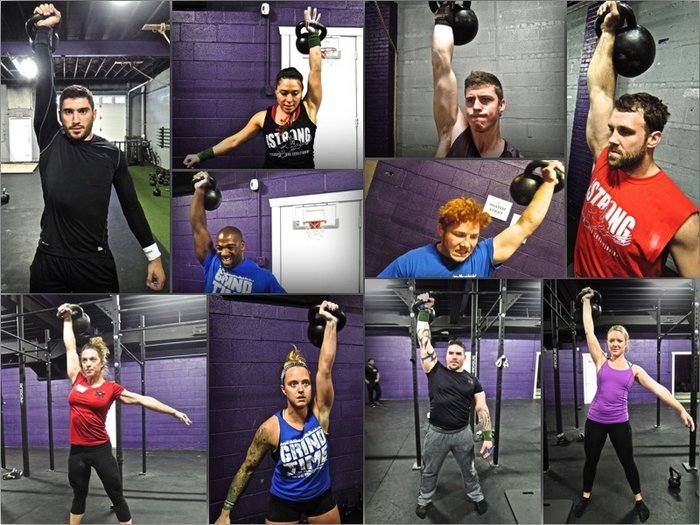
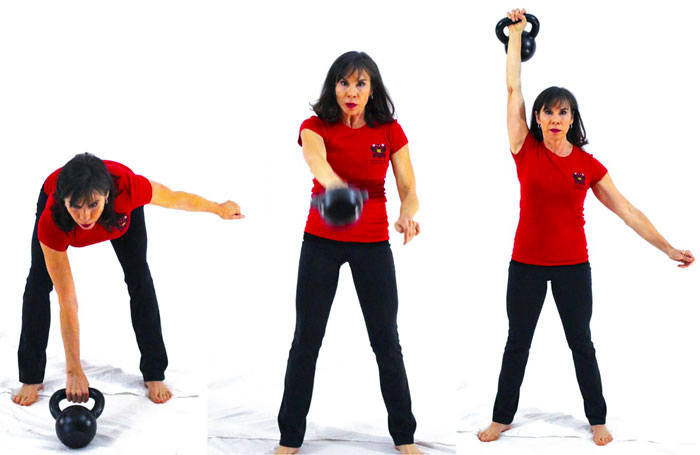
RKC Kettlebell Snatch Test Collage

This insight allowed me to finally connected the dots in regards to holding the hips in a neutral stance for training. If the pelvis is like a bowl filled with water, we want to stand (and stretch and move generally) without the water pouring out forward, backward or to either side. Utilizing this notion of a cylinder helps immensely with the hip position, too. It’s like the story of the Three Bears, one wants to stand “Just Right.”

While we are discussing posture, let’s add an additional insight about the packed shoulder. Sometimes, it is difficult to teach the packed arm to experienced athletes. Years of compensations can make some people convinced that their shoulders are packed, when in truth, their traps are on their ears! Fortunately there’s a very simple solution for this problem:

Years ago, Janis Donis, the famous Javelin thrower, told me that all throwing movements need to be done with an “open armpit” to protect the shoulder. This idea illuminated my discus throwing and kept me trouble-free with decades of pain-free shoulders. Literally, the entire armpit should be exposed for throwing movements. It shouldn’t twist or turn the shoulder down, a movement that often signals an “arm throw.”

As I worked with more and more guys who had played collision sports and trained like bodybuilders, teaching the packed shoulder became a more of a chore. Between the injuries and Frankenstein training, many athletes were not aware of where their shoulders were. Many were thinking, “Isn’t it right next to my head?”

Get ready for my million-dollar drill: Grab the tag on the back of your shirt collar. For most people, this will pack the shoulder “instantly”. Now, many people will need to slide down the spine a bit more to get the position, but this simple movement “instantly” packs the shoulder. Note how the bicep is on the ear? This is also probably the most-heard phrase during waiter walks, consider how “open” the arm pit has become with this simple move. Now, hold the shoulder in this position and simply straighten the arm. Now we have the packed shoulder and the open arm pit. Now that the body is in the cylinder, it is time to drop the kettlebell.

Let’s look at three terms or images that all lead to the same powerful swinging hip hinge. Let’s start with “Pour the Pitcher.” Now, if I drop the kettlebell straight down, my head is the first point of contact. Hitting the head multiple times with a heavy kettlebell is NOT optimal. Yes, please feel free to quote me on that. So, obviously, we need to push the bell forward. But, launching it straight out to the position of the top of the swing is not perfect either. With a heavy kettlebell, the athlete simply can’t counter this movement, and the athlete will either be pulled forward, or the kettlebell may even cause damage or injury—this is a lot of force in a bad position!

The first image I ever heard for the proper drop was “Pour the Pitcher.” With the thumb leading from the lockout position, simply turn the wrist and think of pouring milk on some cereal. (Just think of the cereal, don’t eat it. Cereal is for cows. Eat the cow instead.) Because of gravity, the kettlebell will start coming down in front. I encourage people to immediately get “the courage” to attack the hinge here.

“Swimming” is another cue that helps some people. Like the crawl stroke, imagine bringing the bell down the midline of the body as if you were doing laps in a pool. This image immediately made sense to me because the correct crawl stroke isn’t performed with a straight arm or a precisely prescribed angle, the elbow angle “depends” on many factors. The same is true for the kettlebell snatch. I also like this term because it illustrates that this is a dynamic movement, not just a simple free fall.

“Unzip the Jacket” is a phrase I heard at my RKC in San Jose. Simply, one should think of unzipping a jacket. Again, there is no National Zipping Policy, so there will be multiple ways to accomplish this task. As always, keep thinking about attacking the hinge.

Something I hear over and over from RKC candidates who FAIL the snatch test is the following kind of statement:

“Well, I did 30 reps the first time I tried the test, then built up to 54 with the 24kg kettlebell. I was hoping that the energy and enthusiasm of the group would get me those last 46 reps.”

I believe that you should come to the RKC already able to do 100 reps of the snatch. Now, that doesn’t mean every workout is done with the snatch-test weight kettlebell. Months before the RKC, I often recommend that the candidate use lighter kettlebells—as light as 12kg for men—and do several sets of 100 in training. I think it helps to “get used to” 100 reps.

Recently, I did a little challenge where I had to do 100 reps with the 24kg kettlebell. At 18 reps, I smiled. Later, I was asked, “Why did you smile?” Well, it’s because I use this system:

  • 20 reps with my left hand
  • 20 reps with my right.
  • 15 left
  • 15 right
  • 10 left
  • 10 right
  • 5 left
  • 5 right

This system gives a total of 100 reps with only seven hand switches. At 18 reps, I figure that I only have two more reps left with my weak hand and then I get to use my strong hand. In my mind, the first twenty reps get me over the hard part! The next eighty reps will be dessert.

But, if you don’t have the courage to actively drop the kettlebell for each and every rep, every rep will be hell.

****

Master RKC, Dan John is the author of numerous fitness titles including the best selling Never Let Go and Easy Strength.

Register for the Upcoming 2016 San Jose, California RKC taught by Master RKC Dan John with Senior RKC Chris Holder, and RKC Team Leader Chris White

Dan has spent his life with one foot in the world of lifting and throwing, and the other foot in academia. An All-American discus thrower, Dan has also competed at the highest levels of Olympic lifting, Highland Games and the Weight Pentathlon, an event in which he holds the American record.

Dan spends his work life blending weekly workshops and lectures with full-time writing, and is also an online religious studies instructor for Columbia College of Missouri. As a Fulbright Scholar, he toured the Middle East exploring the foundations of religious education systems. For more information visit: http://danjohn.net

Filed Under: Kettlebell Training, Tutorial Tagged With: Dan John, how to do the RKC snatch test, how to pass the snatch test, how to snatch a kettlebell, kettlebell snatches, Master RKC Dan John, RKC Prep, Snatch Test

Stop Fearing the 5 Minute Snatch Test

September 2, 2015 By Paul Britt, DC 15 Comments

Paul Britt Kettlebell Snatches

Nothing seems to scare potential RKC Instructors more than the 5 Minute Snatch Test (read complete testing requirements here), the gatekeeper of the system. In the long run, it’s only 5 minutes out of 23 hours of training—just 0.36% of the weekend. Sometimes I think the fear comes from a lack of confidence in their preparation, even though I have found that many people over-train for the snatch test. They snatch almost daily for tons of reps for long periods of time. In my opinion, a less is more approach works better. My last snatch test was my easiest one to date, and I only trained an average of 5 minutes a day for the test.

If you break down the kettlebell snatch, it’s a swing that ends up at the top position of the press. My plan was to work the swing and the press to train for the snatch test. It works if you look at the small space you must travel between the two exercises. The swing comes to chest height, and the press begins just a little bit higher. There’s only a small space missing when performing the snatch.

In my opinion, if you cannot handle heavy weight overhead, it’s not smart to ballistically propel the weight into position at the top of the snatch movement. So, my students work on heavy presses—snatch weight or heavier. Since this is RKC prep, this approach knocks out two birds at once.

When it comes to swings, I mix it up a little. I believe in having a great hip extension to launch the kettlebell and use the “float” as rest—with swings and as much as you can during the snatch test. That explosive hip extension also makes snatching easier as there is no pulling or fighting the bell on the way up. You can generate the float and guide the bell into position. That power can be developed with heavy double swings to chest height. This is typically the longest training session because we like to get a little more rest between sets when working on power and explosiveness. We will typically perform 10 reps on the minute, every minute, for 10 minutes. This usually gives us about 45 seconds of rest each set. If I feel like I’m losing some of the pop or if form deteriorates, we will occasionally just perform a set of swings and wait one minute.

On some days, we will see how many swings we can do in a 5 minute set of one-arm swings. A starting goal is to hit 100 swings. After a student can do 100 in five minutes, they will work up to as many as possible in that time frame. We have had a couple of students perform 160 swings in 5 minutes. On other training days, the students will grab a medium weight kettlebell for two-hand swings—somewhere between their one hand and two-and swing weights—and perform 100 two-hand swings in a 5 minute set. This helps bridge the gap between endurance and power.

We do the snatch test about every two weeks. And it is the only training for that day, they don’t get to work anything else other than recovery and mobility.

Typically the first time they hit 100 snatches, they knock it out in less than 4 minutes. They are typically spent and take a while to recover, but once they know that they can do it, we work on strategy and timing. If you finish the test in 3:30 minutes or 4:59 minutes, you still pass. I like to take my time and have something left at the end. We typically train for 10 left and 10 right on the minute for the test, but find that some students like the 20, 15, 10 and 5 rep scheme to pass. Once you can pass the test, the rep strategy comes down to personal preference and finding what works best for you.

The following training template focuses on the swing and snatch, I did not include the rest of the skills, but they can fit into the training plan if they’re thought of as a skill to practice. Use appropriate weights and make sure that the technique is good. There is no need to really push it for an extended length of time. Remember that this is only a small part of your RKC Workshop weekend. Do not dread it so much that you miss the awesomeness of the entire experience.

Monday

  • 5 Minutes of 2 hand swings
  • 5 x 5 pressing

Tuesday

  • 10×10 heavy double kettlebell swings
  • 5 x 5 double kettlebell squats

Thursday

  • 5 minutes of snatch weight one-arm kettlebell swings
  • 3 x 5 presses each side

Friday

  • Light to medium one-arm swings for 10×10 (30 seconds on / 30 seconds off works well)
  • 5 Get-ups left and right

Saturday

  • Snatch test

***
RKC Team Leader Paul Britt has been an RKC kettlebell instructor since 2006. He trains clients at Britt’s Training Systems, his award-winning Hardstyle Kettlebell Training Facility in Rockwall, Texas. Paul has served as an assistant instructor at many RKC and HKC Courses, is a Certified Kettlebell Functional Movement Specialist (CK-FMS) and works with some of the top Chiroprators in North Texas. Please visit his website brittstrainingsystems.com for more information.

Filed Under: Kettlebell Training, Tutorial Tagged With: how to pass the RKC, kettlebell snatches, passing the RKC, Paul Britt, RKC Prep, RKC snatch test, Snatch Test, training template, tutorial

Primary Sidebar

Featured Products

previous arrow
BOOK-RKCBookofSnC
HardStyleKettlebellChallegeDanJohn700
BookCoverMasterTheKettlebell1
RKCiconKettlebell512
KettlebellGoddessdv040
next arrow

Recent Posts

  • RKC Big Six Workout
  • The Kettlebell Swing & Low Back Pain
  • Key Kettlebell Exercises To Help You Create Better Balance
  • How to Most Effectively Use Kettlebells to Meet Your New Year Goals
  • 1 Exercise That Checks All The Boxes
FOLLOW US ON TWITTER!

Archives

Copyright © 2025

Dragon Door Publications / The author(s) and publisher of this material are not responsible in any manner whatsoever for any injury that may occur through following the instructions or opinions contained in this material. The activities, physical and otherwise, described herein for informational purposes only, may be too strenuous or dangerous for some people, and the reader(s) should consult a physician before engaging in them.