• Skip to main content
  • Skip to primary sidebar
  • Home
  • Contributors
    • Matt Beecroft, Master RKC
    • Martijn Bos, Master RKC
    • Andrea Du Cane, Master RKC
    • Angelo Gala, Master RKC
    • Chris Holder, Master RKC
    • Steve Holiner, Master RKC
    • Dan John, Master RKC
    • Mike Krivka, Master RKC
    • Thomas Phillips, Master RKC
    • Robert Rimoczi, Master RKC
    • Phil Ross, Master RKC
    • Max Shank, Master RKC
  • Workshops
    • HKC Workshops
    • RKC Workshops
    • RKC-II Workshops
  • Find an RKC Instructor
  • Resources
    • Articles
    • Forums
    • Kettlebells
    • Products
  • Blogs
    • PCC Blog
    • Strong Medicine Blog
  • Archives

RKC School of Strength

Official blog of the RKC

phil

Dirty Dozen #9 The Get-up

April 2, 2014 By Phil Ross 1 Comment

Phil Ross Get UpThe next movement in our Dirty Dozen Line-up is #9, The Get Up. The Get Up is often referred to as the Turkish (TGU) or Low Sweep Get Up. Just the mention of the movement conjures up fear, apprehension and utter abhorrence in most people. I had the same attitude until I began to absolutely love this movement!

I recall when I first started training with Kettlebells, I only did the TGU’s (as we referred to them) enough to pass my tests and move on. After the 6 months or so upon passing my RKC 1, I started to notice that through my practice, my TGU’s were getting better. I also noticed that my shoulder was more stable and the weights of my other lifts were increasing! Much to the chagrin of my students, I started to completely embrace the Get Up.

I soon realized that I wasn’t just doing them to pass my next test, but to get the most that I could from the movement. I started to add different types of Get Ups to my training regiment. Bridge, Squat, Bottoms-up, No Hand and Dual Bell Get Ups to name a few.

Phil Ross Get Up
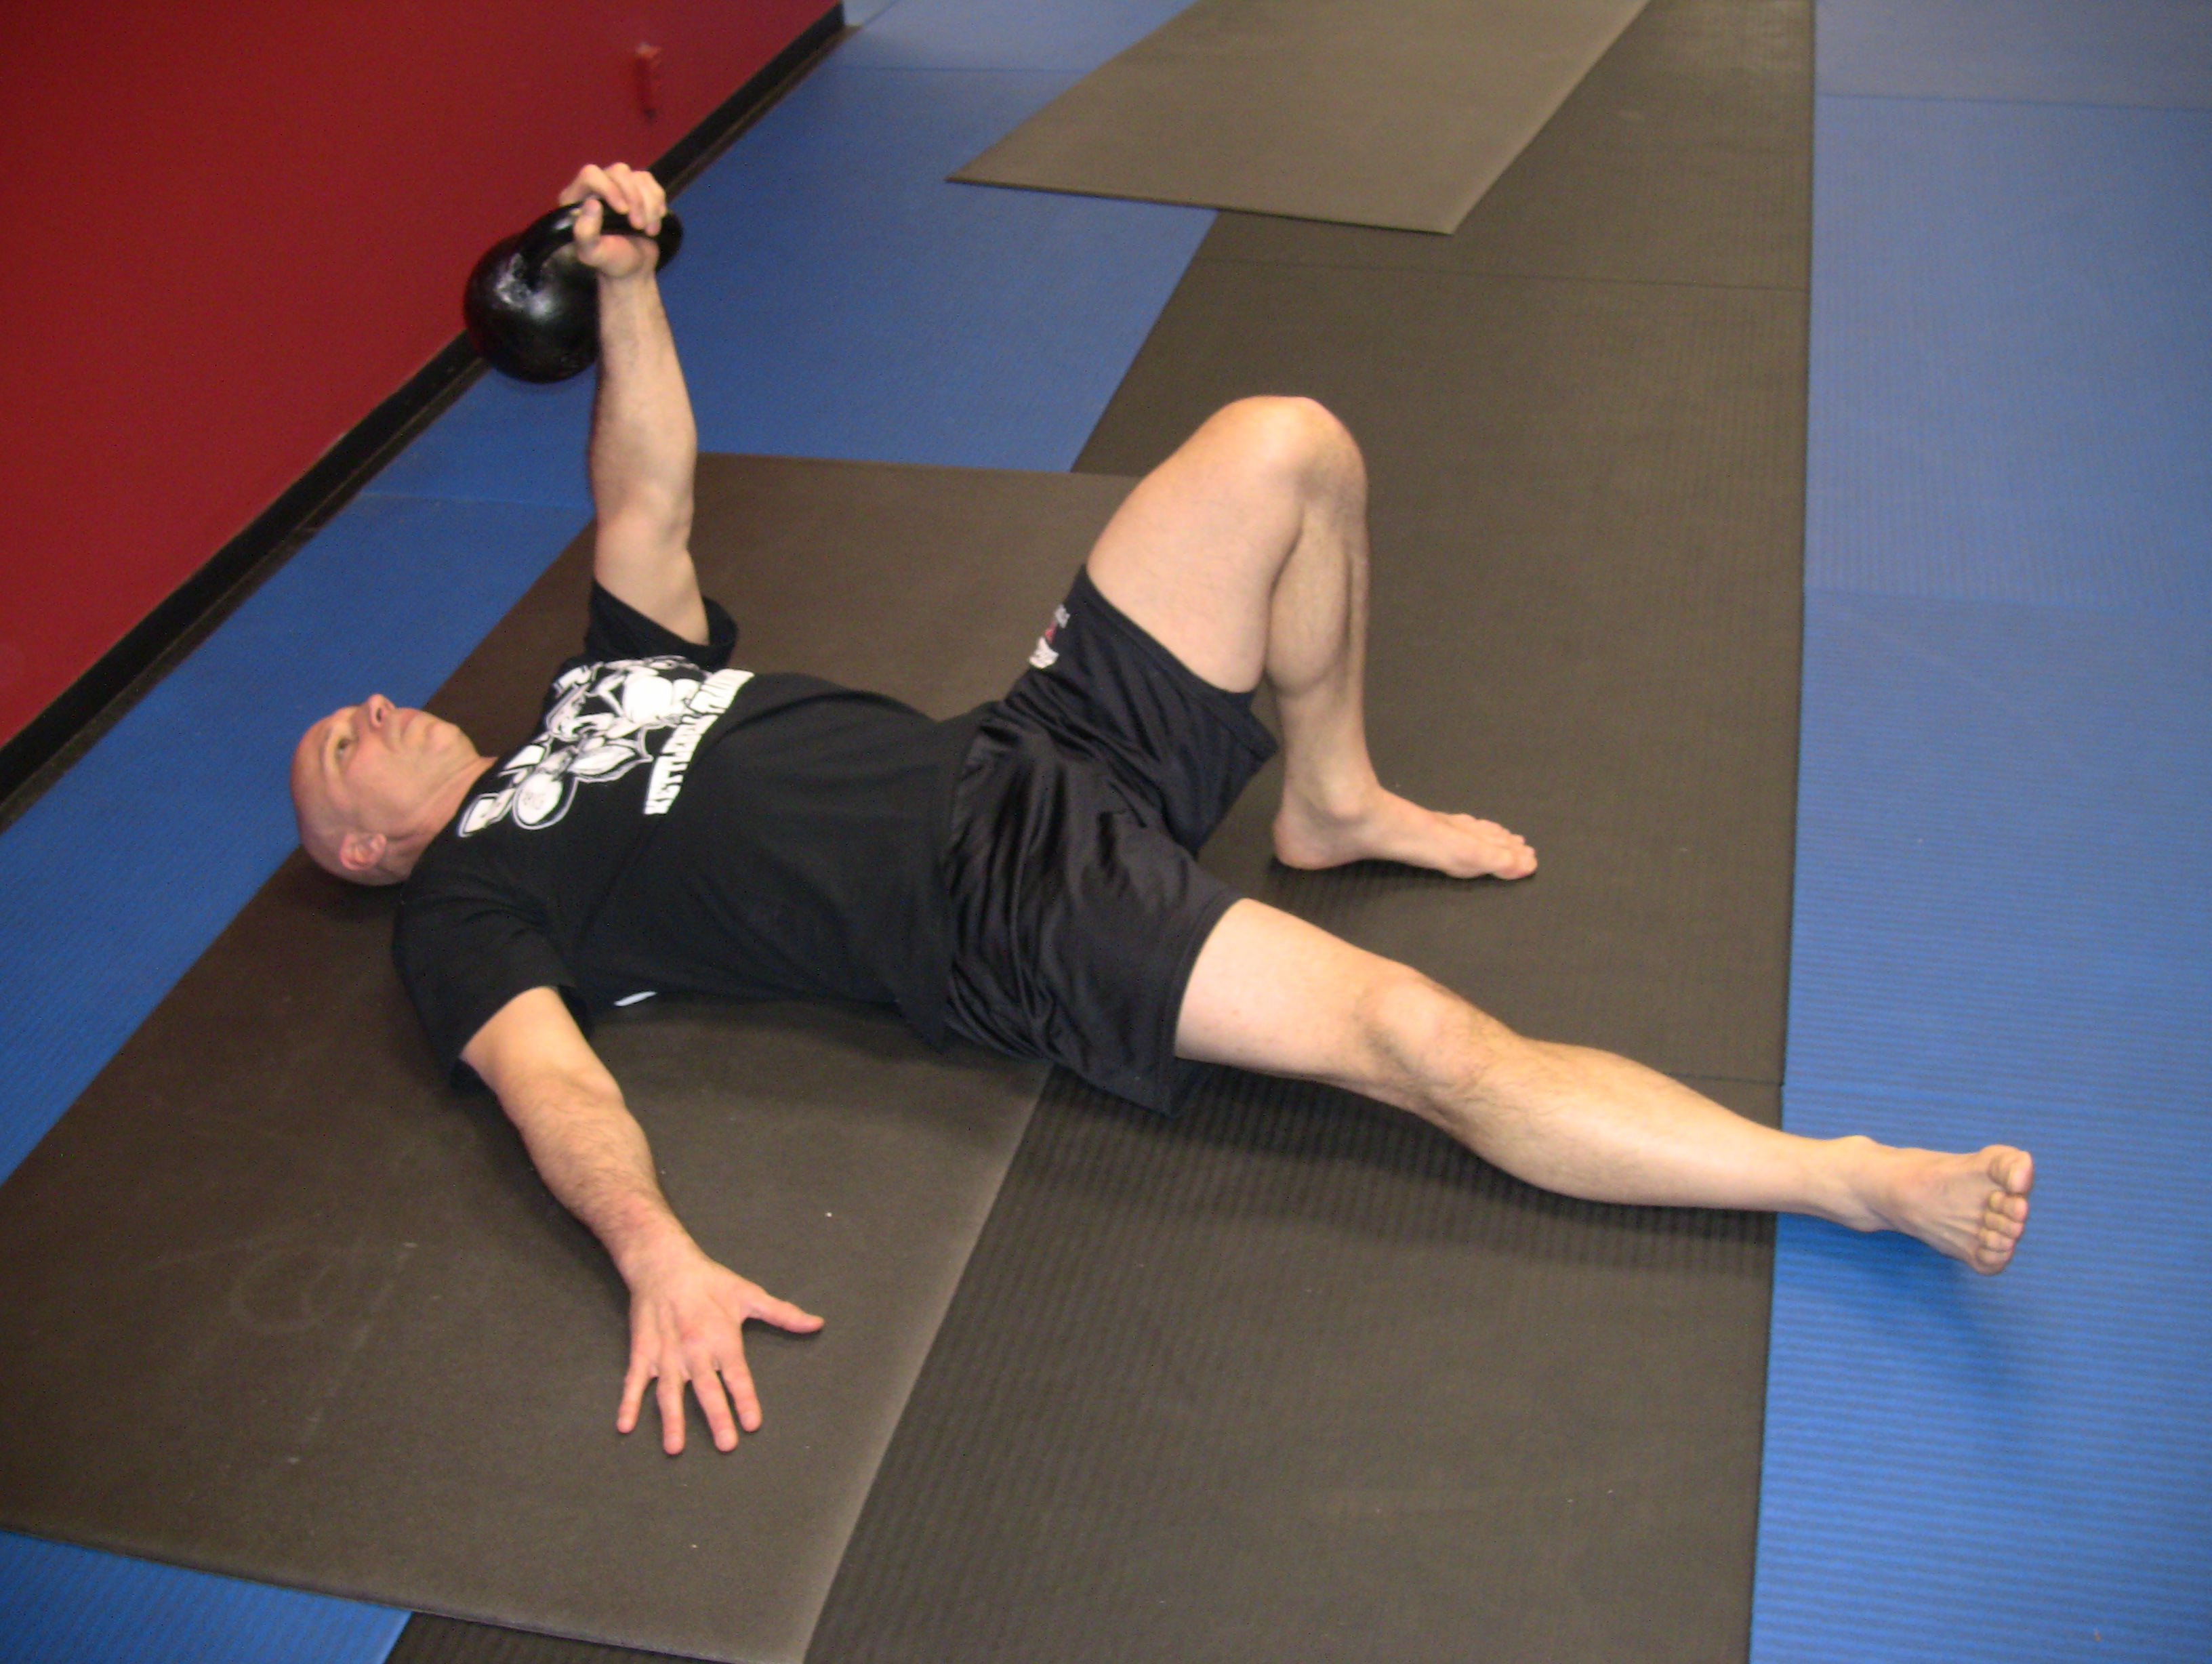
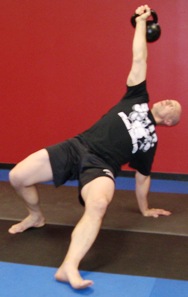
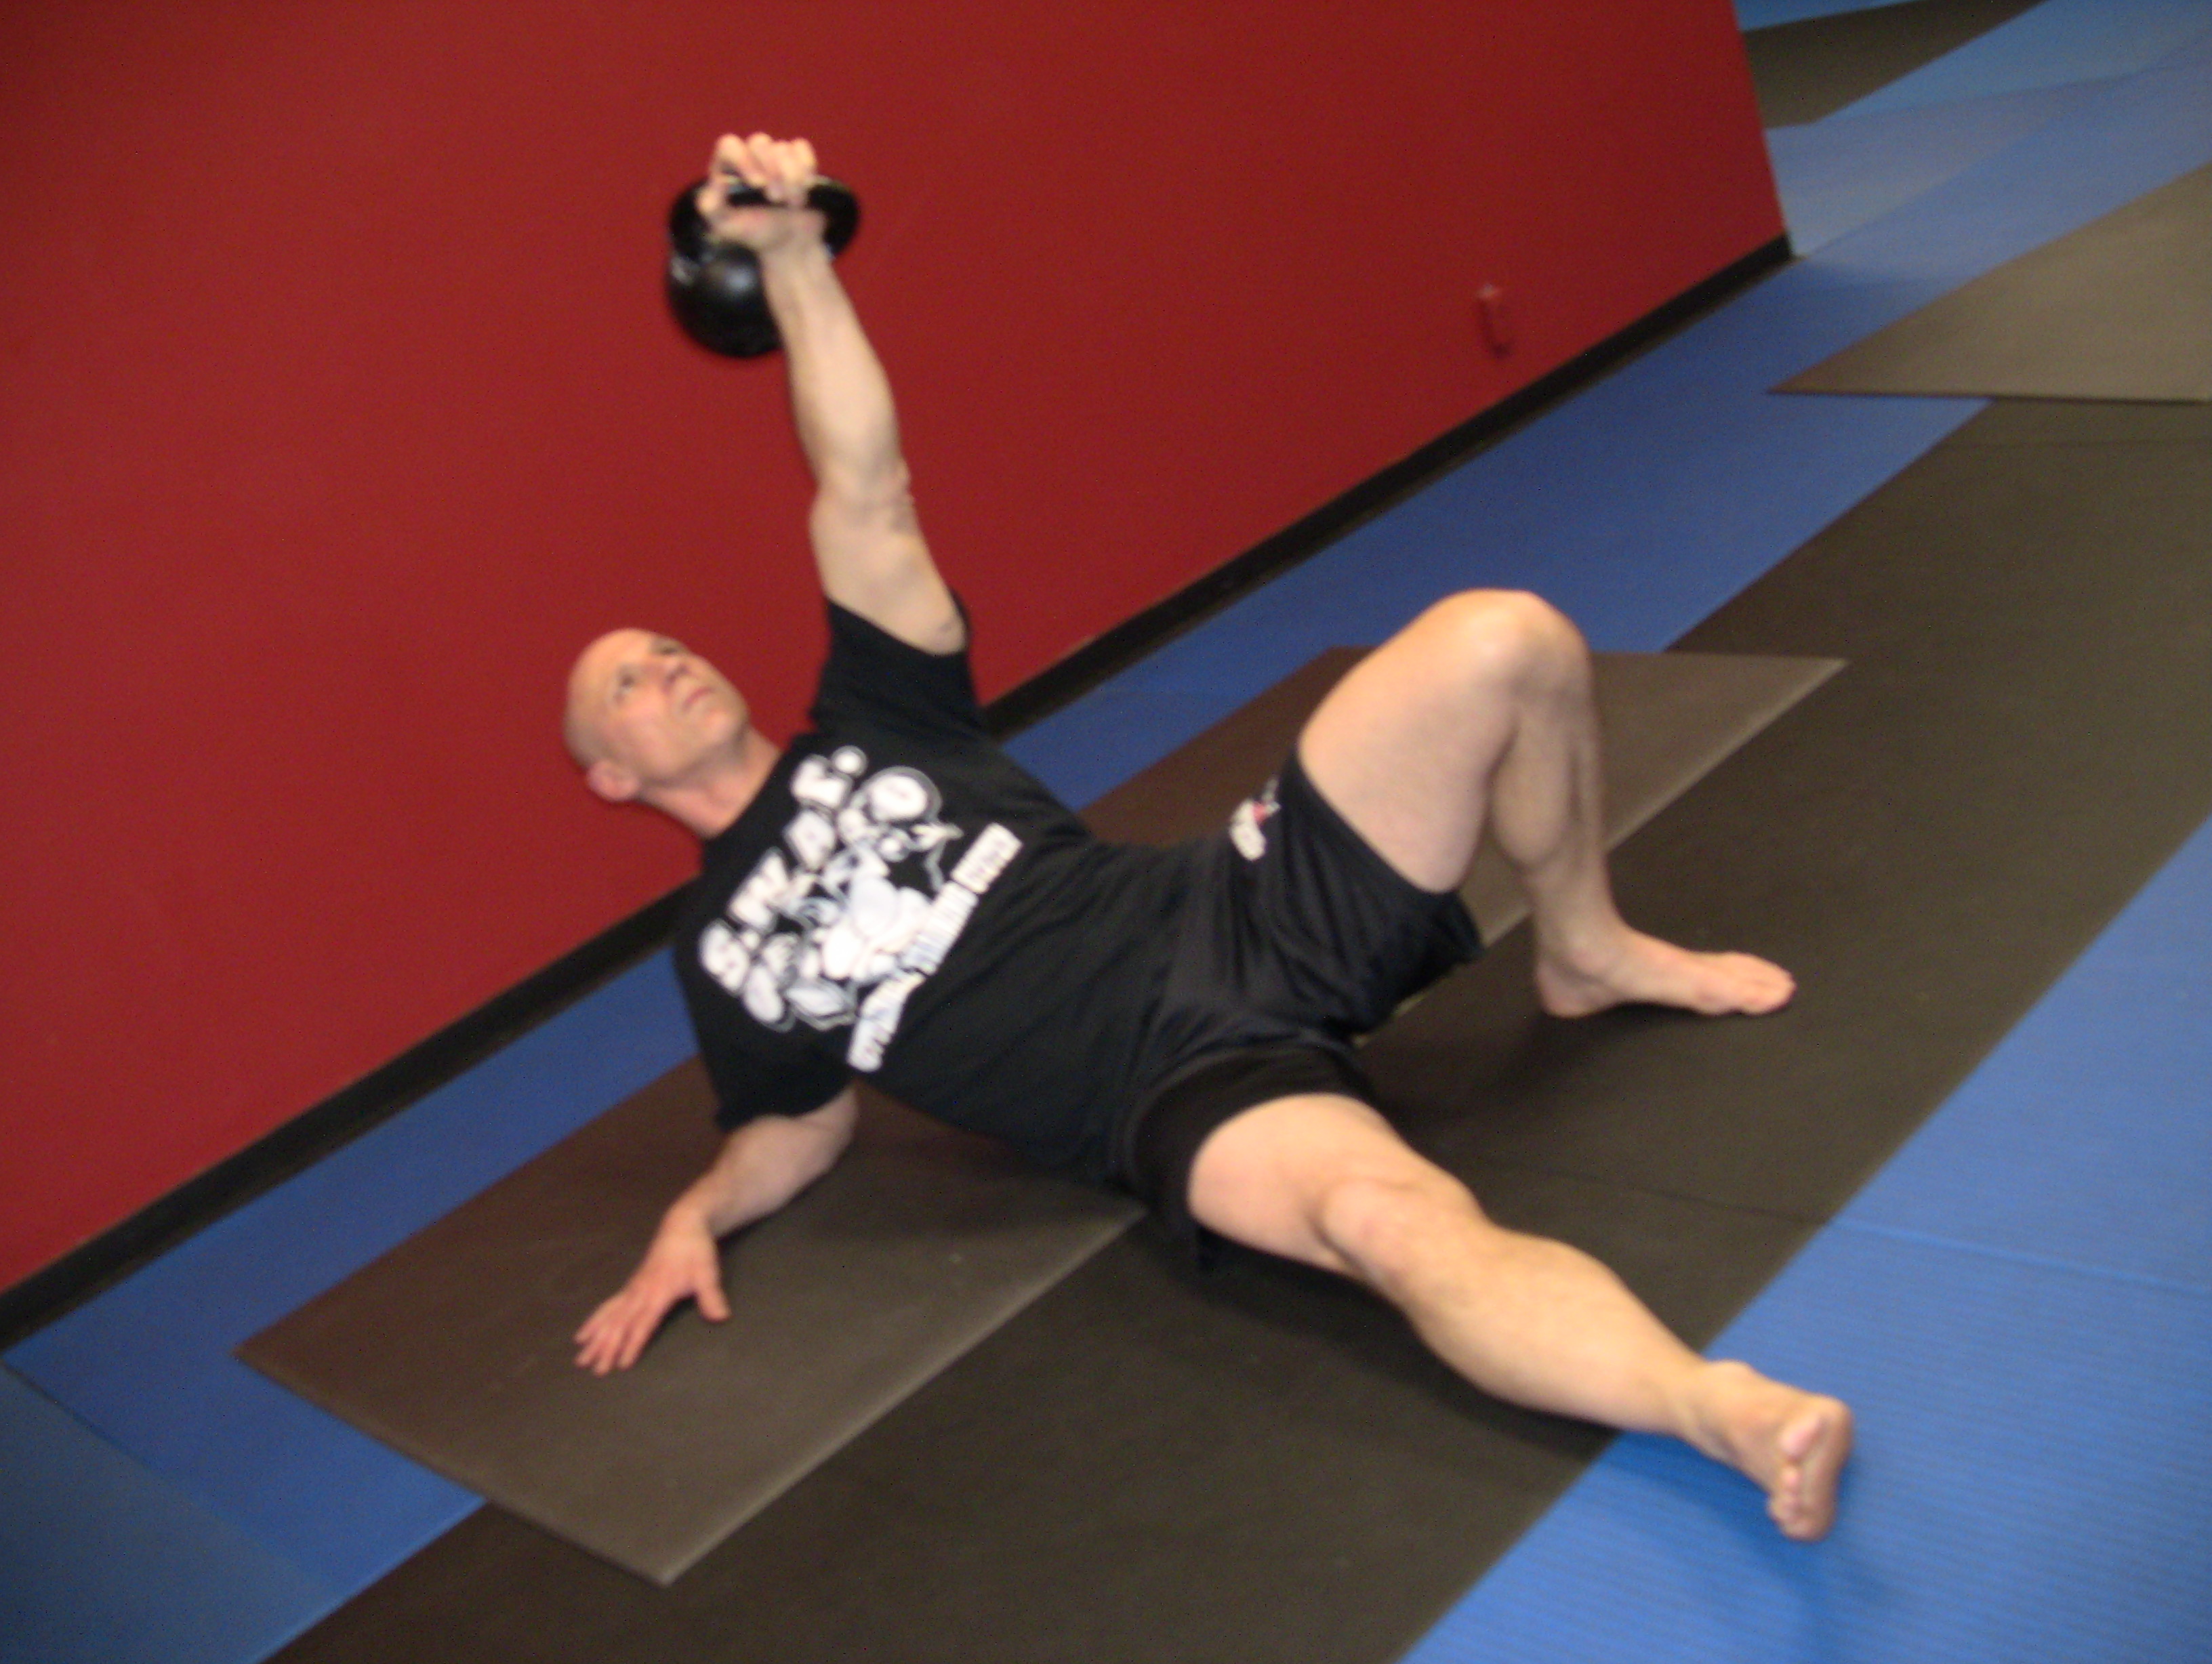
I then began to incorporate Heavy Get Up training and worked on methods to imprint the movement into the muscle memory. Owning each segment of the movement became my focus. The Roll to Press, Sit-up to Elbow, Tall Sit, Side Press, Tall Kneel and the Standing Press. Each section of the Get Up needed to be owned. To imprint this I employed three basic approaches. The first was practicing a 5 second hold at each of the 6 specific positions of the Get Up.The second was to perform 5 repetitions at each position and the third was the 5 3 2 1 Method.

Training Method #1:
At each of the positions, hold the Kettlebell in the lock out for a 5 second count. Feel the position of your body and embrace the tension. Don’t simply do it to get it done and over with, though the temptation will be present. Focus on increasing your stability in each of the 6 positions on the way up as well as the way down.

Training Method #2:
This method always evokes moans and groans from my class. Well, that simply makes me grin and tell them how many sets to do. Execute 5 presses at each of the 6 positions. Change position with the Kettlebell in the full lock out, no resting in the Rack. Go up one side of your body, change hands at the top and do your Get Down on the opposite side with the same 5 press repetitions at each position. Repeat on the other side, but perform the ascent with the side that descended last time.

IMG_1885

Training Method #3:
I call this one the 5 3 2 1 Method. I use this for increasing my 1, 2 & 3 RM (Repetition Maximums). I will generally perform 3 to 5 sets of the aforementioned repetitions. Beginning with a lower weight and increasing to a higher one. Be very cautious when performing the doubles and singles, especially if you are in “uncharted waters” (a weight that you’ve never done previously). I noticed the most improvement when I employed this method last in the progression. It is essential to have complete stabilization and OWN each and every of the 6 positions to safely increase the weight of your Get Ups.

Well it’s now time to grab your Kettlebell and GET UP!


Strength & Honor

Coach Phil

***

About Master RKC Phil Ross: Master RKC, 8th Degree Black Belt, Specialist in Bodyweight Strength, PCC and CK-FMS Certified. His name is synonymous with Martial Arts and Fitness. He is known as the area’s Kettlebell King and has successfully competed on the National Level in…  Read more here.


Filed Under: Uncategorized Tagged With: coach, dirty, dozen, dragon door, get up, Kettlebell, kettlebells, master rkc, phil, phil ross

My Best Friend …

June 11, 2013 By Phil Ross Leave a Comment

jumprope

Are you a fitness enthusiast that takes their running shoes on trips, only to feel uncomfortable road running in unfamiliar areas? Are you tired of endlessly waiting for cardio equipment to free up at your gym, only to feel like a hamster running on a wheel? Do you love to run outdoors, yet shy away from putting on five layers of under-armor and sweats on in order to brave the sub arctic temperatures?

Well, let me introduce you to my “Best Friend,” the jump rope. You can take it anywhere, you do not need much space, it does not matter what the weather is like outside, you do not need expensive equipment ($2.00 to $20.00 for a rope, my favorite costs $8.00) and you can vary the routines and movements to keep it interesting. My Grandfather was a boxing trainer in Paterson, NJ back in the 30’s, 40’s and into the 50’s. He instructed me on how to jump rope as a teenager as a means to improve my foot speed and endurance for wrestling and football. I then began to realize the incredible benefits of jumping rope.

If you jump rope at a good pace for 5 minutes, it’s equivalent to running a mile! The coordination of your hands and feet moving in rhythm with each other is essential for a fighter. All of my martial arts classes begin with 3 to 5 minutes of jumping rope. In addition to the coordination development, jumping rope is an incredible means to warm up the body.

Even if you are a beginner and you miss on your jump, keep moving your feet. To learn how to jump, here are a couple of tips:

1) Play some music that you like with a good beat. You should put together a playlist for at least the same amount of time that you want to jump for. Use your favorite, upbeat songs & make a mix. Or, for those with obsessive, manic personalities, repeat the same song as an extended version. This also helps you jump rope longer. You basically fool your self into NOT thinking that you are jumping that long.

2) To initially get your timing, watch as the rope hits the ground. That’s when you time your jump. It may take a few weeks to get your timing, but keep working, it will eventually happen.

3) If you are still having issues, try putting the rope in one hand and jump up and down while rotating your wrist. This will help you to find your timing.

4) Remember the less movement of your arms, the better. Your wrists are the primary focus of the rotation. Try also to keep them in the same spot, approximately chest level. This does not hold true when you are doing more advanced movements, like crossing the rope or double jumps.

5) You do not have to jump very high. You only need to jump high enough to allow the thin rope to pass under your feet. Get your rhythm and all else will fall into place.

If you’d like to workout the rest of your body, try performing push-ups and abdominal exercises in a rotation with jumping rope. You can start with 100 jumps, 20 push – ups and 30 abdominals. Start with 3 rotations and then increase to 5. You may also execute additional push – ups or abdominals. What a great way to start the day!

Victory Favors the Prepared!

– Phil

P.S. If you have any questions or comments, feel free to reach me at www.philross.com.

About Master RKC Phil Ross: Master RKC, 8th Degree Black Belt, Specialist in Bodyweight Strength, PCC and CK-FMS Certified. His name is synonymous with Martial Arts and Fitness. He is known as the area’s Kettlebell King and has successfully competed on the National Level in…  Read more here.


Filed Under: Uncategorized Tagged With: best, experts, fitness, friend, jump, jumprope, Marlboro, master, my, New Jersey, phil, RKC, rope, ross, says, When

The Dirty Dozen Exercises: Move #4, The Hanging Abdominals

May 24, 2013 By Phil Ross 1 Comment

Jack_Knife_Abs_Touch_Finish_Side_Close_up

There is nothing sought after more than a set of “washboard abs.” A set of ripped, hard looking, abdominal region inspires awe and envy in everyone that sets eyes upon them. A “Cut Gut” is a sure telltale sign the the bearer is in incredible physical condition and that they “don’t have an ounce of fat” on them. How do we achieve these legendary abdominals of steel and sinew? How do we develop 6-pack abs that can withstand having cinder-blocks piled on it and being hit with a sledgehammer? Can we develop our midsection so that we can absorb a full power knee drive from a Muay Thai Fighter or an uppercut from a Prize Boxer?

First of all, having a “ripped” abdominal section is not necessarily indicative of abdominal strength. It not simply the appearance, but how did they get those abs? By simply starving themselves or as the result of serious, pointed abdominal training? There are some fitness experts that recommend a thousand abdominal repetitions per day or some type of fitness apparatus that they are undoubtedly paid to endorse. These machines may or may not work and I don’t know how many of us have the time to perform a thousand or more crunches a day. So how do we achieve these legendary abdominals that can withstand having a 2 x 4 broken over them, but fit the workout into our overloaded lives?

2x4_Phil

If you are engaged in a consistent Kettlebell and Bodyweight training regiment, your abdominals and core are already receiving a great deal of work. However, if you want to take it to the next level and maximize the “best bang for the buck” for your abdominals,  then Hanging Abdominal training is a must. You will discover that I do detest long, drawn out training sessions. Who has the time? How long can ANY of us effectively train while maintaining intensity and proper form? Plus – if you are an athlete, you want to leave time to practice your sports skills, not spend the bulk of your day with your strength and conditioning. If you are not a competitive athlete, you probably have work, family or social matters that require your attention. Use your time wisely.

There are several methods of practicing the hanging abdominals. or a beginner, I will recommend that you use (or purchase) the Dip, Pull-up & Ab Machine. The are available new for about $300, used for $100 or less. It will be the most useful apparatus that you ever purchase. No moving parts whatsoever. In addition to the video demonstrating the higher level abs, check out this one on YouTube.  It will show the machine. For beginners, simply raise your knees up to chest (or as high as you are able) while keeping your lumbar region (low back) pressed firmly against the back board of the machine. When you able to accomplish 20 repetitions with bent knees, then move to straight legged version and bring your legs up so that your heels are level with your waist. For the next level of this exercise, you bring your feet up to or above head level. Please remember to maintain a flat back against the back pad. Packing your shoulders and assuming a tall chest position are a must.

Jack_Knife_Abs_Start2

Once you are able to to perform the suspended abdominals, you are ready for the Hanging Abdominal training. There are three basic movements that I recommend. The Hanging Knee Lift, Jackknife and the Side to Side Jackknife. The easiest are the Hanging Knee Lift. Grasp a pull-up bar with your elbows straight and your shoulders packed. Do not allow for body sway. Contract your abs and raise your knees up to chest level. Work up to at least 20 repetitions prior to advancing toward the Jackknife Abs. For the straight Jackknife abs, assume the same position as during the Knee Lifts. Straighten your legs, steady your body and contract your abs as you raise your legs so that your feet are above the bar. Repeat. For the Side to Side Jackknife, simply raise your feet to one corner of the pull-up bar and then the other. This contra-lateral movement is incredible. As far as repetitions are concerned, start with 3 to 5 and then work your way up to 10 per set. Do not permit yourself to swing. You will not maximize the effect of the movement and you may expose yourself to injury. Packed shoulders, locked elbows and a steady body.

As always, train hard, train often and TRAIN SMART!

Coach Phil

 ***

About Phil Ross, Master RKC, 8th Degree Black Belt, Specialist in Bodyweight Strength and CK-FMS Certified. Phil Ross’ name is synonymous with Martial Arts and Fitness. He is known as the area’s Kettlebell King and has successfully competed on the National Level in…  Read more here.

Filed Under: Uncategorized, Workout of the Week Tagged With: 4, abdominal, abdominals, dirty, dozen, four, hanging, move, phil, RKC, ross, the

Are You Making These Mistakes With This Key Kettlebell Drill?

May 1, 2013 By Phil Ross Leave a Comment

squat_1

Picture courtesy of Cathy Raimonda, HKC

The Kettlebell Front Squat is a key movement directly applicable to virtually every sport and to ALL sports requiring explosive power and strength positions. The squat is also essential to everyday life. Picking up our child, carrying suitcases, getting up out a chair – to name a few. Many people believe that they can’t squat. However after one short lesson they realize that they can. In most cases, if you can sit on a toilet you are able to squat. We utilize an active negative method of pulling the hips into the squat position. Barring any severe deficiencies or physical limitations, this method has remarkable results – usually the first time it is applied!

Why is the Kettlebell Front Squat such an essential movement? The strength gains from the Kettlebell Front Squat experienced in the legs, hips and especially the core are greater and with a significantly lighter load than required with the back squat. When considering Sports Performance and General Fitness, there is a breakpoint where the training required and the muscle size created actually hinders your performance. For example, if squatting 400 lbs. helps you reach a 10.4 second mark in the 100 meter dash, squatting 450 lbs may not necessarily bring your sprint down to 10.2; you may actually become slower!

Yes, your squat will increase, but your hamstrings and hips will become tighter thus slowing your movement. The aforementioned numbers are arbitrary. There are far too many variables in individuals and sports to effectively assign exact numbers. In order to provide accurate assessments, experimentation needs to be conducted on a case by case basis. However, I will add one caveat; if your goal to have an extremely heavy back squat and you are a powerlifter, you need to perform heavy sets of traditional, back squats. Even though the Kettlebell Front Squat (KFS) will help boost your back squat numbers, you still need to perform the actual movement that you are competing in.

The Kettlebell is placed in front of you, whether bottoms up, racked or bottoms down. Compression and core activation is required to stabilize your truck and and your spine. Compression, tension and an active negative are all employed as you inhale and pull yourself deep into your squat. The spine is kept long and strong with no “tail tuck” as you get to the bottom. A quick, short and forceful exhale shoots you upward to the fully locked position. The strength of your upper torso is also required/developed to hold the Kettlebell(s) in place as you perform your KFS. Proper power breathing and expansion of your intercostals and serratus, not to mention the development of your pectorals, forearms, biceps and triceps. The muscles that comprise latissimus dorsi are recruited to keep your back straight and strong to handle the load in front.

squat_2

As far as actual weight is concerned, you have to use considerably less weight with a KFS than for a back squat with better results and less chance of injury. On the back squat, the object is to break parallel with the greatest amount of weight possible on your back and then stand back up into the upright position. One’s back is compromised from having to bend forward to get lower and the hips are also overloaded due to the wide stance. This position does not aide you in developing the strength and proper neural pattern for strength development. On the other hand, the proper execution of the KFS lends itself to activating the Central Nervous System to develop incredible strength the legs as well as in the core/stabilizers. By keeping the spine long and strong, you develop a “Tower of Power” enabling you to move resistive loads and push with your whole body.

I could go on and on about the Kettlebell Front Squat, but I’m sure that you only have a limited time to read! You need to get in there and start practicing your KFS! Substantial gains in your leg strength, increased your cardiovascular capacity and explosive power development, while creating a healthy spine and a pair knees, are all benefits of the Kettlebell Front Squat.


Get Strong and Stay Strong!


Coach Phil Ross, Master RKC

***

About Phil Ross, Master RKC, 8th Degree Black Belt, Specialist in Bodyweight Strength and CK-FMS Certified: Phil Ross’ name is synonymous with Martial Arts and Fitness. He is known as the area’s Kettlebell King and has successfully competed on the National Level in…  Read more here.

Filed Under: Uncategorized Tagged With: drills, front, Kettlebell, key, master, mistakes, phil, RKC, ross, squat

The Dirty Dozen Exercises: Move #2, The Bridge

March 29, 2013 By Phil Ross 8 Comments

phil_ross

Master RKC Phil Ross explains the Bridge

The Bridge, what an incredible exercise! There is no single exercise for developing two steel cable like spinal erectors supporting and protecting your spine than the Bridge. Being a former wrestler, I had the fortune of being introduced to the Bridge at an early age and while training in Greco-Roman Wrestling, I was taught how to go belly to belly with another wrestler, pop my hips and bridge all the way backward, landing my opponent on his back (or head!) behind me. This required a great deal of practice bridging backward from a standing position. We would also “reverse bridge” from that position, coming up to fully upright and regain the standing position once again and repeat. Little did I realize at the time that I was equipping myself with an incredible foundation of strength that would help me with all of my other physical and athletic activities for the rest of my life. Other than gymnastics, very few high school sports develop the spinal erectors and utilize the bridge to the extent of wrestling and gymnastics.

The muscles in the back at the most important group of muscles in the body. The Bridge is exactly what the name connotes, the exercise “bridges” the upper and lower sections of your body together. Your back is also the support structure for your whole body. How many times have you seen (or experienced) throwing your back out and being completely helpless? One can have “biceps like mountain peaks”, they tweak their back and they are as helpless as a newborn lamb! The importance of the Bridge is second to none. Your central nervous system is housed in your spine and the spinal erectors and other support muscles protect and control the the spine and it’s movement. Why would anyone ignore the single exercise that develops the most important muscle group in the body? The Ancient Greeks knew the importance of a strong back. Look at the depictions of the god Atlas. His exceptionally prominent back muscles rippling under the stress of his eternal task of holding up the world!

How do we achieve this? Who does the Bridge work for?

There are many variations of the Bridge. You will find a variation or modification that may be used by virtually anyone at any age. Even people who have physical deficiencies will benefit from doing bridges. I have students that have suffered severe injuries or were born disabled and they have developed great strength in their backs and abdominals through employing bridging techniques. Not only does the Bridge develop the spinal erectors and other back support muscles but it has a profound positive effect on the abdominals, gluteus, hamstrings and in higher level movements, the shoulders and arms as well. The Tall Kneeling Bridge also develops great strength and flexibility in the quads.

The regenerative and restorative properties of the Bridge are unmatched by any other single exercise group. The Bridge develops stability, flexibility and durability like no other. Implement the Bridge into your workout regiment and develop a “Bullet Proof Back”!

***

Master RKC, 8th Degree Black Belt, Specialist in Bodyweight Strength and CK-FMS Certified. Phil Ross’ name is synonymous with Martial Arts and Fitness. He is known as the area’s Kettlebell King and has successfully competed on the National Level in…  Read more here.

Filed Under: Uncategorized, Workout of the Week Tagged With: ama, blackbelt, Bridge, dirty, dozen, Kettlebell, king, phil, ross, trainer

The Dirty Dozen: Move #1 – The Kettlebell Swing

February 13, 2013 By Phil Ross 18 Comments

The Kettlebell Swing: Often to referred to as the “Mother of All Kettlebell Exercises” and is the root of all Kettlebell Training.

The Kettlebell Swing is not only the basis but one of the biggest differentiators between Kettlebell Training and other strength and conditioning systems. The Kettlebell Swing “reverse engineers” the practitioner’s hips by the development of the hip hinge, hamstring and glute recruitment through the pop and lock required to execute the movement properly. In addition, the incredible rooting effect for power transference through the body is applicable to improved performance in virtually all sports and strength performance.

The Kettlebell Swing has so many benefits, yet many go untapped through poor execution. I’ve had people walk into my studio claiming “I love to swing, I do tons of them all of the time.”  Then I watch them swing – Ooof! I don’t know where the heck they learned to “swing”, but now I know why they thought that swings were easy! No eccentric/concentric motion, shoulder’s not packed, no rooting, legs bent at the top and to much at the bottom, chicken necking so much that I thought was I hanging with Frank Perdue, lats not engaged, power leaks all over!

Now that we’ve looked at the poor examples, how do we execute the swing? Step one, find a quality instructor or at least purchase some DVDs or get your hands on a video program from one of the top flight RKC Instructors. I will mention, no matter how good a video is, nothing replaces working under the scrutiny of a qualified Kettlebell Instructor.

Starting from the ground up, let’s consider our feet. First make certain that your feet are the correct width apart. If they are too close, you’ll never be able to swing the bell between your legs. If they are too far apart, you won’t be able to completely fire your gluteus, thus leaking power. Additionally, you will tax your hip flexors more which could result in injury. Rooting with the floor is key. Take advantage of the feedback from your feet with the floor. Establishing that that intimate contact with the floor creates a map of you body’s nervous system and helps facilitate feedback and feedforward of movement.

Draw your kneecaps up into your quadriceps as you lock out your knees. This should happen simultaneously to the driving of your coccyx to your naval and the contraction of your gluteus.

While all of this in occurring, you need to shorten your abdominals by “zipping up” and exhaling a short, hard purposeful breath.

Pack your shoulders and engage the lats as the power of the swing travels from the ground, through your feet, into your legs and through you hips and gluteus, up into your lats, passing through your arms and shoots out of the bottom of the Kettlebell.

When you are swinging, think of “hips and grips”. It’s also very important that you go between full relaxation and full tension. This is how to develop incredibly useful strength!

There are quite a few swing variations. There are the two hand swings, the one hand swing, hopping lateral swing, hand to hand swing, dual bell swing, dead start swing, walking swings and the much maligned bottoms up swing, to name a few. All of the same principles apply to all of the swing variations, however there are certain unique benefits to each variation. Check out the accompanying video demonstrating some of the variations of the swing.


Now its time to get off of the computer and start swinging!

—

Master RKC, 8th Degree Black Belt, Specialist in Bodyweight Strength and CK-FMS Certified. Phil Ross’ name is synonymous with Martial Arts and Fitness. He is known as the area’s Kettlebell King and has successfully competed on the National Level in…  Read more here.


Filed Under: Uncategorized, Workout of the Week Tagged With: dirty, dozen, Kettlebell, phil, ross, swing

Primary Sidebar

Featured Products

previous arrow
BOOK-RKCBookofSnC
HardStyleKettlebellChallegeDanJohn700
BookCoverMasterTheKettlebell1
RKCiconKettlebell512
KettlebellGoddessdv040
next arrow

Recent Posts

  • RKC Big Six Workout
  • The Kettlebell Swing & Low Back Pain
  • Key Kettlebell Exercises To Help You Create Better Balance
  • How to Most Effectively Use Kettlebells to Meet Your New Year Goals
  • 1 Exercise That Checks All The Boxes
FOLLOW US ON TWITTER!

Archives

Copyright © 2025

Dragon Door Publications / The author(s) and publisher of this material are not responsible in any manner whatsoever for any injury that may occur through following the instructions or opinions contained in this material. The activities, physical and otherwise, described herein for informational purposes only, may be too strenuous or dangerous for some people, and the reader(s) should consult a physician before engaging in them.