• Skip to main content
  • Skip to primary sidebar
  • Home
  • Contributors
    • Matt Beecroft, Master RKC
    • Martijn Bos, Master RKC
    • Andrea Du Cane, Master RKC
    • Angelo Gala, Master RKC
    • Chris Holder, Master RKC
    • Steve Holiner, Master RKC
    • Dan John, Master RKC
    • Mike Krivka, Master RKC
    • Thomas Phillips, Master RKC
    • Robert Rimoczi, Master RKC
    • Phil Ross, Master RKC
    • Max Shank, Master RKC
  • Workshops
    • HKC Workshops
    • RKC Workshops
    • RKC-II Workshops
  • Find an RKC Instructor
  • Resources
    • Articles
    • Forums
    • Kettlebells
    • Products
  • Blogs
    • PCC Blog
    • Strong Medicine Blog
  • Archives

RKC School of Strength

Official blog of the RKC

Kettlebell

The Only Three Ways to Build the Body

January 22, 2014 By Andrew Read 2 Comments

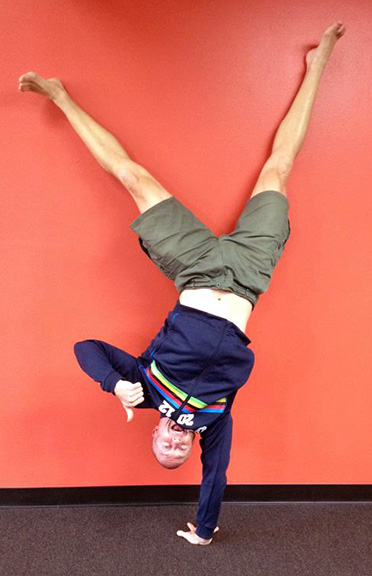
a_read_cartwheelThere are only three ways to build the body – intensity, volume, and density. So why is it that we often look to only change one variable when seeking to improve?

In textbook periodization the early phases of training are characterized by a steady increase in volume first. This continues until beginning the competition preparation phases and a subsequent rise in intensity. However in modern fitness planning it is far more common to see people try to increase either intensity via lifting more weight or density by trying to do more reps in a given time frame.

Back when I started lifting weights it was common for beginners to start in the gym with a simple plan that was full body, with each exercise being done for three sets of ten reps. It was common for there to be an exercise for major muscle groups, and this plan was repeated for three days each week. As the trainee improved it was normal to add an extra day of training, thereby increasing the total volume of work they did for the week.

This process of adding volume was repeated by adding another set or two into the workout, up until it got to the point where it was unrealistic in terms of time management to complete the session. At this point trainees were often put onto a plan called a split routine where they did different body parts on different days, or still did the whole body each time but performed different lifts. The trend of adding volume continued as people added more exercises to each body part, until they arrived at something like three to five exercises per body part, done for three to five sets of eight to fifteen reps each. It’s not uncommon for bodybuilders to hit as many as twenty-five sets of work for a big body part like the legs. As the total volume of the workout increased they kept dividing the workout into smaller and smaller groups of body parts starting with full body, then half body, and then into days where one major part per day was being worked such as legs, arms, or chest.

And the reason for all this is simple – because adding volume works.

But then we get to strength training and one of the things that everyone seems to always think is that plans need to be kept low volume. I don’t believe that to be the case for most people, and the reason is simple – because most haven’t broken through to the point where volume can no longer added. It’s only when you can no longer recover from your previous training that volume can no longer be added. This ultimately is because of only one thing – your training intensity is too high.

Two very noteworthy experts, from two different types of weight lifting, agree on one thing. That average intensity should be around 70%. Sheiko believes this to be the case for power lifters, and Medveydev claims this for nearly all lifters too (except those at International Master of Sports levels, i.e. those attending the Olympics. Obviously because these are rare genetic specimens, and the use of performance enhancing drugs must be considered, the rules that apply to them are slightly different). When two guys at the top of their fields are both saying the same thing we should all listen up.

Often people look at all the numbers in a lifting plan and see a mass of percentages but never take the time to consider how they add up.

Method #1

The simplest way to moderate intensity is to do as many sets above 70% as you do below. For example, doing a set at 60%, then at 70% and finally at 80% keeps the average intensity at 70%, as long as you do the same number of reps in each set.

For example: 60%/3, 70%/3, 80%/3.

If you want to do more sets at the top weight you need extra sets at the lower weights too. The lower weight sets are useful for building technical proficiency.

For example: 55%/3, 65%/3, 70%/3, 80%/3 x 2 will still give you an average intensity of 70%, while giving you exposure to higher loads too.

Method #2

When it comes to fixed weight objects, like kettlebells or sandbags, it becomes much harder to moderate the weight and a better method becomes moderating intensity through manipulating volume. Let’s say that you can press a 24kg bell five times just to make the math easier. If you do ladders of 2, 3, and 5 reps, then your average for each ladder comes out to 67%. That’s pretty good considering that kettlebells tend to come in large jumps in sizes and you can’t micro-load like you can with barbells.

The other way to do this is to play around with how many total ladders you do in a session. Let’s suppose that the maximum number of 2-3-5 ladders you can cope with at a given weight is five. If you have a week where you perform four ladders, then two ladders, and three ladders over successive workouts your average intensity is 60%. However, if you then perform five ladders, three ladders, and four ladders the following week you have an average of 80%. And when you look at the long-term effect of that you wind up back at our magic 70% intensity.

The magic thing about training at this seventy percent average is that you can train a lot. I mean A LOT. Dan John’s Forty Day Plan in Easy Strength is a classic example that allows you to train daily with an average intensity of 70%.

A further example that I’ve used personally was during helping Beth Andrews and Val Hedlund get ready for the Iron Maiden challenge. They both did workouts that featured twenty sets of five presses with a 16kg bell. With a projected max of 24kg, that 16kg works out to 67%. (That’s as close as you’ll likely get when using kettlebells because of the big jumps from one bell to the next).

The lesson here is simple – keep average intensity to seventy percent and try adding volume before you add intensity. This has the added benefit of not taxing the joints so much, nor needing to psyche oneself up for training efforts. There is no need for screaming at this stage of training – save that for game day. But get the volume in.

People like to talk about how strength is a skill. Well, skills need to be practiced a lot before they are polished and become second nature. Keeping the intensity moderate allows many, many practice sessions that would otherwise be missed due to muscle soreness or fatigue. All those extra reps will add up when you call on your strength to be there for you.

At this point you’re asking how do you know if you need more volume? Just ask yourself one question – are you getting the result you want? If not try doing more. I think you’ll be surprised at exactly how much you can do, and how quickly you improve, once you add more volume.

 ***

About Andrew Read, Master RKC, Dragon Door Australia: Andrew Read, Master RKC, is head of Dragon Door Australia and Read Performance Training. Recognized as Australia’s leading functional strength trainer he is a regular contributor to Blitz, Inside MMA, International Kickboxer, Oxygen, Ultrafit and Breaking Muscle. His coaching background spans nearly twenty years having worked with many Olympic and world championship level athletes.
Filed Under: Uncategorized Tagged With: australia, density, intensity, Kettlebell, load, master rkc, pressure, quitters, RKC drills, strength, trainers, volume

Combining RKC and FMS

January 8, 2014 By Andrew Read Leave a Comment

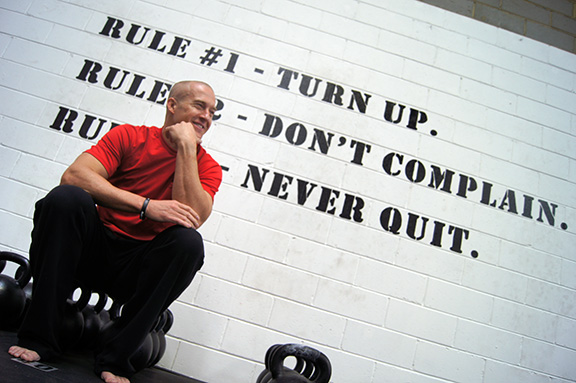
Andrew Read's 3 rulesThe FMS is a fantastic tool kit for any trainer, and when used in conjunction with RKC methods can provide a quick way to resolve almost any issue a client may have. But it can also be incredibly daunting once you start to peel back the layers of the systems and see everything that there is.

One of the best ways to use both systems together is to start to look at the framework that both provide and distil them down to their barest elements. In the case of the RKC drills our purpose is to lead a client in only a single direction, to an “a-ha” moment. A smart drill leaves them with only one direction to go in – the correct one, allowing them to instantly get the feeling or movement they were previously unable to connect with.

While there are many corrective exercises also within the FMS, and this is perhaps what it is best known for, people often forget that the purpose of the FMS is to not only screen for and correct asymmetries, but also to give us a path to follow once we go back to strength work. A simple framework that can be followed is that each movement has four steps –

No load, pattern assistance.
No load, no pattern assistance.
Load, with pattern assistance.
Load, with no pattern assistance.

Looking at how we teach the swing at the RKC you can see that this format is followed closely. We begin by teaching the hinge. This is often assisted in a variety of ways – either using the blades of the hands in the hips to help find the hip crease, pushing the butt back towards a wall, or using a dowel to teach how to keep neutral spine.

And here is where the “a-ha” drills fit in – we can go back and forth between the first and second steps as needed to reinforce the pattern. Our intent is to remove the pattern assistance and have the person do it unloaded but perfectly on their own. If form breaks down we can get them to return to the pattern assistance method (dowel, wall, etc.) until it becomes ingrained.

From there we can move to kettlebell deadlifts with the partner “reminding” the student how to keep the body tight via some tough love. Many people struggle to activate the right muscles to begin with and providing a cue that allows them to feel what muscles need to be switched is valuable. The final step in this process is to finish with deadlifting without any form of pattern assistance.

You can follow the same step for the swing itself. Begin with the hip hinge reinforced with a dowel. Move to hinging without any form of pattern assistance. Then onto the swing where we can assist in any number of ways from using a towel to teach timing, hip drive and straight arms, to putting the toes on a slight raise to teach people to avoid scooping, to having a target behind the student to have them hike the bell more, to spiked swings to reinforce the loading phase of the swing. Finally, once we have cleared all problems with our “a-ha” drills we can swing without pattern assistance.

The FMS also have a logical system of progression for loading and uses four postures that follow a developmental sequence. They start with lying, progress to quadruped, then onto kneeling and finally standing. If you look closely you’ll see that this sequence is the get up. That kind of symmetry between the two systems isn’t a mistake as both are about movement and strength.

But how can we apply our FMC framework to a skill like kettlebell pressing, using the postures too?

One of the issues people often have with pressing is an inability to stay tight through their midsection during the press putting their lower back at risk. If we begin lying supine (face up) we can do the backpressure crunch drill. To perform this have your partner place a rolled up towel under your lower back and lie down on it. Bring your knees to your chest and push your lower back into the ground while your partner tries to take the towel away as you extend your legs. This will teach how to stay tight through the midsection while keeping neutral spine. Retest with your press and see if it has improved.

The next step is to be in quadruped. For this drill we’re going to do bird dogs using a Cook band. Our single kettlebell press is fired on a diagonal and this drill will teach you to stay tight while your arm is moving. (To regress this drill slightly stay in the same position, but use a foam roller on the lower back to teach how to keep the natural curve of the spine). Retest again with your press and see if it has improved.

From here we can choose to press from kneeling and use either the tall kneeling or half kneeling postures. I would pick which one to use based on whether my client had asymmetries in their Inline Lunge or Hurdle Step tests (half kneeling in this case). If they were symmetrical then we could progress to tall kneeling. For pattern assistance we could do a core activation drill and press the kettlebell bottoms up. Again, perform the drill then retest your press to see what has improved. (Kneeling and bottoms up presses are taught and discussed at RKCII so if in doubt please see an RKCII for further information).

The final step is a standing single bell press without any assistance. At any point if the movement degrades there is the choice of regressing the posture used, or going back into the matrix and deciding if we need pattern assistance. Both answers can be right, depending on the person’s unique history.

Keep these simple rules in mind when training and you’ll find a lot of the confusion melts away. The takeaways are that the RKC uses “a-ha” drills to give a client only a single solution to their problem. If the drill you’ve picked doesn’t lead to the right answer then you picked the wrong drill. The FMS uses a simple four by four matrix to figure where training needs to be at any time. Follow the process and you’ll see that the system is very logical, and make sure to use the system.

Tying the two together leads to quick gains for your students and can often shine a light on the right path to take when someone just seems stalled in training.

 ***

About Andrew Read, Master RKC, Dragon Door Australia: Andrew Read, Master RKC, is head of Dragon Door Australia and Read Performance Training. Recognized as Australia’s leading functional strength trainer he is a regular contributor to Blitz, Inside MMA, International Kickboxer, Oxygen, Ultrafit and Breaking Muscle. His coaching background spans nearly twenty years having worked with many Olympic and world championship level athletes.
Filed Under: Uncategorized Tagged With: australia, back pressure, clients, fms, hinging, Kettlebell, load, master rkc, pattern assistance, quitters, RKC drills, strength

Dirty Dozen Move #7: The Kettlebell Clean

December 4, 2013 By Phil Ross Leave a Comment

dirty_dozen_number7_smallThe Kettlebell Clean is often overlooked as an essential exercise because it lacks the “sexiness” of the Swing and Snatch, the power of the Squat and Press and it does not stimulate the intrigue of the Turkish Get-up. However, couple your Swings with Cleans or perform a chain with a Swing, a Clean and a Snatch and you’ll have some great routines. Also, if you want to perform your Presses and Squats, how will you get your Kettlebells into the Racked position? You got it, The Kettlebell Clean.

In all of it’s simplicity, the Clean is more often performed incorrectly. This results in bruised wrists, strained biceps, elbows or forearms as well a faulty rack incapable of providing a stable starting point for your Press or Squat. Also, casting of the Kettlebell on the descent will place undue stress on the low back and possibly result in a face-plant!

Simply put, a Clean is nothing more than a Swing with your elbows pinned to your sides. There is no jerking up into the position, nor is there a “curling” of the bell into the rack (try to use that method to rack the Beast and let me know how many pieces you shred your bicep into). I have also found that teaching people how to Clean two kettlebells at once is easier. The students don’t have to be concerned with over rotating one hip and they are also psyched about using two Kettlebells at the same time. Once they have the idea that the Clean is identical to the swing at the start point, exhale and hip movement, the Clean becomes easier to perform. Pay particular attention to the breathing aspect. The breath of the Clean occurs at the exact point as your exhale while performing the Swing – at the top of the hip motion when your knee caps are drawn into your quads and your legs are locked. The sharp exhale does not occur when the Kettlebells are in the Rack, it happens slightly before. This simple tip will significantly reduce the amount of “smashing” that occurs on your wrists. At this point, the top of the Swing portion of the clean, you stop pulling and allow the Kettlebells to “float” into position. The float will occur only when your breath is timed correctly and you allow the bells to achieve the Rack position without using your arms to pull.

If you find that you are “curling” the bell during your Cleans, use a heavier bell. This will cure many issues because you will not be able to “curl” a heavier bell into position. Once your technique improves, you should be able to execute proper form of your Cleans with any sized bell. For one to attain mastery of the Clean, the technique should look identical, regardless of the size of the Kettlebell.

There are also several extremely beneficial variations of the Clean. Alternating Cleans provide an incredible core workout, Bottoms-up Clean and Hold are one of the best grip development exercises available. Have Cleans as part of any Chain or Complex for a transitory or additional movement to enhance the circuit.

The Kettlebell Clean is not only essential for transitions from one movement to another, but it is an incredible exercise for going from ballistic to static to ballistic again. The athletic application from the Clean is is beneficial for development of power for strikes, throws, synergy of upper and lower body movements, not to mention the incredible way it develops superior core strength.

Good luck with your Training!

Strength & Honor,

Coach Phil 

www.kettlebellking.com

***

About Master RKC Phil Ross: Master RKC, 8th Degree Black Belt, Specialist in Bodyweight Strength, PCC and CK-FMS Certified. His name is synonymous with Martial Arts and Fitness. He is known as the area’s Kettlebell King and has successfully competed on the National Level in…  Read more here.

Filed Under: Uncategorized Tagged With: athletic application, ballistic to static, clean, dirty dozen, Kettlebell, kettlebell king, phil ross

Dirty Dozen Move # 6: The Pistol

November 13, 2013 By Phil Ross 5 Comments

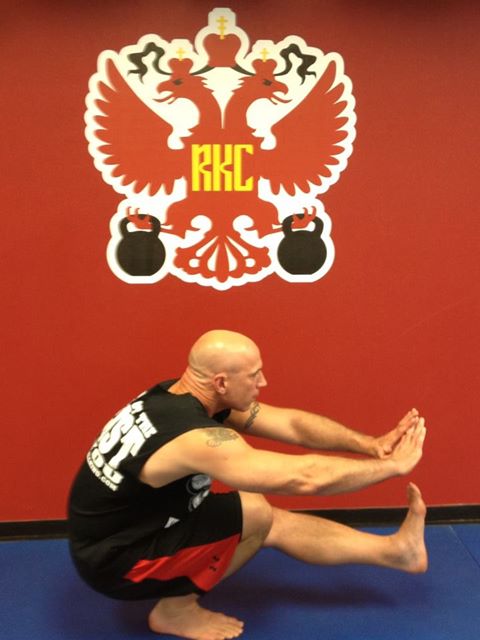
Phil_Ross_Pistol

The Pistol (Single Leg Squat): The most difficult and beneficial leg exercise – period. The training enroute a butt to heel Pistol develops balance, trunk stability and incredible leg strength. There are weight lifters that can full squat 500 to 600 pounds, yet they collapse and fall over when attempting the Pistol.

Let me relay a little story to you. I was cornering at a UFC Event in Houston in 2011 and went out for a bit of R & R before the fight, once my fighter was in bed. As a typical occurrence, the supporting fight team trainers and coaches usually run into each other and discuss their “Trade Secrets” and training methods. As it happened, I ran into a couple of other trainers in a local watering hole (that’s another name for a bar incase the younger crowd is wondering what I’m talking about.) So I’m talking to a couple of the other trainers and we strike up a conversation about strength training, what works best, how we train, etc… Our conversation moves onto squats. Now both of these guys were around 30 years old and are built like brick outhouses. They could both squat in excess of 600 lbs, but were not overweight or disproportionate. We started talking about the one-legged squat (Pistol) and I proceeded to demonstrate a few of them. They, of course, had to try and promptly fell over – on every attempt. Not a clean pistol performed between the both of them. I now had their attention.

The balance, core strength and overall athletic development gained from performing the Pistol are incomparable. In most athletic events (even in walking!) you are placing all of your weight on one foot and then the other.  When you make a “cut” on the field, quickly hop from one side to the other or have to scale a deep incline, your stabilizers, tendons and and core are continuously firing. Pistols, much more than machines or bilateral, two legged exercises, increase your strength more efficiently.

As far as injury prevention, the development of the synergy with these muscles of the leg – all at once – is incredible. I experienced a trilateral break o my left leg which resulted in 10 screws and a 5″ plate being installed.  I used Pistols as part of the rehabilitation process. I realize that whole industries have been built and billions spent on leg muscle “isolation” machines. However, when you walk, perform a task or athletic event – do you ever isolate your gastrocs, quads or hammys? The answer is a resounding “No”. Unless you’ve experienced some type of injury to a specific area, you will be creating asymmetries by muscle isolation. If you have a leg extension/hamstring machine, do yourself favor and sell it for scrap metal and practice your Pistols!

So, how do we achieve the proper execution of this Ultimate Leg Exercise? You need to employ progressions and at times, regressions. This exercise, up to a certain weight, is more easily achieved with a kettlebell. The counter weight aides your downward momentum.  One of the best books on the subject is Coach Paul Wade’s Convict Conditioning:  http://www.dragondor http://www.dragondoor.com/?apid=4640 & visit products/books. The progressions enroute achieving the Pistol are the best available.

To start your Pistol Training, you must first be able to perform narrow stance squats. Once you are able to do 20 or so, you are ready to attempt shifting the weight from two legs to one. I believe the best methods to improve your Pistol is with both Top Down and Bottom Up motions. Maintaining tension throughout the full range of the movement is tantamount, especially at the bottom of the Pistol. That is the point where most people lose their tension and collapse. Go down into a full narrow stance squat and thrust one foot forward and then go up. Be sure to stomp your Pistol foot into the ground and drive your power through the heel of the unweighted leg. Grunting and focused hissing, especially when you are first learning, is very helpful.  Again, creating and maintaining the tension throughout the whole movement is essential. For the Top Down training – employ the use of a bench and once your buttocks touches the bench, EXPLODE Upward. When practicing the Bottom Up training, use a rope or band thrown over a high bar. While you improve, you’ll have to use your arms less and less to help you come out of the bottom position. There are also a variety of steps explained thoroughly in Coach Paul Wades Convict Conditioning book. Once you start to develop the ability to perform the Pistol, do it from a raised platform so that your unweighted leg does not have to be held so high. When you can perform 5 or more on a raised platform, you are ready to try a Pistol from the floor. The actual amount of repetitions before you are ready to move to the next step may vary from individual to individual. However, the numbers listed are good guidelines.

There are more advanced levels of the pistol as well. One or two hands raised in the air adds an element of difficulty and makes the Pistol a truly Elite Movement. You may add weight. It is true that a smaller kettlebell makes performing the movement a bit easier, but once you start increasing the weight or use two kettlebells or a barbell, then you have significantly increased the difficulty of the movement.

As Always, Train Hard & Train Often! – Coach Phil

www.kettlebellking.com

***

About Master RKC Phil Ross: Master RKC, 8th Degree Black Belt, Specialist in Bodyweight Strength, PCC and CK-FMS Certified. His name is synonymous with Martial Arts and Fitness. He is known as the area’s Kettlebell King and has successfully competed on the National Level in…  Read more here.

Filed Under: Uncategorized Tagged With: dirty, dozen, Kettlebell, phil ross, pistol, press

2 of the MOST Common Kettlebell Mistakes

September 18, 2013 By Josh Henkin 9 Comments

josh_henkin

If you train long enough there is one absolute guarantee, you will make mistakes! Most people look at mistakes as a negative, but in fact they teach us so many valuable lessons. We learn what works for us as individuals, we realize that different points in our lives require different types of training, an understanding that our needs change as we go through our journey of fitness will evolve. You see, the only way you actually learn these lessons is by making many of these mistakes.

I hope to save you a bit of time from 20 years of training so that you don’t have to learn all these lessons on your own! When comes to training with kettlebells for the past ten years I have also ran into many trainees that seem to run into many of the same issues.

By writing this article I hope to help you learn from my own experiences. Yes, you will make mistakes, but realize the only really bad mistake is the one you keep repeating! Hopefully I can help you avoid those times of frustration with two of the most common mistakes and result haltering kettlebelI mistakes.

Too Much of a Good Thing

Any time you start something new, it is cool, it is exciting, it is motivating. Unfortunately, just as many times we take a good idea and take it to the extreme. Getting reintroduced to kettlebells for me in 2002 was the first time that I saw pressing weight overhead being heavily promoted as a means of improving health and performance.

Many fitness programs were still touting overhead work as dangerous to the shoulder. However, the RKC focused on many overhead lifts as a means of having a healthy and strong upper body. Overhead lifts were about integrating the lower body, trunk, and upper body in one efficient and highly effective unit.

What was the mistake? Many people went from very little experience of lifting overhead to 90% of their program or more being overhead lifts. I started to see an influx of people with overtraining injuries because like anything good, people tended to overdue it!

What should you do instead? Instead of taking a good thing and going to the extreme, slowly integrate new ideas and exercises into your routine. Nothing wrong with adding 2-3 sets of 3-5 repetitions of a new exercise into your training program. That ends up being about 15 repetitions, instead of 30 plus repetitions that I would see in most new training programs.

Find out how your body responds, see if you are ready to do more or if your body needs more preparation. One of the hardest things for many of us to do is to slow ourselves down. Trust me, patience has the reward of long-term progress and injury free training versus the instant progress many see from just doing something new and stalling early and developing issues!

Not a Balanced Routine

You just read about exercise x, it is the new exercise that basically is suppose to solve ALL your training needs. This is the ONLY exercise you ever need to use a again. What do you do? If you are like most of us, you do as you are told. You focus on this one, okay, maybe two different lifts and POOF, all your training needs are solved!

The reality is that most of us need much more variety, especially earlier in training. Whether you are referencing legendary coaches and scientists like Tudor Bompa that spoke of an “anatomical adaptation phase”, periodization models that spoke of “general physical preparation”, or even old time strongmen that used a wide array of gymnastic and strength training exercises to build a strong foundation before more focused training. In any of these situations, the best coaches and athletes realized a need to prepare the body for more intense training.

I remember many people coming to me so excited to start kettlebell training and when I asked them how much exercise they had been doing most hadn’t done anything with great intensity for some time. Looking at their training they were doing one to three kettlebell exercises. Many times with the same movement patterns.

Here is a common kettlebell routine I would see.

  • Kettlebell Swings 3 x 15
  • Kettlebell Clean and Press 3 x 5
  • Kettlebell Snatches 3 x 10

I am taking some liberties with the programming, but you get the idea. All three have a two legged hip hinge movement, all done explosively. There is no squatting, no lunging, no single leg work, no stability exercises. Two out of the three exercises are overhead movements there is no upper body pulling at all. You start to see such movements are quite unbalanced. How might I change this routine? Here is something I loved to provide with beginners.

Workout 1

  • Goblet Drop Lunge 2 x 6 each side
  • Rows 2 x 8-10
  • Suitcase Deadlift 2 x 8-10 per side
  • Overhead Press 2 x 5 each side
  • Front Plank 2 x 30 seconds

Workout 2

  • Single Leg Deadlift 2 x 6 each side
  • Assisted Pull-ups (Band or otherwise) 2 x 6-8
  • Front Squat 2 x 6-8
  • Get-up Sit-up 2 x 5 each side
  • Mountain Climber 2 30 seconds

You can see there are two more exercises per routine, but that isn’t the big difference. In each routine we get a far more well rounded movement based program. We place the most challenging exercises first and more isolated or stable exercises later. There is single leg work, balance of pushing and pulling, working different angles, and a compliment of squatting, lunging, pulling, and foundational stability.

Most people make the mistake of over doing or not doing enough for their fitness in the initial stages. A good base of fitness helps prepare the body for more intense programs later on.

One of my favorite stories to illustrate my point is follows the path of a young man. In his early 20’s this well built young man (with limited training experience) told me he hurt his back deadlifting. I asked to see his technique and program. His technique needed a few tweaks, but his program needed far more!

I asked him, “Where did you get this program?” He replied, “It is what elite powerlifters do!” “How long have you been training?” I had to ask, “About six months.” After asking him to repeat to me who the program was for a few times he understood his mistake. I wasn’t trying to embarrass the young man, but rather remind him that following the right program for your current ability level helps you get to higher and higher levels.

If you follow these two simple rules I ensure you that you will have many years of success. It can be hard in this day and age of instant gratification to have the discipline to have patience and honesty with where you are currently starting. However, if you are able to implement these ideas, the rewards are years of successful training with the greater chances of experiencing plateaus and injury!

***

About Josh: Josh Henkin, Senior RKC, CSCS has been a RKC instructor since 2003 and has implemented kettlebell programs for major Division I programs, SWAT teams, and many different general fitness programs. Josh is also the creator of the DVRT Ultimate Sandbag Training system where he is a highly sought after presenter worldwide. He can be reached at info@ultimatesandbagtraining.com or http://DVRTFitness.com.

Filed Under: Uncategorized Tagged With: 2, common, Josh Henkin, Kettlebell, kettlebells, mistakes, most, sandbag

My Weight Loss Struggle

August 28, 2013 By Laurel Blackburn 64 Comments

laurel
On left: In my body-building days / 
On right: Most recent pic – feeling huge

I’ve been thinking about writing this blog for quite a while. I’ve been struggling with this issue since I was a teenager. I know I am not alone.

This blog won’t give you the latest weight loss secret, nor will it give you a really incredible workout. As a matter of fact, it won’t give you any answers. My hope is that it starts a conversation that needs to happen.
It’s time for me to get honest with myself and it’s time for me to get honest with others.

I need to hear about other people out there who struggle with the same issues as I do. I know I am not alone. I see it in others, I see it in my clients, I see it all over social media and I see it in my family.

My issue is my love/hate affair with my body. I can’t even tell you when or why this started. All I know is that I have fought with my body image and my weight since I started junior high school. I have no idea whether or not I was actually overweight, but that does not even matter. I thought I was overweight and thus began decades of self-loathing, countless diets and a trip to a 28 day eating disorder clinic.

laurel3
On left: At leadership meeting, very ashamed about weight /
On right: Starting another diet

At 20 years old and after the birth of my first son, my goal was to weigh in the double digits. Imagine my elation when I tipped the scales at 99 pounds. I was on top of the world. That number meant that I was finally a success and that I was attractive.

Of course it didn’t last long. Before I knew it, I ballooned to a whopping 119 pounds. I felt like a failure. Suddenly I went from feeling attractive to feeling like a monster. I was buying a size 20 in clothes to hide my hideous body.

I only wore clothes that hid my massive frame. It was then that I sought help and entered treatment for my eating disorder. I never considered myself anorexic nor bulimic, I went because I was a straight up binge eater and my weight was out of control. Again I only weighed 119 pounds.

One of the things we had to do was exercise. I felt so hideous that my workout clothes consisted of my huge potato sack skirt that reached the floor and a huge over-sized shirt. After all, I didn’t want anyone to see how big I was.

I spent 28 days in treatment and left the same as when I went in.

laurel2
On left: Weight down, feel great /
On right: Weight up again – note the baggy clothes

Over the past decades, I have gained and lost 20 pounds.

My biggest weight loss successes came when I was competing in bodybuilding. Those were the days. Some how I managed to stay with a strict diet for 12 weeks. I ate by the clock every 2-3 hours. My meals consisted of boiled chicken, rice, cold sweet potatoes and broccoli. It wasn’t good, but it was what I ate. Food was not longer enjoyable. I even traveled to Las Vegas on vacation for a week with my cooler full of food.

On the day of my contests, my body fat was approximately, 18% and yet I still had a wad of fat on the back of my legs. I guess I should mention that I am of Hispanic, Italian descent.  We have some meaty thighs! God, how I hate them.

It took about 3-4 weeks after each contest to gain back 20 pounds. I had no idea how to transition back to normal eating. I went from a ripped, lean size 0, back to what I felt was a fat, over weight woman.

The next few years, I gained and lost 15-20 pounds through various diets and exercise plans.

Now I sit here writing this, ashamed. I am 51 years old and I’m still struggling with weight and body image.

Laurel5
On left: Weight up… Again / On right: Starting yet another diet…

As fitness professional, I know better. But, first and foremost, I am a woman. I am woman who has struggled with her weight, self-image, self-esteem and body image for 40 years.

Trust me, I have done every diet out there. I have done Paleo, I have done the Whole30, I have gone off sugar, I have gone off carbs, I have detoxed, I have done Precision Nutrition, I have eaten low fat, high fat, low protein, high protein, I have kept food journals. I have counted calories and I have measured my food. I have done tons of cardio, I have lifted heavy weights…I have done it all.

I still go through the same emotions and behaviors. I lose around 7-10 pounds. I feel great. I feel attractive. I feel successful. I go shopping and buy cute clothes and wear them with pride. Then I gain the weight back. My self-esteem, body image and confidence go to hell. I go back to my baggy clothes.

So, is there a point in life and I am asking anyone who is reading this blog, in which you stop the madness and just accept who you are, accept and love your body and quit torturing yourself? Or do you continue the self-destructive mental and physical abuse?

At 51 years old, I’m tired of fighting this. I’m tired of hating and fighting with my body. I want to enjoy my life and I want to just enjoy food. Damnit, I want to eat cake and not feel like a loser and not feel judged and not feel guilty.

I know I am not alone. I have clients who have been coming to me for years who pretty much do the same. We have transformation contests with pretty amazing results. After the contest is over, they end up where they started. I have clients who, after coming for years look pretty much the same. They work hard, their health has improved tremendously, but they are still overweight. Is that so bad?

As fitness professionals, we post before and after pictures of our best client’s transformations. However, when I see group pictures of clients working out, there are some who are over weight and obese and I know those clients have been coming to those classes for a very long time. It happens in gyms, in boot camps, in Kettlebell classes and in Crossfit.

Now I know that other fitness professionals will judge me because I am fitness professional and I should look the part. What is the part? Many of my new clients, when asked what their goals are, say they want arms like mine.

One of the things I am guilty of that just adds fuel to my already low self-esteem fire is that I compare myself to other women on Facebook who are leaner and stronger. I know those are part of the issues I need to work on.

I don’t know the answers. I don’t know what to tell my clients who struggle with the same issues. When is it time to quit the madness?

Laurel4
On left: Weight back up, ashamed.. / On right: Diet success, feeling great

One thing that really helps me is to understand different body types. We are all different. I will never be a skinny girl even though I have tried. My brothers and my oldest son struggle to put on weight. They are tall and thin with nice long legs. My sisters and I are short with short, muscular legs. No matter how hard I try and how lean I get, I will not have tall, lean legs. I know I can have a lean upper body, but my legs will always be and look heavier.

One of the things that help me, is the website that has pictures of some of the world’s most elite athletes. You will see they have completely different body types depending on their sport. None of them are the same.

http://reelfoto.blogspot.com/2012/08/howard-schatz-and-beverly-ornstein.html

I am not writing this blog to get pity and I am certainly not writing it to get any more advice.

If you are one of those who have never struggled with weight, or if you are one of those who have fought the weight loss battle and won, without having to fight the demons of self-loathing and constant failures, then you will never be able to wrap your head around this. As fitness professionals however, we need to understand that for some of your clients that struggle with this, we have to understand and we have to be able to help them.

Another diet, another food journal and harder workouts will not take care of the underlying emotional issues surrounding this issue.

So what are we to do?

Is quitting the madness and focusing on health instead of losing weight so bad? Do we support and affirm their efforts on improving their health or are we focused on their weight loss?

Do we refer them out for help, for counseling?

I go to counseling and have been on anti-depressants since I was a teenager. Many of our clients have never been and maybe it’s time. Do we do them a disservice by not addressing this issue?

I ask you to please share this blog in the hopes that it helps someone and starts a conversation that I think needs to happen. I really put myself out there and I would like to think I didn’t do this in vain.

***

Laurel Blackburn is an RKC Team Leader and owner of Boot Camp Fitness and Training and Tallahassee Kettlebells.  Look for Laurel at www.bootcampstogo.com or www.tallahasseekettlebells.com.

At 51, she is out to prove that age is just a number. Her goal is to motivate and inspire people everywhere, both young and old that strength, flexibility and mobility can get better with age. Follow her adventures on her blog: www.SuperStrongNana.com. 

Filed Under: Uncategorized Tagged With: anorexia, blackburn, bulimia, challenge, coach, disorders, eating, emotional, fitness, Kettlebell, laurel, loss, mom, nana, strength, trainer, trainers, weight

Dirty Dozen Move # 5: The Kettlebell Press

August 21, 2013 By Phil Ross Leave a Comment

Spencer Ross Demonstrates the Kettlebell Press

There are not too many many things cooler than pressing heavy weight over your head. The Kettlebell press is one of the best methods available to enable you to achieve these great feats of strength.

You may say that I can press dumbbells and barbells and get the same effect. Yes, you can press dumbbells and barbells – and there is nothing wrong with it. However for the “Best Bang for your Buck,” maximum shoulder load with reduced shoulder stress and a greater recruitment of stabilizers, the Kettlebell Press can’t be beat.

The Kettlebell Press differs from the dumbbell press and the barbell press in several ways. Dumbbells and barbells have a unilateral weight distribution, so there is a less of a need for the body make adjustments. Due to the shape of the Kettlebell, with it’s offset Center of Gravity (COG), the position of the weight constantly changes during the movement of the press. This requires more involvement of the core, stabilizers and lats to complete the movement. The pressing motion starts in a racked position with a tensioning of the body ends with the full lockout and the arm pressing the Kettlebell in line with or slighting behind the ear. This motion upward is accomplished with a “J” pattern of travel. The degree of the “J” may vary from practitioner to practitioner.

When pressing, you not only want to focus on pressing the bell skyward, but think about pressing your body away from the bell as well. This will also aid you in rooting with the floor and employing total body tension. We also need to pay particular attention to the width of your stance. Experiment with the wider then more narrow stance. You will discover that you are able to create more tension with a less than shoulder width stance.

As with many Kettlebell exercises, root with the floor, bring your coccyx to your naval, contract your glutes and abs, pack your shoulders and engage your lats. Focus on an exhale with the eccentric movement of the press and an inhale with the concentric portion, all accomplished while maintaining tension and compression.

When pressing heavier Kettlebells, you may employ a slight hip hitch to the opposite side of your pressing hand. This will help you recruit more of your lats. However, be certain no to go so far as to turn the press into a side press. In addition to the Military or Kettlebell Press and the Heavy Press there are many other presses with Kettlebells. Push Press, Jerk Press, Bottoms-up Press, Waiters Press, Side Press and the Bent Press, to name a few. There are also dual bell versions of most of the aforementioned.

Good luck with discovering or enhancing your Kettlebell Pressing Skills! If you have any any questions or comments on this introduction to the Kettlebell Press or any of the other Dirty Dozen Exercises, do not hesitate to contact me.

Train Hard and Train Often – Coach Phil

***

About Master RKC Phil Ross: Master RKC, 8th Degree Black Belt, Specialist in Bodyweight Strength, PCC and CK-FMS Certified. His name is synonymous with Martial Arts and Fitness. He is known as the area’s Kettlebell King and has successfully competed on the National Level in…  Read more here.

Filed Under: Uncategorized Tagged With: dirty, dozen, Kettlebell, move, phil ross, press, Spencer Ross

It’s in the Hips: Part 1

August 7, 2013 By Mark Bixby 1 Comment

This blog initiates the first in a series of 4 posts with companion videos about effective ways to better utilize the hips. While I’ve invented nothing in the series, I have hopefully ordered things in such a way—from simple to more complex—that those who practice these time-efficient drills will experience success at each point along the way. In the end, you’ll be crawling, squatting, running and jumping more efficiently.

Two years ago on Thanksgiving, I sat down in front of the wooden stove with my wife, mother-in-law, and daughters. They all sat comfortably on their knees, butts to heels. Given that my 63-year-old mother-in-law (with a hip replacement) could sit with ease in that position, I thought I could easily join her and dropped down in a knee sit. I sensed immediately that I might never stand again; either my knees were going to dislocate or my quads snap. Unable to conceal the distress on my contorted face, the ladies assembled asked if I needed an ambulance. I explained that the position created an unbearable stretch through the knee and quads, to which they responded they could all sit easily in the position for hours and not feel a thing.

Moral of the Story: Your tight hips are probably surrounded by lots of other tight muscles/tissue, especially if you are a dude.

While the RKC hip flexor stretch is probably the most commonly applied hip remediation in our community, we forget that many people don’t feel it in their hips because their quads are so tight that the stretch doesn’t travel above the thigh. One great solution is to practice your knee sits. We all have ample opportunities to sit, so we might as well use some of that time to increase our mobility.

Two weeks ago, MovNat Founder Erwan Le Corre led a wilderness survival training session that he kicked off in our gym. He sat on his knees as he explained some of his principles of natural movement. All of the men in attendance copied his seated position. One of them squirmed around uncomfortably until Erwan asked him if he was injured. The man replied that he had sprained his ankle a while back and that the position just hurt. Erwan said, “I’ve sprained my ankle lots of times, and sitting this way is no problem. You just don’t ever sit this way, right?” Like so many of you (especially men) reading this, he couldn’t disagree. The SAID Principle (Specific Adaptation to Imposed Demand) tells us that we adapt to what we do. Sit on your knees more regularly and, as I’ve discovered through persistence, you can lose the wince and hang out a while.

The following video sequence shows a progression of moves from knee sits to active hip stretches that should knock the rust off of the joints from your feet up through your spine. It’s just a further reminder that your tight hips are probably a product of your tight everything else. Practice these, and my next blog, with a more dynamic series of hip openers, should come more easily.

***

Mark Bixby is a Dragon Door RKC Team Leader, PCC Instructor and MovNat Instructor.  He discovered kettlebells in 2002 and found that they are the quickest, most effective way to train.  A combination of past injuries and persistent low physical self-image had caused Mark to have severe posture issues and chronic back pain. Kettlebells taught Mark how to use his hips so that he didn’t tuck his pelvis and slump with his posture. He grew taller, stronger and more confident. More than six years later, Mark has accomplished huge gains in strength, flexibility and stability and he finds that kettlebells still present significant physical and technical challenges. Because the skill set can always be refined, kettlebells continue to push Mark towards higher levels of body awareness and fitness.

Filed Under: Uncategorized Tagged With: athletes, Bixby, flexibility, hips, Kettlebell, kettlebells, Mark, stretch

The Kettlebell Jerk

July 10, 2013 By Mike Krivka Leave a Comment

329

Overview
The strength of the RKC is its reliance on the development of the six fundamental techniques that are taught as part of the baseline RKC curriculum: the Swing, Clean, Front Squat, Press, Snatch, and Turkish Get-Up.  These foundational techniques give the trainer and the athlete a solid foundation to start with and enough variety in movement and skills mastery to keep them busy for years to come.  But is there a missing link? Is a critical technique excluded that would round out the six and make it a lucky seven?  I think the missing link would be the Kettlebell Jerk and in the following paragraph’s I’ll try to explain to you my reasoning.

BTW – the Kettlebell Jerk is part of the RKC II curriculum so fear not—it’s part of the program!

What is the Kettlebell Jerk?
The Jerk, by extension, is within the same family as all of the other overhead techniques that can be performed with the Kettlebell.  Meaning that it is related to the Press and Snatch – at least it’s a distant cousin of both.  In reality it is part of the loading progression to getting heavy weights overhead; starting with the Press, moving on to the Push Press, and then ending with the Jerk.  The Jerk isn’t as “ballistic” as the Snatch, but its close; and it’s not as “grinding” as the press, because it shouldn’t be.  This means that the carryover skills that you will develop when practicing the Jerk will benefit both sides of the movement coin.

The Jerk is comprised of the “Dip and Drive” of the Push Press followed by a soft lockout in a high Overhead Squat or high Hip Hinge.  The key behind having success with the Jerk is in how well you can translate the energy behind the Dip and Drive into the Kettlebell and get it moving overhead.  If your Dip and Drive isn’t strong enough to get the Kettlebell to “float” then you won’t be able to get under the it and “catch” it with a locked out arm.  Now if your Dip and Drive really is strong enough to “float” the kettlebell, but your initial racked position is weak or loose, then there’s no way you’ll get it overhead or you’ll struggle to press it out.  Your racked position has to keep the Kettlebell in the perfect alignment with the torso and legs to accept the power from the Dip and Drive, and the elbows have to be tight against the body and ready to transition from holding to driving upward once the legs have done their job. So you might say that your Jerk depends on fast knees and tight elbows.

So far we’ve talked about transferring energy from the lower body to the upper body—now we need to talk about what the lower body is doing to set up the energy transfer.  First thing you need to think about is your stance width or how far apart your feet are.  Many people take a wide stance assuming that if their feet are far apart they will get more power.  Well in this case it just doesn’t work that way.  Remember, we are trying to create a ballistic transfer of energy from your legs to the Kettlebell.  To do that you want to have a shoulder-width stance (be realistic about how wide your shoulders are) that will allow you to drive hard off the ground and get a maximum contraction of the glutes.  If your starting stance for the Jerk is too wide then you won’t get maximum glute contraction and you’ll have to make up the difference somewhere else.  So, after you’ve got the perfect stance you need to make sure that you Dip doesn’t go too deep.  The Dip should be a quick and forceful bending of the knees (not the hips) that lets you get underneath the Kettlebell and start driving it upwards.  The Drive starts immediately after the Dip; don’t hesitate – explode! Once you starting driving off of the ground through the knees you need to make sure that you follow all of the way through to engage the glutes and transfer the energy into the torso.

Now that your Dip and Drive are in place and working the way you want them to, you still don’t have a Jerk yet.  What you’ve got is the underpinnings for a decent Push Press.  Now you have to master the most difficult part of the Jerk: the Drop.  This seems to be the most common area of confusion and difficulty for most athletes when in actuality it should be the easiest.

Then why is it so hard for most people?  All you have to do is look back at their Dip and Drive.  If they aren’t fully transferring the energy generated by the Drive into the torso, thereby allowing the Kettlebell to float, then they are going to be stuck under the Kettlebell and won’t be able to drop underneath to catch it.  Remember: you can’t effectively drop out from under the Kettlebell if you are still loaded with it.  You’ve got to off-load the kettlebell and then quickly drop or hinge out underneath it.

If all of the elements described above line up, then the Kettlebell will be caught in the overhead position with a locked elbow but a “soft arm.”  What do I mean by a “soft arm?”  It means that you shouldn’t be punching through the lockout with any more force than what’s needed to brace the arm for receiving the load from the Kettlebell.

Better than the Kettlebell Snatch?
Is the Jerk (or the Clean and Jerk to be specific) better than the Snatch?  It could be—it just depends on the person and what they are training for.  The Snatch, when executed properly, trains a laundry list of qualities that will benefit the athlete. It trains maximizing the Backswing, taming the arc, transitioning from pulling to punching, the overhead lockout position and the commensurate mobility required to attain it, maximizing the trajectory of the Kettlebell throughout the movement, and other important qualities.  The Jerk, also when executed properly, trains a similar list of qualities. Foremost are translating energy/motion from the legs to the torso, translating energy/motion from the torso to the arm via the elbow, perception of movement and split-second timing while under load, transitioning from driving to catching, and anticipating load and velocity while in motion.  Sounds pretty complex and it is; but the work is worth it once you get the proper timing and sequencing down.

So, it looks like they are both pretty beneficial—so which one comes out on top?  Well if you are looking for a great way to build up your grip and develop explosive power from ground to sky then the Snatch will fit the bill.  It’s also a great way to build up some serious anaerobic endurance.  Don’t believe me? Ask someone who trains for the RKC Snatch Test what it feels like around minute four. Oh I’m sorry, they can’t talk right now, they’re gasping for air!

In regards to the Jerk, I think it comes out on top for someone who is trying to move a near one-arm maximum load in a ballistic manner and learn how to deal with it in the overhead lockout.  For the combat athlete it is a great technique to develop a more intimate appreciation for how to apply maximum force to any upper body striking technique and how to conserve energy until the very last millisecond.  Remember that time under tension is how you get strong and the Jerk will allow you to put a greater load overhead and train you to manage the position as well.

Conclusions
Training the Jerk will benefit anyone who has mastered the “Big Six” Kettlebell techniques already and are ready for a challenge that will allow them to develop the strength to manage a heavier load overhead.  While it is a simple technique, it is not easy to master—and success with it will be dependent on not only have a strong Press and Push Press but also a relatively high degree of physical awareness and how to manage quick height transitions.  If you are truly interested in learning how to perform the Jerk, I strongly suggest you find an RKC that can help you fine-tune all of the precursors to this dynamic, fun and positively challenging technique.

About Michael A. Krivka, Sr. – RKC Team Leader: Michael A. Krivka, Sr. is a Washington, DC native who has been involved in Kettlebell training for over a decade and is currently an RKC Team Leader and member of the RKC Board of Advisors and the RKC Leadership Team under Dragon Door (where he has been listed as one of the top reviewed RKC’s in the world for the last five years). He is also the author of a bestselling eBook entitled “Code Name: Indestructible” and is in the process of finishing up several other eBooks on Kettlebells, body weight, and the integration of other tools into an effective strength and conditioning program. Mike has traveled extensively throughout the United States teaching Russian Kettlebells to military (USMC, USN, USA and USAF) and law enforcement personnel (FBI, DEA, USSS and CIA)… read more here.

Filed Under: Uncategorized Tagged With: advanced, jerk, Kettlebell, Krivka, mike, skills, techniques, training

Troubleshooting the Squat with Master RKC, Keira Newton

July 3, 2013 By Keira Newton Leave a Comment

The Goblet squat and the Front squat are two of the most important, and most neglected of RKC exercises.   In this video, Master RKC Keira Newton demonstrates with student Brittany Branch where some problem areas typically are—and how to fix them.

 ***

Master RKC, Level 3 Z-Health, MCT. Keira first picked up a kettlebell in 2005 when her husband challenged her to stop laughing and start swinging. She stuck with the challenge when she realized that she could get an all-in-one workout in a fraction of the time she spent at the gym. Keira was convinced… Read more here.

Filed Under: Uncategorized Tagged With: fitness instructor, keira, Keira Newton, Kettlebell, kettlebells, master, master rkc, newton, RKC, squat, student, teacher, troubleshooting

  • « Go to Previous Page
  • Page 1
  • Page 2
  • Page 3
  • Page 4
  • Page 5
  • Go to Next Page »

Primary Sidebar

Featured Products

previous arrow
BOOK-RKCBookofSnC
HardStyleKettlebellChallegeDanJohn700
BookCoverMasterTheKettlebell1
RKCiconKettlebell512
KettlebellGoddessdv040
next arrow

Recent Posts

  • RKC Big Six Workout
  • The Kettlebell Swing & Low Back Pain
  • Key Kettlebell Exercises To Help You Create Better Balance
  • How to Most Effectively Use Kettlebells to Meet Your New Year Goals
  • 1 Exercise That Checks All The Boxes
FOLLOW US ON TWITTER!

Archives

Copyright © 2025

Dragon Door Publications / The author(s) and publisher of this material are not responsible in any manner whatsoever for any injury that may occur through following the instructions or opinions contained in this material. The activities, physical and otherwise, described herein for informational purposes only, may be too strenuous or dangerous for some people, and the reader(s) should consult a physician before engaging in them.