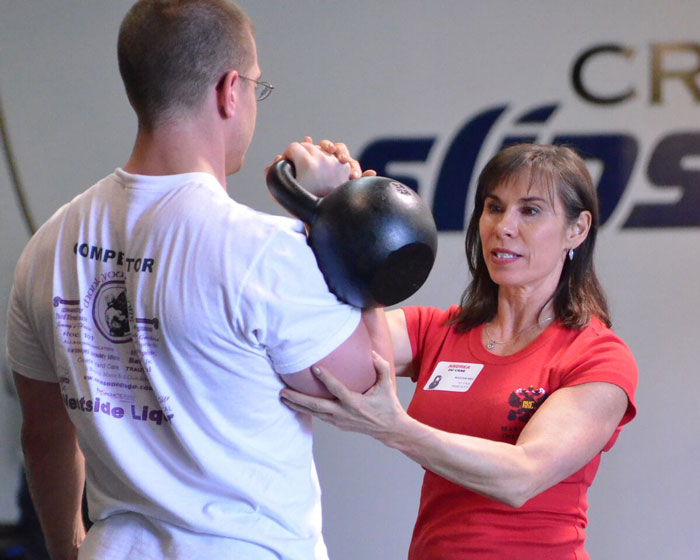
As I travel around the country, I find there is a lot of confusion about where to grab the kettlebell handle—in the middle or in the corner? It is understandable that people are confused. After all, kettlebell training is still reasonably new to the broader public and it IS a very unique training tool. I hope to clarify some of this confusion and explain why certain grips are better for certain exercises, while some are definitely not appropriate for others.
The simplest way to break it down is to look at where you grab the kettlebell on the handle: the center or the corner. I’ll refer to this as the Center Grip or the Corner Grip.
This is very important. Unfortunately, many people do not pay attention to where they are grabbing the kettlebell. This is part of what I call the “set-up”. Every single kettlebell exercise has a set-up. This is where you stop and look at your feet, then determine where you place the kettlebell—in front of you for a swing/clean, or directly between your feet for a deadlift. You need to pay attention to where you place your hand on the kettlebell handle, and this too is determined by which exercise you are planning to practice.
Let’s begin by breaking down the different kettlebell grips, their uses, and advantages.
The Center Grip or Parallel Grip:
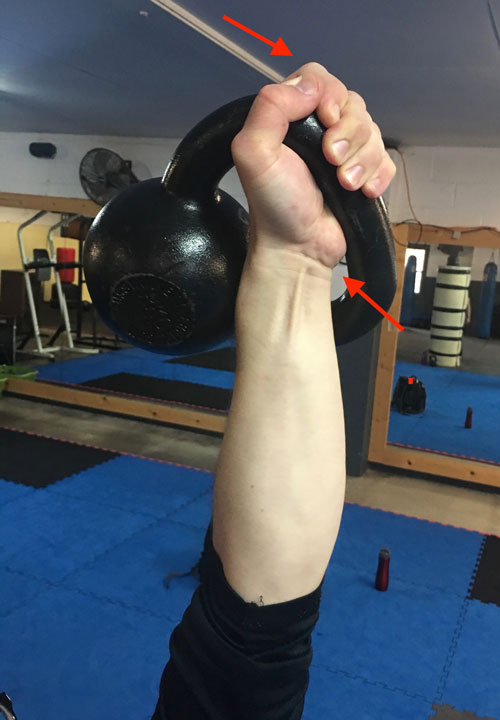
Grab the kettlebell in the center of the handle. The handle will generally lie across your callus pads with a slight downward angle toward the pinky side of the hand.
Rule of Thumb:
Anytime a kettlebell is held overhead, the kettlebell should be gripped in the middle of the handle.
Exercises:
presses, get-ups, kettlebell carries, windmills, snatches
Why to Use the Center Grip:
1) The center grip keeps the kettlebell balanced so it won’t roll in either direction around the forearm. When the kettlebell is locked out overhead, the handle should be balanced in the palm. I have seen people lose control of the kettlebell and let the kettlebell roll around the forearm, not fun!
2) It helps to keep the wrist neutral. In contrast, a corner hold tends to pull the wrist into lateral flexion as well as flexion. This is very hard on the wrist. We want a strong forearm and wrist. An angled kettlebell tends to pull the wrist out of alignment.
3) During snatches a corner grip encourages the KB to spiral around the forearm, instead of the hand going through the middle and the kettlebell moving straight over the hand. A corner grip turns the snatch into a kind of GS spiral. This in turn, makes the landing less stable, the kettlebell is harder to control, and the shoulder can move around and become unpacked. Remember our snatches are Hardstyle, we use the force and speed of the hips to outrun the arm, and the fist punches through the handle fast. Once mastered, the kettlebell snatch using a center grip is both powerful and smooth, with no unnecessary movement at the lock out.
4) We need ALL our muscles to press heavy. If we hold the kettlebell at an angle during heavy presses, it puts the emphasis on the pinkie side of the palm which turns on mostly the triceps and lats. The corner grip turns off the part of the hand (thumb side) that facilitates the neurological connection with the pecs, biceps and anterior delts. When we press we don’t want to leave anything on the table, so we use the center grip.
The Neurology of Grip:
I’m sure many of you have heard about the studies that link grip strength to overall health and longevity. Because of how our bodies are wired, there is also a correlation to grip strength, shoulder health, and pressing strength.
If you’ve ever seen the picture of the Cortical Homunculus you can easily see how important the hands are. There are two particular “buttons” on the lower palm, one on the pinkie side of the fleshy palm and one on the thumb side.
The lateral side (pinkie) correlates to the triceps and lats. The medial side (thumb) relates to the pecs and biceps. When we press heavy kettlebells overhead, we want to “push all the buttons”. By grabbing the kettlebell in the center with the handle flat across the line of the calluses, we are able to activate both buttons.
Try this little exercise: Get down into a tall pushup position. Slowly lower yourself down while only contacting the ground on the outsides of your hands (pinkie), and then come back up. Next, try it again, but this time put the weight on your thumb/index side of the palm. If you listen closely to your body, the first time you tried the exercise, you should have felt more activation in your lats and triceps and the second time more muscles firing with your biceps and pecs.
While we are on the subject of kettlebell grips, I’d like to touch on the different pressures we use:
Crush Grip: Used for heavy presses and bent presses.
Soft Grip: Used for get-ups, overhead carries, windmills. The fingers are closed around the handle and there is a light squeeze. This helps with shoulder stability and keeps control of the kettlebell on the forearm.
Closed Grip: Used for snatches and jerks. The fingers are closed around the handle with no pressure, to facilitate shoulder stability. It can also help with timing. When time is a factor as in the snatch test, keeping the fingers on the kettlebell handle will save time.
Open Grip: This is probably the most misused and misunderstood grip. There are certain populations of kettlebell lifters who will benefit from opening the fingers at the top of the snatch. When the fingers open at the top of a snatch, it allows the hand and grip to relax at the lockout. This is especially good for people with tight shoulders who need more mobility at the lockout and for high volume of snatching where the grip fatigues. And it can help while learning to snatch, for those having trouble over gripping the handle throughout the snatch.
Opening the hand at the top of a snatch rep can also help to slow people down if they are rushing through the lock-out. However, if someone is running out of time during a snatch test, make sure they keep their hands closed, as it will give back a second more for each rep.
As a side note, those who tend to over grip the kettlebell handle are often not using their hips and glutes to drive the movement, instead they are pulling with their arms and back. So fix the hips first, and that may alleviate the need to open the hand at the top of the snatch. In general, fix problems from the ground up!
Secondly, the open grip should only be used during high volume snatches, never for grinds like presses or get-ups, windmills or carries.
When pressing heavy and/or for reps, always keep the hand closed and with at least light pressure on the handle. If you open the hand at the top of a press, it signals the nervous system to relax–which we do NOT want to do during heavy presses!
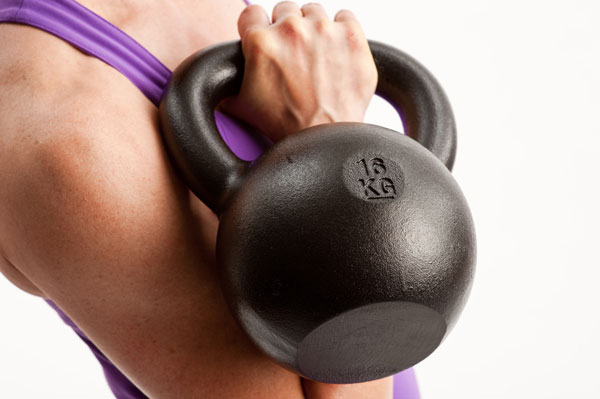
The Diagonal Grip (or Corner Grip):
The diagonal grip is only used for cleans, or the combination of clean and squats together. Because there is no overhead holding, grinding or stability needed, the corner grip is fine—and in some cases preferred.
The corner grip is also encouraged for clean & jerks, since the triceps and lats are doing most of the overhead work to finish the lock out. For jerks and push presses, the lower body initiates the movement and drives the kettlebell overhead. You actually want the arms relaxed—because it is NOT a press.
Forearm Discomfort—the Causes and Solutions
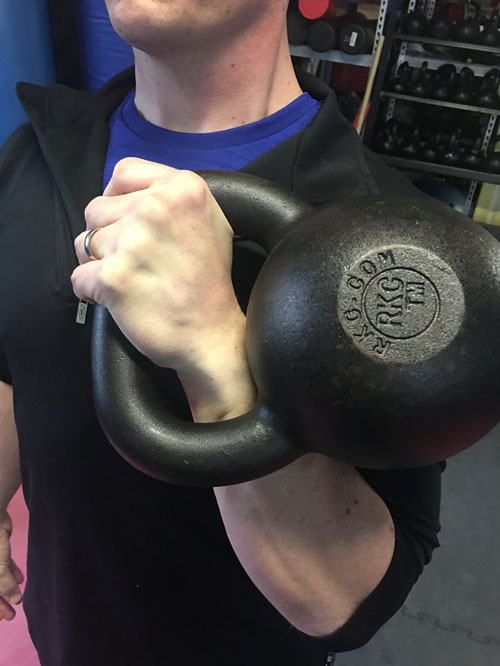
Lastly, I’d like to discuss the issue of discomfort on the forearm. In some cases, depending on an individual’s build and structure, adjusting the kettlebell in the hand and adopting a slightly angled hold during presses etc., may be necessary. The intention should still be to grab the kettlebell in the middle, but also allow it to angle down toward the pinky-side of the hand. It is still important to try and feel the thumb side with a solid contact as described above.
A few populations often have sensitive forearms, but there are methods to help them stay as comfortable as possible while not sacrificing technique:
The first reason for forearm discomfort is being new to kettlebell lifting. It is a new sensation and takes a bit of time to get used to pressure on the forearm. Also, because beginners are typically using smaller, lighter kettlebells which sit higher on the forearm where it is more sensitive. We used to say “If it hurts your arm, get a bigger kettlebell”. That’s not a particularly sensitive thing to say, even though it is true. But, the bigger kettlebells really do sit lower on the forearm and are more comfortable to hold in the rack and overhead.
The problem is that you have to use the appropriate size kettlebell for a given client and a given exercise. Which means beginners, or other populations will still need to use the lighter kettlebells.
In this case, the best solution will be to have your clients use wrist guards to protect the wrist and forearm. The more experienced the person becomes, the more their technique improves—and the more likely they will find a comfortable position. At the same time, they will be working up to larger kettlebells and the problem will go away.
The second and most common reason for people to have problems holding kettlebells—especially in overhead positions—is a lack of shoulder and T-spine mobility. Remember, the more vertical that the arm holding the kettlebell is (either in the rack or locked out overhead), the less weight will be placed on the forearm.
If someone’s lock out is forward of the shoulder, then most of the weight of the kettlebell will go directly into the forearm. Shoulder flexibility and T-spine mobility should be addressed as part of their daily programming. Until the mobility issues are addressed, they will continue to feel the pressure from the kettlebell on their arm.
Big-chested men and women, powerlifters or bodybuilder physiques, might find it hard to hold a kettlebell in the rack position. There is not much that can be done, because it is a structural or body-type problem. They will need to move the kettlebell around until they find the most comfortable arm angle and kettlebell placement. In some cases, the rack position will never be comfortable for them and they should limit holding the rack position for any length of time.
In all these examples, using a wrist guard can help protect the forearm and make the kettlebell position safer and more comfortable. Shoulder mobility work should be done regularly. In some instances, adjusting the grip slightly to angle it off a sensitive point can help. However, keeping good exercise technique in mind, the correct form should be followed as much as possible for safety of the client and the effectiveness of the exercise.
***
Andrea Du Cane is a Master RKC Kettlebell Instructor, CK-FMS, CICS, and RIST, ZHealth certified, she has a BA in Psychology from the University of Minnesota and is also a Pilates instructor. She is the author of several books and dvds including The Ageless Body, The Kettlebell Boomer, and The Kettlebell Goddess Workout. She has over twenty years of aerobics, weight training and fitness experience, with an additional background in… Read more here.