• Skip to main content
  • Skip to primary sidebar
  • Home
  • Contributors
    • Matt Beecroft, Master RKC
    • Martijn Bos, Master RKC
    • Andrea Du Cane, Master RKC
    • Angelo Gala, Master RKC
    • Chris Holder, Master RKC
    • Steve Holiner, Master RKC
    • Dan John, Master RKC
    • Mike Krivka, Master RKC
    • Thomas Phillips, Master RKC
    • Robert Rimoczi, Master RKC
    • Phil Ross, Master RKC
    • Max Shank, Master RKC
  • Workshops
    • HKC Workshops
    • RKC Workshops
    • RKC-II Workshops
  • Find an RKC Instructor
  • Resources
    • Articles
    • Forums
    • Kettlebells
    • Products
  • Blogs
    • PCC Blog
    • Strong Medicine Blog
  • Archives

RKC School of Strength

Official blog of the RKC

Matt Beecroft

Shoulder “Packing”—The Right Way

January 24, 2018 By Matt Beecroft 1 Comment

Matt Beecroft Shoulder Coaching

The kettlebell community has taught the concept of shoulder packing to stabilize the shoulder for a very long time. I have seen it cued, taught, and discussed for about 14 years! As a Master RKC, I see this concept taught worldwide. But for a long time I’ve wondered if everyone really understands the cues.

The premise of “shoulder packing” is to prevent the shoulders from rising towards the ear at the beginning and end of the press—and to keep the shoulder from excessive elevation during the lock out and overhead lifts. The use of the cue “pack the shoulder” or “engage the lats as you initiate the press” is a simplification for the average client. It cues them to avoid excessively using the upper traps and levators to initiate the press. Instead, they should keep the shoulder stable by engaging all four shoulder rotators, the lower traps, and the subclavius (which helps to seat the clavicle in the sternoclavicular joint).

Most clients are desk athletes that come into our gyms with protracted shoulders and a forward head position. Many of them are also upper trap dominant and have poor T-spine mobility. The easiest cue to help someone keep their shoulders from rising to their ears, and thereby risking shoulder impingement and injury has often been: “pack your shoulders by engaging your lats”. But, a better cue might be to engage your entire mid-back along with the shoulder muscles. And it’s also important to remember that over cueing or using unnecessary cues can lead to other shoulder movement problems and issues.

Let’s explore how the lat attaches to the body from a textbook anatomy perspective. Then from a functional anatomy perspective, we can see what it actually does.

Attachment: Function: Requirements for a great press:
Thoracolumbar fascia: 4-8 vertebrae or illium Humeral extension /adduction Humerus flexion/abduction
Ribs Internal rotation Ext rotation for healthy position
Scapula (40% of population ) Weak horizontal abduction Upward rotation and slight posterior tilt of scapula
Intertubercular groove of humerus Lumber extension Stable core
(can differ for people) Lateral flexion Rib cage in neutral alignment
Involved in core, neck and respiration


In the last column above, I’ve described what happens when we press overhead or hold a weight overhead. Activating the lat strongly does the exact opposite of what we want to do when we press or go overhead. When we use the cue “pack the shoulders with the lat”, we can cause scapula depression because of all of its attachment points—which will force the downward rotation of the scapula. This is in direct opposition to the upward rotation of scapula required in an overhead lift. If we “pack the shoulder with the lat” we close the space in the AC joint, and since the lat is also responsible for internal rotation, we are more likely to get some cuff impingement.

Upward rotation of the scapula is perfectly normal and healthy as long as the person has good T-spine mobility and sufficient external rotation of the humerus. In fact, many people need to focus on external rotation when pressing overhead so that they naturally and unconsciously fire the lats, rotator cuff, rhomboids and lower and middle traps in a perfectly synchronized and sequenced way.

Remember, head forward position, poor motor control with the external rotators, and poor T-spine mobility are often the causes of shoulder impingement. When someone performs a good overhead press, they should also have a stable core and neutral rib cage, with no rib flare.

An important component of healthy overhead lifting is unconsciously activating the pesky lower traps in your mid back. While they have no direct control of the humerus, they are an integral part of upward scapular rotation. They are also responsible for some posterior tilt and retraction of the scapula required for correct overhead mechanics.

The activation of the lower trap along with the muscles of the rotator cuff, serratus anterior, rhomboids and lats in the correct sequencing actually helps clear the space in the shoulder for the humerus to move. When we see someone’s shoulder come back to its optimal position, we usually see the upper back contract very subtly. Perhaps the correct strategy for optimal shoulder position is firing the lower traps-not the lats.

The shoulder “packing” cue needs to be used very carefully—much like the cues “pull the belly button in” for core activation (when the core unconsciously fires in a perfectly healthy person), pushing the knees out for correct knee and toe alignment (even when alignment is fine, hence sending someone into varus—the opposite of “valgus” collapse) or the “big chest” cue that can cause undesirable rib flare in some lifts. Trainers should not cue clients on autopilot without observing the actual situation.

Matt Beecroft Shoulder Coaching

Trainers using cues unnecessarily, misunderstanding the nuance and subtleties of the cues, or not understanding the logic behind cues can cause real problems. Better education and understanding of why specific cues are given needs to happen so we can all abide by the first rule of training others: do no harm. Perhaps the cue should be to “activate” the upper back to keep the shoulder in a natural position without overly sucking it down or packing it down. Or maybe some clients would better respond to the cue: “relax the shoulder away from the ear”. Regardless the words chosen, we should only use cues when necessary, not all the time.

Many haphazardly overused cues in the fitness industry also expose a poor understanding of functional anatomy and nuance. Without that understanding, we could be creating some long term negative effects with incorrect cuing. When the shoulder “packs” naturally, it’s a very subtle movement. The human body is amazing, and sometimes trying to outsmart it to make it better can have the opposite result.


***

Matt Beecroft is a Master RKC, PCC Team Leader and CK-FMS instructor with over 17 years as a personal trainer. He is a national fitness presenter with Thump Boxing, an Expert Level 2 Krav Maga instructor with KMG, Muay Thai coach and movement specialist in systems such as CST, Ground Force Method and Animal Flow. He writes for various publications including Breaking Muscle and Blitz Magazine and can be contacted by his Facebook page https://www.facebook.com/MeetLifeHeadOn/ or his website https://www.realitysdc.com.au/

Filed Under: Coaching, Kettlebell Training Tagged With: Coaching, correct cueing, cuing, Matt Beecroft, shoulder health, shoulder mobility, shoulder packing

11 Specialized Variety Methods For Blasting Through Overhead Pressing Plateaus

May 31, 2017 By Matt Beecroft 3 Comments

Matt Beecroft BU Press

A heavy kettlebell press—or any overhead press for that matter—will always be a super impressive feat of whole-body strength. For some, getting heavy things overhead is the meaning of life, and I can understand why! There are few better feelings than locking out a heavy overhead grind.

You have probably heard the phrase, “To press well, you have to press a lot.” Technically, this statement is true. But, when you regularly work heavy grinds like the press, or any high tension, high threshold lift for high reps like ladders, it can be pretty unforgiving on the body—especially the shoulders. Like many in our RKC community, I am a big fan of push-presses and jerks, especially since they seem to be a little more forgiving on the shoulders.

Enter one of the programming principles taught in the RKC: specialized variety. This important concept allows us to avoid plateaus, improve a skill (like pressing), and can also help us avoid injury.

The biological law of accommodation holds that the more you repeat a given movement, the less effective it will be for achieving your goals. A biological object’s response to a given constant stimulus decreases over time. Accommodation is your body’s decreasing response to a constantly continued stimulus—so, we will need to vary our training a little.

Another training principle—which seems to be the opposite—is the SAID principle. The specific adaptations to imposed demands (SAID) principle states that the more something specific is practiced, the more that specific skill will improve. In other words perfect practice makes perfect when it comes to developing skills.

With specialized variety, we want to choose exercises that are very similar, but are slight variations so we can keep training a movement without reaching a plateau.

Principle One: Change Your Foundation

Changing your lower body position is a simple way to add specialized variety to your pressing. With the regular press we usually stand in a bilateral stance with our feet square and roughly shoulder width apart. But, when we change position?

In real life and especially in sports, we’re very rarely in a perfect bilateral stance. More often, we’re in lunge like or single leg stances. Some of these variations can also have crossover for better sports performance.

  1. Feet Together

By narrowing your base, your body really has to zip everything up. Pressing with your feet together ensures that you think about drawing everything into your center, while stopping any tension “leaks” of throughout the body.

  1. Inline Lunge

Similar to pressing with the feet together, but place one leg behind the other (kettlebell on same side as the rear leg). This stance introduces a lateral balance demand and forces the body to zip everything up. You can self-limit the balance demand of this technique—make it harder or easier—by changing the distance or width between the two feet.

  1. Contralateral and Ipsilateral Stances

Even though these stances are very rarely seen or used, I love using them to strengthen the body contra-laterally (think of an X across the body from shoulder to hip) or ipsilaterally (shoulder to hip on the same side). If you are interested in fascia and slings (see Thomas Myers) then this will be right up your alley. These press variations are done on one leg and can be really challenging. For the contralateral version, the kettlebell in the opposite hand of the foot you are standing on, and for the ipsilateral version, press and stand on the same side.

  1. Tall Kneeling and Half Kneeling

Without going down the rabbit hole of corrective exercise, both the tall and half kneeling positions give us great pressing options. By taking the knees and ankles out of the movement, we can focus on letting the hips and the core do their work. The goal of the tall and half kneeling positions is to help us create more stability and control while pressing. They can prompt us to tie the upper and lower body together as in the two previous options. The half kneeling option is also self-limiting. Narrowing your base of support (as in the inline lunge press) in the kneeling lunge position creates more instability—and an environment where you will need to stabilize more to keep your balance—just like the standing inline lunge. If you decide to work from a half or tall kneeling position, you really need to make sure your set up in these positions is spot on—a poor setup will not allow you to gain the benefits of these movements.

  1. V-Seated Press

One of my all time favorite all pressing positions is sitting down in semi side split/pancake position with my legs in a V. This is an amazing variation that really helps to tie in the core with the shoulders, lats, and triceps. Watch your lumbo-pelvic positioning in the V-seated position, so your back and lower back stay in a neutral position.

Matt Beecroft V-Seated Press

  1. The Sots Press

The Sots press is a tough variation for those with great squatting technique and good overhead shoulder mechanics. The press is performed by cleaning the kettlebell, pulling yourself down into a squat, bracing, and then pressing from the deep squat position.

  1. Side Press

Often overlooked as an option to improve the basic press, the side press is an awesome variation that again can really challenge the core. It also requires crazy lat firing, or creating a “shelf” with your lat behind your elbow. This tough variation starts with the feet in a windmill position. The press begins at the bottom position—or after coming down to the bottom position—of the windmill, pressing to lockout and then standing up with the bell just like in the windmill. The windmill is taught at the RKC-II with the kettlebell in the top hand already in lockout and then descending up and down—there’s also a version with kettlebells in both hands. If you are not proficient with the windmill yet, I would suggest waiting to try this press variation until you have trained with an RKC-II instructor.

The setup for this lift is the same as the windmill style setup for the bent press (as opposed to the squat variation of the bent press) taught at the RKC Level-II. Unlike the bent press, where you press your body away from the kettlebell, when performing the side press, you are actually pressing the kettlebell away from you.

  1. The Get-Up Press

Want to strengthen each position of your get-up while training for a stronger press? Try pressing at each stage of the get-up for a real challenge. Even in the half kneeling/windmill position, you can bring your elbow behind your body to the lat, as a progression to help your bent press and kettlebell windmill. The get-up press will really highlight any weakness in your get-up, it will really force you to be more stable in each position.

Principle Two: Change Your Grip

  1. The Bottoms-Up Press

If you’ve seen Master RKC Max Shank perform a bottoms-up press, it’s easy to see that it’s a great pressing variation. While the kettlebell’s groove and body positioning are slightly different, the benefits of this pressing variation are huge. Not only does this variation improve your grip strength, core activation, and reflexive stability, it can also be the safest way for those with troublesome shoulders to press a kettlebell without discomfort or pain. Set up for this lift by placing the webbing of the thumb and first finger in the middle of the kettlebell handle so you can balance it on the heel of your palm. Even though the groove of this press is different, it will encourage you to keep your forearm vertical, which can be helpful for improving your regular press. Since you can’t press very heavy kettlebells with the bottoms-up press, it is a great variation to use when you don’t have a heavy kettlebell to press.
Max Shank Bottoms-up press in Master the Kettlebell

  1. The Stacked Press

The stacked press variation really changes the center of gravity—the position—of the weight/load. To perform this lift, stack a lighter kettlebell on top of a heavier one by carefully cleaning both together and around the wrist. The grip requirement for this variation is huge. You have to crush both handles to complete the press. This is also an awesome option when you only have access to smaller kettlebells or if you only have a few big kettlebell sizes, and want to work on something in between. Because the center of gravity of the load and grip are different than a regular press, you probably won’t be able to press as much with this lift.

Matt Beecroft Stacked Kettlebell Press

Side note: there is a bottom’s up stacked press where you can do a bottoms up press with another kettlebell sitting on top. While I like variety, this is probably taking it a bit too far, and is usually only manageable with very light weight. Even then, it’s a very risky lift, and you probably don’t want to be remembered as an epic “gym fail” on YouTube after a kettlebell falls on your head.

  1. The Waiter’s or Palm Press

When performing a waiter’s press (palm press), you hold the body of the kettlebell, not the handle in the palm of your hand. Your palm is facing up, just like a waiter’s when carrying a tray on the palm of the hand. This variation feels really weird, but encourages surprisingly strong shoulder “packing” and lat activation during the press.

Matt Beecroft Waiters Press

Lastly, it can be really cool to pick an option from principle one and combine it with an option from principle two. For example, you could try a bottoms up press from tall or half kneeling, or a stacked press from the V-seated position. The options are endless and they all lead to a better press.

Don’t forget to base your rep ranges on your goals:

For strength aim for total 6-20 reps and 1-5 reps per set: 3 x 3, 3 x 5, 2 x 5, 5 x 3, 10x 1 etc.

For strength and muscle mass aim for 20-40 total reps and 3-8 reps per set: 7 x 3, 8 x 4, 4 x 8, 5 x 5 (my favorite), 6 x 4, 10 x 4, 6 x 6 etc.

When it comes to pressing, apart from the regular single, double or alternating and see-saw pressing with the feet square and roughly shoulder width apart, these two principles will really help you burst through your current plateau without hours and hours of pressing ladders. Especially when there are no heavy bells to press, we can make the press more challenging and get gains in strength by using complexity instead of load and volume.


****

Matthew Beecroft is a Master RKC, PCC Instructor, and CK-FMS certified instructor. He is also a GFM and Animal Flow instructor and Expert Level 2 instructor with Krav Maga Global and a Muay Thai coach who has trained amateur and professional Muay Thai champions. He can be contacted through his website www.realitysdc.com.au or Facebook page: facebook.com/MeetLifeHeadOn/

Filed Under: Kettlebell Training, Tutorial Tagged With: advanced drills, advanced press, kettlebell training, Master RKC Matt Beecroft, Matt Beecroft, specialized variety

Transform Your Kettlebell Swing with Two Simple Cues

September 14, 2016 By Matt Beecroft 4 Comments

Matt Beecroft kettlebell swing

There’s no doubt that the swing is the center of the kettlebell universe. Mastering the swing should be one of the first goals of your kettlebell journey. It is simple—if you can swing well, you will probably clean and snatch your kettlebell properly too. Besides, the swing should look exactly like your clean and snatch, the hips do all the work and the arm guides the kettlebell to where you want it to go with some “steering strength”. While I consider the swing a basic, nailing it so it becomes a thing of power and grace can be difficult. “Basic” doesn’t mean “easy”.

My previous post, “Regress To Progress” steps out the progressions we use in the RKC to teach the swing. It explains how most kettlebell swing issues can be resolved by going back to master the progressions. Likewise, mastering regressions can really improve your kettlebell swing, no matter where you currently are in your practice.

In my opinion, great coaches give cues which can instantly and radically improve technique. I learned the two cues in this post from former Master RKC Geoff Neupert in my few years training with him. With these two cues, I feel like I can really transform a swing. I use them every time I teach at an RKC Workshop.

The timing of the swing movement is seldom discussed in detail, and yet it can play a very powerful part in making your swing a thing of grace and beauty—and powerful as hell!

One of the benefits of using kettlebells is working with the eccentric phase (the backswing) or downward phase of the kettlebell swing. The “overspeed eccentric” technique is a method to increase the intensity of the kettlebell swing in the RKC. This technique adds an active acceleration of the kettlebell on the backswing in addition to the ballistic concentric acceleration of the kettlebell during the forward swing phase. Instead of simply letting the kettlebell accelerate downward with gravity, a partner pushes the kettlebell down from the top of the swing. This assisted acceleration also increases the posterior chain’s eccentric muscle contraction speed.

During this eccentric muscle contraction, the muscles lengthen from the external load of the kettlebell while contracting under tension. Research shows that eccentric muscle contractions are capable of producing more force than either isometric or concentric muscle contractions. Maximum eccentric strength is estimated to be between 1.5 and 2.0 times that of maximum concentric strength. Put in other words, you get strong on the negative phase of exercises. This is why concentrating on the negative or eccentric phase will build the strength required for both phases of the exercise. For example, learning how to do a push up or pull up by focusing on the eccentric phase is the way to build the strength to do your first full push up or pull up.

“Overspeed eccentrics” result in an accumulation of kinetic energy from greater force production and elastic energy. Studies that have shown that training programs which utilize eccentric contractions at fast velocities remove neural inhibition. Normally, neural inhibition is a mechanism for injury protection as exemplified by the stretch reflex phenomenon. The rapid stretching of the posterior chain muscles in the backswing causes sensory muscle spindles—which are distributed throughout the fleshy part of skeletal muscle—to activate. To protect the muscle from being overstretched, the spinal cord is notified that the muscles are being lengthened. Next, the spinal cord reacts by contracting the muscle being stretched while inhibiting the contraction of the antagonist muscles. This process bypasses sending any messages to the brain and is known as the “stretch reflex”. Taking advantage of the muscle’s elasticity and the stretch reflex is also known as the “stretch-shorten cycle”. The faster the muscle is stretched eccentrically, the greater the force will be on the following concentric contraction. In other words, you will get a stronger and a more explosive swing.

To take advantage of overspeed eccentrics during the two-arm kettlebell swing, two things must be present: a fast backswing and a rapid switch from the eccentric muscle contraction of the backswing to a concentric contraction of the forward swing. This technique can be implemented with the kettlebell swing when a partner forcefully pushes the kettlebell down from the top of the swing at chest height as it we do it in the RKC.

Coincidentally, a common kettlebell swing technique error is to not get deep enough with the backswing. An insufficient backswing results in a lackluster swing without much force. The overspeed eccentric drill is one cure for this—along with other “A-HA drills” you will learn at an RKC workshop.

mattbeecroftswingsetup

What if you don’t have a training partner?

Then, play chicken with the kettlebell! Yes, you read that correctly. Remember earlier in the article when I mentioned timing? We know that kettlebell swings are really ugly when your hips break and your bum goes backwards as soon as the kettlebell begins its downward or eccentric phase. That ugliness is usually just a timing issue.

Instead, try letting the kettlebell drop—or better still—pull the kettlebell down between your legs like a gridiron “hike pass”. Wait for the kettlebell to come down towards your hips, and for your elbows to connect to the rib cage, then right at the last second, forcefully “break” at the hips. You will hinge your hips down and back out of the way, getting a nice and deep backswing. The result will be similar to the overspeed eccentric drill. You’ll follow this with a powerful upward, concentric phase, giving you a much stronger and forceful swing. This is what I call “playing chicken with the kettlebell”. I probably don’t have to tell you what will happen if you wait too long… it will only happen once!

Breaking at the hips should not happen as soon as you reach the apex of your swing. Wait for the kettlebell to descend before hinging back. Be patient with your swing.

mattbeecroftkbswingup
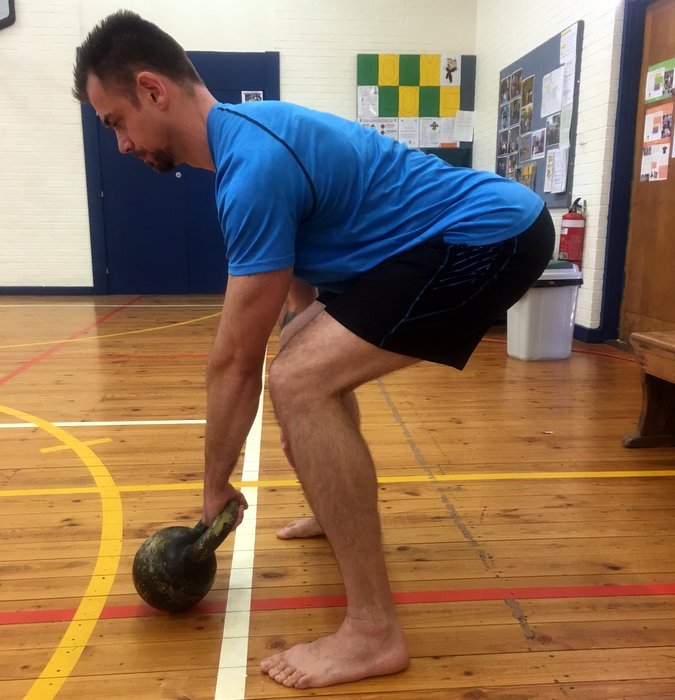
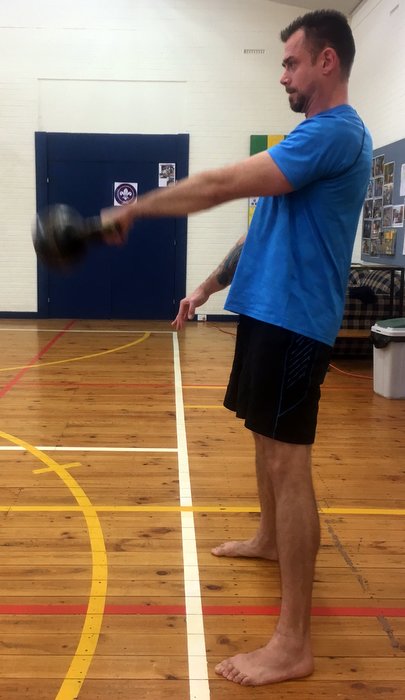
Don’t Rush the Kettlebell Swing

Rushing the kettlebell swing is another one of the biggest technique errors. Lock off your hips for longer at the top

The second cue is probably something you probably think you’re already doing. You might think you’re using your glutes and hips effectively. Finishing your hips strongly at the top of the swing, just like a deadlift lockout, is paramount to using the glutes properly, protecting the back, and strongly completing the movement. But if you observe an average kettlebell swinger, you’ll see that their hip/glute activation or “lock-off” at the top of the swing only lasts for a split second before they turn it off again. Have someone video your kettlebell swing. For an exercise that is touted as a strong posterior activation exercise and glute developer, it’s surprising how many kettlebell swingers hit the top of the swing and don’t keep the hips/glutes locked for longer than a split second. In fact, many won’t finish with the hips at all on their swings. The remedy is to simply to keep your hips locked and glutes engaged for longer at the top of the swing.

This will also change the timing of your swing—you will find that your kettlebell will start to “float” for a second at the apex of the swing. This must happen in our swings if we want to snatch well since the “float” also requires relaxing the shoulders a little (while strongly gripping the kettlebell with straight arms) at the top. This is very different from many incorrect “swing” attempts that are really just a squat with a front raise.

Try the Two Simple Cues…

Play chicken with the kettlebell and work on your timing. Let the kettlebell drop or forcefully pull the it down. Only “break” and hinge at the hips at the last second. Be patient.

Lock your hips and engage your glutes for longer at the top of your swing. Try to “float” the kettlebell with your hips. Feel the change in timing and technique. It will radically power up your swing.

Let me know how you do in the comments section below.


****

Matthew Beecroft is a Senior RKC, PCC and CK-FMS certified instructor. He is also a GFM and Animal Flow instructor and Expert Level 2 instructor with Krav Maga Global and a Muay Thai coach who has trained amateur and professional Muay Thai champions. He can be contacted through his website www. realitysdc.com.au or Facebook page https://www.facebook.com/MeetLifeHeadOn/

Filed Under: Kettlebell Training, Tutorial Tagged With: fix kettlebell swing, how to do kettlebell swing, kettlebell swing, kettlebell swing drills, kettlebell swing technique, kettlebell swing timing, kettlebells, Matt Beecroft, overspeed eccentrics

Regress to Progress—Why Patterning is the Key to Fixing Your Swing

October 28, 2015 By Matt Beecroft 5 Comments

Matt Beecroft Swing Setup
Matt Beecroft demonstrates the incorrect (left) and correct (right) position for starting a kettlebell swing

Movement quality underpins any good strength training system. The RKC has never been just about the kettlebell, it’s always been about learning to move better. And the key to moving better is often knowing the right time to progress an exercise—and when to regress. It can be challenging to know when to increase the movement challenge, complexity or difficulty of an exercise if you don’t have an RKC instructor to coach you. Fortunately, the RKC system also includes an awesome system for teaching the movements progressively and safely.

Sure, you could go out and learn 17 different techniques in other one or two day workshops… But not only will your personal proficiency in those lifts be suspect (unless you are an athletic freak, like our own Master RKC, Max Shank) but more importantly your ability to communicate and teach the information to others will also be questionable. This is especially true when attempting to coach someone who is new to training efficiently, safely, and effectively.

Also, the skill set of an athlete and a coach are very different. Many of your clients aren’t really interested in your amazing athleticism, they are much more interested in how amazing you can make them. We all know great athletes who are terrible coaches and vice versa.

The intelligent progression of exercises which teach how to get from “point A” to “point B” is what sets the RKC apart. If someone is having trouble mastering the swing, you probably know by now that trying to correct it is difficult. Because swings are ballistic, they’re fast, so trying to correct a client (or yourself) during an exercise like a swing can be almost impossible.

The first thing I want to emphasize that you must be patient with the steps leading up to the kettlebell swing. You will know if you have successfully completed the steps if you finally pick up the kettlebell and swing it with some grace and efficiency. But, if you have sped through the progressions too quickly, your swing will be ugly and dangerous. And then more problems will arise when you progress to the clean and the snatch—which should look exactly like a swing in many ways since your arms simply guide the kettlebell to these other positions while your hips do all the work. These more sophisticated exercises will amplify and illuminate all the flaws with your kettlebell swing technique.

Many people speed through the progressions in various exercises thinking that if they have to be patient and spend the time mastering the basics (note: basic doesn’t mean easy) or need to regress the exercise, then they have somehow failed or gone backwards. This couldn’t be further from the truth.

A few things happen when people try to outsmart the process, or jump ahead in the progressions:

  1. They find out that their swing is terrible and have many things to troubleshoot.
  2. They get injured.
  3. All of the above.

Either way, they will end up spending much more time ironing out their kettlebell swing issues. Hopefully they will go to an RKC Workshop to learn the “a-ha drills” we teach to troubleshoot and save time. Otherwise, they risk getting sidelined by injury instead of patiently mastering the progressions and enjoying the journey. Speeding ahead with load and intensity usually causes limited or dysfunctional movement patterns, if adequate mobility and motor control (stability) aren’t achieved beforehand.

So, how should you fix your kettlebell swing?

Embrace the suck and regress to progress. One reason the swing is taught through a progression—at least in my opinion—is because of the patterning. In many respects, it’s similar to some of the ideas in the Functional Movement Screen (FMS). By the time you pick up a kettlebell, after all the correct patterning you have practiced , it shouldn’t look like you are trying to hump the bell! Instead, your kettlebell swing will be a thing of power and beauty.

The general rule is to only use techniques that improve form, quality of movement, and quality practice while reducing compensations. Unfortunately, many trainers don’t have a system for teaching the swing, they just pick up the kettlebell any way they can and then try to get it to move!

The FMS and the RKC teach patterning in this order:

  1. No load, pattern assistance.
  2. No load, no pattern assistance.
  3. Load, with pattern assistance.
  4. Load, with no pattern assistance.

In the RKC, we begin by teaching the hinge unloaded. This is often assisted in a variety of ways – either the student uses the blades of their hands in their hips to help find the hip crease (sometimes coined “chopping and popping”), they might push their butt back towards a wall, or use a dowel touching three points along the spine (head, between the scapula, and the sacrum) to teach how to maintain a neutral spine.

Next we would aim to do this without load, but with no pattern assistance. Our goal is to remove the pattern assistance and do the movement unloaded with perfect form. If the form breaks down we can go back and return to the pattern assistance method (dowel, wall, etc.) until the right movement becomes what we do every time. Old strength coaches were renowned for not letting their athletes pick up a bar until they could first do the movements correctly with a dowel or a stick.

The third stage is load with pattern assistance. In the RKC curriculum, this is the kettlebell deadlift. Placing the kettlebell in line with the heels also places the shoulder blades over the kettlebell. This makes for a foolproof deadlift when we simply stand up with the bell. If you can’t do it slow then you probably can’t do it fast—this is what grinds like the deadlift are all about. Slow is smooth, smooth will become fast later. If the deadlift lacks stiffness or tension, we can use the static stomp deadlift or Hardstyle plank to link the body with tension and to keep midline stability and posture.

The next step is using the deadlift drag or pendulum swing to teach the backswing and the start of the swing—pattern assistance with load. At the final stage we will do dead swings or the proper two handed swing, which is the load with no pattern assistance. If we have adequately mastered the first three steps, the final stage, load with no pattern assistance, will be solid.

Every time I progress a client who isn’t ready, I find that I spend a lot of time trying to troubleshoot their swing. Regressing these clients back to one of the first three stages of patterning was the fastest way to actually help them master the swing.

So relax and enjoy the journey. Be patient in your progress and understand you don’t have to master everything immediately. Basic doesn’t mean “easy”. Spend more time on patterning and you will likely spend less time with the difficult task of troubleshooting swings at full speed. This approach also works with more advanced exercises, for example if your clean isn’t great, your one arm swing probably will need work. If your press isn’t great, your clean will need work. If your kettlebell snatch isn’t great, then your one arm swing, clean, and press probably all need work too.

If you find that your swing isn’t great, don’t think of regressing to an earlier step as failure, or that you’ve made a mistake. You are still traveling in the right direction. Regressing to progress is an amazing strategy that will still have you traveling in the right direction.

***

Matt Beecroft, RKC Team Leader, PCC Instructor is the director and head coach of Reality Self Defense & Conditioning in Adelaide, South Australia. He can be contacted through his website at realitysdc.com.au email: matt.beecroft@realitysdc.com.au or follow him on Facebook: facebook.com/MeetLifeHeadOn.

Filed Under: Coaching, Kettlebell Training, Tutorial Tagged With: clean a kettlebell, how to learn kettlebell swing, how to teach the kettlebell swing, how-to, kettlebell squat, kettlebell swing regressions, kettlebells, Matt Beecroft, movement patterning, movement patterns, movement quality, tutorial

Primary Sidebar

Featured Products

previous arrow
BOOK-RKCBookofSnC
HardStyleKettlebellChallegeDanJohn700
BookCoverMasterTheKettlebell1
RKCiconKettlebell512
KettlebellGoddessdv040
next arrow

Recent Posts

  • RKC Big Six Workout
  • The Kettlebell Swing & Low Back Pain
  • Key Kettlebell Exercises To Help You Create Better Balance
  • How to Most Effectively Use Kettlebells to Meet Your New Year Goals
  • 1 Exercise That Checks All The Boxes
FOLLOW US ON TWITTER!

Archives

Copyright © 2025

Dragon Door Publications / The author(s) and publisher of this material are not responsible in any manner whatsoever for any injury that may occur through following the instructions or opinions contained in this material. The activities, physical and otherwise, described herein for informational purposes only, may be too strenuous or dangerous for some people, and the reader(s) should consult a physician before engaging in them.