• Skip to main content
  • Skip to primary sidebar
  • Home
  • Contributors
    • Matt Beecroft, Master RKC
    • Martijn Bos, Master RKC
    • Andrea Du Cane, Master RKC
    • Angelo Gala, Master RKC
    • Chris Holder, Master RKC
    • Steve Holiner, Master RKC
    • Dan John, Master RKC
    • Mike Krivka, Master RKC
    • Thomas Phillips, Master RKC
    • Robert Rimoczi, Master RKC
    • Phil Ross, Master RKC
    • Max Shank, Master RKC
  • Workshops
    • HKC Workshops
    • RKC Workshops
    • RKC-II Workshops
  • Find an RKC Instructor
  • Resources
    • Articles
    • Forums
    • Kettlebells
    • Products
  • Blogs
    • PCC Blog
    • Strong Medicine Blog
  • Archives

RKC School of Strength

Official blog of the RKC

Frank Delventhal

Finish Your Training Session With The Kettlebell Squat Massacre

April 25, 2018 By Frank Delventhal Leave a Comment

Frank Delventhal's Kettlebell squat massacre

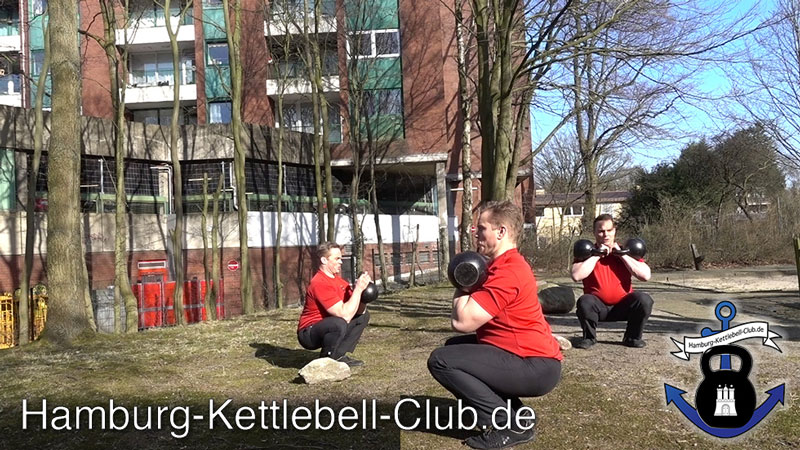
A great training session often ends with a crisp finisher to expend any extra energy. At the end of a recent session, my students weren’t very enthusiastic about doing Dan John’s “6 Minute Squat Challenge” (one goblet squat every 30 seconds and staying in the lower position during the break). I like Dan John’s finisher, but my students wanted something with more variety. One student commented that they’d “rather have something nice, like a mixed grill plate.” That inspired me to name their finisher “Katrins Grillteller.” (Grillteller is the German word for mixed grill plate.) When I asked them if they wanted to do the squat challenge or the “Grillteller,” the decided to choose the “Grillteller” since they didn’t know what it would be. Afterwards, they renamed it the Kettlebell Squat Massacre.

Requirements:

All participants should be proficient in the following squat variants: double kettlebell front squat, single kettlebell front squat and the goblet squat. Be sure to review the correct form for each move and ensure that everyone is safe to complete this intense workout finisher.

Directions:

Have everyone form a large circle. Since most people will accidentally decrease the size of the circle during this finisher, mark the boundaries of the circle with small items.

Each person should choose a kettlebell that they can squat with for many reps. When performing the finisher, everyone squats at the same time—down and up when the trainer instructs them to do so. When everyone is standing again while keeping their kettlebell in the rack position, they march to their next spot on the circle. When everyone is in place, everyone squats together again. If someone’s kettlebell gets too heavy, they should quickly get a lighter kettlebell and rejoin the group.

For groups of less than four people, it’s best to do two rounds, otherwise one round is often enough. Each squat should be held in the bottom position for at least one full breath. Of course longer is always more “efficient.” Staying in the bottom position of the squat for a longer duration is the first way to make the finisher more difficult.

Procedure:

Everyone squats and stands at the same time. When everyone is standing with their kettlebells held in the rack position, it’s time to move forward again. This finisher is not a race, so there is no reason to rush the movements . Be sure to remember where you started on the circle, so you know when one round is complete. If the group is struggling to stay synchronized, be sure that you are giving clear instructions so that everyone can follow your commands.

As a trainer, I like to join in with this finisher. Normally I only lead the training and do not train myself. But I have found that if a coach joins this grind, then everyone seems to be more motivated. If you are the trainer, be fair to your students and pick an appropriately heavy kettlebell. Show that you can do what you expect from your students. “Shared pain is half of the pain.” The goal is for everyone to safely reach their limits and still finish.

Kettlebell Squat Variations

Double Kettlebell Front Squat

Frank Delventhal Double Kettlebell Front Squat

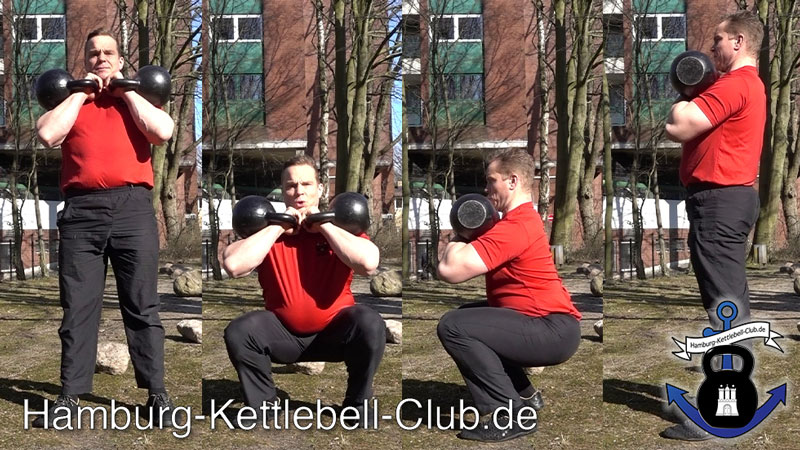
In larger classes it’s not always possible for everyone to have two kettlebells, but this is a great variation when there are not too many people in the group. Fewer people also means that there will be fewer stations on the circle for this difficult squat variation.

Single Kettlebell Front Squat (Left Side)

Frank Delventhal Single Kettlebell Front Squat

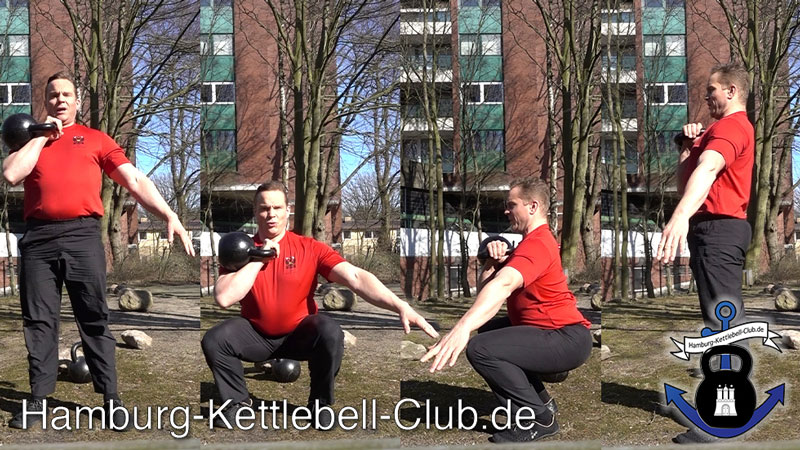
Pay attention to the time spent in the squat. At first, participants can stay in the squat longer when they’re “fresh.”

Single Kettlebell Front Squat (Right Side)

As above. Adjust the time spent in the squat, so that all can still hold a correct position.

Goblet Squat

Frank Delventhal Kettlebell Goblet Squat

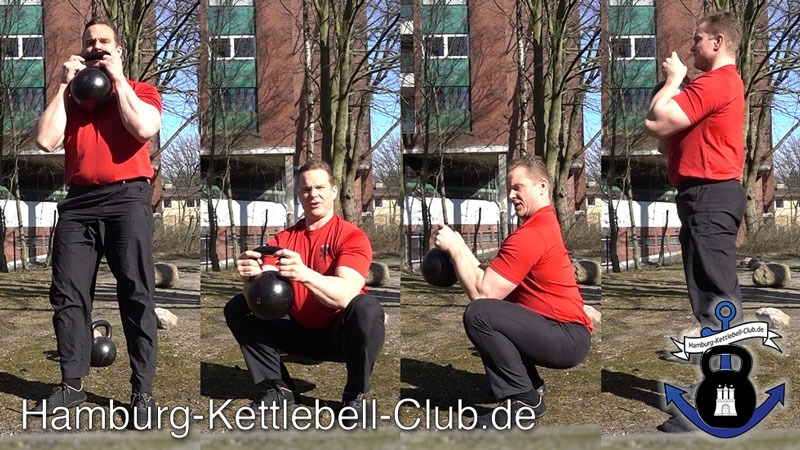
Since the lower position of the goblet squat is relatively easy to maintain (and also a good mobility exercise in itself), aim to stay longer in the squat. So that “nobody gets bored”, while holding the squat, I recommend trying a few “kettlebell curls” since the elbows are already on the inside of the thighs. When leading the finisher, I will do the following reps: 1, 2, 3, 3, 2, 1. Don’t overdo it. And if you can do more than three curls, the kettlebell you’ve chosen is too light for the squats!

Crawling

The kettlebells are placed inside in a circle, then everyone gets on all fours and crawl once around the circle. Knees do not touch the ground, and keep the torso parallel to the ground. Imagine that you’re a moving coffee table

(Evil) Cardio Variation

Replace each kettlebell front squat round with kettlebell thrusters.

Frank Delventhal Double Kettlebell Thrusters

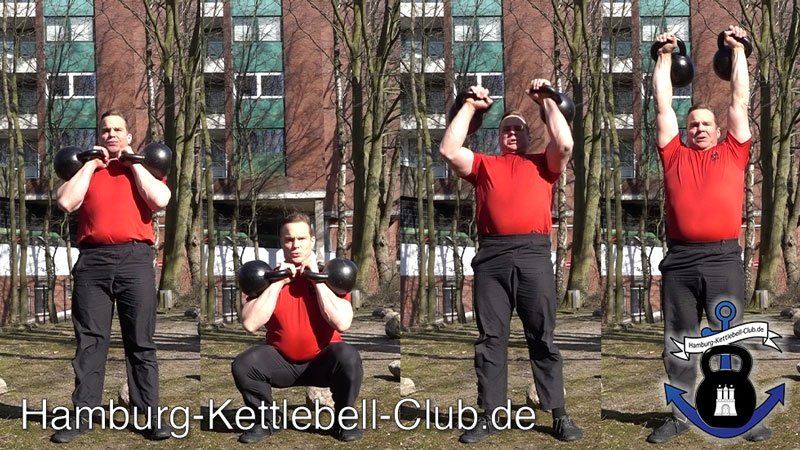
For an cardio intensive version of this finisher for very fit participants, try double or single kettlebell thrusters instead of squats. To perform this movement, squat down with the kettlebell, then use the explosive power of your squat to continue through your arms, pressing the kettlebell overhead. Since the kettlebell is already in motion from the power of the squat, you can lift heavier weights overhead than with a strict military press.

After the kettlebells are thrusted overhead, lower the kettlebells back to the rack position under control, then walk to the next circle position. For an even more difficult variation, keep the kettlebells overhead (“waiter’s walk”) and walk to the next point before bringing the kettlebells down to the rack position. This challenging variation is a good way to strengthen the shoulders and the top position of the lockout.

For groups with mixed fitness levels, advanced students can opt to do the thruster variation. If it becomes too difficult, the student can just switch back to front squats and walking with the kettlebells in the rack position. Be safe and use common sense.

The Unspeakably Evil Variation:

If you do the double thruster variation, add left and right single kettlebell thrusters before doing a round with regular double kettlebell front squats. (This variation is a good way to see how stupid tough you are.)

Adjustments for making the difficulty easier or harder:

  • If your kettlebell becomes too heavy to maintain good form, get a lighter kettlebell and rejoin the group.
  • For a more difficult finisher, do more rounds for each squat variations
  • Adjust the time spent in the bottom of the squat position
  • Adjust the time spent in the rack position before squatting down
  • A larger circle is more difficult, a smaller circle can be easier
  • Replace front squat variations with thrusters (let the kettlebells sink back into the rack position and then continue)
    • To increase difficulty when doing thrusters, leave the kettlebells overhead while moving to the next spot on the circle
  • Do goblet squats with or without “kettlebell curls” at the bottom of the squat
  • For masochists, plan to do thrusters before double kettlebell front squats


Video Example (In German)

Conclusion

This is a “delicious” finisher that can be customized and made to be challenging for anyone. Even though it may sound complicated, it is in fact quite simple:

Everyone gets kettlebells and stands in a circle. They squat together, then move to the next position on the circle. When you reach the point on the circle where you started, switch down to an easier squat variation. The last round is crawling. Enjoy your “meal” and let me know how you liked it!

The original article published in German: https://hamburg-kettlebell-club.de/kettlebell-blog/144-katrins-grillteller-aka-kettlebell-squat-massaker.html


***

Frank Delventhal, RKC2, PCC, 1 Dan Aikido, performing strongman. Visit his website: https://hamburg-kettlebell-club.de/

Filed Under: Kettlebell Training, Workout of the Week Tagged With: finisher, Frank Delventhal, front squats, goblet squats, kettlebell training, kettlebells, squats, workout, workout finisher

How to Dominate the RKC Snatch Test

April 20, 2016 By Frank Delventhal 7 Comments

Frank Delventhal Snatch Test

For many, the Snatch Test is a fearsome obstacle to RKC certification. But it does not have to be that way. When you start training frequently enough and have acquired good technique, you will be able to beat the challenge. It’s like learning vocabulary in school—you know what is expected of you, so it becomes more a question of diligence than talent.

What is the RKC Snatch Test?

You must snatch your kettlebell 100 times in 5 minutes. The weight of the kettlebell depends on your bodyweight, age and gender. The average gentleman will use a 24kg and the average lady usually uses a 16kg kettlebell (be sure to check the rules link below to find your exact weight class)

You are allowed to switch hands as often as you like, and can even (carefully) rest the kettlebell on the floor. Click here for the exact rules and kettlebell weight requirements.

What are the Prerequisites for the Snatch Test?

Before you attempt to snatch a kettlebell, you need a solid foundation in the two-hand Hardstyle swing, the one-arm swing, and the clean. These are the preliminary steps of the snatch. “OK” is not good enough—you must be good at these before you begin training for the Snatch Test.

As a general rule you should be able to do 100 one-arm swings within 5 minutes, with a kettlebell at or close to the weight of the kettlebell required for your test. For example, If you have to use a 24kg kettlebell for your test, you should be able to do 100 swings with a 20kg before you begin to specifically train for the snatch.

What Equipment Do I Need?

  • Assorted kettlebells ranging from very light up to your goal-sized kettlebell. (Hopefully your gym is well stocked and also has an RKC-Certified Instructor!)
  • Chalk
  • Optional hand protection: socks, tape, Dragon Skins™, minimalist gloves (cotton gardening gloves)
  • Optional sweat bands for the wrists
  • Your soundtrack
  • Hand care items for after training
  • You may not use belts, thick or padded-gloves, wrist wraps or any other equipment designed to support your body

Chalk

When doing 100 snatches, your hands will need to withstand a lot of friction. A little chalk can help, and will also dry your skin. If you have sweaty hands during the test, you can end up with “burger meat” for hands without chalk. But, too much chalk is also not good, so be sure to discover the right amount that just keeps your hands dry enough. I found that I do very well with just a couple of drops of liquid chalk or by rubbing a piece of chalk. Since chalk generally dries up your skin, it can cause excessive calluses—see the hand care section below.

Socks, Tape, Dragon Skins™, Minimalist Gloves

You are allowed to use sock strips, tape, DragonSkins™, or minimalist gloves (cotton gardening gloves) to protect your hands. If you really need them, that’s ok, but honestly I do better without them. I think you trade an important tactile connection for a little extra protection. But, I also have relatively tough hands that are conditioned to take a beating!

You may not even need these protective items if you train with the following method: begin with a very light weight and slowly progress to heavier weights (which also create more friction) so that your hands have plenty of time to adapt.

Thin Sweatbands or Long Sleeves

I sweat a lot during the test, so I need to wear sweatbands on my wrists—when I don’t have them sweat floods down my arms onto my hands, turning them to “burger meat” by the end of the test. Remember that wraps to protect or support the wrist are not allowed, so make sure that you only use thin sweatbands. Be sure to ask your instructor or judge at the RKC if your sweat bands are ok.

Alternately, you may want to wear a long sleeve compression shirt. The instructor must be able to see if your elbow is really locked out, so make sure that your compression shirt is extremely light and thin. It’s also common sense to use a dry shirt, not one already quenched in your own sweat!

Your Personal “Snatch Test Soundtrack”

The right music can give you extra power. My favorite track has plenty of power, but is not too fast. It’s 5:12 long, so I figured out exactly when to start during the song’s intro.

Listen to that song every time you practice the test. That has nothing to do with enjoying the music, it’s more about training your subconscious to feel the passing time. The song will also help you focus, giving you additional power. Each time you hear the song or imagine it in your head, you’ll KNOW that you will pass the snatch test. If you’re interested in learning more about the mental side of training, check out Logan Christopher’s Mental Muscle. Even though your snatch test at the RKC will be without music, all you need to do is hum the first notes of your song, and you are ready to rock and roll.

Hand Care After Training

The snatch test is also challenging for your hands. Be sure to start your training soon enough before the RKC workshop so that your hands have plenty of time to adapt.

After every workout, check to see if your calluses are hardening. These hardened areas must be removed carefully with a callus remover. Please make sure that you only remove the hard spots. The callus itself is important because it protects your hands from friction and pressure. If you used chalk (especially liquid chalk) you may also want to use a drop of lotion to soften up your hands.

Frank Delventhal Swings

Why should I train specifically for the Snatch Test? Isn’t it enough to prepare with plenty of swings?

This is a question of faith, and it is possible to gain enough power with swings to pass the test. In an objective comparison of the swing and snatch, you will discover that the swing is safer than the snatch. Using the swing to train is generally justified. Additionally, some argue that the Snatch Test is so strenuous that you should not do it very often. Under certain circumstances, I agree with that argument, especially when the student starts with his snatch size kettlebell and tries to work up to the volume of the test. But the title of this post is “How to DOMINATE the Snatch Test”! So, I have a “secret” training plan for you. 😉

Train Success

Start with a kettlebell that you can snatch 100 times in 5 minutes. It doesn’t matter if the kettlebell is very light—even as light as 6kg! The key is to practice the test two to three times a week after your normal workout, and you must succeed each and every time.

Before you do the 100 snatches, take 3 to 5 minutes to actively relax your muscles and visualize completing the test. The more detail you can imagine in your mind, the better. Mentally, you have already finished the test, before you even touch the kettlebell.

It is essential that you succeed each and every time! The goal is to become so accustomed to doing 100 snatches that it nearly becomes boring.

Frank Delventhal InstructingSnatch as precisely as Swiss Clockwork

Watch your form. Every “no count” is discouraging, and many candidates have lost their focus during the test because of it. Take care that you practice strict form. Take a mini break at the top lockout position, when the kettlebell is held over your head. You will have a small rest, and the instructor watching will absolutely know that you are in control of the movement. Your arm should point straight at the ceiling. Your wrist must be straight, and your legs have to be locked out as well. You will look like a “hardcore version of the Statue of Liberty” holding a kettlebell instead of a torch. 😉

Pull your shoulder down to stabilize it. Normally I do not like mirrors while training, but they can be useful for checking your lockout position.

A Tip For the Overhead Lockout Position

If it is difficult to hold the correct overhead arm position, try the “downward dog” yoga pose. Let the tips of your thumbs touch each other, this will increase your mobility—and the ability hold your arms straight overhead. While a yogi will straighten their legs in “downward dog”, that isn’t necessary for our purposes. We want a straight line from the wrists on the floor towards the hips. It takes some practice to achieve that position (at least for most males, the ladies are generally better at this). If you can maintain that straight line, push your shoulders to the floor and over time, increase your range of motion. Improvement may take five minutes to several months, depending on your general mobility.

Changing Hands

Changing hands uses up precious time. It is an advantage if you can use fewer changes—but that also requires more conditioning. Fortunately with kettlebells, you can train cardio and power at the same time! Work up to more reps before switching hands slowly over time. It doesn’t make sense to do more than 20 snatches with one arm before you switch, as that would be unnecessarily fatiguing.

During the live test, your instructor will count for you. While you train, you should have enough concentration to count for yourself. When in doubt, just do ten extra reps.

Rep Schemes

Use your strong hand last as a “secret weapon”. This will make the end of the test will be much easier for you. For example, I am right handed, so I start with my left hand and finish the test with my right hand.

Scheme A: 9 Hand Changes

Let’s start simply. Do 10 snatches, then change hands until you reach 100 reps. If you can complete this scheme in under 4:30, then try Scheme B.

  • 10/10 (10 left / 10 right)
  • 10/10
  • 10/10
  • 10/10
  • 10/10

Scheme B: 7 Hand Changes

This scheme is slightly more challenging, but if you have completed Scheme A with enough spare time, the extra challenge will only be marginal.

  • 15/15
  • 15/15
  • 10/10
  • 10/10

Scheme C: 7 Hand Changes

This scheme allows you to complete 20 snatches with one arm safely. It is possible that you do not need this scheme, and can jump directly to Scheme D, but try it out at least once. As it gets progressively easier, many people like it.

  • 20/20
  • 15/15
  • 10/10
  • 5/5

Scheme D: 5 Hand Changes

The “master level”

  • 20/20
  • 20/20
  • 10/10

When you can easily complete the test with this scheme, and your time is always somewhere between 4:00-4:30 minutes, then you can progress to the next heavier kettlebell. You will probably be faster just because you need fewer hand changes. With the heavier kettlebell, start with the 10 x 10 (Scheme A). It will be more difficult, but you can do it. Progress the same way until you reach your goal weight kettlebell. Do not rush, just use a weight that allows you to succeed every time and the Snatch Test will become easy for you!

Create a Cardio Surplus

Even with your snatch size kettlebell, you should be able to complete scheme D. With extra gas in your tank, you can do the snatch test any time. If you have a bad day (or a cold), just drop to an easier scheme (such as C).

Does it make sense to use a kettlebell heaver than required by the test? No, and I would advise against using a much heavier kettlebell. “Enough is enough!” (Thank you Dan John.)

The RKC certification requirements include more than just the Snatch Test, so use your energy wisely. After you can do scheme D, only train the test once a week or every two weeks to maintain your skill and conditioning.

After your RKC certification workshop, you can work up to more if you want. Now you know how!

Good Luck!

You will greatly benefit from preparing for the test, whether you want to pass it as a personal goal or for your certification. Now that you know how to tackle it, it isn’t a “boss battle”.

Understand that just watching a video about snatching on YouTube does not mean that you can do a snatch! Get an RKC instructor to teach you the right technique. This is safer and saves time. The snatch is the last exercise of the RKC Big Six (swing, get-up, clean, military press, squat, snatch) because the other five build the essential foundation. Enjoy your journey.

“First use your brain, then train!” 😉

Frank Delventhal, RKC-II

***

Frank Delventhal, RKC2, PCC, 1 Dan Aikido. Visit his website: https://hamburg-kettlebell-club.de/

Filed Under: Kettlebell Training, Tutorial Tagged With: Frank Delventhal, kettlbell snatch test, Kettlebell, passing the RKC, RKC snatch test, RKC workshop prep, Snatch Test

Primary Sidebar

Featured Products

previous arrow
BOOK-RKCBookofSnC
HardStyleKettlebellChallegeDanJohn700
BookCoverMasterTheKettlebell1
RKCiconKettlebell512
KettlebellGoddessdv040
next arrow

Recent Posts

  • RKC Big Six Workout
  • The Kettlebell Swing & Low Back Pain
  • Key Kettlebell Exercises To Help You Create Better Balance
  • How to Most Effectively Use Kettlebells to Meet Your New Year Goals
  • 1 Exercise That Checks All The Boxes
FOLLOW US ON TWITTER!

Archives

Copyright © 2025

Dragon Door Publications / The author(s) and publisher of this material are not responsible in any manner whatsoever for any injury that may occur through following the instructions or opinions contained in this material. The activities, physical and otherwise, described herein for informational purposes only, may be too strenuous or dangerous for some people, and the reader(s) should consult a physician before engaging in them.