• Skip to main content
  • Skip to primary sidebar
  • Home
  • Contributors
    • Matt Beecroft, Master RKC
    • Martijn Bos, Master RKC
    • Andrea Du Cane, Master RKC
    • Angelo Gala, Master RKC
    • Chris Holder, Master RKC
    • Steve Holiner, Master RKC
    • Dan John, Master RKC
    • Mike Krivka, Master RKC
    • Thomas Phillips, Master RKC
    • Robert Rimoczi, Master RKC
    • Phil Ross, Master RKC
    • Max Shank, Master RKC
  • Workshops
    • HKC Workshops
    • RKC Workshops
    • RKC-II Workshops
  • Find an RKC Instructor
  • Resources
    • Articles
    • Forums
    • Kettlebells
    • Products
  • Blogs
    • PCC Blog
    • Strong Medicine Blog
  • Archives

RKC School of Strength

Official blog of the RKC

exercises

Take Those Kettlebells Outside

May 14, 2014 By Laurel Blackburn Leave a Comment

Laurel_kb

It’s spring, the weather is warming up, the flowers are blooming and the sun is shining.

If you’ve been hibernating all winter and your workouts have gotten dull, now is the time to breathe new life into those workouts by taking your Kettlebells outside for some fun in the sun.

The possibilities for outdoor workouts are endless. I’ve been outside with my clients for several weeks working on some fun variations for outdoor workouts. Obviously, you need to be in a large grassy area or you could be liable for destroying property and we certainly don’t want that.

The workouts I’ve included are just a few of the fun variations that you can use. Get creative!

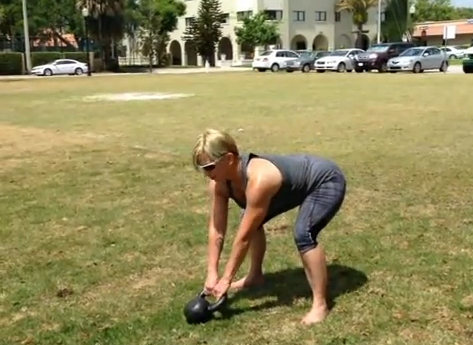
To get a full body workout, I start with bent over rows and push-ups. You can either do them once at the start of the workout or you can have them do the rows and push ups each time they pick up the bell.

Depending on how far you want to go down the field, you can vary the reps. If I plan to go far, then I will do 1 rep of each, swing, squat, curl and press before I throw the bell. If you want you can have your clients do several reps of swings, squats, curls and presses before they throw the bell.

Another option is to add a rep of each for every time they pick up their bell.

This can also be a time to work on form. At the end of the video, I included a “stop and throw” swing. This requires a very powerful hip snap in order to heave the bell as far as you can.

Hopefully this will give you some fun ideas and motivation to get you outside and enjoy the spring time.

***

 Laurel Blackburn is an RKC Team Leader and owner of Boot Camp Fitness and Training and Tallahassee Kettlebells.  Look for Laurel at www.bootcampstogo.com or www.tallahasseekettlebells.com.

In her early fifties, she is out to prove that age is just a number. Her goal is to motivate and inspire people everywhere, both young and old that strength, flexibility and mobility can get better with age. Follow her adventures on her blog: www.SuperStrongNana.com.

Filed Under: Uncategorized Tagged With: dragon door, exercises, fat, fitness, hips, Kettlebell, kettlebells, RKC, strength, swing, women, workout, workouts

It’s in the Hips, Part 4

December 18, 2013 By Mark Bixby 8 Comments

mark_bixby_croppedIn this fourth and final installment dedicated to better utilization of the hips, I show some crawling progressions to emphasize that we can sometimes skip mobility drills and just move instead.  But before we jump into part four, let’s briefly review the previous three pieces.  First, we looked at some basic stretches done in a variety of positions to loosen up tight areas around the hips.  In part two, we covered a very basic dynamic hip and hamstring mobility sequence to prepare field/court athletes or fighters for their active flexibility needs in competition.  In the third piece, I differentiated “linkage” from “leakage” using the Hanging Leg Raise Sequence, and I went on to show how plyometric-style HLR’s can help with patterning powerful hip flexion/extension for the sprints.

I reviewed the previous segments to set this piece up as continuing in the line of “linkage” discussed in part three.  In the HLR sequence, we used linkage to generate explosive power and dynamic control.  Today’s segment departs from the power focus and instead incorporates “linkage” to produce controlled efficiency of movement.  My aim today is to demonstrate quiet rather than explosive movement.

While your average guy on the street isn’t yet acquainted with the notion of mobility, it’s been a trendy word in the fitness industry for several years.  The few people who actually do mobility drills tend to stand in one place and make a series of circular motions through the joints from the neck down to the ankles.  While this is an excellent thing to get fluid moving into the joints and surrounding tissues, it’s debatable whether these isolated drills actually produce better mobility.  Today’s video, then, attempts to show how putting mobility in motion yields better results than isolating each joint while also being more fun.

There are six movements on the video.  All of them both require and improve mobility in the hips.  The first two are low crawls, one on the belly and one on the back.  The next two moves are creeping squats, the first done from a traditional squat and the other from a Cossack squat position.  The final two moves combine elements of the first four and add rolls.  The goal on each of the six movements is to move quietly.  If you can do them without producing thuds during the transitions, you aren’t leaking; instead, you’re moving efficiently.

In an attempt to elaborate on my notion of how linkage can create quiet as well as explosive movement, I’ll provide an exercise x-ray of the fifth move in the video: the creeping squat/roll combination.  I set up the move in a Cossack squat position.  From there, the flat foot shifts towards the ball of foot as the ankle extends to drop the knee to the floor.  The knee drop carries my momentum forward.  If I don’t rotate through my thoracic spine while flexing and rotating my neck, I’ll do a face plant.  So, I opt for rotation.  The previous movement clears the neck and spine so I can roll over the shoulder.  An internal rotation of the rolling shoulder (imagine the Egyptian shoulder mobility drill that screws the shoulders into internal and external rotation) allows me to take the impact of the floor on the backside of the shoulder (thus avoiding jamming into the A/C joint).  I roll across (not straight down) the spine to the opposite hip and back into the Cossack position.  I do a creeping squat Cossack switch to get the other knee up and repeat the sequence to roll over the opposite shoulder.  Basically, I have linked mobility drills sequentially from the feet up through the neck to produce movement.

In the RKC School of Strength, we emphasize the Turkish Get Up because it demands multi-planar movement through multiple joints while navigating the stability challenge of maintaining weight overhead.  It is one of those few, coveted “desert island” exercises because of its strength, mobility and stability demands.  If we hope to achieve the same great benefits from bodyweight exercises, we need to remember the mantra of “multiple planes, multiple directions and multiple joints.”  While focusing on the hips is a great place to start in this endeavor, we must remember that dynamic movement is produced by systemic integration.  Hopefully, the video that accompanies this piece can give you some ideas in making your movement more effective, integrated and enjoyable.

***

Mark Bixby is a Dragon Door RKC Team Leader, PCC Instructor and MovNat Instructor.  He discovered kettlebells in 2002 and found that they are the quickest, most effective way to train.  A combination of past injuries and persistent low physical self-image had caused Mark to have severe posture issues and chronic back pain. Kettlebells taught Mark how to use his hips so that he didn’t tuck his pelvis and slump with his posture. He grew taller, stronger and more confident. More than six years later, Mark has accomplished huge gains in strength, flexibility and stability and he finds that kettlebells still present significant physical and technical challenges. Because the skill set can always be refined, kettlebells continue to push Mark towards higher levels of body awareness and fitness. Mark can be reached through: http://www.dkbfitness.com/.

Filed Under: Uncategorized Tagged With: dragon door, exercises, GAIN, hips, joints, Mark Bixby, part 3, posture, stiff, stretches

It’s in the Hips: Part 3

October 30, 2013 By Mark Bixby Leave a Comment

Part three of this series on the hips continues the focus on dynamic hip action demonstrated in the second installment by implementing explosive hip drive into the Hanging Leg Raise sequence.  After reading this and watching the companion video, you’ll have more control in your HLR while also running faster and jumping higher.

One of the great aspects of the PCC was the camaraderie developed over the three days.  As we were sharing pull-up and flag stations, as well as spotting each other on handstands and bridging, we got to constantly coach and encourage each other.  This was most evident during the Century Test, where the 55 attendees rotated through four testing stations.  This meant that each of us had a cheering audience to encourage us through the Century.

Beth Andrews, Senior RKC and Iron Maiden (a title gained by doing a press, a pull-up and pistol with a 24 Kg. kettlebell) was the first person to pass the Century and gain her PCC certification. While the three guys next to her blew through their squats and pushups, Beth methodically did her own.   The guys got to the bars to start their 20 hanging leg raises before Beth, but she ended up finishing first.  While the Century isn’t a race, Beth’s hanging leg raises perfectly demonstrated the contrast between “linkage” and “leakage.”   Beth’s leg raises could have been done with walls right in front and behind her, and she wouldn’t have touched them.  She pulled her knees straight up, and pushed them straight down, deftly “linking” her movements into a total-body move.  Meanwhile, the guys started noticeably swinging a bit in the HLR and had to stop their reps and kill their momentum so they didn’t get no-counted.  They were “leaking.”  Determined to mimic Beth’s HLR during my Century, I stepped up to the bar, started the sequence and began rocking a bit by my 5th rep.  I “leaked.”  The question was where.

As I quickly discovered at the GAIN Conference (discussed in part two of this series), I was leaking from the ankles up through the hips.  Gary Winckler, Head Coach of the University of Illinois Women’s Track Team, led practical sessions at GAIN to demonstrate the importance of hip drive and ankle tension in the sprints.  Over the course of his illustrious career at Florida State and Illinois, Mr. Winckler has coached over 300 All-Americans and 13 Olympians in the sprints and hurdles.  He told us that the common coaching cues in the sprints—“stride it out” and “kick your butt”—had transformed sprint mechanics from being powerfully hip-driven to being weakly knee-driven.  Striding as far as possible, we extend our knees, driving our posture forward.  Then, to look pretty, we weakly flex our knees to kick our butts.  As Coach Winckler demonstrated, the point is to create power by pushing through the ground with powerful hip extension on one leg, while spring-loading the other leg in hip flexion and prepping it to drive down.  The up/down motion generated by the hips allows the runner to maintain the upright posture most effective for generating force into the ground.

While I made improvements on my stride working on the track, the lesson of hip drive didn’t really hit home until the next day’s session in the weight-room with Coach Jim Radcliffe of the University of Oregon (See part two of this series for more on Coach Radcliffe.).  As a powerful hip hinge is a huge part of running faster and jumping higher, Coach Radcliffe tries to teach it in as many contexts as he can.  He uses the hanging leg raise sequence to demonstrate how linking the hips/ankles into the movement can produce a more explosive leg raise without compromising posture.  For me, Coach Winckler’s advice on the track hit home on the bar.  A dynamic combination of hip flexion/extension and active ankles in the hanging leg raise cured me of my swaying motion.  He was right: I had been weakly flopping through the knees and not driving up and down through the hips.  After doing these dynamic hanging leg raises, I went back to the track, found the hip and ankle link, and produced the most powerful sprints I’ve ever run.

Please watch the accompanying video to learn this “plyometric” HLR progression.  You’ll better understand linkage in your HLR sequence and benefit in your sprints and jumps.

***

Mark Bixby is a Dragon Door RKC Team Leader, PCC Instructor and MovNat Instructor.  He discovered kettlebells in 2002 and found that they are the quickest, most effective way to train.  A combination of past injuries and persistent low physical self-image had caused Mark to have severe posture issues and chronic back pain. Kettlebells taught Mark how to use his hips so that he didn’t tuck his pelvis and slump with his posture. He grew taller, stronger and more confident. More than six years later, Mark has accomplished huge gains in strength, flexibility and stability and he finds that kettlebells still present significant physical and technical challenges. Because the skill set can always be refined, kettlebells continue to push Mark towards higher levels of body awareness and fitness. Mark can be reached through: http://www.dkbfitness.com/.

Filed Under: Uncategorized Tagged With: dragon door, exercises, GAIN, hips, joints, Mark Bixby, part 3, posture, stiff, stretches

It’s in the Hips, Part 2

September 25, 2013 By Mark Bixby 2 Comments

In part one of this four-part series, I talked about how hip stiffness is usually part of a larger complex of stiff tissues and joints throughout the body.  I then offered a very basic mobilization sequence starting with a knee sit and progressing to a standing hip extension/flexion drill.  In this second part of the series, I will discuss more dynamic strategies for opening the hips and hamstrings to produce the active and resilient flexibility needed for sport.

After finishing the initial PCC with Al, Danny, Steven and Adrienne, I had the opportunity to attend the GAIN Conference hosted by Vern Gambetta at Rice University in Houston.  This five day event, which started each day at 6:30AM on the Rice track and concluded at 9:30PM at the Valhalla Pub, included lectures and practical sessions hosted by luminaries in Olympic, collegiate and professional athletics.

One of the most inspiring presenters was Jim Radcliffe, Head of Strength and Conditioning at the University of Oregon for the past 28 years.  It was immediately obvious that Jimmy was first and foremost a “movement” guy, who happened to be applying his principles in one of the most successful and well-funded athletic departments in the world.  He spoke of growing up in northern California where he climbed trees and ran through the woods acquiring strength, mobility and coordination in a natural environment.  He then discussed how his strength and conditioning program for Oregon football was based upon the natural movements he grew up with.  Jimmy said that probably only 25% of his team’s work is done with weights.  And much of the weight work, such as his Good Morning sequence, adds movement into the progressions.

Jimmy’s training template is as follows (in this order): dynamic mobility, “pillars of strength” (reflexive core stability drills), two stations of hip hinging drills, two weight-based stations (usually Olympic-style lifts), and agility work.  The athletes do much of this work barefoot, and the agility work is often done in Oregon’s 40-Meter sandpit.  Most importantly, Jimmy uses what he calls a “Jet Tempo” in his workouts to mimic the pace that Oregon football has become famous for.  He emphasizes that he does no additional “conditioning” work to supplement his workouts.  As he wants every rep to be explosive, he has no interest in training kids to do cardio at less than game pace because he doesn’t want to create “slow” neural adaptations.

The video that follows is an adaptation of the dynamic mobility drills Jimmy had us do in one of our practical sessions at GAIN.  He said the athletes spend 3-5 minutes max doing this before going on to their reflexive core work.  As Pavel demonstrated in Super Joints, Beyond Stretching and Relax into Stretch, athletes need to be flexible in athletic positions.  They need mobility/stability under the incredible amount of tension produced by making high-speed cuts and other athletic moves.  This sequence is a great way to loosen up the hips and hamstrings to prepare your body for whatever intense workout you may have in store for it.

***

Mark Bixby is a Dragon Door RKC Team Leader, PCC Instructor and MovNat Instructor.  He discovered kettlebells in 2002 and found that they are the quickest, most effective way to train.  A combination of past injuries and persistent low physical self-image had caused Mark to have severe posture issues and chronic back pain. Kettlebells taught Mark how to use his hips so that he didn’t tuck his pelvis and slump with his posture. He grew taller, stronger and more confident. More than six years later, Mark has accomplished huge gains in strength, flexibility and stability and he finds that kettlebells still present significant physical and technical challenges. Because the skill set can always be refined, kettlebells continue to push Mark towards higher levels of body awareness and fitness. Mark can be reached through: http://www.dkbfitness.com/.

Filed Under: Uncategorized Tagged With: dragon door, exercises, GAIN, hips, joints, Mark Bixby, posture, stiff, stretches

Check Your Neck (Before You Wreck It)

May 3, 2013 By Max Shank 1 Comment

maxshankblog_pic1
I’m imagining this is you, exercising.

I can’t tell you how many people walk into my gym with neck and/or shoulder pain. Okay I can, it’s a lot—probably half. There are a couple of factors that cause this:

  • Forward head posture
  • Poor Breathing
  • Lack of disassociation between neck and shoulders during exercise

Let’s break down the problem that’s causing your forward head posture.

  1. Lack of thoracic spine mobility
  2. Shoulders rounded forward (tight pecs)
  3. Cervical immobility

maxshankblog_pic2

Fortunately you’ve been given tools on how to deal with thoracic immobility (Joint by Joint approach). This could include foam rolling, lying rib pulls, or one of many other thoracic mobilizations.

Tight pecs can be simply addressed by some SMR (Self Myofascial Release) via a lacrosse ball against the wall:

and followed up by some wall slides:

Cervical spine immobility can be caused by a number of factors. For the sake of simplicity, the scope of this article will cover fascial tightness and lack of joint awareness or motion. Fix it by rolling out the levator scapula (between your shoulder blades and your spine) and your traps with the lacrosse ball. Next step is to take care of your awareness of good neck position.

Do this by gliding your face forward and backward (think funky chicken), trying to maintain length through your spine. Do 5 reps nice and slow. You’ll be amazed at how uncoordinated it is at first.

(Editors note: I doubt this will do anything for your gobbler). Finish with some good rotations left and right, through a full range of motion—think about lifting through your crown.

Next step is breathing.

We all start knowing what to do here and somewhere along the line it gets pretty messed up. Most folks breathe through their mouths (not ideal) and the shoulders elevate with every breath. Also not good when you consider we take an average of 20,000 breaths per day. You can imagine how 20,000 dysfunctional breathing shrugs might have an impact on your neck health.

  • Quick fix #1: Start breathing through your nose. Seriously that’s it. We’re designed to inhale and exhale through the nose, start doing it. All the time.
  • Quick fix #2: Breathing exercise: Lay face down with your forehead on your hands so you’re comfortable. Place an ankle weight (book, medicine ball, small child, etc) on your low back around your sacrum. Breathe for 5:00 (through your nose) trying to lift the weight with each inhale. The weight gives you instant feedback and gives you something to push into, making it much easier.

Combining these 2 things will not only increase orthopedic health, but also increase performance by improving your kinetic efficiency. However, it’s a total waste if you keep breaking yourself in the gym:

Disassociation between neck and shoulders during exercise is imperative if you want to maintain optimal strength and athleticism. Bench, check your neck. Rows, check your neck. Weight overhead? Check your neck.

The point is that you should be able to rotate your neck left and right freely during exercise. This is most easily experimented with during pushups or one arm presses.

Pushup:

  • Assume pushup position
  • Rotate neck left and right (if your ROM feels strained, try to lengthen your neck)
  • Drop into a pushup
  • Rotate left and right (“check your neck”)
  • Pushup back up

Overhead Press:

  • Bring dumbbell or kettlebell to the shoulder
  • “check your neck”
  • Press dumbbell or kettlebell overhead
  • “check your neck”

You should be able to move freely during almost any exercise or stretch you’re doing. Not only will it save you a lot of trouble dealing with neck and shoulder pain, but it will also elevate your performance by improving your upper body coordination, making you stronger.

-Max Shank

***

About Max Shank, Master RKC: Max Shank is not only an extremely gifted teacher, but one of the most well-rounded and capable athletes in the world. From excelling in Muay Thai and Jiu Jitsu to performing impressive feats of strength in weightlifting and gymnastics, Max has… Read more here.

Filed Under: Uncategorized Tagged With: before, check, exercises, health, injuries, kettlebells, max, neck, shank, you wreck, your

My Journey to the 1 Arm, 1 Leg Push Up

April 17, 2013 By Beth Andrews 3 Comments

I’ve always been interested in mastering body weight exercises. There is a fascination with athletes that are able to push and pull their body around with total body strength as opposed to those that can only lift a heavy object. When I began kettlebell training, and more specifically, when I got certified in RKC, I began drifting towards the body weight challenges.

At my RKC2 in April 2012, I bought the Convict Conditioning book and signed up for the Naked Warrior cert held in October. Females were required to do a 1 arm push up to pass. I didn’t know much about the technique of the 1 arm push up and with only a few months to prepare, I dug into the CC book for guidance. My program design was centered on training Pull ups, HLR, OAPU, Pistols, Handstands, and Bridge work.

Just prior to the cert, the results were: HLR- 2 sets 27reps, Pistols- 37right/37left, Uneven Pull Ups- 5sets 5reps, Bridges improved, and even though I was hesitant in kicking up a Handstand, I had help getting up and then would hold the position. And of course, sets of 1 arm assisted push-ups. I had actually gotten an ugly 1APU . The strength was there but the mechanics of tension, engaging hollow, breathing, etc., was missing.

The Naked Warrior cert went into details with creating tension, engaging hollow, breathing, shoulder positioning, etc. and it all came together for me. I was able to achieve the 1 arm push up.

Here’s a demonstration video, followed by some cues:


Cues to Use: Root hand in floor. Pack the shoulder. Wrap arm around low back and squeeze fist creating tension. Engage the hollow position. Quick breath in and hold. Chest to floor. Let just enough air out to push up.

The following week, I designed a thirty day program for the 1 Arm 1 Leg Push Up using ladders. I paired variations of pull-ups with OAOLPU assisted ladders. I only laddered up to three on each side but varied the rounds each day I trained. I also varied the intensity by using a basket ball on easier days and using a towel/Frisbee as a harder variation. I didn’t over complicate things with different variations I picked 2 and stuck with it.


MONDAY- 3 rounds

BW pull ups- 10

OAOLPU ladders- 1-1,2-2,3-3 (towel assisted)

WEDNESDAY- 4 rounds

L-sit Baseball grip pull ups- 8

OAOLPU ladders- 1-1,2-2,3-3

FRIDAY/SATURDAY- 3 rounds

Weighted pull ups- 5

OAOLPU ladders- 1-1,2-2,3-3 (Towel assisted)


I kept it simple. I never went to failure. I always could have done a few more reps. I never forced reps. If I needed a day of rest I took it. I waited thirty days before testing to see the progress.

On Tuesday, Thursday, and Sunday, the workout consisted of bridges, handstands, hollow drills, pistols, cossack pistols, weighted push ups, HLR, and OAOL plank holds. I also snatched twice a week.

After 30 days, I achieved the OAOLPU.

Here’s a video and cues:


Cues to Use: Root hand in floor. Pack the shoulder. Lift opposite leg and push contact foot into floor. Wrap arm around low back and squeeze fist creating tension. Engage the hollow position. Quick breath in and hold. Chest to floor. Let just enough air out to push up.

Next up is the PCC, as Al Kavadlo says on the Progressive Calisthenics blog… ”We’re Working Out.”

 ***

More about Beth Andrews: Beth Andrews, Senior RKC,  is a gym owner and instructor at Maximum Body Training in Cartersville, Georgia.  She can also be reached through her website: http://www.wix.com/drruss21/mbt.


Filed Under: Uncategorized, Workout of the Week Tagged With: beth andrews, body, bodyweight, exercises, fitness, oaolpu, one arm, one leg, pushups, RKC, senior, weight, women, workout

The “Dirty Dozen” Exercises (Part 1) by Phil Ross

January 16, 2013 By Phil Ross 25 Comments

More often than not, I get asked “Coach, what are the best exercises to do?” Or “If you were to choose “X” amount of exercises, what would they be?”. There are a plethora of great exercises and variations that my students and I truly love to do. However if I were to boil it down to several movements that are essential to any strength and conditioning regimen, I would choose 6 Kettlebell exercises and 6 Bodyweight movements.

I’m not saying that these are the ONLY exercises you should do but they all should be included in your workout regimen, no matter what your focus is. These exercises will increase strength, endurance, coordination, flexibility and durability like no others. These exercises will even improve your performance with your bench press, deadlift and bar squats , not to mention your physique.

Over the next year, I’ll be putting forth write ups accompanied by videos on the “Dirty Dozen”. We’ll discuss variations and progressions, especially when considering bodyweight. I’ll discuss each movement in depth and give my reasoning for the selection of each movement.

OK- here’s the list.

Kettlebells

The Kettlebell Swing: This movement is the root of all Kettlebell Training and one of the great differentiators between Kettlebell based training and all other strength developing exercise systems. The Kettlebell Swing “reverse engineers” the practitioner’s hips by developing hip hinge through the pop and lock required to execute the movement properly.

The Front Squat: Single Rack or Bottoms up. Squatting is the most important movement for lower body strength. The Front Squat, by virtue of the position of the Kettlebell, requires the complete linkage of the upper and lower body. Tensioning of the trunk (I’m not a fan of the word ” core” ) and maintaining the bell in the prescribed position requires considerable upper body engagement in addition to the tension in the trunk.

The Kettlebell Press: Pressing heavy weight above your head is very cool and extremely useful. The Kettlebell Press employs full range of motion, full body tension and the active negative motion of the bell.

The Get-up: There is not a single movement that incorporates more muscles of the body than the Get up, also known as the Turkish Get Up or TGU. This incredible exercise is a signature movement of Kettlebell Training. Dynamic tension, balance, flexibility and body alignment are all developed with the TGU.

The Clean: The Kettlebell Clean is used in a great deal of Kettlebell complexes, racking the kettlebell for Squats and Presses, but it’s an incredibly beneficial stand alone movement. A single arm clean taxes the stabilizers in the trunk as well as reinforcing the tensioning and relaxing of the body.

Pose_A_No_Adj

The Kettlebell Snatch: This is my favorite of all Kettlebell movements. The Kettlebell Snatch is a ballistic movement that develops strength, endurance, speed, coordination and there is no question why this movement is used in both competitions and testing as a fitness barometer. The Kettlebell Snatch V02 Max workout is unmatched in maximizing one’s volume of oxygen uptake.

Bodyweight

The Bridge: An ignored movement in American physical fitness. Very few athletes, except for wrestlers and gymnasts, utilize this crucial movement. The Bridge is exactly what it’s name connotes. The development of a strong, flexible spine linking together the upper torso with the trunk and lower limbs. Strong spinal erectors are essential to a healthy spine and unhindered movement. Key to athletics, active living and certain vocations – not to mention every day living!

Hanging Abdominal: One can do thousands of crunches and buy every gimmicky ab machine on the TV at 2:00am, but nothing will develop your abdominal strength better than the Hanging the Abdominal. Lifting your legs up to your chest or your feet above your head develops and requires significant abdominal strength.

The Pistol (Single Leg Squat): The most difficult and beneficial leg exercise – period. The training en route a butt to heel Pistol develops balance, trunk stability and incredible leg strength. There are weight lifters that can full squat 600 pounds, yet they collapse and fall over when attempting the Pistol.

The Hand Stand: This is the coolest of all bodyweight exercises. Nothing demonstrates full body control and balance than being able to invert yourself in the middle of a room and hold it there. The progressions building up to the Handstand develop incredible shoulder and trunk strength.

The Pull-up: There is no single exercise that demonstrates and develops upper body strength like the Pull-up. If you can do 20 pull-ups, you are in great shape. I challenge you to show me a person who can do 20 pull-ups and doesn’t have a 6-pack.

The Push-up: The Push-up is my favorite for several reasons. There are fun and challenging variations, the movement works not only your upper body but conditions your abdominals and reinforces the total body tensioning. The best thing about Push-ups is that you can do them virtually anywhere that there is a floor. Your bedroom, basement or office – anywhere. There is no good reason for you not to do them.

Get started now!

There you have it. 12 exercises that no training regimen should be without. If you want to achieve ultimate, applicable strength and conditioning, your program needs to include these core “Dirty Dozen” exercises.

—

Phil Ross: Master RKC, 8th Degree Black Belt, Specialist in Bodyweight Strength and CK-FMS Certified. Phil Ross’ name is synonymous with Martial Arts and Fitness. He is known as the area’s Kettlebell King and has successfully competed on the National Level in Submission Fighting, Kickboxing, both Full Contact; Point Karate, Taekwondo and Olympic Style Wrestling from 1979 through 2010. He has also held several titles in Bodybuilding and Power Lifting. More important than his personal accomplishments are the many benefits that his students have gained. He has trained many National and State champions in a multitude of Combat Disciplines, Scholarship Athletes, Law Enforcement and Military Personal as well as professional athletes.

He has owned and operated his studio, American Eagle MMA & Kettlebells, ever since 1988, training thousands of students in his classes and seminars. In addition, he created the #1 Rated S.A.V.E. Self Defense and Fitness video series, has an online Kettlebell Training program and The Kettlebell Workout Library video training system.


Filed Under: Uncategorized Tagged With: dirty, dozen, exercises, phil ross

Primary Sidebar

Featured Products

previous arrow
BOOK-RKCBookofSnC
HardStyleKettlebellChallegeDanJohn700
BookCoverMasterTheKettlebell1
RKCiconKettlebell512
KettlebellGoddessdv040
next arrow

Recent Posts

  • RKC Big Six Workout
  • The Kettlebell Swing & Low Back Pain
  • Key Kettlebell Exercises To Help You Create Better Balance
  • How to Most Effectively Use Kettlebells to Meet Your New Year Goals
  • 1 Exercise That Checks All The Boxes
FOLLOW US ON TWITTER!

Archives

Copyright © 2025

Dragon Door Publications / The author(s) and publisher of this material are not responsible in any manner whatsoever for any injury that may occur through following the instructions or opinions contained in this material. The activities, physical and otherwise, described herein for informational purposes only, may be too strenuous or dangerous for some people, and the reader(s) should consult a physician before engaging in them.