• Skip to main content
  • Skip to primary sidebar
  • Home
  • Contributors
    • Matt Beecroft, Master RKC
    • Martijn Bos, Master RKC
    • Andrea Du Cane, Master RKC
    • Angelo Gala, Master RKC
    • Chris Holder, Master RKC
    • Steve Holiner, Master RKC
    • Dan John, Master RKC
    • Mike Krivka, Master RKC
    • Thomas Phillips, Master RKC
    • Robert Rimoczi, Master RKC
    • Phil Ross, Master RKC
    • Max Shank, Master RKC
  • Workshops
    • HKC Workshops
    • RKC Workshops
    • RKC-II Workshops
  • Find an RKC Instructor
  • Resources
    • Articles
    • Forums
    • Kettlebells
    • Products
  • Blogs
    • PCC Blog
    • Strong Medicine Blog
  • Archives

RKC School of Strength

Official blog of the RKC

Archives for February 2014

Fitness, Health, and Performance

February 26, 2014 By Max Shank 4 Comments

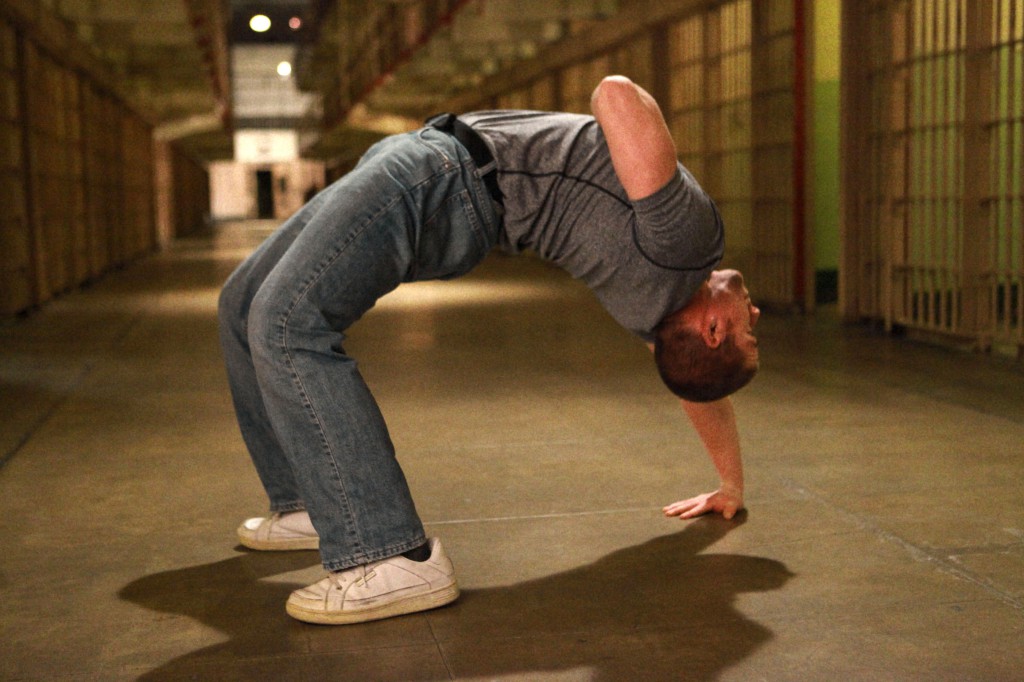
Max_Shank_IMG_1520

What is the primary goal of exercise? What is the primary objective to training at all?

The answer is that it depends entirely on the individual. However, most of us will fall into the health category. This would include anyone who is not a professional athlete getting paid for their level of performance. Fitness and Health typically go hand in hand, but Health is the primary goal. It is possible to be fit (physically) but to be unhealthy (pain, disease, malnutrition). Therefore we must look at Health first. Then we can address fitness and performance.

There are a few cases where you may have to sacrifice health to excel at a sport (i.e. cutting weight for wrestling, or taping up an ankle instead of resting because you are the star quarterback playing in the Superbowl.)

As you can see those instances are few and far between. So focus on Health before performance. The really cool part is that being healthy will actually unlock your potential by eliminating negative effects of distress/sickness.
When you are in pain or unhealthy, a couple things will happen:

1) Cortisol (stress hormone) is elevated constantly from pain which decreases growth hormone, testosterone, muscle growth, recovery, strength, etc.

2) Pain is depressing and will be psychologically damaging over time. Do not develop an association between pain and exercise!

3) When you feel pain, your brain will compensate by making you weak, tight, or both so you don’t do any more damage. This obviously makes you weaker or stiffer–the last thing you want.

4) Basic nutrient deficiency can also play a factor in your decreased health and performance

-Fatigue

-Apathy

-Simple Vitamin D deficiency, for example, can cause muscle fatigue, weakness, and even depression

So realize, moving forward, that health is not only a precursor to fitness and performance, but health enhances performance, as well as quality of life.

Common Sense

My best friend’s dad told us when we were young that, “Common sense isn’t very common.”

I have found the last couple decades to have confirmed that statement.

So, with that said, here is an abbreviated list of the most important common sense to be applied to your training.

1) If it hurts, don’t do it.

2) Don’t try to put square pegs into round holes.

3) Heavier does not mean “better.”

4) More does not mean “better.”

5) Your personal goals are yours and yours alone, and they are meaningful

6) You don’t have to do anything

Keep these simple things in mind when you approach your training or coaching.

Fitness Folks

The overwhelming majority of exercisers want the following things in this order:

1) Look better

2) Lose Fat and Build Muscle (see #1)

3) Feel better

4) Get stronger

This is an important reality to understand whether you are a coach or athlete.

Even if you think you are neither of the above, you are an athlete; you just play a different sport.

Maybe your sport is losing ten pounds or walking up the stairs without getting tired after the first 5 steps. We all have goals and should approach them with the same dedication that professional athletes pursue their own goals.

Educate yourself, and attack your goals, whatever they are.

The first thing you have to do is to simply be healthy.

Then move well.

Max_Shank_2 hands anyhow profile***

About Max Shank, Master RKC: Max Shank is not only an extremely gifted teacher, but one of the most well-rounded and capable athletes in the world. From excelling in Muay Thai and Jiu Jitsu to performing impressive feats of strength in weightlifting and gymnastics, Max has… Read more here.
Filed Under: Uncategorized Tagged With: athletic performance, fitness, health, max shank, RKC, Russian Kettlebell Challenge

What is the most versatile RKC movement?

February 19, 2014 By Shannon Scullin 2 Comments

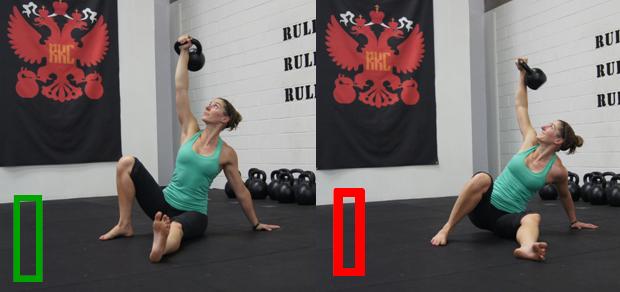
Good and bad getupShannon demonstrates a good and a bad Get Up stance

The Turkish Get Up is the most versatile movement in the RKC system. It incorporates all seven of the FMS movement patterns  – squat, hurdle step, in line lunge, shoulder mobility, active straight leg raise, trunk and rotary stability – allowing us to utilise it as not only a strength building exercise but as a screening and rehab tool, making it the most valuable exercise to have in your arsenal of training drills.

I’ve been known to be a little bit of a perfectionist when it comes to teaching people how to do a get up.  I firmly believe that one repetition completed with good form is far more beneficial to you than completing ten reps with a half arsed attempt at the movement. But I am pedantic about technique for a very good reason…

I train and have taught a large number of people how to use kettlebells during my time as a trainer. From personal trainers to the self-taught and those who have never touched a weight before in their life. All of these people have one thing in common… As their get up improves, their mobility and stability improves. As their mobility and stability improves their coordination improves. As their coordination improves their strength improves and as their strength improves so does the rest of their training.

The get up is not a “simple” movement to teach or to learn. In fact as well as being the most versatile it’s actually one of the most complex of all the kettlebell exercises.

There are a few books on the market that delve deep into the get up, its technique and corrective drills to help you improve your form, the most famous being “Kalos Sthenos – Kettlebells From the Ground Up”. However, most people’s get up can be greatly improved by simply doing the following:

1)    Thoracic mobility and hamstring flexibility drills.

Two of the most common issues we see in the get up are caused by poor thoracic mobility (hunching forward or shoulder unpacking during the seated position) and hamstring flexibility (inability to keep the down leg straight or allowing the foot to rotate outward).

Often I see people grinding their way through the movement with bad posture in an attempt to improve. But why continue beating your head against a brick wall when there is an easier way.…

There are a number of drills that you can perform to help improve your mobility and flexibility in these areas, thus improving your get up and posture in general.

My favourite drills, and the ones I have found achieve the best results are all incorporated in to one simple mobility workout called the “Daily Dozen”.  This simple eight minutes of mobility, done consistently in conjunction with the get up, will not only vastly improve your movement and posture but they are the perfect way to prepare your body for the workout ahead.

I recommend starting your warm up by “testing” a get up on each side. Once you have completed your get up perform one round of the “Daily Dozen” and then perform another get up on each side. Repeat this process three times.

Pay attention to how your get up feels after performing the first round of mobility drills. If you are particularly tight in the thoracic region you may choose to focus solely on the armbar, bent armbar and kettlebell brettzel for the next round of mobility. Likewise, if you are feeling particularly tight from the hips down, you may choose to focus on the Cossack, can opener and lower limb drills.

For those of you who are beginners or may be a little daunted at the thought of doing a bent armbar or the kettlebell brettzel you can replace both of these movements with the “Brettzel” which will achieve the same results.

2)    Shift your weight.

From the moment you are born you commence a journey of movement. You learn how to shift your weight in order to roll over on to your belly, rock back and forth, crawl, stand and walk. Without this shift in weight movement becomes very difficult.

The get up is a similar journey of movement. Each stage you move to has a different centre of gravity. In order to perform the get up efficiently and gain maximum results you need to learn how and where to shift your weight in order to take the kettlebell from lying to standing position and back down again.

The easiest way to remember where the weight should be felt is to follow this zig zag pattern – elbow, hip, hand, knee.

As you roll to your elbow you should feel all the weight of your body and the bell going through your elbow in to the floor. As you straighten your arm out and progress to the seated position this weight should shift and be felt through your glute, where your femur meets your hip. As you progress to the bridge/low sweep, your arms should form a straight line from the kettlebell, through your shoulders and the weight should be felt through the hand that is connected to the ground. And finally, as you transition from the knee to hand through to the lunge position the weight should be felt through the knee that is connected to the ground. On the descent the weight shift works in the opposite order – knee, hand, hip, elbow.

3)    Do more reps.

This is important. In order to get better at something you need to practice it over and over again.

In an average workout you may complete anywhere between 25 to 100 repetitions of exercises such as swings, snatches, presses, deadlifts and squats however, the get up seems to get neglected when it comes to getting our repetitions in.

Instead of lumping the get up in with your warm up every time you train, why not try changing it up a little? Try spending an entire session focusing solely on the get up every now and then.

Mid last year I started using the get up as my recovery workout. Twice a week I would take a light kettlebell (nothing heavier than 14kg), set the Gymboss on sixty second intervals and then proceed to perform get ups for the next 100 minutes. One get up on the minute, every minute. The get up was to be slow and controlled, focusing on good form throughout the movement.  By the time I had completed twenty get ups all tightness had washed away from my body and any aches and pains that were rearing their ugly little heads prior to the session had retreated with tails between their legs. My movement felt strong, natural and effortless and the more repetitions I did the better everything felt.

Coincidentally, after incorporating the 100 get up recovery workout in to my routine, not only did I hit a new get up PR but I saw gains in all other areas of my training too.

Work on your mobility, shifting your weight and getting more reps in and I guarantee that your get up will not only get better but you will get stronger too!

***

Shannon Scullin is an RKC Team Leader and PCC Instructor based out of Dragon Door Australia.  As Australia’s first, and highest ranked female RKC Shannon brings a keen eye for technique to training and is renowned for being very focused on form ensuring that clients with previous injuries are able to train safely. As the head of Personal Training at Read Performance Training she uses the CK FMS to test and evaluate all clients before training, ensuring that not only will they look better from training, but they will also move better too. With a background in triathlon, adventure racing, rock climbing, cycling, hockey and running Shannon fell in love with kettlebells and the FMS system when she saw the immediate result that improving mobility, stability and strength has on sporting performance. She can be reached through: www.readpt.com

Filed Under: Uncategorized Tagged With: athletes, coordination, get up, ketllebells, kettlebells, mobility, RKC, stability, strength, turkish get up, women

The Four Pillars of Strength

February 12, 2014 By Mike Krivka Leave a Comment

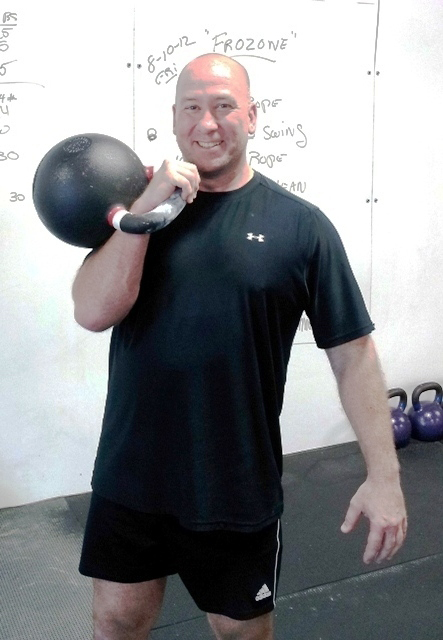
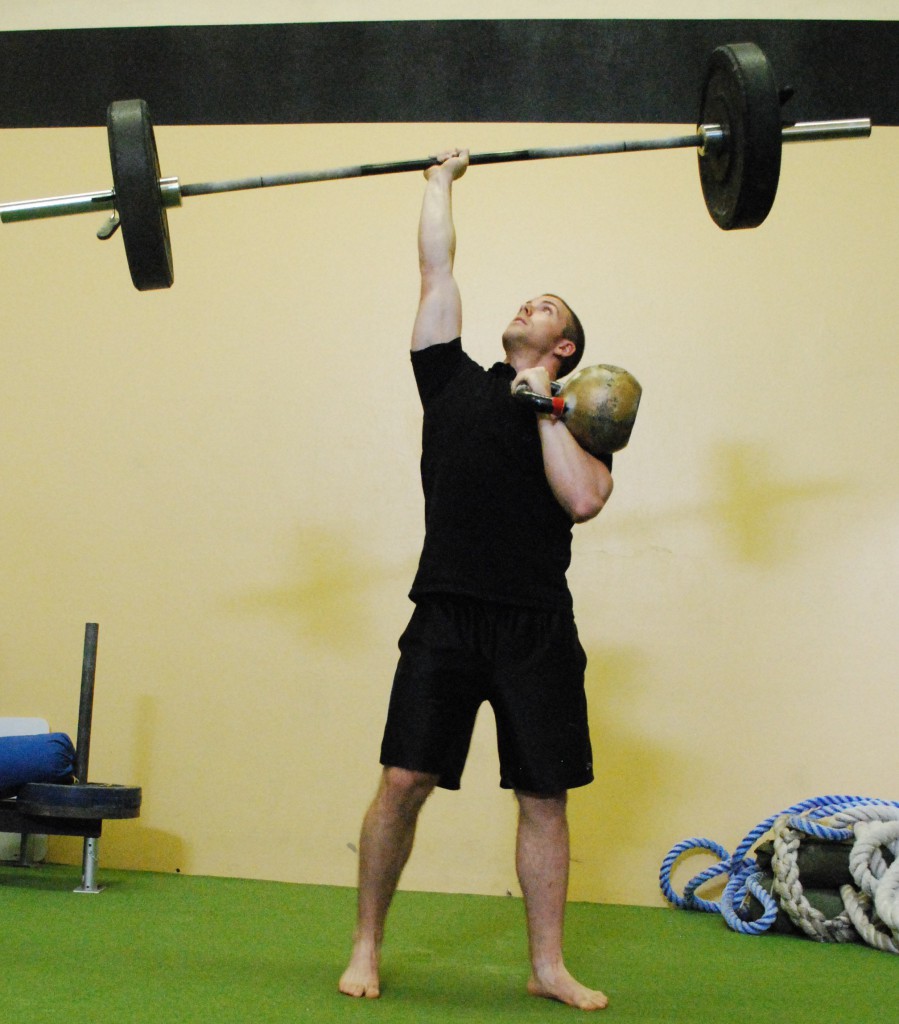
Mak_110lbs_KB_pngINTRODUCTION

People are constantly looking for new ways to increase their strength.  They get wrapped up in changing up reps, loads, intensity, and new exercises in the blind pursuit of strength. This pursuit usually entails looking for a new training program, tool, or gimmick that they desperately hope will give them an edge and increase their athletic abilities.  Unfortunately what usually happens is that they fall back on their old training habits and apply them to their new program with dismal results.  Let me borrow a definition from someone who is (obviously) smarter than I am: “Insanity: doing the same thing over and over again and expecting different results” – Albert Einstein.

So if I told you that there are four basics tenets of strength that you can apply to the training program that you are doing right now, that would almost instantly increase your strength – would you try it?  Really?  Then I’ll let you in on a trade secret in the strength and conditioning world!  The keys to strength lie in the “Four Pillars of Strength” (and they all start with the letter “G”): Grip, Gut, Glutes and Gaze.  Let’s take a look at each one and see how focusing on one or all of them will ensure that you actually do get what you are looking for!

GRIP

I know this seems obvious but increasing your grip strength, or even focusing on what your grip is doing, will give you a huge jump in the strength game.  Think about when you missed that heavy Deadlift – what failed?  Your grip failed.  How about when you tried to do that strict pull-up and you couldn’t ramp up the tension to complete it – what kept you from making it happen?  Your grip failed. How about the last time you did your RKC Snatch Test (05 minutes to do 100 reps with a 24 kg Kettlebell) – what happened around minute four that made the last thirty or so reps hard?  Your grip failed.

So is it really a question of increasing your grip strength or learning how to manage your grip?  Well it couldn’t hurt to increase your grip strength, and I strongly suggest that you do, but the better you become at managing your grip the better results you are going to get. What do I mean by “managing your grip”?  What I mean is that you need to learn when you should be applying maximum tension and when you should be using just enough tension to keep control of the situation.  Taking the time to master this one technique will make your Kettlebell technique improve, help you manage your fatigue, and allow you to train harder and (more importantly) harder.

Does strengthening your grip only apply to your hands?  Heck no!  Your feet are almost as important as your hands when it comes to grip strength.  The recent appearance of “minimalist” shoes is nothing new to traditional strength athletes who know that without a firm, direct connection to the ground their strength will be fragile and tenuous.  For athletes, especially contact or combat athletes, strengthening your feet and how well they grip the ground during dynamic and ballistic loading will go a long way in protecting your ankles, knees, hips and back.

When it comes to your feet do you know what they are doing when you are swinging or snatching?  How about when you are doing pull-ups or push-ups? Well you should!  When you are performing any movement skill you not only need to maintain control of the load, be it your body weight or a Kettlebell, but you also need to get feedback.  If you are compromising the surface area of your foot, and therefore compromising the quality and quantity of feedback you are getting from your feet, then you are never going to be able to get as strong as your potential.

Test it out:

Pistol or Body Weight Squat – Pick either the Pistol of the Body Weight Squat (Squat) and take some time to explore what your feet are doing when you do this movement. Chances are that your feet are tapping like you are playing the piano with your feet or you are rolling onto the edge of your foot.  Both of these are very common and are easily remedied!  As you are pulling yourself down into the Squat or Pistol “grab the ground” with your whole foot, especially your toes, and feel how much more stable and strong you feel.  Don’t lose this tension at the bottom; instead let it by the driving force behind driving the ground down and away from you as you come up.  BTW – does your hand grip affect your Pistol and Squat?  Heck yes!  Having trouble maintaining tension throughout the whole movement?  Make a fist and crush your grip to help create stabilizing tension throughout your upper body that will irradiate into your legs. You can also squeeze a towel or a hand gripper to get the same effect.

Kettlebell Swing or Snatch – the same concept holds true here as it did with the Pistol or Squat. You’ve got to pay attention to what your feet and hands are doing if you are going to ever become stronger doing the Swing or Snatch.  There are two key moments in the execution of both the Swing and the Snatch that you want to pay close attention to what your hands and feet are doing: during the backswing of the Swing and the Snatch and in the overhead lockout of the Snatch.  In both of these positions it’s easy to concentrate on your grip, as you should, but are you over-concentrating on your grip?  Maximum tension should only be applied to the Kettlebell grip at the bottom of the backswing and at lockout overhead; all the rest of the time you need to use just enough grip to keep the Kettlebell under control.  How about looking at what your feet are doing as well?  Your feet should be gripping the ground maximally on the backswing, really grabbing the ground and giving you a solid base to drive off of. During the Snatch you should think about doing the same thing when you hit the overhead lockout; grip the Kettlebell tightly to buffer the impact and create a stable strong base to receive the load on.

GUT

Your Abs are the bracing system for everything you do and learning how to use them properly will allow you to generate more force as well as accept more of a load.  Being able to regulate your abdominal tension is critical when it comes to creating power from the ground up – and it’s invaluable when it comes to protecting your back.  The concepts behind Intra Abdominal Pressure (IAP) will teach you how to create a “virtual belt” around your midsection that not only reinforces the spine but allows you to transfer energy more efficiently.

Just bracing your gut and hoping for the best isn’t enough; learning how and when to tighten is the real key.  Coordinating breathing and the amount of breath you inhale and exhale are important as well as learning how to “bleed off” tension (through hissing and/or the martial arts kiai).  You’ll see people panting, huffing and puffing while training; never once thinking about how that unregulated breathing is affecting their performance.  Having a strong gut is not a matter of doing sit-ups and crunches – both those exercises have faults that only lead to more problems down the road.  While I’m a big fan of the Ab Wheel, or as I call it “The Wheel of Pain”, you really need to shown how to use it correctly or you’ll overstress your shoulders and lower back.  So how do you get a strong gut?  Learn when and how to breath.

Sucking in a big gut full of air and letting it out is going to get you nowhere.  You need to regulate the amount of air you bring in, how much tension is used to maintain it, and how to effectively release it.  Taking in too much air at one time is counterproductive as well as taking in too little; not to mention trying to maintain it by using your throat. Yikes!  I teach a really simple technique to get enough air in, braced, and ready for use that seems to work well for most people.  First off you can’t take a big “gulp” of air through your mouth. It’s going to create pressure in the wrong area and lead to problems.  All you need to do is take a “predatory sniff” of air through your nose and hold it. NOTE: the “predatory sniff” is a technique you can observe right before someone take a swing or tackles a defender.  It’s a cue that an attack is imminent but it is also a great way to prepare for an explosive energy requirement.  Hold that breath in your gut, deep in your gut and not up in your chest, then let it out under control through your teeth like you are hissing.  This sequence will take a while to develop but once you get it down you will be able to reference the skill on demand.  Time this breathing sequence with your efforts and you will find that you aren’t getting breathless or winded… but did I mention that this takes practice to achieve?

Test it out:

Pull-ups – applying this directed breathing during a grand makes it easier to stay “tight”.  Try doing a pull-up with a big gut full of air and see how it feels.  Now try it with the method described above.  It should be a lot easier and feel tighter and “crisper”. One of the things you will need to work on is regulating how much air you release. Too much too soon and you’ll be left only half way up… this is a regulated release of air, with the accompanying abdominal pressure, that lasts the whole movement.

Swings – Kettlebell Swings can make even the most well conditioned athlete breathless; but it doesn’t have to happen early in the session. Take a quick sniff of air on the backswing of the Swing and then explosively let it out in conjunction with your hip snap.  You’ll find that the Kettlebell moves faster, and higher, than usual and that you are able to regulate your breathing for longer as well. This breathing pattern is quick and crisp and doesn’t require as much air to make it effective as the grinding version.

GLUTES

Much aligned and often ignored, especially by guys, the glutes are the biggest, and as far as I’m concerned, the most important muscles in the body.  So developing the ability to integrate them fully and activate them at the appropriate time will make you strong – fast!  While everyone knows (not really, but let’s assume they do) how important the Glutes are then why do we still see people with soft knees and soft Glutes at the top of their Kettlebell Swing and Snatch? That’s because they aren’t tying in the Glutes to the end of the hip snap and missing out on tying in the biggest muscles in the body into their technique.

When I talk about working the Glutes most guys ignore my advice and head for the nearest set of dumbbells to work on their curls or grab a bar to work on their bench press.  Women are more receptive to my advice because they understand the “power” of strong Glutes… but for a different reason than the one that I’m interested in addressing!  So why are the Glutes so important?  Because the Glutes are not only the biggest group of muscles in the body they are also the brace for the abs and the foundation for the back.  Weak Glutes and you’re going to be overtaxing your abs and lower back to do the work that the Glutes are designed for.  Especially bothersome are people who have spent an inordinate amount of time developing their abs (think mucho sit-ups or crunches) and have compromised their posture and have effectively short-circuited their ability to fully engage their Glutes.  Don’t believe me?  Take the following two tests and see what happens when you are able to clench your Glutes for all they are worth!

Test it out:

Tip-over Test – Have someone stand tall and strong, locking their knees and clenching their Glutes as hard as they can. Place your hand on their chest and slowly start pushing.  See how hard it is to rock them back onto their heels. Do this again a second time but have them keep their Glutes relaxed; slowly start pushing against their chest and see how easy it is to rock them back onto their heels. Now here comes the clincher: same setup as the previous two but this time have them relax their Glutes and only clench them when they feel like they are going to tip over and fall. Be sure to put your other hand behind them just in case they can’t “catch” themselves. If they can’t catch themselves then they need some serious “Glute therapy” to get them turned back on! If they are able to catch themselves then they will have a shocked look on their face when they realize that their Glutes are the reason why they didn’t fall.

Stance Test – how wide you have your feet apart can directly impact how tightly you can clench your Glutes.  Is really that important? Only if you want to move faster, hit harder, and translate more energy from your body into a Kettlebell or bar. Try this series of tests to see how your stance (distance between your feet) impacts your Glute tension. Start with your feet in stance that is wider than your shoulders. Squeeze your Glutes as hard as you can and make a mental note of how tight they are.  Move your feet in a little this time, just inside shoulder width, with your heels right under your arm pits. Squeeze your Glutes as hard as you can and make a mental note of how tight they are. Now place your feet together with your big toes almost touching. Squeeze your Glutes as hard as you can and make a mental note of how tight they are. Last one: with your feet together once again, put your heels together and let your feet point off at an angle, let’s see 15-20 degrees. Squeeze your Glutes as hard as you can and make a mental note of how tight they are.  What did you find?  Did you find that the wider the stance the less Glute contraction you get and the more narrow the stance (especially with your heels together!) the more Glute contraction you get? What does that tell you about how you can get more power out of your hip snap if you learn to maximize your Glute contraction by minimizing your stance?  Yeah, I thought so…

GAZE

What the heck are you looking at? No really. What the heck are you looking at while you are training?  How much do your eyes, and how they are being used during movement, impact your performance? Quite a bit actually!  If you watch people doing Kettlebell Swings or Snatch you’ll see that most of them have their eyes going up, down, left, right, pretty much everywhere and it gets even worse when they change hands. Training yourself to focus internally is hard enough but you also need to create some discipline in what you are doing with your eyes and your head as you are training. Remember that your head is going to follow your eyes and you can end up doing some weird stuff to your neck and back if you’re not careful.

So what should you be doing with your eyes? First think about keeping your head neutral on your neck.  Neutral means that your chin is neither pointing up or down – you are looking straight ahead. You will see a lot of people putting their head into weird alignments because they are trying to look at one spot while they are performing a lift or movement.  This is something you can do and it does have its benefits – except for the fact that it’s going to put your neck and thoracic spine into some weird loading configurations that you are going to regret in the long run. So if your head is neutral and you start to do a squat what should your eyes be doing?  As you pull yourself back into your Squat your head should track with your torso and your gaze should end up stopping about 08-10 feet in front of you. As you drive up out of the Squat your head should remain neutral and finish where it began at the beginning.

I know what you’re thinking!  You’ve seen pictures of athletes going for a world record Deadlift or Squat with their head up and back and their chin jutting forward. Yep – you can do that! If you’re chasing a world record and you are familiar with the risks that you are taking when you do that, and then by all means proceed.  But if you are training on a regular basis and don’t want to take risks with your neck and thoracic spine then stick with the neutral position. You’ll thank me one day…

Test it out:

Posterior Chain Activation Test – Take a stance with your feet just inside shoulder width and with your head in a neutral position, squeeze all the muscles in your body from head to toe. Get a feeling for how much tension you’re able to create with your head in a neutral position.  Now try looking straight down at your toes and then squeeze all the muscles in your body from head to toe.  Once again get a feeling for how much tension you’re able to create, especially in the posterior and anterior chain (front and back of your body). For the final attempt try looking straight up at the ceiling and then squeeze all of the muscles in your body from head to toe. Get a feeling for how much tension you were able to create and if there was any difference in the amount of tension you could produce front and back.

What did you find?  I’m guessing that if you created enough tension in all three positions were surprised to find that you were able to balance out the tension with your head in a neutral position but you lost tension either in the posterior or anterior chain when you looked up or down.  Kind of strange that most coaches recommend that you look up when you Squat or Deadlift but in reality you lose tension in the muscles you are trying to activate. Something to think about… Look up too much, shifting the tension from the posterior to the anterior chain, and you can say hello to Mr. Hernia because you’re going to shift the tension too far and put stress on the abdominal wall.

NOTE: a slight downward tilt of the head works best to fire up the posterior chain, especially if you are a martial artist, soldier or law enforcement officer. This part physiological and part psychological phenomenon but it really works.  Keep looking straight ahead, but tilt your chin down and in a little bit, and you can take advantage of the physical and psychological boost this head position gives you.  

Swing Test – This is an easy test to do and experience.  Grab your favorite Kettlebell and do a handful of Swings.  First try doing them with your head staying neutral throughout the movement; that means that your gaze will shift from ahead of you to in front of you as you swing.  Then try to do the Swings with your head up the whole time.  Keep looking up throughout the technique and get a feel for how your hip snap feels and the weight of the Kettlebell. Finally attempt to do some Swings while looking down throughout the technique.  Get gauges for how your hip snaps feels, how heavy or light the Kettlebell feels, and how your breathing is. What did you find?  Did you notice that with your head in the neutral position throughout the movement that you were stronger, faster, and more relaxed?  If you didn’t go back and try it again; I think you’ll be shocked at the difference.

CONCLUSION

I hope that you take the time to look at how these four pillars can be added into your existing strength training program, regardless of if it is with kettlebells, body weight, or barbells.  I am confident that if you mindfully apply the principles that I outlined above that you will be amazed at how quickly you will get gains!  BTW – don’t try to implement all of these new skills at the same time.  I would strongly suggest that you take one and apply it across a spectrum of techniques and see how it works for you. Then, once you’ve given yourself a chance to explore it fully, add another element to the mix.  Being able to apply all the variables surrounding Grip, Gut, Glutes and Gaze will take practice and few people will be able to get them all working at the same time.  But if you can get two out of three you are well on the way to making some great gains!

***

About Michael A. Krivka, Sr. – RKC Team Leader: Michael A. Krivka, Sr. is a Washington, DC native who has been involved in Kettlebell training for over a decade and is currently an RKC Team Leader and member of the RKC Board of Advisors and the RKC Leadership Team under Dragon Door (where he has been listed as one of the top reviewed RKC’s in the world for the last five years). He is also the author of a bestselling eBook entitled “Code Name: Indestructible” and is in the process of finishing up several other eBooks on Kettlebells, body weight, and the integration of other tools into an effective strength and conditioning program. Mike has traveled extensively throughout the United States teaching Russian Kettlebells to military (USMC, USN, USA and USAF) and law enforcement personnel (FBI, DEA, USSS and CIA)… read more here.

Filed Under: Uncategorized Tagged With: four pillars, gaze, glutes, grip, guts, leadership, MAK, mike krivka, RKC Team Leader

Martial Artists and the Kettlebell Swing

February 5, 2014 By Jay Armstrong 3 Comments

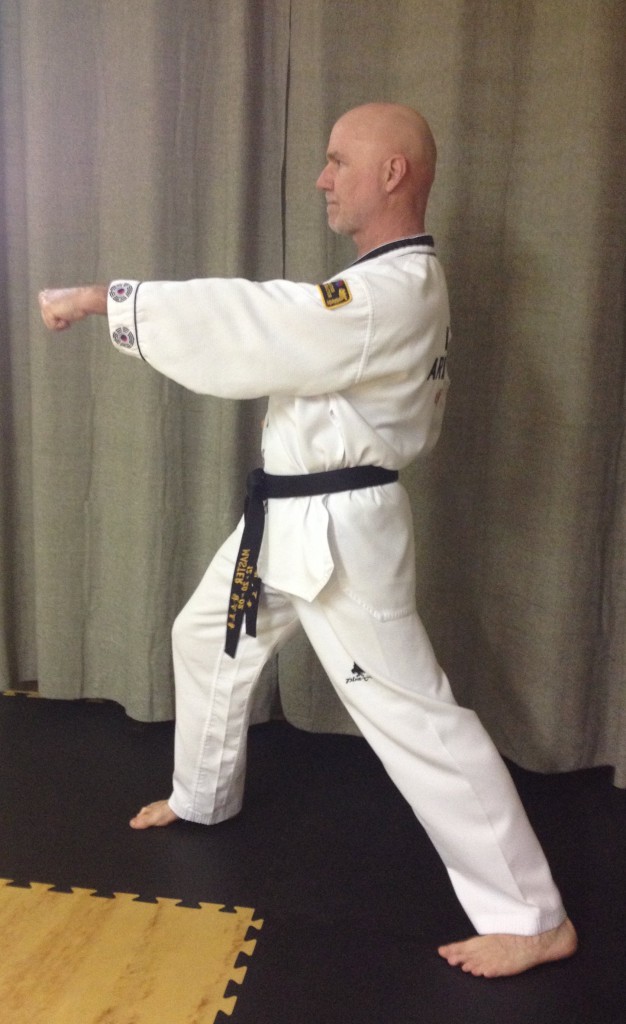
Reverse PunchWhen I encountered the kettlebell, it was love at first swing.

I knew immediately that this was a tool that would complement (rather than interfere with) martial arts training.  Traditional efforts in the gym trying to develop big muscles made me strong, sore, and SLOW.

Swinging a kettlebell is clearly not traditional weight training.  It will help your martial arts practice if you have the proper technique and a clear understanding of what you are trying to master.  Two specific areas of martial arts skills that the kettlebell swing can help improve are:

  • Tense/Relax Cycling, and
  • Breath Control

If you feel you have been missing out on strength training or you want to add a different form of cardiovascular endurance training to your routine the kettlebell swing may be exactly what you need.  But, the kettlebell swing has even more to offer if you are a martial artist.

Tense/Relax Cycling

Exceptional athletes have the ability to rapidly contract their muscles, or create tension, and then just as quickly release that expression of energy.  In fact, one of the things that separates great athletes from good athletes is the ability to create a greater amount tension in a shorter period of time than their competitors and then to more quickly return to a relaxed state.  This makes them more efficient.  I call this skill the tense/relax cycling skill.  This is the ability to rapidly command the desired muscles, and only those muscles, to tense and then to release this tension.

Visualize your favorite professional athlete.  Would you characterize their best performances as tense or relaxed?  Do you think their impressive performances require no effort?  Of course not.  They just make it look easy because there is no unnecessary tension.

The kettlebell swing is an athletic skill.  It is one that requires tension, muscular control, balance, coordination and significant energy expenditure.  This is complex movement pattern that incorporates many practical elemental skills.

As the kettlebell descends down and behind the kettlebell athlete, the maximum amount of force is experienced.  The maximum amount of force is presented to the grip and the shoulders and then downward through the posterior chain and into the ground.  This moment of maximum exertion (or tension) requires that the kettlebell athlete strongly contract the muscles of the abdomen (or core).  The kettlebell doesn’t stay at the bottom position for long.  So, this contraction of the core is brief.

The big muscles of the hamstring group and the glutes drive the hips forward and upward to project energy into the kettlebell.  As the hips move forward, they must encounter an opposing force otherwise they will move far enough forward to put the lower back into excessive extension.  Repetitively doing this will probably make your back hurt.

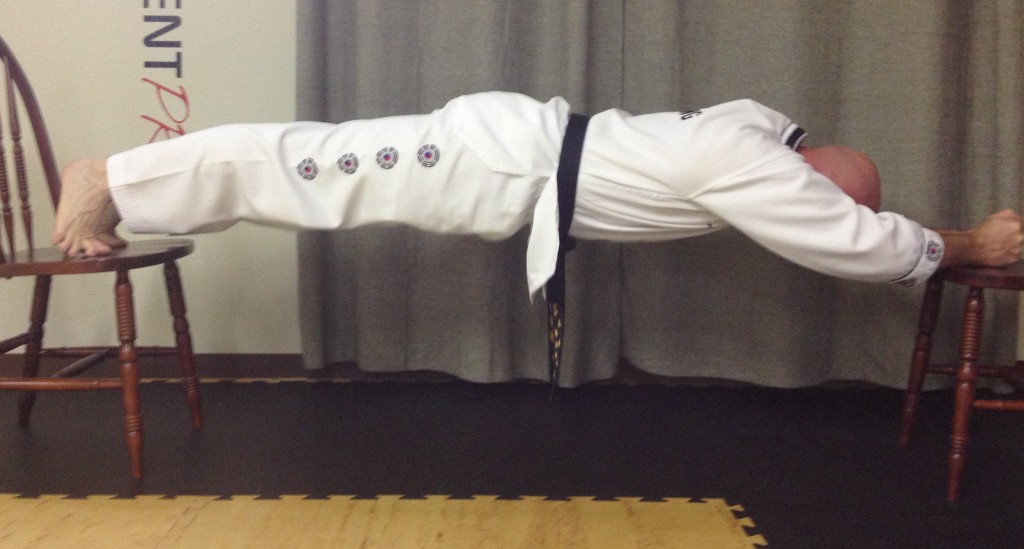
As the kettlebell moves forward, the kettlebell athlete returns to the standing position.  This postural position is referred to as the “plank” position.  It is a neutral alignment of the neck, thoracic spine, and lumbar spine.  In order to achieve this position, there must be a significant, simultaneous contraction of many muscles.  There are few muscles excluded from this contraction.  The lats should be strongly contracted to connect the arms to the torso.  The abs and core muscles should be strongly contracted to transfer the power from the legs to the arms and to prevent hyperextension of the lower back.  The muscles of the legs should be strongly contracted to provide a strong base of support and rooting of the body to the ground.  The kettlebell is only floating at the top of the swing for a brief period of time, so this display of high tension is momentary.

Chair PlankHow do we improve on a particular skill?  Skills improve through focused and intelligent practice.  The rate of progress is also related to 1) the frequency of practice; 2) the number of repetitions; and 3) the load or intensity of the practice.

The kettlebell swing provides the martial artist with an excellent platform for improving the tense/relax cycling skill.  This is a drill that can be practiced with a large number of repetitions and with great frequency.  In addition, the drill is obviously practiced with a load that may sometimes be significant.  This all adds up to imply that swinging a kettlebell is an excellent way to improve the martial artist’s ability to rapidly and strongly tense muscles and then just as rapidly release this tension.

Focus on this aspect of the kettlebell swing and you will find you delivery more power in your kicks and strikes.  And, your newfound ability to quickly relax will greatly reduce your fatigue.

Breath Control

We have looked at the principle of tense/relax cycling and how a martial artist can use the kettlebell swing to improve this skill.  Now, we will look at how the kettlebell swing can be employed to give the martial artist better breath control.

The topic of breathing and breath control could take up several volumes.  We need oxygen to provide energy to our muscles and to our brain.  Carbon dioxide is a waste by-product of energy expenditure. Breathing is the mechanism by which oxygen is added to the blood during the inhalation phase and CO2 is expelled during the exhalation phase.  Both of these are important!  Inefficient breathing techniques will cause premature fatigue and adversely affect cognition.

Breath control is an essential skill for everyone but especially for martial artists.  Two of the breath control abilities that are required by a martial artist are: 1) a sharp, strong exhalation (or yell) to accompany a maximum contraction, breaking technique, or punch; and 2) the ability to effectively inhale while the core and abdominal muscles are contracted (as they are during a fight).

A forced exhalation through a restriction causes many of the abdominal muscles to contract strongly.  Imagine you are blowing up a very stubborn balloon.  This is what I mean by exhalation with restriction.  This effort develops a tension that spreads throughout the entire body.  Yelling simulates this effect and has been used for centuries in martial arts communities.  This practice has become commonplace in the world of tennis (among other sports) where many players yell each time they hit the tennis ball.  The technique of rapidly and forcefully expelling air through a restricted orifice will help you generate much more tension and power.

It is difficult to inhale when your abdominal muscles are contracted.  It is virtually impossible to do so with an inefficient, chest-breathing technique.  To breath when your stomach muscles are tight, you must pull the diaphragm downward.  Whenever you step into the ring to fight, your abdominal muscles automatically contract to help protect the vital organs behind them.  So, you should learn to breathe with these muscles contracted.  Even if you are not a martial artist, these muscles contract in the same way whenever you are under stress (at work, at home, or during sports) or whenever you are afraid.  Learning to breathe while your abdominal muscles are strongly contracted will improve your endurance whenever your are excited or under the stress of competition.

Both of these breathing techniques are skills. You can improve your breath control abilities through intelligent and focused practice.  The kettlebell swing provides an excellent training opportunity to improve these abilities.

The total tension position at the top of the kettlebell swing (or the plank position) is a great time to use the sharp exhalation to generate a bit more tension.  And, the quick sniff of air through the nose at the bottom of the kettlebell swing is an opportunity to practice inhalation with braced abdominal muscles.

Your skill will improve quickly if you practice with focus, if there are lots of reps, and if there is significant intensity.  The kettlebell swing provides the ideal scenario for all of these requirements.

Workout with Purpose

Often, we are given exercises with the sole purpose of working and strengthening a specific muscle group.  Or, perhaps the drills are designed to increase the size of a muscle.  While these activities are not necessarily bad, wouldn’t it be better if the purpose of an exercise was to help us improve our ability to perform in a real-world situation or in a sports activity?

The kettlebell swing can be utilized for just such a reason.  If you focus on the correct aspects of the technique, the kettlebell swing can improve your tense/relax cycling skill and improve your ability to use your breath to facilitate the development of tension.  These skills are essential to all martial artists.  I am sure you will see rapid progress if you focus on these goals during your kettlebell swings.

***

Jay Armstrong is a Senior RKC, 6 Degree Black Belt TKD, and Master Z-Health Trainer.  The past 30 years have been dedicated to helping others develop confidence through increased strength and pain-free, exceptional mobility.  His quest for knowledge continues.  He runs The Kettlebell Club in Houston, Texas and can be reached here.

Filed Under: Uncategorized Tagged With: artist, Jay Armstrong, Kettlebell, martial, power, senior rkc, strength, swing

Primary Sidebar

Featured Products

previous arrow
BOOK-RKCBookofSnC
HardStyleKettlebellChallegeDanJohn700
BookCoverMasterTheKettlebell1
RKCiconKettlebell512
KettlebellGoddessdv040
next arrow

Recent Posts

  • RKC Big Six Workout
  • The Kettlebell Swing & Low Back Pain
  • Key Kettlebell Exercises To Help You Create Better Balance
  • How to Most Effectively Use Kettlebells to Meet Your New Year Goals
  • 1 Exercise That Checks All The Boxes
FOLLOW US ON TWITTER!

Archives

Copyright © 2025

Dragon Door Publications / The author(s) and publisher of this material are not responsible in any manner whatsoever for any injury that may occur through following the instructions or opinions contained in this material. The activities, physical and otherwise, described herein for informational purposes only, may be too strenuous or dangerous for some people, and the reader(s) should consult a physician before engaging in them.