• Skip to main content
  • Skip to primary sidebar
  • Home
  • Contributors
    • Matt Beecroft, Master RKC
    • Martijn Bos, Master RKC
    • Andrea Du Cane, Master RKC
    • Angelo Gala, Master RKC
    • Chris Holder, Master RKC
    • Steve Holiner, Master RKC
    • Dan John, Master RKC
    • Mike Krivka, Master RKC
    • Thomas Phillips, Master RKC
    • Robert Rimoczi, Master RKC
    • Phil Ross, Master RKC
    • Max Shank, Master RKC
  • Workshops
    • HKC Workshops
    • RKC Workshops
    • RKC-II Workshops
  • Find an RKC Instructor
  • Resources
    • Articles
    • Forums
    • Kettlebells
    • Products
  • Blogs
    • PCC Blog
    • Strong Medicine Blog
  • Archives

RKC School of Strength

Official blog of the RKC

shoulder health

How I Finished Rehabbing My Shoulder Using Kettlebells

April 13, 2022 By Ryan Jankowitz 3 Comments

Ryan Jankowitz, RKC-II performs a kettlebell getup

Disclaimer: This is Ryan Jankowitz’s personal shoulder recovery program. What worked for him may not be safe or appropriate for anyone else. If you are experiencing any shoulder pain, see a medical professional for a clear diagnosis and PT program for your injury.

In the Fall of 2021, I started experiencing pain in my left shoulder during presses and Turkish get-ups. I took a month off from practicing those exercises, hoping that rest would be enough to heal my shoulder. But, while the pain decreased, I still couldn’t perform those movements.

Finally, I decided to schedule time with a physical therapist. I was diagnosed with shoulder impingement. The physical therapist scheduled me to come to the office twice a week, plus exercises to do every day at home.

I paid very close attention to the work I was doing with the physical therapist. Soon after, I began to formulate my own program to follow after my course of physical therapy.

Here Are My Five Main Takeaways:

1. Work on Shoulder Blade Retraction

Part of the reason I developed shoulder impingement was because my shoulder blade was not tracking along my ribcage properly. My shoulder blade was “winging”, and I had to strengthen the muscles around my shoulder blade. I could accomplish this by practicing kettlebell rows, farmer’s walks, suitcase carries, and rack carries.

2. Strengthen the Core

I was shocked at how much trouble I had with side planks on my left shoulder. Adding side planks to my training had an immediate positive impact on my shoulder and became a must-have in my program.

3. Improve Shoulder Stability

At physical therapy, we did a lot of shoulder stability work in the tall plank position, and I could tell that this exercise was beneficial. We also practiced lateral moving tall planks and shoulder taps. I decided these side plank variations would be an integral part of my program and would work well in my mobility warm-up.

4. Work on Thoracic Spine Mobility

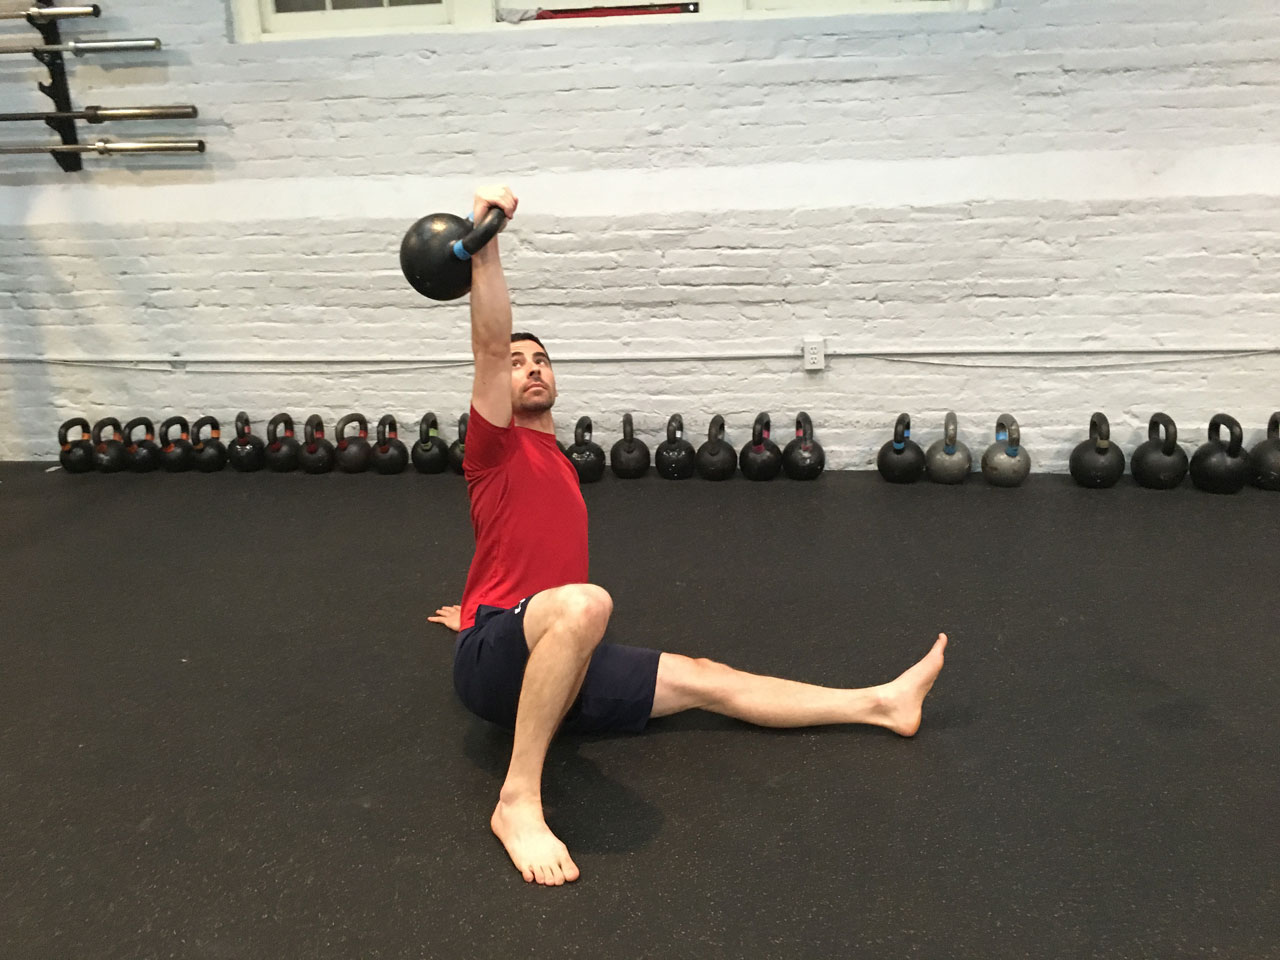
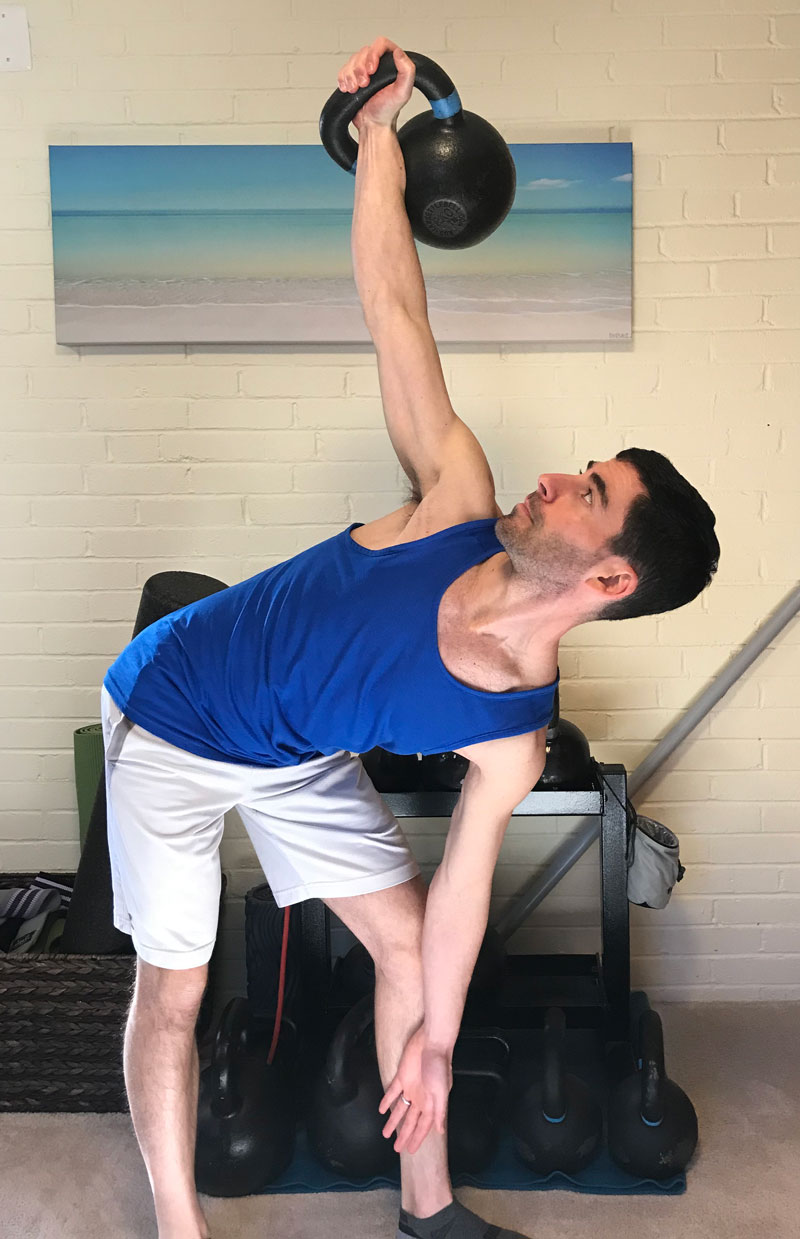
My physical therapist noted that my ability to rotate from my thoracic spine was quite different on my right side to the left. This may have played a role in how I developed the shoulder impingement. Luckily, the RKC program teaches several exercises and mobility drills which can improve t-spine mobility: Turkish get-ups, windmills, bent presses, and the RKC arm bar. I felt that single kettlebell overhead squats could also improve my shoulder stability.

Ryan Jankowitz, RKC-II performing a kettlebell windmill

5. Increase Grip Strength with Bottom-Up Kettlebell Exercises

I remember reading that grip strength and shoulder health were related. I noticed that I had trouble doing even light bottom-up kettlebell exercises on my left arm and was determined to fix this! Oddly enough, even though they were difficult, I could do bottom-up presses without pain. So, I decided to include bottom-up presses along with rack carries in my program.


After six weeks of physical therapy, I was pain free and able to practice presses and get-ups with light kettlebells. I was determined to continue my progress by developing my own post-rehab strength program based on what I did in physical therapy and my RKC knowledge.

Here’s the 8-week strength program I created to address my needs and goals:

Day 1:

Mobility warm-up:
Combination of physical therapy and primal movements to activate my core and shoulder. And to raise my heart rate.

Strength Block 1:
Overhead Squat
Kettlebell Row
Plank variation
x 3 sets

Strength Block 2:
Single Leg Deadlift
Bottom-Up Press
Loaded Carry
x 3 sets

Conditioning:
1 Arm Swings

Day 2:

Mobility warm-up:
Combination of physical therapy and primal movements to activate my core and shoulder and get my heart rate up.

Strength Block 1:
Overhead Lunge
Kettlebell Row
Plank variation
x 3 sets

Strength Block 2:
Suitcase Deadlift
Turkish Getup
Loaded Carry
x 3 sets

Conditioning:
1 Arm Swings

Day 3:

Mobility warm-up:
Combination of physical therapy and primal movements to activate my core and shoulder and get my heart rate up.

Strength Block 1:
Overhead Squat
Kettlebell Row
Plank variation
x 3 sets

Strength Block 2:
Single Leg Deadlift
Bottom-Up Press or Getup
Loaded Carry
x 3 sets

Conditioning:
1 Arm Swings

Ryan Jankowitz performing a bottom-up kettlebell press

Goals and Progressions

I also created a few milestone goals for myself, so I could recognize when it was time to move up to the next size kettlebell or movement progression.

Overhead Squat Progression: I started with a dowel and built up to 10 reps before moving to a single kettlebell. Once I could do 5 reps/side, I moved up to next kettlebell. Once I could do 5 reps with a 16kg kettlebell, I switched to practicing windmills.

Kettlebell Row: I worked up to 10 reps/set before moving up to the next kettlebell.

Single Leg Deadlift: I worked up to doing 5 reps/leg with 32kg, once I could do that I started practicing with double kettlebells.

Bottom-Up Press: I started with a 10kg kettlebell and gradually built up to 5 reps.  Once I could do 5 reps, I moved up to next kettlebell.

Turkish Get-up: My first goal was to comfortably complete 3 reps/side starting with a 16kg kettlebell. Once I could do 3 reps per side, I moved up to the next kettlebell.

Overhead Lunges: I started with 16kg and built up to 5 reps/side. Once I could do 5x per side with a 20kg kettlebell, I switched to practicing the Bent Press.

1 Arm Swings: Start with 16kg and build up to 5 sets x 10R, 10L.  Once 100 reps achieved, move up to next bell.


I followed this program for 8 weeks and made substantial progress without experiencing pain. I’ve now moved into a double kettlebell program that I created for myself to bring my skills back to where they need to be for my RKC Level 2 requirements. Ya gotta stay sharp!

This was an interesting learning experience for me. I learned that if I’m in pain, I  need to go see a medical professional sooner rather than later. This experience also reinforced the notion that kettlebell training should be considered to be a practice, not just a workout. A practice requires patience—but this will result in developing greater skills. Sometimes it’s important to slow down to go faster.

Stay Strong.

***

Ryan Jankowitz, RKC II, CK-FMS Owner of RJ Kettlebell. Ryan is on a mission helping busy men and women lose weight and gain more self-confidence using kettlebells.  He enjoys spreading the RKC message and teaching others.  If you’re new to kettlebells or you just need some guidance, download his FREE 5-Day Kettlebell Workout Plan.

Filed Under: Tutorial Tagged With: kettlebell exercises, kettlebell shoulder stability exercises, Ryan Jankowitz, shoulder exercises, shoulder health, shoulder stability

Shoulder “Packing”—The Right Way

January 24, 2018 By Matt Beecroft 1 Comment

Matt Beecroft Shoulder Coaching

The kettlebell community has taught the concept of shoulder packing to stabilize the shoulder for a very long time. I have seen it cued, taught, and discussed for about 14 years! As a Master RKC, I see this concept taught worldwide. But for a long time I’ve wondered if everyone really understands the cues.

The premise of “shoulder packing” is to prevent the shoulders from rising towards the ear at the beginning and end of the press—and to keep the shoulder from excessive elevation during the lock out and overhead lifts. The use of the cue “pack the shoulder” or “engage the lats as you initiate the press” is a simplification for the average client. It cues them to avoid excessively using the upper traps and levators to initiate the press. Instead, they should keep the shoulder stable by engaging all four shoulder rotators, the lower traps, and the subclavius (which helps to seat the clavicle in the sternoclavicular joint).

Most clients are desk athletes that come into our gyms with protracted shoulders and a forward head position. Many of them are also upper trap dominant and have poor T-spine mobility. The easiest cue to help someone keep their shoulders from rising to their ears, and thereby risking shoulder impingement and injury has often been: “pack your shoulders by engaging your lats”. But, a better cue might be to engage your entire mid-back along with the shoulder muscles. And it’s also important to remember that over cueing or using unnecessary cues can lead to other shoulder movement problems and issues.

Let’s explore how the lat attaches to the body from a textbook anatomy perspective. Then from a functional anatomy perspective, we can see what it actually does.

Attachment: Function: Requirements for a great press:
Thoracolumbar fascia: 4-8 vertebrae or illium Humeral extension /adduction Humerus flexion/abduction
Ribs Internal rotation Ext rotation for healthy position
Scapula (40% of population ) Weak horizontal abduction Upward rotation and slight posterior tilt of scapula
Intertubercular groove of humerus Lumber extension Stable core
(can differ for people) Lateral flexion Rib cage in neutral alignment
Involved in core, neck and respiration


In the last column above, I’ve described what happens when we press overhead or hold a weight overhead. Activating the lat strongly does the exact opposite of what we want to do when we press or go overhead. When we use the cue “pack the shoulders with the lat”, we can cause scapula depression because of all of its attachment points—which will force the downward rotation of the scapula. This is in direct opposition to the upward rotation of scapula required in an overhead lift. If we “pack the shoulder with the lat” we close the space in the AC joint, and since the lat is also responsible for internal rotation, we are more likely to get some cuff impingement.

Upward rotation of the scapula is perfectly normal and healthy as long as the person has good T-spine mobility and sufficient external rotation of the humerus. In fact, many people need to focus on external rotation when pressing overhead so that they naturally and unconsciously fire the lats, rotator cuff, rhomboids and lower and middle traps in a perfectly synchronized and sequenced way.

Remember, head forward position, poor motor control with the external rotators, and poor T-spine mobility are often the causes of shoulder impingement. When someone performs a good overhead press, they should also have a stable core and neutral rib cage, with no rib flare.

An important component of healthy overhead lifting is unconsciously activating the pesky lower traps in your mid back. While they have no direct control of the humerus, they are an integral part of upward scapular rotation. They are also responsible for some posterior tilt and retraction of the scapula required for correct overhead mechanics.

The activation of the lower trap along with the muscles of the rotator cuff, serratus anterior, rhomboids and lats in the correct sequencing actually helps clear the space in the shoulder for the humerus to move. When we see someone’s shoulder come back to its optimal position, we usually see the upper back contract very subtly. Perhaps the correct strategy for optimal shoulder position is firing the lower traps-not the lats.

The shoulder “packing” cue needs to be used very carefully—much like the cues “pull the belly button in” for core activation (when the core unconsciously fires in a perfectly healthy person), pushing the knees out for correct knee and toe alignment (even when alignment is fine, hence sending someone into varus—the opposite of “valgus” collapse) or the “big chest” cue that can cause undesirable rib flare in some lifts. Trainers should not cue clients on autopilot without observing the actual situation.

Matt Beecroft Shoulder Coaching

Trainers using cues unnecessarily, misunderstanding the nuance and subtleties of the cues, or not understanding the logic behind cues can cause real problems. Better education and understanding of why specific cues are given needs to happen so we can all abide by the first rule of training others: do no harm. Perhaps the cue should be to “activate” the upper back to keep the shoulder in a natural position without overly sucking it down or packing it down. Or maybe some clients would better respond to the cue: “relax the shoulder away from the ear”. Regardless the words chosen, we should only use cues when necessary, not all the time.

Many haphazardly overused cues in the fitness industry also expose a poor understanding of functional anatomy and nuance. Without that understanding, we could be creating some long term negative effects with incorrect cuing. When the shoulder “packs” naturally, it’s a very subtle movement. The human body is amazing, and sometimes trying to outsmart it to make it better can have the opposite result.


***

Matt Beecroft is a Master RKC, PCC Team Leader and CK-FMS instructor with over 17 years as a personal trainer. He is a national fitness presenter with Thump Boxing, an Expert Level 2 Krav Maga instructor with KMG, Muay Thai coach and movement specialist in systems such as CST, Ground Force Method and Animal Flow. He writes for various publications including Breaking Muscle and Blitz Magazine and can be contacted by his Facebook page https://www.facebook.com/MeetLifeHeadOn/ or his website https://www.realitysdc.com.au/

Filed Under: Coaching, Kettlebell Training Tagged With: Coaching, correct cueing, cuing, Matt Beecroft, shoulder health, shoulder mobility, shoulder packing

Primary Sidebar

Featured Products

previous arrow
BOOK-RKCBookofSnC
HardStyleKettlebellChallegeDanJohn700
BookCoverMasterTheKettlebell1
RKCiconKettlebell512
KettlebellGoddessdv040
next arrow

Recent Posts

  • RKC Big Six Workout
  • The Kettlebell Swing & Low Back Pain
  • Key Kettlebell Exercises To Help You Create Better Balance
  • How to Most Effectively Use Kettlebells to Meet Your New Year Goals
  • 1 Exercise That Checks All The Boxes
FOLLOW US ON TWITTER!

Archives

Copyright © 2025

Dragon Door Publications / The author(s) and publisher of this material are not responsible in any manner whatsoever for any injury that may occur through following the instructions or opinions contained in this material. The activities, physical and otherwise, described herein for informational purposes only, may be too strenuous or dangerous for some people, and the reader(s) should consult a physician before engaging in them.