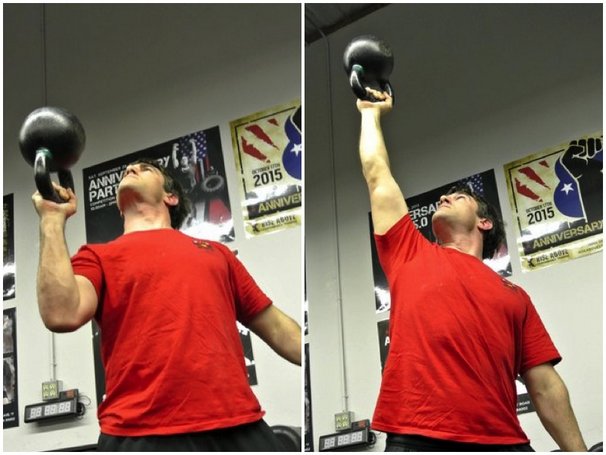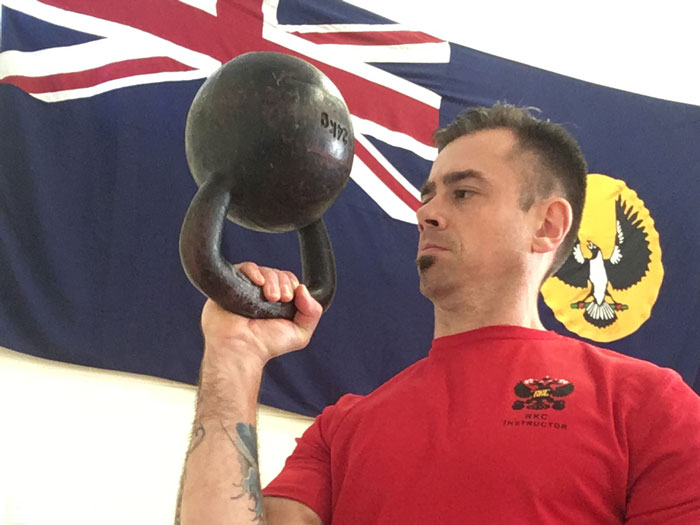
A heavy kettlebell press—or any overhead press for that matter—will always be a super impressive feat of whole-body strength. For some, getting heavy things overhead is the meaning of life, and I can understand why! There are few better feelings than locking out a heavy overhead grind.
You have probably heard the phrase, “To press well, you have to press a lot.” Technically, this statement is true. But, when you regularly work heavy grinds like the press, or any high tension, high threshold lift for high reps like ladders, it can be pretty unforgiving on the body—especially the shoulders. Like many in our RKC community, I am a big fan of push-presses and jerks, especially since they seem to be a little more forgiving on the shoulders.
Enter one of the programming principles taught in the RKC: specialized variety. This important concept allows us to avoid plateaus, improve a skill (like pressing), and can also help us avoid injury.
The biological law of accommodation holds that the more you repeat a given movement, the less effective it will be for achieving your goals. A biological object’s response to a given constant stimulus decreases over time. Accommodation is your body’s decreasing response to a constantly continued stimulus—so, we will need to vary our training a little.
Another training principle—which seems to be the opposite—is the SAID principle. The specific adaptations to imposed demands (SAID) principle states that the more something specific is practiced, the more that specific skill will improve. In other words perfect practice makes perfect when it comes to developing skills.
With specialized variety, we want to choose exercises that are very similar, but are slight variations so we can keep training a movement without reaching a plateau.
Principle One: Change Your Foundation
Changing your lower body position is a simple way to add specialized variety to your pressing. With the regular press we usually stand in a bilateral stance with our feet square and roughly shoulder width apart. But, when we change position?
In real life and especially in sports, we’re very rarely in a perfect bilateral stance. More often, we’re in lunge like or single leg stances. Some of these variations can also have crossover for better sports performance.
- Feet Together
By narrowing your base, your body really has to zip everything up. Pressing with your feet together ensures that you think about drawing everything into your center, while stopping any tension “leaks” of throughout the body.
- Inline Lunge
Similar to pressing with the feet together, but place one leg behind the other (kettlebell on same side as the rear leg). This stance introduces a lateral balance demand and forces the body to zip everything up. You can self-limit the balance demand of this technique—make it harder or easier—by changing the distance or width between the two feet.
- Contralateral and Ipsilateral Stances
Even though these stances are very rarely seen or used, I love using them to strengthen the body contra-laterally (think of an X across the body from shoulder to hip) or ipsilaterally (shoulder to hip on the same side). If you are interested in fascia and slings (see Thomas Myers) then this will be right up your alley. These press variations are done on one leg and can be really challenging. For the contralateral version, the kettlebell in the opposite hand of the foot you are standing on, and for the ipsilateral version, press and stand on the same side.
- Tall Kneeling and Half Kneeling
Without going down the rabbit hole of corrective exercise, both the tall and half kneeling positions give us great pressing options. By taking the knees and ankles out of the movement, we can focus on letting the hips and the core do their work. The goal of the tall and half kneeling positions is to help us create more stability and control while pressing. They can prompt us to tie the upper and lower body together as in the two previous options. The half kneeling option is also self-limiting. Narrowing your base of support (as in the inline lunge press) in the kneeling lunge position creates more instability—and an environment where you will need to stabilize more to keep your balance—just like the standing inline lunge. If you decide to work from a half or tall kneeling position, you really need to make sure your set up in these positions is spot on—a poor setup will not allow you to gain the benefits of these movements.
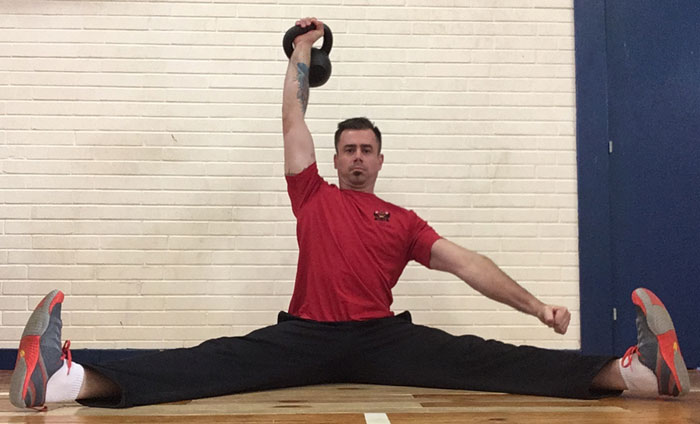
- V-Seated Press
One of my all time favorite all pressing positions is sitting down in semi side split/pancake position with my legs in a V. This is an amazing variation that really helps to tie in the core with the shoulders, lats, and triceps. Watch your lumbo-pelvic positioning in the V-seated position, so your back and lower back stay in a neutral position.
- The Sots Press
The Sots press is a tough variation for those with great squatting technique and good overhead shoulder mechanics. The press is performed by cleaning the kettlebell, pulling yourself down into a squat, bracing, and then pressing from the deep squat position.
- Side Press
Often overlooked as an option to improve the basic press, the side press is an awesome variation that again can really challenge the core. It also requires crazy lat firing, or creating a “shelf” with your lat behind your elbow. This tough variation starts with the feet in a windmill position. The press begins at the bottom position—or after coming down to the bottom position—of the windmill, pressing to lockout and then standing up with the bell just like in the windmill. The windmill is taught at the RKC-II with the kettlebell in the top hand already in lockout and then descending up and down—there’s also a version with kettlebells in both hands. If you are not proficient with the windmill yet, I would suggest waiting to try this press variation until you have trained with an RKC-II instructor.
The setup for this lift is the same as the windmill style setup for the bent press (as opposed to the squat variation of the bent press) taught at the RKC Level-II. Unlike the bent press, where you press your body away from the kettlebell, when performing the side press, you are actually pressing the kettlebell away from you.
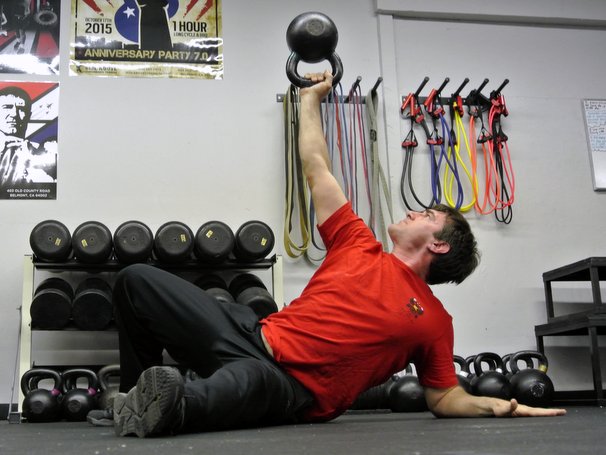
- The Get-Up Press
Want to strengthen each position of your get-up while training for a stronger press? Try pressing at each stage of the get-up for a real challenge. Even in the half kneeling/windmill position, you can bring your elbow behind your body to the lat, as a progression to help your bent press and kettlebell windmill. The get-up press will really highlight any weakness in your get-up, it will really force you to be more stable in each position.
Principle Two: Change Your Grip
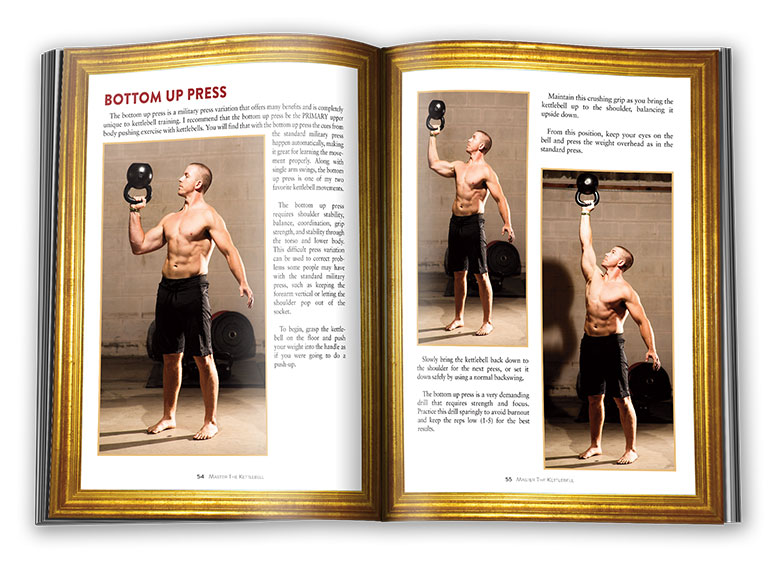
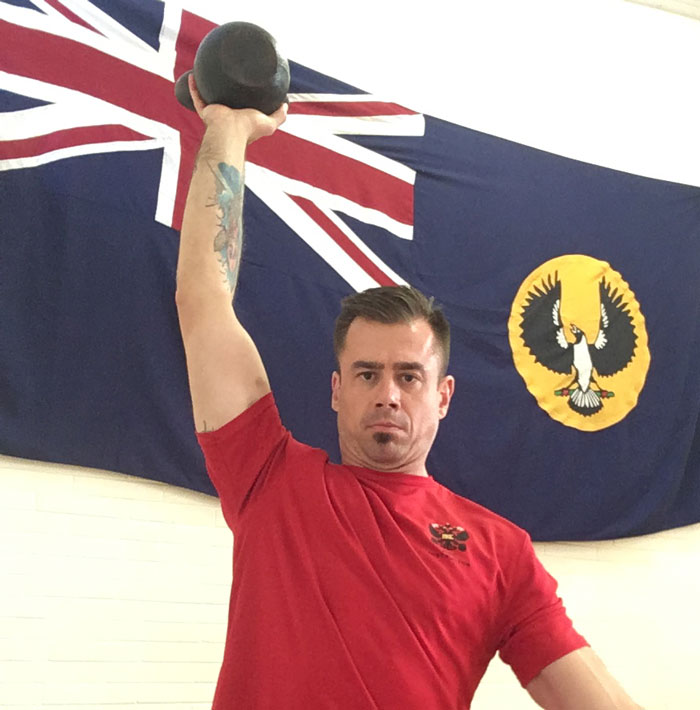
- The Bottoms-Up Press
If you’ve seen Master RKC Max Shank perform a bottoms-up press, it’s easy to see that it’s a great pressing variation. While the kettlebell’s groove and body positioning are slightly different, the benefits of this pressing variation are huge. Not only does this variation improve your grip strength, core activation, and reflexive stability, it can also be the safest way for those with troublesome shoulders to press a kettlebell without discomfort or pain. Set up for this lift by placing the webbing of the thumb and first finger in the middle of the kettlebell handle so you can balance it on the heel of your palm. Even though the groove of this press is different, it will encourage you to keep your forearm vertical, which can be helpful for improving your regular press. Since you can’t press very heavy kettlebells with the bottoms-up press, it is a great variation to use when you don’t have a heavy kettlebell to press.
- The Stacked Press
The stacked press variation really changes the center of gravity—the position—of the weight/load. To perform this lift, stack a lighter kettlebell on top of a heavier one by carefully cleaning both together and around the wrist. The grip requirement for this variation is huge. You have to crush both handles to complete the press. This is also an awesome option when you only have access to smaller kettlebells or if you only have a few big kettlebell sizes, and want to work on something in between. Because the center of gravity of the load and grip are different than a regular press, you probably won’t be able to press as much with this lift.
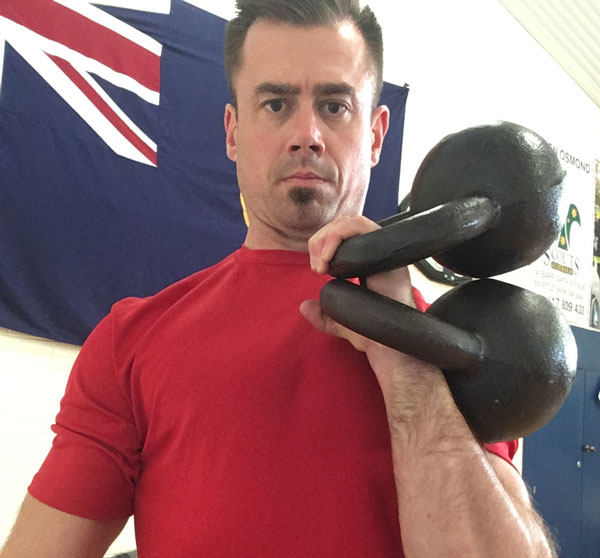
Side note: there is a bottom’s up stacked press where you can do a bottoms up press with another kettlebell sitting on top. While I like variety, this is probably taking it a bit too far, and is usually only manageable with very light weight. Even then, it’s a very risky lift, and you probably don’t want to be remembered as an epic “gym fail” on YouTube after a kettlebell falls on your head.
- The Waiter’s or Palm Press
When performing a waiter’s press (palm press), you hold the body of the kettlebell, not the handle in the palm of your hand. Your palm is facing up, just like a waiter’s when carrying a tray on the palm of the hand. This variation feels really weird, but encourages surprisingly strong shoulder “packing” and lat activation during the press.
Lastly, it can be really cool to pick an option from principle one and combine it with an option from principle two. For example, you could try a bottoms up press from tall or half kneeling, or a stacked press from the V-seated position. The options are endless and they all lead to a better press.
Don’t forget to base your rep ranges on your goals:
For strength aim for total 6-20 reps and 1-5 reps per set: 3 x 3, 3 x 5, 2 x 5, 5 x 3, 10x 1 etc.
For strength and muscle mass aim for 20-40 total reps and 3-8 reps per set: 7 x 3, 8 x 4, 4 x 8, 5 x 5 (my favorite), 6 x 4, 10 x 4, 6 x 6 etc.
When it comes to pressing, apart from the regular single, double or alternating and see-saw pressing with the feet square and roughly shoulder width apart, these two principles will really help you burst through your current plateau without hours and hours of pressing ladders. Especially when there are no heavy bells to press, we can make the press more challenging and get gains in strength by using complexity instead of load and volume.
****
Matthew Beecroft is a Master RKC, PCC Instructor, and CK-FMS certified instructor. He is also a GFM and Animal Flow instructor and Expert Level 2 instructor with Krav Maga Global and a Muay Thai coach who has trained amateur and professional Muay Thai champions. He can be contacted through his website www.realitysdc.com.au or Facebook page: facebook.com/MeetLifeHeadOn/