• Skip to main content
  • Skip to primary sidebar
  • Home
  • Contributors
    • Matt Beecroft, Master RKC
    • Martijn Bos, Master RKC
    • Andrea Du Cane, Master RKC
    • Angelo Gala, Master RKC
    • Chris Holder, Master RKC
    • Steve Holiner, Master RKC
    • Dan John, Master RKC
    • Mike Krivka, Master RKC
    • Thomas Phillips, Master RKC
    • Robert Rimoczi, Master RKC
    • Phil Ross, Master RKC
    • Max Shank, Master RKC
  • Workshops
    • HKC Workshops
    • RKC Workshops
    • RKC-II Workshops
  • Find an RKC Instructor
  • Resources
    • Articles
    • Forums
    • Kettlebells
    • Products
  • Blogs
    • PCC Blog
    • Strong Medicine Blog
  • Archives

RKC School of Strength

Official blog of the RKC

Mark Bixby

It’s in the Hips, Part 4

December 18, 2013 By Mark Bixby 8 Comments

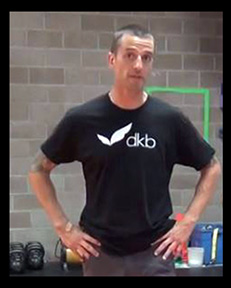
mark_bixby_croppedIn this fourth and final installment dedicated to better utilization of the hips, I show some crawling progressions to emphasize that we can sometimes skip mobility drills and just move instead.  But before we jump into part four, let’s briefly review the previous three pieces.  First, we looked at some basic stretches done in a variety of positions to loosen up tight areas around the hips.  In part two, we covered a very basic dynamic hip and hamstring mobility sequence to prepare field/court athletes or fighters for their active flexibility needs in competition.  In the third piece, I differentiated “linkage” from “leakage” using the Hanging Leg Raise Sequence, and I went on to show how plyometric-style HLR’s can help with patterning powerful hip flexion/extension for the sprints.

I reviewed the previous segments to set this piece up as continuing in the line of “linkage” discussed in part three.  In the HLR sequence, we used linkage to generate explosive power and dynamic control.  Today’s segment departs from the power focus and instead incorporates “linkage” to produce controlled efficiency of movement.  My aim today is to demonstrate quiet rather than explosive movement.

While your average guy on the street isn’t yet acquainted with the notion of mobility, it’s been a trendy word in the fitness industry for several years.  The few people who actually do mobility drills tend to stand in one place and make a series of circular motions through the joints from the neck down to the ankles.  While this is an excellent thing to get fluid moving into the joints and surrounding tissues, it’s debatable whether these isolated drills actually produce better mobility.  Today’s video, then, attempts to show how putting mobility in motion yields better results than isolating each joint while also being more fun.

There are six movements on the video.  All of them both require and improve mobility in the hips.  The first two are low crawls, one on the belly and one on the back.  The next two moves are creeping squats, the first done from a traditional squat and the other from a Cossack squat position.  The final two moves combine elements of the first four and add rolls.  The goal on each of the six movements is to move quietly.  If you can do them without producing thuds during the transitions, you aren’t leaking; instead, you’re moving efficiently.

In an attempt to elaborate on my notion of how linkage can create quiet as well as explosive movement, I’ll provide an exercise x-ray of the fifth move in the video: the creeping squat/roll combination.  I set up the move in a Cossack squat position.  From there, the flat foot shifts towards the ball of foot as the ankle extends to drop the knee to the floor.  The knee drop carries my momentum forward.  If I don’t rotate through my thoracic spine while flexing and rotating my neck, I’ll do a face plant.  So, I opt for rotation.  The previous movement clears the neck and spine so I can roll over the shoulder.  An internal rotation of the rolling shoulder (imagine the Egyptian shoulder mobility drill that screws the shoulders into internal and external rotation) allows me to take the impact of the floor on the backside of the shoulder (thus avoiding jamming into the A/C joint).  I roll across (not straight down) the spine to the opposite hip and back into the Cossack position.  I do a creeping squat Cossack switch to get the other knee up and repeat the sequence to roll over the opposite shoulder.  Basically, I have linked mobility drills sequentially from the feet up through the neck to produce movement.

In the RKC School of Strength, we emphasize the Turkish Get Up because it demands multi-planar movement through multiple joints while navigating the stability challenge of maintaining weight overhead.  It is one of those few, coveted “desert island” exercises because of its strength, mobility and stability demands.  If we hope to achieve the same great benefits from bodyweight exercises, we need to remember the mantra of “multiple planes, multiple directions and multiple joints.”  While focusing on the hips is a great place to start in this endeavor, we must remember that dynamic movement is produced by systemic integration.  Hopefully, the video that accompanies this piece can give you some ideas in making your movement more effective, integrated and enjoyable.

***

Mark Bixby is a Dragon Door RKC Team Leader, PCC Instructor and MovNat Instructor.  He discovered kettlebells in 2002 and found that they are the quickest, most effective way to train.  A combination of past injuries and persistent low physical self-image had caused Mark to have severe posture issues and chronic back pain. Kettlebells taught Mark how to use his hips so that he didn’t tuck his pelvis and slump with his posture. He grew taller, stronger and more confident. More than six years later, Mark has accomplished huge gains in strength, flexibility and stability and he finds that kettlebells still present significant physical and technical challenges. Because the skill set can always be refined, kettlebells continue to push Mark towards higher levels of body awareness and fitness. Mark can be reached through: http://www.dkbfitness.com/.

Filed Under: Uncategorized Tagged With: dragon door, exercises, GAIN, hips, joints, Mark Bixby, part 3, posture, stiff, stretches

It’s in the Hips: Part 3

October 30, 2013 By Mark Bixby Leave a Comment

Part three of this series on the hips continues the focus on dynamic hip action demonstrated in the second installment by implementing explosive hip drive into the Hanging Leg Raise sequence.  After reading this and watching the companion video, you’ll have more control in your HLR while also running faster and jumping higher.

One of the great aspects of the PCC was the camaraderie developed over the three days.  As we were sharing pull-up and flag stations, as well as spotting each other on handstands and bridging, we got to constantly coach and encourage each other.  This was most evident during the Century Test, where the 55 attendees rotated through four testing stations.  This meant that each of us had a cheering audience to encourage us through the Century.

Beth Andrews, Senior RKC and Iron Maiden (a title gained by doing a press, a pull-up and pistol with a 24 Kg. kettlebell) was the first person to pass the Century and gain her PCC certification. While the three guys next to her blew through their squats and pushups, Beth methodically did her own.   The guys got to the bars to start their 20 hanging leg raises before Beth, but she ended up finishing first.  While the Century isn’t a race, Beth’s hanging leg raises perfectly demonstrated the contrast between “linkage” and “leakage.”   Beth’s leg raises could have been done with walls right in front and behind her, and she wouldn’t have touched them.  She pulled her knees straight up, and pushed them straight down, deftly “linking” her movements into a total-body move.  Meanwhile, the guys started noticeably swinging a bit in the HLR and had to stop their reps and kill their momentum so they didn’t get no-counted.  They were “leaking.”  Determined to mimic Beth’s HLR during my Century, I stepped up to the bar, started the sequence and began rocking a bit by my 5th rep.  I “leaked.”  The question was where.

As I quickly discovered at the GAIN Conference (discussed in part two of this series), I was leaking from the ankles up through the hips.  Gary Winckler, Head Coach of the University of Illinois Women’s Track Team, led practical sessions at GAIN to demonstrate the importance of hip drive and ankle tension in the sprints.  Over the course of his illustrious career at Florida State and Illinois, Mr. Winckler has coached over 300 All-Americans and 13 Olympians in the sprints and hurdles.  He told us that the common coaching cues in the sprints—“stride it out” and “kick your butt”—had transformed sprint mechanics from being powerfully hip-driven to being weakly knee-driven.  Striding as far as possible, we extend our knees, driving our posture forward.  Then, to look pretty, we weakly flex our knees to kick our butts.  As Coach Winckler demonstrated, the point is to create power by pushing through the ground with powerful hip extension on one leg, while spring-loading the other leg in hip flexion and prepping it to drive down.  The up/down motion generated by the hips allows the runner to maintain the upright posture most effective for generating force into the ground.

While I made improvements on my stride working on the track, the lesson of hip drive didn’t really hit home until the next day’s session in the weight-room with Coach Jim Radcliffe of the University of Oregon (See part two of this series for more on Coach Radcliffe.).  As a powerful hip hinge is a huge part of running faster and jumping higher, Coach Radcliffe tries to teach it in as many contexts as he can.  He uses the hanging leg raise sequence to demonstrate how linking the hips/ankles into the movement can produce a more explosive leg raise without compromising posture.  For me, Coach Winckler’s advice on the track hit home on the bar.  A dynamic combination of hip flexion/extension and active ankles in the hanging leg raise cured me of my swaying motion.  He was right: I had been weakly flopping through the knees and not driving up and down through the hips.  After doing these dynamic hanging leg raises, I went back to the track, found the hip and ankle link, and produced the most powerful sprints I’ve ever run.

Please watch the accompanying video to learn this “plyometric” HLR progression.  You’ll better understand linkage in your HLR sequence and benefit in your sprints and jumps.

***

Mark Bixby is a Dragon Door RKC Team Leader, PCC Instructor and MovNat Instructor.  He discovered kettlebells in 2002 and found that they are the quickest, most effective way to train.  A combination of past injuries and persistent low physical self-image had caused Mark to have severe posture issues and chronic back pain. Kettlebells taught Mark how to use his hips so that he didn’t tuck his pelvis and slump with his posture. He grew taller, stronger and more confident. More than six years later, Mark has accomplished huge gains in strength, flexibility and stability and he finds that kettlebells still present significant physical and technical challenges. Because the skill set can always be refined, kettlebells continue to push Mark towards higher levels of body awareness and fitness. Mark can be reached through: http://www.dkbfitness.com/.

Filed Under: Uncategorized Tagged With: dragon door, exercises, GAIN, hips, joints, Mark Bixby, part 3, posture, stiff, stretches

It’s in the Hips, Part 2

September 25, 2013 By Mark Bixby 2 Comments

In part one of this four-part series, I talked about how hip stiffness is usually part of a larger complex of stiff tissues and joints throughout the body.  I then offered a very basic mobilization sequence starting with a knee sit and progressing to a standing hip extension/flexion drill.  In this second part of the series, I will discuss more dynamic strategies for opening the hips and hamstrings to produce the active and resilient flexibility needed for sport.

After finishing the initial PCC with Al, Danny, Steven and Adrienne, I had the opportunity to attend the GAIN Conference hosted by Vern Gambetta at Rice University in Houston.  This five day event, which started each day at 6:30AM on the Rice track and concluded at 9:30PM at the Valhalla Pub, included lectures and practical sessions hosted by luminaries in Olympic, collegiate and professional athletics.

One of the most inspiring presenters was Jim Radcliffe, Head of Strength and Conditioning at the University of Oregon for the past 28 years.  It was immediately obvious that Jimmy was first and foremost a “movement” guy, who happened to be applying his principles in one of the most successful and well-funded athletic departments in the world.  He spoke of growing up in northern California where he climbed trees and ran through the woods acquiring strength, mobility and coordination in a natural environment.  He then discussed how his strength and conditioning program for Oregon football was based upon the natural movements he grew up with.  Jimmy said that probably only 25% of his team’s work is done with weights.  And much of the weight work, such as his Good Morning sequence, adds movement into the progressions.

Jimmy’s training template is as follows (in this order): dynamic mobility, “pillars of strength” (reflexive core stability drills), two stations of hip hinging drills, two weight-based stations (usually Olympic-style lifts), and agility work.  The athletes do much of this work barefoot, and the agility work is often done in Oregon’s 40-Meter sandpit.  Most importantly, Jimmy uses what he calls a “Jet Tempo” in his workouts to mimic the pace that Oregon football has become famous for.  He emphasizes that he does no additional “conditioning” work to supplement his workouts.  As he wants every rep to be explosive, he has no interest in training kids to do cardio at less than game pace because he doesn’t want to create “slow” neural adaptations.

The video that follows is an adaptation of the dynamic mobility drills Jimmy had us do in one of our practical sessions at GAIN.  He said the athletes spend 3-5 minutes max doing this before going on to their reflexive core work.  As Pavel demonstrated in Super Joints, Beyond Stretching and Relax into Stretch, athletes need to be flexible in athletic positions.  They need mobility/stability under the incredible amount of tension produced by making high-speed cuts and other athletic moves.  This sequence is a great way to loosen up the hips and hamstrings to prepare your body for whatever intense workout you may have in store for it.

***

Mark Bixby is a Dragon Door RKC Team Leader, PCC Instructor and MovNat Instructor.  He discovered kettlebells in 2002 and found that they are the quickest, most effective way to train.  A combination of past injuries and persistent low physical self-image had caused Mark to have severe posture issues and chronic back pain. Kettlebells taught Mark how to use his hips so that he didn’t tuck his pelvis and slump with his posture. He grew taller, stronger and more confident. More than six years later, Mark has accomplished huge gains in strength, flexibility and stability and he finds that kettlebells still present significant physical and technical challenges. Because the skill set can always be refined, kettlebells continue to push Mark towards higher levels of body awareness and fitness. Mark can be reached through: http://www.dkbfitness.com/.

Filed Under: Uncategorized Tagged With: dragon door, exercises, GAIN, hips, joints, Mark Bixby, posture, stiff, stretches

It’s in the Hips: Part 1

August 7, 2013 By Mark Bixby 1 Comment

This blog initiates the first in a series of 4 posts with companion videos about effective ways to better utilize the hips. While I’ve invented nothing in the series, I have hopefully ordered things in such a way—from simple to more complex—that those who practice these time-efficient drills will experience success at each point along the way. In the end, you’ll be crawling, squatting, running and jumping more efficiently.

Two years ago on Thanksgiving, I sat down in front of the wooden stove with my wife, mother-in-law, and daughters. They all sat comfortably on their knees, butts to heels. Given that my 63-year-old mother-in-law (with a hip replacement) could sit with ease in that position, I thought I could easily join her and dropped down in a knee sit. I sensed immediately that I might never stand again; either my knees were going to dislocate or my quads snap. Unable to conceal the distress on my contorted face, the ladies assembled asked if I needed an ambulance. I explained that the position created an unbearable stretch through the knee and quads, to which they responded they could all sit easily in the position for hours and not feel a thing.

Moral of the Story: Your tight hips are probably surrounded by lots of other tight muscles/tissue, especially if you are a dude.

While the RKC hip flexor stretch is probably the most commonly applied hip remediation in our community, we forget that many people don’t feel it in their hips because their quads are so tight that the stretch doesn’t travel above the thigh. One great solution is to practice your knee sits. We all have ample opportunities to sit, so we might as well use some of that time to increase our mobility.

Two weeks ago, MovNat Founder Erwan Le Corre led a wilderness survival training session that he kicked off in our gym. He sat on his knees as he explained some of his principles of natural movement. All of the men in attendance copied his seated position. One of them squirmed around uncomfortably until Erwan asked him if he was injured. The man replied that he had sprained his ankle a while back and that the position just hurt. Erwan said, “I’ve sprained my ankle lots of times, and sitting this way is no problem. You just don’t ever sit this way, right?” Like so many of you (especially men) reading this, he couldn’t disagree. The SAID Principle (Specific Adaptation to Imposed Demand) tells us that we adapt to what we do. Sit on your knees more regularly and, as I’ve discovered through persistence, you can lose the wince and hang out a while.

The following video sequence shows a progression of moves from knee sits to active hip stretches that should knock the rust off of the joints from your feet up through your spine. It’s just a further reminder that your tight hips are probably a product of your tight everything else. Practice these, and my next blog, with a more dynamic series of hip openers, should come more easily.

***

Mark Bixby is a Dragon Door RKC Team Leader, PCC Instructor and MovNat Instructor.  He discovered kettlebells in 2002 and found that they are the quickest, most effective way to train.  A combination of past injuries and persistent low physical self-image had caused Mark to have severe posture issues and chronic back pain. Kettlebells taught Mark how to use his hips so that he didn’t tuck his pelvis and slump with his posture. He grew taller, stronger and more confident. More than six years later, Mark has accomplished huge gains in strength, flexibility and stability and he finds that kettlebells still present significant physical and technical challenges. Because the skill set can always be refined, kettlebells continue to push Mark towards higher levels of body awareness and fitness.

Filed Under: Uncategorized Tagged With: athletes, Bixby, flexibility, hips, Kettlebell, kettlebells, Mark, stretch

The Windmill: Safe and Effective Implementation

May 22, 2013 By Mark Bixby 1 Comment


The windmill is an outstanding advanced kettlebell move that combines shoulder stabilization, thoracic rotation, plus hip and hamstring mobilization. Mastering this exercise will improve functional qualities like dynamic motor control and mid-line stabilization. It will also improve your overhead lifting skills. Unfortunately, the windmill is usually misunderstood as a basic side-bend like something learned in yoga. The following breakdown provides a useful and safe progression to learning the windmill.

Step One: Start in a half-kneeling position, not standing. The outstanding FMS dvds Kettlebells from the Ground Up 1 and 2 provide detailed tutorials on these kneeling positions. Part 2 of the series focuses almost extensively on these positions. Do yourself a favor and make them part of your training library.

To get in the open-half-kneeling position (the easiest position), assume a lunge position on the floor where the front and back legs are at 90 degrees. Swivel the shin of the back leg (the one with knee down) in 90 degrees (shin should be perpendicular to the heel of the standing leg). Raise one arm overhead (the arm that coincides with the standing leg, if right leg is standing, right arm should be overhead) in an elbow-locked, shoulder-packed position. The bicep of the raised arm should be even with (not touching) your ear. Now, hinge back in the hip of the standing leg and drop your non-raised arm to the floor straight in front of the kneeling knee (it should be 10-12 inches forward of the down knee). You should be looking up at the raised arm. Now, you’re in the hip-hinged, trunk-rotated position that will eventually be the bottom of your windmill.

The next step involves keeping the exact same setup as before but with an additional flexibility component that will more closely approximate the flexibility needed to actually windmill. From your open-half-kneeling position with arm raised, start to descend to the floor by this time reaching for the top of your standing foot with your descending arm. Cup the top of your foot with the hand, hinge back in the folding hip and try to bring your elbow and forearm to the floor. You should feel this in the backside of your hip—not your low back. If you feel it in your low back, you’ve gone too far. You don’t have to reach the floor with your elbow; instead go as far as is comfortable.

Step Two: Repeat this drill on the other side of your body. Then, to gain more stretch and the closest approximation to a standing windmill, do the exact same drills from your regular kneeling lunge position. You’re now lunging on “railroad tracks,” without the turned in back shin. These will be more difficult.

Step Three: After you feel comfortable in these positions, the next task is to add a kettlebell. Use a light bell and repeat the previous drills with a kb in the half-kneeling positions. To repeat, you should not feel this in your low back. If you do, you probably lack either hip mobility or thoracic rotation.

Step Four: You are now ready to try this standing. As before, you will do these drills unloaded first and then add a kettlebell. Assume a shoulder-width standing position. Let’s assume we’re working on our right side. Swivel on your heels so that you’re right foot is turned left at about 30 degrees and your left foot is turned left 30-45 degrees. Raise your right hand overhead to the press lockout position. Look up at your raised hand. Now, hinge back in the right hip and try to visualize that your hip is hinging in a line with the 30 degree line of your right foot. Your right leg should stay straight as you descend and rotate (just keep your eye on your pressing hand, and you’ll properly rotate). The knuckle-side of your left hand should be tracing a line down the inside of your left leg (which can be slightly bent). Most of your weight should be in your back leg (right leg in this case) at probably an 80/20 ratio. Now that you’re standing, you will feel the stretch in your hinging hip and the hamstring of your straight leg. Only reach as far down your front leg as you can without deviating from the straight back, hip-hinged position. Eventually, you will be able to touch the floor or pick up a kettlebell with the reaching hand. For now, just make sure that you can do the move with perfect technique and no pain. Repeat this sequence on the other leg.

Step Five: Once you have accomplished the progression, you are ready to add a kettlebell. Either clean/press or snatch the bell up, and then follow the exact same cues as are detailed in Step Four. Once you have mastered the technique of windmills, you can add them to the beginning or end of your workouts. Or, they are a great stand-alone drill on a rest/mobility day.

Step Six: Mastery of the windmill (including the ability to do it perfectly with substantial weight) will allow you to start learning the kettlebell bent press, which is an even more advanced windmill progression that allows for greater load bearing. Practice these drills sequentially and safely, and your overhead kettlebell skills and total body coordination will improve dramatically. Enjoy.

***

About Keira Newton, Master RKC Instructor: Master RKC, Level 3 Z-Health, MCT. Keira first picked up a kettlebell in 2005 when her husband challenged her to stop laughing and start swinging. She stuck with the challenge when she realized that she could get an all-in-one workout in a fraction of the time she spent at the gym. Keira was convinced… Read more here.

Filed Under: Uncategorized Tagged With: advice, effective, fitness, implementation, instructors, kettlebells, master rkc, RKC, safe, videos, windmill

Primary Sidebar

Featured Products

previous arrow
BOOK-RKCBookofSnC
HardStyleKettlebellChallegeDanJohn700
BookCoverMasterTheKettlebell1
RKCiconKettlebell512
KettlebellGoddessdv040
next arrow

Recent Posts

  • RKC Big Six Workout
  • The Kettlebell Swing & Low Back Pain
  • Key Kettlebell Exercises To Help You Create Better Balance
  • How to Most Effectively Use Kettlebells to Meet Your New Year Goals
  • 1 Exercise That Checks All The Boxes
FOLLOW US ON TWITTER!

Archives

Copyright © 2025

Dragon Door Publications / The author(s) and publisher of this material are not responsible in any manner whatsoever for any injury that may occur through following the instructions or opinions contained in this material. The activities, physical and otherwise, described herein for informational purposes only, may be too strenuous or dangerous for some people, and the reader(s) should consult a physician before engaging in them.